Week 17: Applications and Implications
Final Project: Smart Plant Buddy
Built by human hands, refined by AI conversations
Visual Identity Co-Creation
To kick off the project documentation, I wanted a header image that would make the Smart Plant Buddy immediately recognizable — not just a generic sensor render, but something with warmth and personality. I discussed this with the AI and proposed a Studio Ghibli-style visual to give it charm. The assistant agreed and generated the following image based on a shared vision:
Conversation Summary:
I wanted a graphic for the top of the page — either a sensor or a logo. I suggested something “like Ghibli style, comic-like.” The AI proposed a friendly, illustrated plant-sensor hybrid with anthropomorphic vibes and a soft palette. We both agreed it should feel whimsical but modern.
Final Prompt Used:
“This charming digital illustration presents the ‘Smart Plant Buddy’ in a Studio Ghibli-inspired design, highlighting a friendly, anthropomorphic device with a potted plant on top against soft sky-blue hues. The device's simplistic, inviting face is paired with earthy tones and soft textures to create a warm, hand-painted feel, with the bold ‘SMART PLANT BUDDY’ text prominently displayed below.”
1. What does it do?
The Smart Plant Buddy is a wireless, battery-powered plant monitoring device that senses key environmental parameters: soil moisture, temperature, humidity, and light levels. The data is uploaded via Wi-Fi and accessed through a mobile-friendly web interface. Bonus feature: an NFC tag lets users tap their phone to instantly access the dashboard. It’s designed to feel like a small product, not a prototype — and no, it doesn’t water your plant (yet), but it knows when your plant is being neglected.
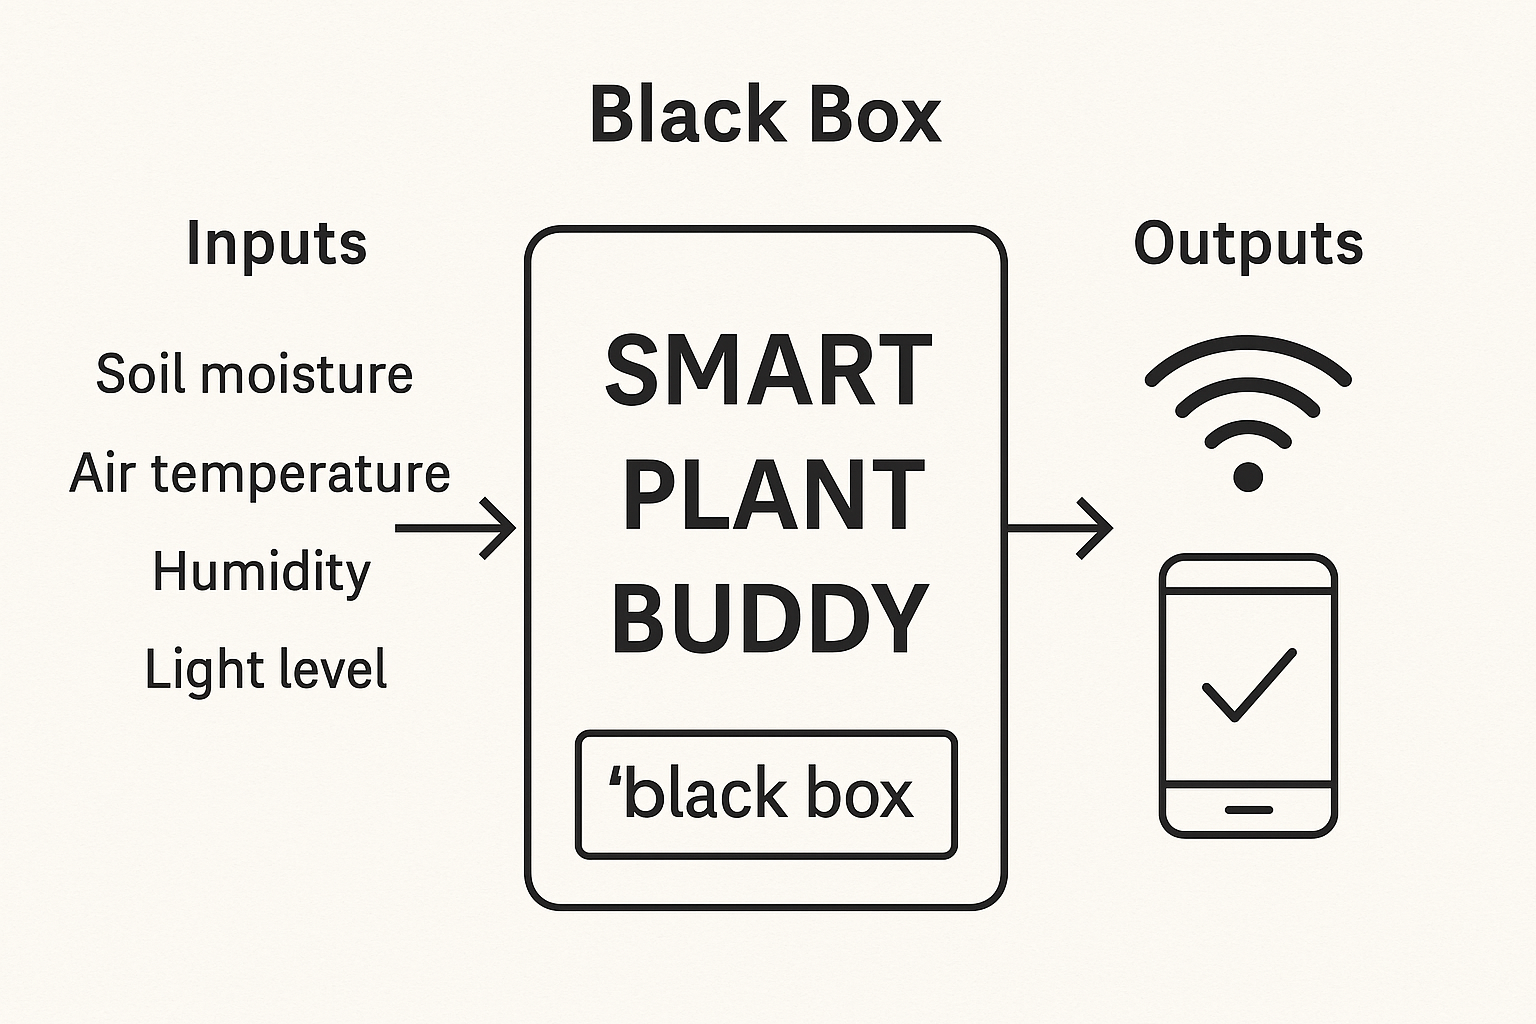
Visualizing Functionality: Black Box Diagram
To explain the system's core functionality, I wanted a clear, minimalistic diagram. So I asked the AI to generate a "black box"-style schematic showing the inputs and outputs of the device, while keeping it visually clean for documentation. The following image was generated from that conversation:
Conversation Summary:
I mentioned that I wanted to include a black box diagram to explain the basic functionality of the Smart Plant Buddy. The goal was to show environmental sensor inputs, and outputs like Wi-Fi and a phone interface, without going into circuit-level detail. I said it should be high-contrast, clean, and work like a visual TL;DR of what the system does.
Final Prompt Used:
“This 2D digital diagram showcases how a plant monitoring system works via a 'black box' labeled 'SMART PLANT BUDDY,' broken into three sections: Inputs, the black box, and Outputs. The image highlights key elements such as soil moisture, temperature, humidity, light level, and connections to Wi-Fi and smartphone outputs, all in a bold, high-contrast black-and-white layout for clarity.”
2. Who’s done what beforehand?
Smart plant monitors are not a new idea — but execution, context, and design vary wildly. I reviewed several FabAcademy projects and some commercial implementations to understand what worked and what didn’t. Here's what I found:
Conversation Summary:
I researched several plant monitoring projects, including FabAcademy final projects and commercial systems. I shared the links with the AI and asked for a structured table comparing their goals, strengths, weaknesses, and what stood out in each. The goal was to situate my own design within the broader landscape and see what others had tackled — and what they hadn’t.
Final Prompt:
“I found some plant monitor projects from FabAcademy and other sources. Some are finished, some are just assignments. Here are the links. Can you make a table that compares each one — description, strengths, weaknesses, and notable features — so I can better position my own project?”
| Project & Link | Description | Strengths | Weaknesses | Notable Features |
|---|---|---|---|---|
| Deepak Chaudhry (2021) | Soil and air sensor box with solar panel and GSM communication. | Good power independence, modular design. | Data interface is limited, no documentation of enclosure build. | Solar powered, focuses on agri-scale deployment. |
| Yesenhia Parra (2024) | Hydroponic system with sensors and pH control, great housing design. | Visually polished, nice 3D modeling, good integration. | No interface for remote control or data logging. | Clean physical design; focused more on structure than UI. |
| Elsa Cui (2025) | Soil moisture + OLED plant monitor in a minimalist enclosure. | Elegant documentation, strong UX thinking. | Limited scope — only one sensor, no connectivity. | Focus on physical form and aesthetics. |
| Liam Howell (2024) | Plant pot with capacitive sensor and data logging to SD card. | Complete integration, good fabrication process. | No wireless data or dashboard; offline-only approach. | 3D-printed pot design with embedded sensors. |
| Angela Mejía (2024) | Plant monitor as part of application week — temp, humidity, soil. | Good sensor choice, complete MVP. | Not a final project; lacks integration and packaging. | Simple and approachable prototype. |
| Elecrow Smart Plant | Commercial product that senses moisture and alerts via app. | Clean industrial design, app interface. | Closed system; no customization, no transparency. | Bluetooth alerts; sleek and consumer-ready. |
| RoboCraze DIY Kit | Educational soil sensor + display kit with tutorial support. | Great for beginners, low cost, open-source examples. | Very basic; no connectivity, limited expansion. | Uses DHT11 + soil sensor + LCD in a breadboard format. |
3. What did I design?
I didn’t invent plant sensors. I’m not here to reinvent the moisture-measuring wheel — and I’m okay with that. This project isn’t about novelty, it’s about execution. What I designed is a system that works: a device that’s wireless, battery-powered, compact, low-maintenance, and clean enough to feel like a product — not just a prototype.
But here’s the twist: I didn’t design it alone. I designed it *in collaboration with AI*, using a structured prompt-response workflow that helped me think clearer, faster, and deeper. Some might say that's cheating. I say it's engineering. I used what was available — just like I’d use a multimeter, or a library, or a PCB mill.
Before FabAcademy, I had little experience with coding, circuit design, or embedded systems. Through the weeks — and a ridiculous number of questions — I not only built technical skill, but also learned how to enhance my own decision-making by collaborating with AI. I didn't just design a thing — I designed *how* I build things from now on.
Here’s what I designed (with AI in the loop):
- A plant monitoring system built around the XIAO ESP32-C6
- A sensor configuration using only 3.3V-compatible, low-power components
- A charging and power flow setup using TP4056 + LiPo battery
- A smart enclosure with airflow, minimal wiring, and possibly transparent housing
- An NFC-based user experience (via tag sticker, not wiring)
- A mobile-first web interface hosted directly on the ESP
- A prompt-based documentation and design process where AI was used in every phase — sensor selection, enclosure logic, power routing, pin assignment, risk analysis, and even naming
Conversation Summary:
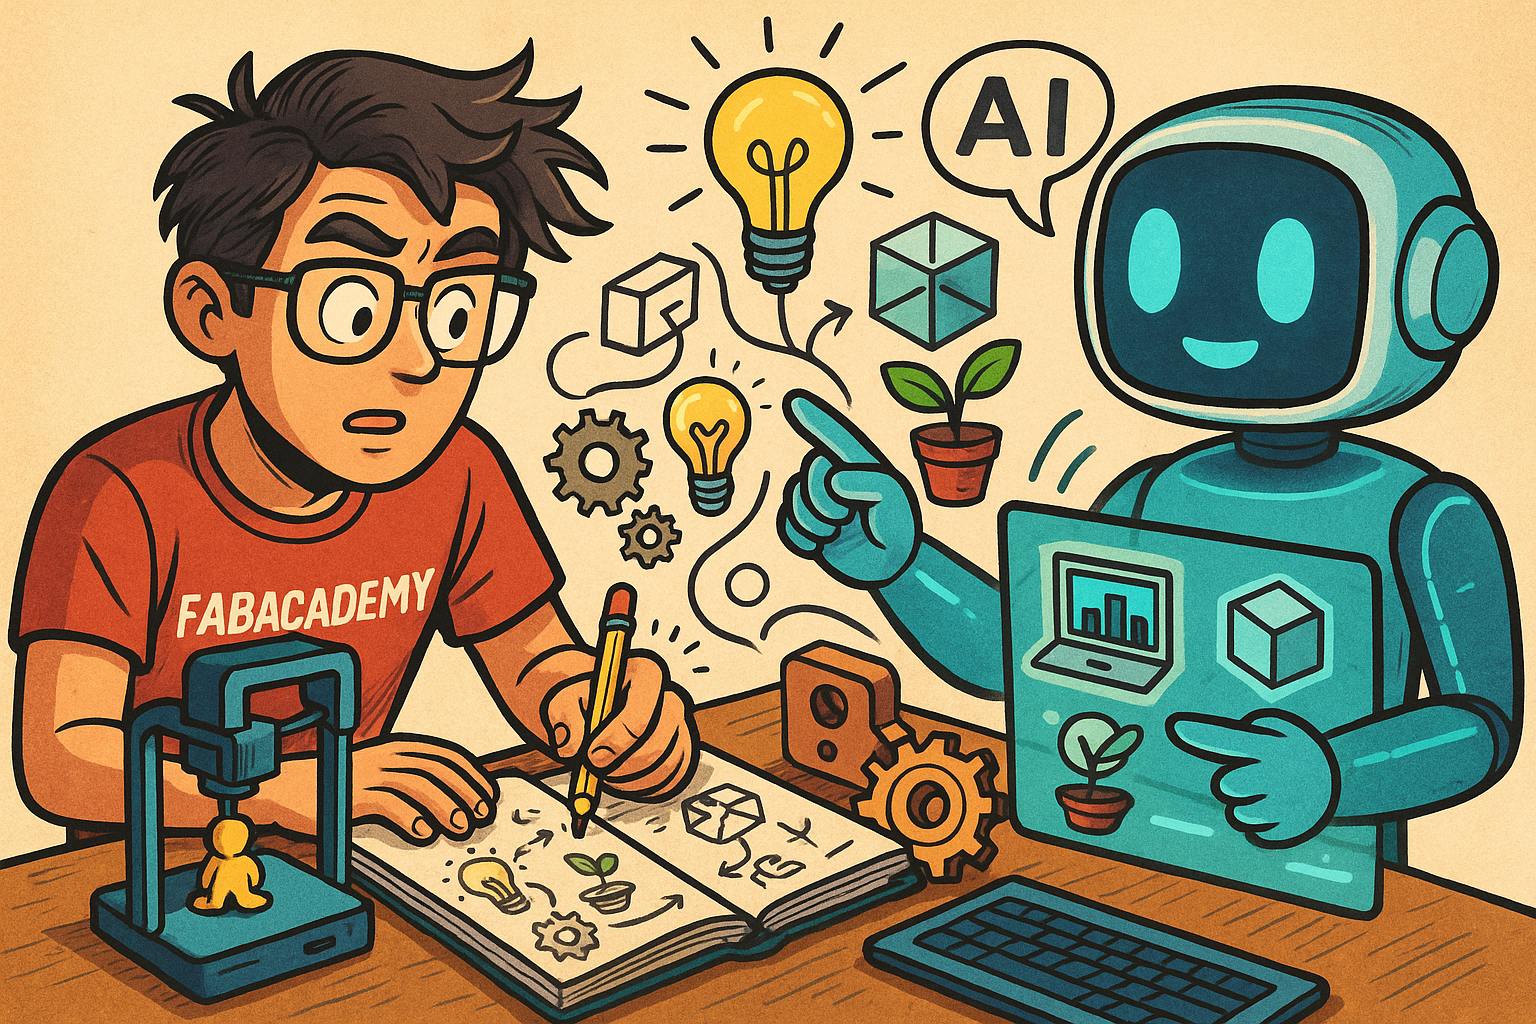
I wanted to visually represent what this project was really about: not just building something, but co-designing it with AI. The FabAcademy is about learning to make (almost) anything, and I pushed that into “co-making with AI.” So I asked for a comical illustration that captured a human working alongside an AI, blending creativity and fabrication. I specifically asked for a mix of comic style with strong FabAcademy and maker culture references.
Final Prompt:
“This vibrant digital illustration showcases the dynamic collaboration between a human and an AI in creating innovative projects, blending bold lines and bright hues in a style drawing influence from both manga and Western comics. On the left, a focused young man sketches designs while standing next to a 3D printer, while on the right, an AI with glowing blue eyes and a sleek body points towards a holographic display, symbolizing the merger of human creativity and artificial intelligence in design.”
4. What materials and components were used?
This is the list of components used — or painfully ruled out — during the co-design of the Smart Plant Buddy. It’s organized by function, sourced mostly from UNIT Electronics in Mexico, and annotated with tears of experience.
Conversation Summary:
I told the AI what components I had, what I could source locally, and where I was stuck. We compared sensors (e.g., resistive vs. capacitive soil probes), debated 3.3V vs 5V issues, and decided to drop the RS485 sensor because — sanity. The list evolved based on GPIO limits, power supply design, physical constraints, and how likely things were to actually arrive on time.
Final Prompt:
“Let’s build a bill of materials for the Smart Plant Buddy. Group components by type: sensors, power, control, casing, and accessories. Use the UNIT Electronics website links where possible. Add price estimates in MXN and call out any potential compatibility quirks. This list is flexible — we’ll improve it if time or rage demands it.”
Sensors
-
Capacitive Soil Moisture Sensor – $20 MXN
Chosen for durability and 3.3V compatibility. Not great on analog noise, but better than resistive garbage. -
BH1750 Light Sensor – $36 MXN
Lux sensor via I2C. Accurate, low power, and honestly cute. -
BME280 – Temp + Humidity + Pressure – $75 MXN
Sensor triple threat. Reads your plant’s mood with 3.3V elegance. -
DS18B20 Waterproof Temperature Sensor – $38 MXN
1-wire, waterproof, and lives in the soil like a trooper.
Microcontroller & Power
-
Seeed Studio XIAO ESP32-C6 – ~$130 MXN
Tiny, Wi-Fi-enabled, and just enough GPIO to make this work. -
TP4056 Charging Module (USB-C + Protection) – $25 MXN
Because charging LiPo batteries without protection is how you meet firefighters. -
LiPo Battery 3.7V 4000mAh – $156 MXN
Thicc battery = longer runtime + longer procrastination window.
Casing and PCB
- 3D printed enclosure (PLA, black) – ~$10 MXN worth of filament
Designed for minimum visible wiring. The dream of clean cable management lives on. - Laser-cut PTFE vent membrane cover – scrap
To let the BME280 breathe without inviting water in. - Single-sided milled PCB for sensor/power breakout – ~$20 MXN
Because fabbing is love. And because breadboards look like chaos.
Accessories & Miscellaneous
-
NTAG215 NFC Sticker – $15 MXN
Tap phone → open dashboard. No code, no fuss, just magic. - Jumper wires, headers, heat shrink, zipties – ~$20 MXN
The silent heroes of any project.
Total Estimated Cost
~ MXN $575 (~USD $34)
Cheaper than therapy, and now my plant is thriving.
5. Where did they come from?
All the electronic components — sensors, microcontroller, charging module, and battery — were sourced from UNIT Electronics, a solid Mexican supplier that had everything I needed (and some stuff I didn’t but almost impulse-bought anyway). The NFC sticker was ordered from Amazon, and all 3D printing filament, headers, wires, and fabrication materials were provided by the Fab Lab Puebla. Also, a big shoutout to the lab's “box of mystery parts” — truly the unsung hero of this build.
6. How much did they cost?
Here's the breakdown of the main components used in the Smart Plant Buddy, with rough prices in Mexican pesos (MXN):
- ESP32-C6 (XIAO) – $160
- TP4056 Charging Module (USB-C + Protection) – $25
- LiPo Battery 3.7V 4000mAh – $156
- Capacitive Soil Moisture Sensor – $20
- DS18B20 Waterproof Temp Sensor – $38
- 3D printing filament (partial spool) – ~$10
- NFC Tag Sticker – ~$15
- Misc (headers, wires, zip ties, heat shrink, laser-cut scraps) – ~$20
Total Estimated Cost: ~MXN $575 (~USD $34)
Which is a pretty solid price for a fully wireless, sensor-packed, AI-co-designed botanical sidekick. And way cheaper than a month of plant therapy.
7. What parts and systems were made?
AI can’t physically build anything (yet), but I can — and did. With its support in decision-making, sanity-checking, and “don’t burn your lab” warnings, I made the following parts and systems for the Smart Plant Buddy:
- Custom wiring harness: Hand-soldered, labeled, and routed for clean internal layout
- Sensor module stick: Assembled with all sensors in a unified probe-like form
- 3D-printed enclosure: Designed for minimal wiring exposure, airflow for the BME280, and NFC sticker placement
- PCB (optional breakout): Milled or prototyped to cleanly connect sensors and power modules to the ESP32
- Web interface (hosted on ESP32): Designed for mobile access to real-time plant data
- NFC touch-to-open feature: Programmed and placed for ease of use
AI didn’t touch a soldering iron or run the laser cutter — but it helped decide what was worth building, how to route connections, how to avoid frying components, and how to balance ambition with feasibility. Honestly, if it could hold a screwdriver, I’d be out of a job.
8. What processes were used?
This project is powered by sensors, solder, and a highly unstable relationship with multiple fabrication machines. Here's the breakdown of the actual processes used to bring the Smart Plant Buddy into the physical realm:
- PCB milling: Used a Roland SRM-20 to mill a custom sensor breakout PCB, because hand-wiring all that felt like asking for failure. V-bit, flat endmill, mods workflow, the whole deal.
- Laser cutting: Used both wood and transparent acrylic to create clean front panels and vent designs for the enclosure. Aesthetic and functional — plus I didn't want to 3D print the entire box because patience has limits.
- 3D printing: PLA prints for internal structural features and mounting points. Includes a snap-fit system for holding the ESP32, battery, and sensor stick. May or may not have fused to the bed once.
- Embedded programming: Coded in Arduino environment using MicroPython (at times) for sensor integration, Wi-Fi connection, and simple data handling via web server. Debugging included 3AM serial monitor despair.
- Web UI setup: Custom HTML+CSS interface hosted from ESP32-C6 flash, accessible via phone. Basic but functional — because design is how it works, not just how it looks (ok, and a little how it looks).
- Co-design process: All phases guided through structured conversation with AI — sensor selection, system logic, design validation, and documentation structuring.
This wasn’t just about using machines — it was about learning *which* process made the most sense for each part, and not overcomplicating things that could be done simpler. That’s real design maturity. Also, everything smells faintly of burnt MDF now.
9. What questions were answered?
This project was driven by questions — not just technical ones, but practical, strategic, and existential ones. Every design decision came from a process of asking, testing, validating, and occasionally panicking. These weren't theoretical “nice-to-think-about” questions. They were real doubts that determined whether this project would actually work — or be another unfinished folder on my desktop.
Here are some of the actual questions I had — and how I answered them:
-
“Can I power everything from a single 3.7V LiPo battery without using a boost converter?”
After checking datasheets, asking around, and reviewing how much current my components really needed, the answer was: yes. Every sensor I picked was 3.3V-tolerant, and the ESP32 runs fine on that voltage. Boost converter avoided. Simplicity: 1, Overengineering: 0. -
“Is the analog output from a capacitive soil moisture sensor reliable at 3.3V?”
Not officially — it’s spec’d for 5V — but testing confirmed that the readings are still clean enough when powered at 3.3V. I just had to calibrate the values and apply some smoothing in code. -
“Will I run out of GPIOs using a XIAO ESP32-C6?”
Almost. But by reusing the I2C bus and avoiding optional outputs (like Neopixels), I was able to fit everything within the available pins. Planning ahead and assigning functions early made this manageable. -
“How do I keep the BME280 from getting useless readings inside an enclosure?”
The solution was a laser-cut vent covered with a PTFE membrane. This allowed air to pass while keeping dust and moisture out — preserving accuracy without compromising the enclosure. -
“Is NFC actually useful or just a gimmick?”
It’s useful — if you don’t overthink it. A passive NTAG215 sticker, programmed to open the local IP of the ESP32 dashboard, turned the user interface into a simple “tap to check your plant” experience. No coding, no wiring — just a tap. -
“Can I do all of this with my initial skillset?”
No. But that’s the point. Through documentation, repetition, and asking the right questions (and getting the right answers — sometimes from AI), I went from Googling “how to solder” to confidently building a system I fully understood.
This wasn’t just a project of making — it was a project of figuring things out, one constraint at a time. And I didn’t figure it out alone. Every resolved doubt was a step forward, and every step made the final result feel possible.
10. How will it be evaluated?
This project will be evaluated based on how well it integrates the core FabAcademy skills into a complete, functional system — and whether it does what it claims to do without releasing smoke or tears during the final demo. Specifically:
- Functionality: The sensors (soil moisture, temperature, humidity, light) provide accurate, readable data in real time.
- Connectivity: The device sets up its own Wi-Fi network and serves a working web dashboard accessible by phone or computer.
- User Interaction: NFC sticker triggers the dashboard interface with a simple tap — no app, no cables, just interaction magic.
- Power System: The TP4056 module successfully charges the 3.7V LiPo and powers the system continuously.
- Fabrication: The enclosure is fabricated using a combination of 3D printing and laser cutting, and shows clear understanding of digital fabrication techniques.
- System Integration: All components — sensors, power, microcontroller, and interface — are integrated into a compact, well-organized final form that could be mistaken for an actual product (if you squint a little).
- Documentation: Everything from design decisions to late-night troubleshooting is documented — including this exact evaluation checklist.
In short, it will be evaluated as a functional, embedded system that merges physical fabrication, digital design, and network interaction. And if, during the demo, the plant looks happy and I look slightly less stressed than expected — that’s bonus points.
And yes — the AI part.
AI played a major role in this project. From selecting components to designing the wiring strategy, from helping write documentation to even suggesting how to frame this very section — ChatGPT was involved. But to be clear:
- AI did not: Solder anything, wire anything, print anything, debug my hardware, or crawl under a table to find a loose USB cable.
- AI did: Help me structure my ideas, sanity-check decisions, generate diagrams and prompts, and accelerate my ability to think through problems before they became disasters.
I know some people may give this side-eye — like using AI is a cheat code. But here’s the truth: this wasn’t an AI-built system. This was a human-built system with AI acting as a design partner, mentor, and occasionally a sarcastic sounding board. I still had to learn, decide, fail, rewire, and actually build the thing. The AI didn’t hand me a project — it helped me make mine better.
And if you're still unsure about how to evaluate that, well — just ask yourself: when Neo jumped off the building in the Matrix, did the simulation care if it was the Oracle’s idea or Morpheus’? No. It cared if he stuck the landing. So here I am, final project in hand. Let’s see if it lands.
11. What tasks have been completed?
The foundation of the project is fully defined: components selected, system architecture clarified, and the design direction locked in. A full review of sensor compatibility, power planning, and microcontroller limits has been completed through co-design with AI — reducing guesswork and giving the build phase a focused trajectory.
- Component list finalized and sourced
- Sensor logic and wiring plan outlined
- Power system confirmed and mapped
- Co-design flow with AI documented and integrated into structure
- Documentation structure built in HTML and linked to final page
Actual physical fabrication begins this week— including sensor testing, enclosure design in Fusion 360, and PCB prototyping. This section will be updated as things go from “on paper” to “on table.”
12. What tasks remain?
The final integration phase is just around the corner. Now that the design and planning groundwork is set, the remaining tasks revolve around physically building, programming, testing, and—most importantly—making everything work together in a coherent, compact form.
- Sensor testing and calibration
- Enclosure design and fabrication
- PCB assembly (if used)
- Wiring and cable management
- Programming the ESP32-C6 logic and web interface
- Final system integration and test runs
- Photos, videos, editing, and final web documentation
In other words: everything that turns a well-scoped idea into an actual working system. This section will be updated throughout the build process (and probably rewritten under stress).
13. What has worked? What hasn’t?
The planning phase worked surprisingly well — probably because it was a collaborative effort between human intuition, late-night stress, and a very patient AI assistant. Here’s a breakdown of what’s already proven solid, and what still lives in the grey area between “we’ll figure it out” and “please don’t short circuit.”
-
What has worked:
– A clear design direction was defined early on, avoiding scope creep and endless reboots.
– Component selection is complete, and each module has been matched for voltage and communication compatibility.
– The co-design process with AI helped accelerate choices and remove guesswork — especially in identifying viable sensors, power systems, and layout strategies.
– The documentation structure is already built, and project transparency is solid from day one. -
What hasn’t (yet):
– Actual sensor readings have not been tested in real soil conditions.
– No final enclosure exists... yet.
– There’s been no full system test, so interactions between components remain theoretical for now.
– Cable management is a looming problem with no elegant solution (but hope dies last).
This section will evolve (read: fill with battle scars) once the fabrication starts. For now, what’s working is the structure and mindset — and what’s not working is mostly still waiting its turn.
14. What questions need to be resolved?
Even with solid planning and a lot of simulated confidence, several key questions remain open — questions that only hands-on testing, real-world messiness, and probably some debugging at midnight can answer. These are the remaining unknowns:
- Sensor Accuracy: Will the soil moisture readings remain consistent across different soil types and watering events? Calibration might be needed, or the values could drift — especially if powered from a LiPo.
- Environmental Stability: Will the BME280, inside a semi-enclosed box with a vent, give reliable temperature and humidity data over time?
- Battery Runtime: Will a single 4000mAh LiPo last long enough for practical use between charges? How often will it need charging in a real-world setting?
- Web Interface Performance: Will the ESP32-C6 serve the interface reliably every time a user taps the NFC tag? Will the Wi-Fi connection drop out unpredictably?
- Build Tolerances: Will everything actually fit in the box? The Fusion 360 model says yes — real-world cable spaghetti might disagree.
- Human Error Margin: What did I forget? Because let’s be honest, something will be forgotten and it will matter at the worst possible moment.
These questions aren’t blockers — they’re just the final boss fights waiting at the end of the level. I’ll be updating this section as things get built, tested, and either confirmed or violently disproven.
8. What will happen when?
The plan is simple: four days, 15-hour shifts, questionable nutrition, and one final demo standing between me and FabAcademy graduation. Everything begins on Monday June 10 — and by Wednesday June 12, it needs to be built, working, and looking fabulous. No pressure.
- June 10 (Monday): Sensor testing, wiring setup, power management testing, and design of enclosure in Fusion 360
- June 11 (Tuesday): Laser cutting, 3D printing, PCB milling, soldering, and first working prototype
- June 12 (Wednesday): Final integration, UI + NFC setup, video/photo documentation, and THE presentation
- June 13 (Thursday): Clean-up, final website updates, and maybe sleeping for more than four hours
Every day is a full sprint. Failure is not an option — just a learning opportunity I don’t have time for.
15. What have you learned?
I’ve learned to solder, to wire, to code, to debug, to make things break and then pretend that was part of the plan. I’ve learned how to talk to machines, how to talk to AI, and most importantly — how to talk myself out of giving up.
I’ve learned that a good question is more powerful than a perfect answer. That progress isn’t a straight line, and that Google, ChatGPT, and sheer stubbornness can build almost anything.
But most of all, I’ve learned that the real skill isn’t electronics or CAD or Python — it’s turning confusion into momentum. That if you give me a problem, a microcontroller, and five hours of panic... I’ll come back with something that works. Barely. But it works.
So yeah — I’ve learned a lot. And if I could do all this in a few months, with minimal prior experience and a lot of weird late-night decisions… imagine what comes next.
Mic dropped.