Moulding and Casting
Linked to the group assigment page
Introduction
Molding and casting are essential manufacturing techniques that allow for the creation of precise replicas of an original object, using a wide range of materials such as plastics, metals, and ceramics. These processes are divided into two main stages:
Molding: This involves designing and manufacturing a mold, which is essentially a hollow form or a negative of the original object. The mold is typically made from durable and precise materials to ensure that the resulting copies are faithful to the original. Mold design may involve advanced technologies, such as computer modeling and 3D printing, to achieve detailed and complex features.
Casting: Once the mold is ready, the casting stage begins. This involves pouring a material in its liquid state—such as molten metal, melted plastic, or liquid ceramic—into the mold cavity. The material is then allowed to cool and solidify, conforming to the internal shape of the mold. After the material has fully solidified, the mold is opened to remove the replica of the original object.
These processes are crucial in many industries, including automotive, aerospace, jewelry, and construction, due to their ability to efficiently reproduce multiple copies of complex components with high fidelity.
Moulding
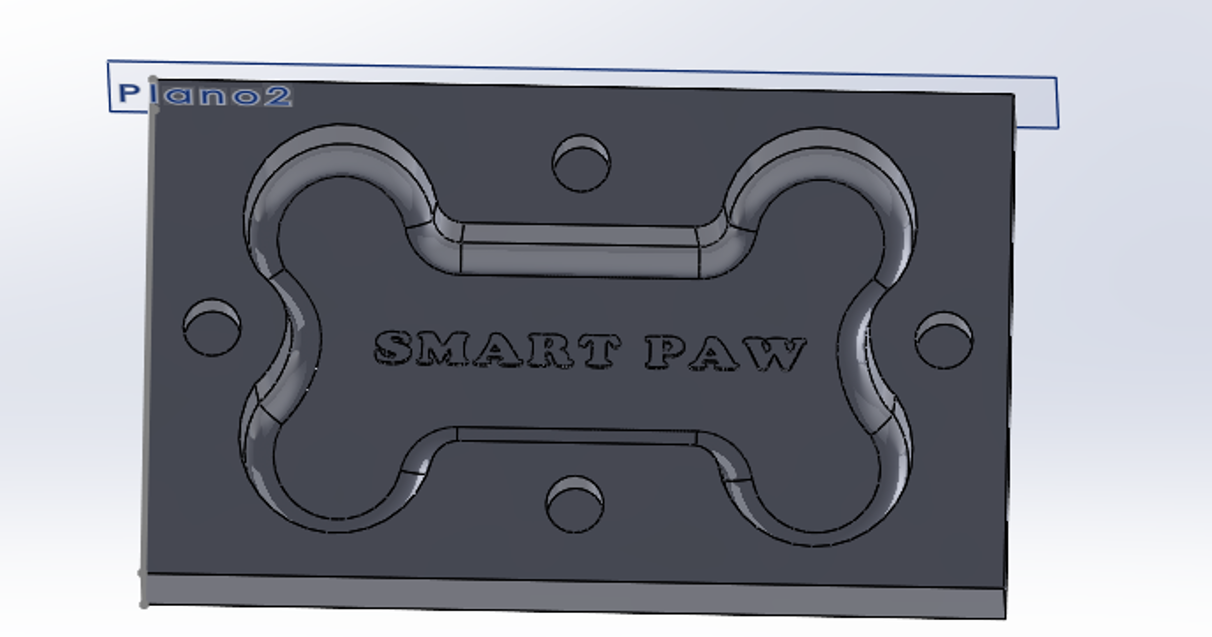
Using male and female molds to create a hollow dog bone is crucial as it allows for precise replication of each half of the design, ensuring exact control over wall thickness and uniform quality. This method facilitates production by allowing each half to be manufactured and reviewed independently before being joined, enhancing the efficiency of the process and ensuring the integrity of the final product. Additionally, the molds aid in demolding and enable work with a variety of materials, which is ideal for meeting different requirements of strength and flexibility in the finished product.
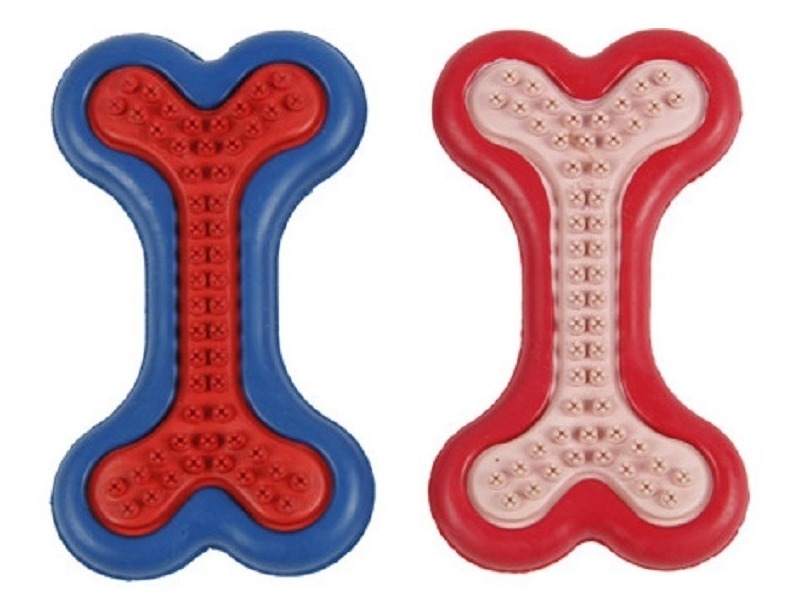
For the design and manufacture of the mold, I based it on a pet toy that I show below.
I decided to do it in solid since in this course I have gained a little love and experience
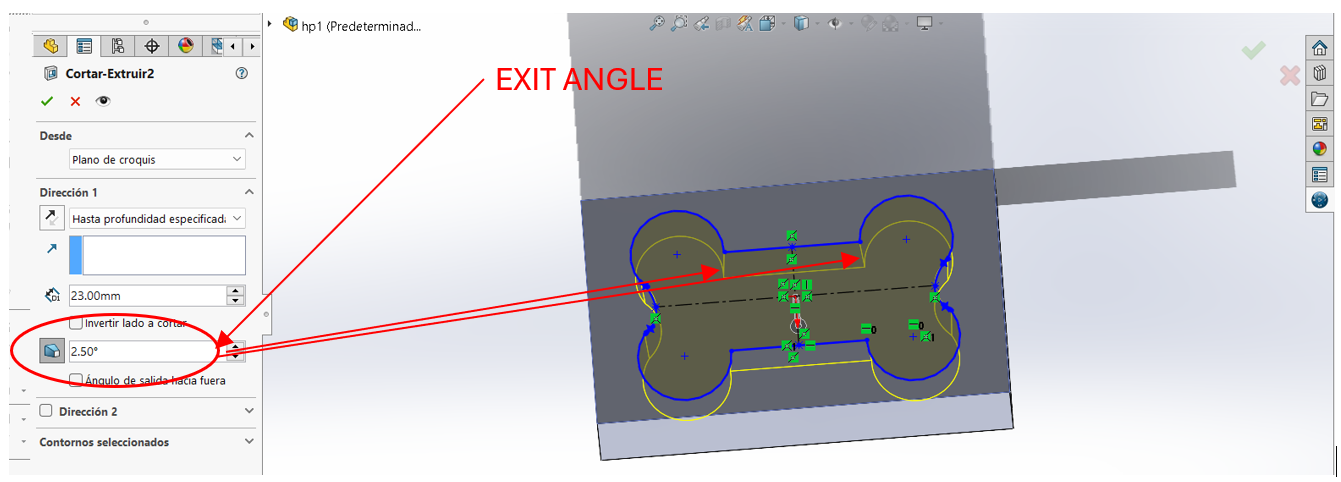
It is important to mention the exit angles that were given to the mold so that the tool on the router would not have a hard time making those movements in addition to the chamfers that were given to the figure for a better finish.
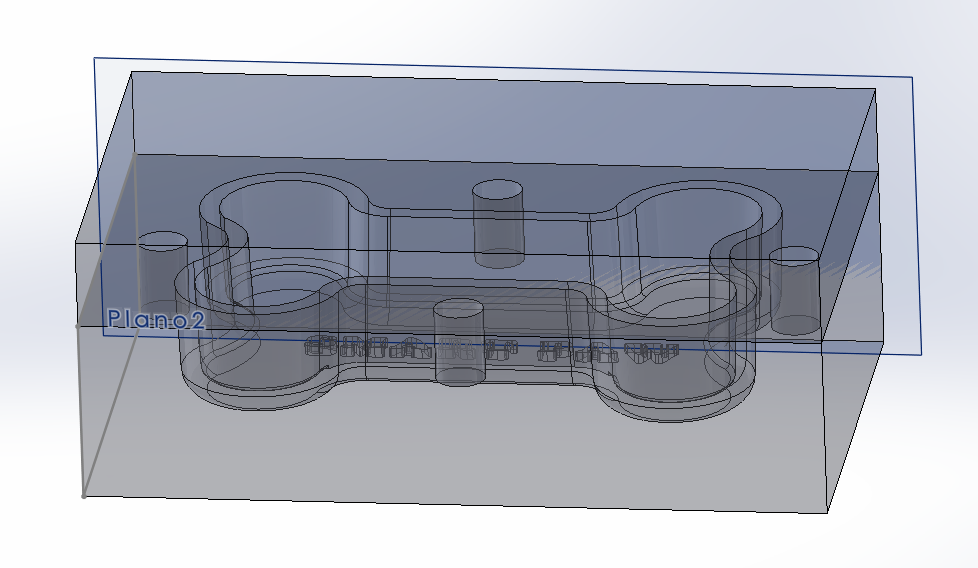
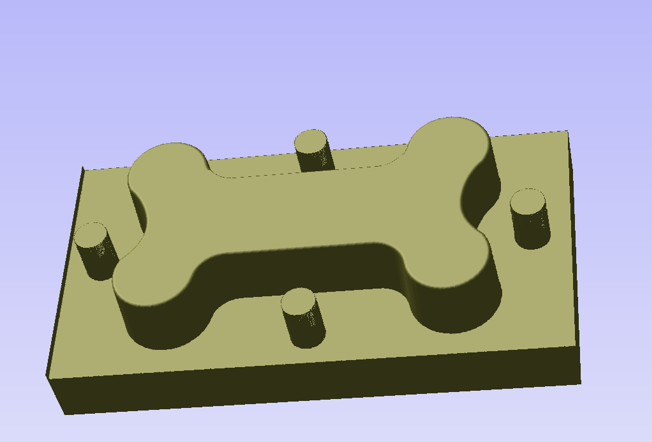
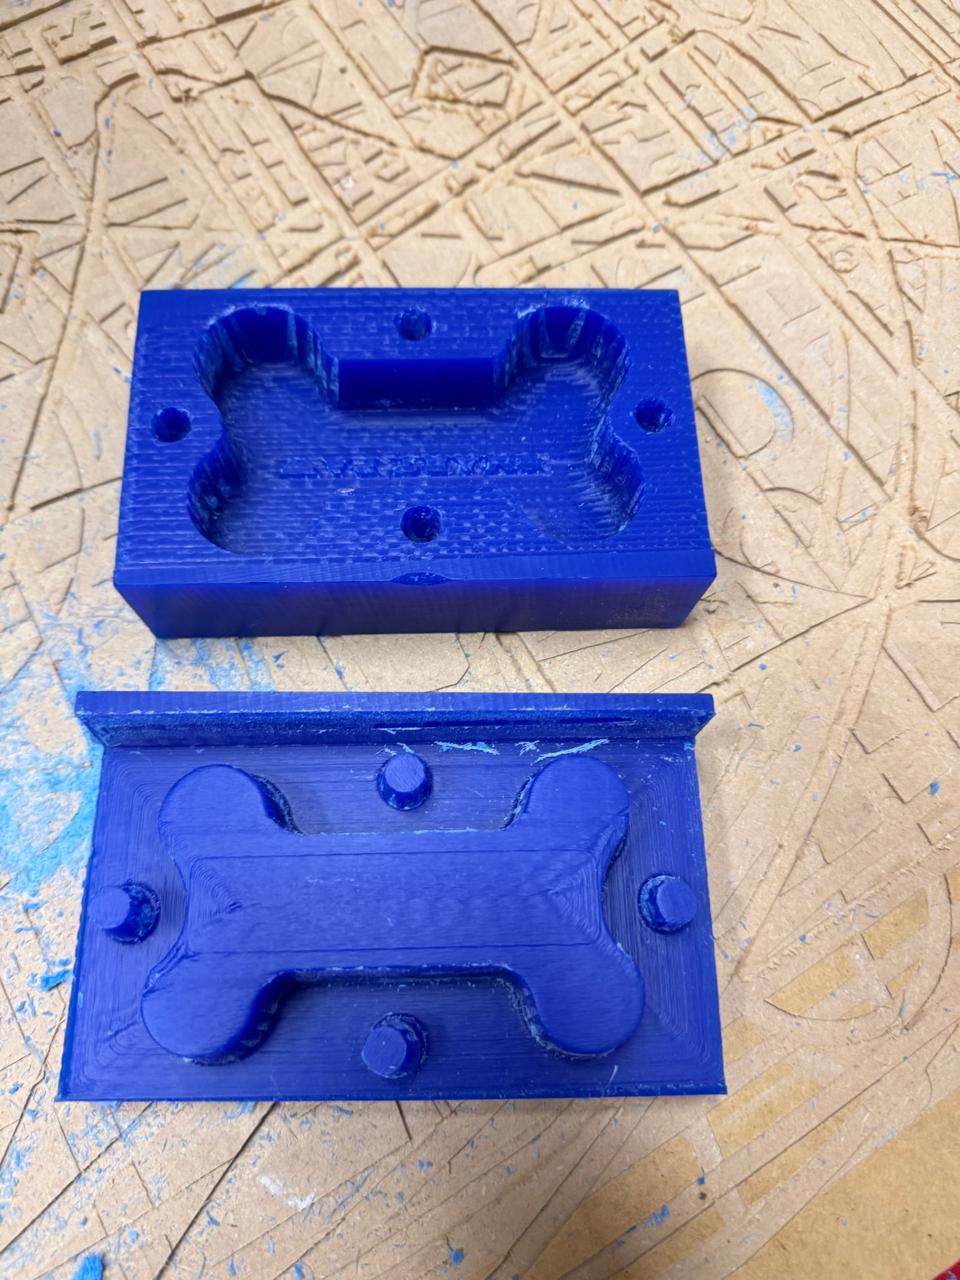
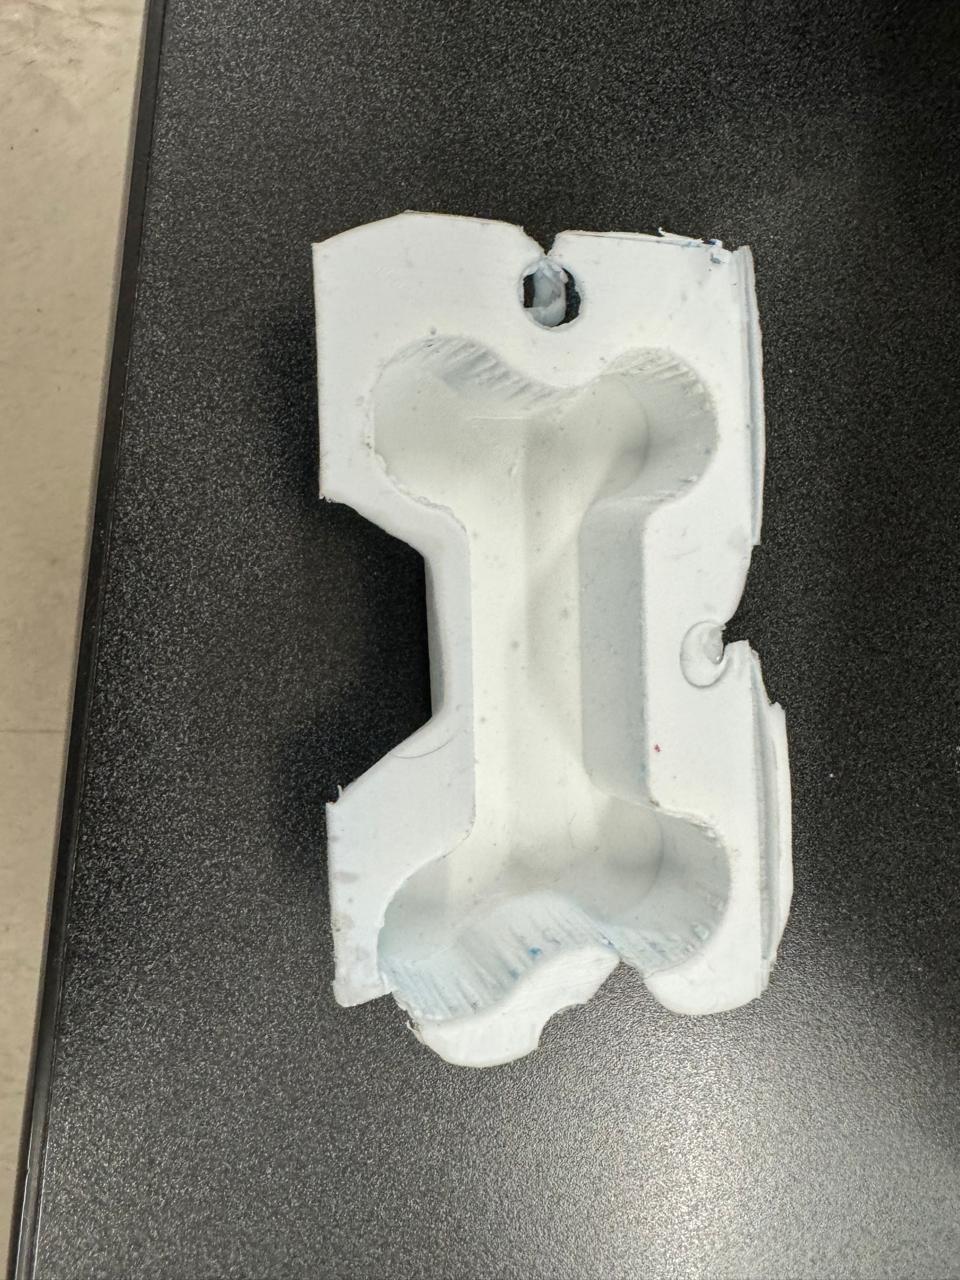
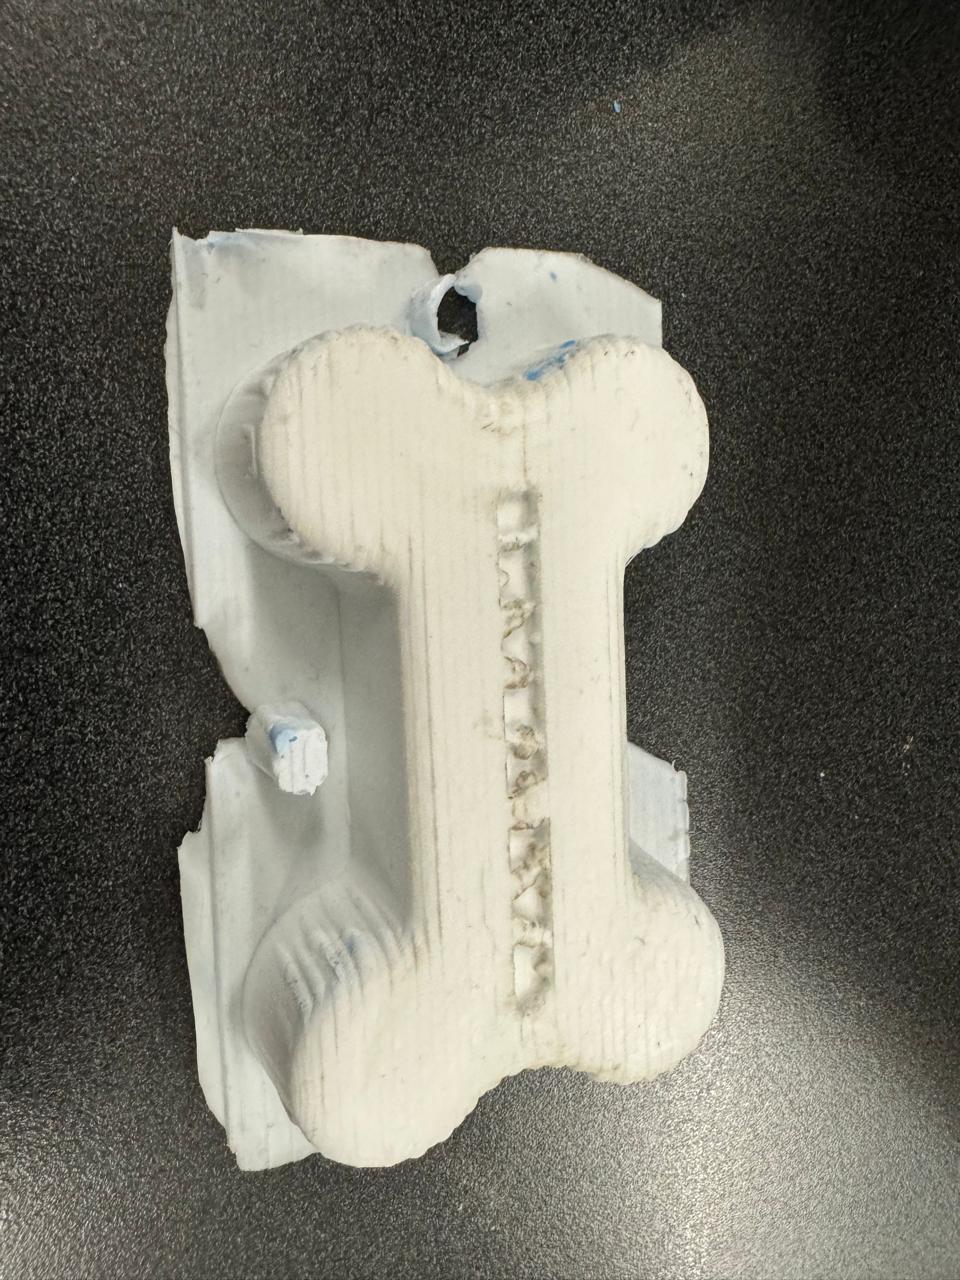
final mold
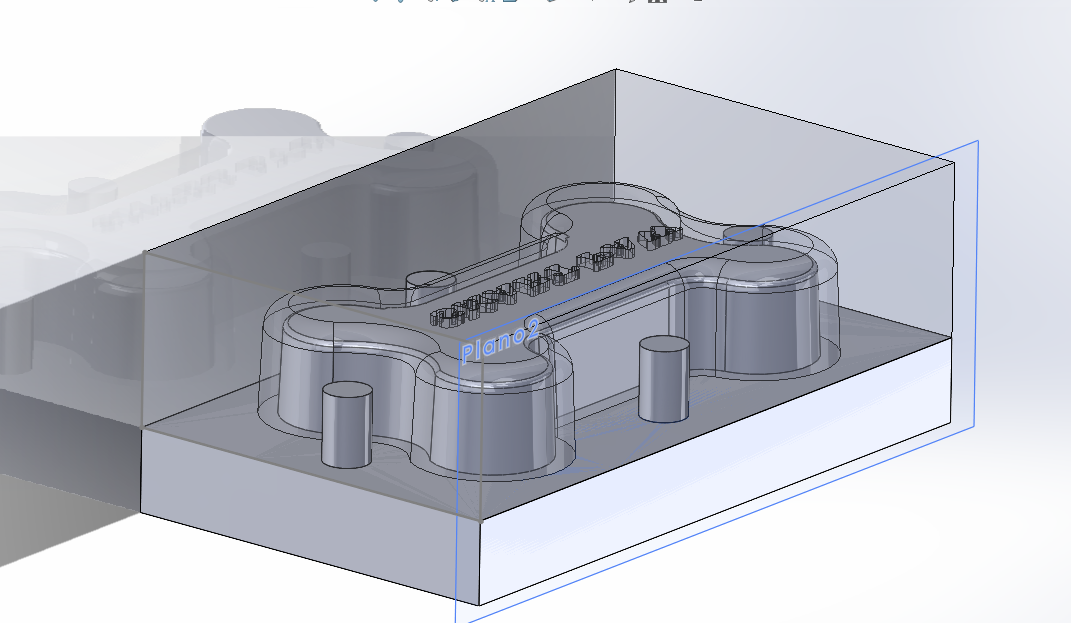
male model
female mold
vcarve

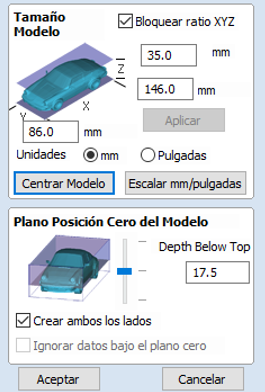
Step 1: Import the 3D STL Model
- Start VCarve: Open the program and create a new file by selecting File.
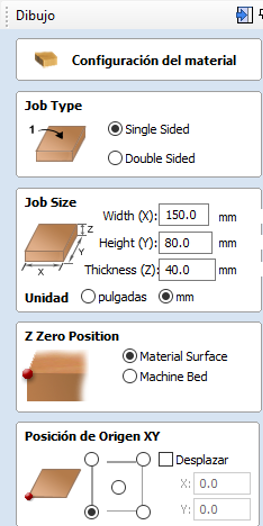
- Set Up the Material: Specify the dimensions of the material you will be working with, such as thickness, length, and width. This is crucial to ensure the cutting paths are correctly generated.
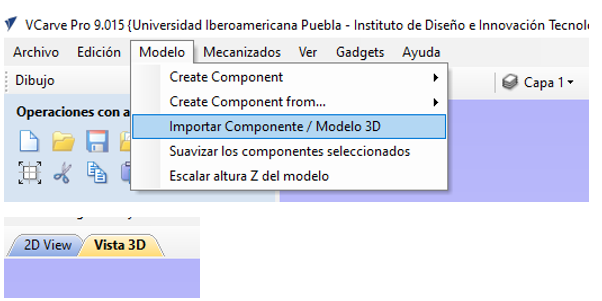
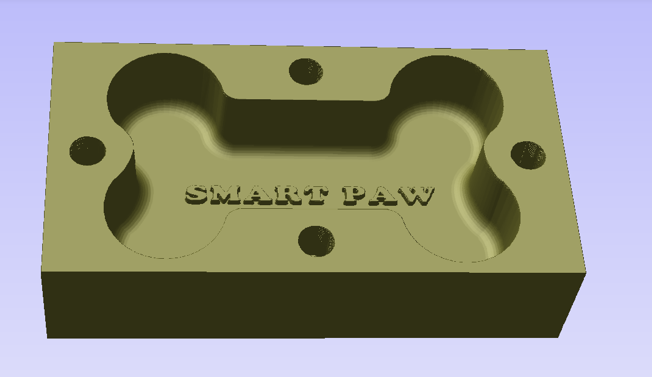
- Import the STL Model: Go to File Import Import 3D Model and select the STL file you wish to use. Make sure the model fits within the configured material limits.
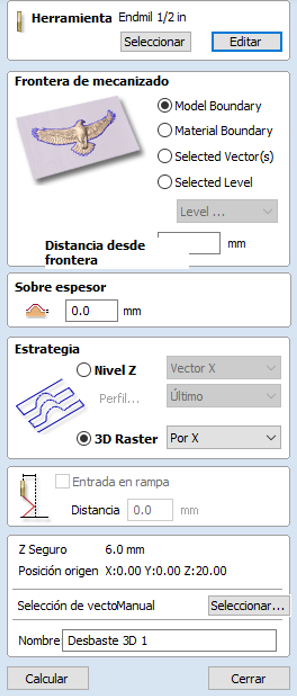
Step 2: Configure Roughing Toolpaths
- Select Roughing Tool: In the toolpaths section, select 3D Roughing Toolpath. Choose a tool capable of removing large amounts of material quickly, like a roughing end mill.
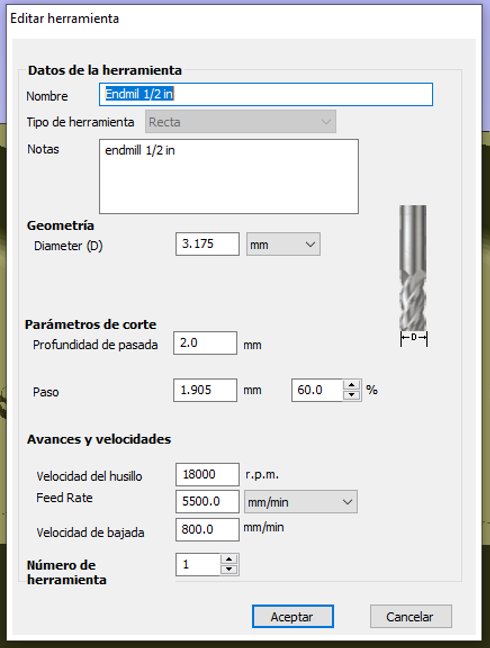
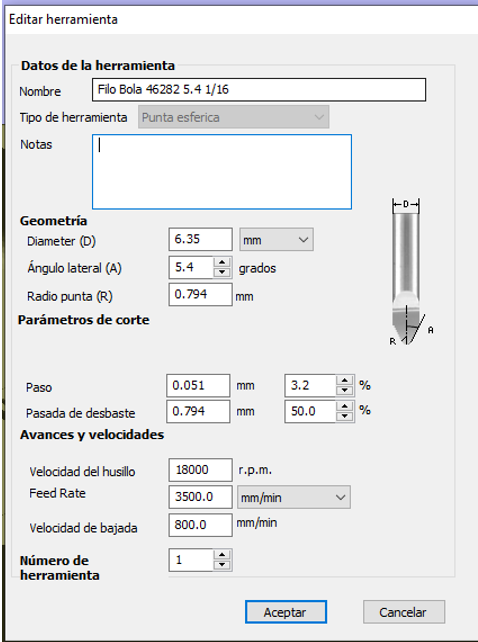
- Adjust Tool Parameters: Configure parameters such as tool diameter, pass depth, cut depth, and feed rate. These values depend on the specific material and tool.
- Generate the Roughing Path: Adjust the allowance over the final model to leave material for the finishing pass. Then, generate the path and preview it to ensure everything is correct.
Step 3: Configure Finishing Toolpaths
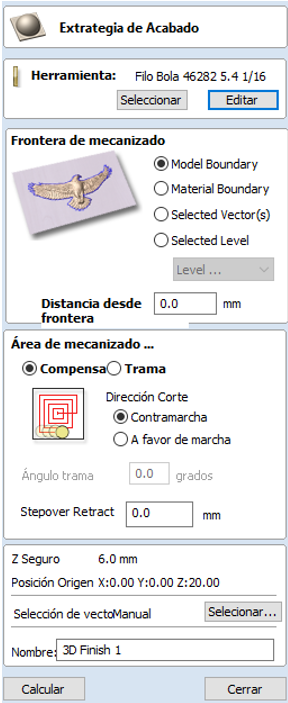
- Select Finishing Tool: In the toolpaths section, select 3D Finishing Toolpath. Choose a suitable tool for fine details, like a ball nose end mill.
- Adjust Tool Parameters: Set details such as tool diameter, pass depth, and cut depth. Adjust the cutting strategy, which could be parallel or raster, to achieve the best finish results.
- Generate the Finishing Path: Configure the path to cover the entire model and check that it does not leave unnecessary marks. Preview the path to ensure it covers all visible surfaces of the model.
- Save the Project: Save your work regularly to avoid losing progress.
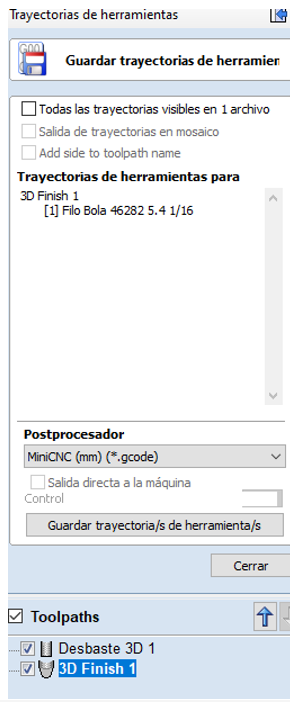
- Export Toolpaths: Once satisfied with the generated paths, export the data to a file that your CNC machine can interpret, usually in G-code format.
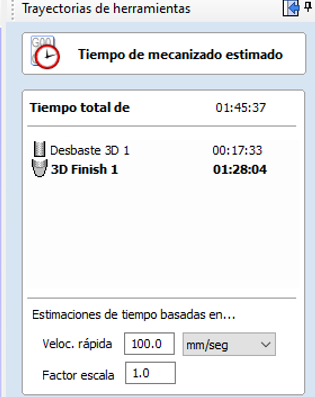
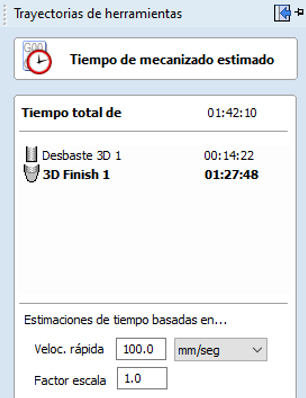
- Check Estimated Times: VCarve offers a feature to estimate the cutting time for each toolpath. Access this information in the Toolpaths section, selecting Toolpath Summary. This shows an estimate of the time each path will take, which is useful for planning operations and optimizing efficiency.
- Adjust Parameters if Necessary: Based on the estimated times, you may adjust tool settings or cutting strategy to improve efficiency or reduce machining time.
- Transfer the G-code to the CNC: Use a USB or direct connection to transfer the file.
- Set Up the CNC: Ensure the material is securely fastened and the tool is correctly mounted and calibrated.
- Perform a Test Cut: It is always advisable to perform a test cut on a similar material to ensure everything is set up correctly before proceeding with the final job.
Step 4: Save and Export Toolpaths
Step 5: Check and Visualize Estimated Cutting Times
female mold
male mold
Step 6: Execute on the CNC Machine
tools
roughing tool
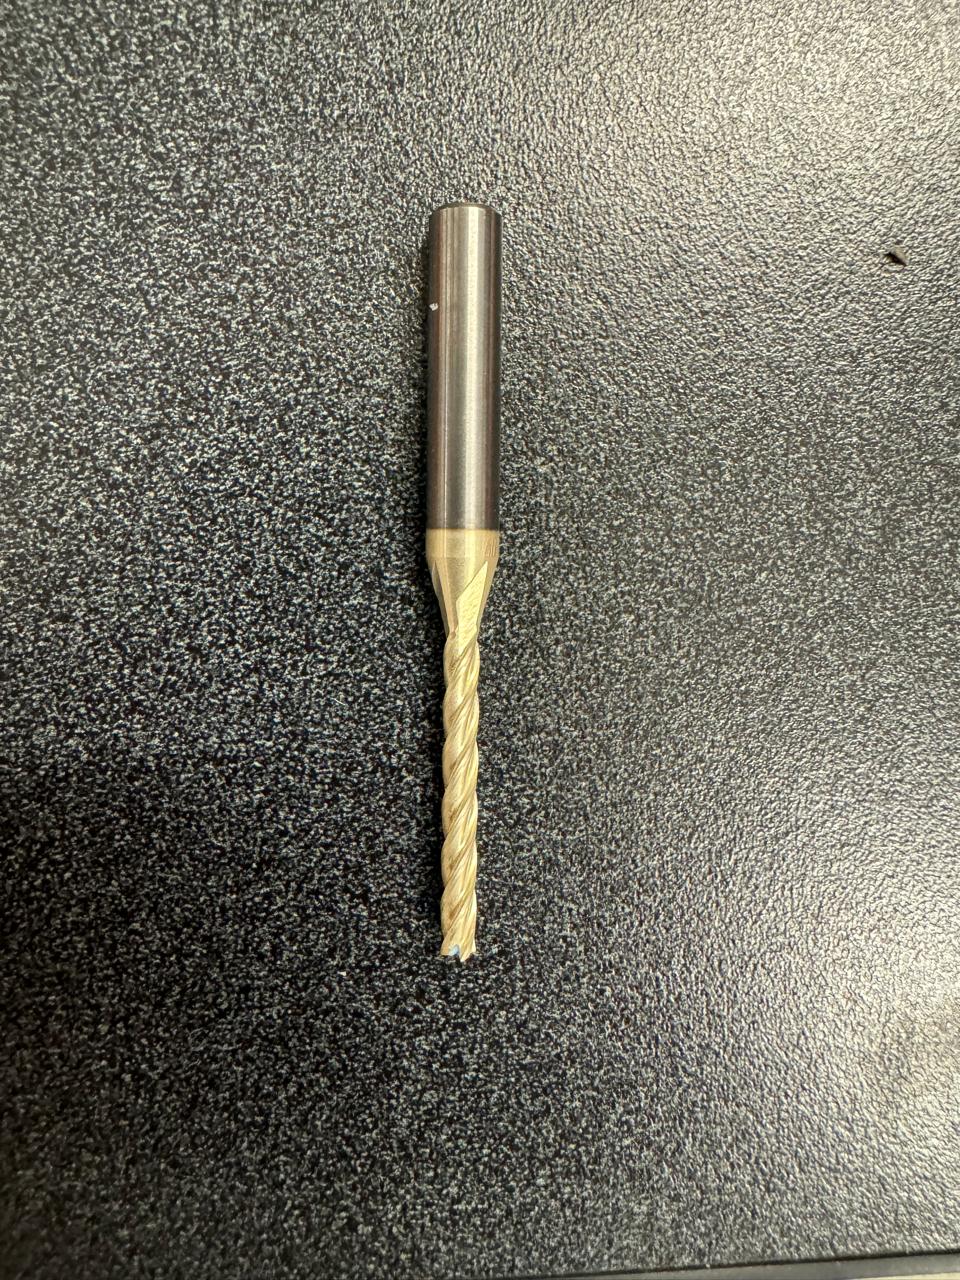
final finishing tool
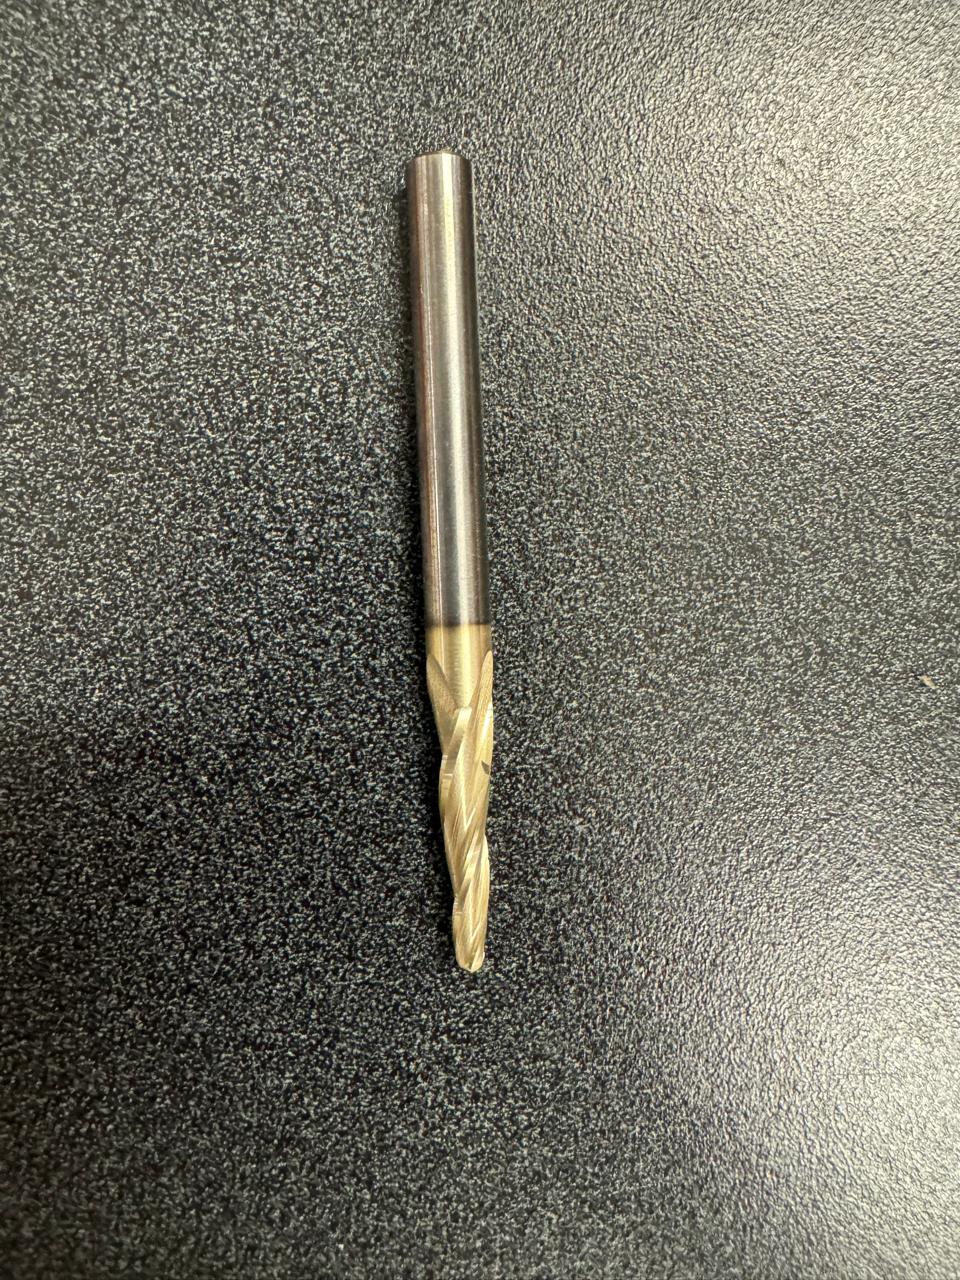
They are not the best tools, for example the finishing tool should be larger for a better finish but due to lack of tools, we had to improvise with available tools.
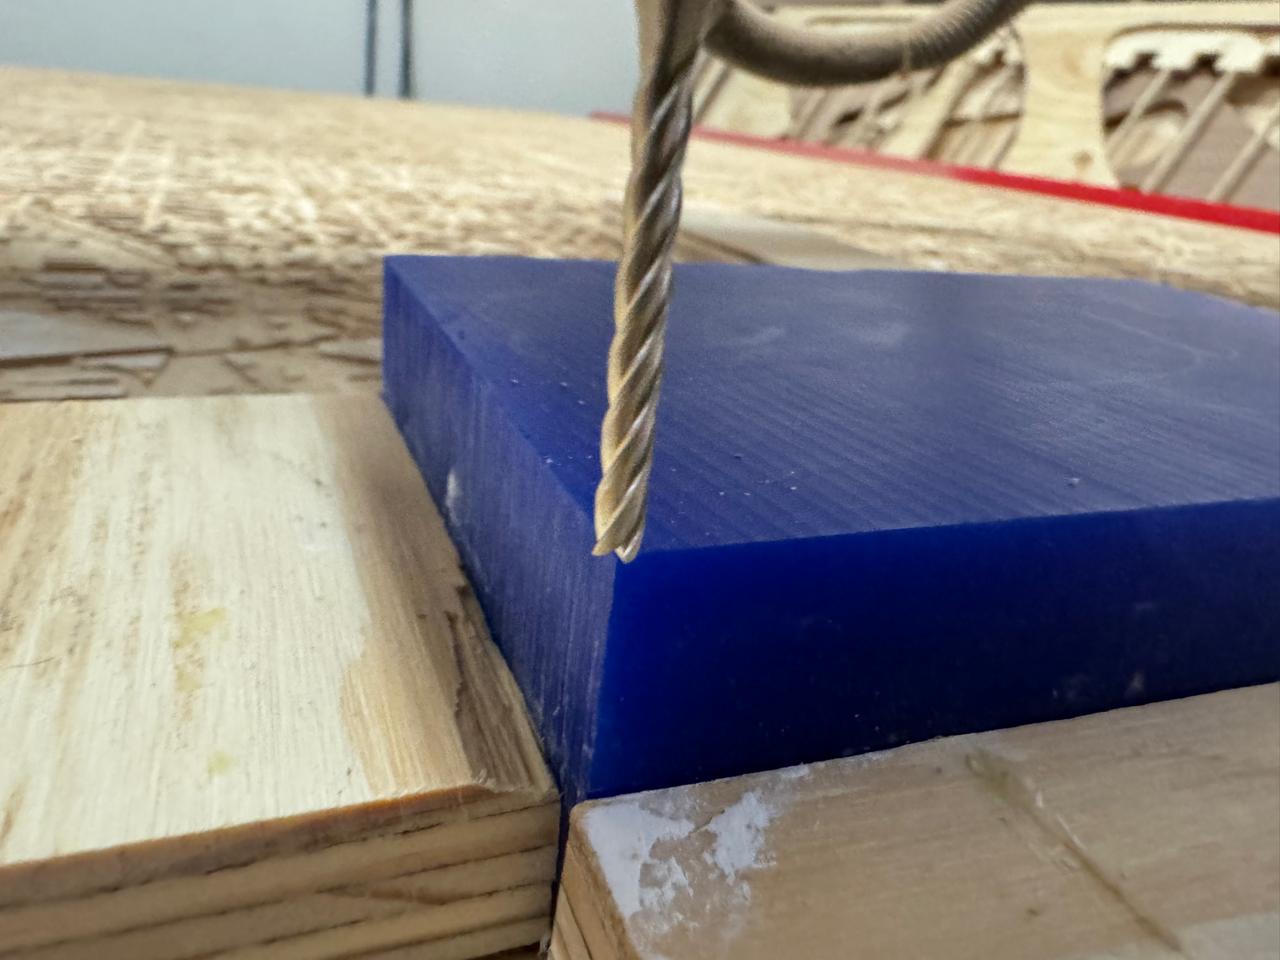
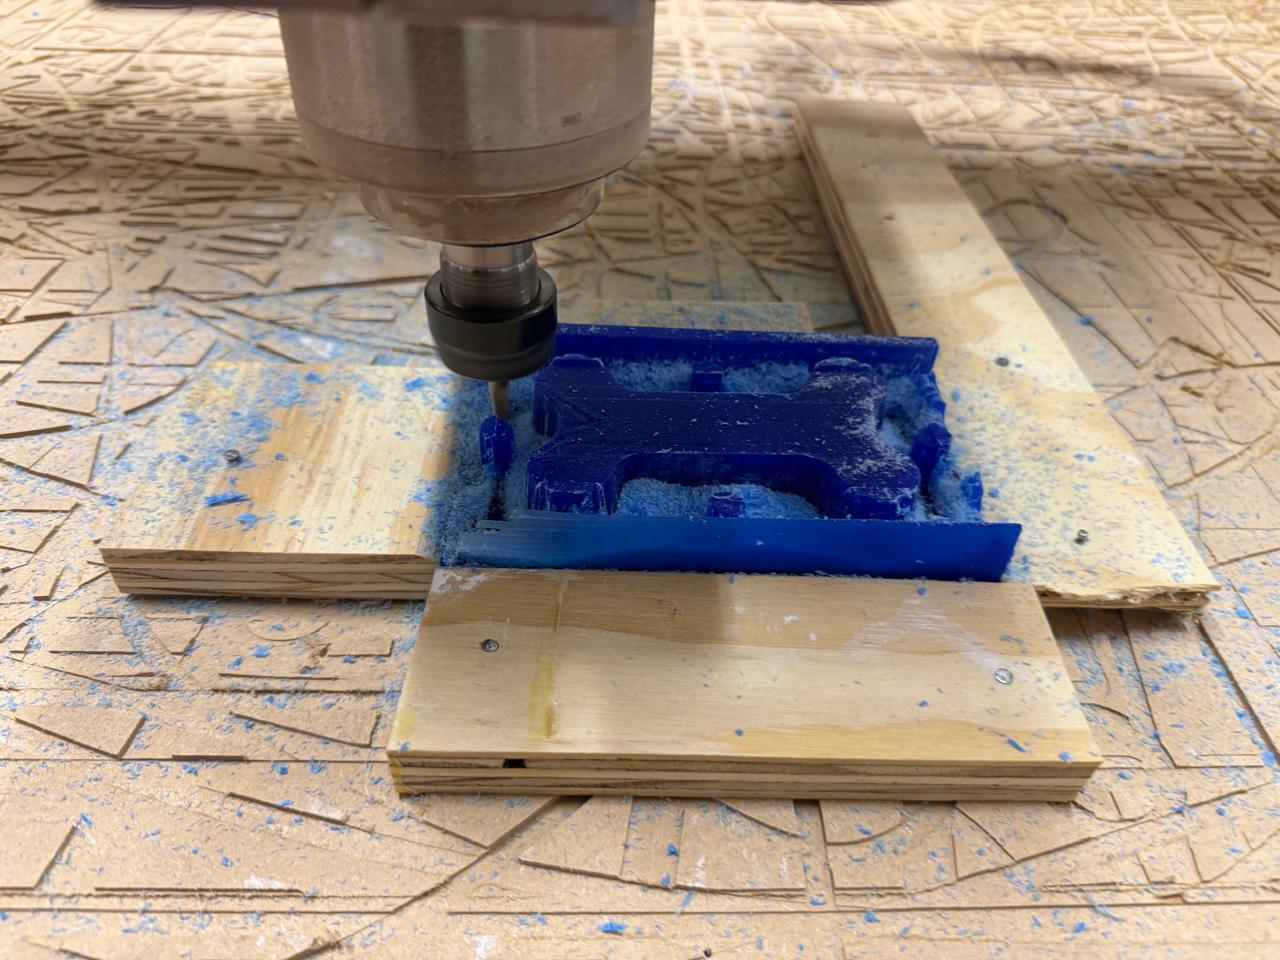
ROUGHING

Casting
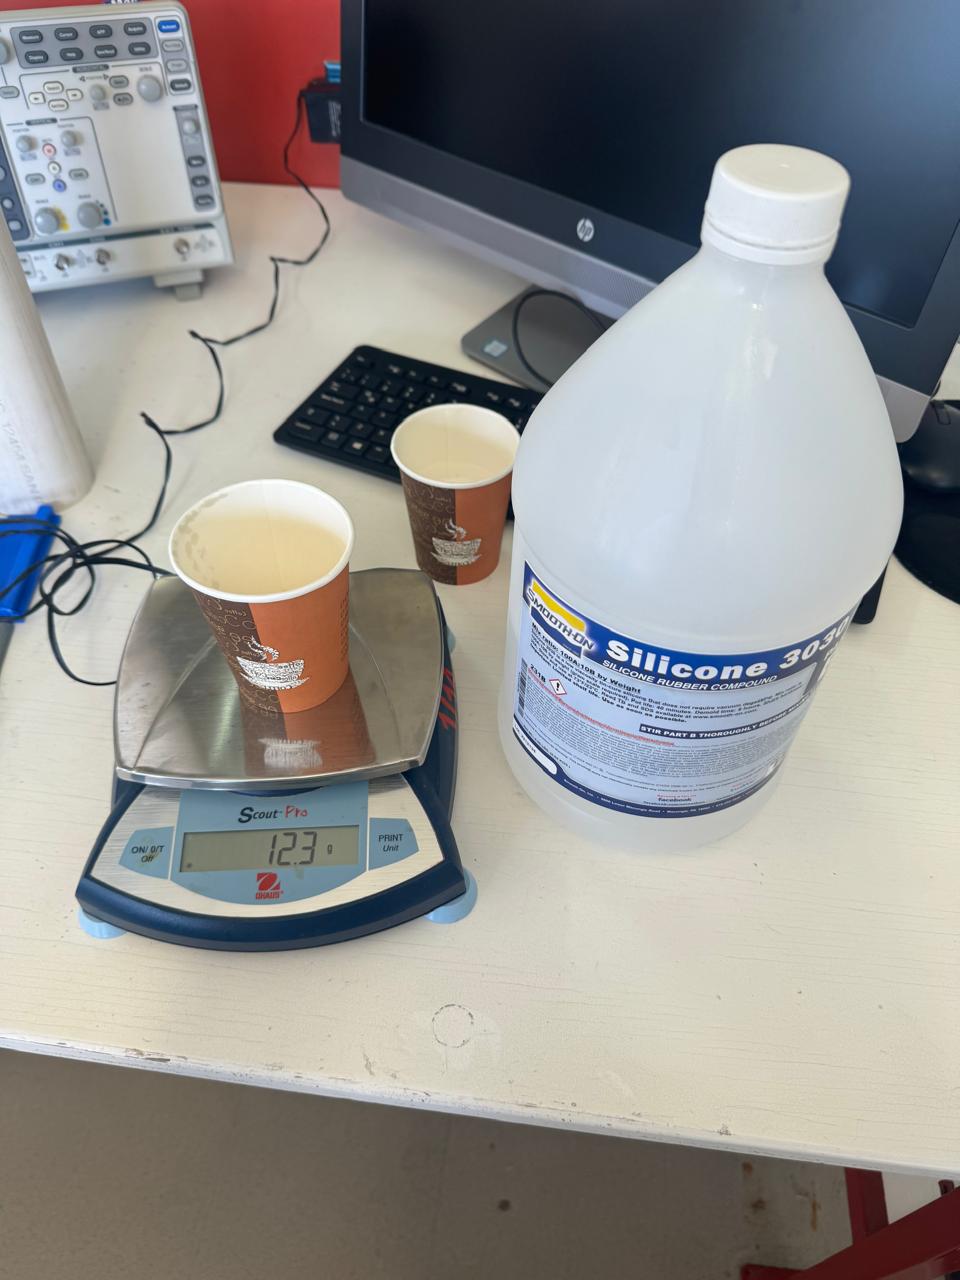
After having my wax mold I used Silicone 3030 with a ratio 100A : 10B for my final mold.
For this material, it is recommended to handle it with gloves since it can be corrosive to the skin, causing burning or an itchy reaction, leaving lesions on the skin.
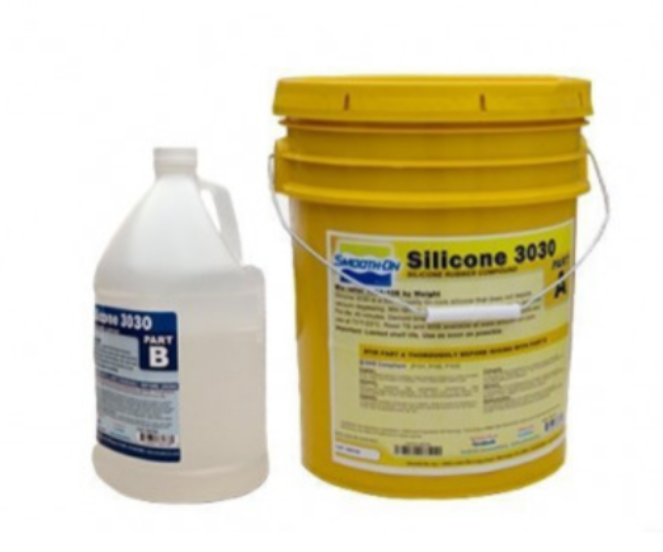
Datasheet click Here
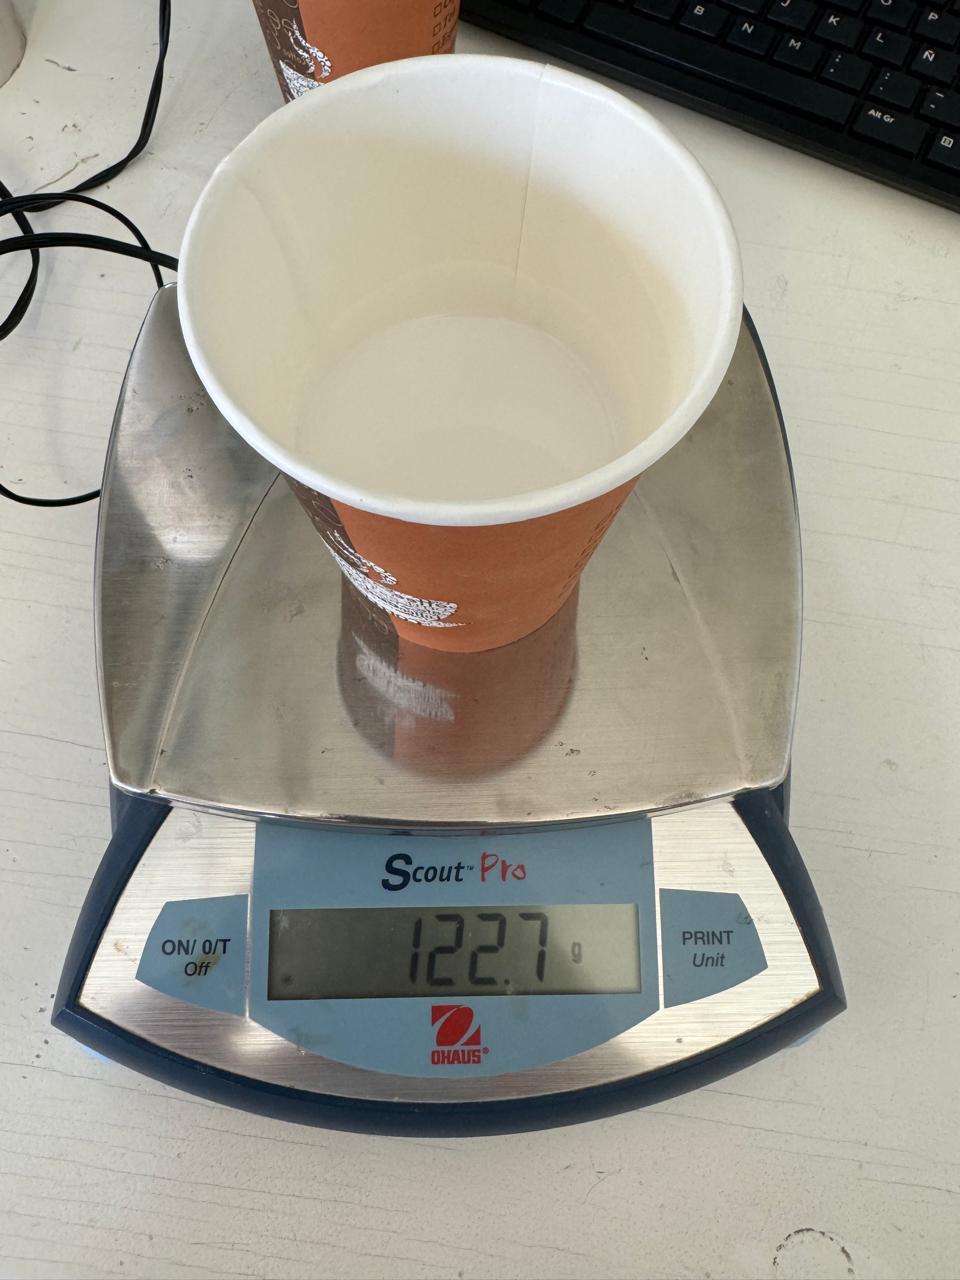
What I did first was analyze and test my mold with water. I filled the female to the limit and then I put the male on top. The water that was left over is the necessary amount, equal to the portion that should be in silicone, I poured that into a glass and took it as a measure for the silicone.
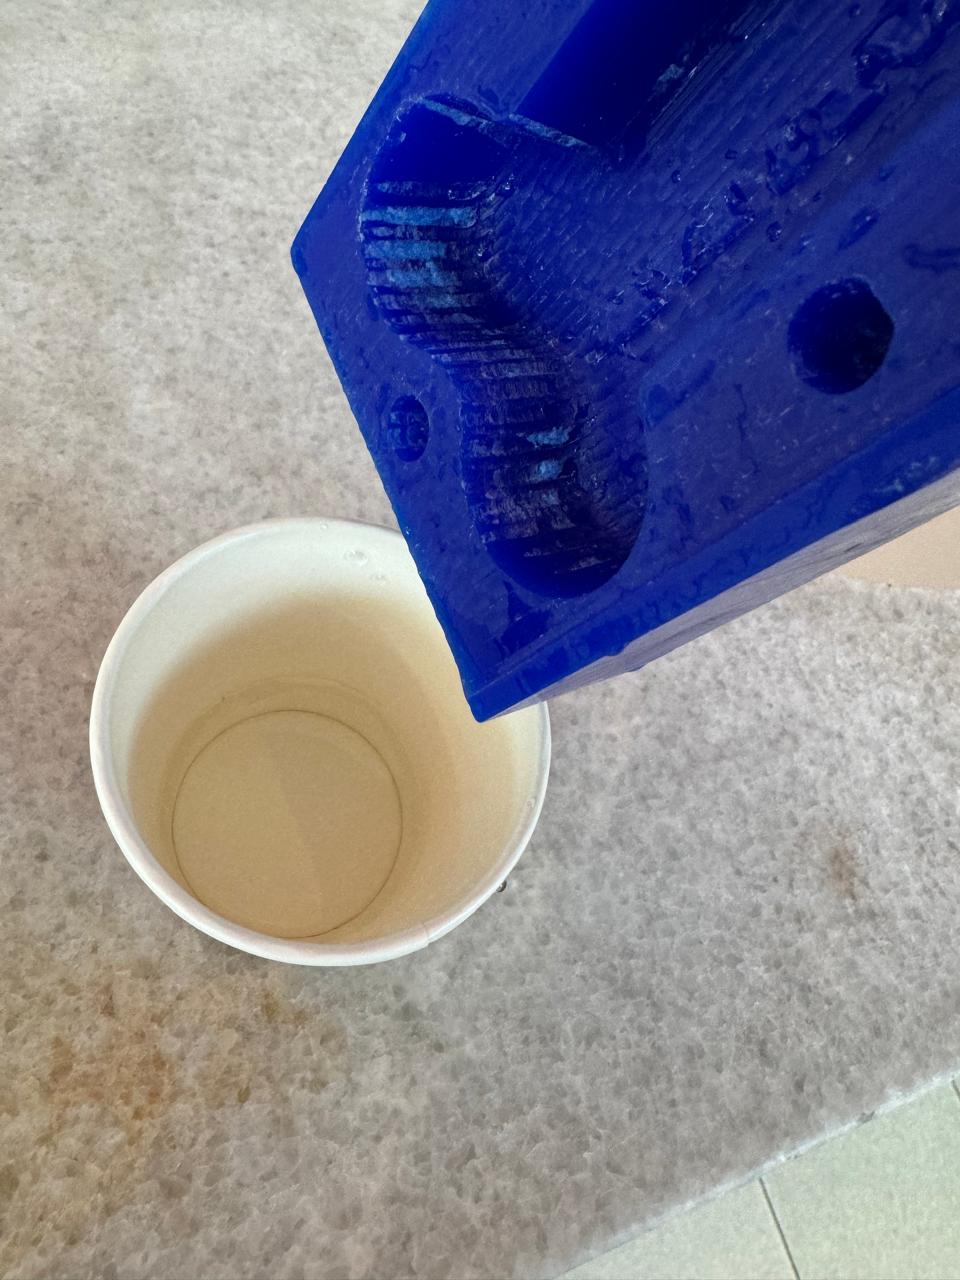
Once we have the water mark on the glass we proceed to pour the water and pour up to that point of silicone A, then we weigh it and take out 10% for part B of the silicone
Once both products have been weighed, we proceed to mix them and shake them for 6 minutes.
Once this step is completed, we pour the silicone into the female monde.
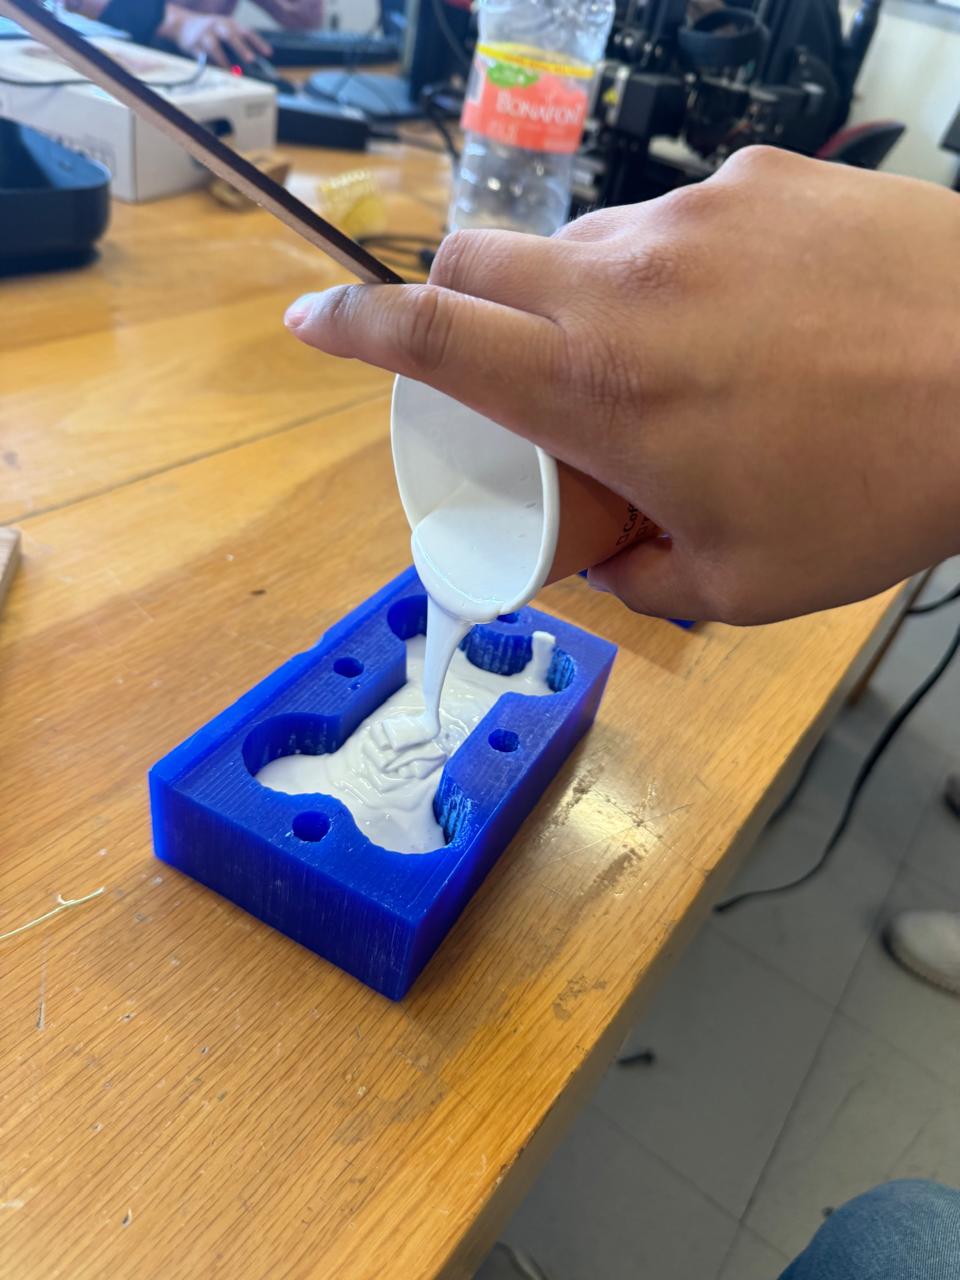
we remove the bubbles with blows
Then we put the male mold on top and verify that each of the points matches, as in the previous water step. In addition, we have to press it with something heavy so that it does not come off or move. In this case I will do it with books
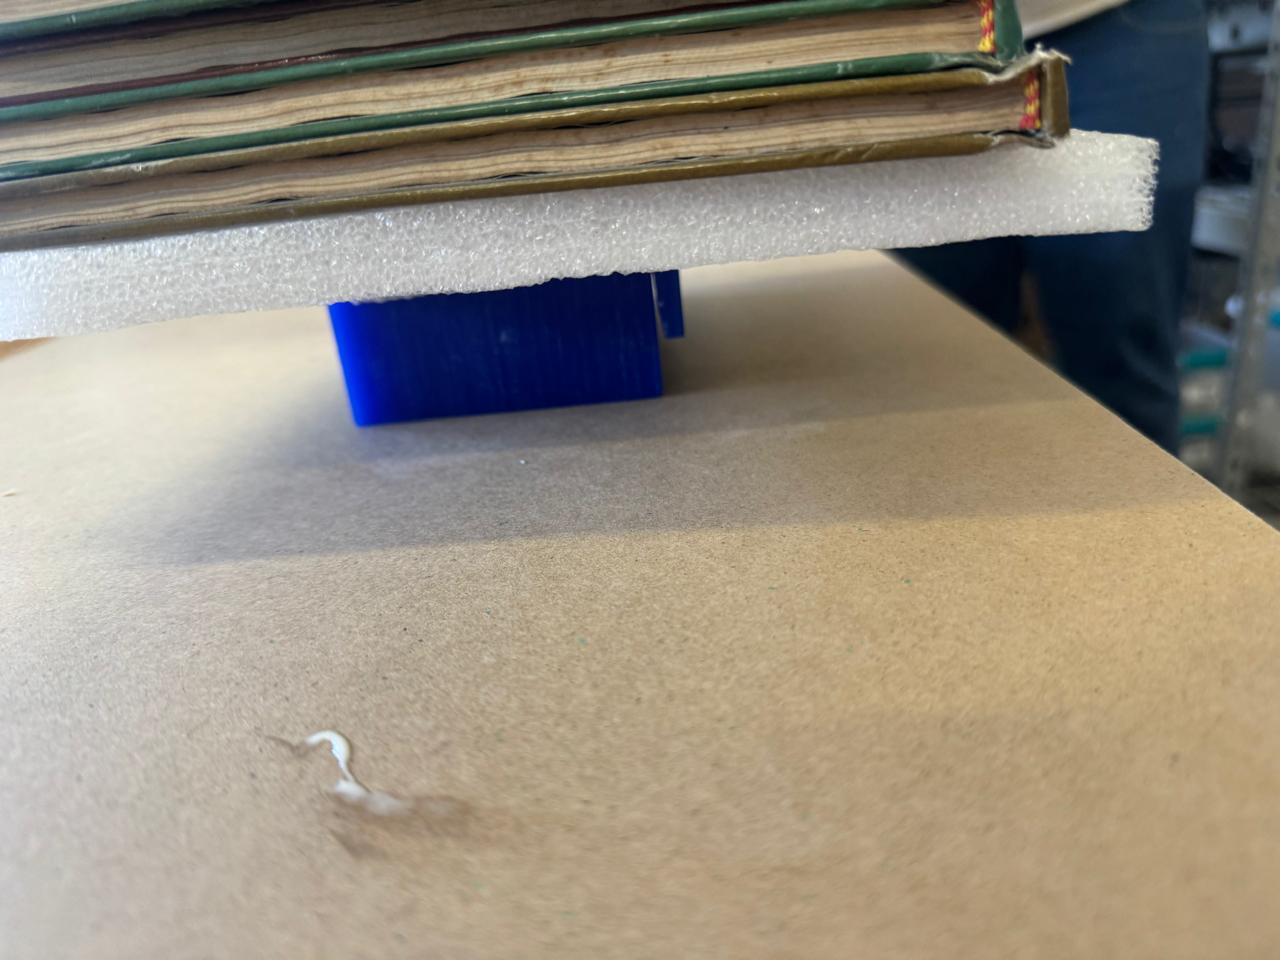
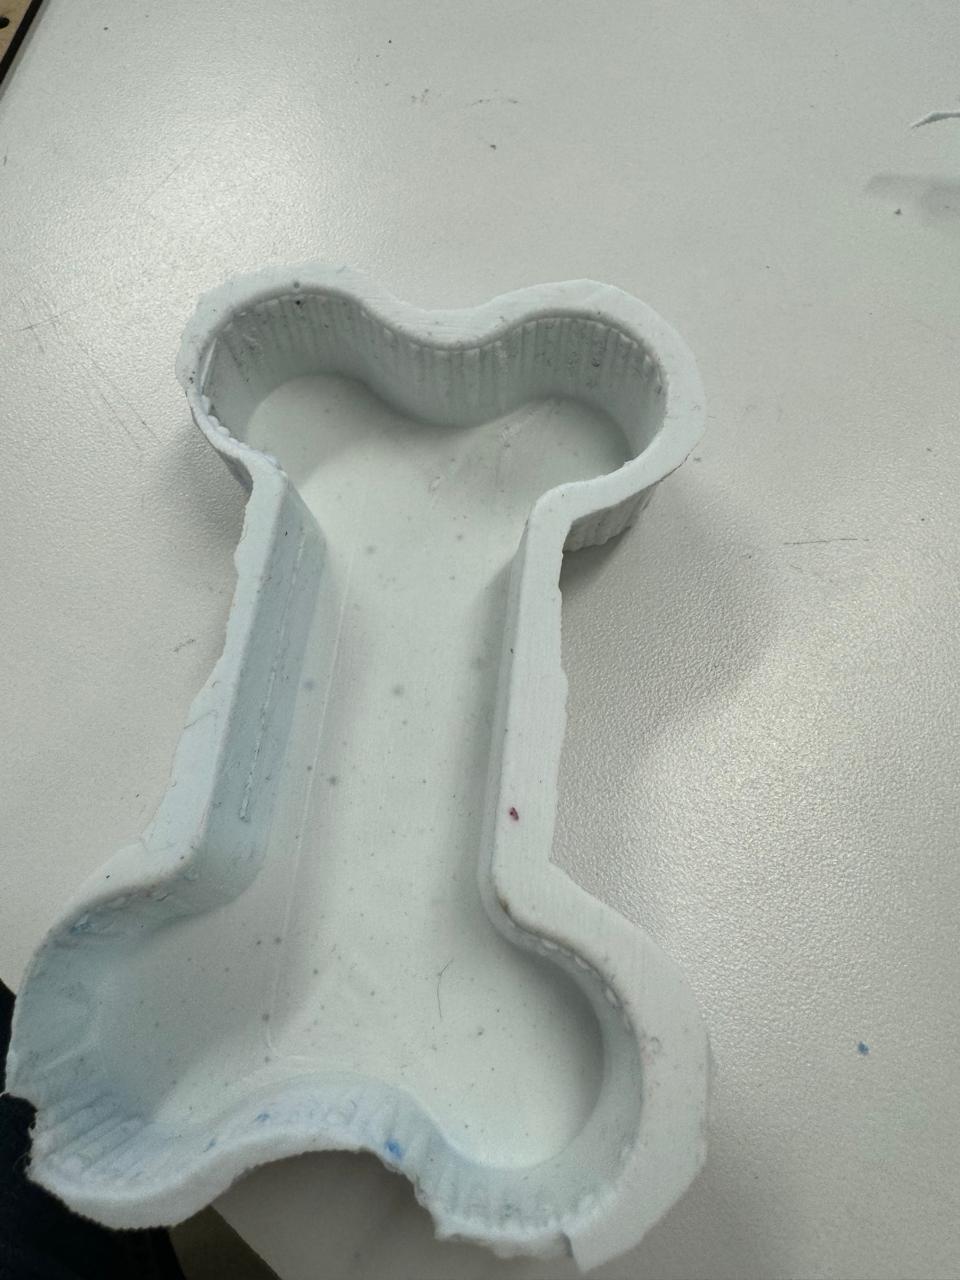
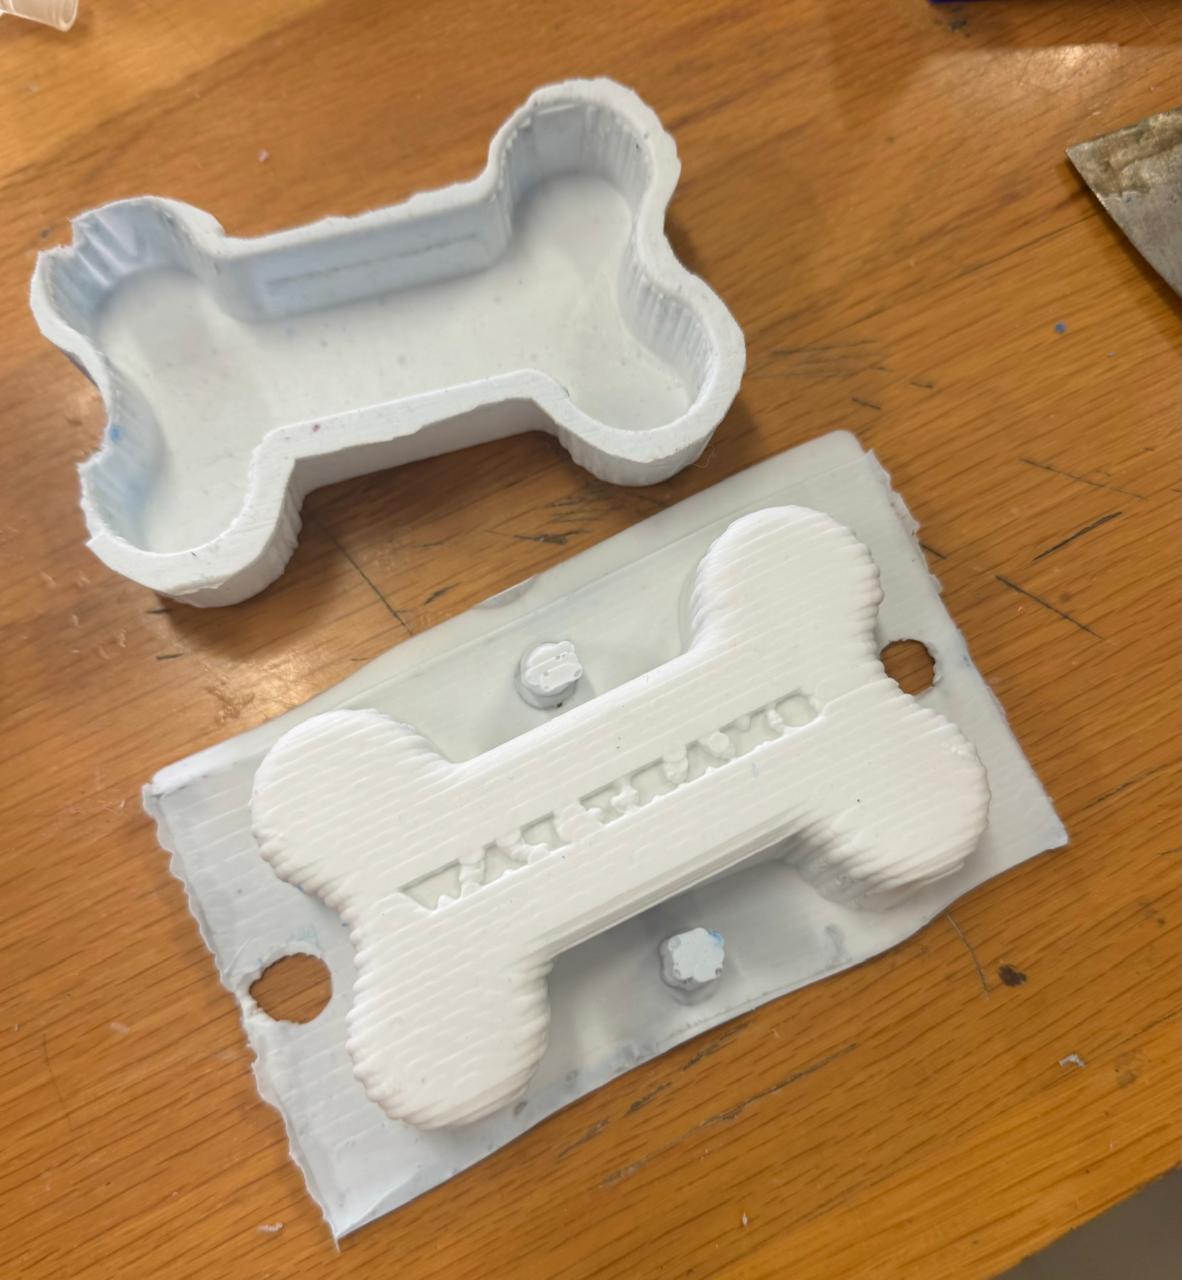
After 15 hours the mold looks like this
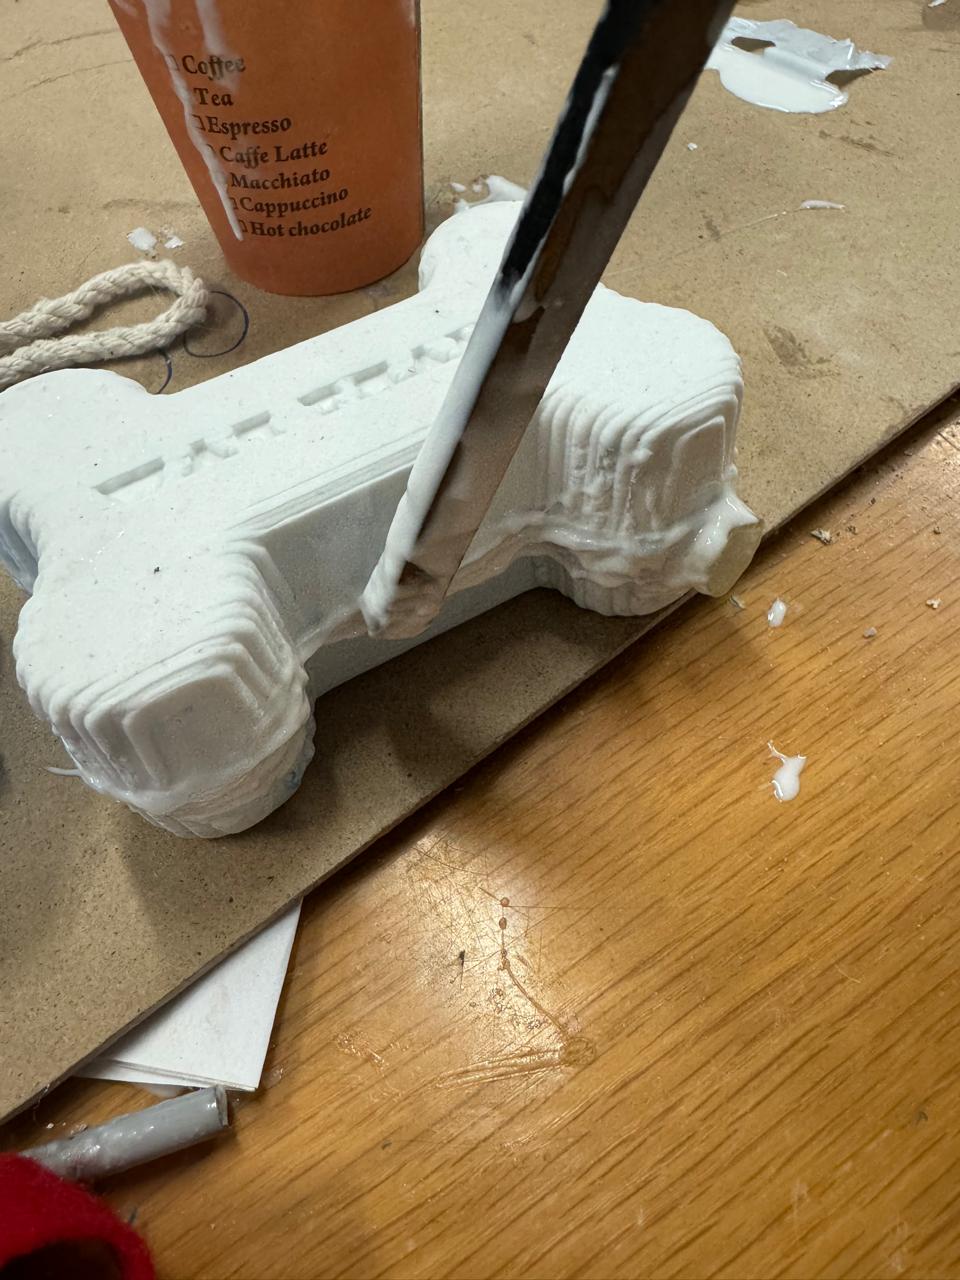
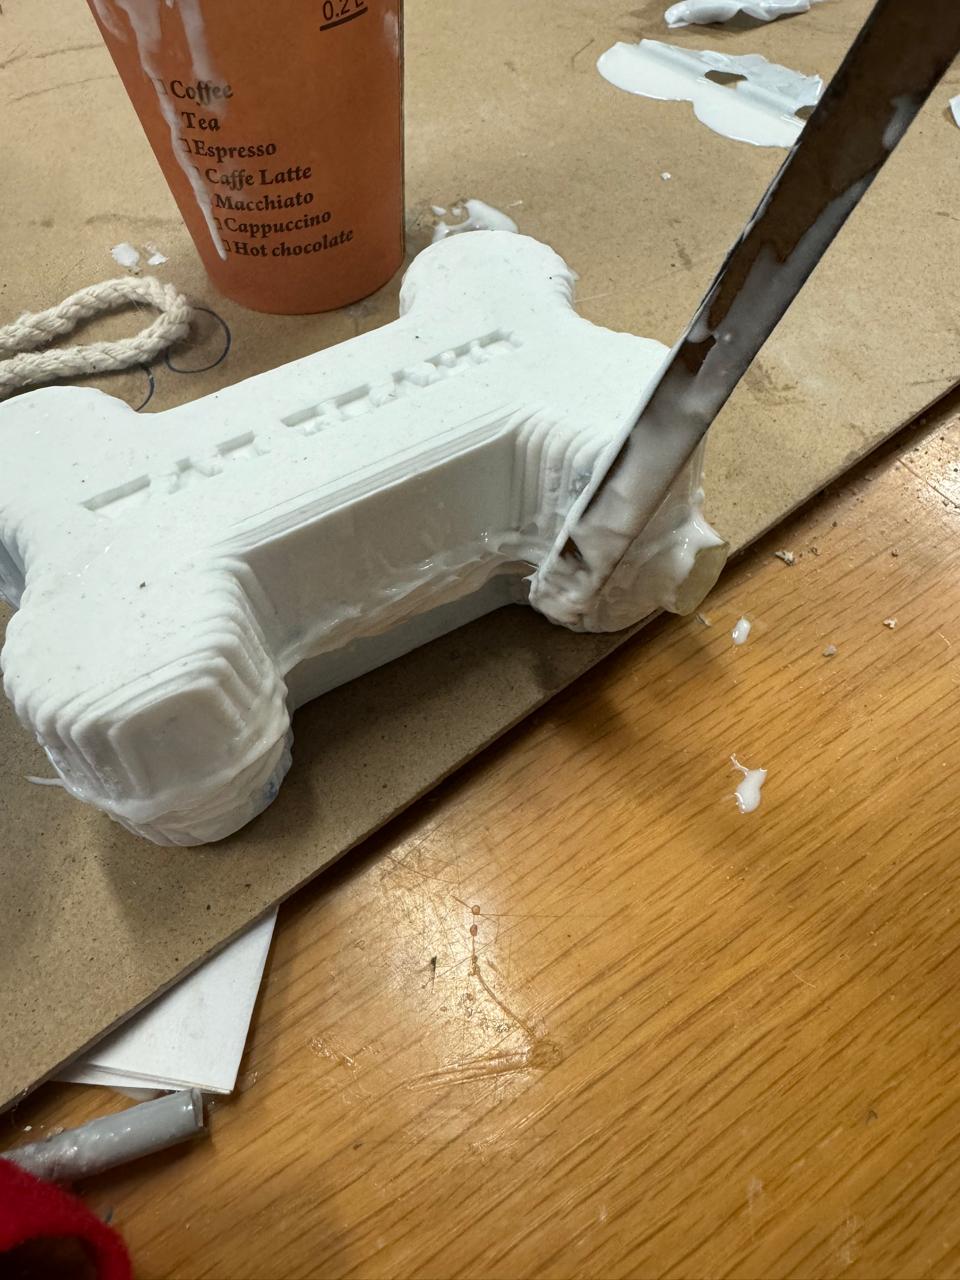
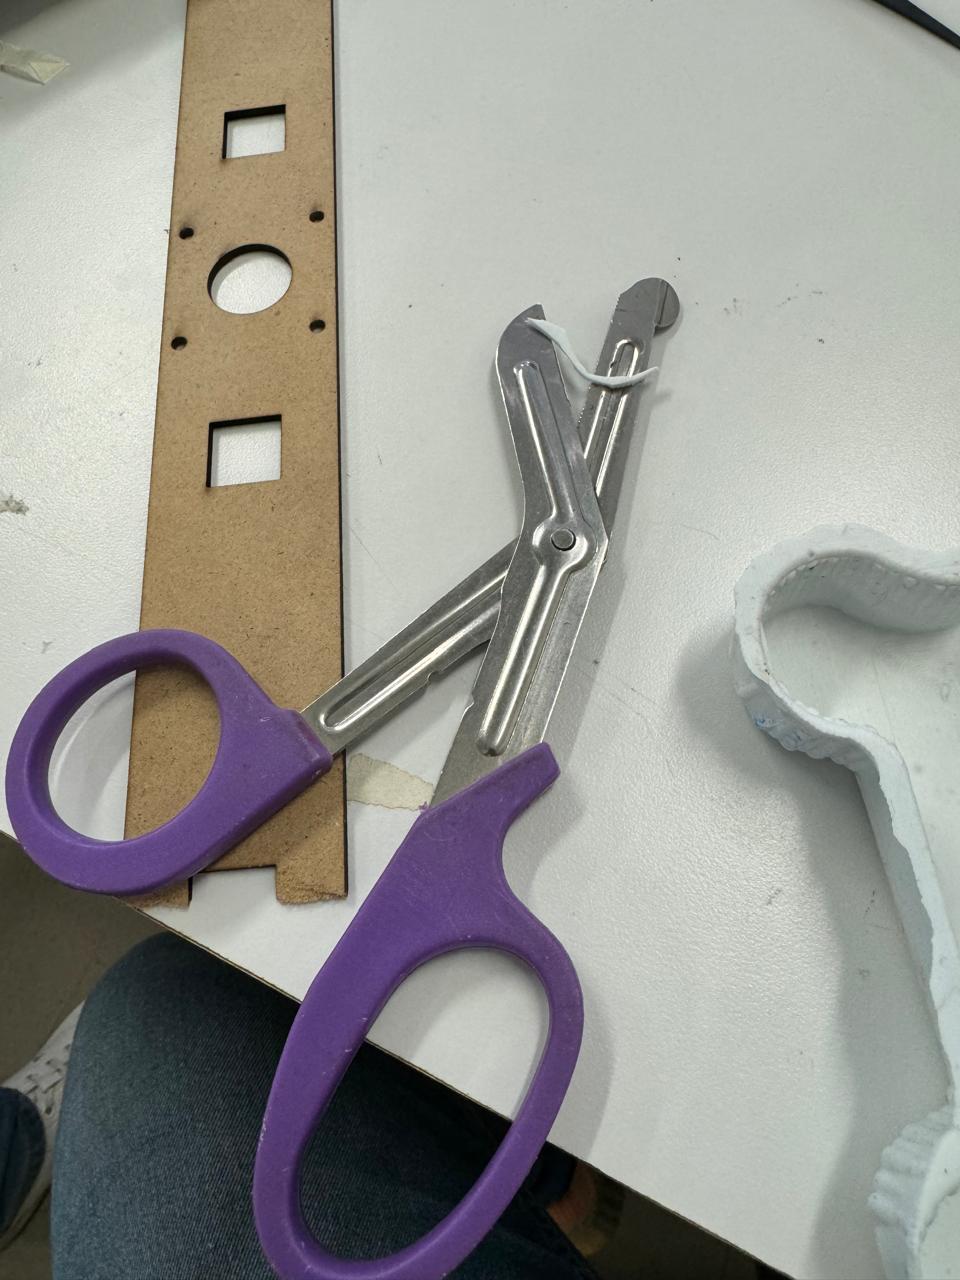
We cut the remaining material from the bone with scissors or a cutter so that we have an exact shape of the bone
Once ready and the wax mold free, we repeat the process to take out another mold.
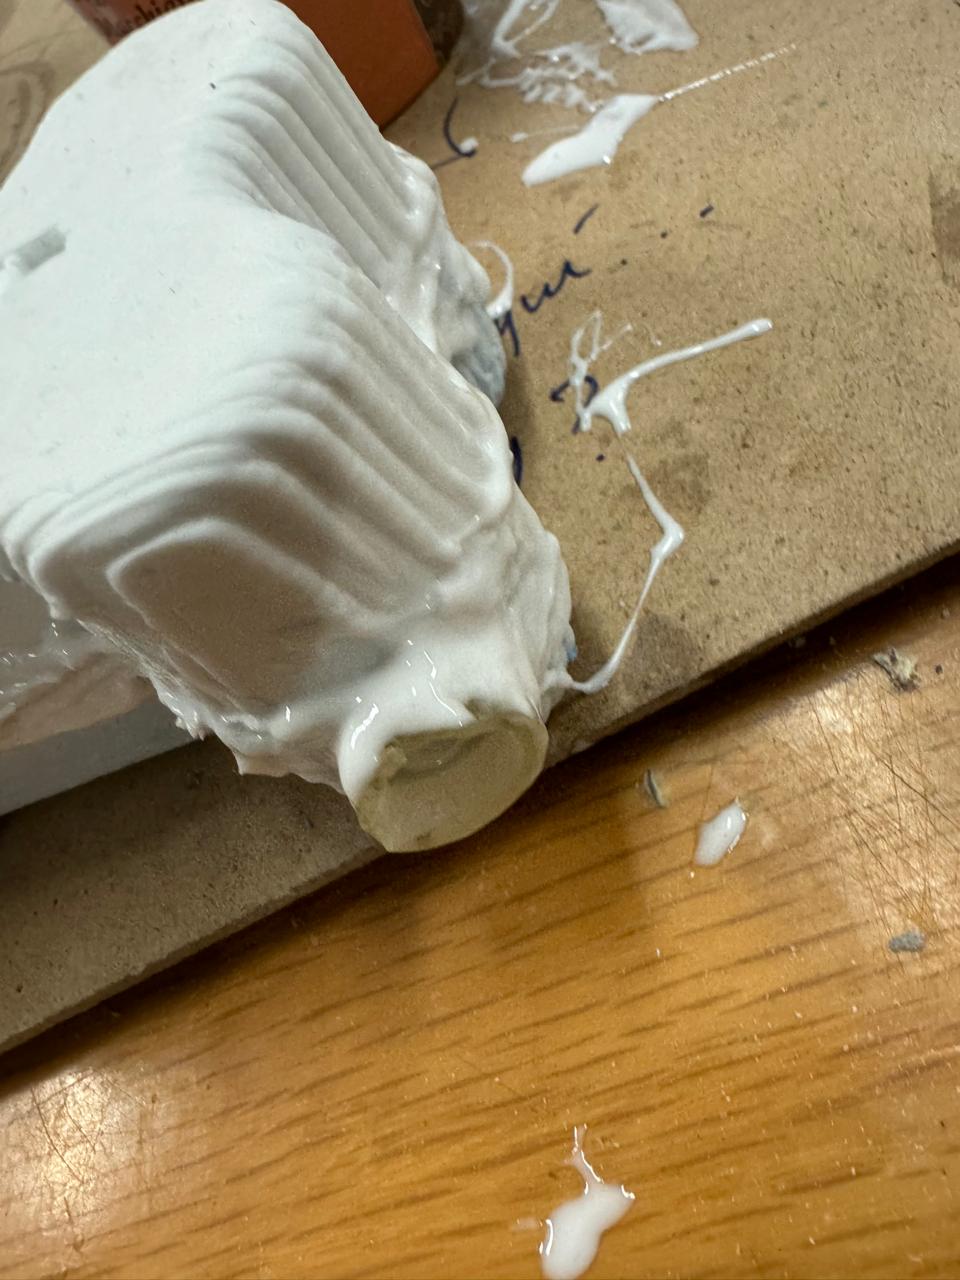
Once we have both molds we put them together and glue them with more silicone mixture, in my case I put the silicone with an MDF stick, also once it had stuck a little I proceeded to put the silvato and around it I put enough silicone. It is important to put in excess so that air does not leak and it can rattle when squeezing the toy.