Interface and application programming
Linked to the group assigment page
Introduction
This week in Fab Academy, I have worked on creating a web page for my project SmartPaw, an intelligent pet monitoring system. Below, I detail how I created the web page and how the data is updated in real-time. The explanation includes the purpose and functionality of each piece of code, aimed at allowing anyone without prior knowledge to understand and replicate it.
What is PHP?
PHP (Hypertext Preprocessor) is an open-source programming language, created in 1994, mainly used for web development.
How does PHP work?
- Web Server and PHP: PHP code runs on the web server.
- PHP Interpreter: Processes the code and generates HTML.
- Output to Browser: The generated HTML is sent to the user's browser.
- Database Integration: PHP interacts with databases like MySQL.
What is PHP used for?
- Dynamic Web Pages: Changes content based on user interaction.
- Form Management: Processes web form data.
- Content Management Systems (CMS): Platforms like WordPress are built with PHP.
- E-commerce: Develops online stores.
- Complex Web Applications: Social networks, forums, etc.
- APIs and Web Services: Facilitates communication between applications.
Advantages of PHP:
- Open Source: Free and has a large community.
- Compatibility: Works on multiple platforms.
- Easy to Learn: Simple syntax.
- Extensible: Many libraries and frameworks available.
In summary, PHP is essential for creating dynamic and functional web applications.
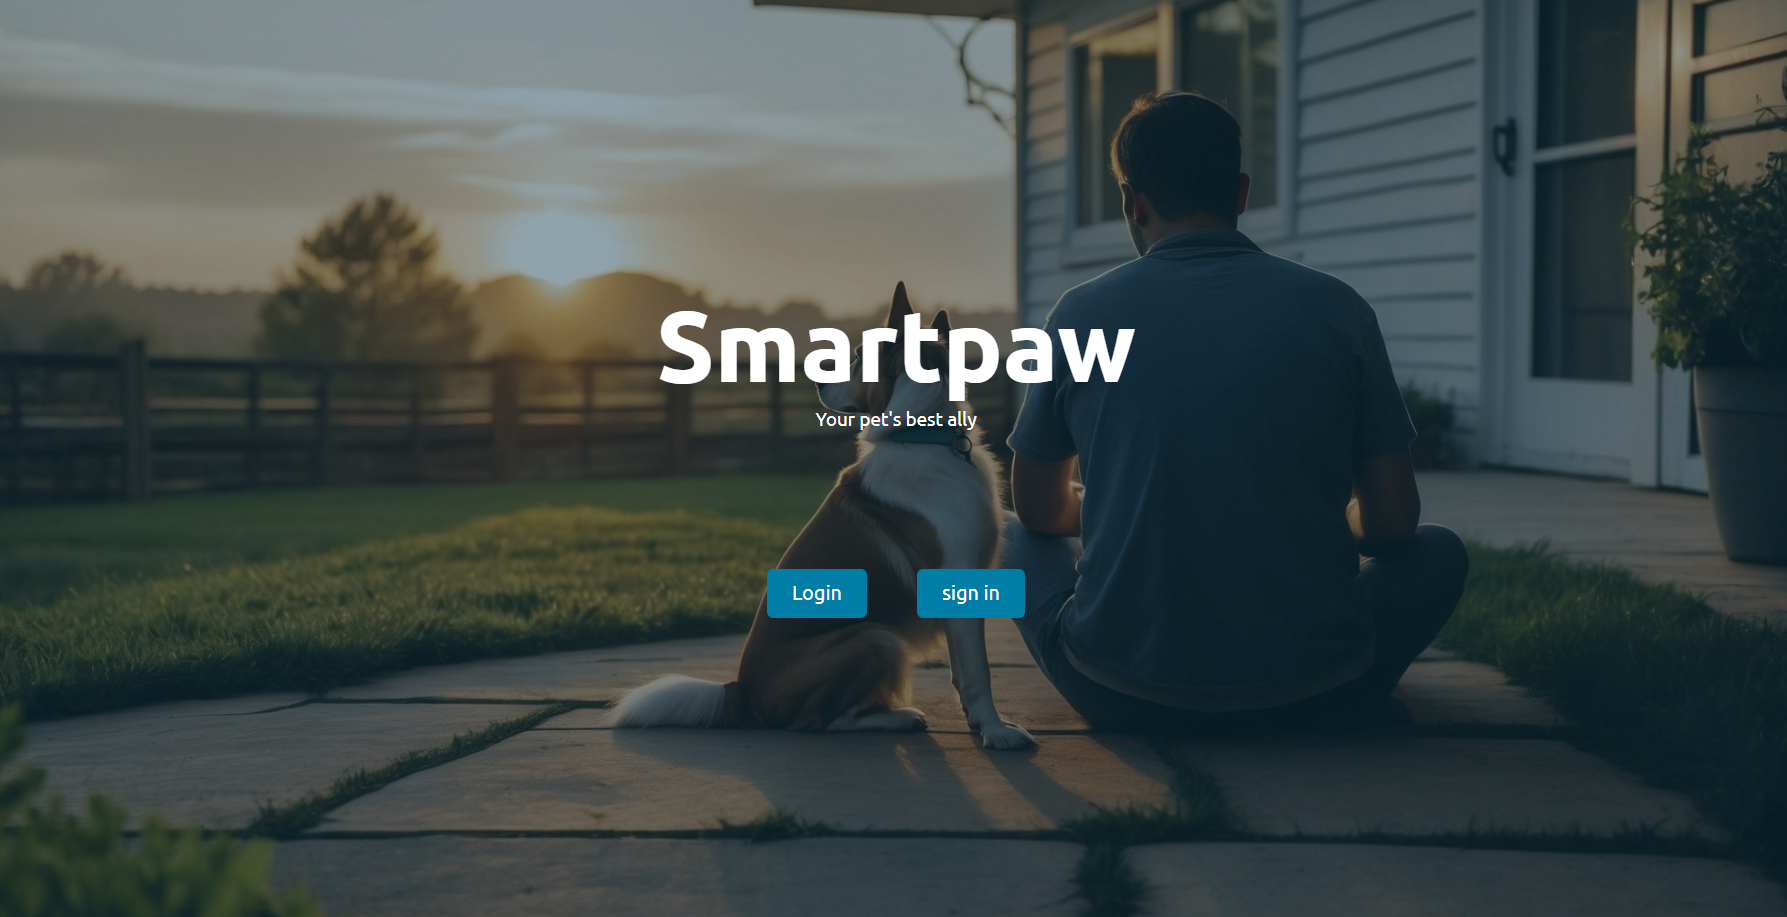
Main Page (index.html)
The main page is the entry point for the SmartPaw system, where users can log in or register.
<!DOCTYPE html>
<html lang="es">
<head>
    <meta charset="UTF-8">
    <meta name="viewport" content="width=device-width, initial-scale=1.0">
    <title>Home Page</title>
    <link rel="stylesheet" href="css/style.css">
    <link rel="preconnect" href="https://fonts.googleapis.com">
    <link rel="preconnect" href="https://fonts.gstatic.com" crossorigin>
    <link href="https://fonts.googleapis.com/css2?family=Ubuntu:ital,wght@0,300;0,400;0,500;0,700&display=swap" rel="stylesheet">
</head>

<body class="body">
    <div class="background">
        <div class="background__overlay">
          <div class="titles">
            <h1 class="titles__title">Smartpaw</h1>
            <h2 class="titles__title titles__title--sub">Your pet's best ally</h2>
          </div>
          <div class="menu">
              <a href="login.php" class="menu__button">Log In</a>
              <a href="signup.php" class="menu__button">Sign Up</a>
          </div>
        </div>
    </div>
</body>
</html>
Code Explanation
- HTML Structure: Defines the structure of the web page.
- Title Tags: Contain the project name and a subtitle.
- Menu Links: Provide options to log in or sign up.
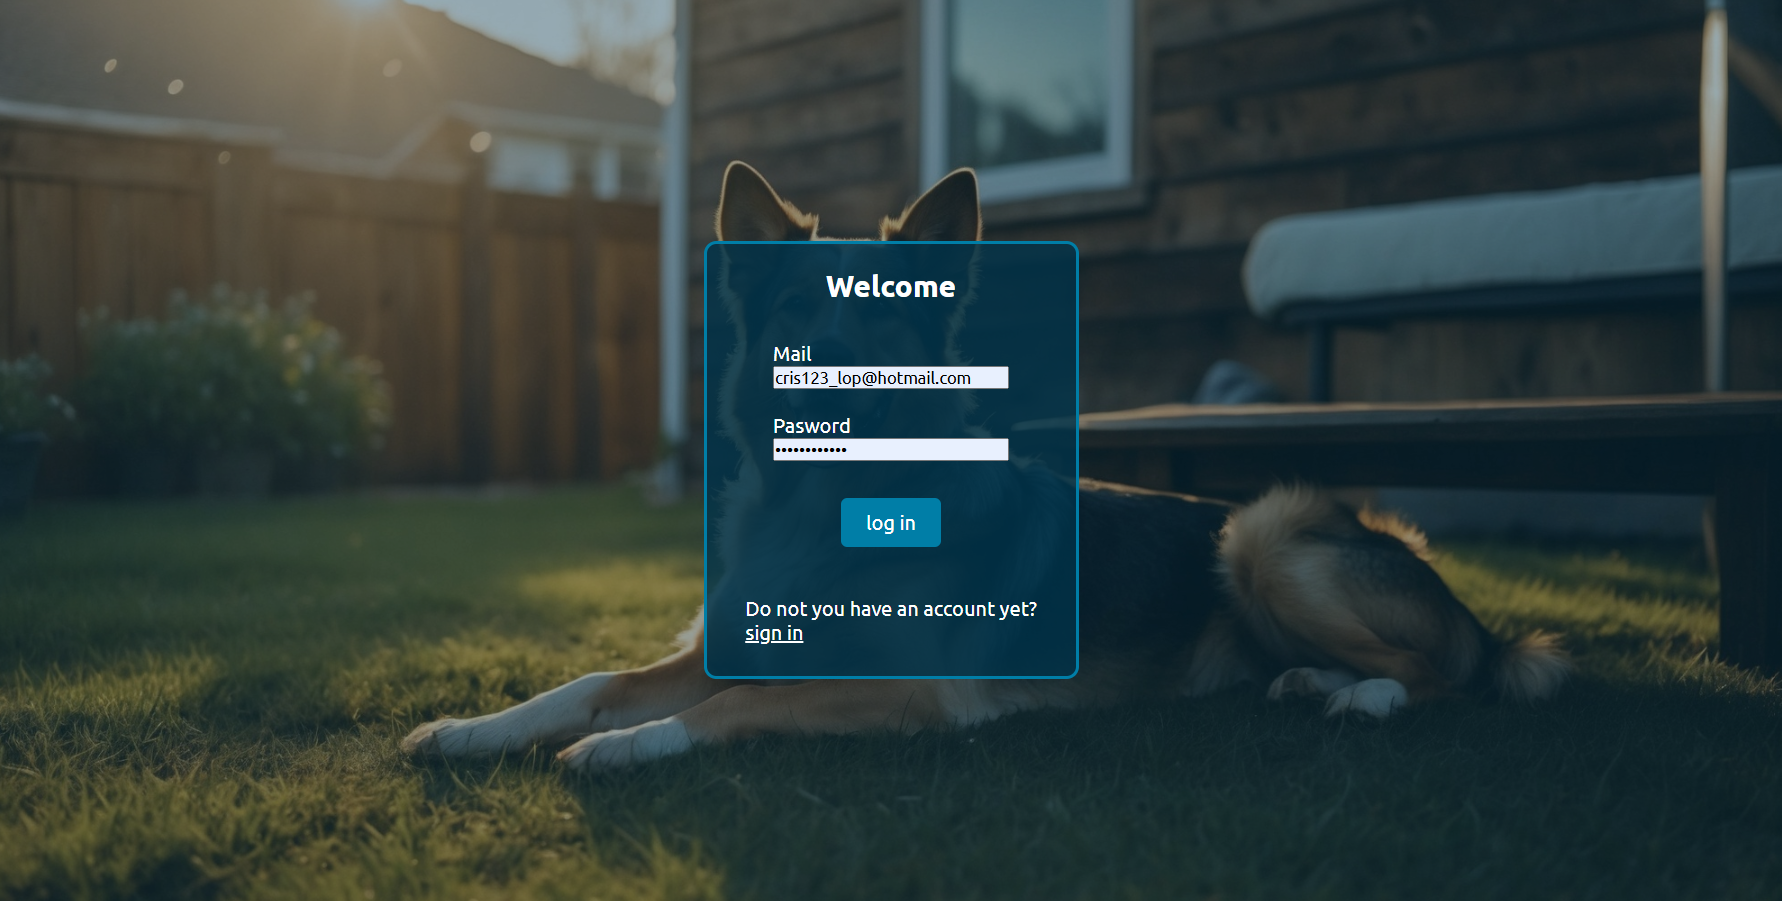
Login Code
1. Include Configuration File
<?php
// Includes the configuration file 'config.php' located in './php/includes/'
include("./php/includes/config.php");

// Checks if the 'user' session variable is set
if(isset($_SESSION['user'])){
    // Redirects the user to 'dashboard.php' if the session is active
    header("location: dashboard.php");
    // Stops script execution
    exit;
}
?>
Explanation: This code includes a configuration file config.php located in the ./php/includes/ directory. Additionally, it checks if the user's session is active. If so, it redirects the user to the dashboard.php page and stops the script execution.
2. HTML Document Structure
<!DOCTYPE html>
<html lang="en">
<head>
    <meta charset="UTF-8">
    <meta http-equiv="X-UA-Compatible" content="IE=edge">
    <meta name="viewport" content="width=device-width, initial-scale=1.0">
    <title>Sign In</title>
    <!-- Link to external CSS stylesheet -->
    <link rel="stylesheet" href="css/style.css">
    <!-- Preconnects to improve font loading -->
    <link rel="preconnect" href="https://fonts.googleapis.com">
    <link rel="preconnect" href="https://fonts.gstatic.com" crossorigin>
    <!-- Link to a specific font from Google Fonts -->
    <link href="https://fonts.googleapis.com/css2?family=Ubuntu:ital,wght@0,300;0,400;0,500;0,700;1,300;1,400;1,500;1,700&display=swap" rel="stylesheet">
</head>
Explanation: This block defines the structure and metadata of the HTML document, including links to CSS files and external fonts.
3. HTML Document Body
<body>
    <!-- Main container for the login form -->
    <div class="backgroundlogin white">
        <div class="background__overlay">
            <!-- Login form -->
            <form method="post" action="./php/scripts/login_action.php" class="formu1">
                <h2>Welcome</h2>
                <div class="formu__elementos">
                    <div class="formu__elementos__input">
                        <!-- Email field -->
                        <div class="input-group">
                            <label for="email">Email</label>
                            <input type="text" id="email" name="email" required>
                        </div>
                        <!-- Password field -->
                        <div class="input-group">
                            <label for="password">Password</label>
                            <input type="password" id="password" name="password" required>
                        </div>
                    </div>
                    <!-- Submit button -->
                    <button type="submit" class="menu__button">Sign In</button>
                </div>
                <p>Don't have an account yet?</br><a href="signup.php">Register</a></p>
            </form>
        </div>
    </div>
</body>
</html>
Explanation: This block defines the body of the HTML document, which contains the login form with fields for email and password, a submit button, and a link to register.
Sign Up Code
1. Include Configuration File and Check Session
<?php
// Includes the configuration file 'config.php' located in './php/includes/'
include("./php/includes/config.php");

// Checks if the 'user' session variable is set
if(isset($_SESSION['user'])){
    // Redirects the user to 'dashboard.php' if the session is active
    header("location: dashboard.php");
    // Stops script execution
    exit;
}
?>
Explanation: This code includes a configuration file config.php and checks if the user's session is active. If so, it redirects the user to the dashboard.php page and stops the script execution.
2. HTML Document Structure
<!DOCTYPE html>
<html lang="en" >
<head>
    <meta charset="UTF-8">
    <meta http-equiv="X-UA-Compatible" content="IE=edge" >
    <meta name="viewport" content="width=device-width, initial-scale=1.0">
    <title>Sign Up</title>
    <!-- Link to external CSS stylesheet -->
    <link rel="stylesheet" href="css/style.css">
    <!-- Preconnects to improve font loading -->
    <link rel="preconnect" href="https://fonts.googleapis.com">
    <link rel="preconnect" href="https://fonts.gstatic.com" crossorigin>
    <!-- Link to a specific font from Google Fonts -->
    <link href="https://fonts.googleapis.com/css2?family=Ubuntu:ital,wght@0,300;0,400;0,500;0,700;1,300;1,400;1,500;1,700&display=swap" rel="stylesheet">
</head>
Explanation: This block defines the structure and metadata of the HTML document, including links to CSS files and external fonts.
3. HTML Document Body
<body>
    <!-- Main container for the sign-up form -->
    <div class="backgroundsignup white">
        <div class="background__overlay">
            <!-- Sign-up form -->
            <form method="post" action="./php/scripts/signup_action.php" class="formu2">
                <h2>Sign Up</h2>
                <div class="formu__elementos">
                    <div class="formu__elementos__input">
                        <!-- Name field -->
                        <div class="input-group">
                            <label for="name">Name</label>
                            <input type="text" id="name" name="name" required>
                        </div>
                        <!-- Email field -->
                        <div class="input-group">
                            <label for="email">Email</label>
                            <input type="text" id="email" name="email" required>
                        </div>
                        <!-- Password field -->
                        <div class="input-group">
                            <label for="password">Password</label>
                            <input type="password" id="password" name="password" required>
                        </div>
                    </div>
                    <!-- Submit button -->
                    <button type="submit" class="menu__button">Sign Up</button>
                </div>
                <p>Already have an account?</br><a href="login.php">Sign In</a></p>
            </form>
        </div>
    </div>
</body>
</html>
Explanation: This block defines the body of the HTML document, which contains the sign-up form with fields for name, email, and password, a submit button, and a link to sign in if the user already has an account.
2. Water Dispenser System (bebedero.php)
This PHP file manages reading and writing the water dispenser level in a text file and displays it in real-time.
<?php
// If the datosbebedero.txt file doesn't exist, create it with the initial value "0\r\n".
if (!file_exists("datosbebedero.txt")) {
    file_put_contents("datosbebedero.txt", "0\r\n");
}

// If a value is sent via a POST form, save it in the datosbebedero.txt file.
if (isset($_POST['valor'])) {
    $VAR1 = $_POST['valor']; // Assign the POST value to the $VAR1 variable
    $TEXTO = $VAR1 . "\r\n"; // Add a new line to the value
    file_put_contents("datosbebedero.txt", $TEXTO); // Save the value in the file
}

// Read the content of the datosbebedero.txt file.
$ARCHIVO = file_get_contents("datosbebedero.txt");
// Find the position of the first newline character.
$pos = strpos($ARCHIVO, "\r\n");
// Extract the value up to the first newline character.
$VAR1 = substr($ARCHIVO, 0, $pos);
?>

<!DOCTYPE html>
<html>
<head>
    <!-- Refresh the page every 1 second -->
    <meta http-equiv="refresh" content="1">
</head>
<body>
    <!-- Display the value stored in $VAR1 on the page -->
    <p style="font-size:20px; font-family:'Segoe UI', Tahoma, Geneva, Verdana, sans-serif; color: #707070; line-height: 0;"><?php echo $VAR1 ?> </p>
</body>
</html>
Code Explanation
- File Creation: Checks if the `datosbebedero.txt` file exists. If not, it creates it with "0\r\n" as the initial value.
- Value Update: If a value is sent via a POST form, it saves this value in `datosbebedero.txt`.
- Value Reading: Reads the content of the file and extracts the value up to the first newline character.
- Auto Refresh: Reloads the page every second to show the updated value.
The water dispenser on the page is shown as 1 or 0 due to the water level sensor. If the sensor detects no water, it will switch to 0, turning off the pump and indicating that 0 means no water, prompting the user to add more water. If it is at 1, there is water, and the pump will be running.
Feeder System (feeder.php)
This PHP file controls and displays the status of the feeder in real-time, storing the data in a text file.
<?php
// If the datosservo2.txt file doesn't exist, create it with the initial value "0\r\n".
if (!file_exists("datosservo2.txt")) {
    file_put_contents("datosservo2.txt", "0\r\n");
}

// If a value is sent via a POST form, save it in the datosservo2.txt file.
if (isset($_POST['comederoval'])) {
    $TEXTO = $_POST['comederoval'] . "\r\n"; // Add a new line to the POST value
    file_put_contents("datosservo2.txt", $TEXTO); // Save the value in the file
}

// Read the content of the datosservo2.txt file.
$ARCHIVO = file_get_contents("datosservo2.txt");
// Find the position of the first newline character.
$pos = strpos($ARCHIVO, "\r\n");
// Extract the value up to the first newline character.
$VAR1 = substr($ARCHIVO, 0, $pos);
?>

<!DOCTYPE html>
<html>
<head>
    <!-- Refresh the page every 1 second -->
    <meta http-equiv="refresh" content="1">
</head>
<body>
    <!-- Display the value stored in $VAR1 on the page -->
    <p><?php echo $VAR1 ?></p>
</body>
</html>
Code Explanation
- File Creation: Checks if the `datosservo2.txt` file exists. If not, it creates it with "0\r\n" as the initial value.
- Value Update: If a value is sent via a POST form, it saves this value in `datosservo2.txt`.
- Value Reading: Reads the content of the file and extracts the value up to the first newline character.
- Auto Refresh: Reloads the page every second to show the updated value.
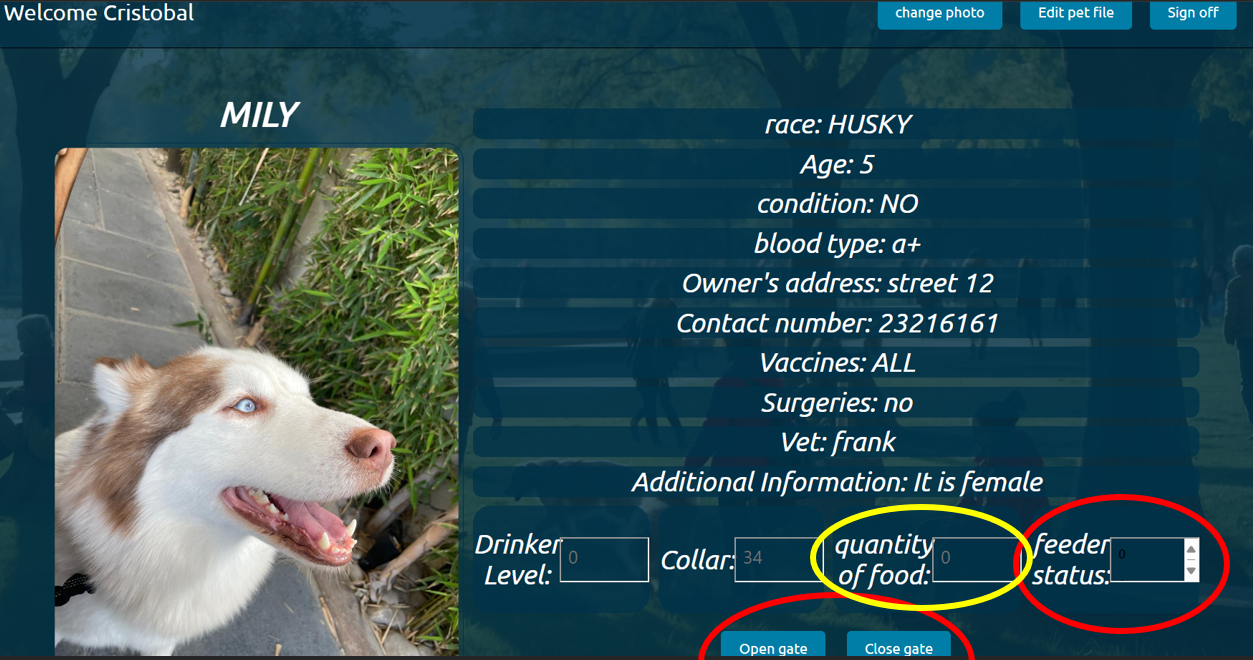
In the feeder section, the operation is very similar to the water dispenser mentioned earlier. However, this time we have two buttons: one to open and another to close the kibble gate. Opening sets it to 1, and closing sets it to 0. These are the circles marked in red. Additionally, a section has been added for an ultrasonic sensor, which is planned to be added as an improvement in the future. This is the yellow circle. It is an ultrasonic sensor to measure the amount of food.
Collar System (infrarojo.php)
The collar system monitors and displays the temperature recorded by the collar in real-time. The data is stored in a text file (`datoscollar.txt`).
<?php
// If the datoscollar.txt file doesn't exist, create it with the initial value "0\r\n".
if (!file_exists("datoscollar.txt")) {
    file_put_contents("datoscollar.txt", "0\r\n");
}

// If a value is sent via a POST form, save it in the datoscollar.txt file.
if (isset($_POST['temp'])) {
    $VAR1 = $_POST['temp']; // Assign the POST value to the $VAR1 variable
    $TEXTO = $VAR1 . "\r\n"; // Add a new line to the value
    file_put_contents("datoscollar.txt", $TEXTO); // Save the value in the file
}

// Read the content of the datoscollar.txt file.
$ARCHIVO = file_get_contents("datoscollar.txt");
// Find the position of the first newline character.
$pos = strpos($ARCHIVO, "\r\n");
// Extract the value up to the first newline character.
$VAR1 = substr($ARCHIVO, 0, $pos);
?>

<!DOCTYPE html>
<html>
<head>
    <!-- Refresh the page every 1 second -->
    <meta http-equiv="refresh" content="1">
</head>
<body>
    <!-- Display the value stored in $VAR1 on the page -->
    <p style="font-size:20px; font-family:'Segoe UI', Tahoma, Geneva, Verdana, sans-serif; color: #707070; line-height: 0;"><?php echo $VAR1 ?> </p>
</body>
</html>
Code Explanation
- File Creation: Checks if the `datoscollar.txt` file exists. If not, it creates it with "0\r\n" as the initial value.
- Value Update: If a value is sent via a POST form, it saves this value in `datoscollar.txt`.
- Value Reading: Reads the content of the file and extracts the value up to the first newline character.
- Auto Refresh: Reloads the page every second to show the updated value.
In this part, data on the dog's temperature is sent in real time
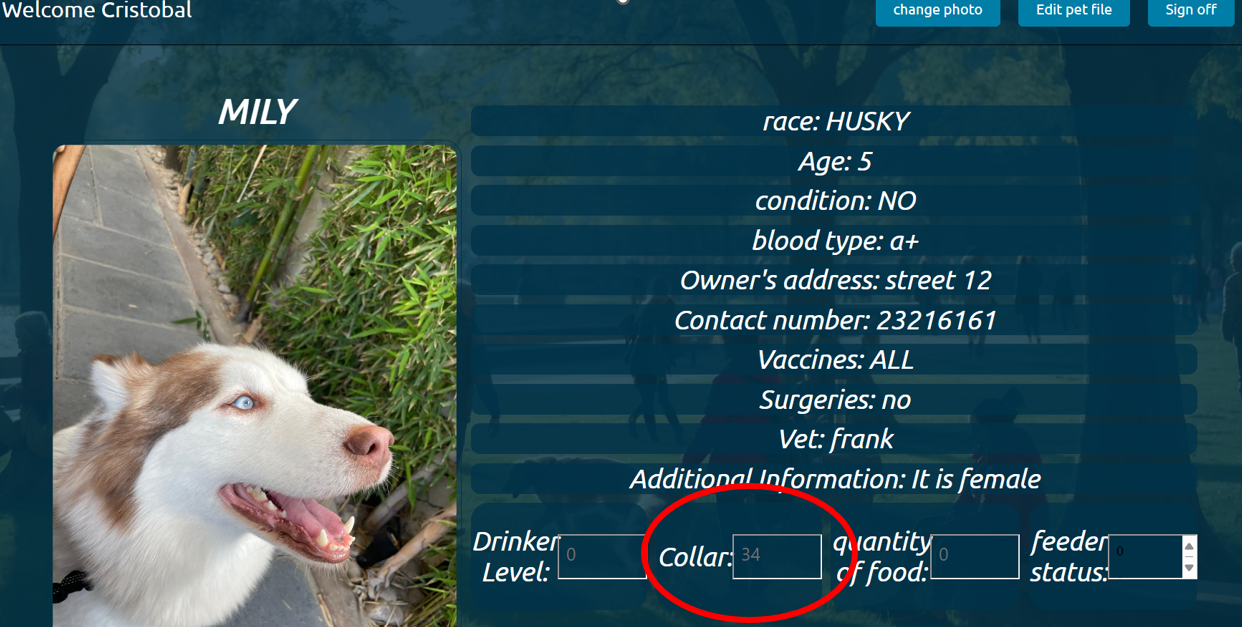
User Dashboard (dashboard.php)
The dashboard allows users to view all the data in one place and control certain aspects of the system, such as the feeder.
<?php
include("./php/includes/config.php"); // Include the config file
include("./php/includes/firebaseRDB.php"); // Include the Firebase library

// Check if the user is authenticated
if (!isset($_SESSION['user'])) {
    header("location: login.php");
    exit;
}

// Get the authenticated user's email
$emailduenoperro = $_SESSION['user']['email'];

// Initialize the connection to Firebase
$rdb = new firebaseRDB($databaseURL);

// Retrieve pet data using the owner's email
$retrieve = $rdb->retrieve("/mascota", "emaildueno", "EQUAL", $emailduenoperro);
$data = json_decode($retrieve, 1);

// If no pet data is found, redirect to the pet registration form
if (count($data) == 0) {
    header("location: signupmascota.php");
    exit;
} else {
    $id = array_keys($data)[0]; // Get the pet ID
}

// Retrieve pet photo using the owner's email
$retrieve2 = $rdb->retrieve("/mascotafoto", "emaildueno", "EQUAL", $emailduenoperro);
$data2 = json_decode($retrieve2, 1);

// If no pet photo is found, redirect to the photo upload form
if (count($data2) == 0) {
    header("location: signupfotomascota.php");
    exit;
} else {
    $id2 = array_keys($data2)[0]; // Get the photo ID
}

// If the datosservo2.txt file doesn't exist, create it with the initial value "0\r\n".
if (!file_exists("datosservo2.txt")) {
    file_put_contents("datosservo2.txt", "0\r\n");
}

// If a value is sent via a POST form, save it in the datosservo2.txt file.
if (isset($_POST['comederoval'])) {
    $TEXTO = $_POST['comederoval'] . "\r\n";
    file_put_contents("datosservo2.txt", $TEXTO);
}

// Read the content of the datosservo2.txt file.
$ARCHIVO = file_get_contents("datosservo2.txt");
// Find the position of the first newline character.
$pos = strpos($ARCHIVO, "\r\n");
// Extract the value up to the first newline character.
$VAR1 = substr($ARCHIVO, 0, $pos);
?>

<!DOCTYPE html>
<html lang="es">
<head>
    <meta charset="UTF-8">
    <meta name="viewport" content="width=device-width, initial-scale=1.0">
    <title>Dashboard</title>
    <link rel="stylesheet" href="css/style.css">
    <link rel="preconnect" href="https://fonts.googleapis.com">
    <link rel="preconnect" href="https://fonts.gstatic.com" crossorigin>
    <link href="https://fonts.googleapis.com/css2?family=Ubuntu:ital,wght@0,300;0,400;0,500;0,700&display=swap" rel="stylesheet">
</head>

<body>
    <div class="backgrounddashboard">
        <div class="background__overlaydash">
          <div class="nav">
            <div class="nombrenav">
              <h1 class="titles__title titles__title--sub2">Welcome <?php echo $_SESSION['user']['name']; ?></h1>
            </div>
            <div class="botonesnav">
              <a href="signupfotomascota.php" class="menu__button">Change photo</a>
              <a href="signupmascota.php" class="menu__button">Edit pet file</a>
              <a href="./php/scripts/logout.php" class="menu__button">Sign off</a>
            </div>
          </div>
          <div class="fichaperro">
            <div class="fichaperroizq">
              <h2 class="nombremascota"><?php echo $data[$id]['nombre']; ?></h2>
              <img src="./uploads/perritos/<?php echo $data2[$id2]['fotoUrl']; ?>" class="fotomascota" alt="Pet image">
            </div>
            <div class="fichaperroder">
              <h2 class="fichamascota">Race: <?php echo $data[$id]['raza']; ?></h2>
              <h2 class="fichamascota">Age: <?php echo $data[$id]['edad']; ?></h2>
              <h2 class="fichamascota">Condition: <?php echo $data[$id]['padecimientos']; ?></h2>
              <h2 class="fichamascota">Blood type: <?php echo $data[$id]['tipodesangre']; ?></h2>
              <h2 class="fichamascota">Owner's address: <?php echo $data[$id]['direcciondueno']; ?></h2>
              <h2 class="fichamascota">Contact number: <?php echo $data[$id]['numerocontacto']; ?></h2>
              <h2 class="fichamascota">Vaccines: <?php echo $data[$id]['vacunas']; ?></h2>
              <h2 class="fichamascota">Surgeries: <?php echo $data[$id]['cirugias']; ?></h2>
              <h2 class="fichamascota">Vet: <?php echo $data[$id]['veterinariocabecera']; ?></h2>
              <h2 class="fichamascota">Additional information: <?php echo $data[$id]['informacionadicional']; ?></h2>
              <div class="sensores">
                <h2 class="fichamascota__sensor">Drinker Level:<br><iframe src="bebedero.php" width="100" height="50"></iframe></h2>
                <h2 class="fichamascota__sensor">Collar:<br><iframe src="infrarojo.php" width="100" height="50"></iframe></h2>
                <h2 class="fichamascota__sensor">Quantity of food:<br><iframe src="ultrasonico.php" width="100" height="50"></iframe></h2>
                <h2 class="fichamascota__sensor">Feeder status:<br><iframe src="comedero.php" width="100" height="50"></iframe></h2>
              </div>
              <div>
                <form method="post" action="dashboard.php">
                    <!-- Button to set the feeder value to 1 (open gate) -->
                    <button type="submit" class="menu__button" name="comederoval" value="1">Open gate</button>
                    <!-- Button to set the feeder value to 0 (close gate) -->
                    <button type="submit" class="menu__button" name="comederoval" value="0">Close gate</button>
                </form>
              </div>
            </div>
          </div>
          <div class="cameras">
            <h2 class="fichamascota">Camera 1</h2>
            <img src="./uploads/camera1/camera1photo.jpg" class="cameraimage" alt="Camera 1 image">
            <h2 class="fichamascota">Camera 2</h2>
            <img src="./uploads/camera2/camera2photo.jpg" class="cameraimage" alt="Camera 2 image">
          </div>
        </div>
    </div>
</body>
</html>
Code Explanation
- Configuration and Authentication: Includes the configuration file and Firebase library, checks if the user is authenticated, and gets the user's email.
- Data Retrieval: Initializes the connection to Firebase, retrieves pet data and photo using the owner's email, and handles redirects if no data is found.
- Feeder Control: Checks if the `datosservo2.txt` file exists, saves POST values to the file, and reads the content of the file to extract the value.
- HTML Interface of the Dashboard: Defines the HTML structure of the dashboard, displaying user and pet data, sensor data, and controls for the feeder.
Deployment on Replit
To deploy all this on Replit and make it work, follow these steps:
Create a new repl:
- Select the
PHP, HTML, CSStemplate.
Upload the files:
- Upload all the PHP, HTML, and CSS files to your repl.
Configure Firebase:
- Set up Firebase in Replit, including the credentials and the database URL in
config.php.
Run and Test:
- Run the repl and test each functionality to ensure everything works correctly.
This process will allow anyone to replicate your project by following the steps described and using the provided code.