17. Project management
What tasks have been completed?
- Design of the mechanical 7-segment display, inspired by a model made by: 7 Segment Mechanical Counter
- Motor programming
- Integration of motors with the display
- Pomodoro Timer
- Local weather programming
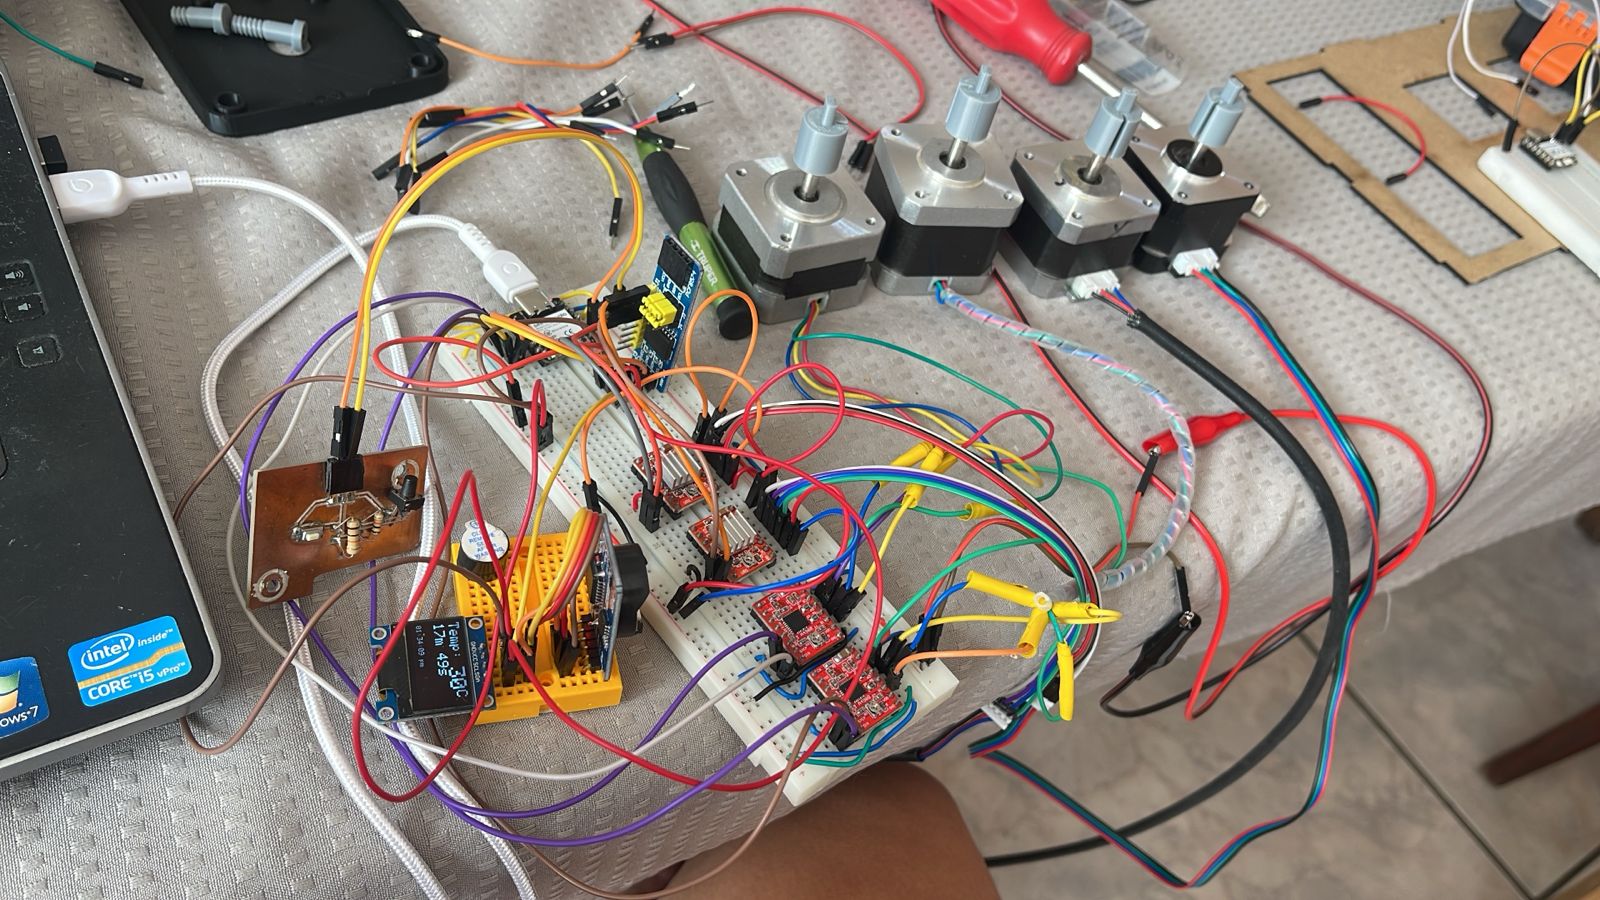
In the following image, you can see one of the tests I conducted still on a protoboard to verify that everything was working correctly. Once it was confirmed, I proceeded to design the PCB.
What tasks remain?
- Weather via API
- Case redesign
- Make PCB
What has worked? What hasn't?
So far, the function of mechanically changing the numbers for the clock part has been a bit difficult, but it is still in progress and I need to program it to change the numbers.
On the other hand, I made a case to place everything, but it didn't fit perfectly, so I need to redesign it.
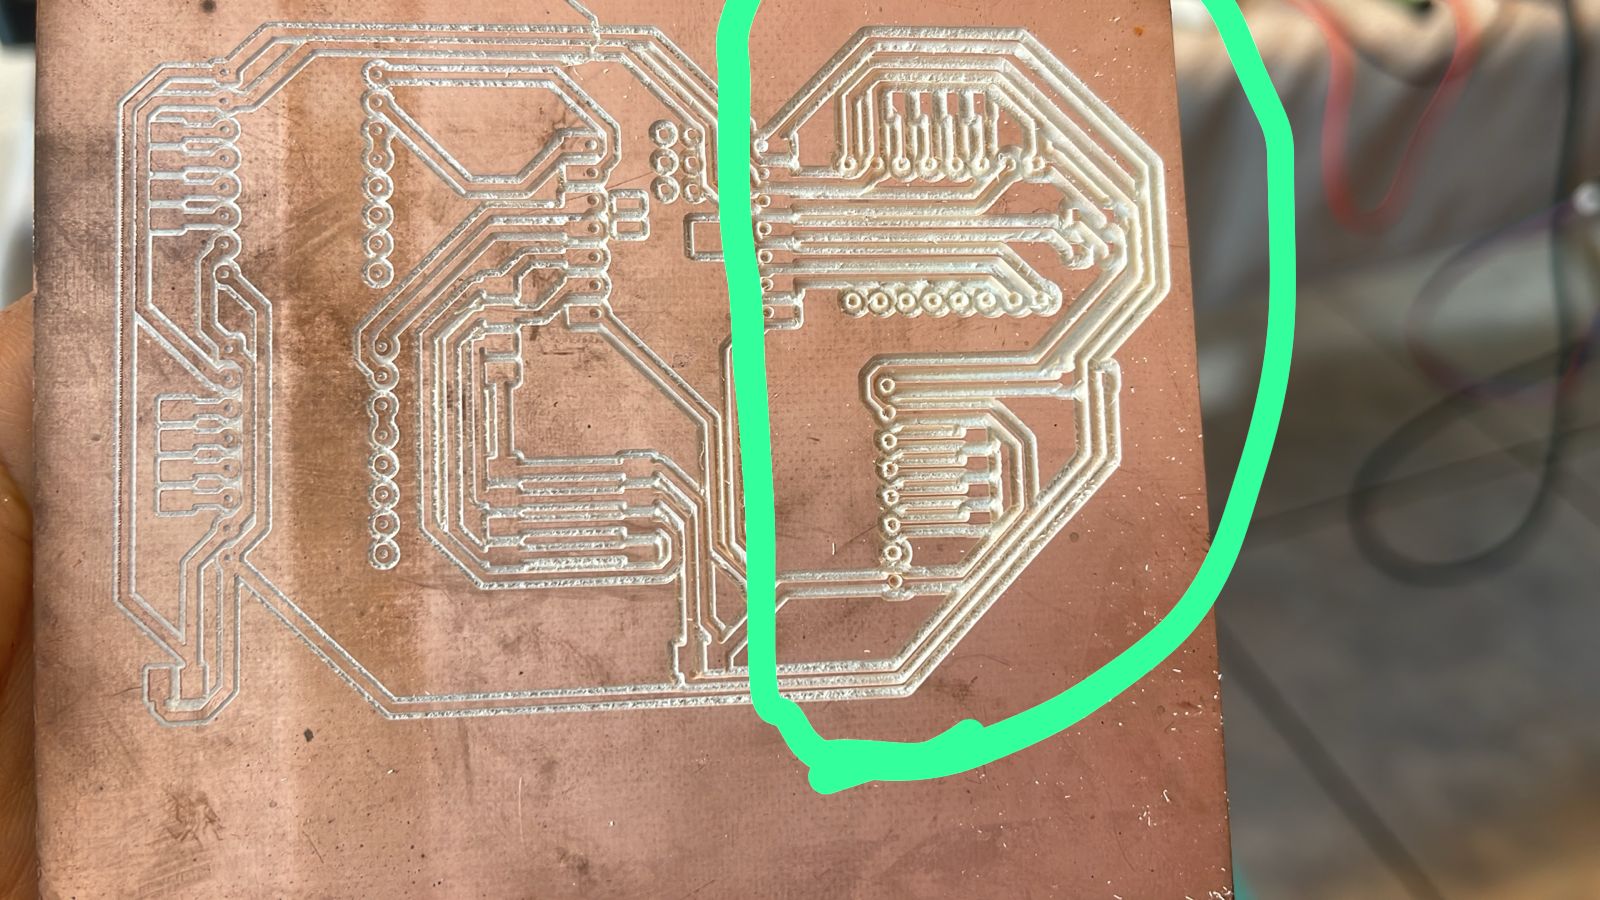
I also had cut the PCB, but due to a small unevenness, some tracks were eaten up, so I need to redo it.
After many tests I conducted on the protoboard, I realized that I changed some of the pins I selected to move the motors, so I also have to redesign the PCB.
What questions need to be resolved?
- How can I make a coupler that adjusts better and has more force to turn the motor?
- How to obtain variables to indicate the number of steps the mechanical number should advance?
- How can I include the weather API?
What will happen when?
Up to this point, my progress includes 3D printing mechanical numbers, testing motors on a protoboard, as well as the RTC module saving the time and displaying the temperature, and starting the Pomodoro method by pressing a button.
For now, I will follow the schedule, and the remaining parts will be taken as tests and adjustments, as well as system programming.

Schedule of Activities
- Week 1, 2, 3: Designing the 7-segment display in SolidWorks
- Week 4, 5, 6: Laser cutting the display.
- Week 6, 7, 8, 9: Programming the motors for the numbers.
- Week 8, 9, 10: Integration of motors with the display and Development of the Pomodoro functionality .
- Week 9, 10, 11: Programming and designing weather system.
What have you learned?
So far, I have learned many ways to control the NEMA 17 stepper motors. At first, I was testing with H-Bridge Modules, but they were too large and consumed a lot of current, losing power when placing 2, so they no longer had enough torque to turn the motor. I also discovered that there is a module that allows me to keep the time and display the temperature, RTC DS3231.
Project Plan
Purpose and Scope of the Project
Purpose: The purpose of this project is to create a clock with different functionalities to help organize better using the Pomodoro Technique. Additionally, the clock will display the weather on a screen.
Scope: This project involves designing and building the clock, integrating a Pomodoro timer, and implementing a screen to display the weather. The project will focus on creating a functional device that allows switching between the clock function and the Pomodoro Technique using a button.
Resources
- PLA for 3D printing the mechanical displays and casing.
- MDF for the casing.
- NEMA 17 stepper motors.
- A4988 stepper motor driver modules.
- Xiao ESP32C3 microcontroller.
- PCF8574 I2C GPIO Expander Module.
- OLED screen.
- RTC DS3231 module.
- Button.
- 220 ohm resistors.
Goals
- Design and fabricate the clock casing.
- Integrate and test the electronic components.
- Develop the basic software for the clock and Pomodoro timer.
- Implement the weather display functionality.
- Ensure the device works correctly and meets the project objectives.
Deliverables
- Completed and assembled clock casing.
- Integrated and functional electronic components.
- Operational clock and Pomodoro timer software.
- Implemented weather display functionality.
- Complete documentation of the process.