14. Interface and application programming
For this week, I used the Qt Designer program, which is quite intuitive for creating an interface, and to make it work, I had to program through Visual Studio with Python the part of the signals that would send to the program I created to perform actions depending on the values obtained from the Xiao ESP32C3 that I created in week 13 through Serial communication.
Research
Interface and application programming is a fundamental field in computer science that focuses on the design and development of interactive systems between humans and computers. This discipline encompasses the creation of intuitive and appealing user interfaces, as well as the development of robust and functional applications that meet the needs and expectations of users. From graphical interface programming to the implementation of complex algorithms, interface and application programming plays a crucial role in creating modern software and improving user experience.
Serial communication is a fundamental method used in computer science and electronics for transmitting data sequentially, bit by bit, over a communication channel. This form of communication involves the continuous sending and receiving of data between devices through a single wire or pair of wires, allowing for reliable data exchange over short or long distances. Whether used in microcontrollers, embedded systems, or computer peripherals, serial communication serves as a cornerstone for connecting various devices and enabling efficient data transfer in numerous applications.
Qt Designer is a specialized application for designing graphical user interfaces. It is part of the Qt toolkit, a widely used software library in multiplatform application development. With Qt Designer, developers can create and customize visual interfaces intuitively, without the need to write code. This tool allows for the arrangement of graphical elements and the definition of interactions between them, facilitating the design of attractive and functional interfaces for a variety of applications. "QT Designer is a program that allows you to develop graphical user interfaces (GUI). It enables us to compose and customize windows or dialog boxes for use in QGIS, for example. Qt is available for Unix-like systems (Linux, BSDs, Unix), Apple macOS, and Windows." (Alonso, 2018)
Here you will find the group assignment with a little more information about the Interface and application programming.
Design interface
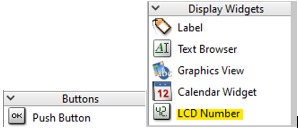
The first step to follow is to open the Qt Designer application. Some of the tools I used were buttons, labels, and LCD numbers.
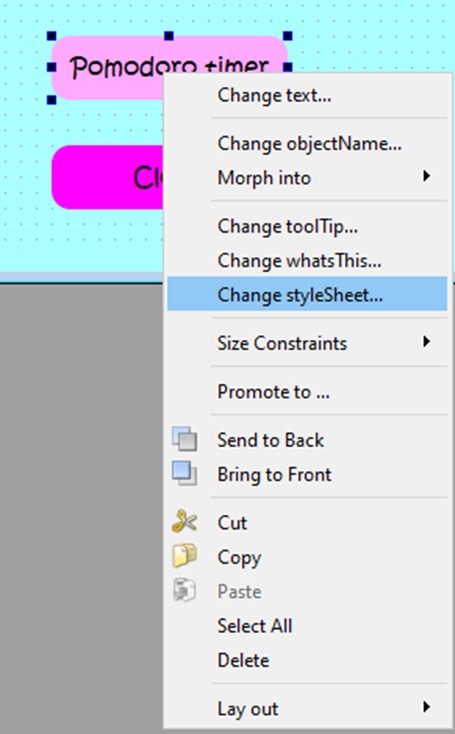
To change the button designs, right-click on them and choose the "Change Style Sheet..." option.
A dialog box will appear as the following, where you can input the design of the shapes and colors you want. In this case, I changed the background of the button when it is idle, when it is hovered over by the cursor, and when it is pressed, as well as adjusting the rounding of its corners.
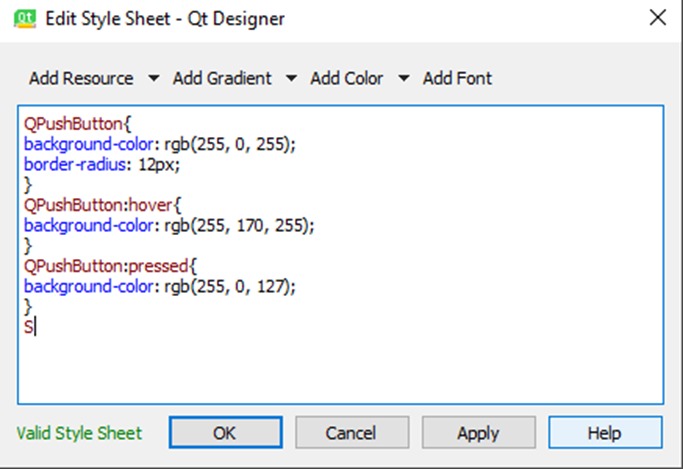
Once the design is finished, make sure to save it without spaces to make it easier to work with later on.
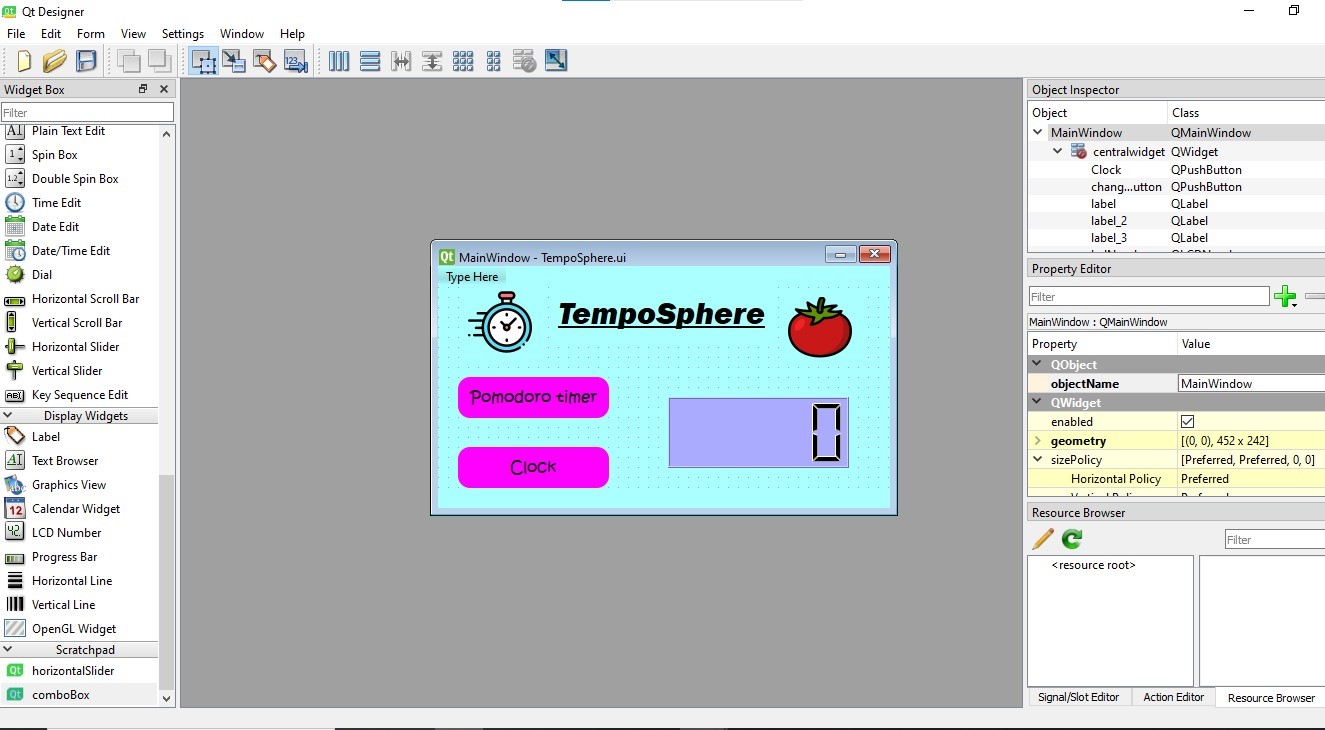
If you want to add images to your interface, add a label, and in the blue section, you will find an option labeled "pixmap". Where you see the arrow, select "choose file..."

It's important that you save the files so we can continue with the programming part.
Programming
To start programming now, it's essential to have Python installed on your computer as it will be used for communication through the interface. It's also important to have Visual Studio; remember that the communication part in Visual Studio can be found in the top right corner enclosed in a red circle.
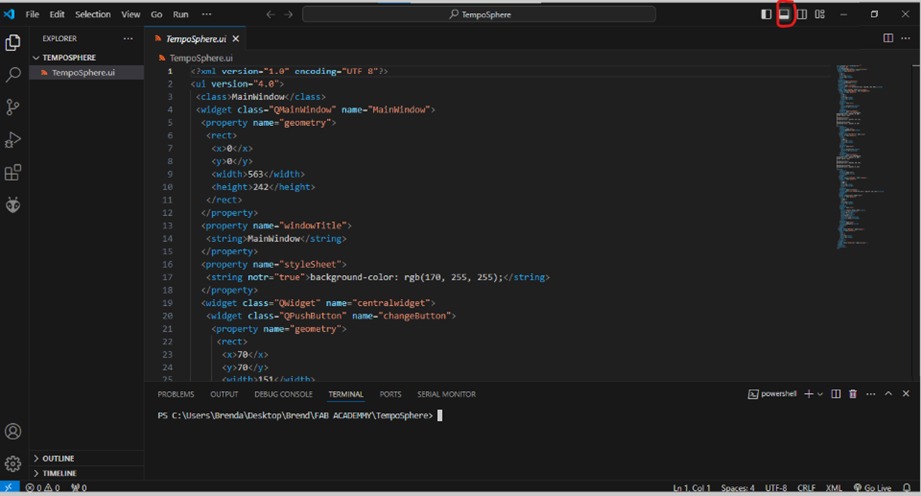
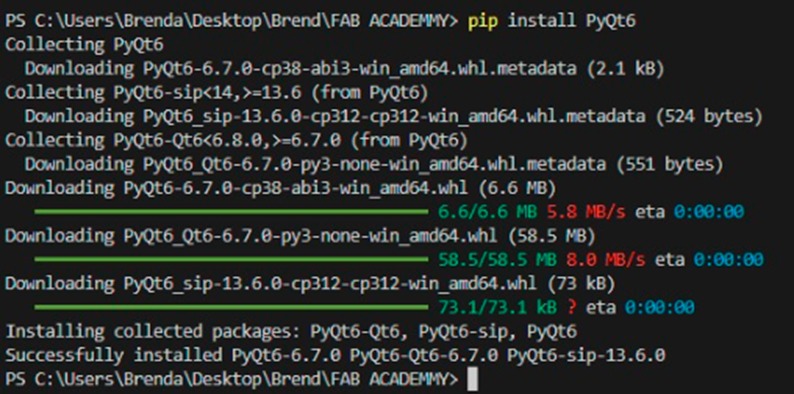
If you're not sure whether Python is installed on your computer, in the communication section of Visual Studio, type "phyton", and you should see a screen like the following. Once you're sure, you can proceed to install the library with the following instruction: "pip install PyQt6". An important note is that in Visual Studio, you should have the folder open where you saved the format that Qt Designer gave you when saving your interface; it should end in .ui.

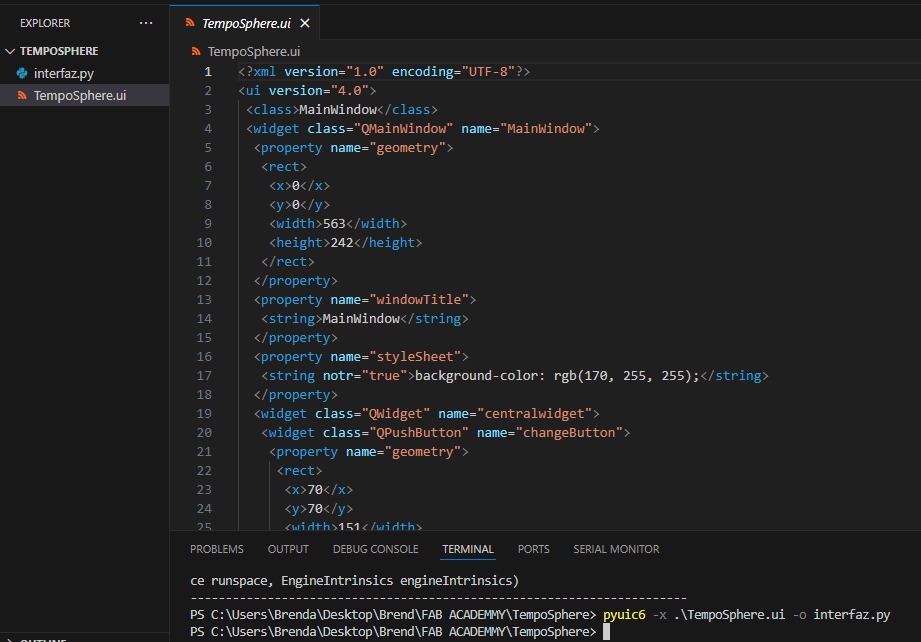
Now, to convert your interface with the .ui format into something you can program, you should enter the following command in Python communication: "pyuic6 -x .\your_name_interface.ui -o name_you_want.py". Afterward, to verify that it was indeed converted into Python format, enter the command "python .\interfaz.py".

Now, after creating all the necessary movements in my interface design, it looks like this in Visual Studio.
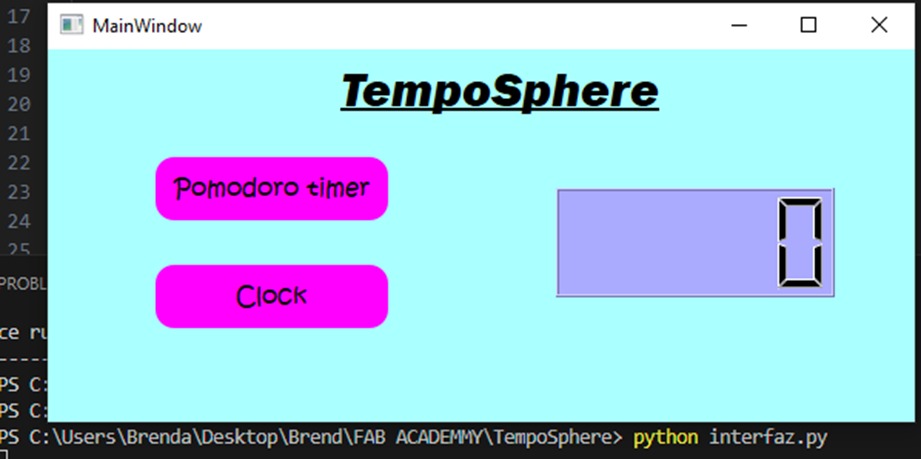
To prevent overwriting when making a modification to your design, create a new Python file like the following. It's importing the Python file created in the previous steps.

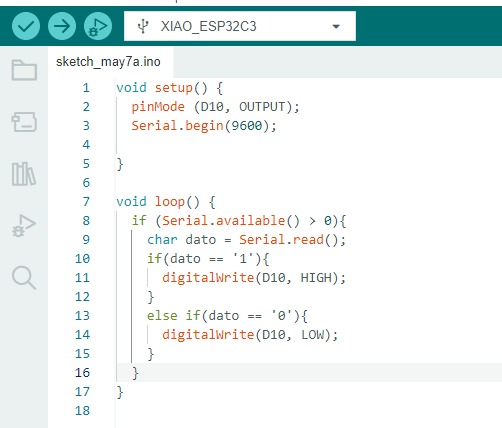
For this interface and to demonstrate that it can communicate with my Xiao ESP32C3, I made it so that through two different buttons, it turns on and off an LED. The interface will serve as a foundation for my final project, in which I'll be able to switch between clock mode and Pomodoro timer mode.
Below, the Python code for the interface is located in Visual Studio, and the code seen on Arduino is the one uploaded to the microcontroller to perform its actions.

Video
In the video, we can see that by using the interface buttons, the LED on my XiaoESP32 PCB can be turned on and off.
Problems
This week, I didn't really encounter any issues, but while we were working on the group assignment, I learned that it's extremely important that once programming is done on the microcontroller, and if serial communication was used, it should be closed to program the interface. Otherwise, it throws an error. The only issue I sometimes faced was that the first time I ran the programs to integrate the interface with the microcontroller program, it didn't do anything, but reloading it made it start again, and it worked perfectly.
