
14. Interface and application programming
This week, I...
Group assignment:
Group Assignment for week 14, Fab Puebla.
Design Process:
For this week I wanted to create an interface for an RGB neopixel ring and talking to a couple of my classmates about how to make a specific color using only red green and blue and how additive primary colors work I thought it would be a good idea to make an additive primary color wheel. For this I made an interface with 5 buttons. Two were simply ON and OFF. ON will turn all Chanels on 100% and OFF will turn all off, pretty simple. The other three buttons will be labeled red, green and blue. These will turn on and off each of those channels individually. That way you’ll be able to turn any two Chanels on simultaneously or just one of them. That way you’ll be able to see what color is created when you combine two of the primary colors. That way people who use this will be able to see how the secondary colors created from this wheel are the primary colors of ink, cian magenta and yellow. Some ink manufacturers use black ink too to avoid waisting ink from the other three cartridges and to avoid blacks from looking brown if the inks aren’t perfectly made or combined in the exact proportions.
This is the design of my interface:
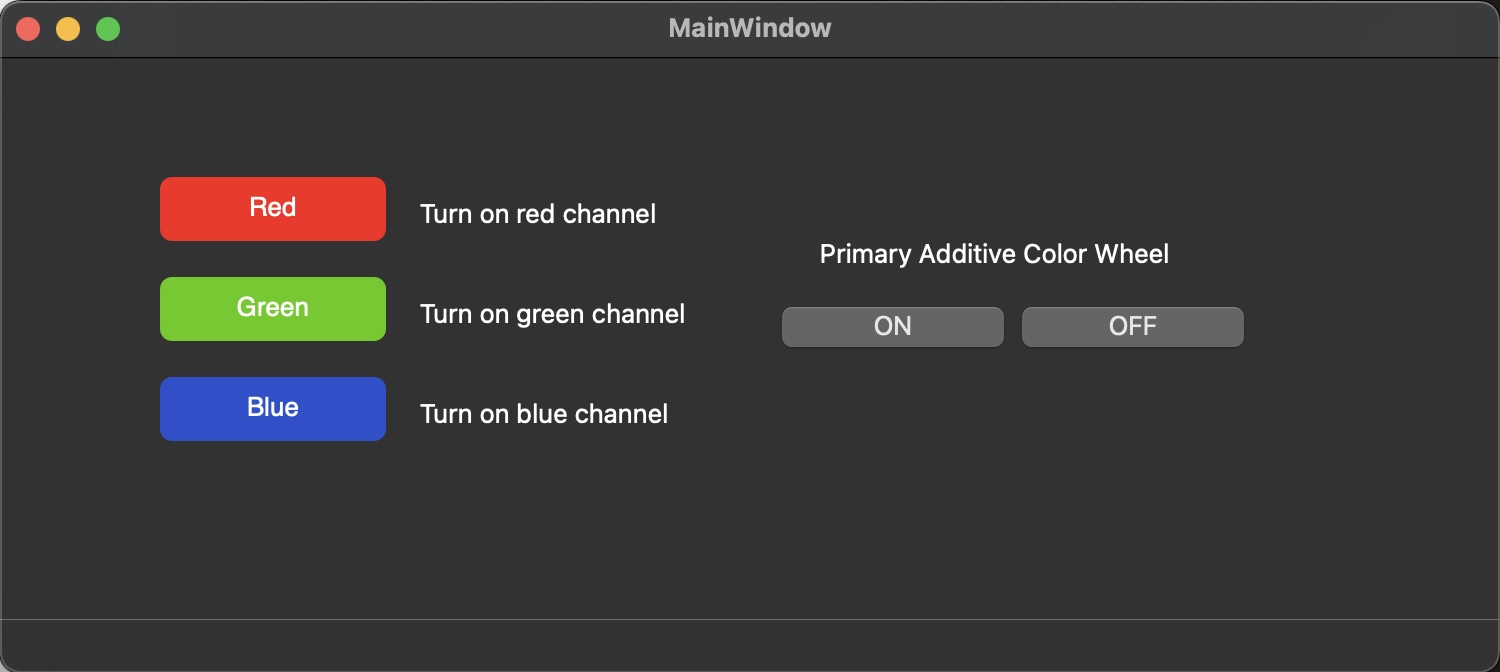
I wanted it to be simple and intuitive. I chose a very light white for the background and black text for contrast to make sure it’s clean and legible. I made the on and off buttons white with black text on them.
Then I made 3 more buttons that were their respective colors. Since I didn’t want them to look like the typical RGB colors I modified them slightly. I will describe how I modified the Red color specifically but a similar process was used for the other two.
First I reduced its saturation. I gave the red channel a value of 255 but added 50 of the other two colors. This reduced the saturation by making it a little whiter. Then to modify the hue slightly to make a more pleasing tone I added a little more green to make it a warmer hue. I figured since red and green make yellow if I add a bit of green it will make the red a little warmer.
For the other colors I did something similar making green warmer too and blue a little more teal by adding a touch of green.
Then I wanted the interface to intuitively signal that the buttons were actionable by changing the color slightly when you hover over the buttons and then further when you click them. For this I used the same colors as before but dropped the values of all Chanels by 10% for hovering and 40% for pressing. This maintained the hue and saturation but lowered the values to make the colors slightly darker.
This is an example of my code for the red button. This code also includes the font I chose and rounding of the buttons.
Turning into python code:
I exported my file as Interface.ui and then automatically converted it to Interface.py using terminal on my mac. To do this you need to install the following software through terminal.
After turning the code into .py you can then initiate the UI directly from terminal. I also opened all these files in visual studio code to edit them and made sure all of them had the correct port assigned to the arduino so the code would actually run and have an effect on the Neopixels. I also added my arduino code to the folder and referenced it in the code to make sure it ran propperly, here is the code I used for the arduino:
After all this it was just a matter of using the interface to turn on the Neopixel ring and then click on the different buttons to achieve the desired effect. Here are two videos of the interface and LED strip working together to create the desired colors. Due to the brightness of the LEDs the colors aren't very saturated as the highlights are clipping but if you focus on it you can see the different colros.
Overall the wheel worked as expected, if I had more time to dive into the project a little deeper I probably would have made 3 different light intensity levels for each channel to make more options and colors.