
10. Molding and casting
This week was a hard week, so hard in fact, that it took me 2 almost 3 weeks to complete. I admit the project was ambitious but I also had some setbacks which extended the timeline of the project.
Group assignment:
Group Assignment for week 10, Fab Puebla.
Ceramic casting molds:
 I was designing a planter and drinker for pollinators at the time, so I decided to take this opportunity
to create a ceramic version of it. I had already designed it for injection molding, but the concepts that
apply to plastic injection molding are entirely different from those for plaster molds used in ceramics.
Injection molding involves creating a mold with the exact shape of the final product, then injecting molten
plastic into it and expelling the piece from the mold. Plaster molds for ceramics operate on a completely
different principle. Liquid clay slip is poured into the plaster mold, which absorbs the moisture from the
slip that is in contact with it. The longer the plaster absorbs the moisture, the thicker the ceramic piece
becomes. Once the desired thickness is achieved, the excess slip is poured out, and the piece is left to dry.
As it dries, the piece will shrink and eventually release from the mold on its own. This process creates a
different type of mold lock compared to regular injection molds. Therefore, I decided to conduct some
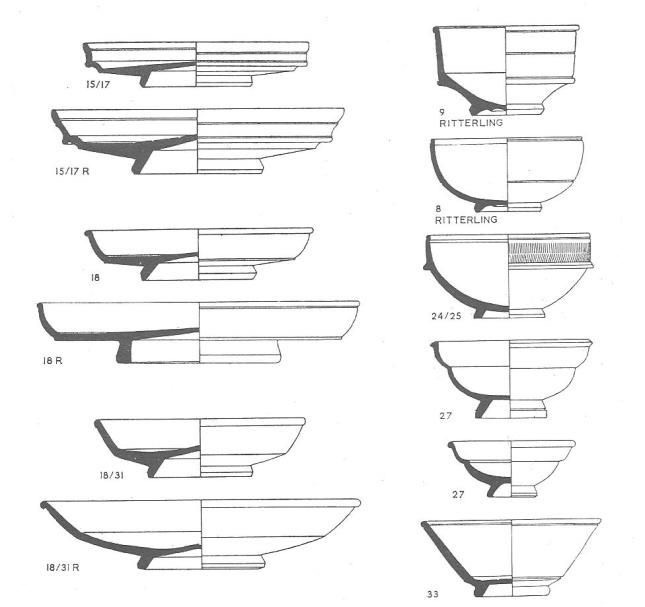
research and also found reference pictures of ceramic pot cross-sections to aid in designing my shape.
I was designing a planter and drinker for pollinators at the time, so I decided to take this opportunity
to create a ceramic version of it. I had already designed it for injection molding, but the concepts that
apply to plastic injection molding are entirely different from those for plaster molds used in ceramics.
Injection molding involves creating a mold with the exact shape of the final product, then injecting molten
plastic into it and expelling the piece from the mold. Plaster molds for ceramics operate on a completely
different principle. Liquid clay slip is poured into the plaster mold, which absorbs the moisture from the
slip that is in contact with it. The longer the plaster absorbs the moisture, the thicker the ceramic piece
becomes. Once the desired thickness is achieved, the excess slip is poured out, and the piece is left to dry.
As it dries, the piece will shrink and eventually release from the mold on its own. This process creates a
different type of mold lock compared to regular injection molds. Therefore, I decided to conduct some
research and also found reference pictures of ceramic pot cross-sections to aid in designing my shape.
Designing the shape:
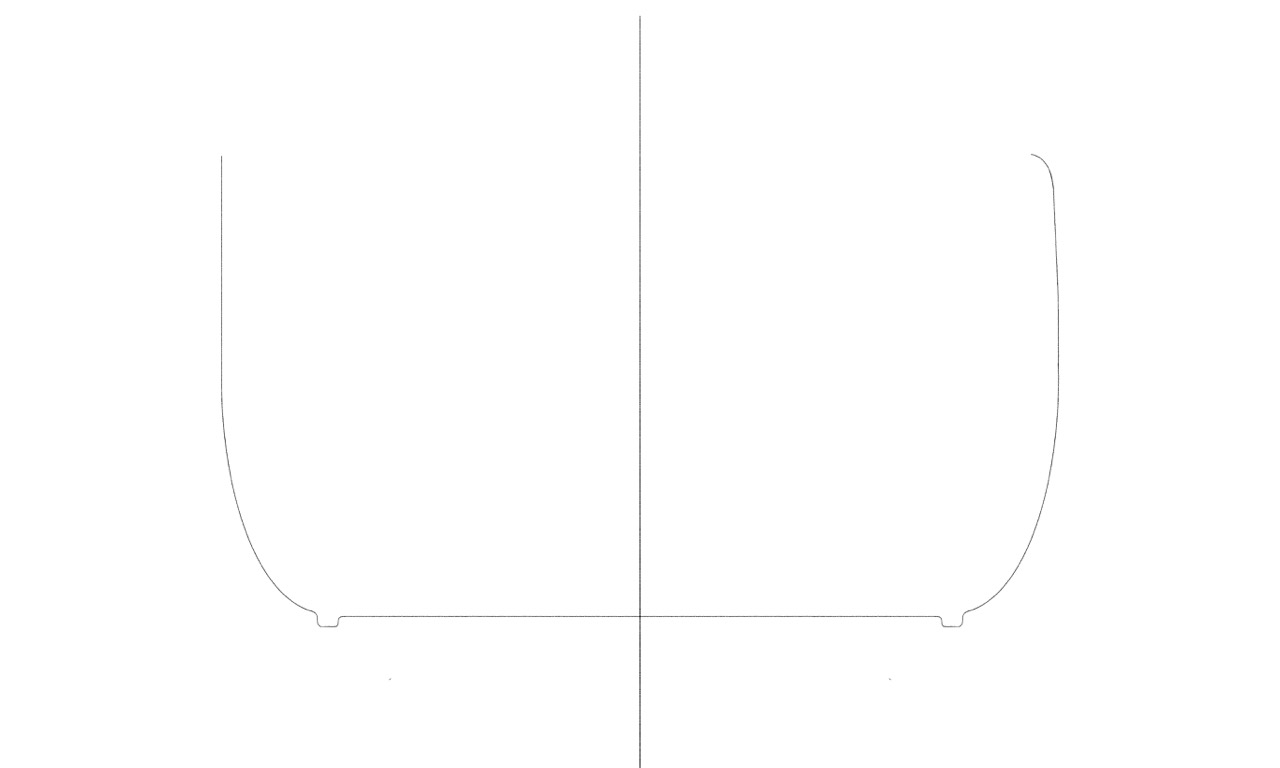
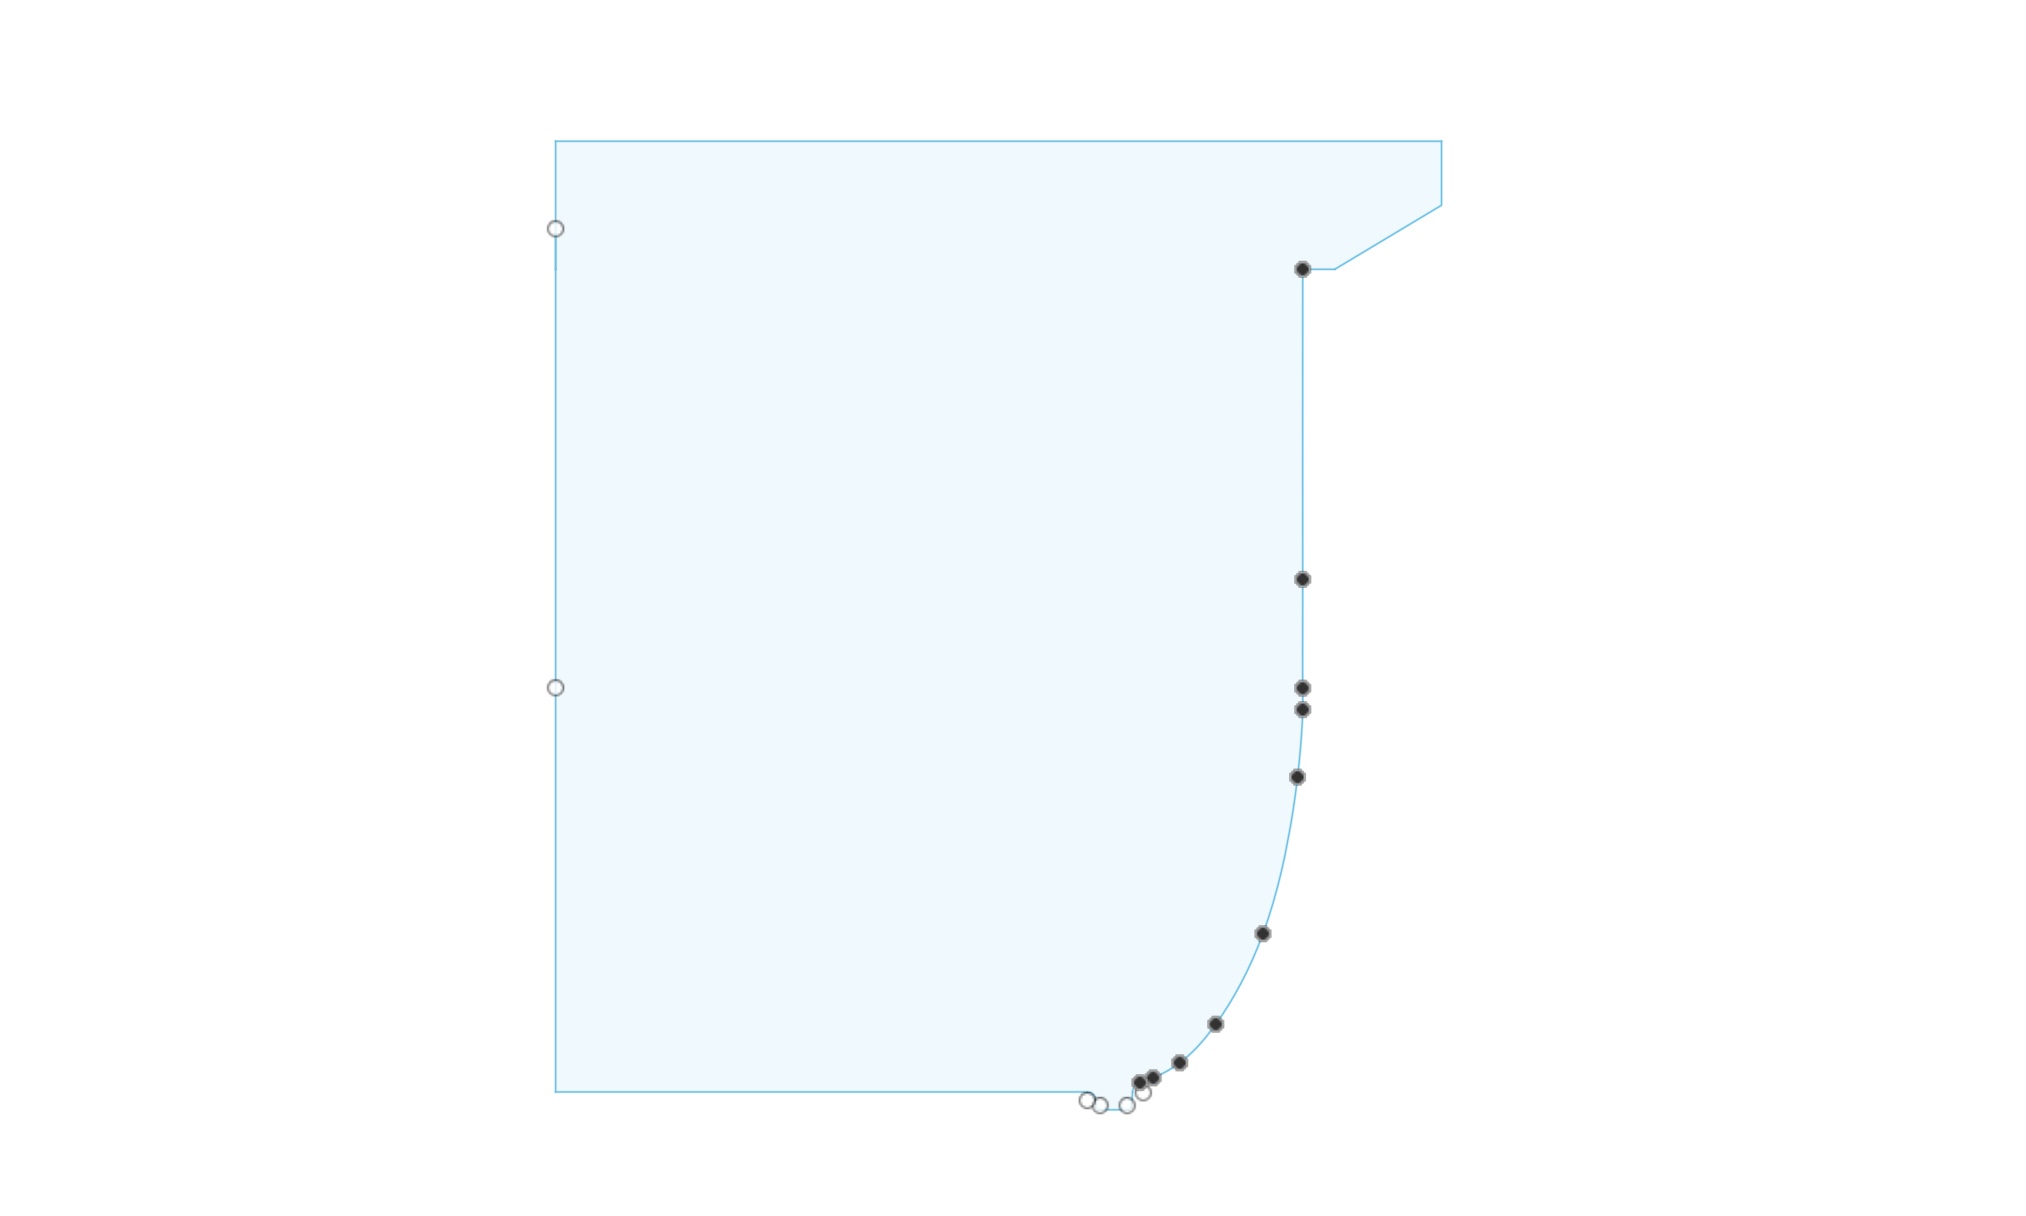
I was designing a planter and drinker for pollinators at the time, so I decided to take this opportunity to make a ceramic version of it. I had already designed it for injection molding but the concepts that apply to plastic injection molding are completely different to plaster molds for ceramics. Injection molding is basically designed to have a mold with the exact shape of the final product that you want and then you simply inject molten plastic into it and then expel the piece from the mold. Plater molds for ceramic are based on a completely different process. Liquid ceramic paste is poured into the plaster mold which then absorbs the moisture from the paste that is directly touching it and the longer you let the plaster dry the paste the thicker the piece will come out. Once you acheive the desired thickness you pour out the excess paste and let the piece dry. The piece will shrink further as it dries and eventually release from the mold by it's self. This creates a different kind of mold lock than regular injection molds. Therefore I decided to do some investigation and also found referecne pictures of ceramic pot bisections in order to design my shape. I added a lip to the design to make a sort of funnel for the liquid clay once I come to pour it.
Choosing materials:
To make a ceramic mold the right material tu use is plaster, specifically plaster of paris. This material is ideal for two reasons, one is it will absorb water very quickly from the liquid clay and will also preserve fine detail from the original shape used for the mold.
For the actual casting I used a clay that is specifically designed for this application. The mix was a proprietary mix made by a local ceramics company but you will likely find a mix of equivalent quality in your area. Here is the ammounts of each.

Bill of Materials
| Qty | Description | Price |
|---|---|---|
| 80 KG | Plaster of Paris | 10.49 $ | 6 KG/piece | Poudered clay | 4.64 $ | 100 KG | Water | N/A | 2x2' | 1/2" MDF for base | 4.10 $ | 1 | Plastic pot | 12.35 $ | 3KG | Recycled Play-doh | N/A |
The size of the plastic pot depends on the size of your final piece. I made the mold 4-5" larger than the original piece per side. I also drilled a large hole on the top to be able to fill it up thorugh there. The play-doh is recycled and can be reused indefinitely, the point is to use it to seal the seam between the MDF and the pot to avoid leaks when filling with plaster.
Safety & precautions:
This project doesn't require toxic chemicals but does require some safety precautions. First of all it's recommended to wear a face mask to avoid breathing in the dry plaster dust. And second, the final mold, specially before it dries is extremelly heavy. I used 80KG of plaster and 100kg of water. After a couple days the weight dropped due to it drying but it was still extremelly heavy so I recomend having several people help you and keeping it close to the ground, ideally on a pallet to be able to move it using a hydraulic forklift.
Execution:
This section is divided into three parts. Making the initial shape which is a 1:1 model of the final piece you want to make, then using that to make the mold and finally using the mold to create the final shape.
Making reference shape:
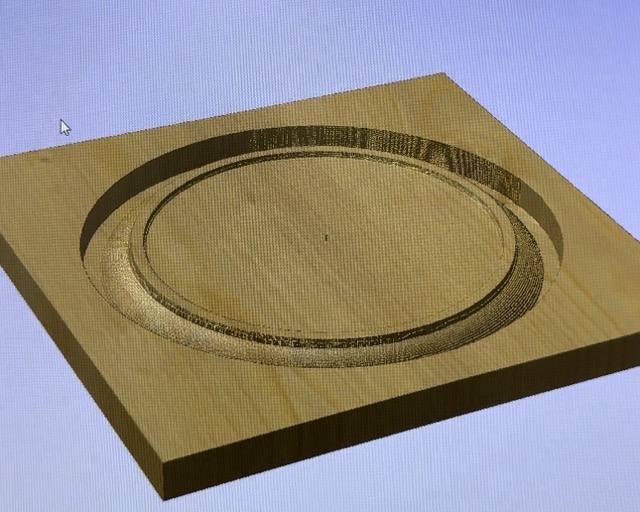
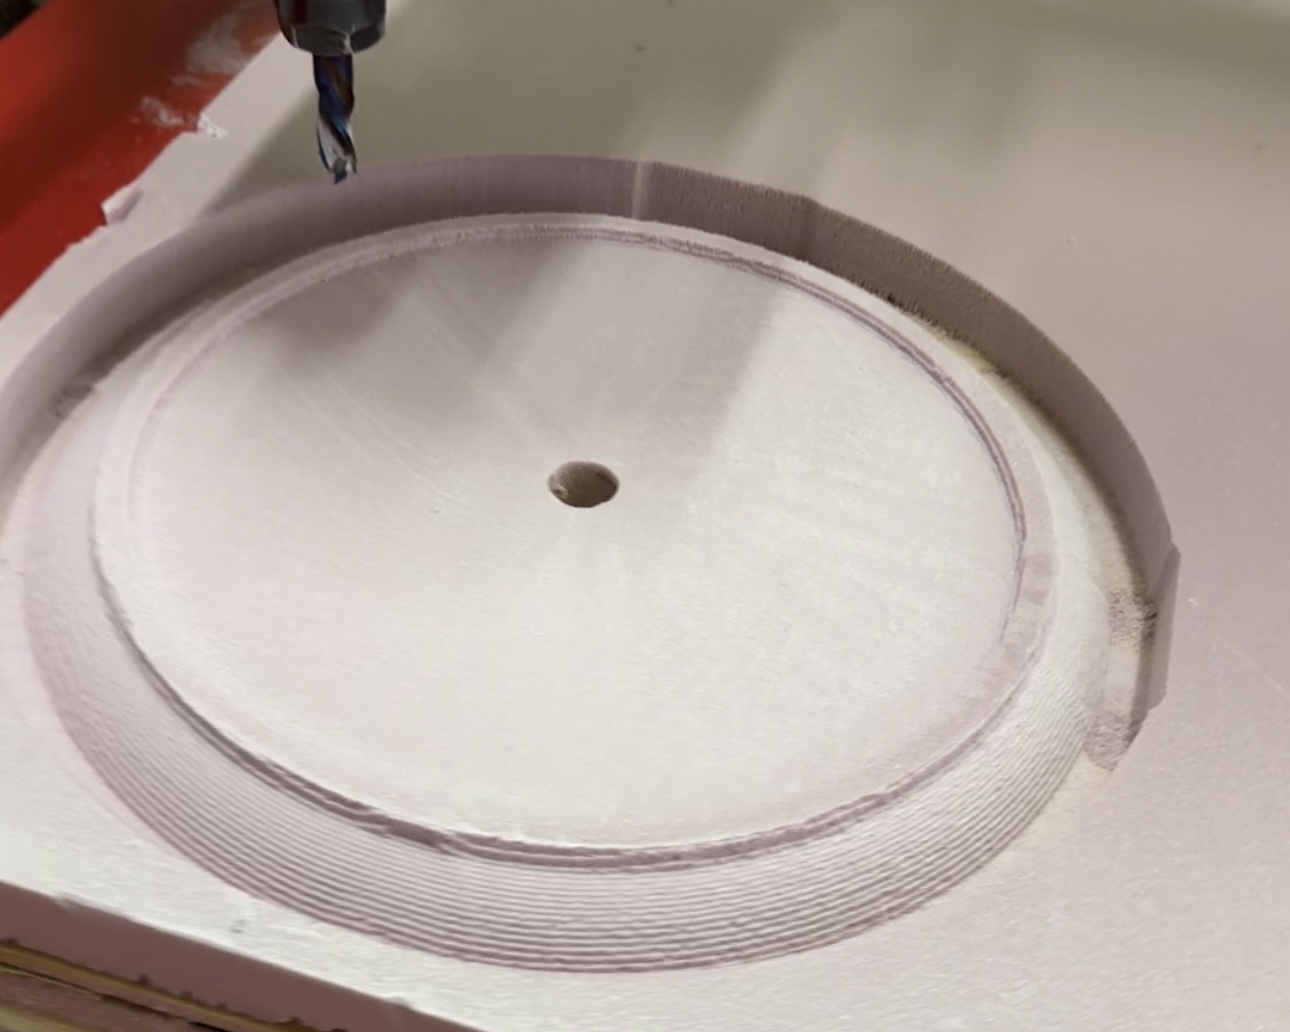
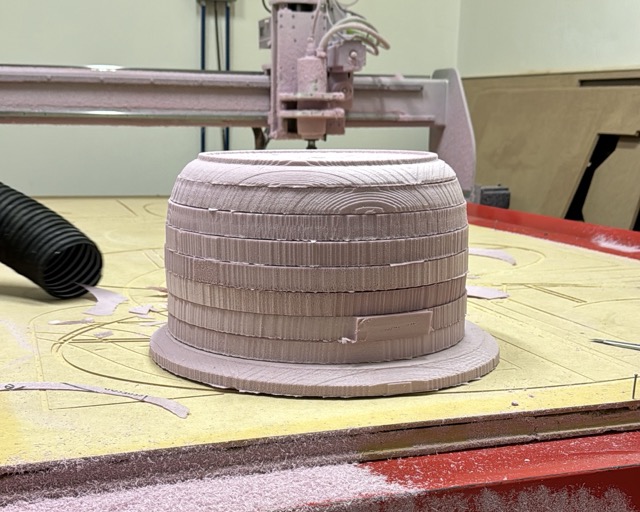
I could've made the reference piece manually but I wanted it to be exactly the same shape that I modelled and perfectly symetrical, plus I wanted to challenge myself so I decided to create this shape with insulation foam, using CNC milling to give it the right shape. One option was to cut the shape into slices and cut the sillhouette of the shape at a 90 degree angle, leading to a stepped look and then sanding it down to make it smooth. I didn't like this idea because I thought it would lend it's self to being asymetrical and looking like a hand made shape. To avoid these problems I decided to carve it directly, cutting the initial shape into 1" slices and then glueing them together to create the final shape. 3D printing was suggested to me but the scale of the project made that harder to pull off and I had a lot more experience with 3d printing so I wanted to learn 3D CNC cutting.
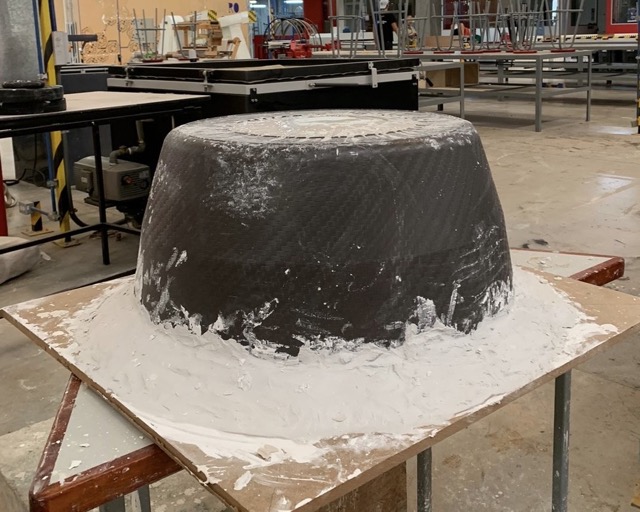
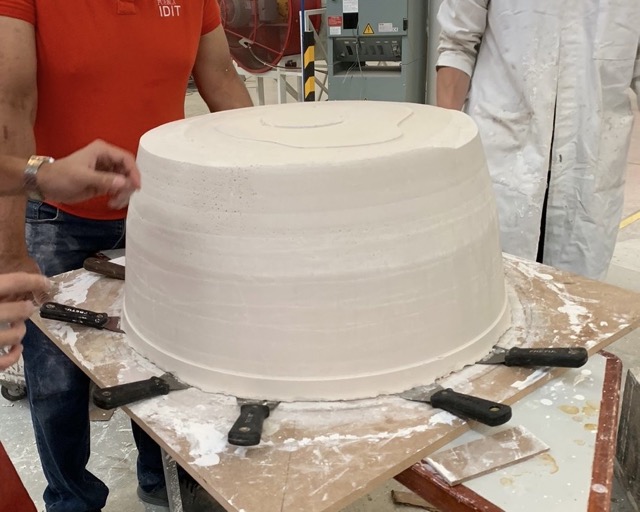
Making final mold:
Once the reference shape was cut I sealed it using elmer's glue and then stuck it to the MDF base to make sure it wouldn't float once I poured the plaster. Then I put the large tub on top and made sure to center the model. Once it was in the right spot I started sealing the seam between the base and the tub using the play-doh we talked about in the previous section. I also added some weights to the top to keep it from moving and then poured the plaster in, I had 3 people help me to make sure the time between plaster batches wasn't too long so it wouldn't have weakspots. Then I let it dry for a day and then removed the plastic tub and carried it along with 4 more people to the oven where it dried for over 4 days at 80 degrees celsius.
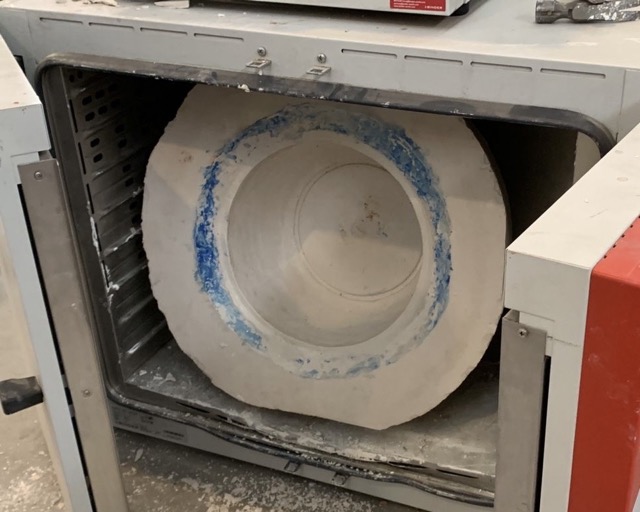
Casting a final piece:
Finally, after four days of drying in the oven and about a week in the sun, the mold was dry enough to cast the first piece. I say “first piece” because, as you will see later, a couple of them broke. The process was relatively straightforward but did require some trial and error. If you remember, I mentioned in the design section that molds for liquid clay don’t determine the thickness of your part. That thickness is determined by how dry your mold is, which affects how much moisture it absorbs and also depends on how long you let it dry.
To ensure relative uniform thickness i ensured the wall thickness of the mold was relatively uniform, making sure no walls of the mold were more than 50% thicker than the rest. It doesn't need to be very exact since the moisture will be distributed quite uniformly.
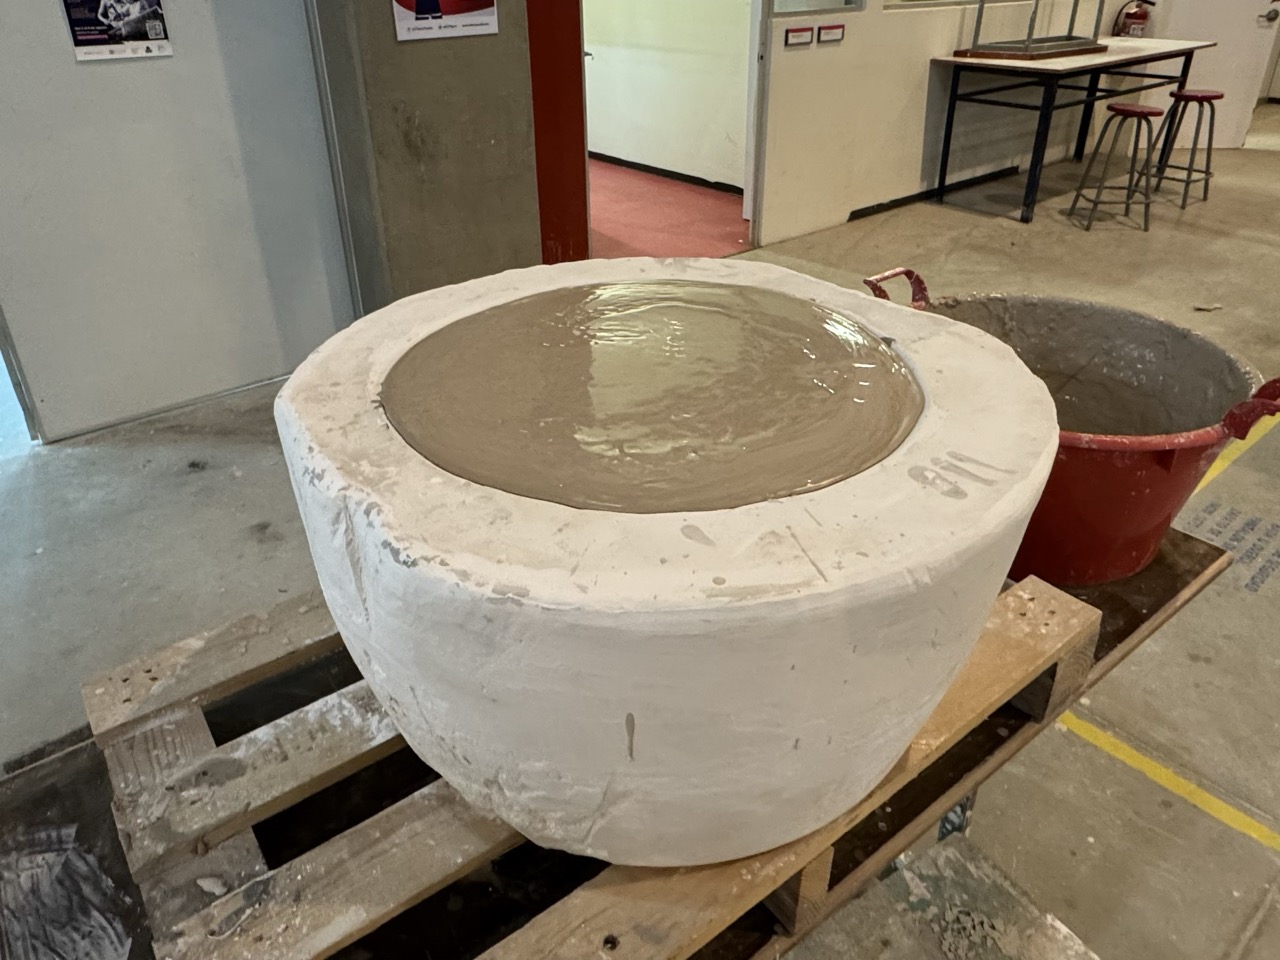
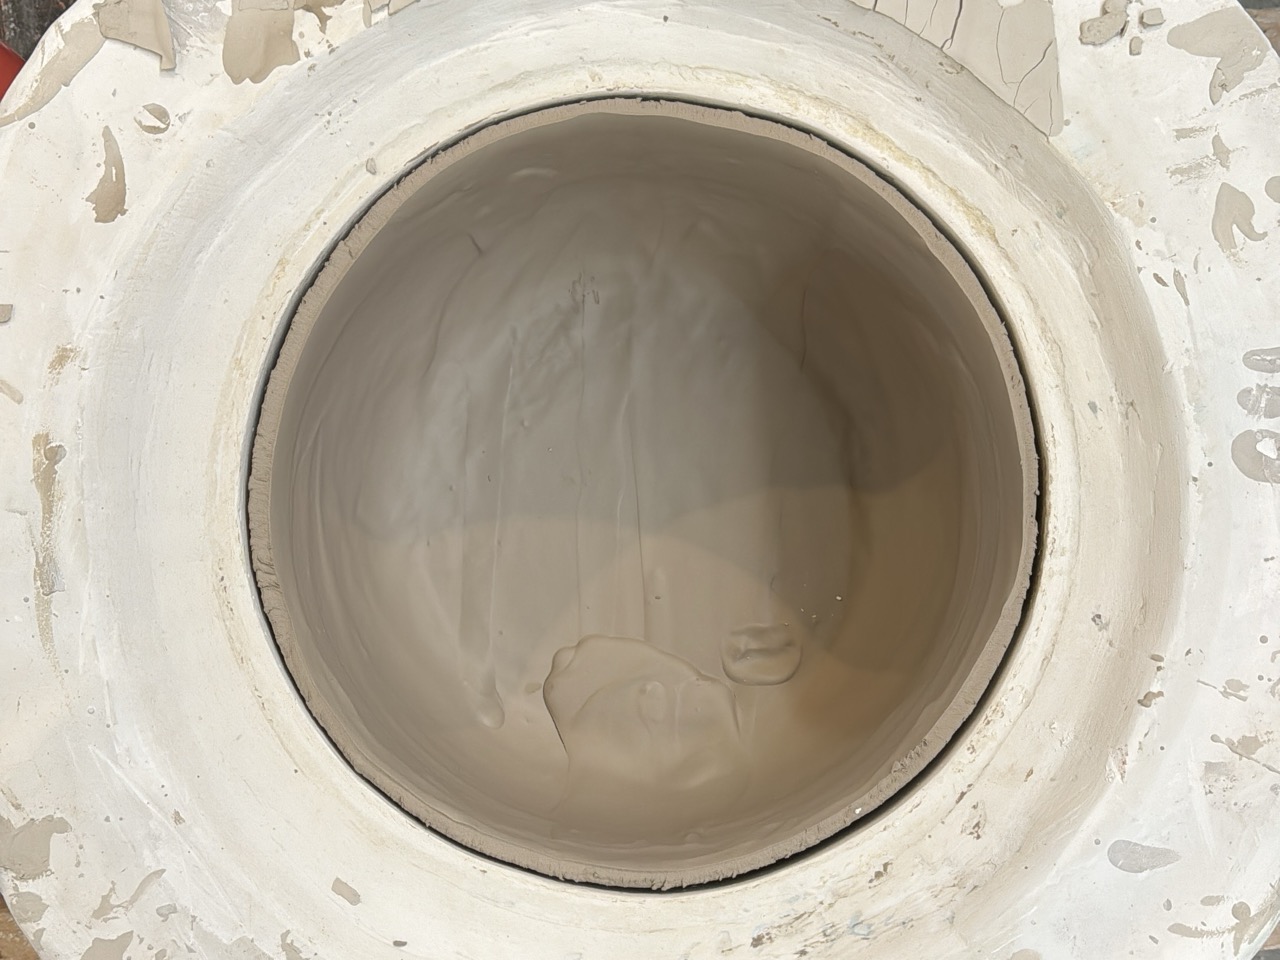
Pouring and release
The mold is first filled to the brim like the first image and is topped off as needed. After about an hour the wall thickness is checked with your finger, if it's thick enough you can then pour out all the liquid clay back out. Then the mold and piece should be left out to dry. During this process the piece will shrink and release it's self from the mold.
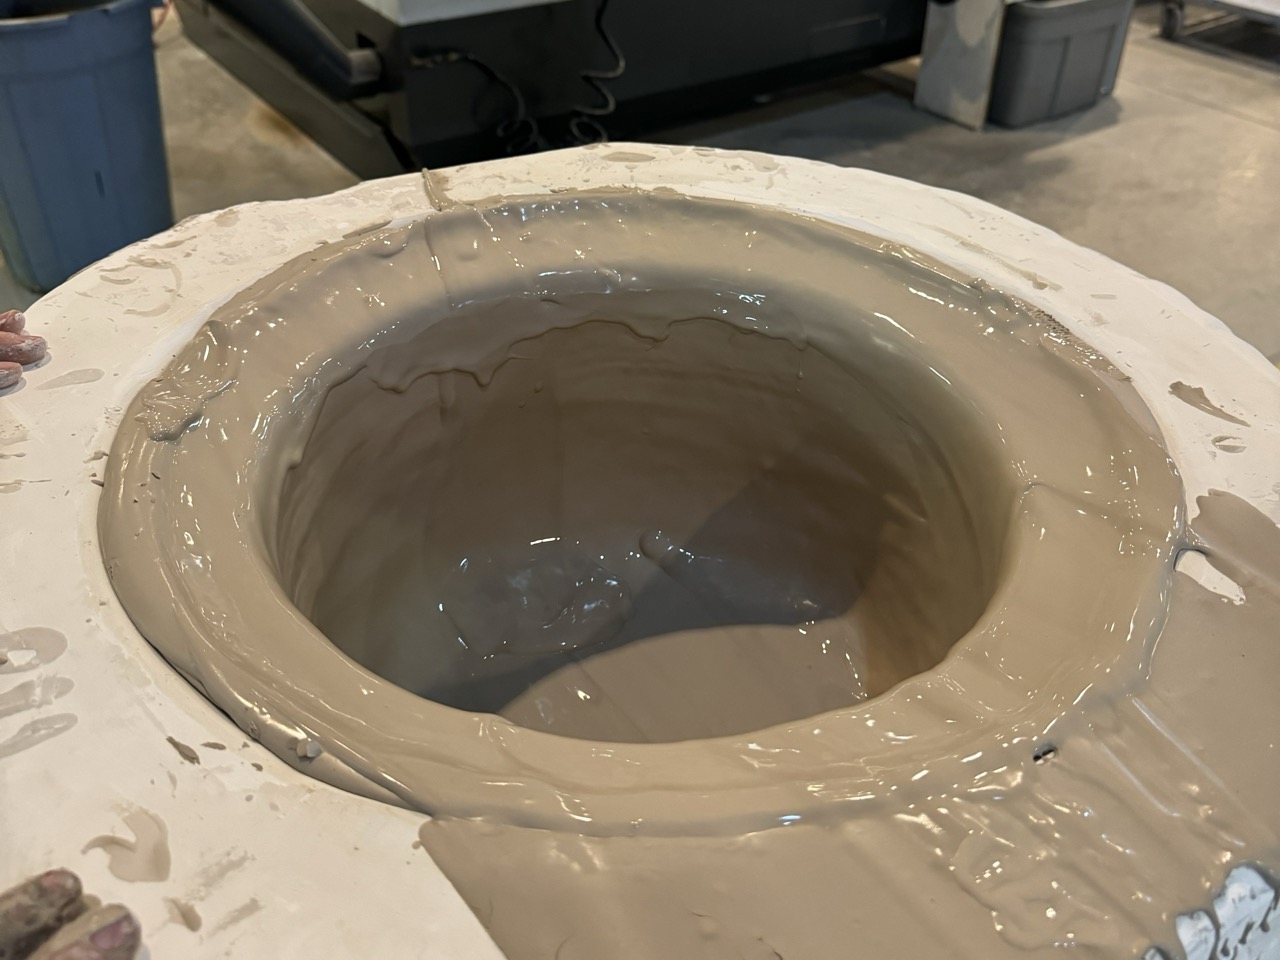
For the first test, I let it sit for about an hour. This resulted in a piece that was too thick, so I adjusted the time for subsequent pours. The good thing is you can recycle all failed casts as long as they aren’t baked or contaminated with plaster or anything else in your studio. When it came to pouring the excess clay out of the mold, it required three of us to tilt it without dropping the whole mold. Honestly, this project was way harder to accomplish than I expected, but I’m glad I did it because I learned a lot and really enjoyed working with clay, even though it’s so finicky and hard to predict.
Fixing problems and issues:
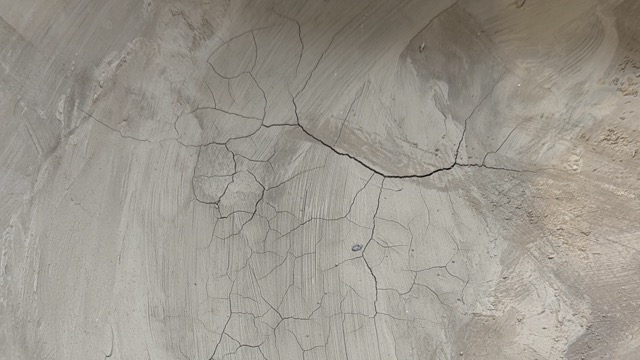
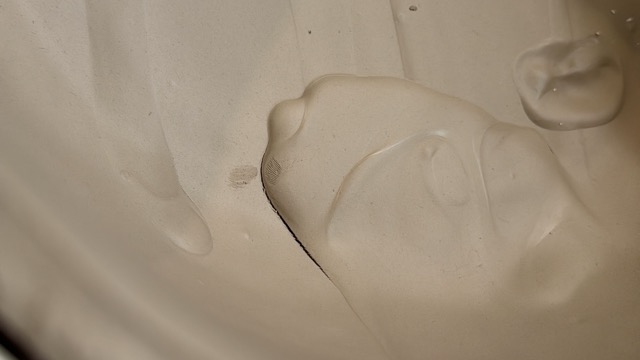

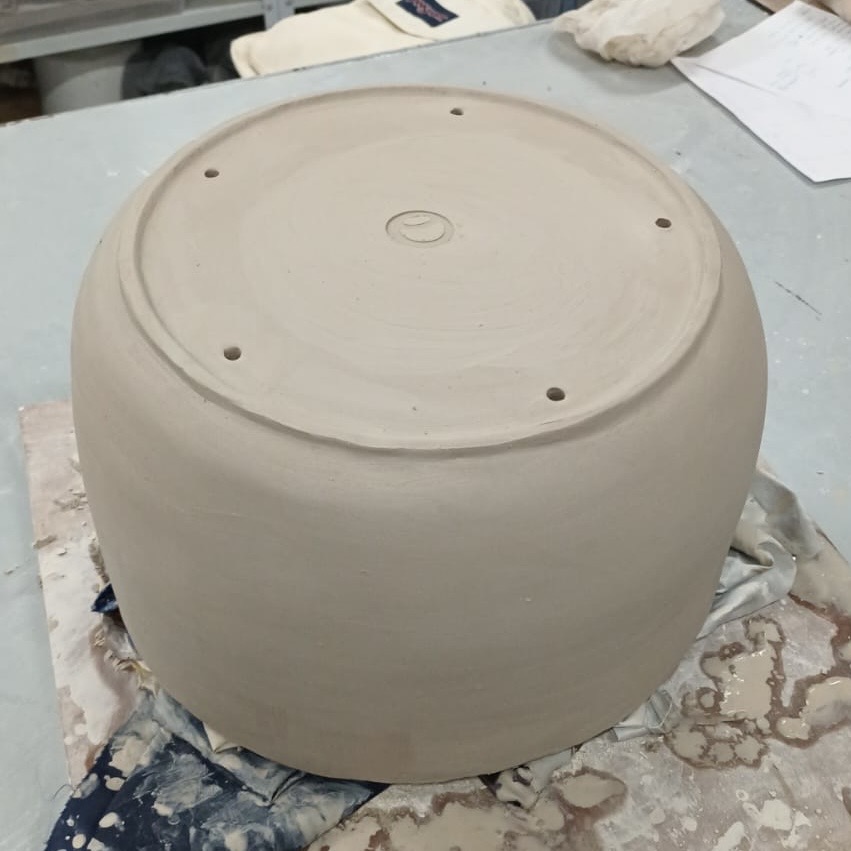
A lot of the pieces I cast initially broke, cracked, warped, or ended up being too thick or too thin. However, with time, I eventually got the hang of it. I learned how long to let the clay sit, how quickly to dry them, when to expose the mold to the sun, and how to handle the pieces after they came out of the mold. I also figured out the best techniques for removing the pieces from the mold and eventually got the one “perfect” piece.
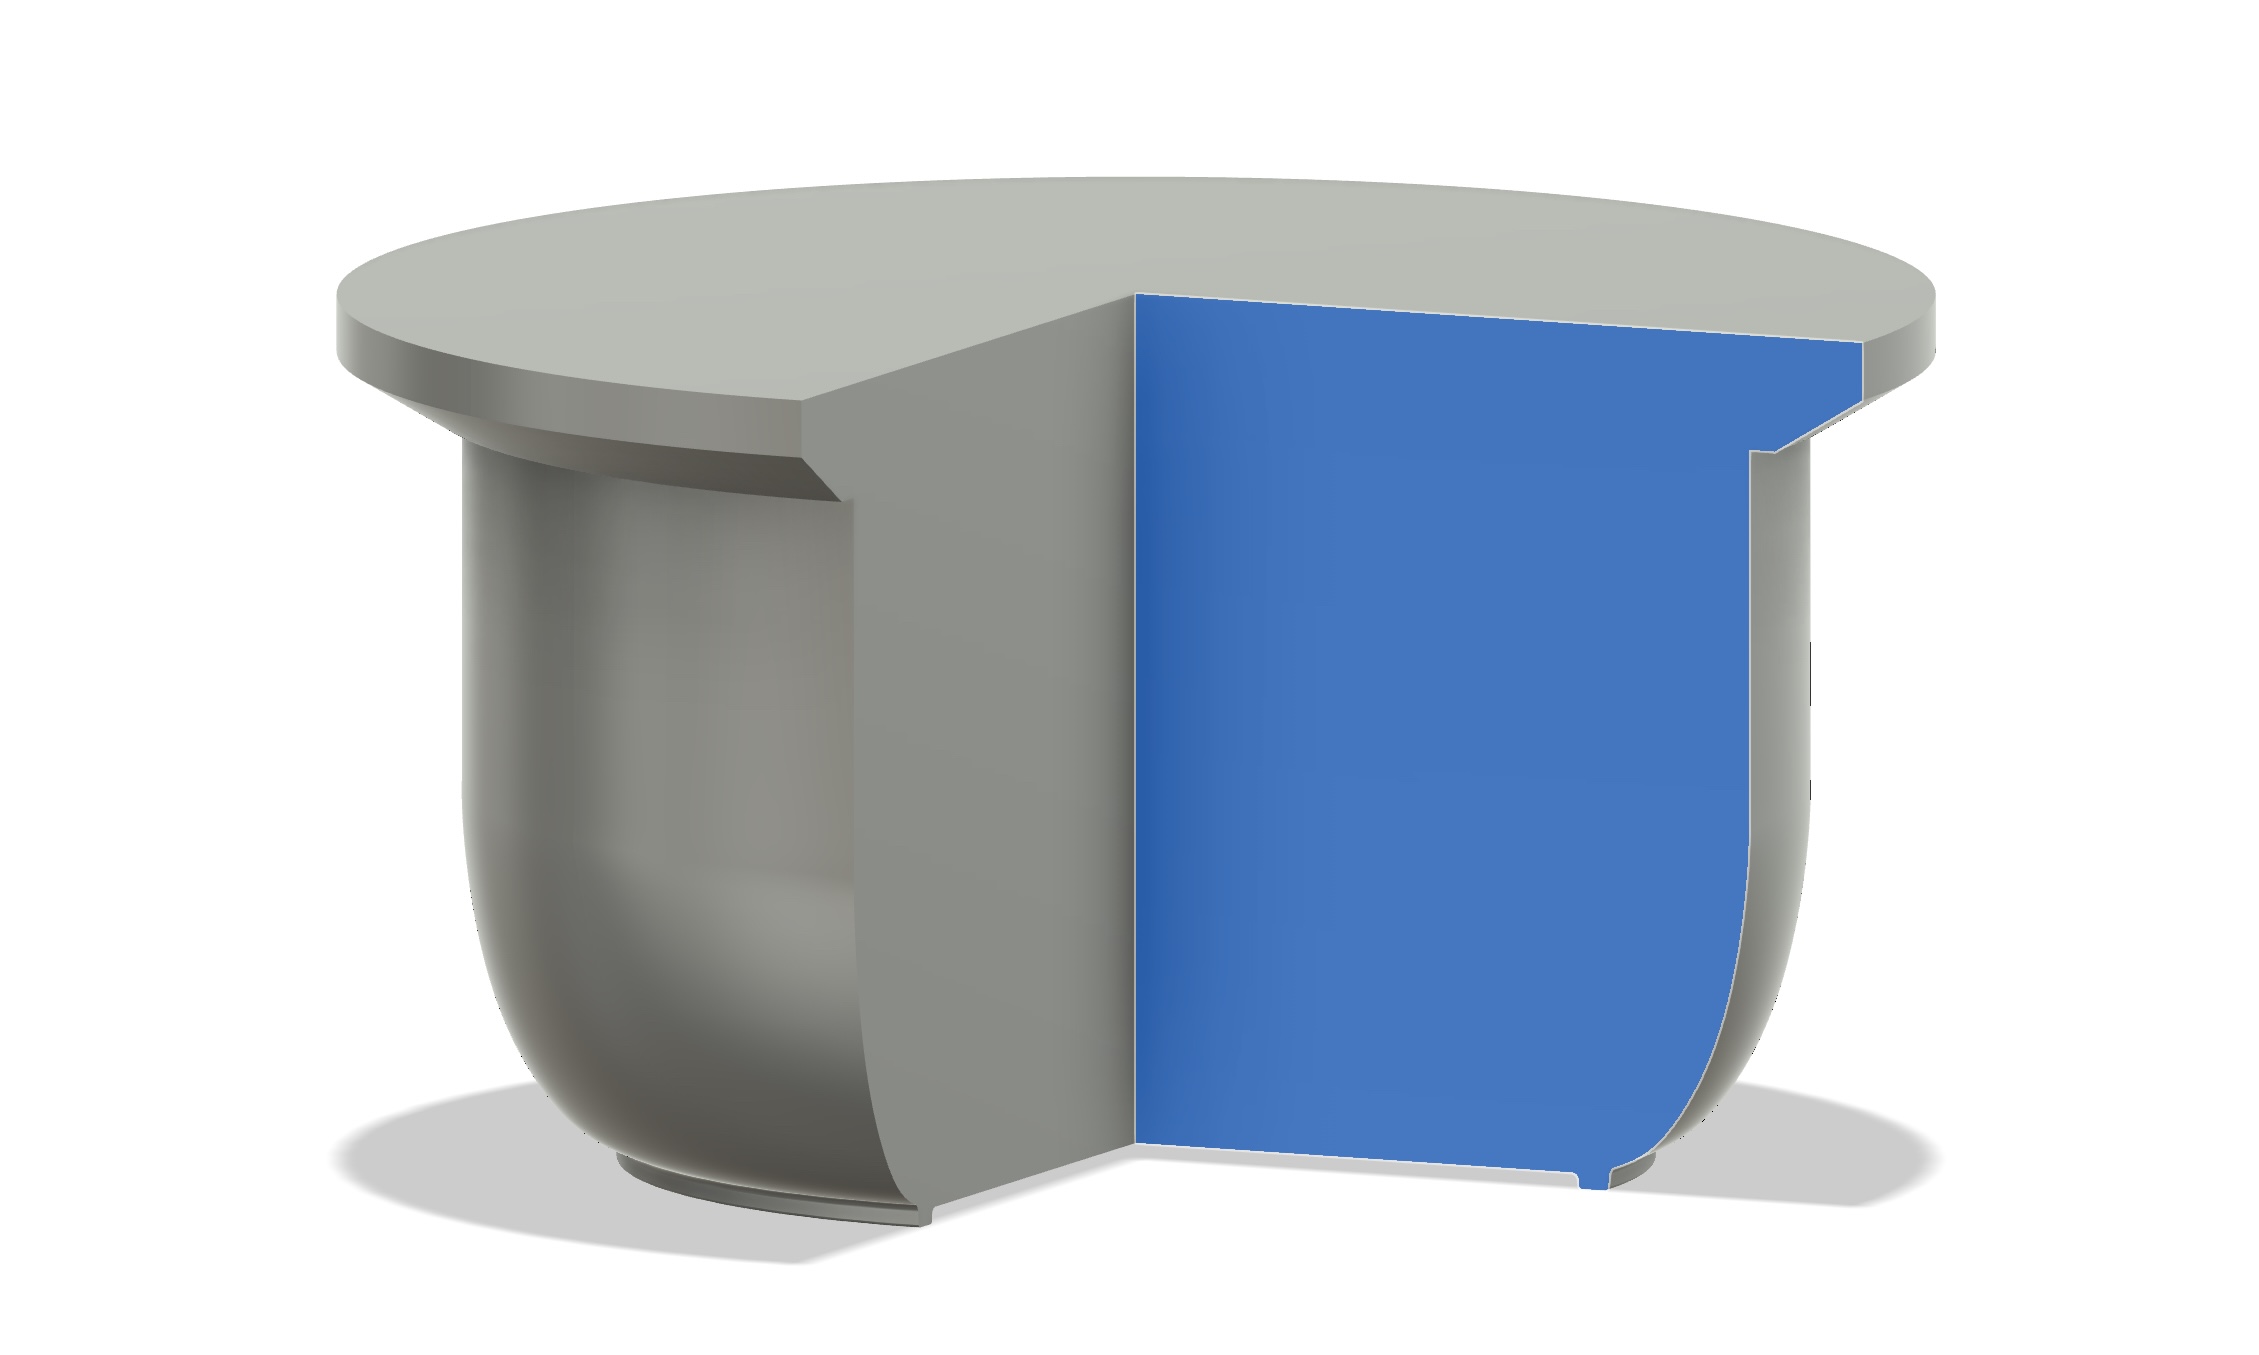
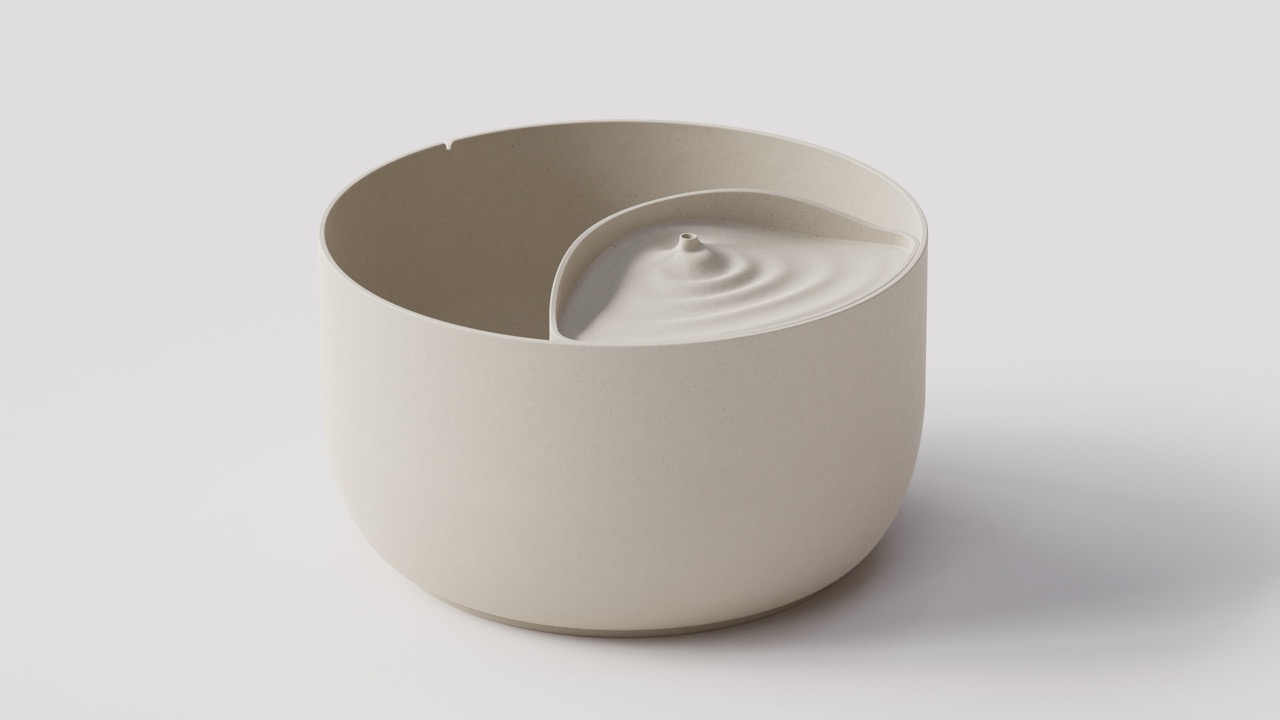
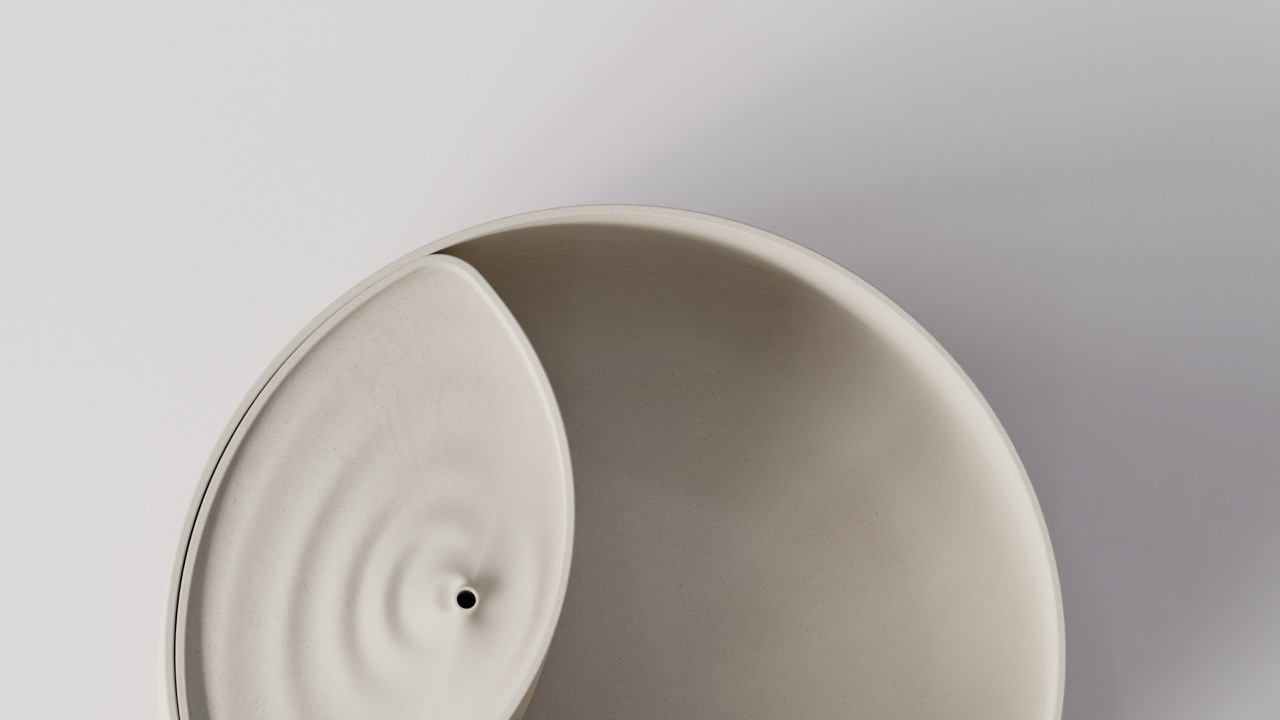
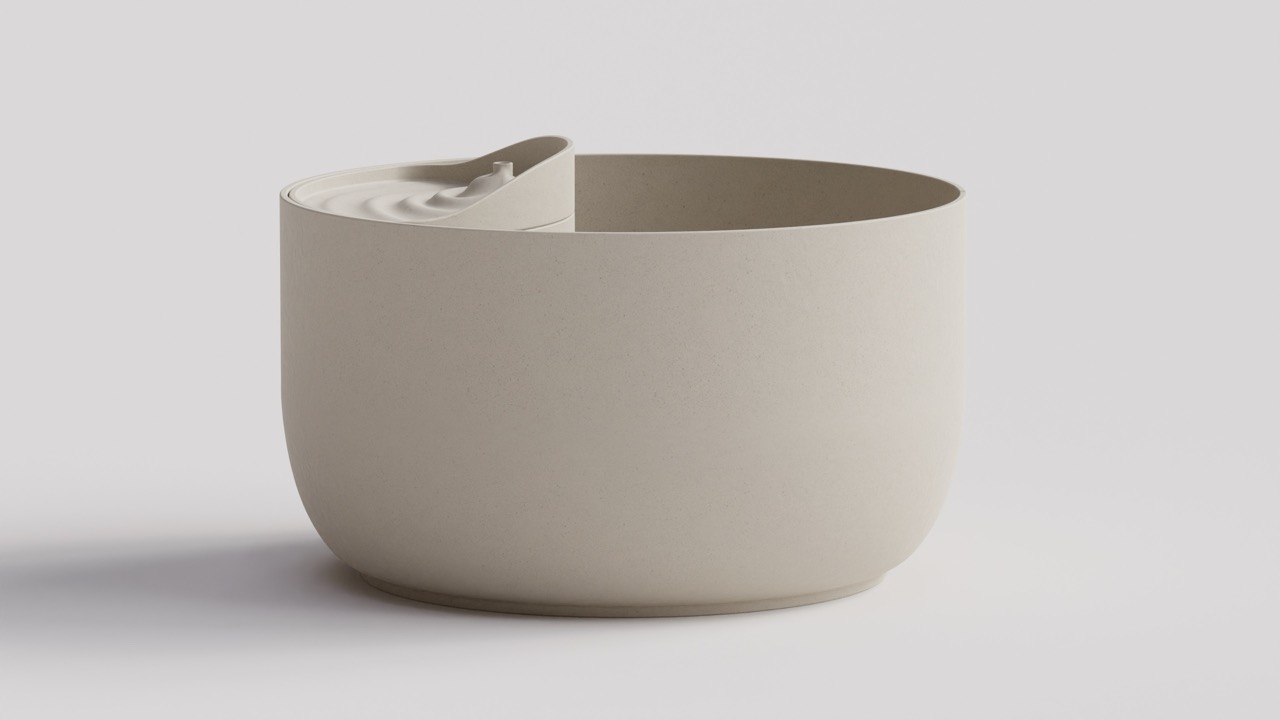
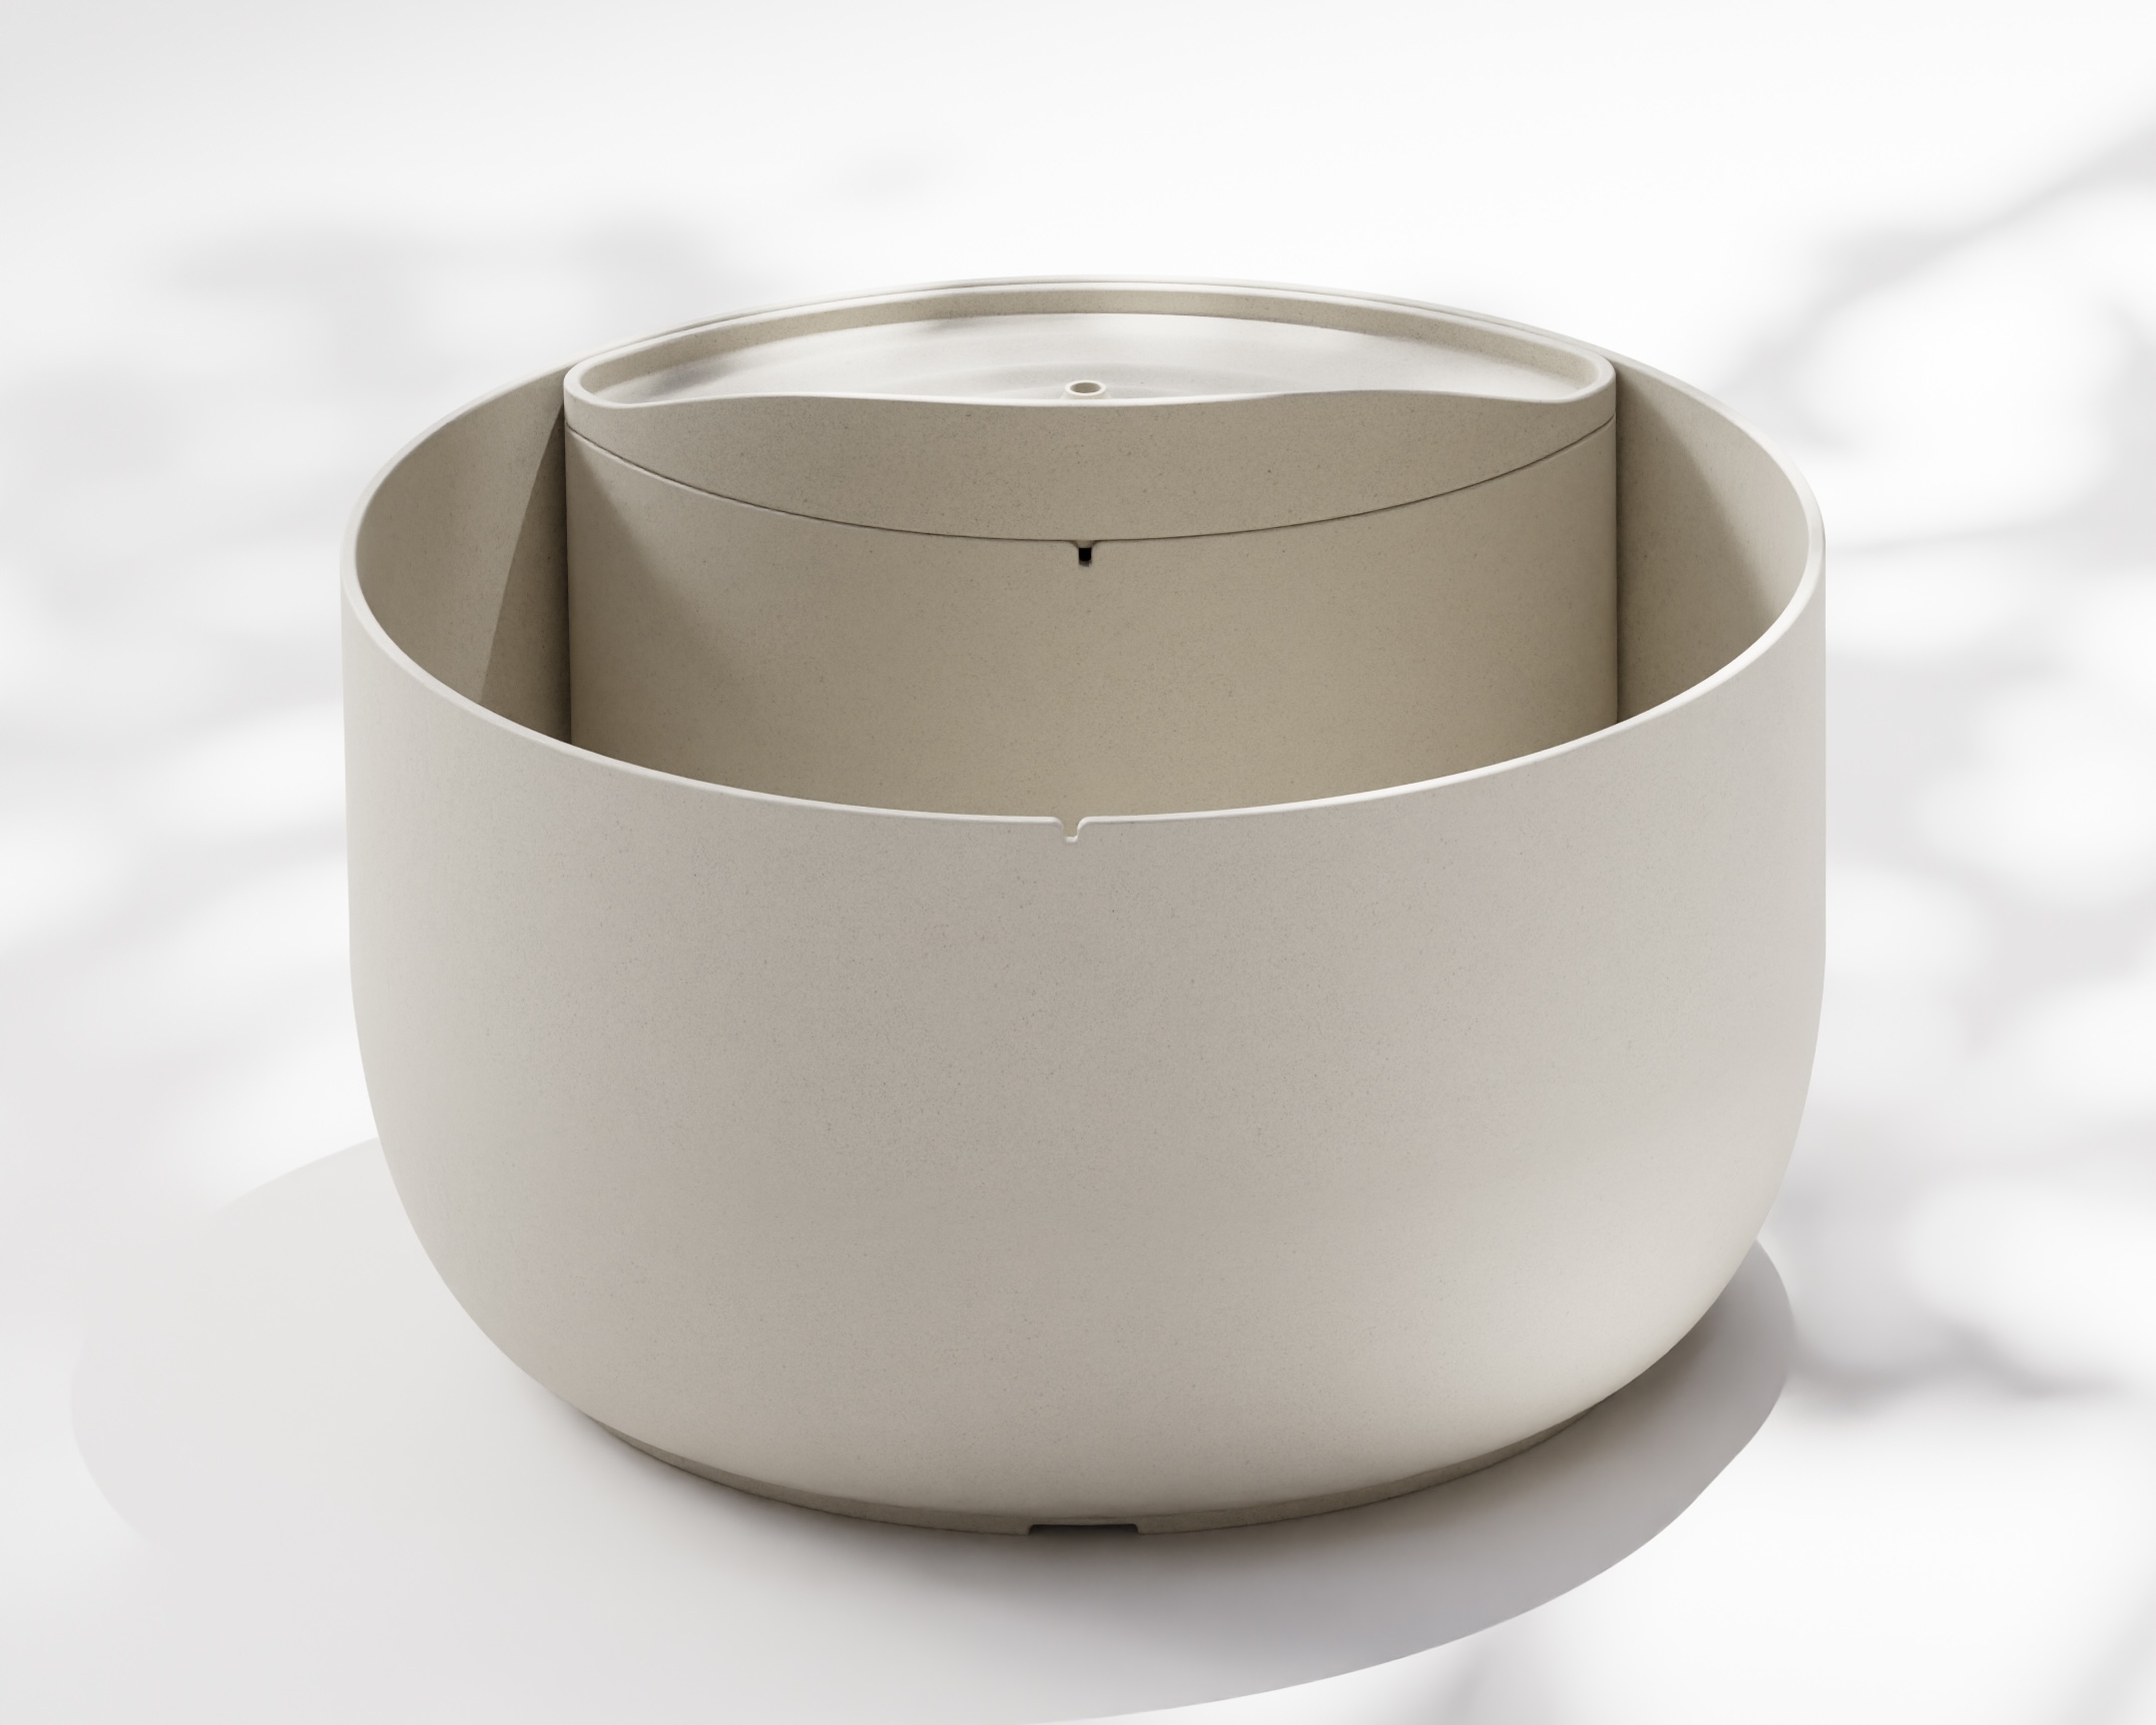
Ideal result:
Thse are renders of what the ideal final result would look like, achieving something like this would require a longer timeframe due to the wait times between each step and the extensive itteration cycle required for a final piece like this. That bieng said, I'm very glad with how the real piece came out and hope to keep learning about molding and casting, both with ceramic and with other materials.
Files
I use the student version of Fusion 360 which is slightly limited in terms of export options and the links to some cloud files are sometimes unreliable so I will provide both the link and the Fusion 360 files exported in either .f3d for the models or .fez for the assembly.
For some reason I can't open these by double clicking on them and fusion isn't shown as one of the apps that can open them for some reason, so the way to open them is to open fusion and click open directly from the app and then select the file.
Here are the actual files
And here are the links for the online files:
Because I have the free version of fusion 360 I can't create a link through which you can donwload the files unfortunately but you can view the 3d models.