
6. Embedded Programmign
This week, I programmed the board we fabricated in week 4 to interact. Specifically I made it change color of the light it's in build LED flashes when I press the button ton the board.
Group assignment:
Group Assignment for week 6, Fab Puebla.
Board:
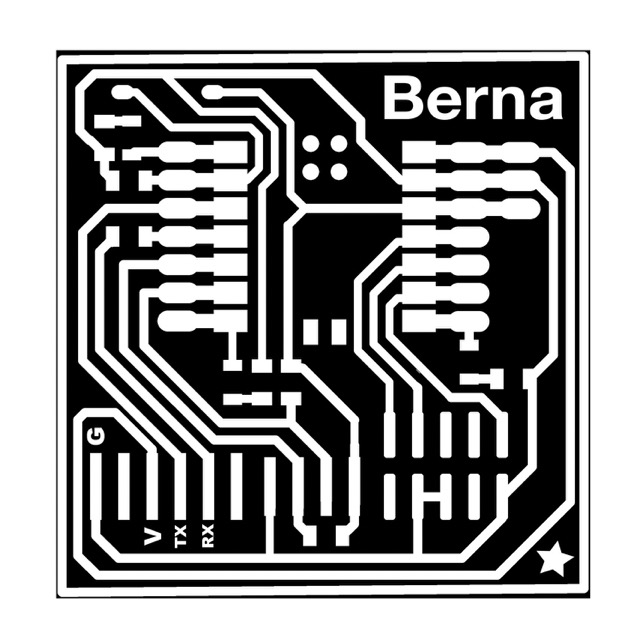
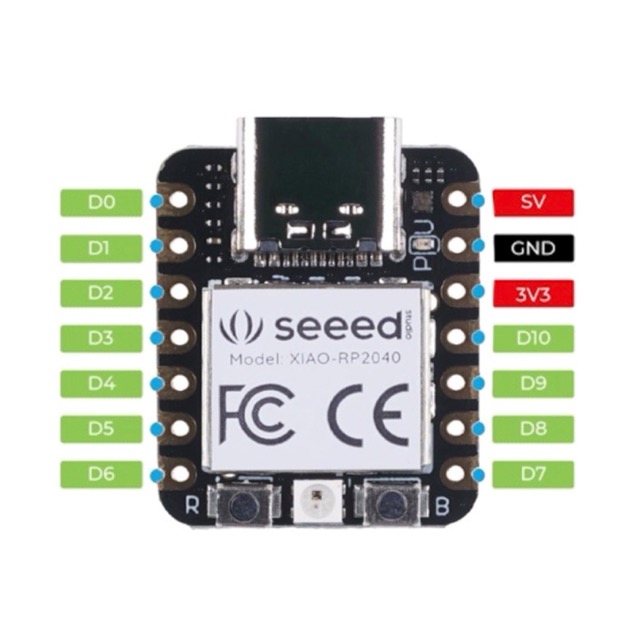
The chip we will be using is the RP2040 and the board design we milled on week 4. This chip has an in-built neopixel which an RGB LED which we will be using for this week's exercise. The way we will interact with the board is the button we soldered on our board on week 4. To know what pins to use when writing our code we need to check the board pinout and the PCB layout which you can see down here. Based on these I created the image on the far right, where you can see the button is recieving 3V from the pin on the right and compelting the circuit with pin D1. Therefore that's the pin we'll be using to interact with the board and then the internal NEOPIXEL to let us know the interaction is having an effect.

Programming board with Arduino:
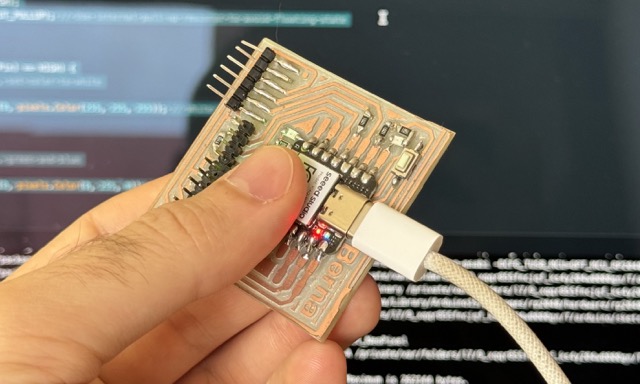
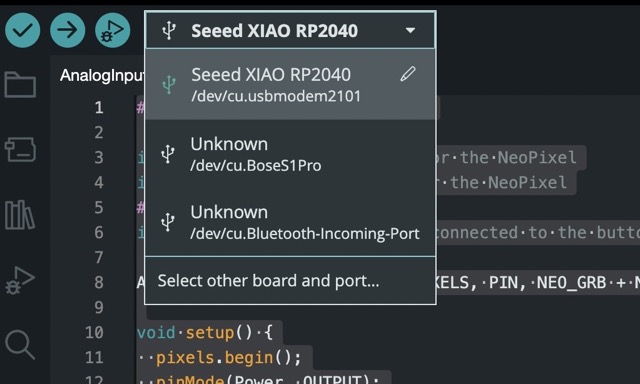
To be able to programm this chip I started by opening Arduino IDE, connecting the board to my computer making sure to use a usb cable that can transmit data because some are only designed to provide power but not data and finally choosing the right usb port and making sure it's detecting the right chip.
Coding Principles
Let's explore the basics of Arduino programming, starting with setting values:
Adafruit Library In order to be able to use the neopixel we need to let arduino know we will be using it's libraries so we type #include < Adafruit_NeoPixel.h > at the top of our code.
Next we need to understand the difference between void setup() and void loop().
void setup() This function runs once when the Arduino is powered on or reset. It is used to initialize variables, pin modes, start using libraries, etc.
void loop() This function runs continuously after `void setup()` has finished. It is where the main code resides and is executed repeatedly for the duration of the Arduino's operation.
Writing my code
I first defined what pins I would use, in this case 11 and 12 for the neopixel which I believe are default, D1 for the button and I also defined the total number of neopixels. In this case one.
Next I wrote an if condition, creating two possible states, all white or constantly changing back and forth from red to green to blue. I used the if/else constraint. Translated to natural language if button activated turn on white, if button deactivated turn on blue, switch to gree, switch to red and then loop unless the condition of the button changes.
To select the color of an RGB LED you choose the brightness of the green blue or red channels. In this case it's pretty straightforward, 100% intensity is 255 so for red, green and blue you just set their channel to 255 and that's it. White is quite simple too, you just need to make all channels the same since they are the primary additive colors. In this case I set them all to 255 since I wanted the brightest light possible but if you wanted to make the intesity the same as that of the red green and blue you'd need to choose a lower value. If you wanted other colors you'd need to figure out the right proportion of each channel to make it. Some easy ones are yellow, cian and magenta which are red and green, green and blue and red and blue respectively.
Final Code:
After some tests and modifications this is the final version of my code:
Final Product:
This video shows the code in action, as you can see the neopixel lights up and cycles through red green and blue until you click the button at which point it turns white.
Communicate
For the communicate portion of the assignment I connected the board to my computer and used the serial monitor to recieve imput from the board, letting me know when the button is pressed and when it's not. Here is a video of the board and serial monitor showing how the serial monitor detects this imput and how the ring light turns white when the button is pressed and stays red when it's not.
And here is the code that enables that function: