
1. Project Management
Git & GitLab
To understand what git is i watched a couple tutorials. The best one I found was this one: Git Tutorial For Dummies
What is Git?
Git is a version control software, what is that? It's basically a way to save your progress, a bit like checkpoints in a videogame
Git commands
The video tries to explain how GIT works by equating it to a video game
git Init This will initialize a new empty git repository and is analogous to putting a memmory card into your game system.
git add This will add your changes to the repository and is kind of like saving your progress or reaching a checkpoint in a game. But there are two options, one is saving a specific file and the other is saving all progress up to now, I haven't found the need to upload just a specific file without the rest of my modifications so y always upload everything at once and the way you do this is by adding a space and a full stop to the command like this: git add .
git commit -m This commits the changes to the memmory and since the point is to be able to go back to previous versions of your software you want to name each save, you do this by typing it after the -m 'writing a description of your modifications like this'.
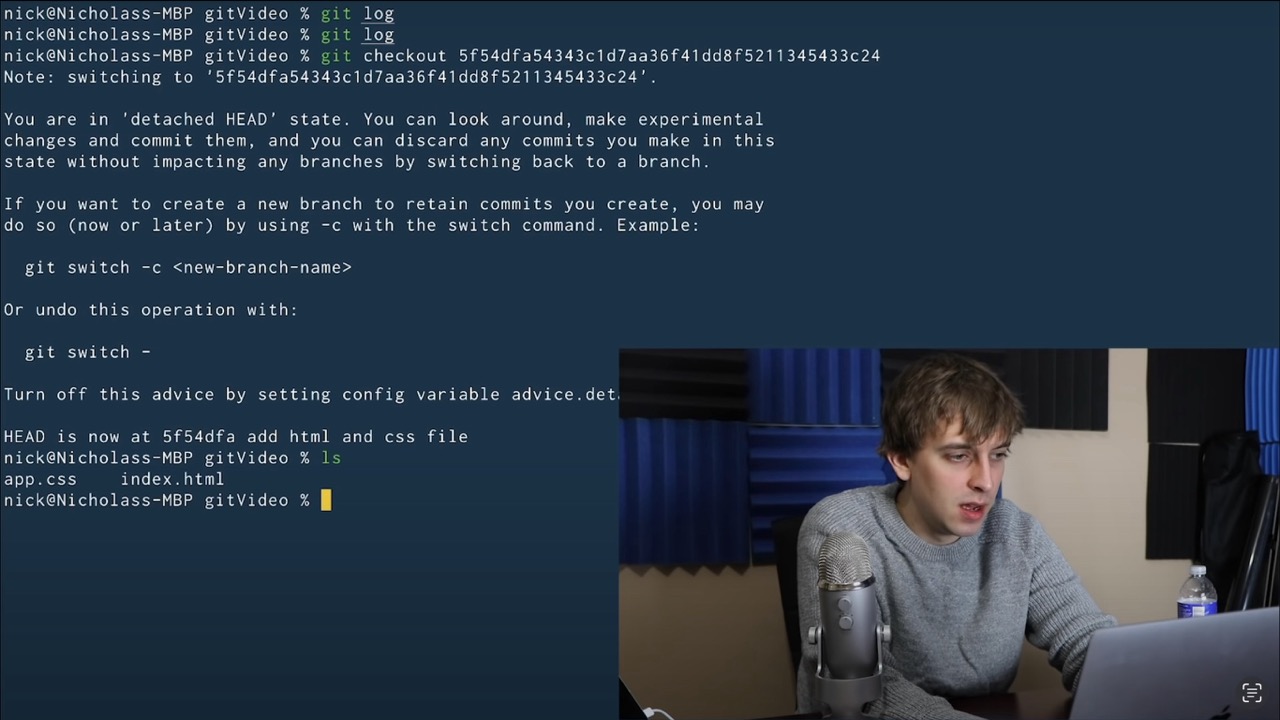
git log This is a log of your changes and will show you all the previous commits a little like a video game where you can choose to return to specific checkpoints within the game
git checkout This will let you open previous saves, but, this is a little like going back in time, and if you make any modifications you essentially create a new branch a little like simultaneous realities meaning you can't just merge them later since the change might lead to a domino reaction that causes everything after to break.
git status This command checks your progress, like pausing a game to see what’s saved and what isn’t. It shows which changes are saved (staged) and which aren’t (unstaged)..
What is GitLab
Git lab is basically a website designet to connect to git which holds all your commits in the cloud and lets you share all your code and each version with other people. In this case we will use it to upload our progress so it can then be hosted on our fab academy website. There are other alternatives like github. This is great for collaboration and is one of the key technologies that enables open source code to exist since it allows people from all over the world to share theyr code and code together as a team.
Web Design
This week's assignment was to make our own website for fab academy, here I will document my journey, what I started with, what I learnt, what I achieved and what I hope to learn in the future about website design.
For starters I have to give credit to Rafa, one of our teachers here at FabLab Puebla, who designed a great website for us to use as a template. He uploaded it to his GitLab and shared it with us. In the following section I will explain how I copied it to my computer, turned it into a repository, uploaded it to my GitLab and then edited to make it my own.
MANAGING MY CODE WITH TERMINAL
Okay, so the first step I took was to find where I wanted to store my files on my computer and created a folder called public. Using terminal I then proceeded to find that folder as shown bellow:
After finding this folder I cloned the template using Rafa’s GitLab link, made sure terminal knew what changes I made using git status, used git add to read the local file, checked it had worked correctly by using git status again and the git init to turn this into a repository.And last but not least, forgot to git push and spent about half an hour trying to figure out what was wrong, and then finally asked for help and realized what I’d done and then used git push to upload.
EDITTING MY CODE WITH VISUAL STUDIO
Once my local file was synced with the cloud I could start using visual studio to edit that file that I had uploaded. First I started changing the color of different elements in the CSS main section by looking for the word color of the specific hex code of the red color used on the template. I chose a blue color and applied that to everything. I also found each piece of text in the HTML. Utilizing the following commands I was able to modify or add new elements to the website:
- H for header
- P for paragraph
- Ul for lists
- Li for bullet points
- OI for numberd list
- Img for image
- A for links
- B for bold