Moulding and Casting
For this week’s assignment we will address the issue of Molding and Casting. For our group assignment we will have to review the safety data sheets for each of your molding and casting materials, make and compare test molds with each of them and compare printing vs milling molds
Group assignment week 12
While for our individual assignment I’m going to have to design a mold around the process you’re going to use, produce it with a smooth surface finish, and use it to melt parts.
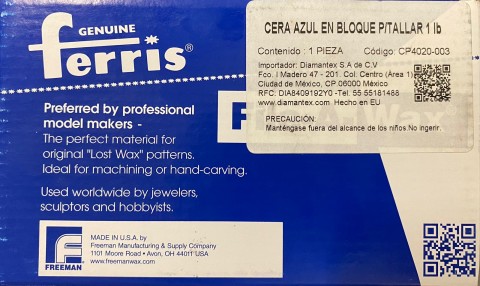
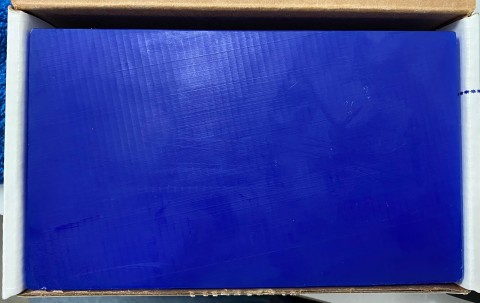
The material provided by the instructors for this assignment was a 1 lb blue wax block, the dimensions of this block are 145 mm long, 92 mm wide and 38 mm high.
Design
For this assignment I wasn’t sure what I was going to do so I decided to make a mold of the Superman logo, the S. I decided this logo because it’s a very recognizable logo and because Superman was one of my favorite superheroes when I was a kid. So I decided to make my inner child happy.
.png)
The design I did in SolidWorks as it is the program that will best deal with. The first thing I did was to make the base block with the original dimensions of the wax block. Then I started to design the logo on the surface of the block.
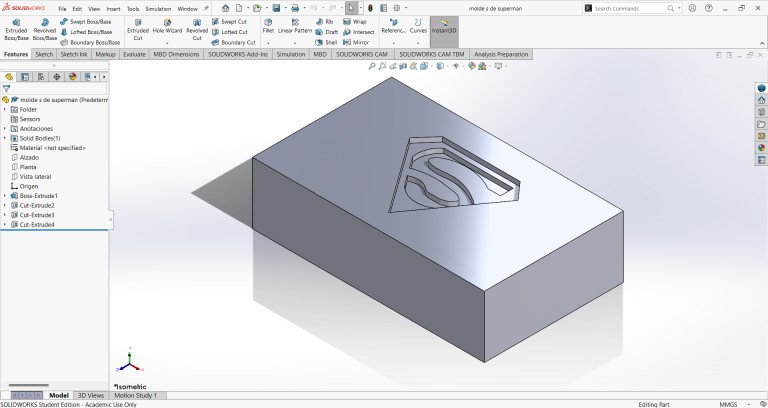
The main idea of this mold is just to cut the part where the logo is and then just pour the material with which I will make the figure.
Moulding
Mold 1: Superman
Due to time problems I could not make the mold cutting on the CNC router, so I had to do it by resin 3D printing.
Elegoo Saturn 2
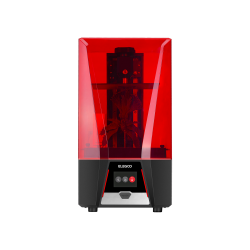
- Printing Technology: MSLA
- Build Volume: 218.88 x 123.12 x 250 mm
- Printing Speed: 30-70mm/h
- XY resolution: 0.028mm
- Layer Thickness: 0.01-0.2 mm
- Supported Materials: Supports most resins on the market
Resin 3D printing is known for producing models with very fine details and smooth surfaces, making it ideal for applications requiring high precision and finish quality, such as design prototypes, jewelry, dentistry, and miniatures, among others.
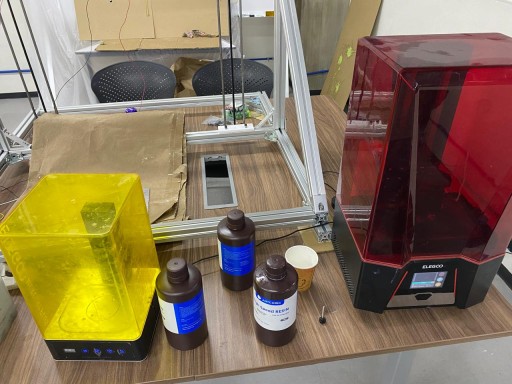
This are all the materials that I'm going to use
Having the file in the format you need to use the printer, the first thing you need to do is put the file on a USB stick and place it on the printer and select the file to be used.
NOTE: I had to scale the block because it was too big for the printer
When the file is finished printing, it is necessary that we remove the impression from the tray using gloves and covers, it is necessary to use this safety equipment as this resin can become toxic. Having removed the impression, it is necessary to remove the supports that were put and then put this impression to soak in isopropyl alcohol in the yellow machine shown in the photo above.
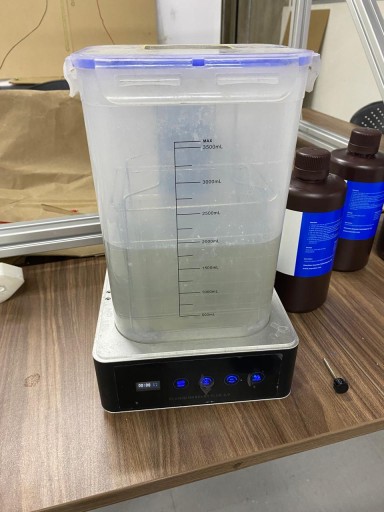
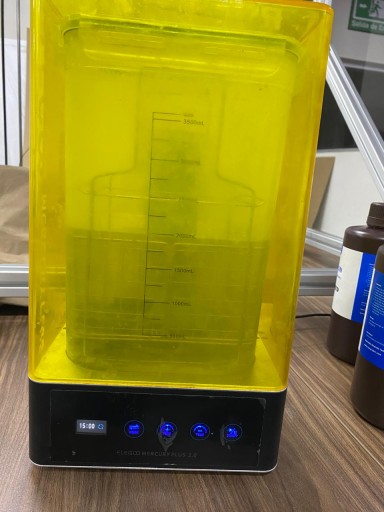
Spent at least 15 minutes after soaking the impression in isopropyl alcohol, can be removed and put to dry, drying is fast, this thanks to the nature of the same alcohol.
Finally you can now expose the printing to UV rays, so that it hardens and the printing is not so moldable. This is the end result.
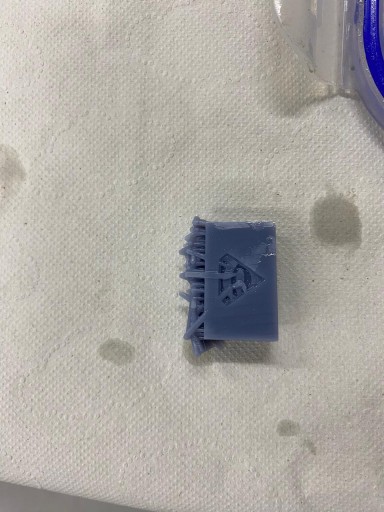
I was not satisfied with the result after printing for several reasons: it was my first time using it and I didn't really know how to use it, the mold turned out to be too small for what I had planned, and I couldn't remove the burrs that remained on the top part of the mold. For these reasons, I have decided to create a different mold.
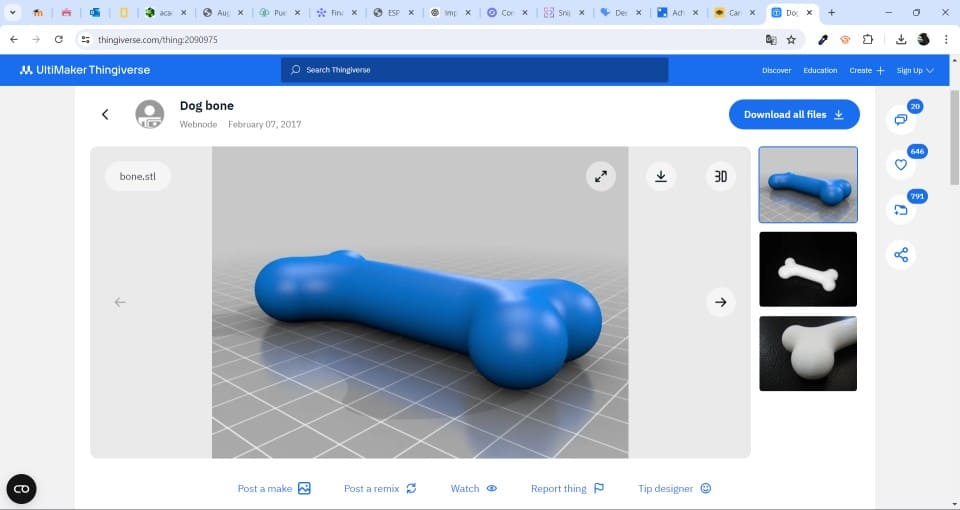
Mold 2: DOG bone
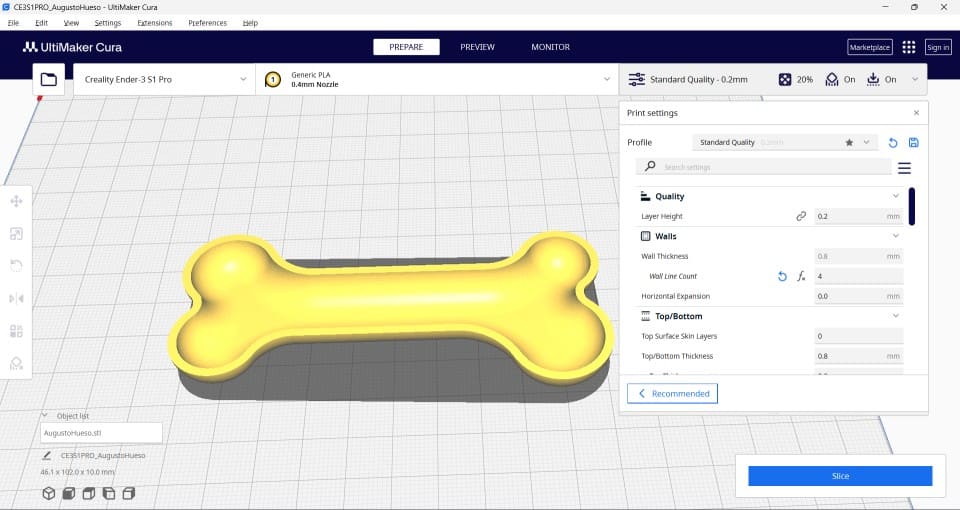
Having passed this week, there was no longer so much congestion on the machines to cut the wax block. The first thing I did was search on Thingiverse for a pre-made 3D model of a dog bone and scale it if necessary. After searching for a while, this was the best option I found.
With the help of my colleague Olaf, we made the bone hollow and cut it in half using Meshmixer. We then transferred it to VCarve to use the router and make the cuts with the necessary tools.
This is the process that I followed to do make the mold
Measure the wax block
.jpg)
Import the dog bone

Created a roughing file.
.jpg)
Created the finishing file
.jpg)
note: we need to save these files individually
Cutting process
roughing
For this part of the process, I placed the mold in the same router I used during week 7. In that week, I provided a more detailed explanation of how to use that machine, but this time we added supports to ensure the wax block wouldn't move.
First, we need to run the initial file we created for roughing. This will shape the figure as we want, but without adding detailed finishes. And this is the tool that is need required.
.jpg)
finishing
After completing the roughing, it's time to switch to a tool with a ball end. This will ensure better definition in the finish.
At this point, we need to keep the x and y axes the same. When changing the tool, we only need to lift it and replace it. After the tool change, we adjust the z-axis to a point where it aligns flush with the wax block.
 (1).jpg)
Final result of the cut
 (1).jpg)
I wasn't sure if this type of molding would be suitable for this task, so I decided to make another one using 3D printing with PLA. This mold has two negatives that will be assembled using small tabs at the corners.
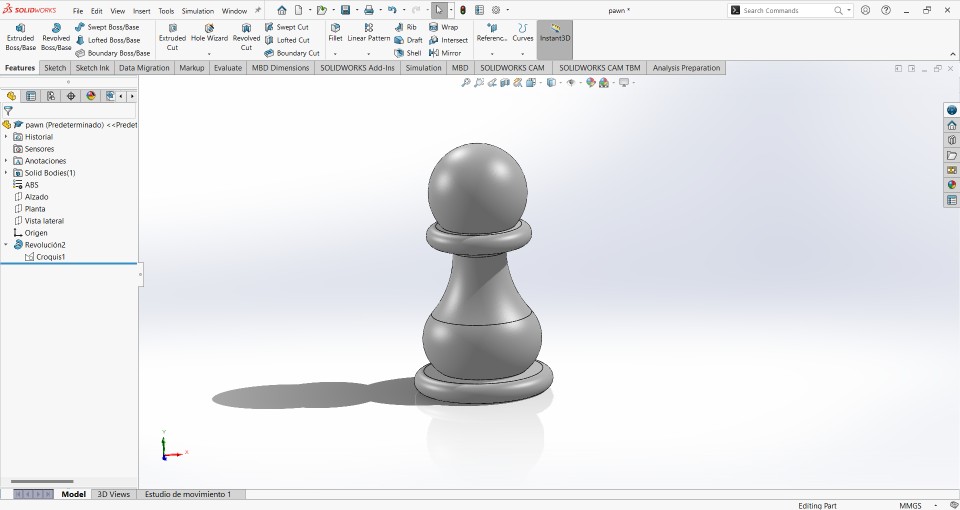
Mold 3: Pawn
I decided to make this final mold so that my figure would come out in 3D without any flat parts. I chose to make a pawn because I really like chess, and it is a figure that can be created in a simple manner.
Design
The first thing I did was create a revolution in SolidWorks to achieve the circular shape of the pawn.
After that, I made a small block with the exact dimensions for the pawn to fit perfectly. In this part, I had some trouble creating the negative of the pawn. Next, I will detail how I performed this operation in SolidWorks!
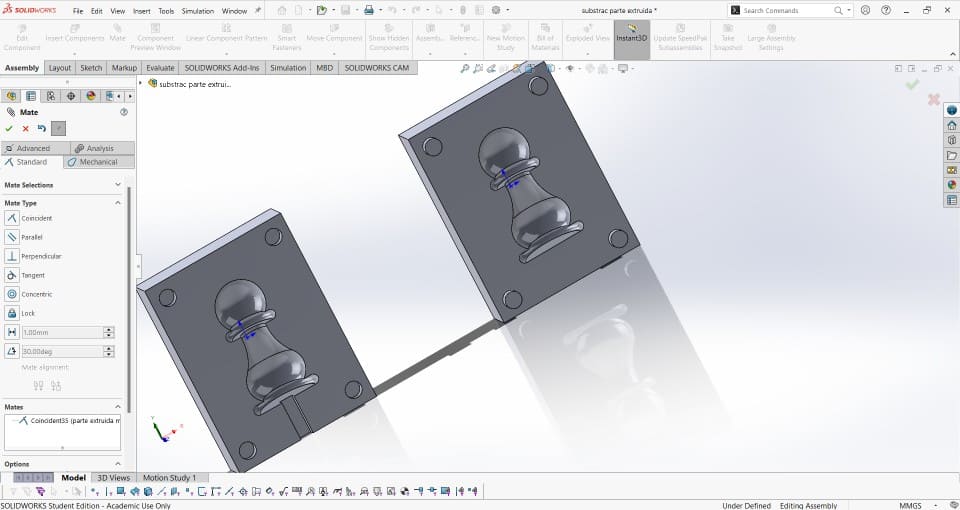
Create a Assembly with the two blocks and the pawn
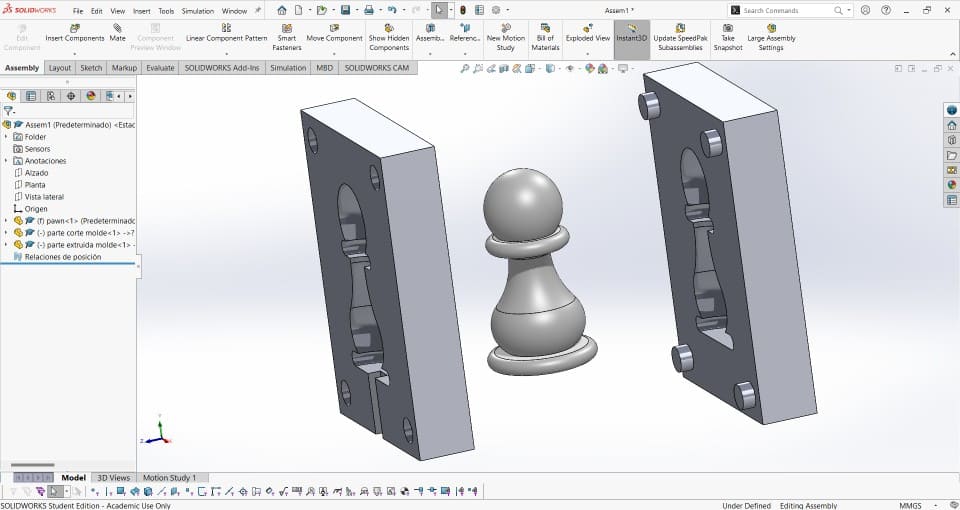
Try to put in the middle of the block the pawn
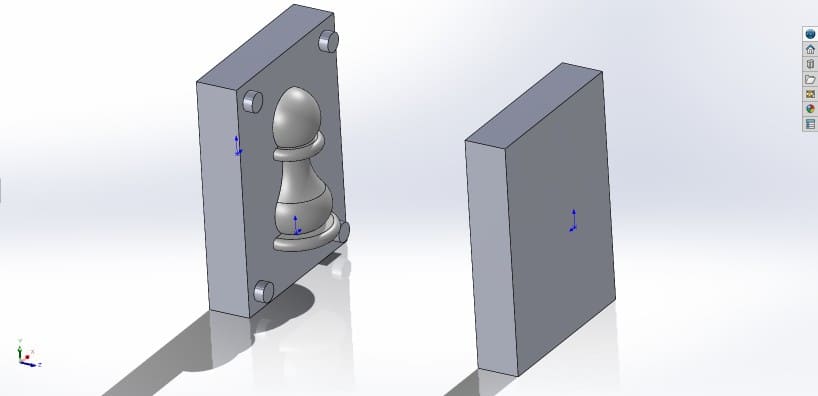
Select pawn/Edit Components/Features/Cavity
.jpg)
This is how it should be
Now all that remains is to send it for 3D printing to start the casting process.
Casting
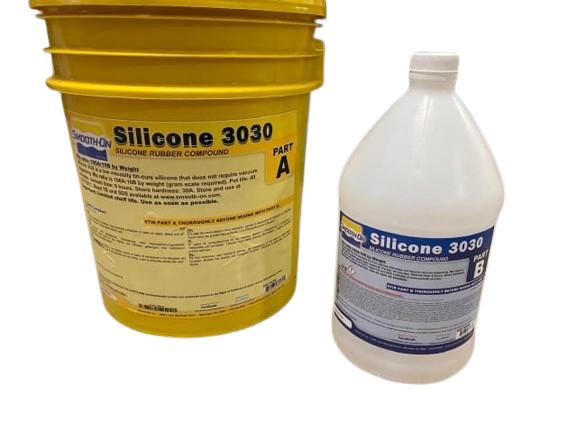
After completing the entire cutting process, it's time to pour the silicone to create the proper mold. For this, I will use Smooth-On Silicone 3030, parts A and B, in a 10:1 ratio, respectively. We'll need a scale for this. Here you can see the datasheet.
First, after having our molds ready, we need to determine the amount of silicone we'll use. To do this, we need to perform a sand test. This involves placing sand in the exact spot where the silicone will be poured. The amount of sand used is then weighed on the scale, and this same amount will be used for the silicone.
 (1).jpg)
This is the amount of sand that I will use
After the sand test, it's time to measure out the amount of silicone I will use, considering the proportion I mentioned earlier. Silicone dries very quickly, so this process must be done swiftly. After measuring, the mixture needs to be thoroughly mixed.
 (1).jpg)
 (1).jpg)
 (1).jpg)
Once everything is mixed, it's time to pour it into the molds. Again, this needs to be done quickly because the silicone dries fast. This also ensures there is enough time for the silicone to spread throughout the mold properly to achieve the correct shape.
.jpg)
.jpg)
After applying the silicone, it is necessary to wait at least 24 hours before removing the dried silicone from the mold. This waiting time ensures that the mold is completely dry and doesn't deform.
This is the result after 24h:
.jpg)
.jpg)
.jpg)
Problems
| The 3D print in resin did not turn out well. | I decided to change the mold and create a new one using 3D printing with PLA instead. |
| In both the 3D printing and the router cutting, there are marks left on the mold. | Expose the wax block to heat and sand the 3D print. |