17. project development
This week, we needed to define the remaining tasks and determine how to complete them before the final presentation.
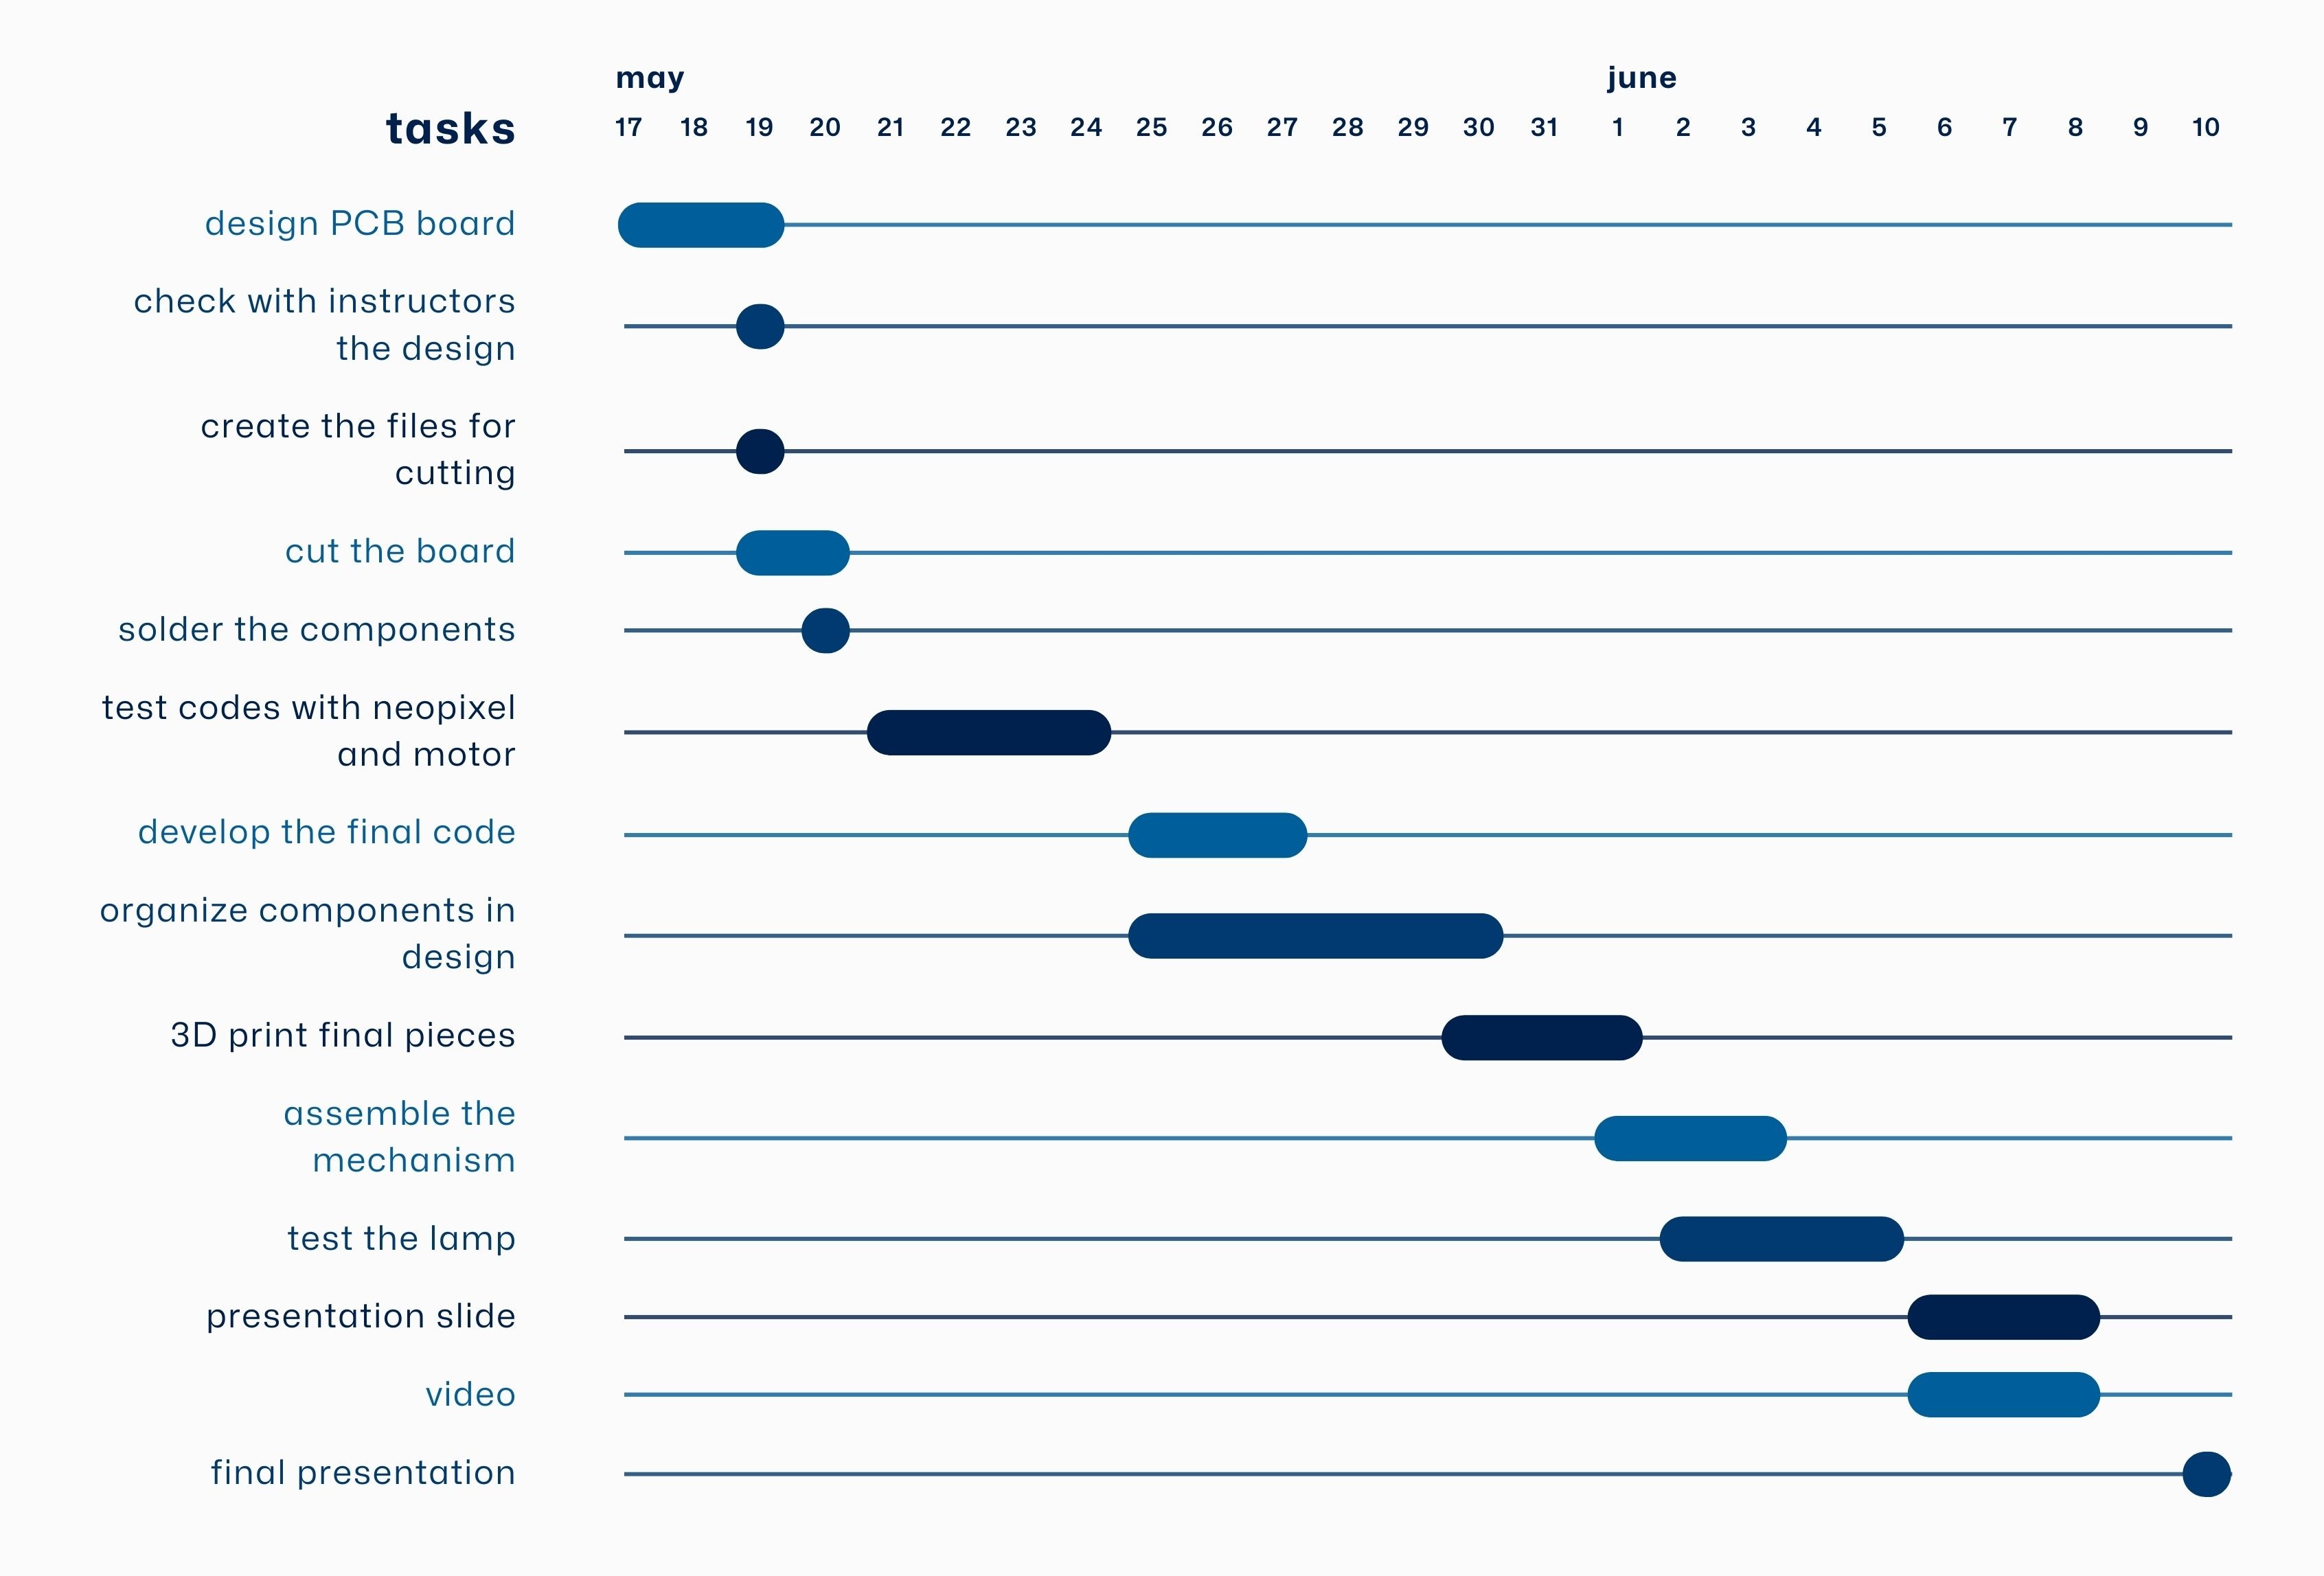
Project stauts
What tasks have been completed?
- Experimented with different production methods for the origami
- Finalized the origami structure
- Designed the mechanism
- Created a prototype of the mechanism
- Laser-cut the final mechanism parts
- Designed and 3D modeled the lamp
- 3D printed the necessary parts
What has worked? What hasn’t?
Overall, the project has been successful, though there were some challenges along the way. Here are some of the struggles and accomplishments:
- Effective Mechanism: The designed mechanism proved to be effective.
- Origami Integration Challenge: Joining the origami with the mechanism was difficult due to the thin origami folds. This was resolved by redesigning the mechanism piece.
- Laser Engraving Paper: Laser engraving paper of different thicknesses with low parameters was complicated, but eventually successful.
- 3D Printing with TPU: 3D printing the origami pattern with TPU did not have the desired results.
- Successful 3D Printed Pieces: The 3D printed pieces met the required functions perfectly. The buttons fit well with the components, the motor and mechanism piece worked as intended, and the tube and internal structure fit together seamlessly.
What needs to be done
What tasks remain?
After all the prototyping work, it's time to start making the final lamp, incorporating the observations and necessary modifications from the prototype. To complete this project, I will need to follow these steps:
- Design the PCB board, considering the internal accommodation of each component.
- Check with my instructors to ensure everything looks correct.
- Create the files for cutting the board.
- Cut the board using the milling machine.
- Solder the components.
- Begin making some test codes to see how the neopixel strip and the DC motor work.
- Develop the final code.
- Figure out how to keep each component in place.
- 3D print the base, buttons, and internal structure.
- Assemble the mechanism.
- Test the lamp.
What questions need to be resolved?
- What speed does the motor need to contract the origami in 4 seconds and then release it in 8 seconds?
- Will the internal design for organizing the components work efficiently?
- Will it be complicated to synchronize the LED breathing effect with the motor movement while writing the code?
- Is using a 5V regulator in my PCB sufficient to power both the motor and the Xiao with the same external battery source?
What will happen when?
What have you learned?
I am very proud of the project so far. It has been a valuable learning experience with some frustrating moments, but I am very excited to see how it turns out. I just need to organize my time, stick to the plan, and execute the final tasks. This project has highlighted the importance of time management and working efficiently, prioritizing tasks, and making steady progress. I’ve also remembered how crucial it is to create as many prototypes as possible to continually refine and solve design issues.