15. interface and application programming
This week's task involved designing an interface and connecting it to our microcontroller, selecting either an input or an output to interact with the interface. I never knew how easy this could be once you understood the basics. We received a brief lesson from Rafa, one of our instructors, where we learned to use QT Designer, a tool for designing user interfaces. We also learned how to code them and, ultimately, how to connect them to a microcontroller. You can find our group assignment linked here.
Steps taken to design an interface to controll text on an OLED display:
1.
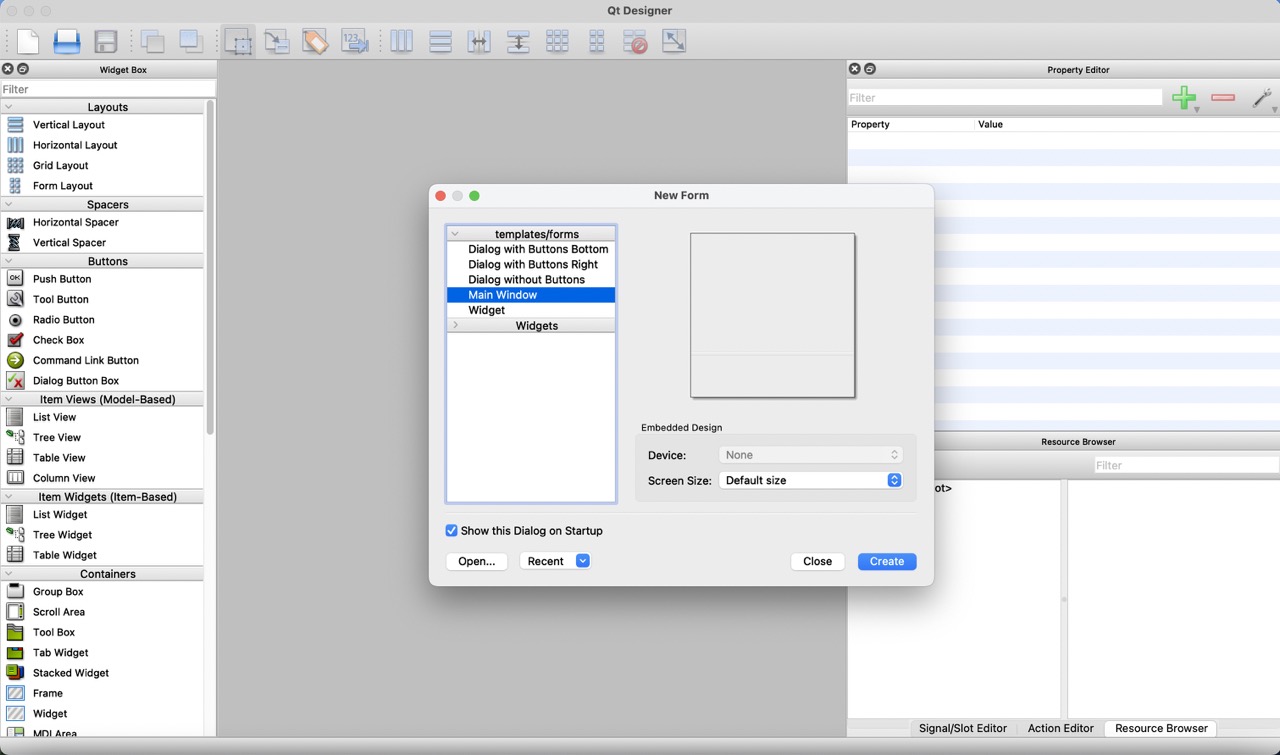
To begin, I opened Qt Designer and created a new file, then I opened the "Main window" template.
2.
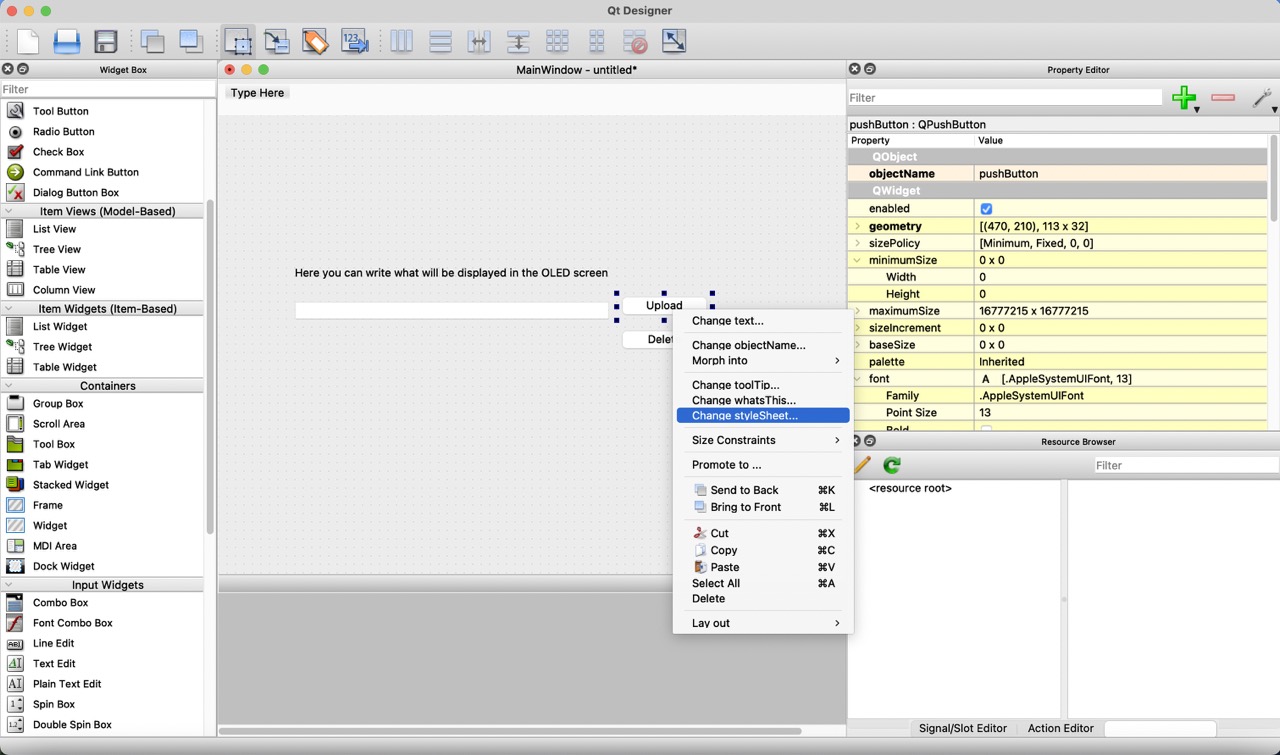
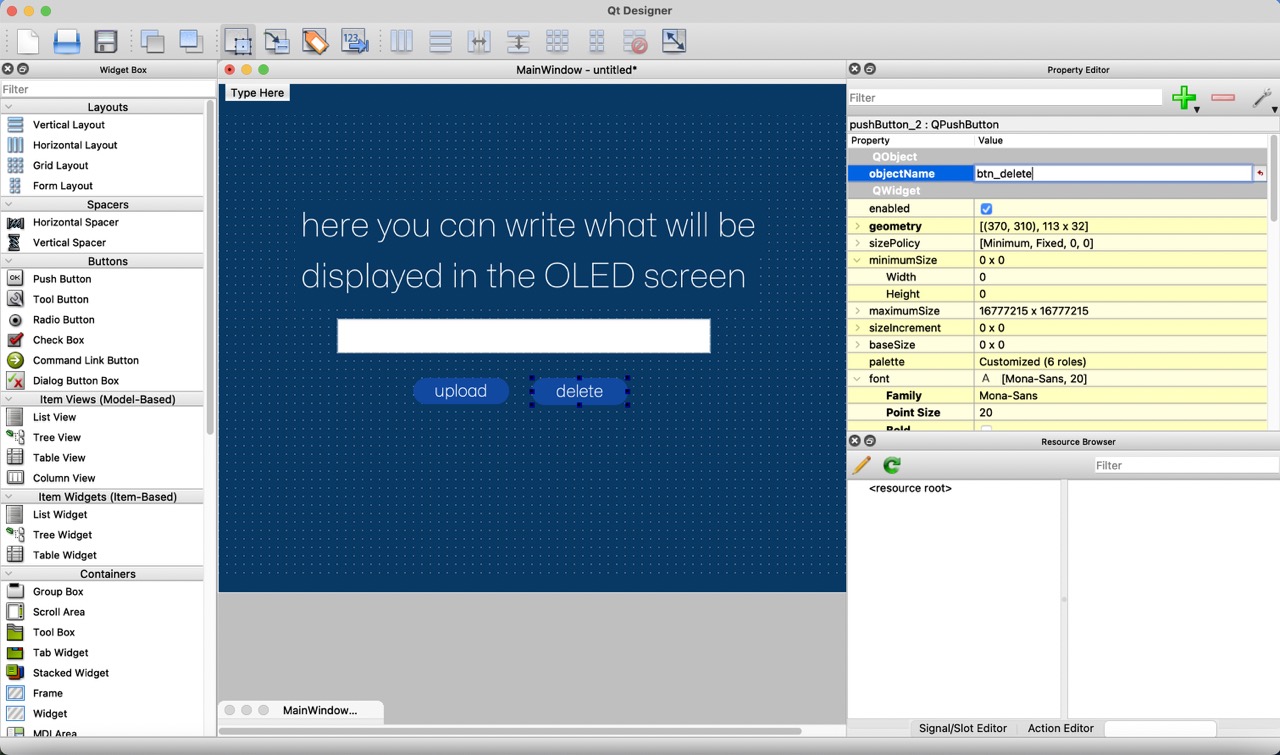
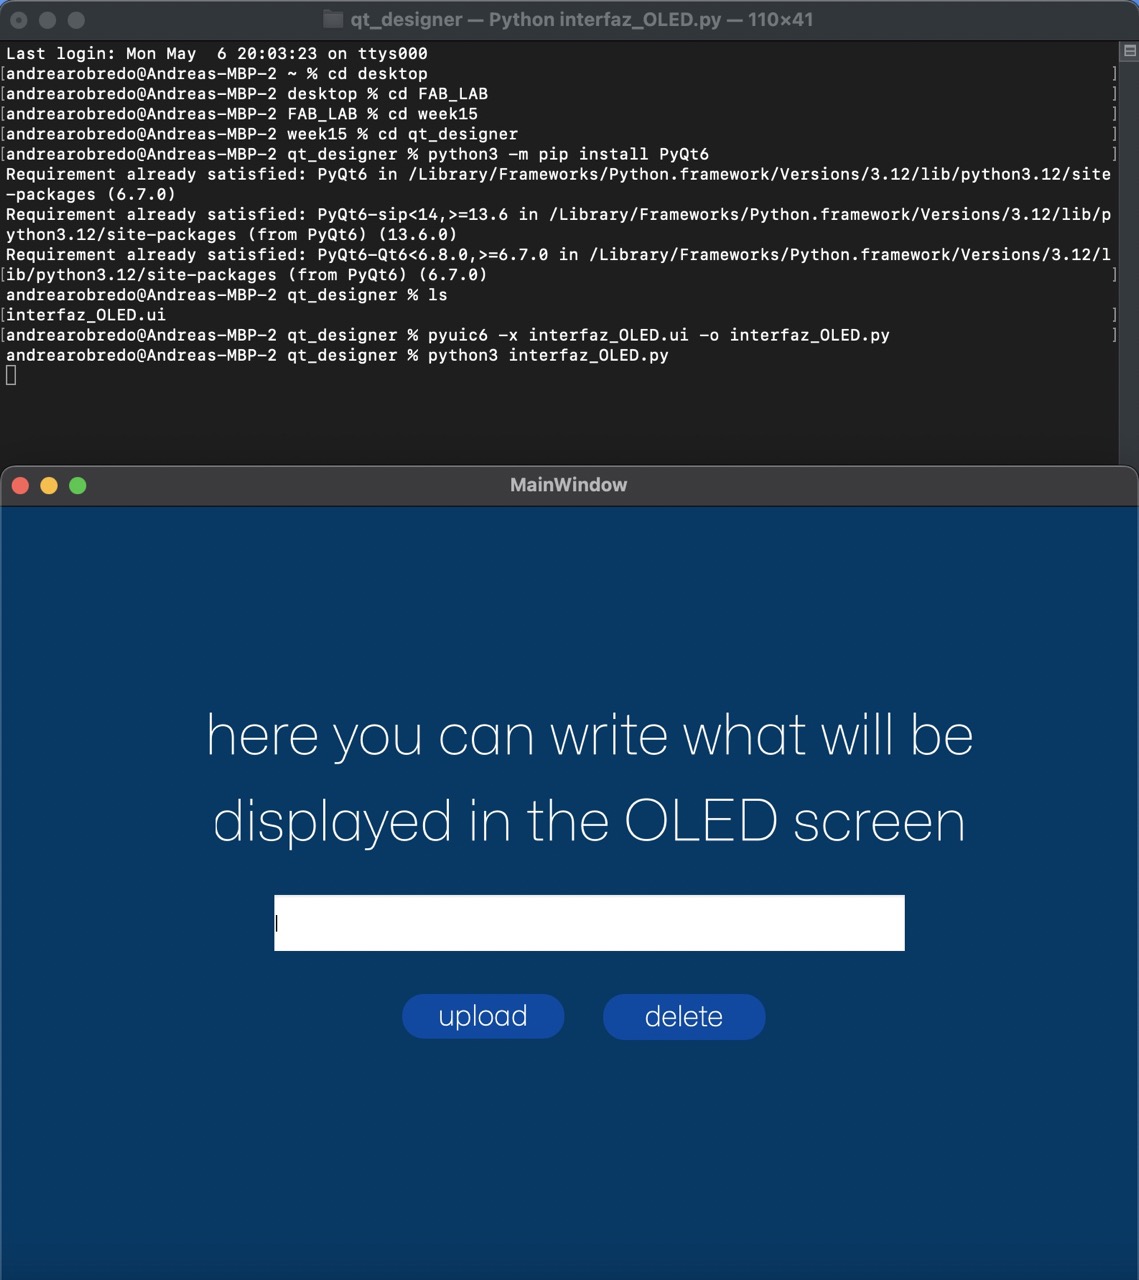
Added two push buttons, a text box, and a label to the interface.


3.
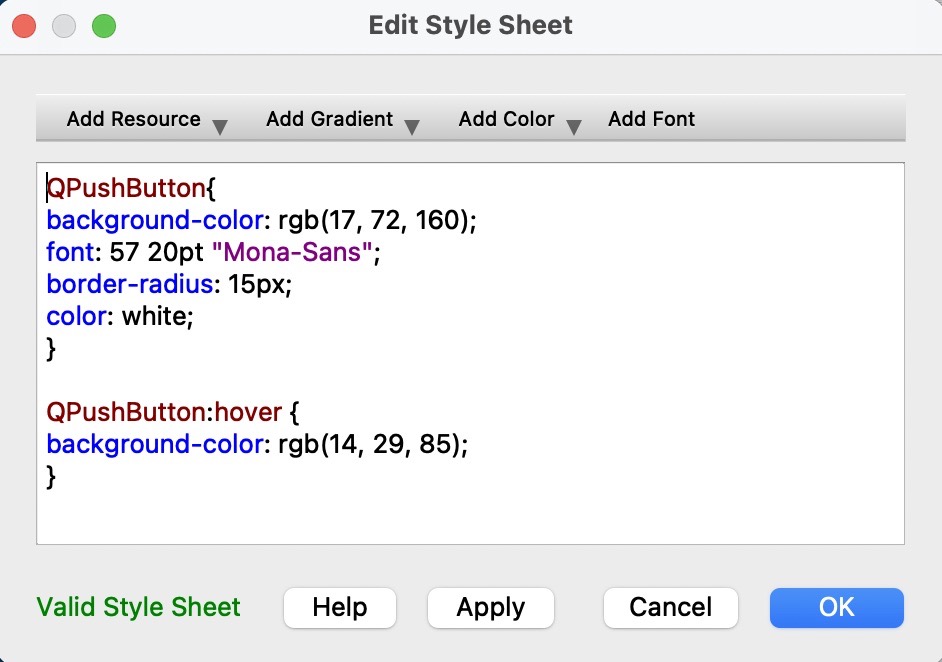
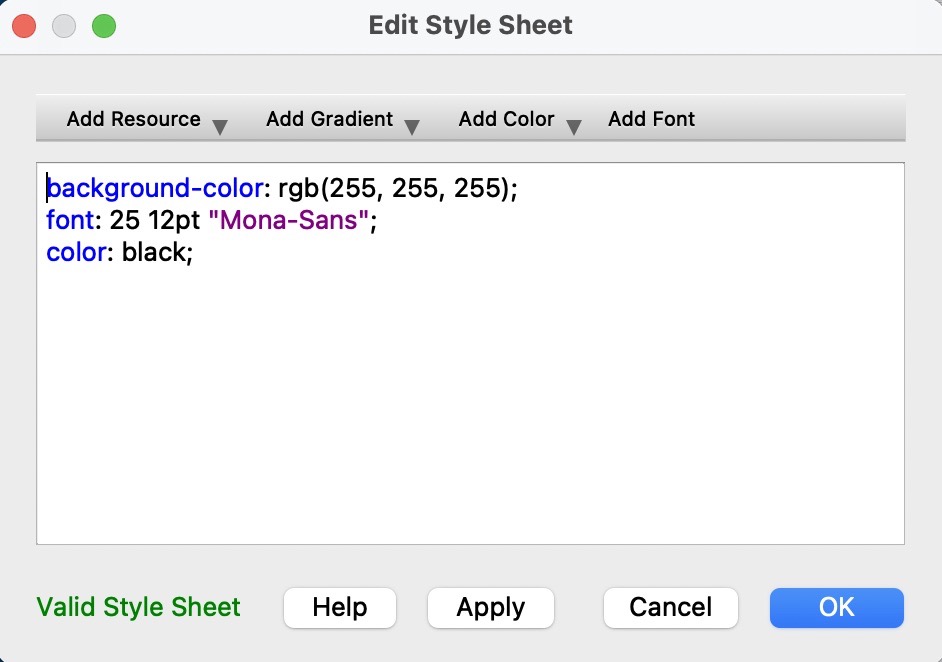
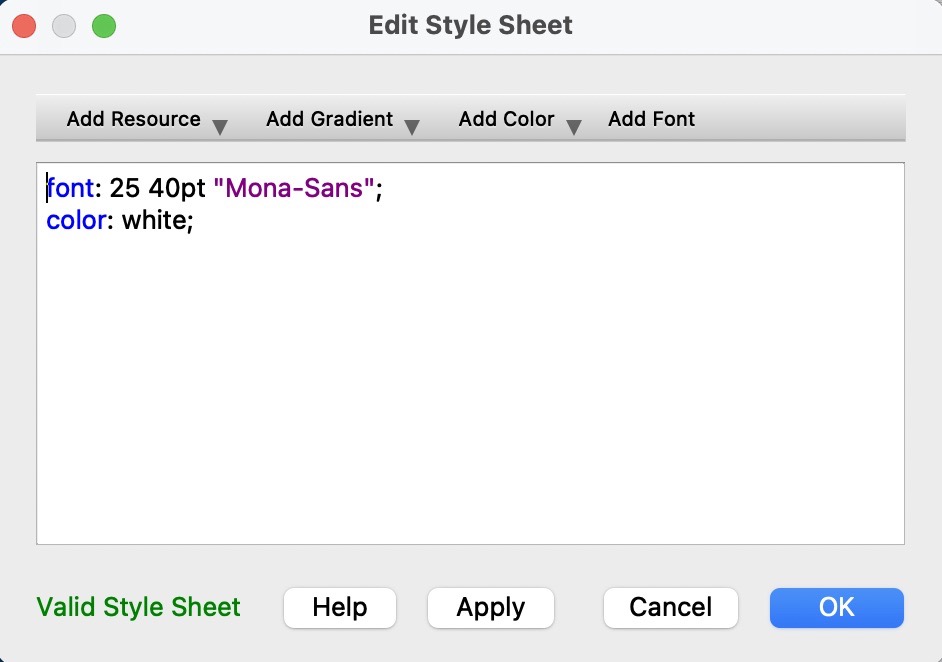
Once I had all of the elements, I decided to customize them by changing the color, text size and font. To do this, I right clicked on the element and selected “Change styleSheet”.

4.
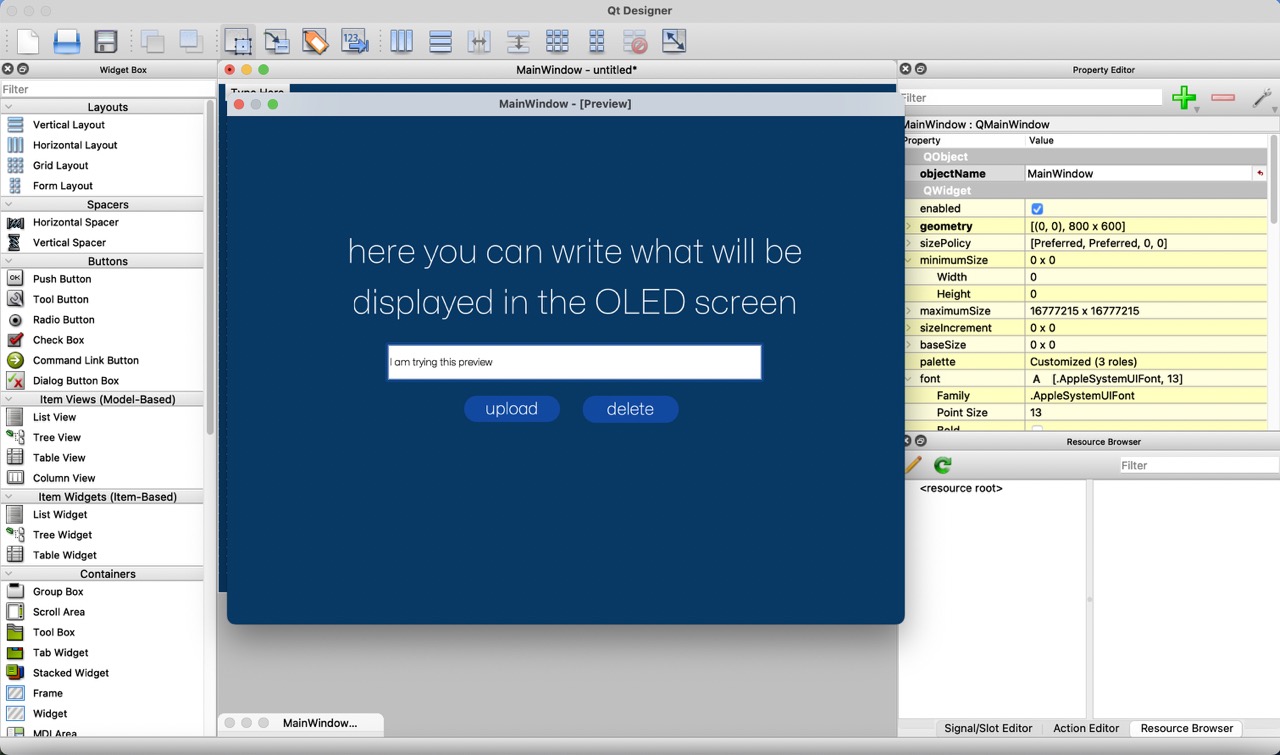
Then, I renamed each element for better identification while programming the code and previewed the interface by pressing "Command + R".


5.
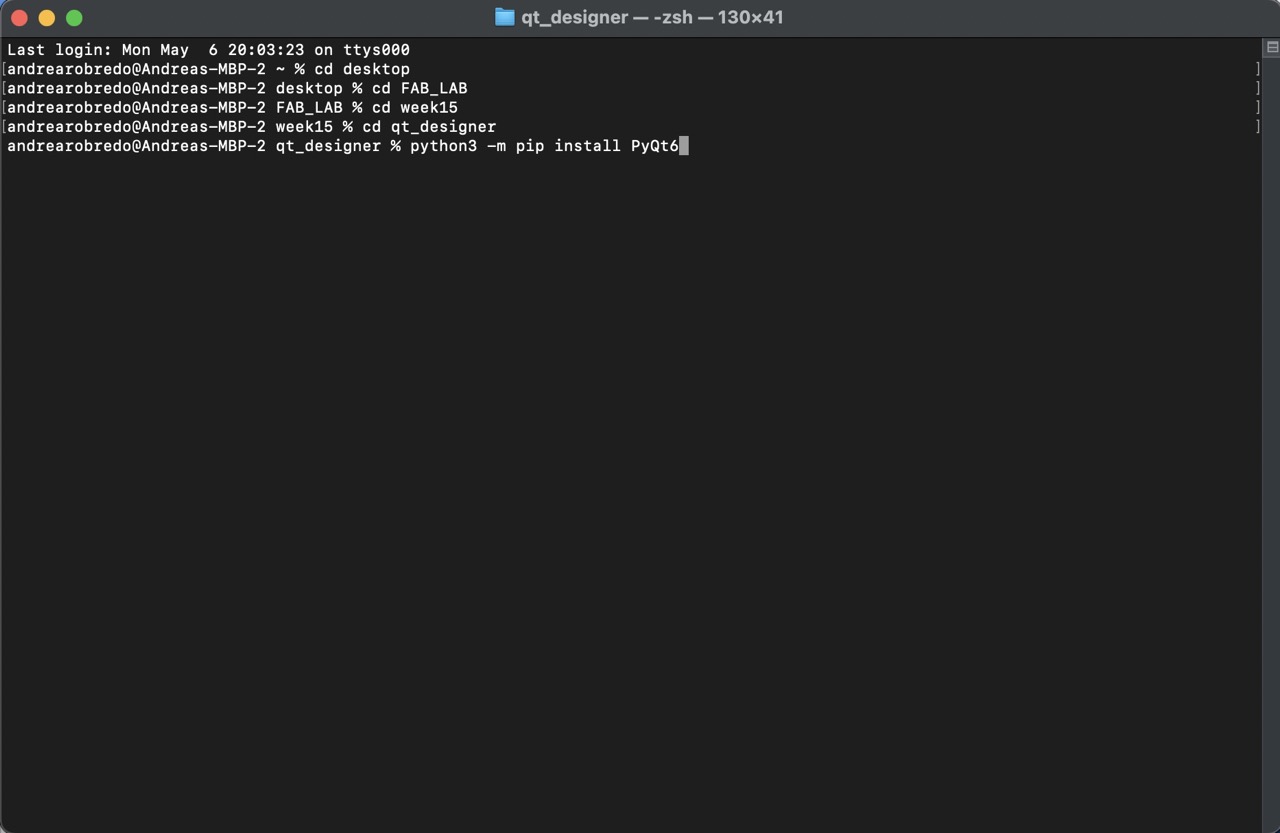
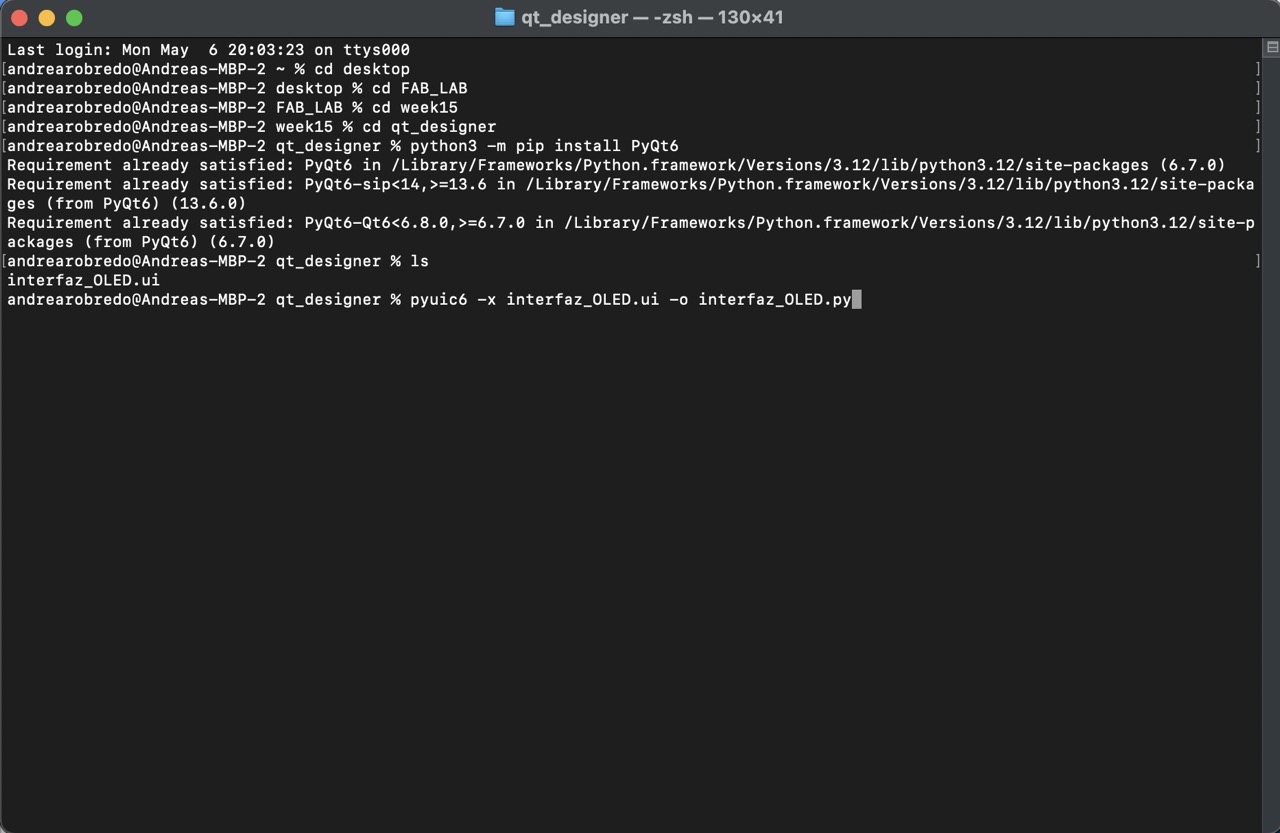
Once the interface was finished, I opened Terminal and ensured Python was installed, then navigated to the folder containing the Qt interface file and installed PyQt6 using the command "python3 -m pip install PyQt6".
6.
Converted the Qt interface file to a Python file using the command "pyuic6 -x interfaz_OLED.ui (name of my file) -o interfaz_OLED.py (name of the new python file)".
NOTE:
If you make changes to your interface file in Qt Designer you must execute this command to update the code.
7.
Checked if the conversion was successful by running "python3 interfaz_OLED.py".

8.
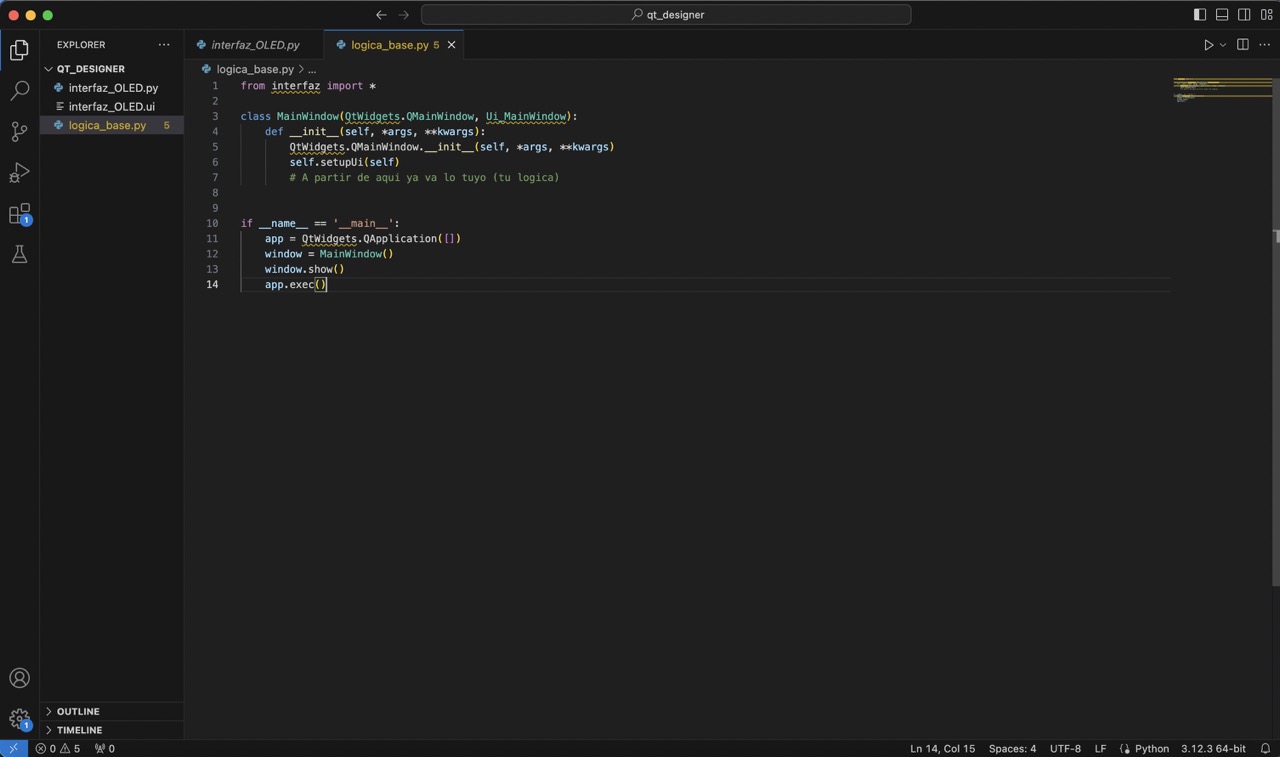
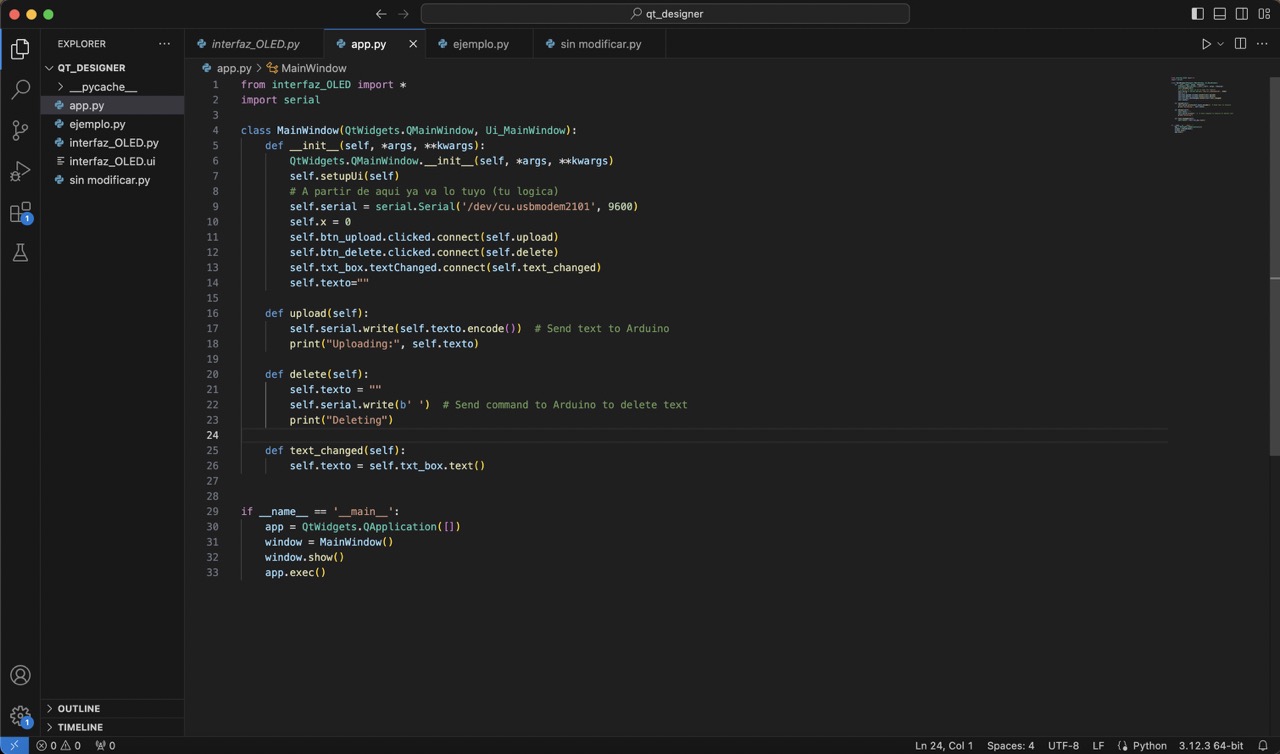
Now it was time to begin coding. I opened the folder in Visual Studio Code and created a new .py file. Here, I pasted a base code provided by our instructor, Rafa, and started editing. This code served as a safeguard to prevent overwriting the initial code and ensured that modifications made to the interface design in Qt Designer wouldn't result in code loss. It accomplished this by importing the code using the statement "from interfaz_OLED import *".

9.
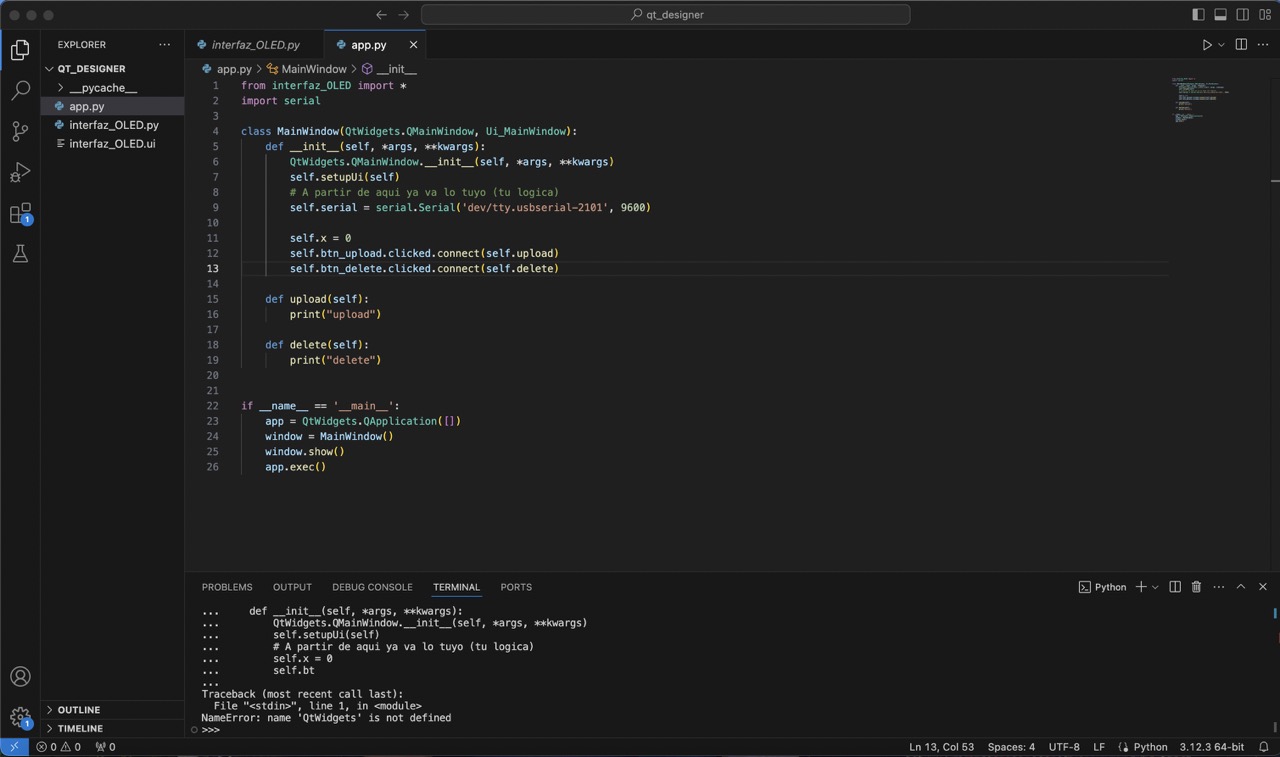
I began by declaring "self.serial = serial.Serial('dev/tty.usbserial-2101', 9600)". This port was identified through Arduino.

10.
Next, I initialized variables such as "self.x=0" and connected button signals using statements like "self.btn_upload.clicked.connect(self.upload)" and "self.btn_delete.clicked.connect(self.delete)". I then defined functions like "def upload(self): print("uploading")" and "def delete(self): print("deleting")". To ensure functionality, I tested each button by clicking on them in the preview.
11.
Returning to the terminal, I installed the pyserial library with the command "python3 -m pip install pyserial" and imported it into my code using "import serial".


12.
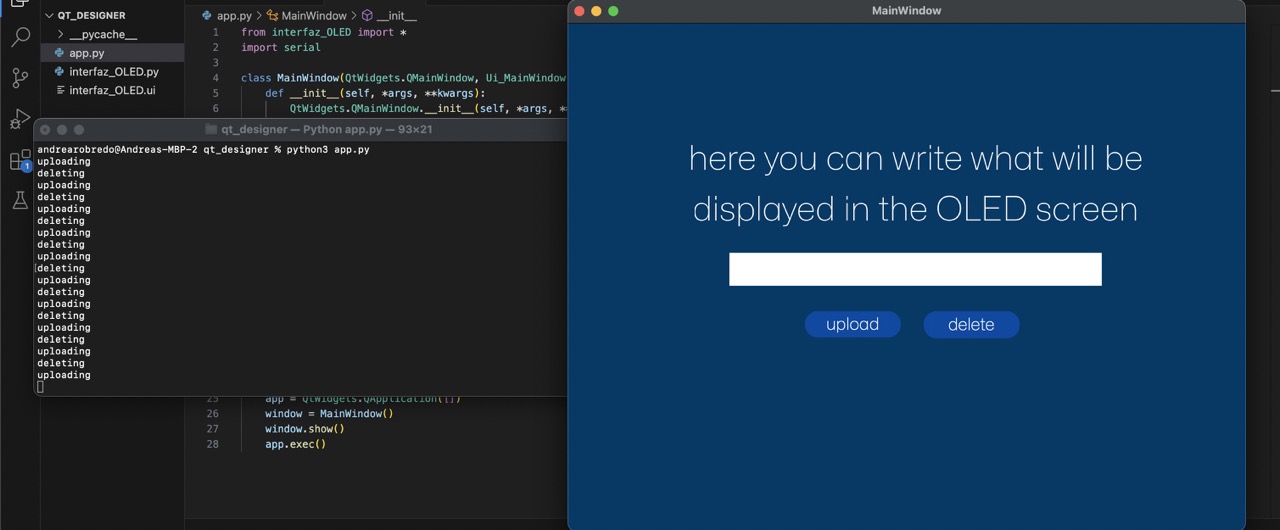
Once I verified that each button performed the correct action, I incorporated functionality for the text box into the code. This finalized the interface code.
13.
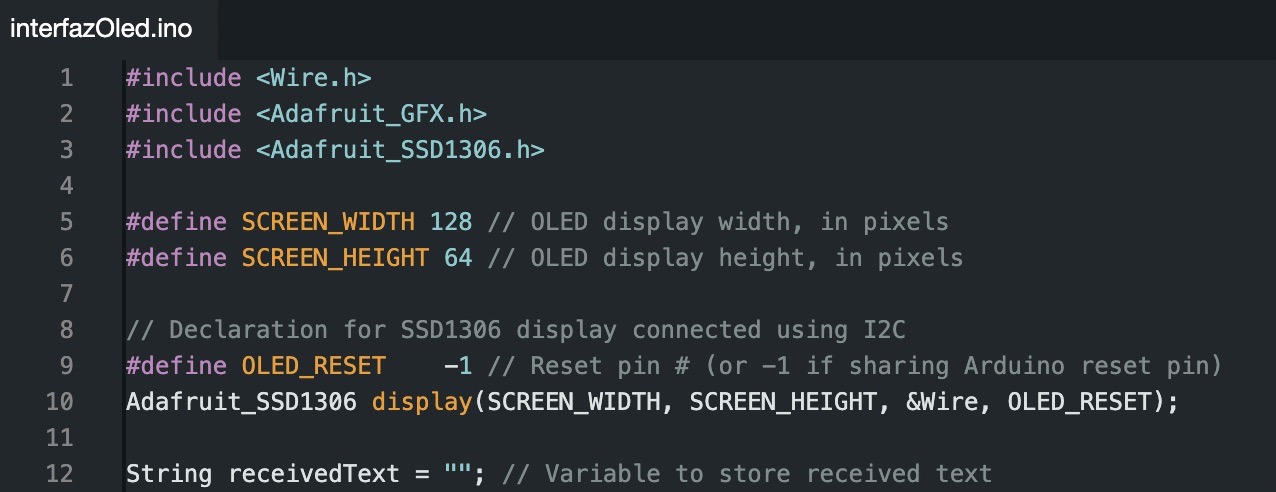
With the interface functioning correctly, I proceeded to program my microcontroller through Arduino to display text on the OLED screen. I included the necessary libraries for accessing the OLED display, defined dimensions, and declared a variable to store received text.
14.
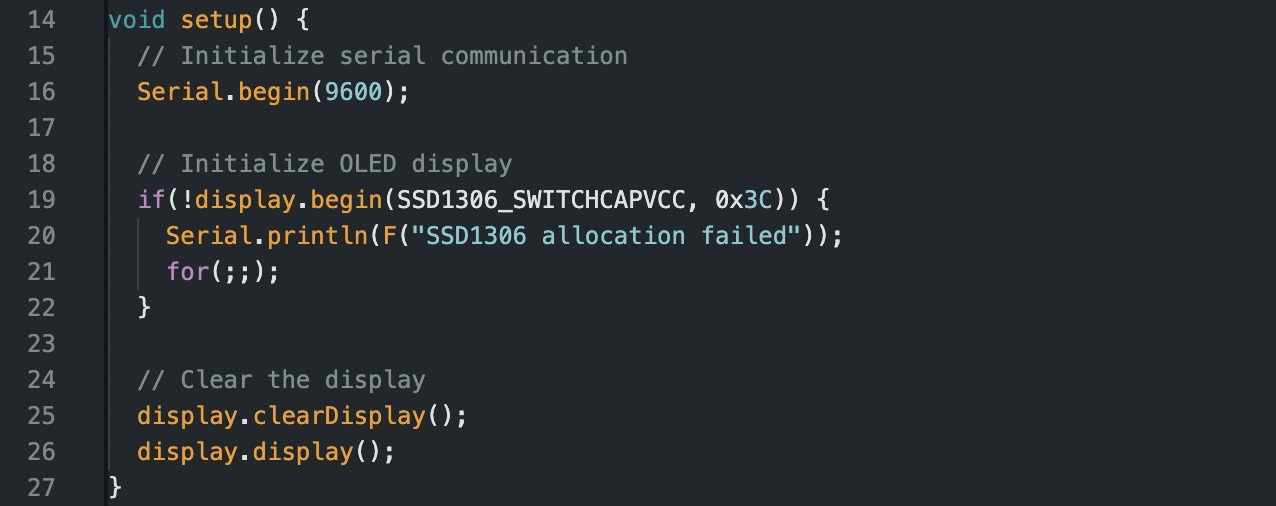
In the "Void setup" section, I initialized serial communication at 9600 baud and established communication with the OLED display.
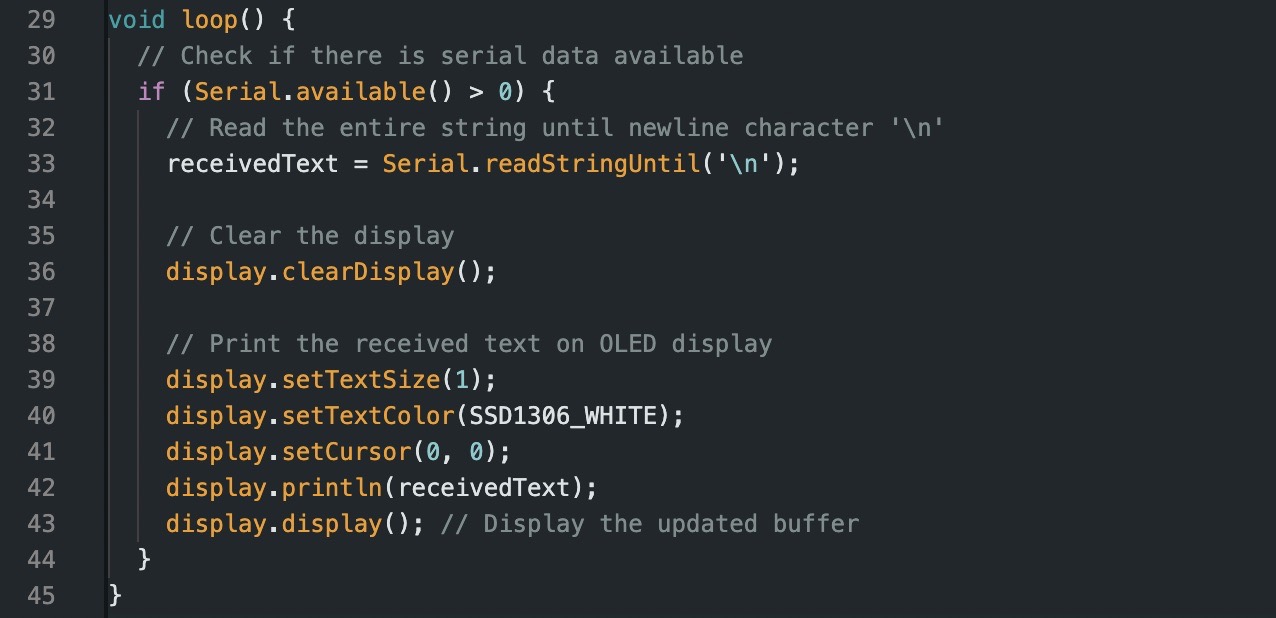
15.
In the "Void loop" section, the code continuously checked for incoming data. If data was present, it would print the received text on the OLED display.
16.
Finally, I uploaded this code to my microcontroller and tested it with the interface to ensure proper functionality.