1. project management
During this first week, I worked on brainstorming ideas and identifying needs from my day to day life in order to explore possible ideas for my final project. I also started documenting how I created my web page and began getting used to the documentation process.
Website - learning GIT and visual studio code
Where to start?
I started from the basics given that I didn't know much about coding and making an HTML website was totally new for me. Before this, I had only used services like Wix where the user interface was pretty self explanatory and coding wasn't necessary. Luckily, our instructor Rafael Perez, gave us some introductory classes in which he broke down the fundamentals of coding and taught us how to set up our own repositories and upload them to GitLab.
To start, I will show you the three platforms I used to create my website and their role:
- Terminal (mac users): it is used for adding and uploading local files to the repository
- GitLab: stores the Git repositories and version control
- Visual Studio Code: editing the code


Basic Commands
There are two ways to start a repository:
- Git init: initializes a new Git repository, here the version controls are stored
- Git clone: it is used to create a copy of an existing Git repository
These are the most important commands used in Terminal:
- Cd “folder name”: open a folder
- Mdkir “name”: create a new folder
- Git status: shows you the status of your repository (which files need to be added, committed etc)
Once you are ready to add and upload your files to GitLab you have to execute the following commands:
- Git add .: adds all of the modified or new files
- Git commit: records the changes made to the files and saves them in the Git repository
- Git push: uploads the changes from the local repository to the GitLab
The following are useful commands for editing your website in visual studio code:
Inside Visual Studio Code, there are different editing areas. It is divided into your HTML pages and a CSS code. The HTML pages are used for structuring the content and layout while the CSS page is used for styling and formatting the appearance of the content.
These commands are what you will use in your HTML pages to include your content:
- Headers: H1 - H6
- Text: <p> text </p>
- Comments: <!-- comments --!>
- Bullet points: <ul><li> text </li> </ul>
- Numbered list: <ol><li> text </li> </ol>
- Image: <img src="nameofimage" alt="">
- Videos: <video src="nameofvideo.mp4" controls></video>
There is a framework called bootstrap that simplifies the process of designing and styling web sites, it provides a collection of pre-designed CSS components that can be used in your personal projects. To include it, it is very simple:
- Access the website getbootstrap and copy the follwing two links to your code
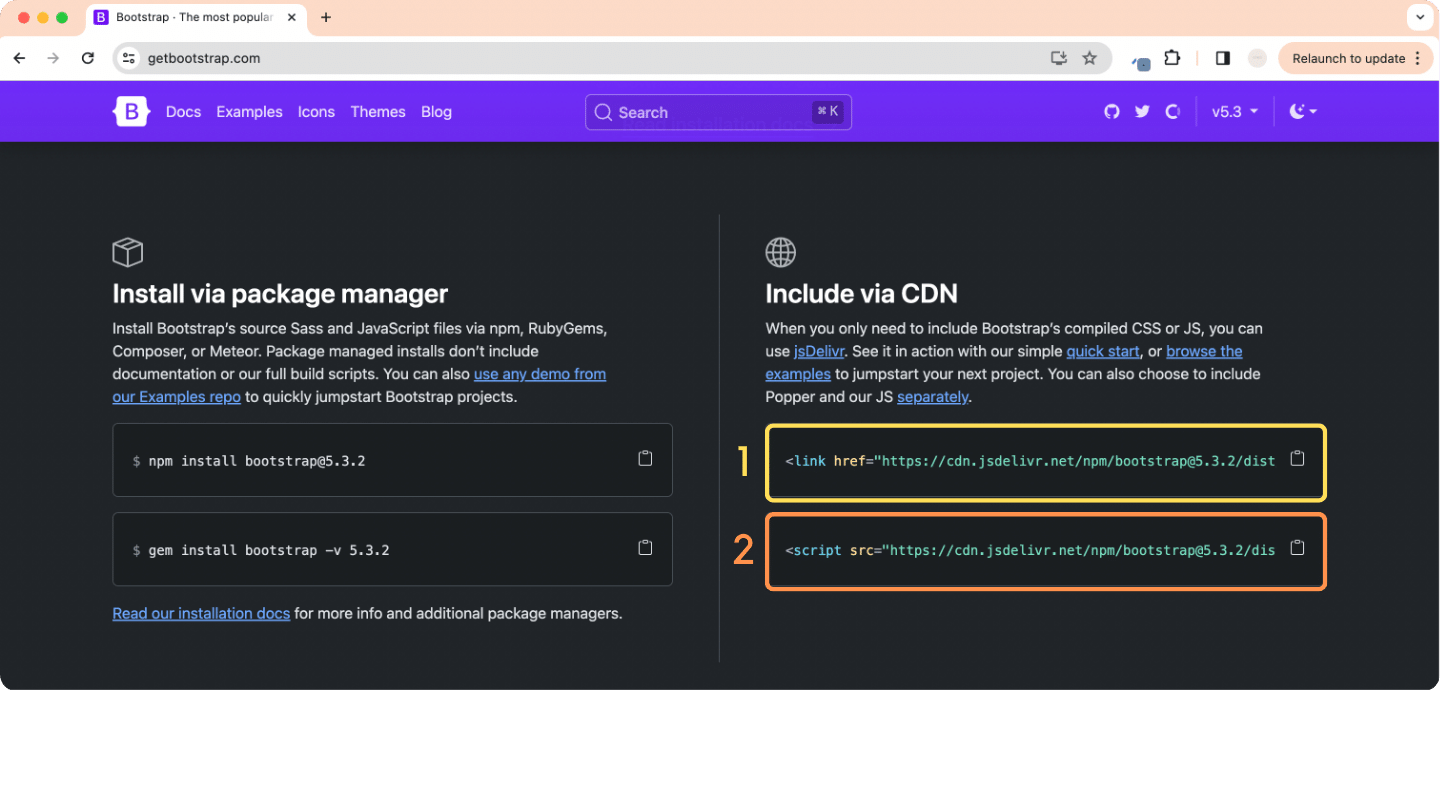
- For this, it is important to copy the first link inside the <head> </head>
- And the second link inside the <body></body>, right before it closes
In the following code example you can see where each of the links are included
How I created my website
To start, our instructor Rafael Perez provided us with a base template which is the one I am currently using. It was very useful to start with this template to explore how the code works and how to modify certain elements to personalize it according to my preferences.
These were the steps to create my web site:
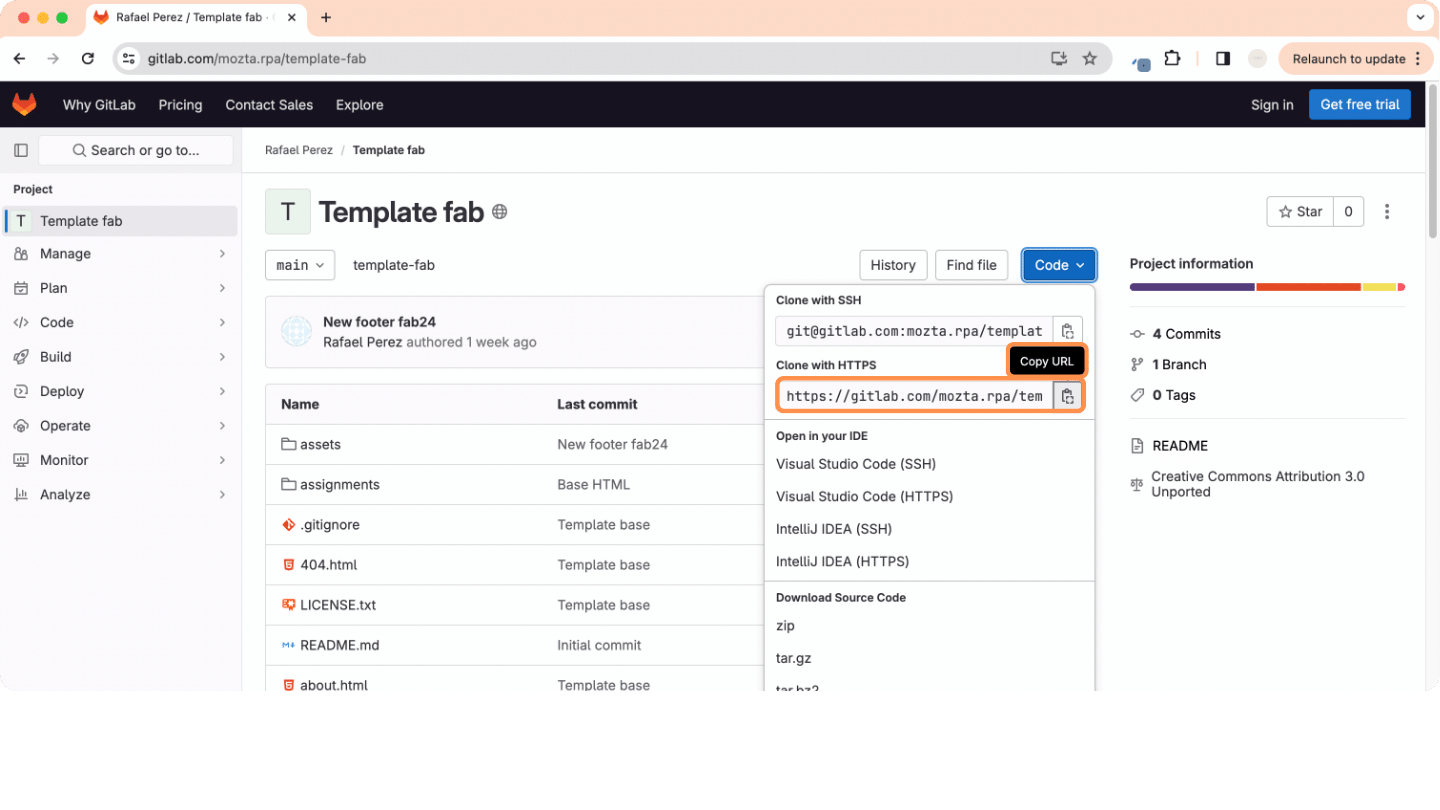
- Copy the link of “clone with https” from the git lab account with the template created by Rafael
- Open "Terminal" on my computer
- Open the documents folder with the "cd documents" command (this is where the repository will be created)
- Git Clone https://… (paste the link given with “clone with https”)
- Open the folder with finder and delete the information inside the “public” folder
- Paste the documents of the given template into the “public” folder
- Git add .
- Git commit -m “base template”
- Git push (you will probably be asked for your username and password)
Design
Afterwards, I got into adapting the current design template to my specific preferences which was a bit complicated and challenging given that I am still pretty new to html coding.
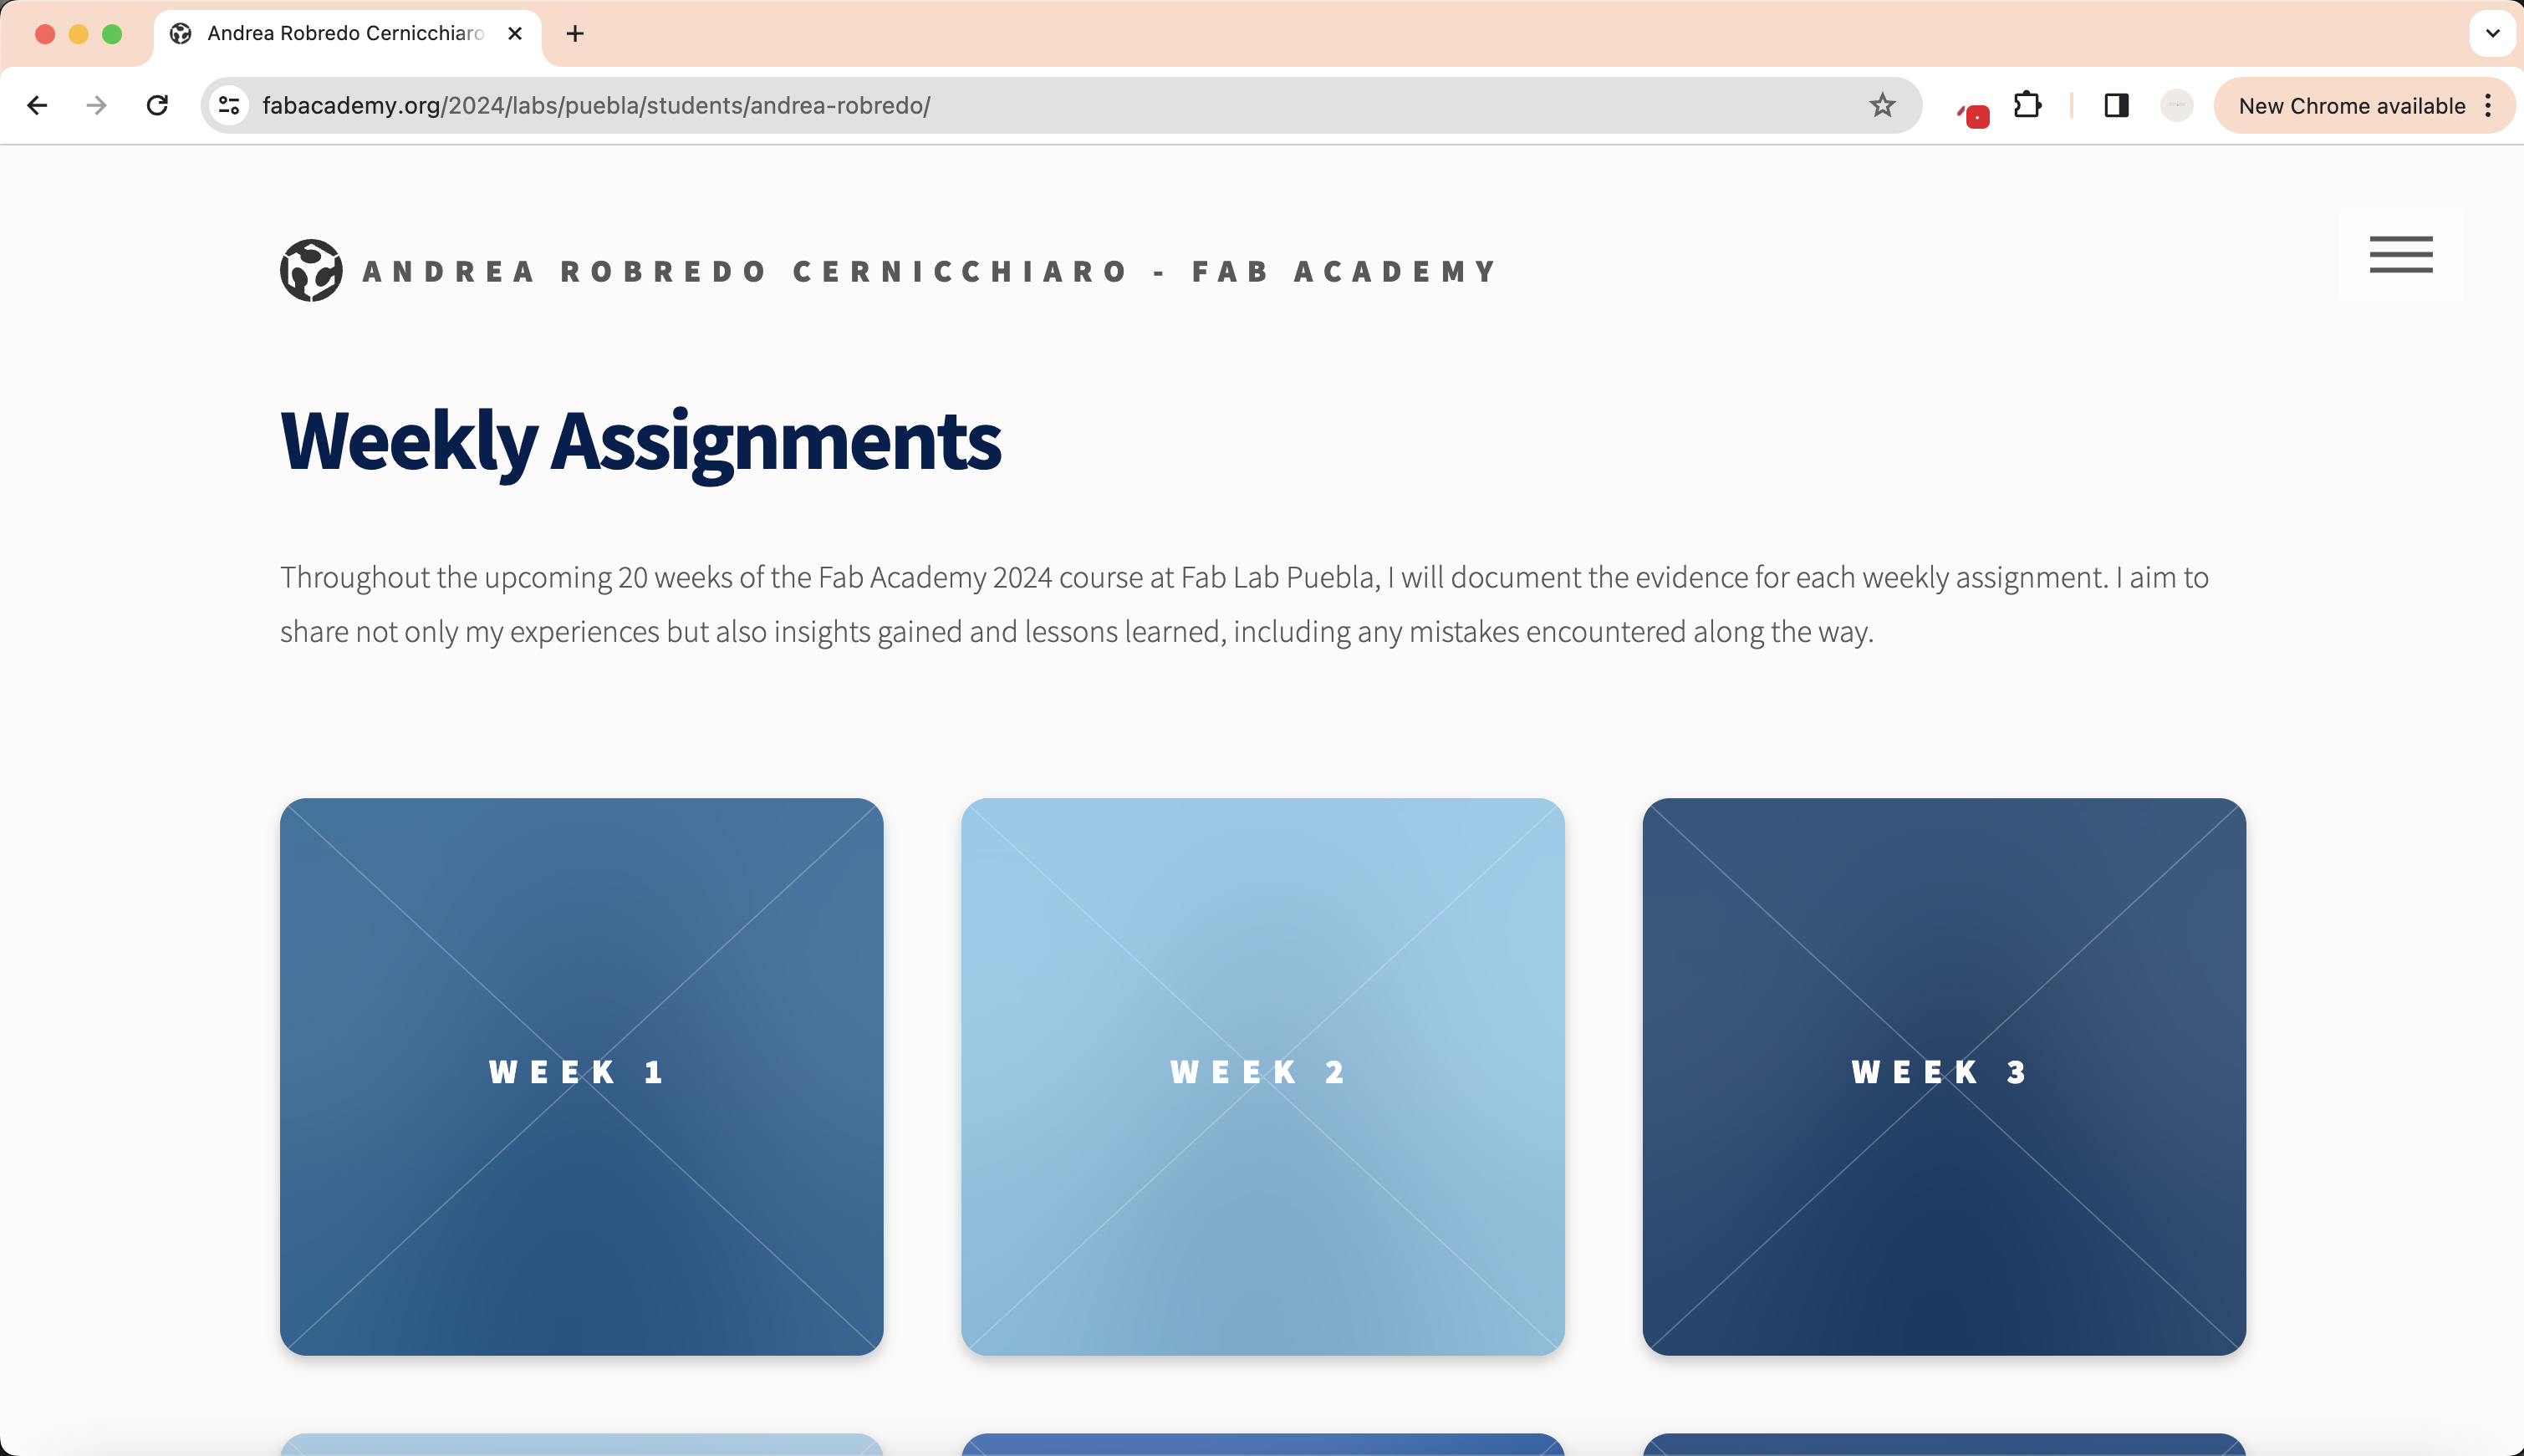
In the follwing images you can see how the home page of the website looked before and after the design was modified.
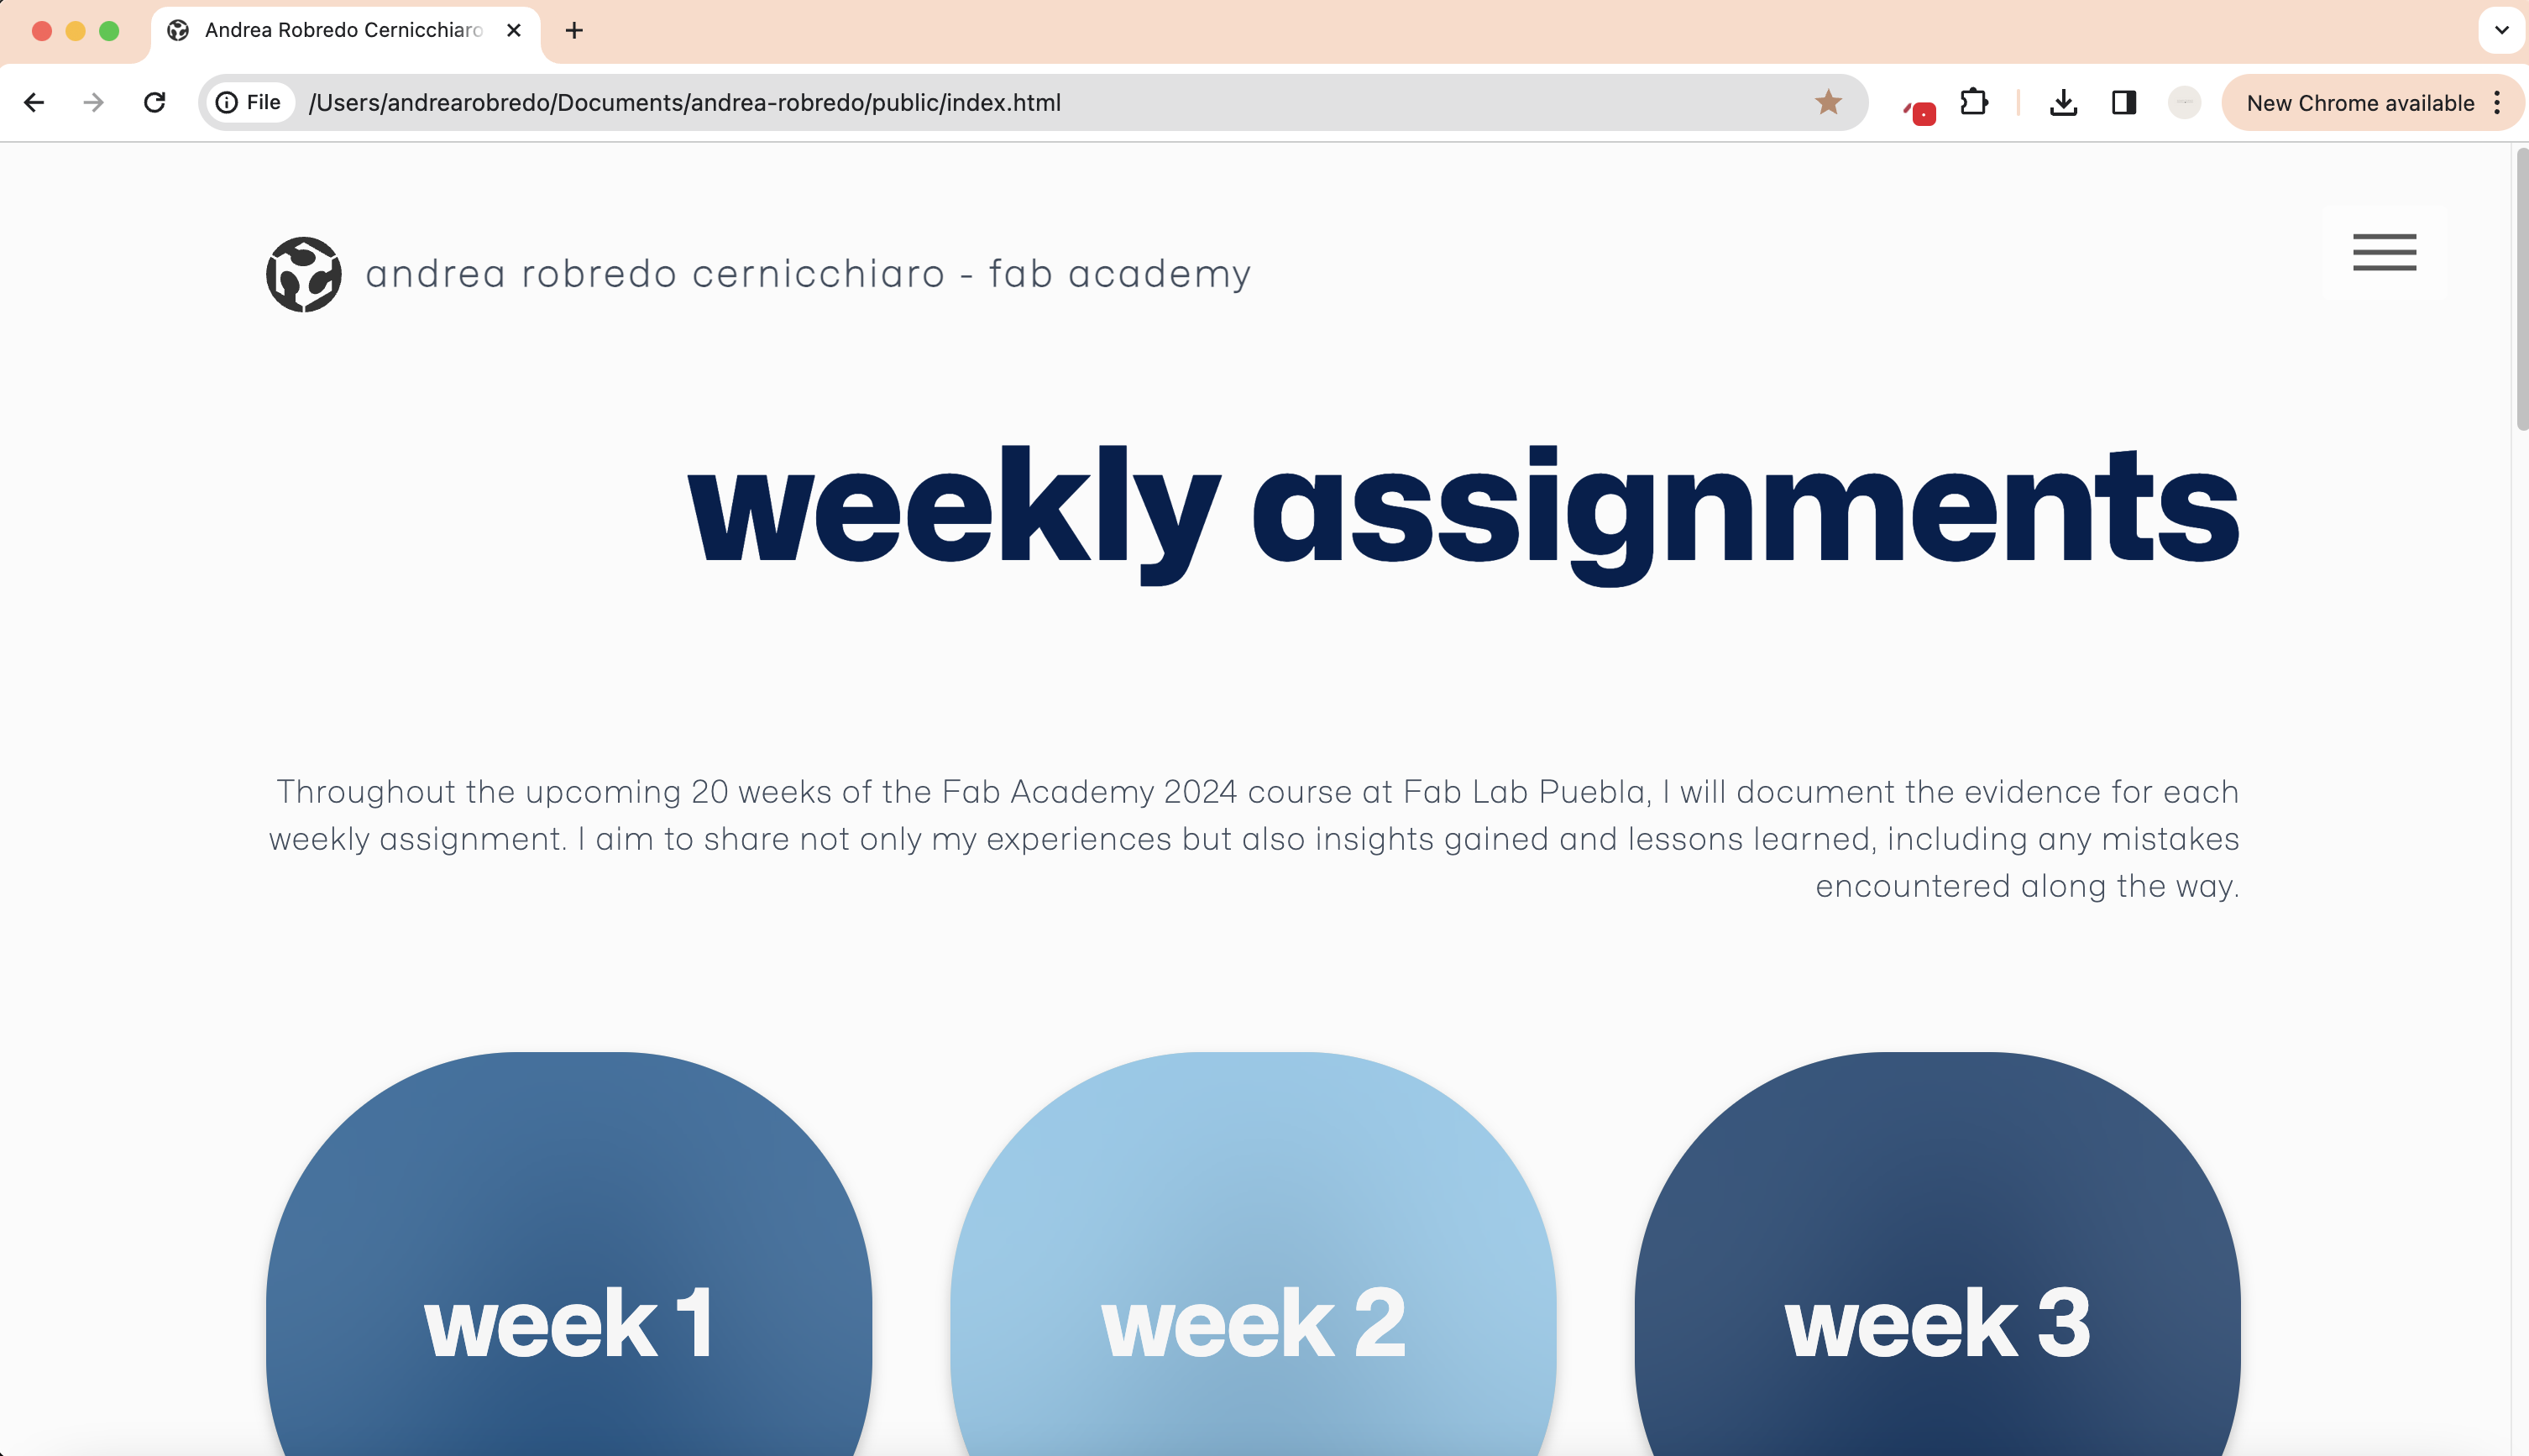
Changing the color
To do this, I began by changing some of the basic elements such as the color of specific headers in the main.css file. For my website's design, I opted for a blue monochrome color palette. To achieve this, I identified the elements I wanted to modify in the main.css and applied the corresponding color codes.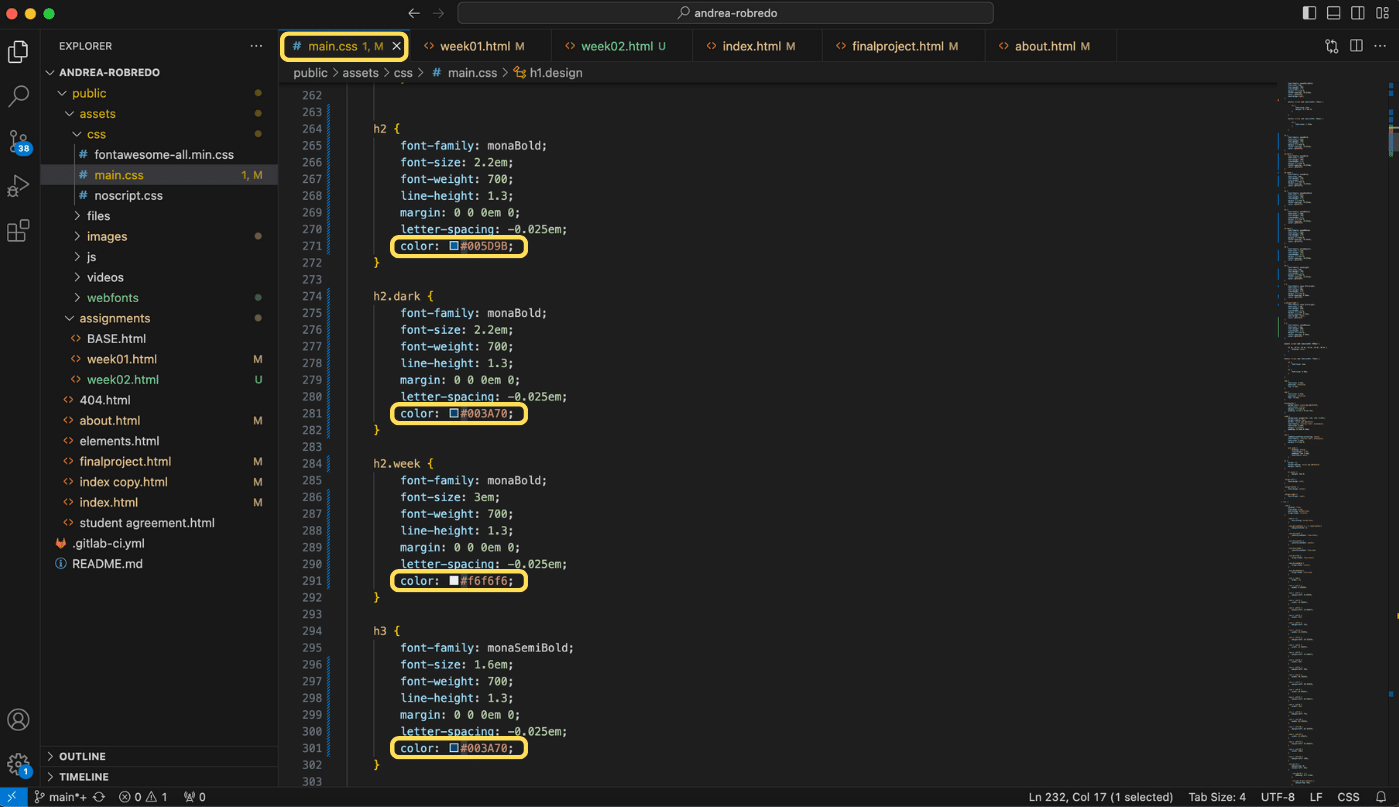
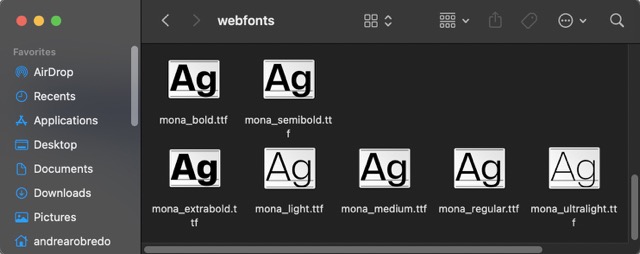
Changing the font and size
In addition to color changes, I wanted to customize the font and header sizes. To do this I watched the following video and began making the necessary changes and additions to the main.ccs code.- First I downloaded the font mona and added it to the webfonts folder inside “assets”
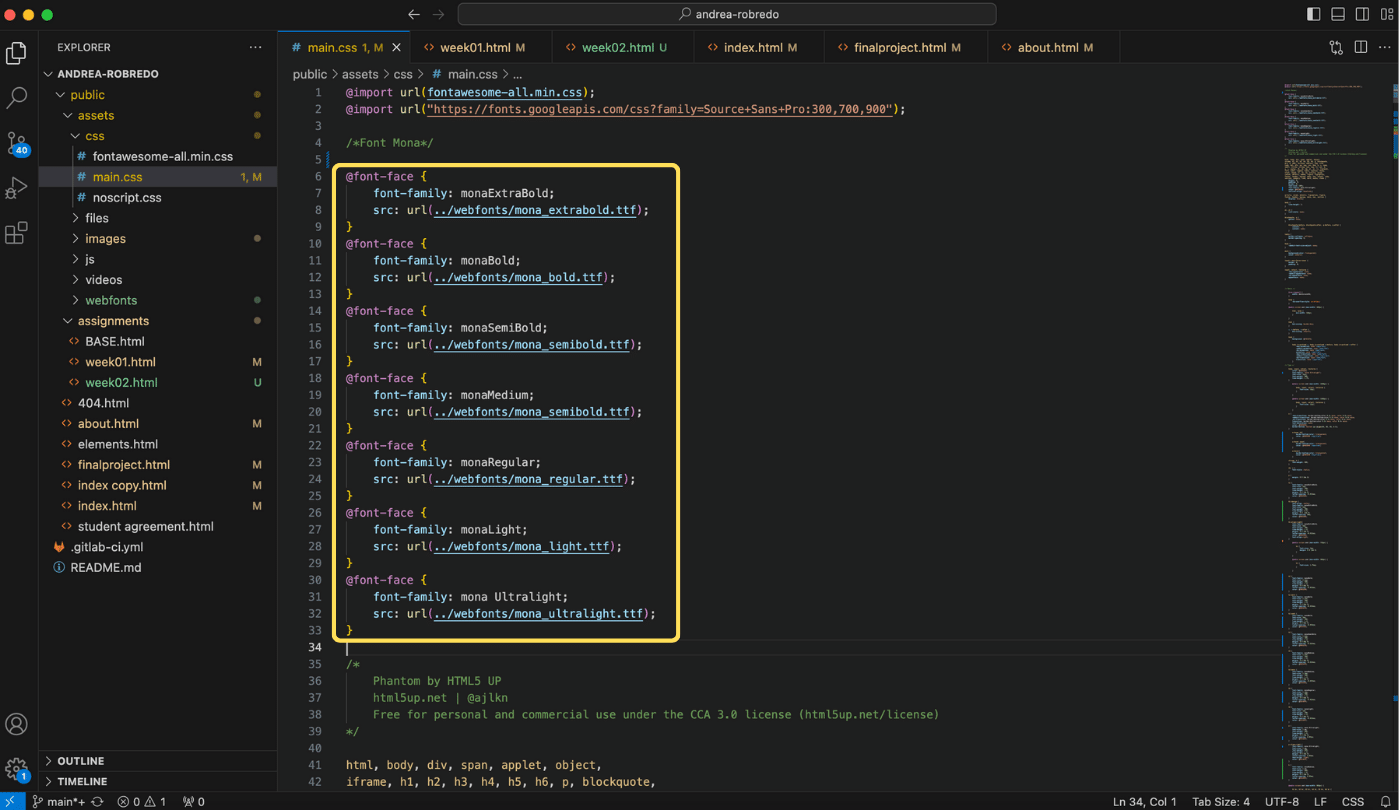
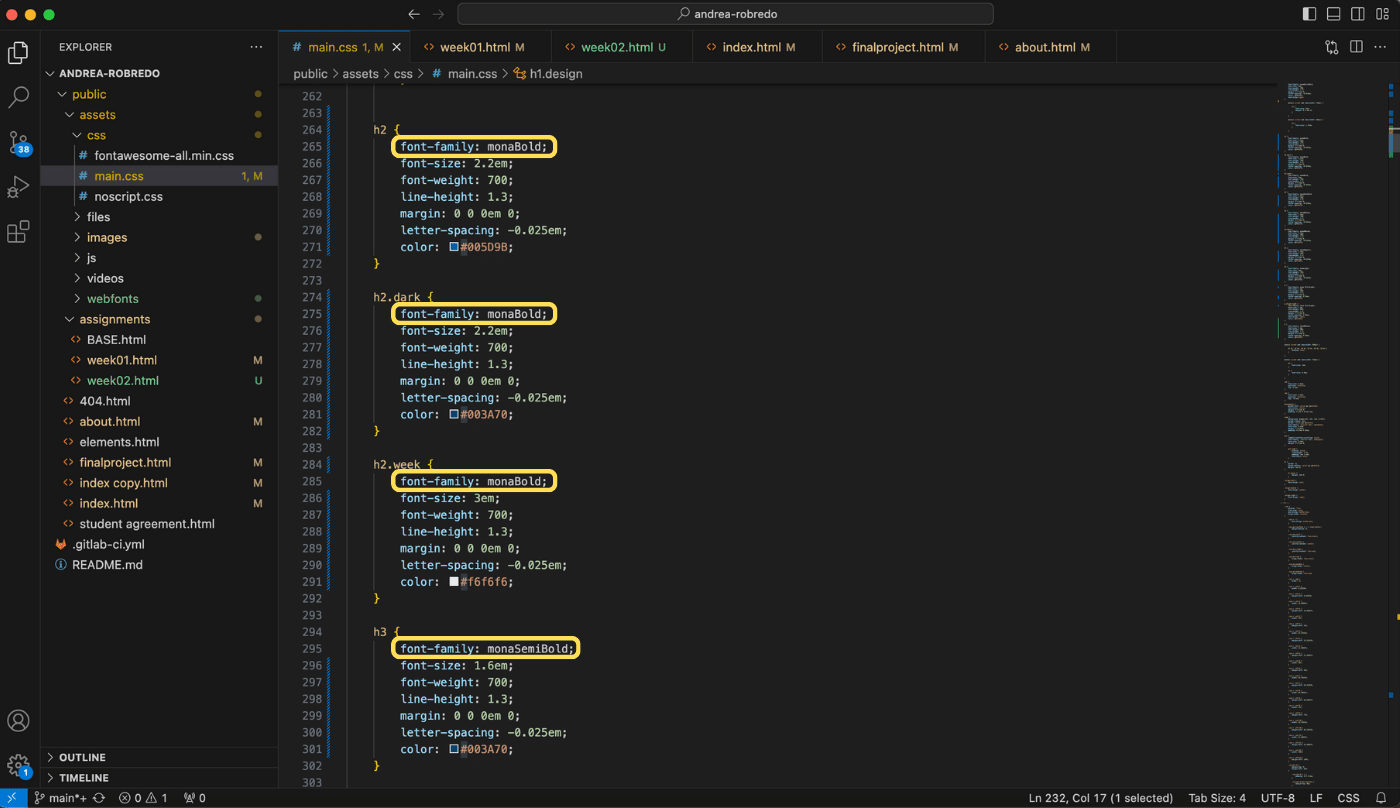
- Then inside the main.css I added each of the font files with the following structure:
- Then for each header style, the corresponding font was applied using font-family: NameOfFont;
@fontface {font family: NameOfFont; src: url(path where the font is located)}
After making these changes, the font, color and size for each of the headings are the following:
header 1
header 2
header 3
header 4
header 5
body text
Finally, I look forward to progressively personalizing my website with new updates each week:)
Final project
This week, I began exploring possible ideas for my final project and developing the chosen one further, you can track the progress in the "Final Project" section.