Mindful Habit Diffuser
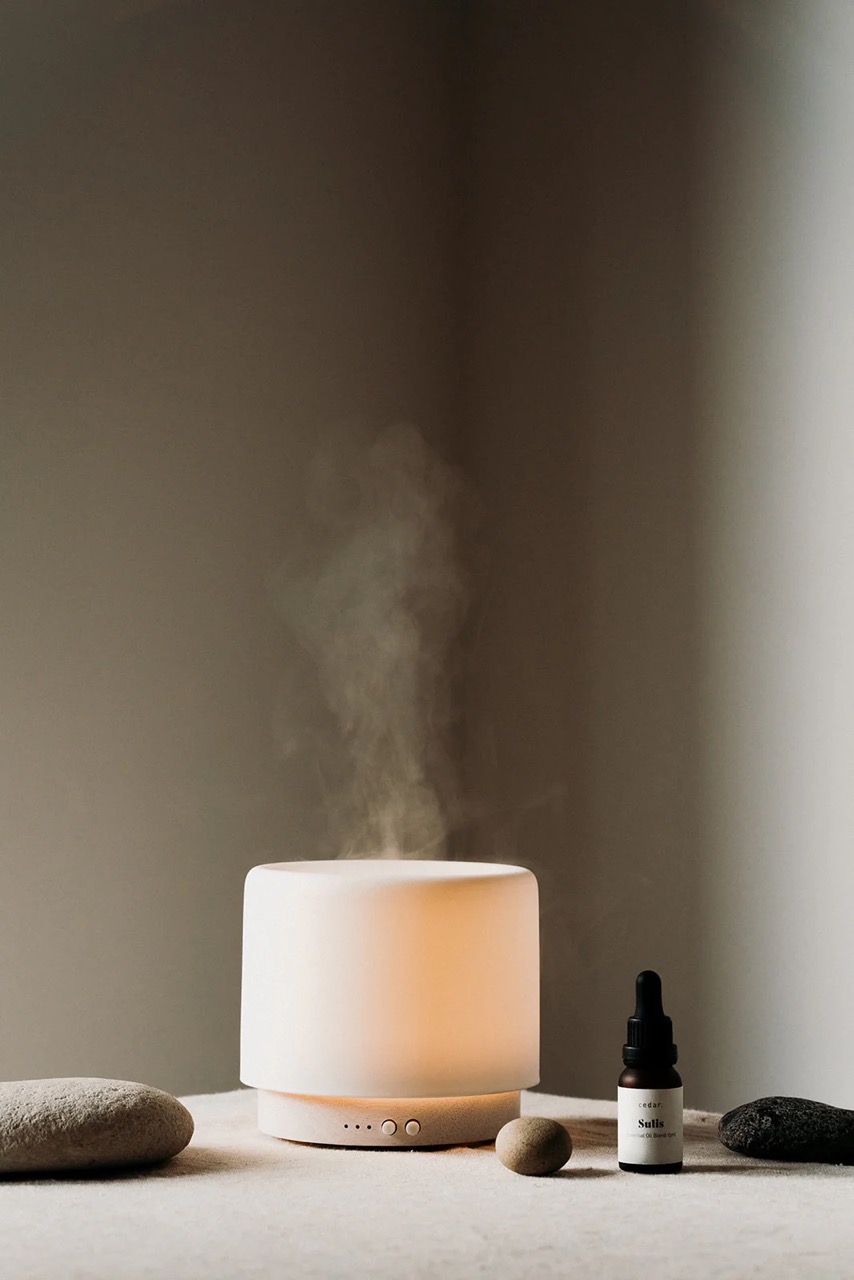
Introducing our ultrasonic oil scent diffuser, a minimalist device designed to enhance your night and morning routines. Combining soothing water sounds from an integrated pump and customizable light intensities, it helps create cues to build healthy habits. In the evening, it aids relaxation with essential oils and dimming lights to signal bedtime. In the morning, it gradually brightens to gently wake you up. Perfect for wellness enthusiasts and those focused on sleep quality, this diffuser blends modern design with digital fabrication, offering a serene start and end to your day.
-
Applications and Implications
- Product description
- Research/Design inspiration
- What will I design?
- List of components and processes
- Evaluation Invention, Intellectual Property and Income Midterm Project development
- 3D Modeling
- 3D printing
- Laser cut
- Vynil cut
- PCB design
- Milling and cutting
- Soldering
- Programming with Arduino IDE
Applications and Implications
Product description
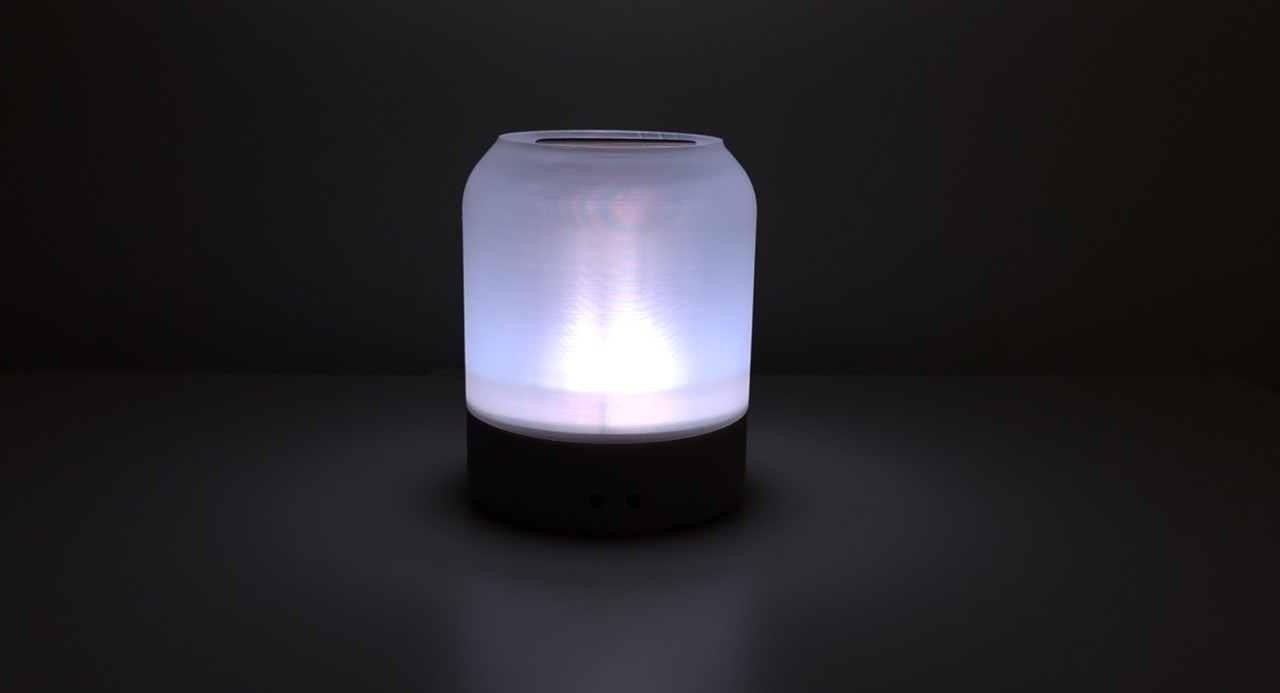
The Diffuser is designed to transform your daily routine with its multifunctional features. It uses an ultrasonic atomizer to diffuse soothing scents, creating a calming ambiance. The device also functions as a nightstand lamp with adjustable dimming, perfect for winding down in the evening. Enhanced with a water recirculation system powered by a water pump, it provides tranquil water sounds that promote relaxation. Additionally, this diffuser can be programmed to activate at specific times in the evening and morning, helping you establish and maintain healthy habits effortlessly.
Who is it designed for?
It is designed for individuals who prioritize their well-being and seek to enhance their daily routines. It is ideal for wellness enthusiasts, those focused on improving their sleep quality, and anyone who loves the calming effects of aromatherapy. This diffuser is perfect for people looking to establish healthier habits through sensory cues, integrating seamlessly into the lives of those who value tranquility, mindfulness, and a minimalist aesthetic.
What will it do?
The diffuser will function as a nightstand lamp with adjustable light intensities. It will also feature real-time relaxing water sounds, created by a water pump, and will be designed to both look and sound soothing. Additionally, it will include a diffuser mechanism for adding essential oils.
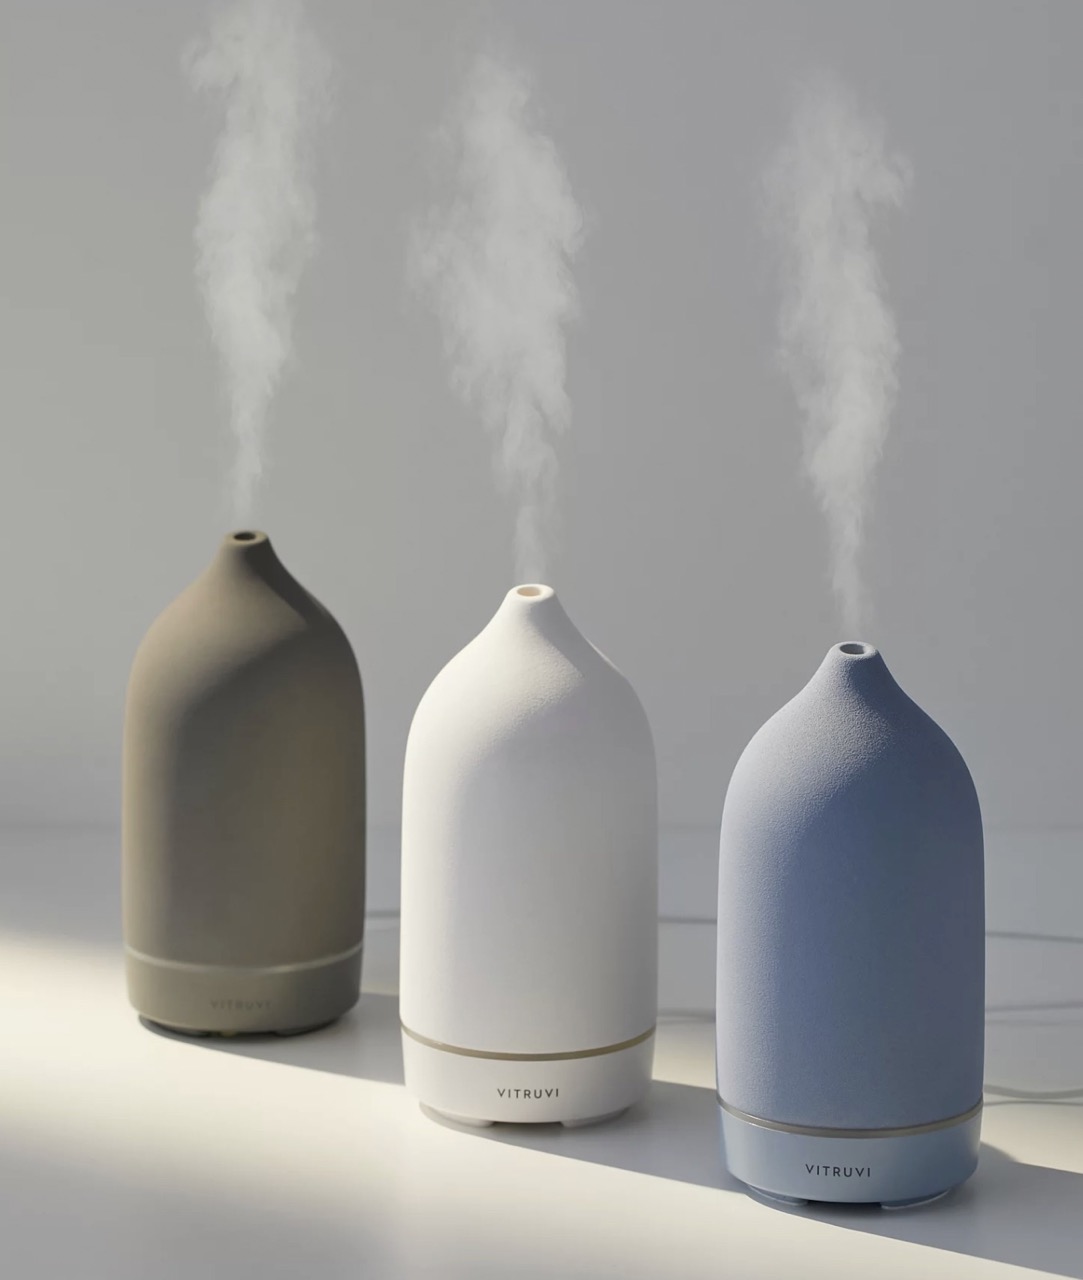
Who has done what beforehand?
There are many brands on the market that sell oil diffusers. Some of the most famous ones are Vitruvi, Young Living, doTERRA, Muji, and Saje.
- Links to ther websites
- Vitruvi
- Young Living
- doTerra
- Muji
- Saje
Research and inspiration
I conducted extensive research using two insightful books focused on creating a healthier lifestyle. I began with Atomic Habits by James Clear, which emphasizes the importance of creating cues and building new habits through small, incremental changes. This foundation helped shape the product's design to integrate seamlessly into daily routines. Additionally, Why We Sleep by Matthew Walker reinforced the critical importance of good sleep quality and provided practical strategies for achieving it. To enhance the product's effectiveness, I also researched aromatherapy, identifying the best scents for calming the mind and body. This comprehensive approach ensures the diffuser supports relaxation, well-being, and healthier sleep habits.
Atomic Habits by James Clear
The product is inspired by the principles outlined in Atomic Habits by James Clear. Applying the Four Laws of Behavior Change, the product is designed to seamlessly integrate into daily routines. To make it obvious, the diffuser's soothing light and water sounds serve as clear cues for relaxation. Making it attractive is achieved through its sleek, minimalist design and the appealing sensory experience of diffused scents and gentle water sounds. The product makes it easy by offering programmable settings, ensuring effortless integration into evening and morning routines. Finally, to make it satisfying, the calming effects of aromatherapy and the gradual light adjustments provide immediate comfort and relaxation, reinforcing the habit of using the diffuser regularly.
Why We Sleep by Matthew Walker
Sleep plays a crucial role in our overall health and well-being, as emphasized in Why We Sleep by Matthew Walker, highlights the importance of a consistent night routine. Establishing a calming pre-sleep ritual can significantly enhance sleep quality. The project addresses this by providing soothing cues that help signal bedtime. The gentle sound of flowing water, the calming scents from essential oils, and the gradual dimming of the light create an environment conducive to relaxation and sleep.
Link to the bookAromatherapy
Aromatherapy is a holistic healing treatment that uses natural plant extracts to promote health and well-being. It works through the olfatory system, when you inhale essential oils, molecules enter the nasal passages and stimulate the olfactory receptors. These receptors send signals to the brain's limbic system, which is involved in emotions, memories, and arousal. This can result in changes in heart rate, stress levels, blood pressure, breathing, and immune function. It can also work from absorption through Skin.
Benefits
- Relaxation and Stress Relief
- Improved Sleep
- Mood Enhancement
- Pain Relief
- Cognitive Function
Types of diffusers
| Difusser | Description | Advantages |
|---|---|---|
| Ultrasonic Atomizers | The core component is an ultrasonic transducer, which converts electrical energy into mechanical vibrations at ultrasonic frequencies. The ultrasonic vibrations continuously produce a fine mist of tiny droplets that are released into the air. |
|
| Nebulizing Atomizers | A high-velocity air pump or jet forces air through a narrow tube.As the liquid enters the tube, it is atomized into tiny droplets by the air jet, creating a fine mist. |
|
| Evaporative Atomizers | These atomizers use a wick or pad that absorbs the liquid (such as water or essential oil) a small fan blows air over the wick or pad and the air passing over the saturated wick or pad causes the liquid to evaporate into the air. | Suitable for continuous, low-output fragrance diffusion |
Inspiration
- Vitruvi Stone Essential Oil Diffuser by Urban Outfitters
- Cedar Aroma Diffuser Lamp by Cedar
What will I design?
I will design the PCB and organize all the electronic components. I'll also create the shape and individual pieces of the diffuser, ensuring they fit together seamlessly. Additionally, I'll design the packaging and plan how all the cables are arranged.
List of components
All the materials I'll use will come from either Amazon, Mercado Libre or Unit Electronics. To keep everything organized, I made a chart listing all the components and materials, including where I bought them and their prices.The prices are in Pesos (mexican coin)
| Component | Store | Price | Quantity |
|---|---|---|---|
| Xiao rp2040 | Mercado libre | $242 | 1 |
| Water Pump | Amazon | 1 | |
| Mist maker | Amazon | $310 | 1 |
| Neopixel ring | Mercado Libre | $68 | 1 |
| Diode Schottky 20V 1A SMD MBR120LSF | UNIT electronics | $4 | 2 |
| Transistor NPN 1.5A 25V SS8050 | UNIT electronics | $2 | 2 |
| Voltage regulator Lm7805 | UNIT electronics | $3 | 1 |
| Male pin | UNIT electronics | $4 | 20 |
| Power source 24v | Amazon | $260 | 1 |
| Button | UNIT electronics | $4 | 2 |
| DC jack | UNIT electronics | $15 | 1 |
| Traslucid filament | Amazon | $340 | 1 |
| Grey filament | Amazon | $340 | 1 |
| Acrilic | Dimecril an acrilic store in Puebla | $300 | 1 |
An approximate budget for the project is $1700.
Processes
For the final project I'll do
- 2d sketching and 3d modeling
- 3d printing
- Laser cutting
- Vynil cutting
- PCB design
- PCB milling and cutting
- Programming
- INPUTS and OUTPUTS
What questions need to be answered?
- How can I convert 24V to 5V?
- How can I ensure the voltages don't combine?
- How can I measure the amperes needed?
- How can I make sure the water doesn't leak onto the electronic components?
- How can I make it translucent?
- How can I ensure all the pieces fit together?
- How can I programm the water pump and the mist maker?
Evaluation
- Application of knowledge in various digital fabrication methods to create a complete project.
- Designing an aesthetic and functional diffuser.
- Designing a PCB that works and incorporates the knowledge gained in the course.
- Successfully programming the Xiao RP2040.
Intellectual Property
I don't believe that creating a patent for every design or project is necessarily a good idea. While patents are a great way to protect your work and secure rights over it, for this particular project, I don't think a patent would prevent it from being copied. An oil diffuser is not a revolutionary idea, but its implementation, like in this project, can be lucrative and add value for consumers and the market. Since this is a course in digital fabrication and hands-on work, I believe my project serves as an example of what can be achieved by properly using digital fabrication tools. I am a big fan of open-source design, and I acknowledge that my design has room for improvement. I would love for people to be inspired by it and to create their own versions with enhancements. So, regarding intellectual property, I think the future of my project lies in continuous improvement and further experimentation with the design and electronics.
Future opportunities
In the future, I would love to create a brand focused on wellness products. I envision building a community on social media, especially Instagram, where I would sell this product and future ones. Additionally, I would share the design process and how I use digital fabrication to my advantage. I believe that fostering this community would have a greater impact than patenting the project, as it would engage and inspire people while promoting the brand.
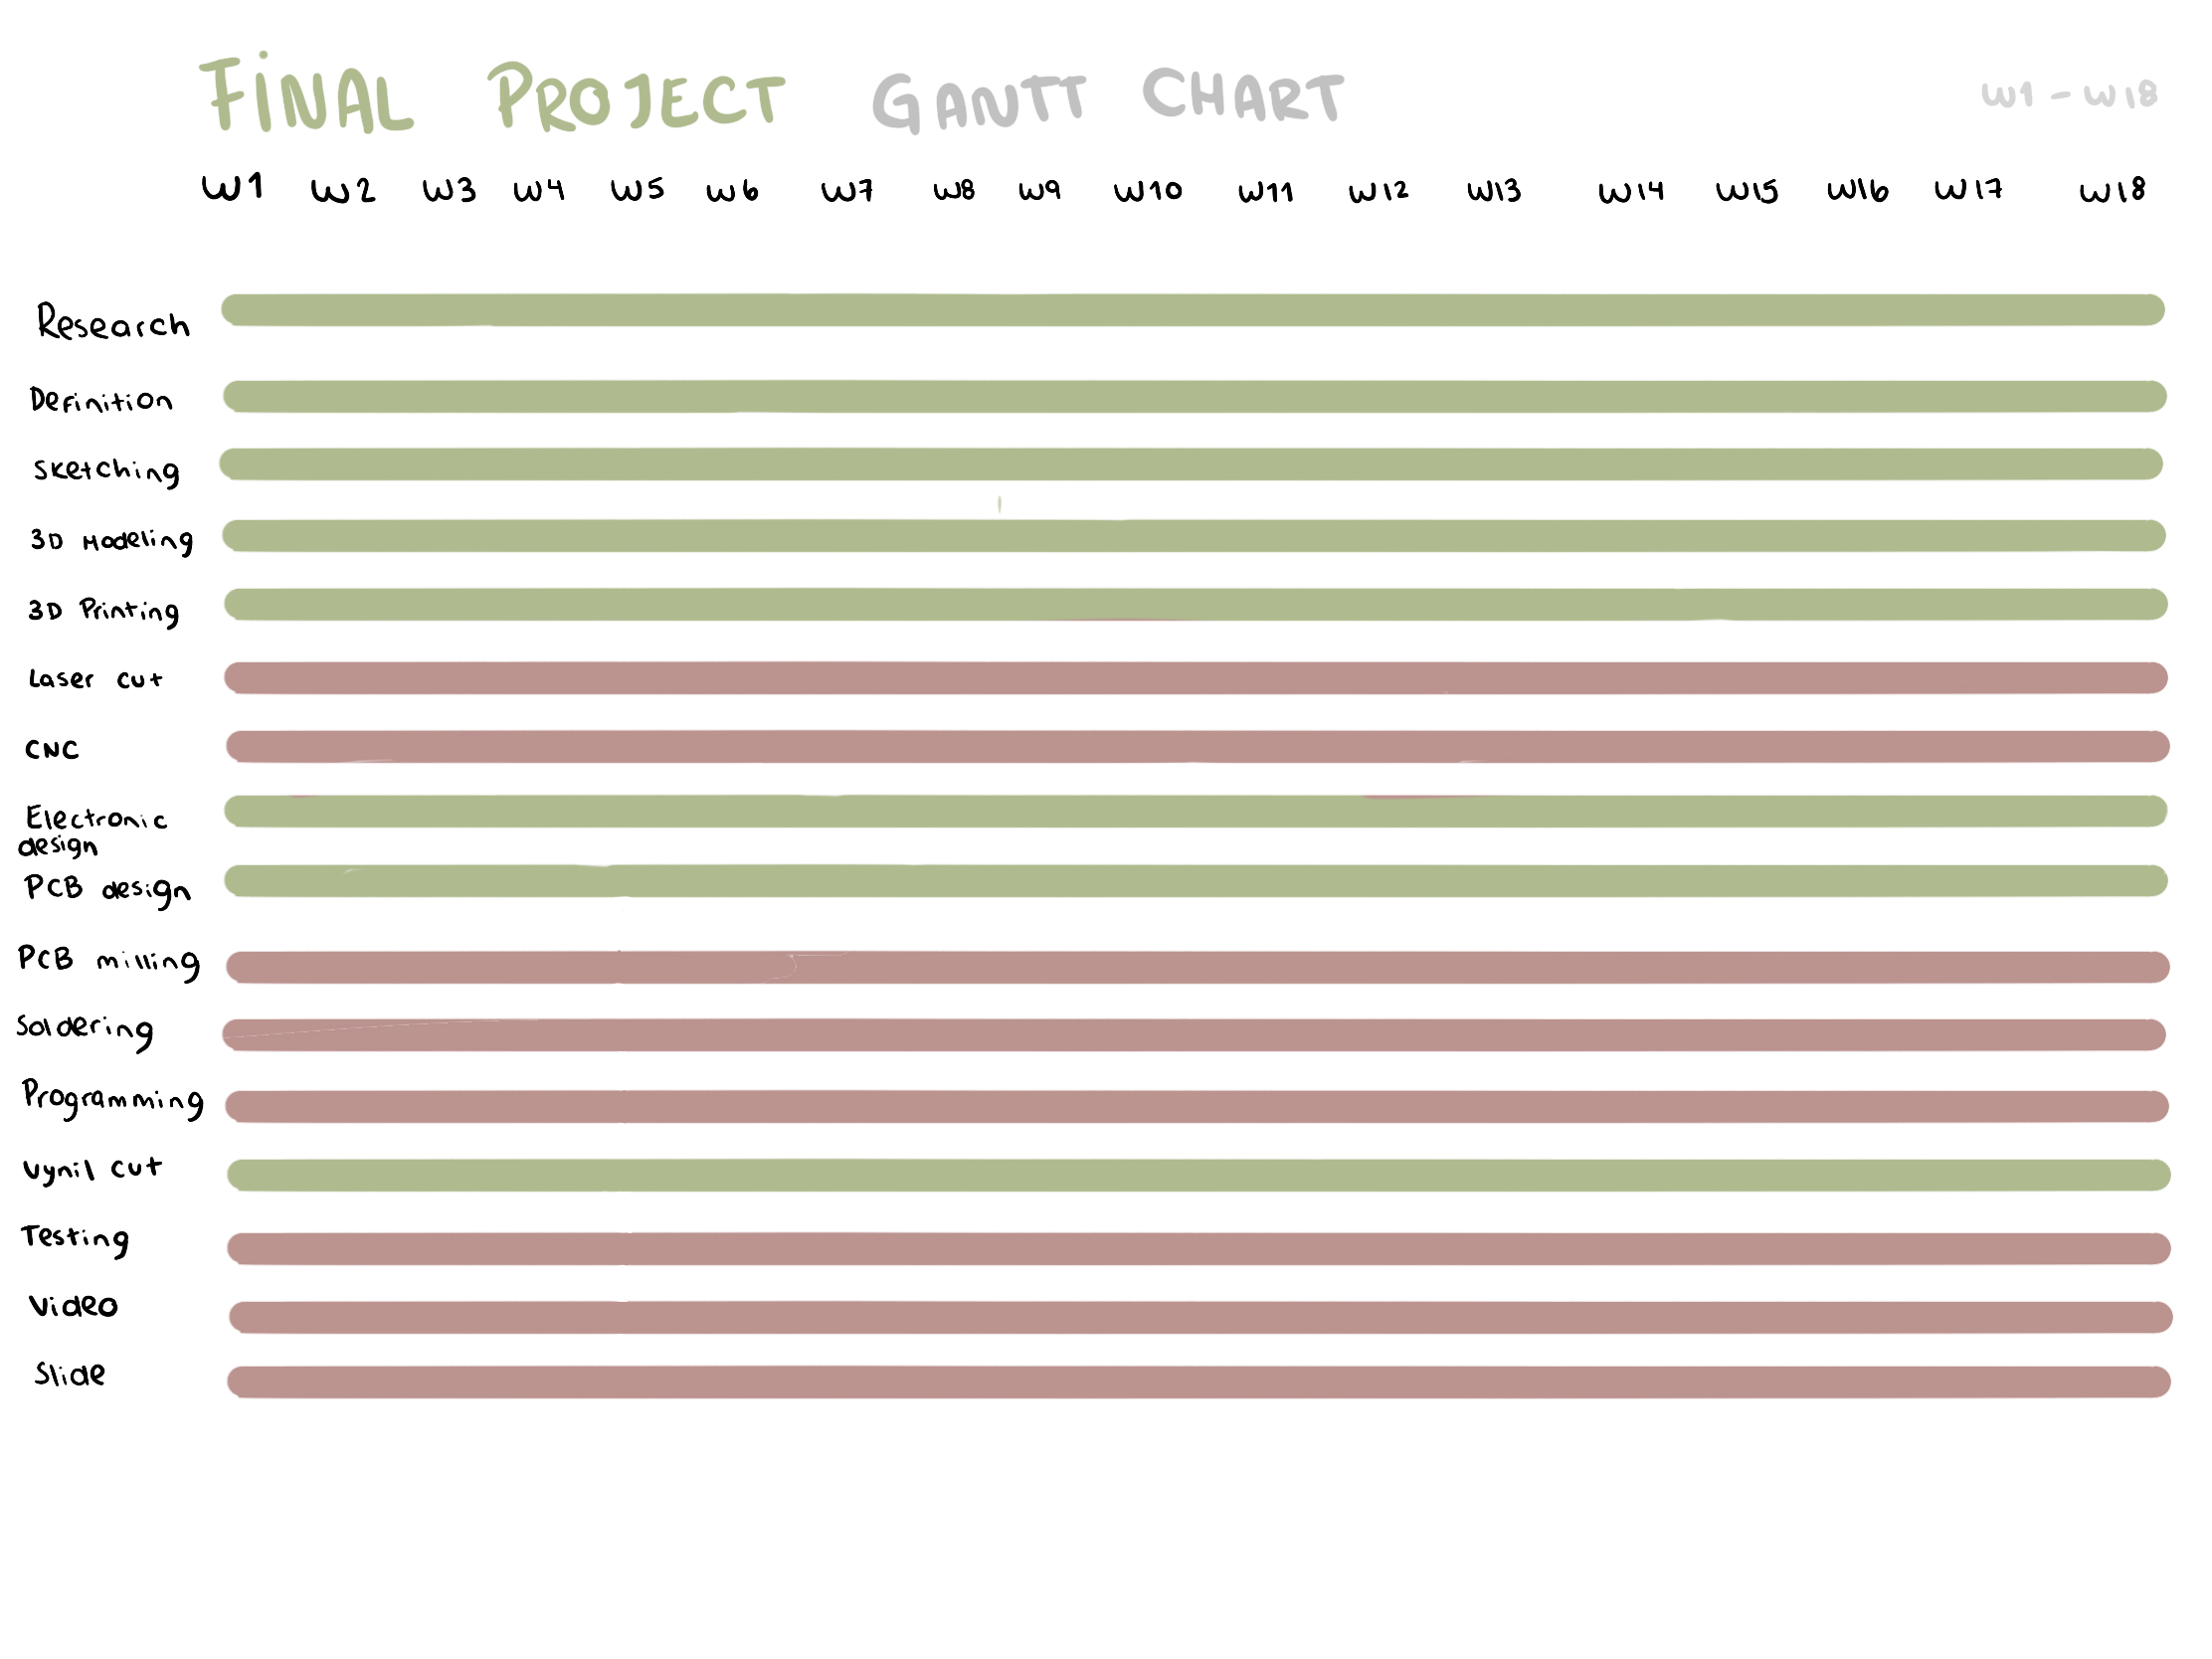
Midterm and project development
I decided to combine both the midterm and project development into this section and revisit the Gantt chart I created in the first week to reestablish my goals based on the time I have left. To adjust my plan, I decided to eliminate the CNC machining component and crossed off the tasks I have already completed from the Gantt chart. Where green are the tasks I have already done and in red the ones im missing.
Project Development
I divided by different sections how I did the whole project.
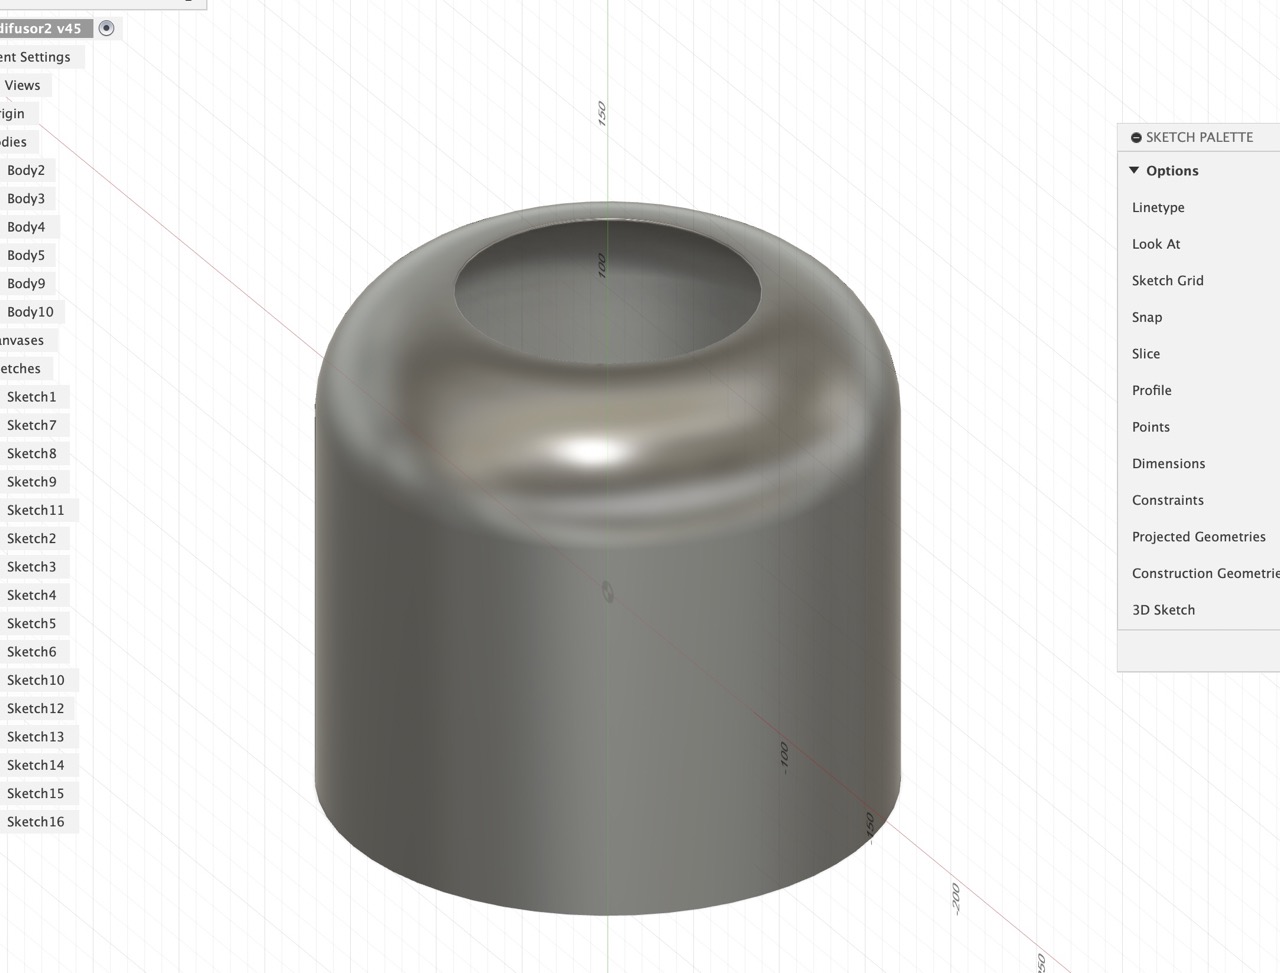
1. 3D modeling
Before modeling I sketch the idea in Procreate for easier modeling later on.

Then I created a new Fusion 360 file and establish some parameters.
- W1:with lid 1mmm
- w2:width base 3 mm
- Hb:height base 60 mm
- We:width base's edge 7 mm
- R:radious lid 40 mm
- H:height 210 mm
- L:length 70 mm
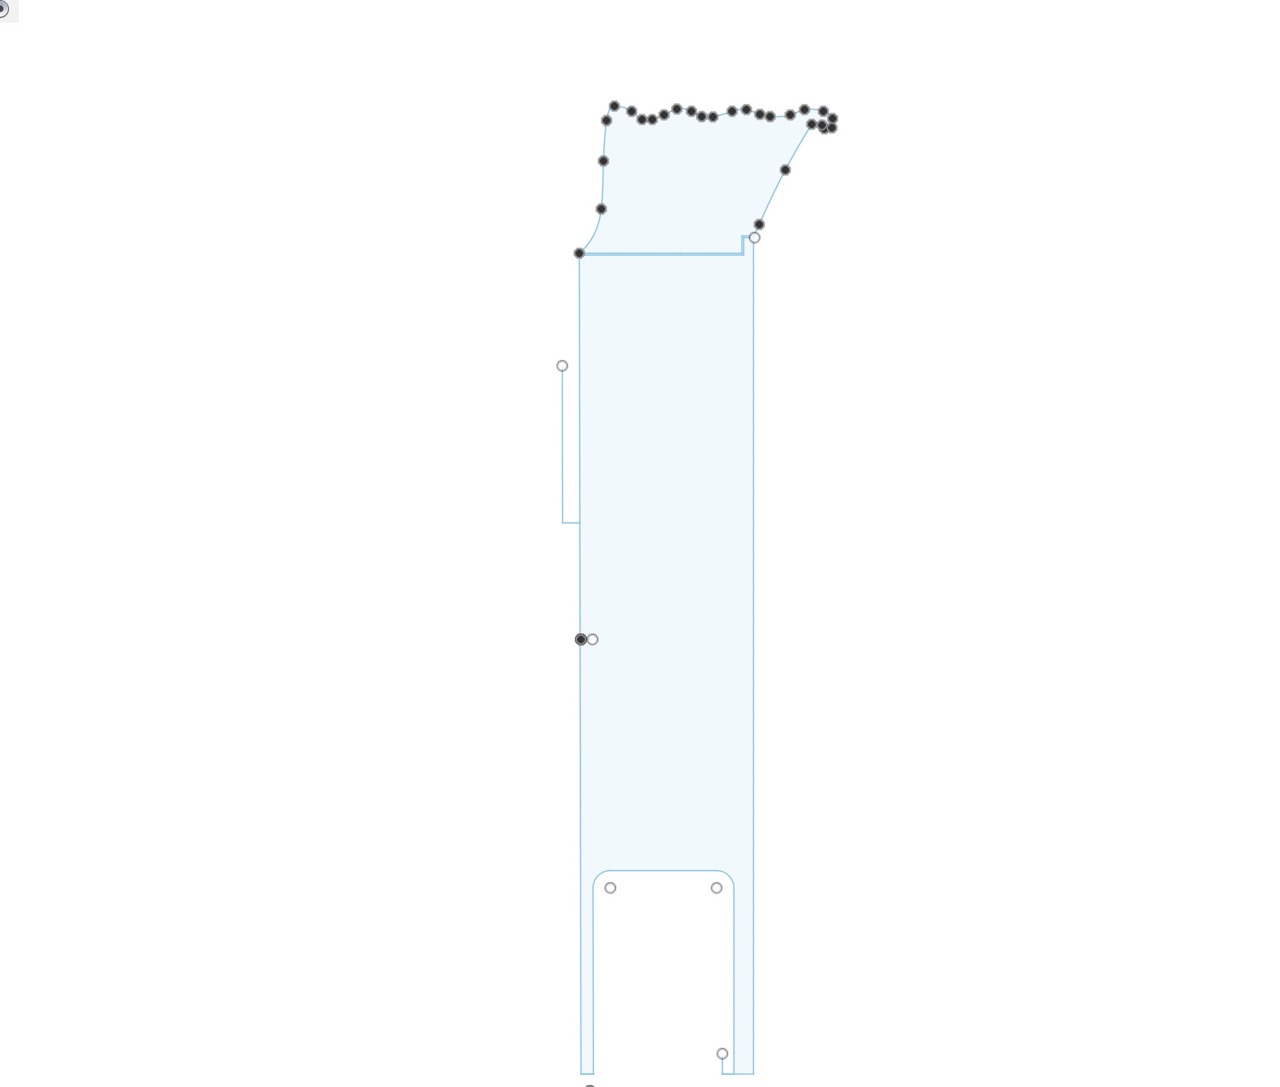
Then I created a new sketch and using the line feature drew the profile shape as seen from a frontal cut.

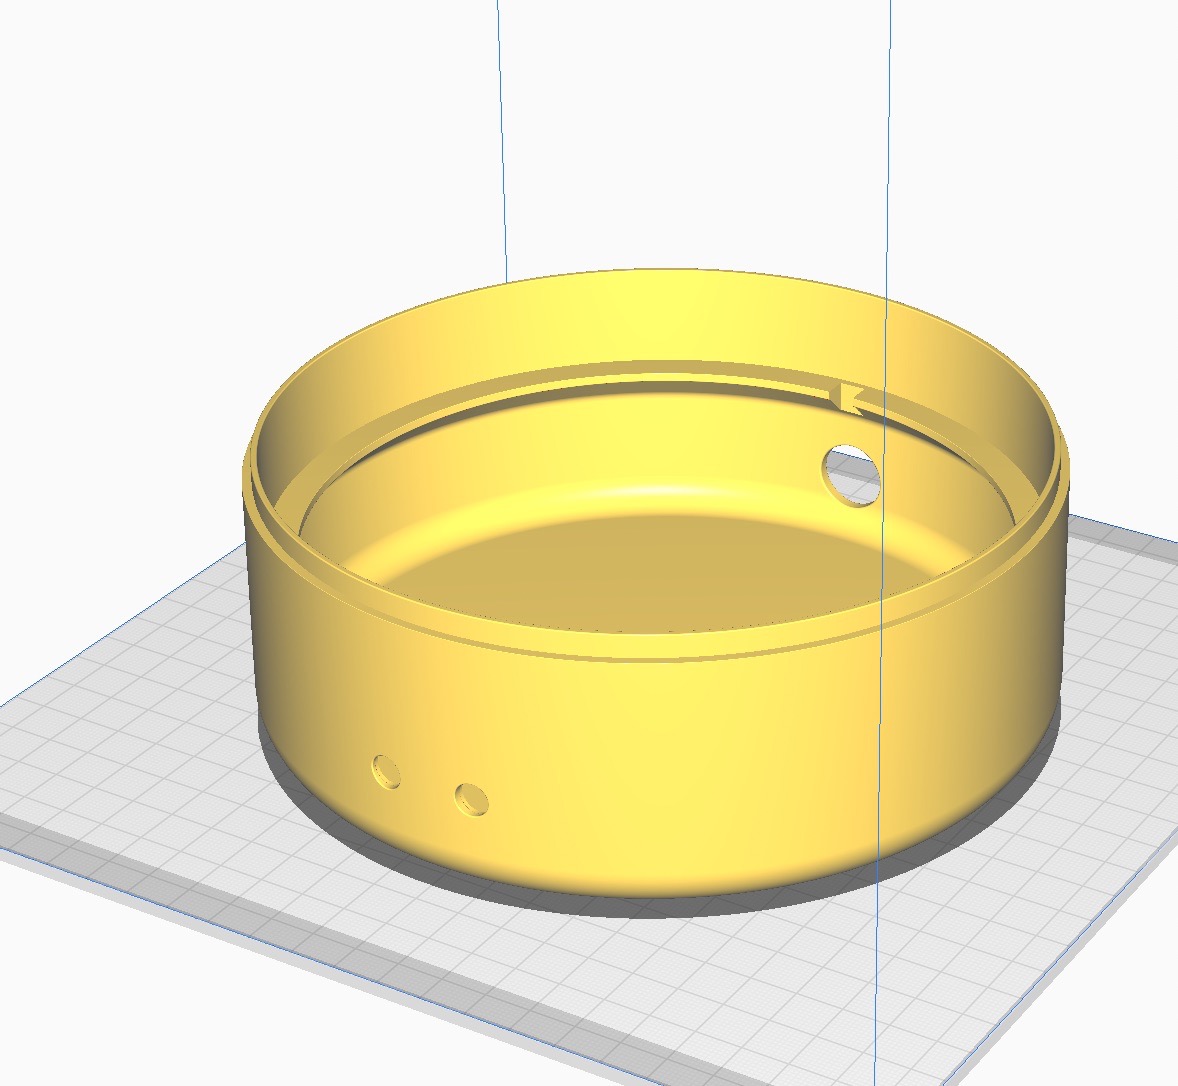
Then I added a hole for the cables and the frontal buttons.
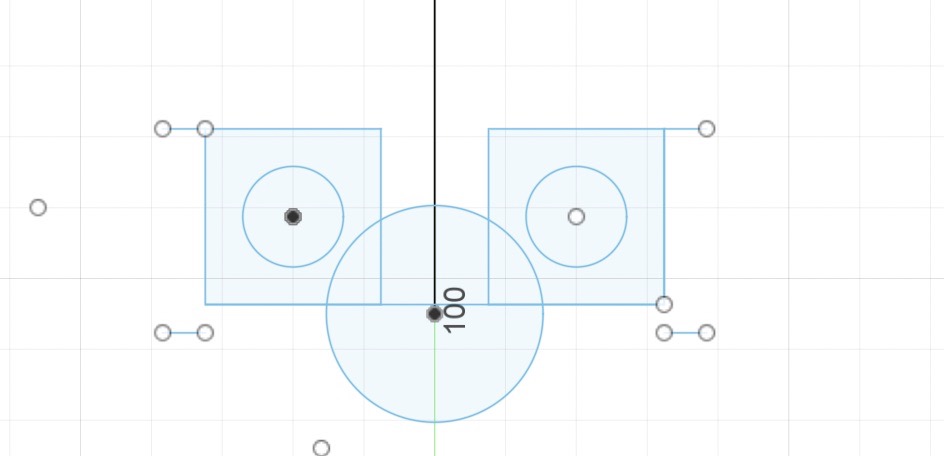
Revolved the base as well as the cable's whole and the buttons.
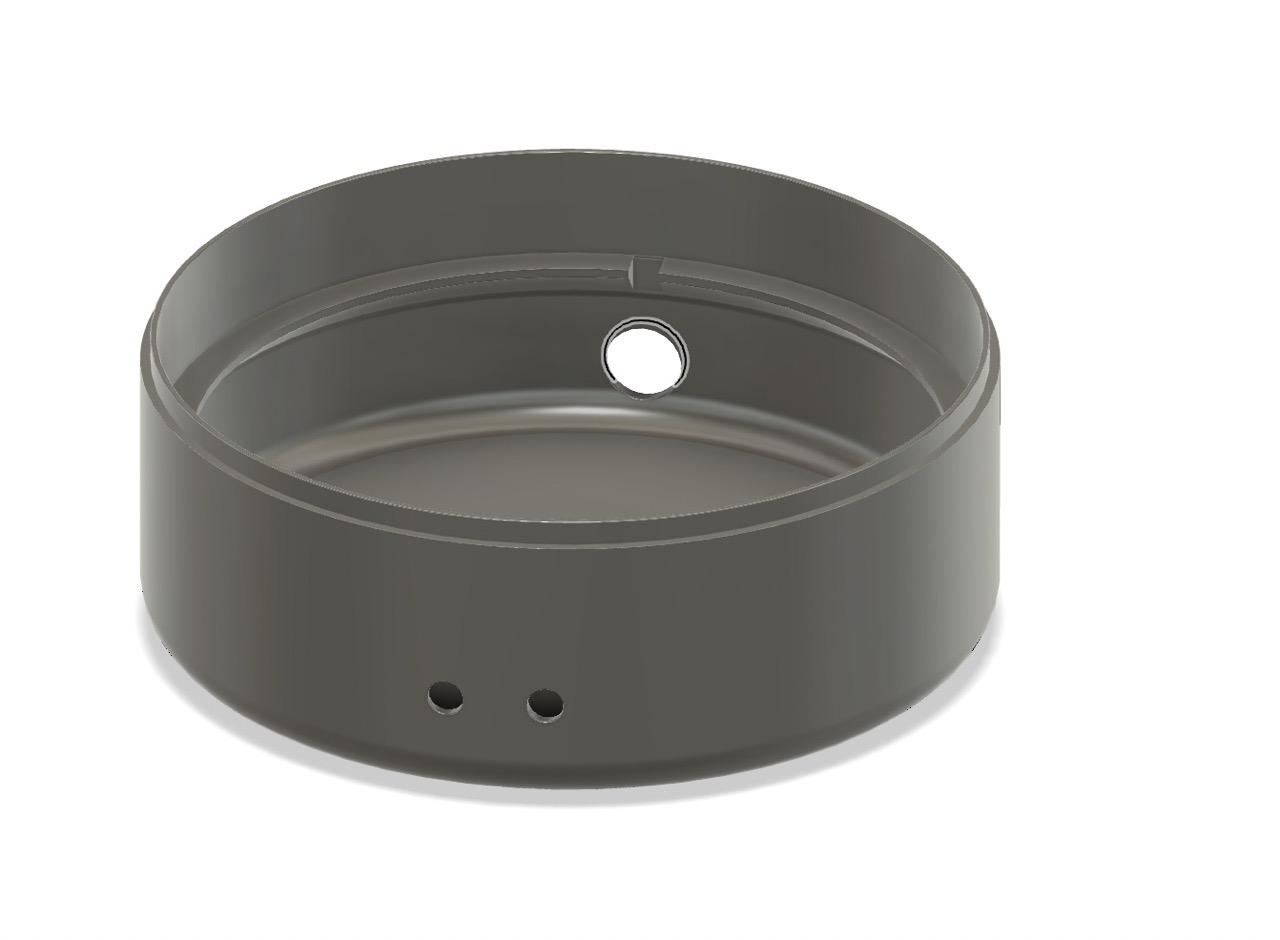
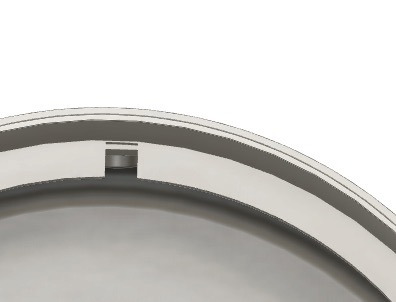
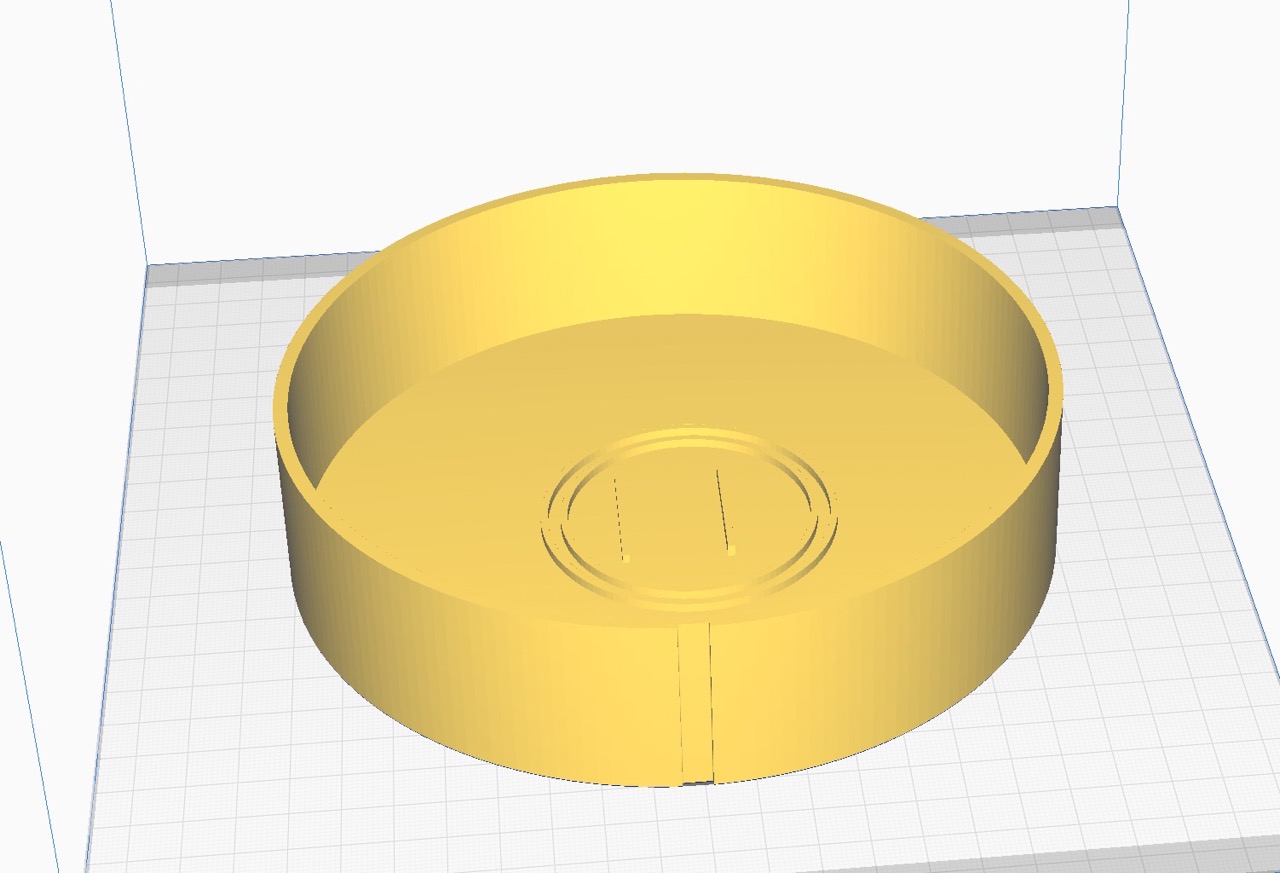
Continued by revolving the water reserve and added a new sketch for a ring to support the water fountain and the water pump. Made a cut on the side for the cables.
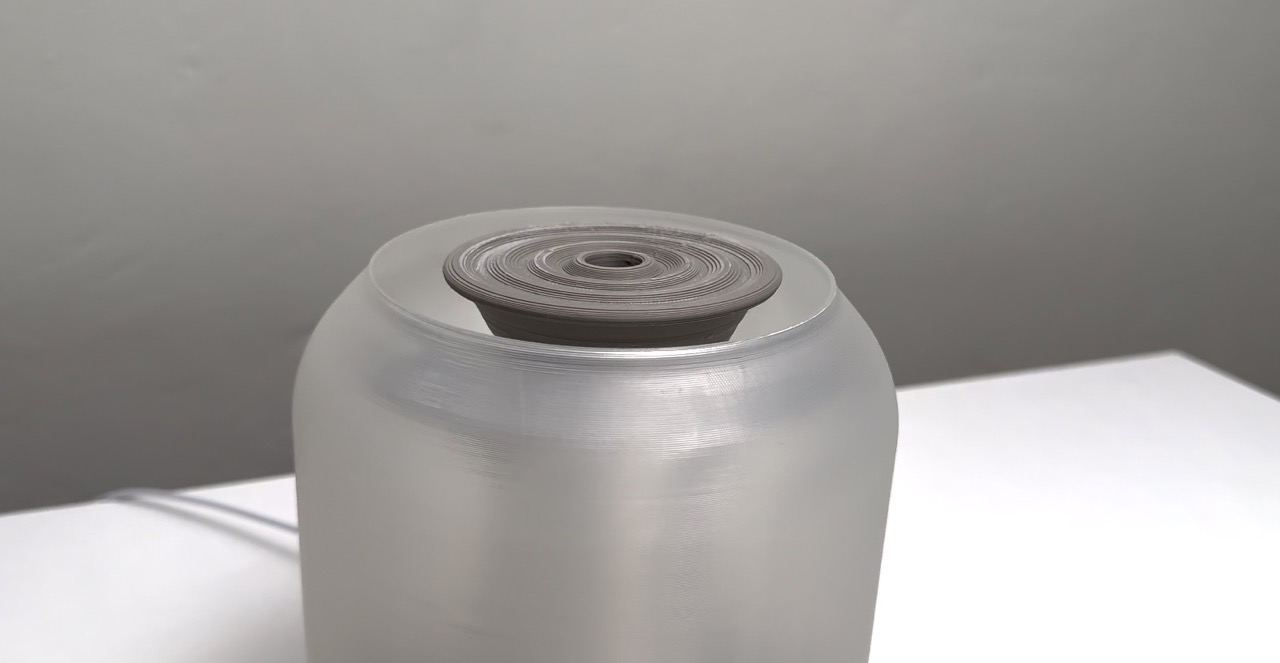
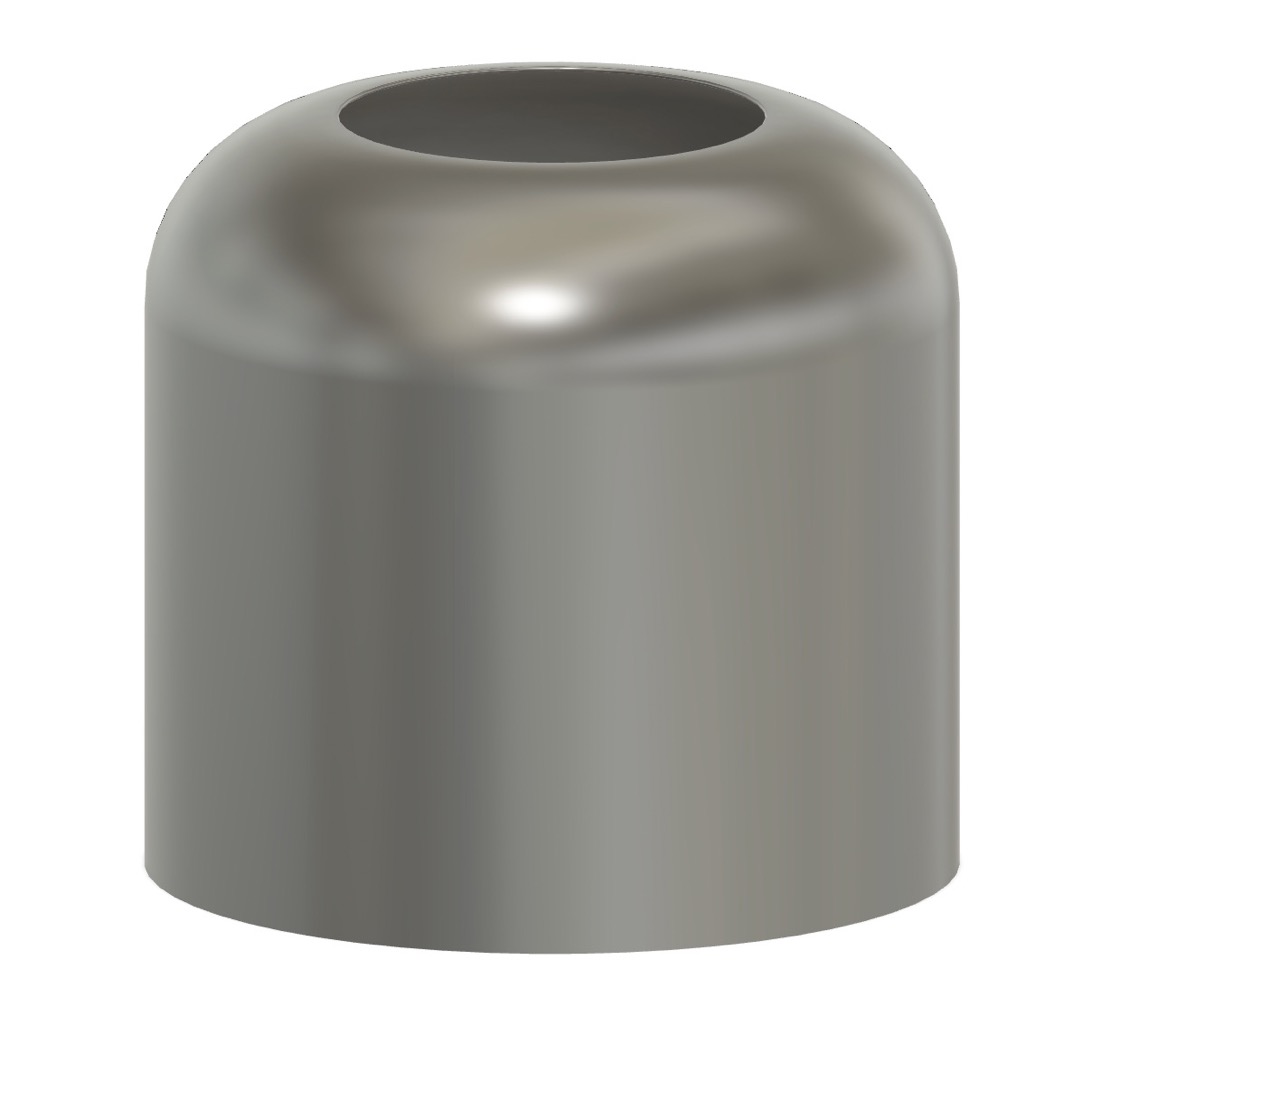
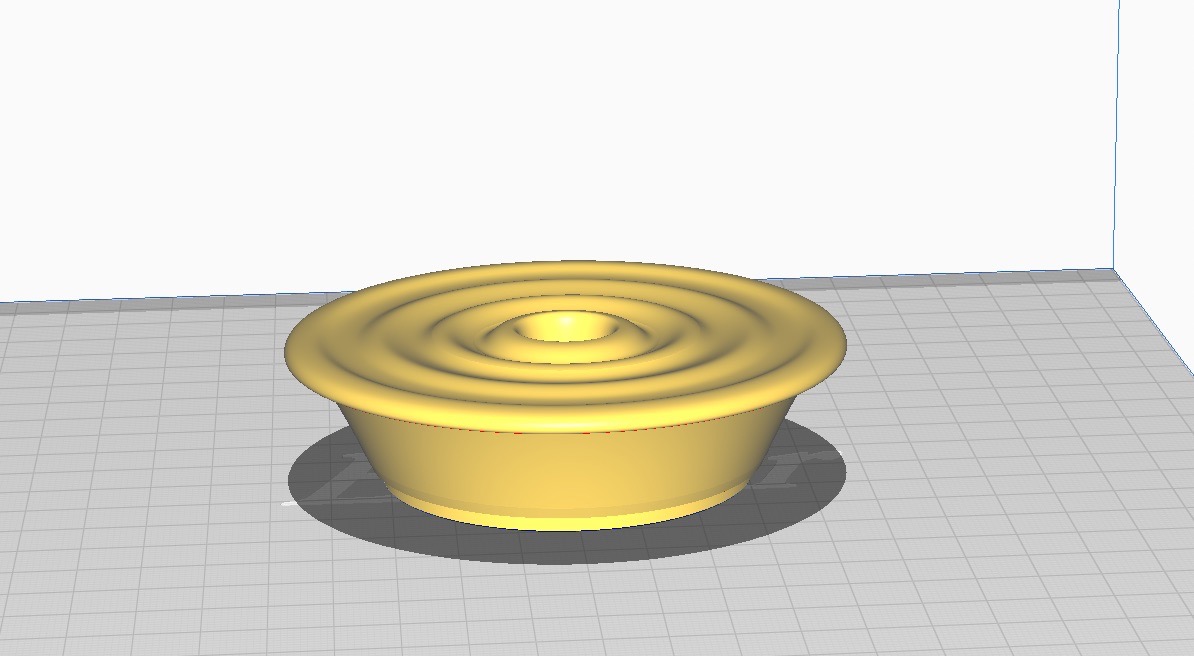
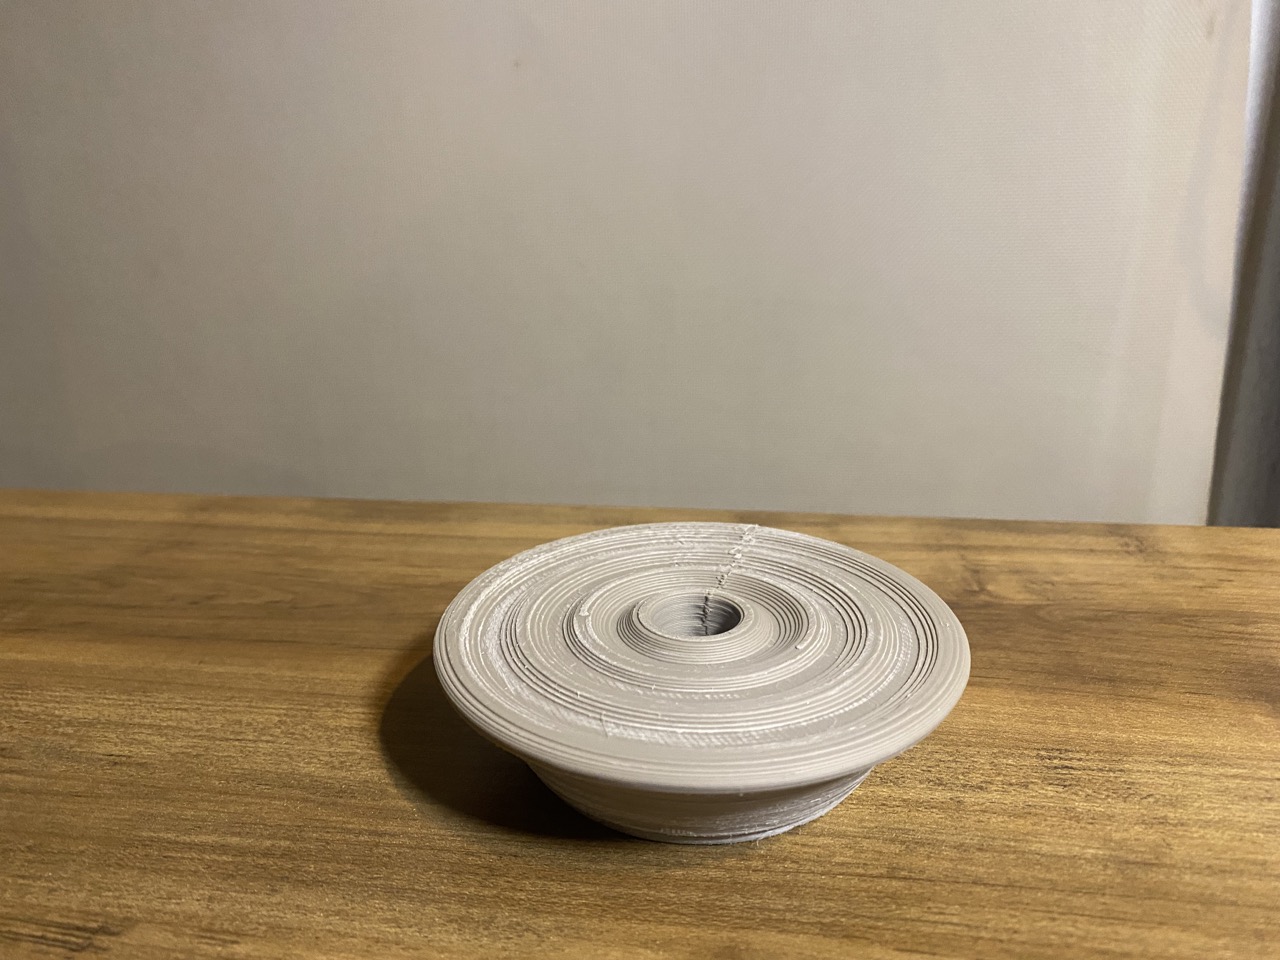
Finally, revolved the lid.
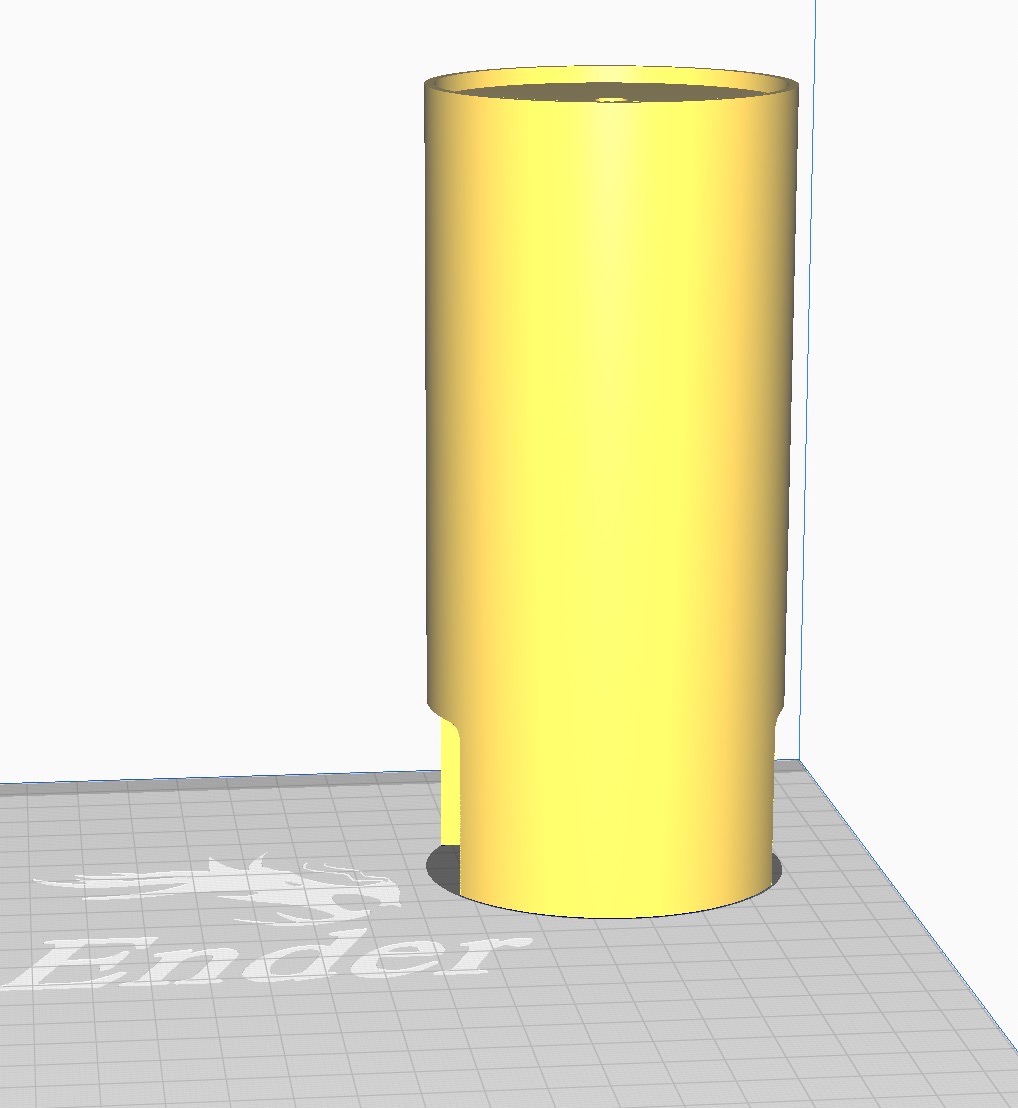
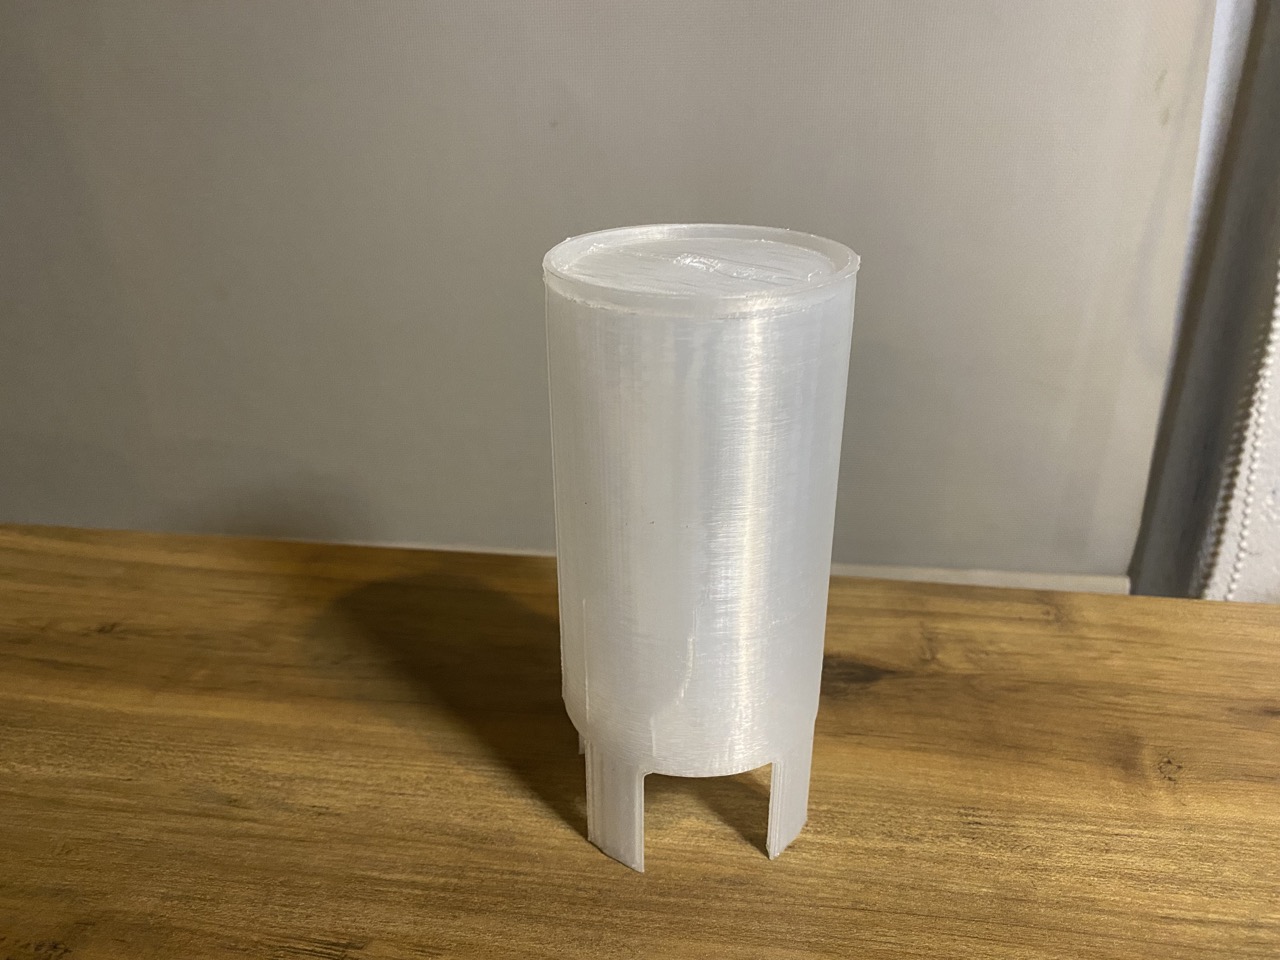
For the Water fountain I divided the piece into the water fountain and the tube. I sketched them in the same space but revolved them separately.

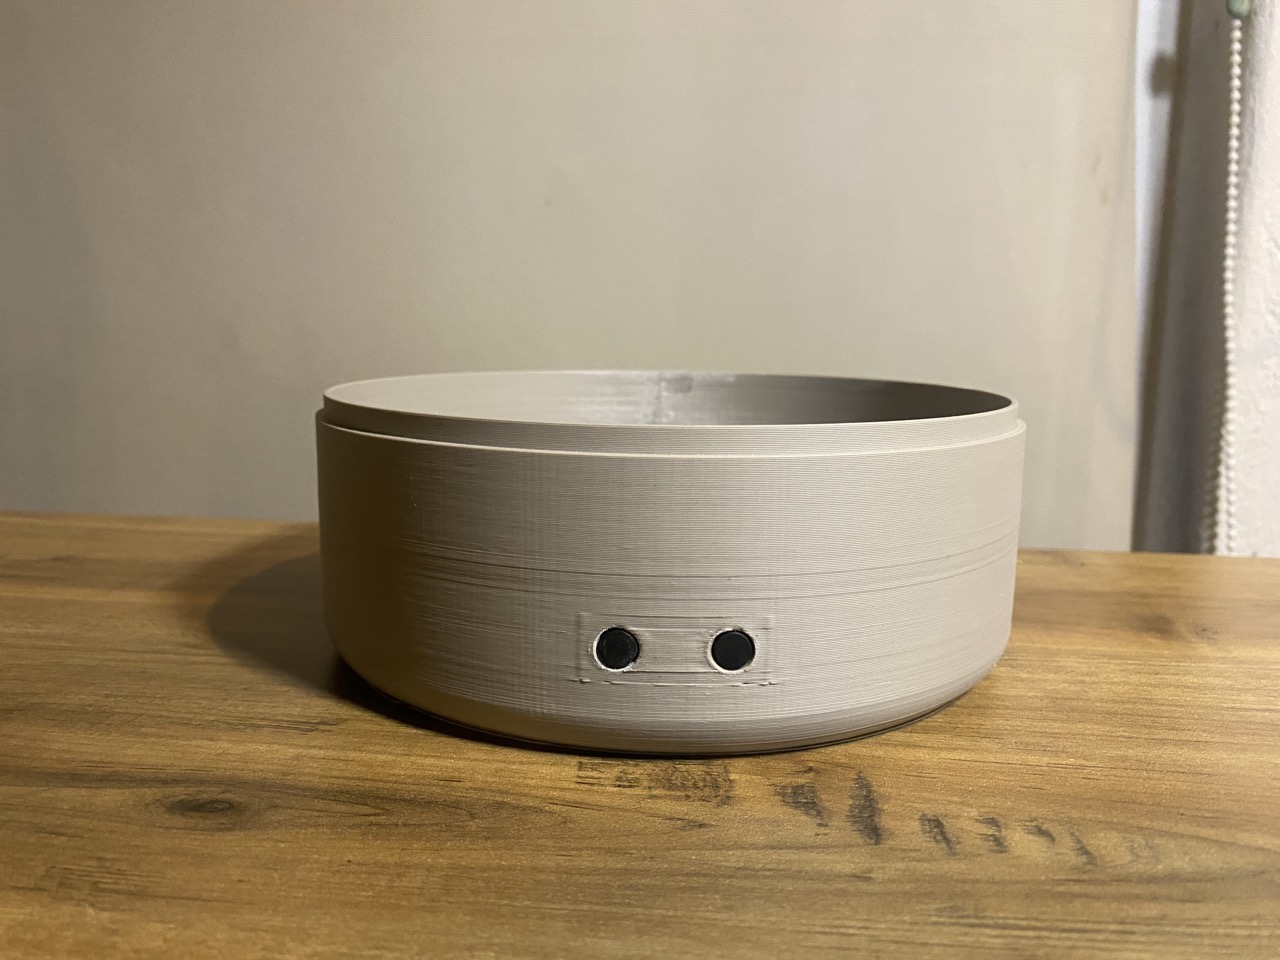
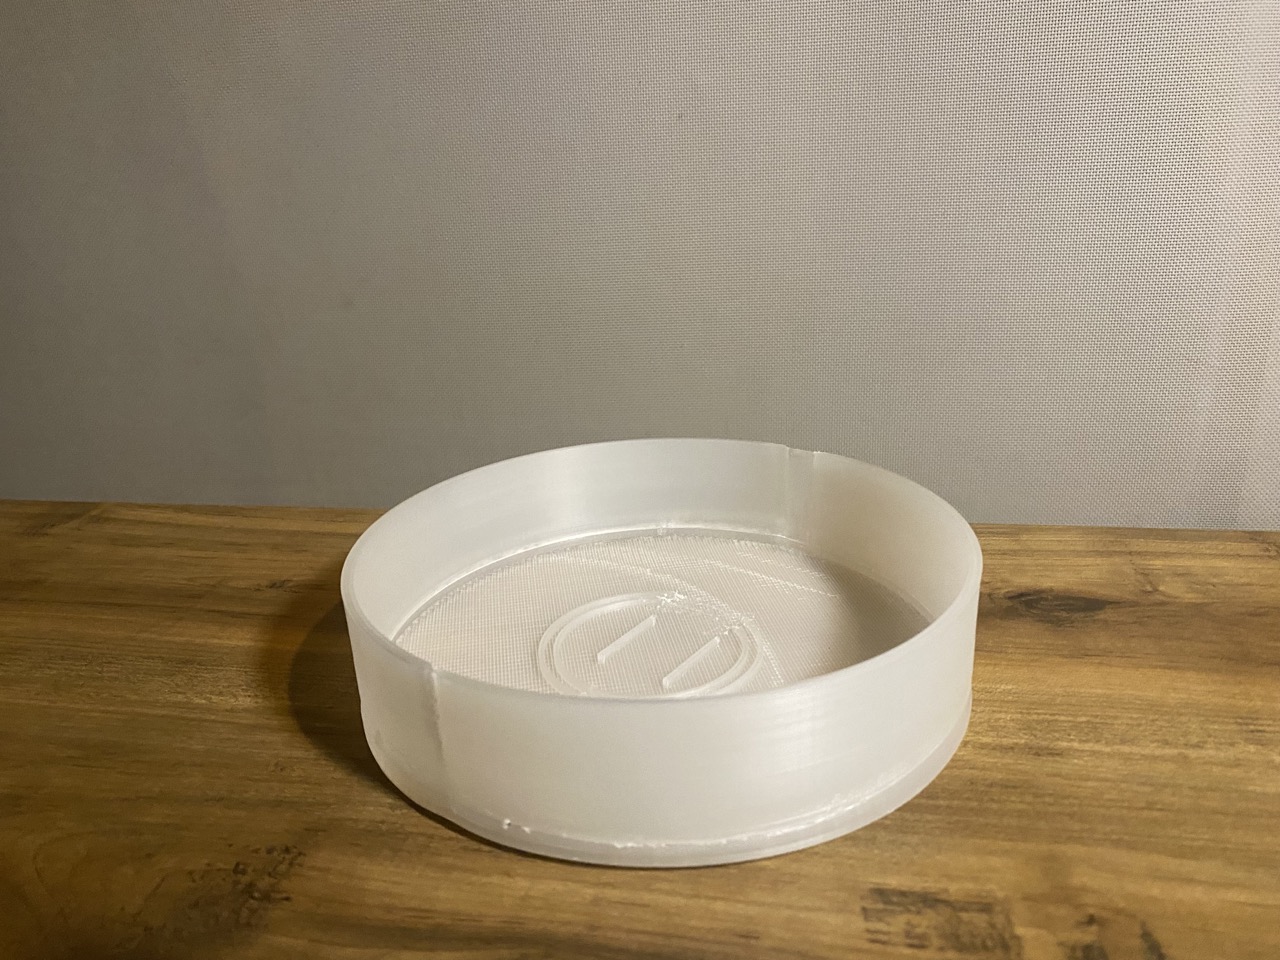
2. 3D printing
Once I had modeled the different pieces I 3d printed them. For the lid, tube and the water reserve I used traslucid PLA filament and for the base a grey one. Mostly all the pieces followed the same preparation in Ultimaker Cura before printing except for the lid.
- Nozzle: 1mm
- Wall thickness: 3 mm
- Infill:15%
- Speed: 120 mm/s
- Build plate adhesion:Brim
- Quality: draft quality
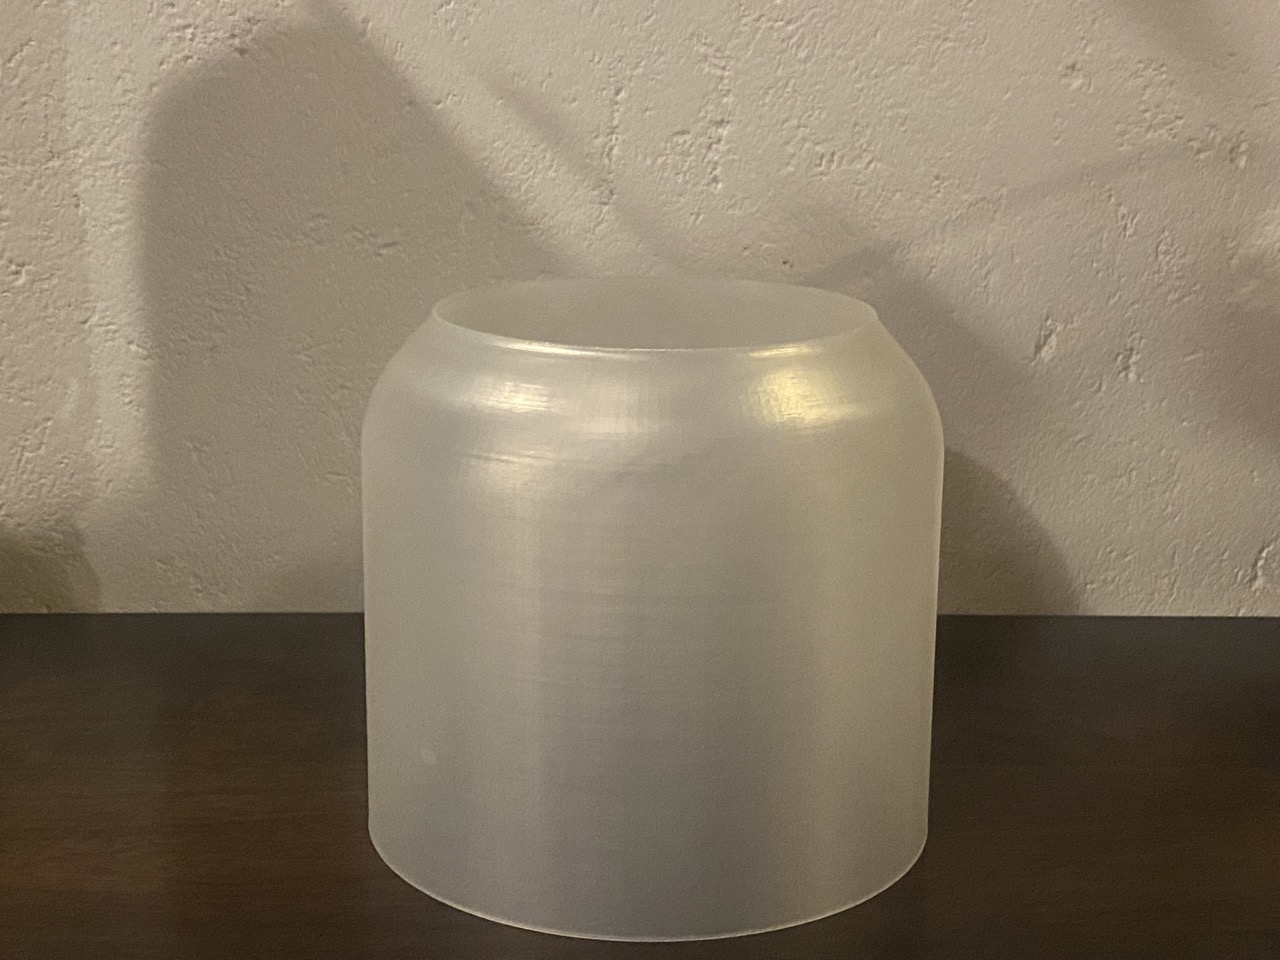
Vase Mode!
For my final project, I plan to create a translucent lid piece using vase mode to ensure the stitches are invisible, resulting in a cleaner finish. To achieve this, I watched several tutorials on YouTube, and I highly recommend this particular tutorial. After modeling the piece in Fusion 360, I imported it into Cura and selected the following features. Fusion's file
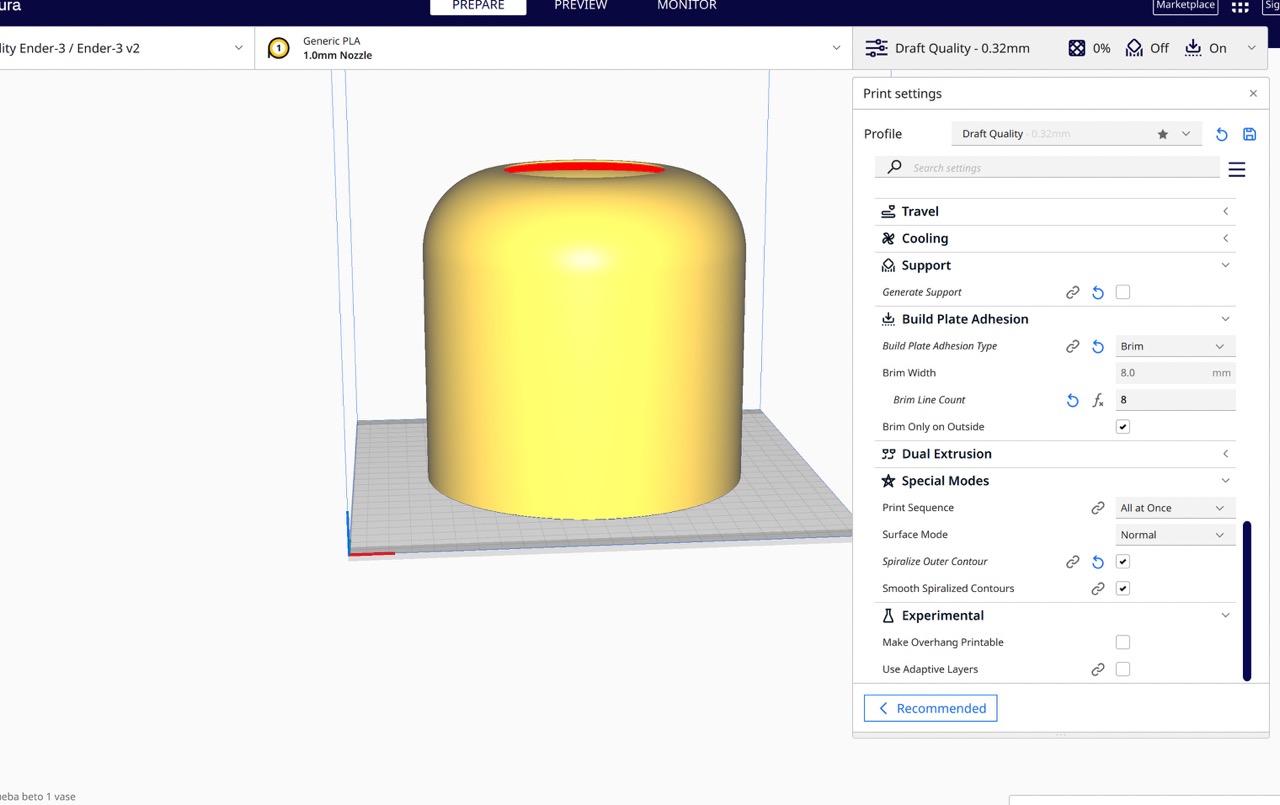
- Nozzle: 1mm
- Wall thickness: 1mm
- Infill:0%
- Speed:50 mm/s
- Build plate adhesion:Brim
- Special mode:spiralize outer contour and smooth spiralized contours
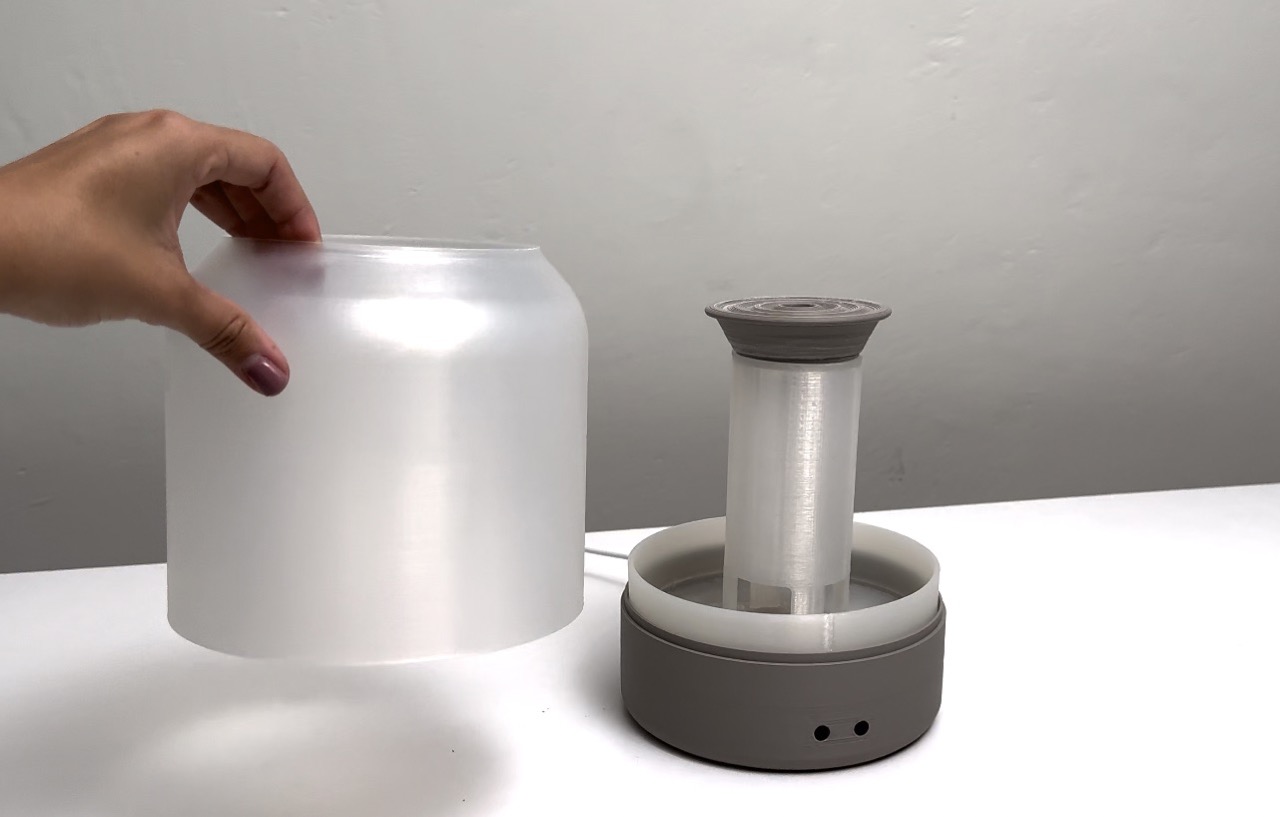
Printing process and result

3. Laser cutting
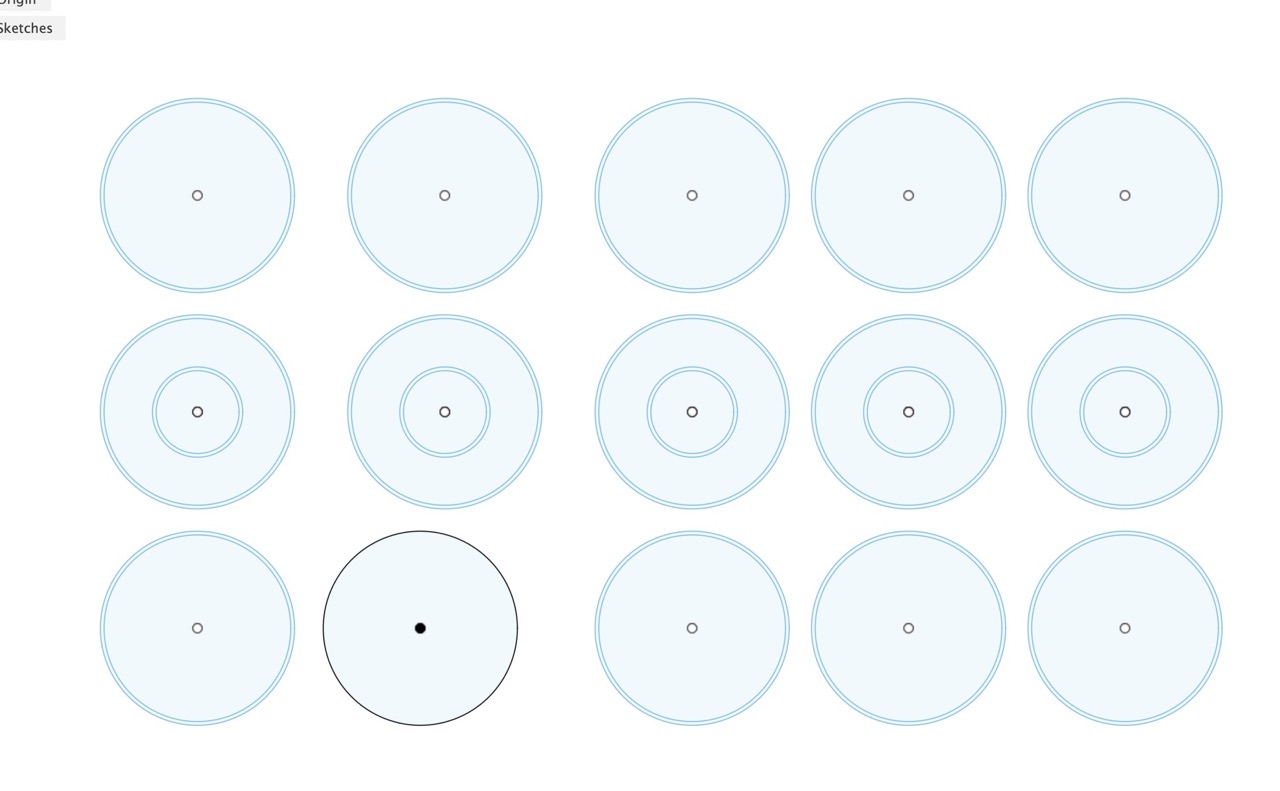
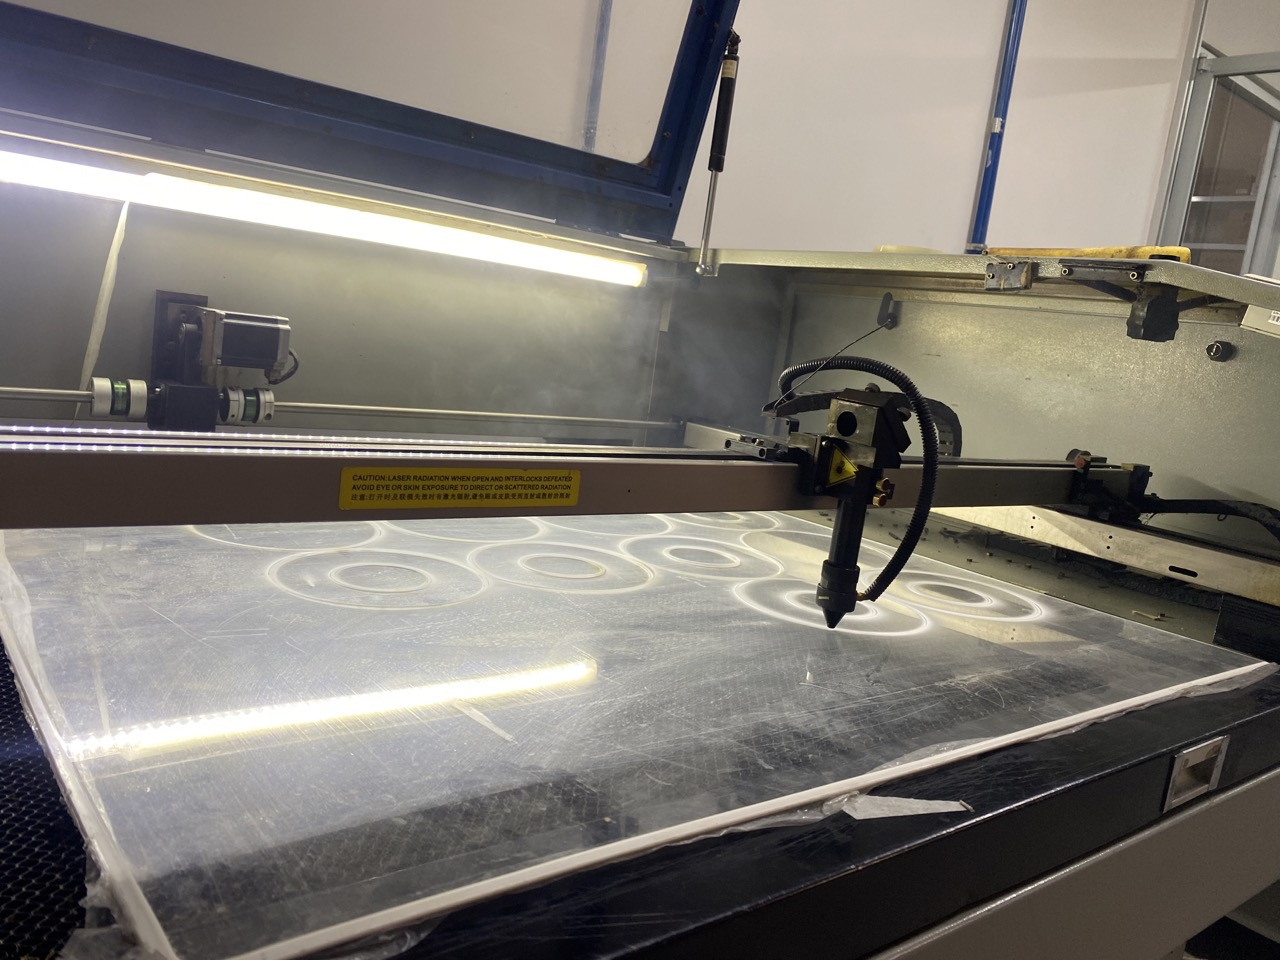
I used laser cutting for the water reservoir because the 3D-printed one leaked. Since I'm using electrical components, I opted for laser cutting acrylic, which is water-resistant and can be sealed effectively. Additionally, I cut some cardboard to make the product packaging. I started by sketching the shapes I wanted in Fusion 360 and then proceeded to use the laser cutter.
For the water reservesince the acrilic is 3 mm width and the water reserve is supposed to be 40 mm i cut 13 circles. So I sketched them all in a fusion's file and exported it as DXF
For the laser cutter I set the Max. power to 60%, the Min. power to 50% and the Work Speed to 40 mm/s.

For the packaging I sketched the different parts in Fusion 360 and set the parameters of the laser cutter to Max. power 100%, Min. power to 50% and Work Speed to 40 mm/s.
Then I pasted the box with glue.
4. Vynil cutting
For the packaging, I designed a logo and imported it as a vector into Fusion 360, then exported it. Fusion's file
I used the vynil cut as an stencil to paint on the box.
4. PCB design
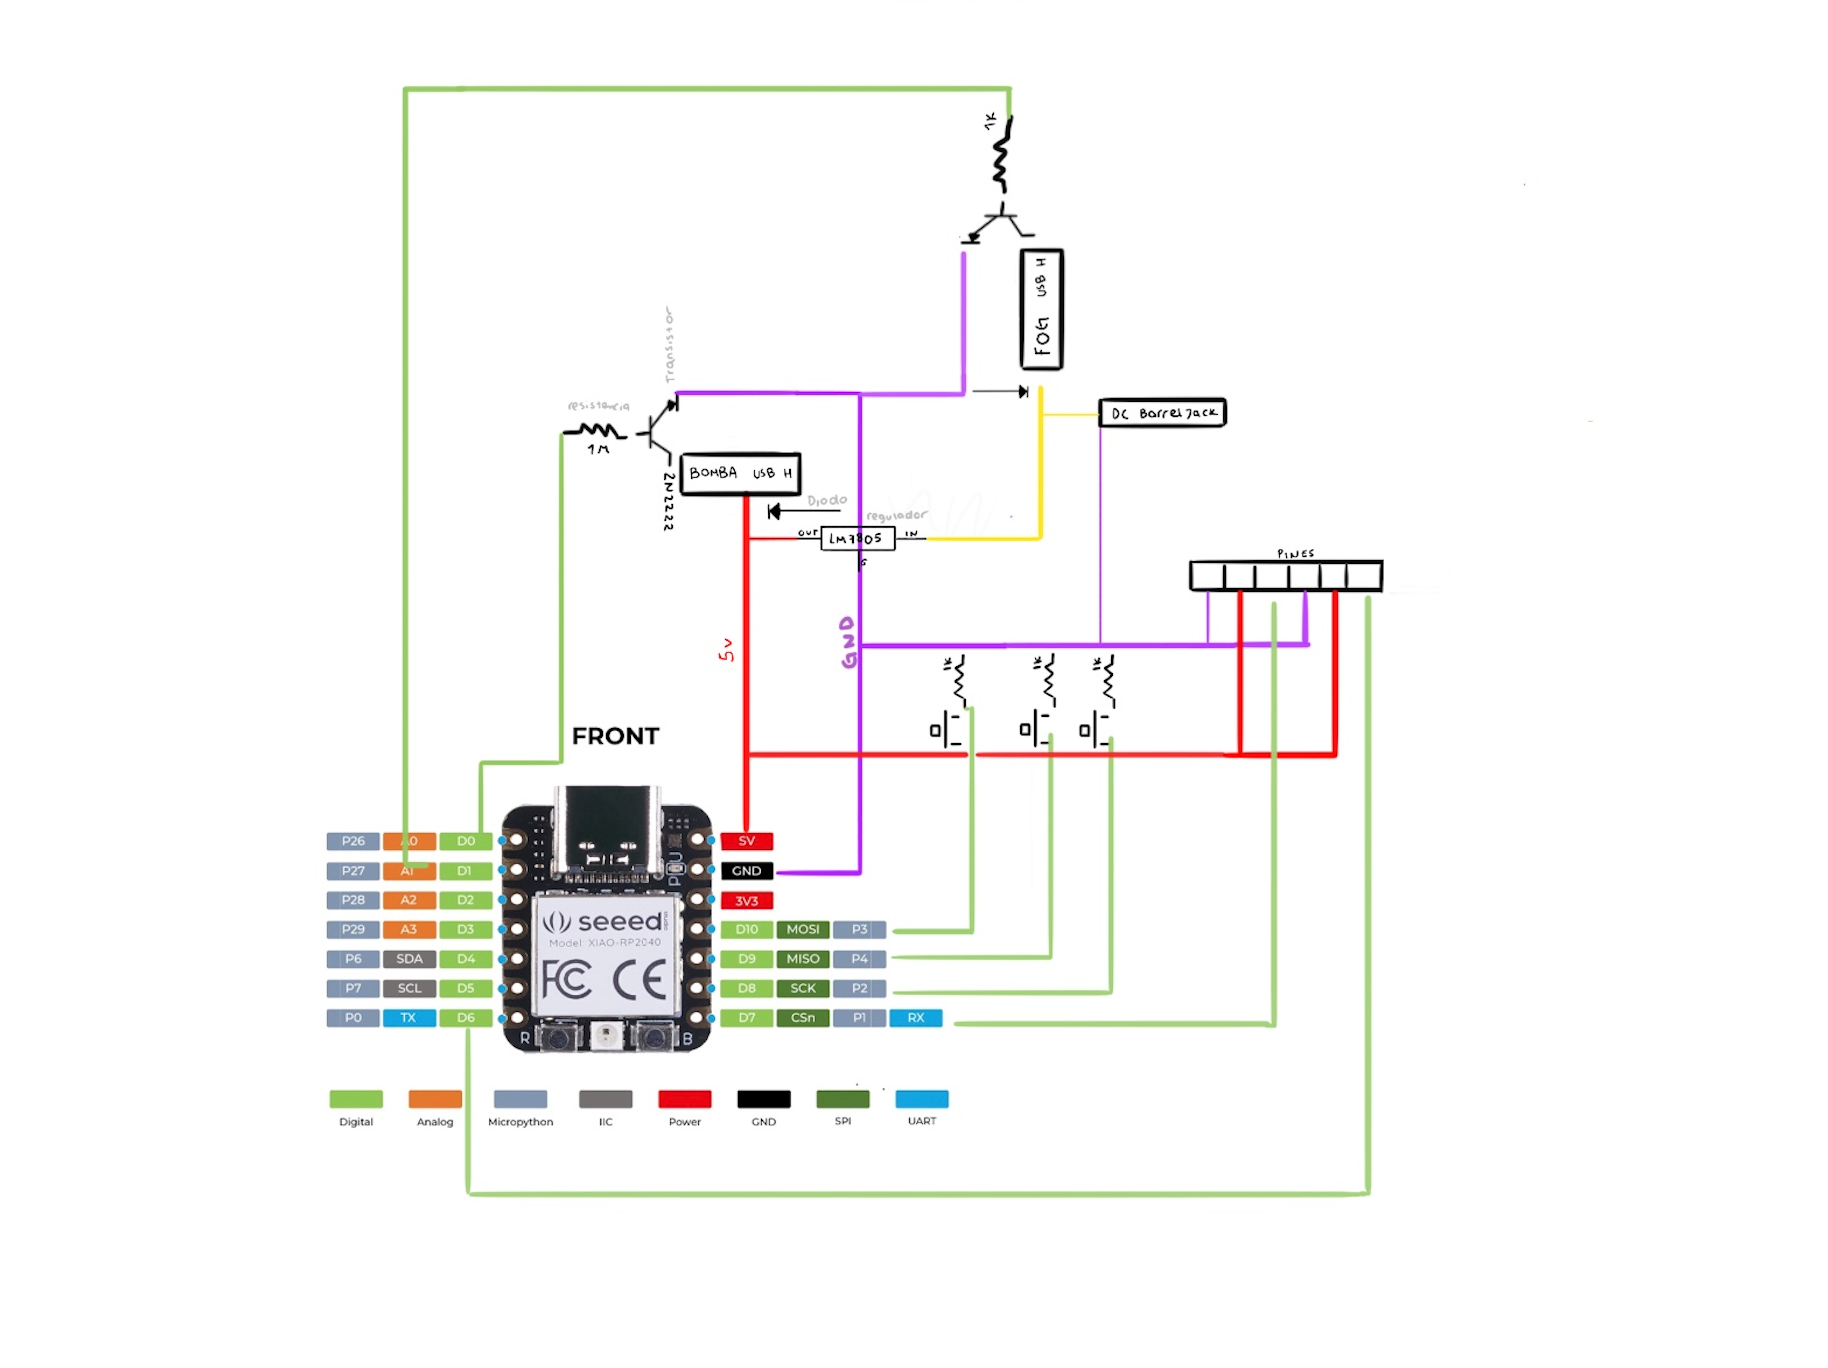
For my final project, I want the PCB to be able to control a ring of NeoPixels, a water pump, and an ultrasonic mist maker. To achieve this, I need to manage two different voltages: 5V for the microcontroller, NeoPixels, and water pump; and 24V for the ultrasonic mist maker.
For the PCB I used the following electrical components:
- Water pump: 4.5 V, 0.18 A
- Ultrasonic mist maker: 24 V, 700 mA
- Neopixel ring: 16 neopixels, 18 mA pear neopixel
- Resistors: 1m and 1K
- Diode Schottky 20V 1A SMD MBR120LSF
- Transistor:NPN 1.5A 25V SS8050
- Microcontroller Xiao rp2040
- Button
- Regulator:Lm7805
- Pins
- 24 V ppower source
-----Meassuring Amperes------
Once I had selected all the electrical components, I added the amperes of each individual component to verify that the regulator, transistors, and power source would work effectively. This ensured that my circuit could handle the total current draw without any issues. The total current draw added up to 1.17 A, so I made a good choice by selecting electrical components that can sustain up to 1.5 A. This provides a safe margin to ensure reliable operation.
Before using a software to design the board I sketched it first in Procreate.
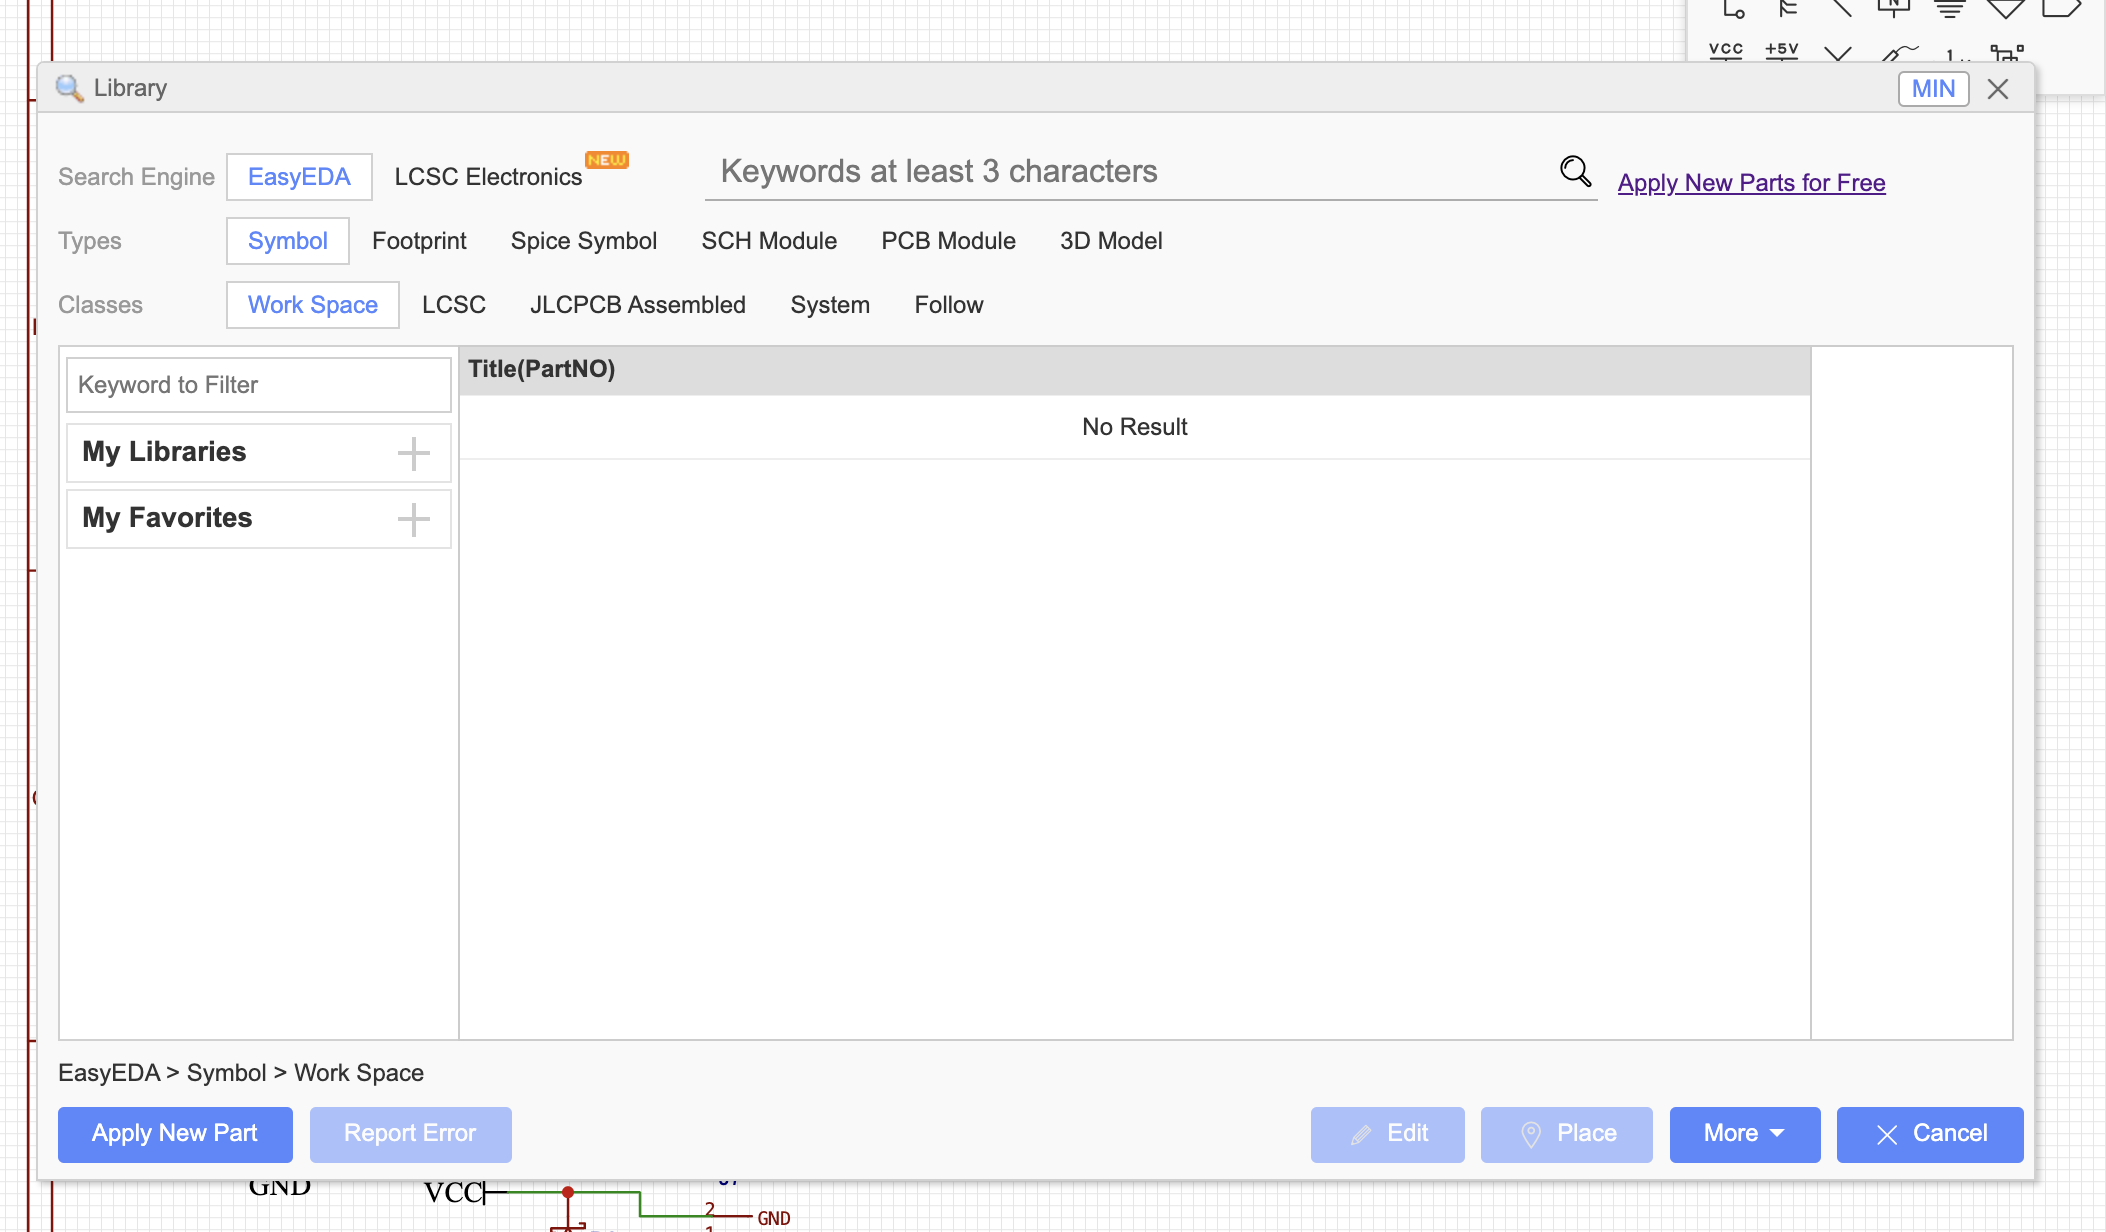
EASY EDA
To learn how to use different software, I decided to design the PCB in EasyEDA.I started by creating a new schematic sketch and used the online library to find the right components.
Then I used the "wiring tools" to connect all the components to voltage and ground and to each other
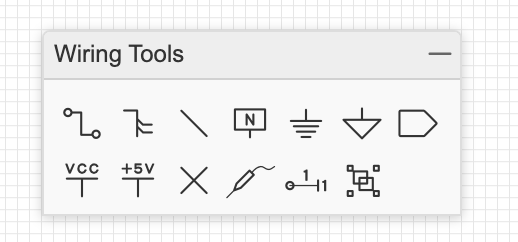
I decided to divide the 24v components and the 5v ones to prevent anything from happening.
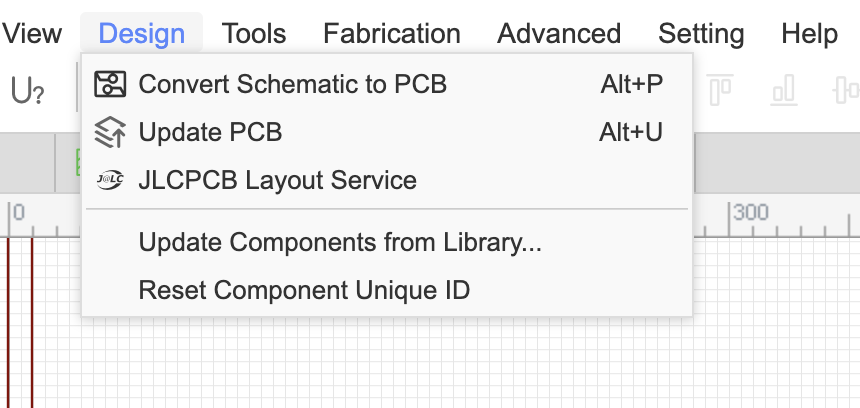
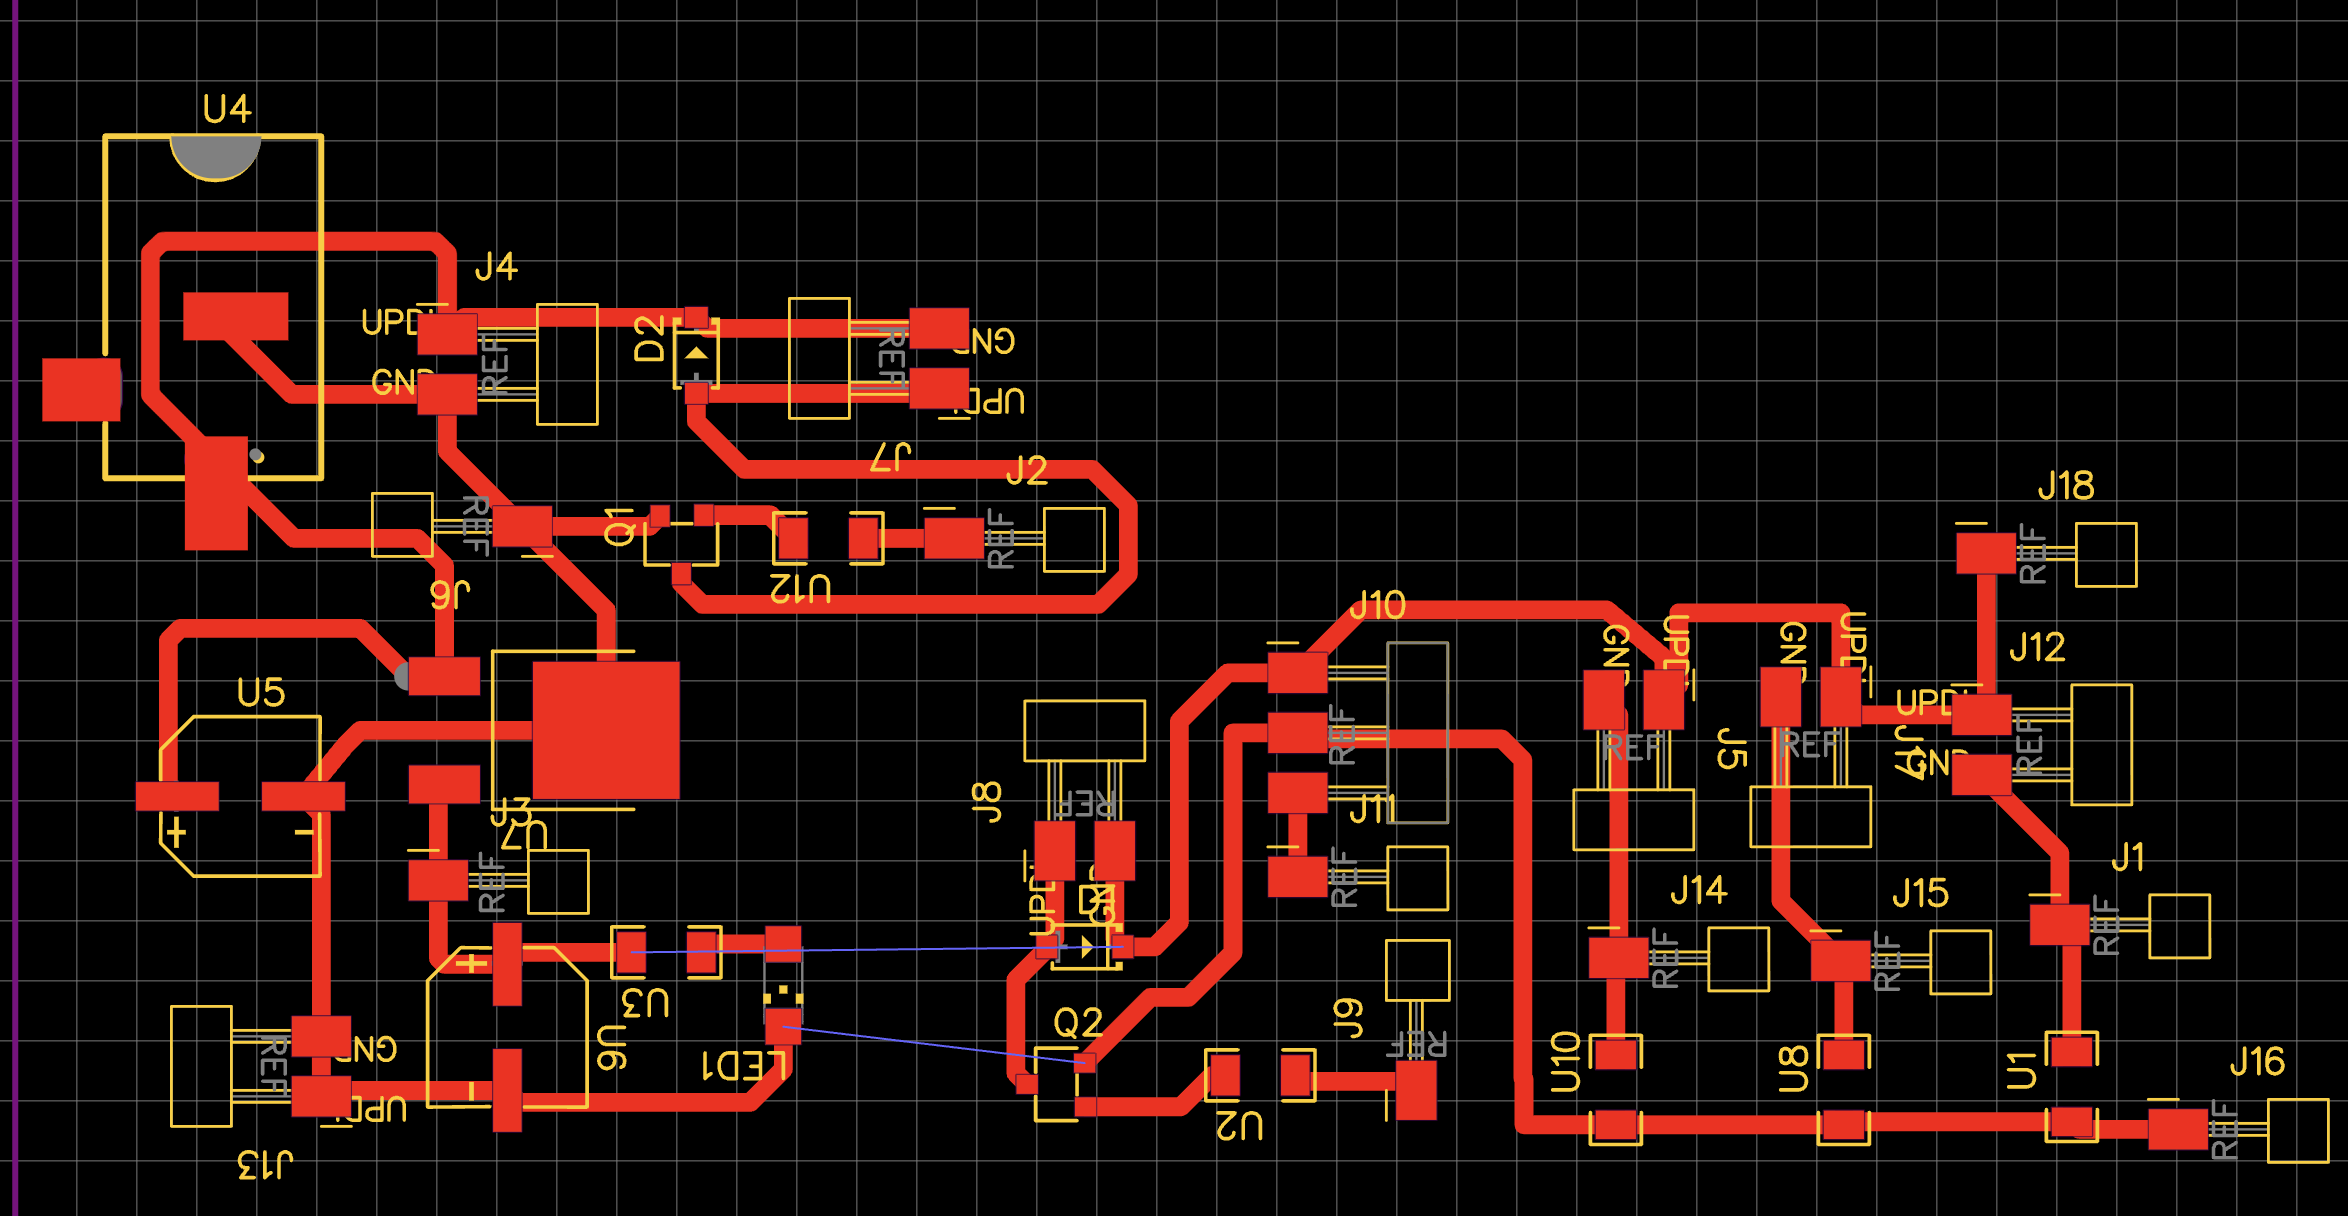
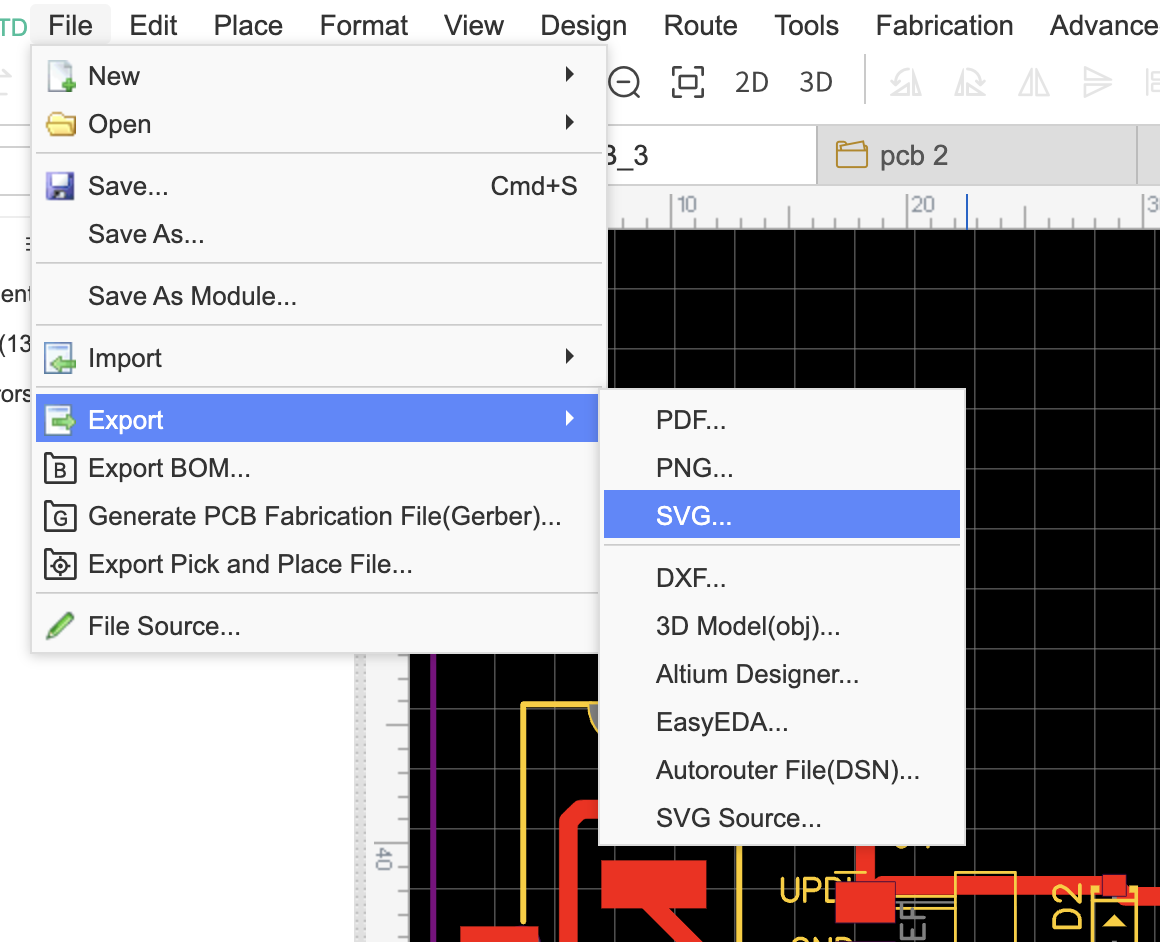
PCB design
Once I finished the schematic, I clicked on "Design" and then "Convert Schematic to PCB" to start laying out the physical design and finally exported it as an SVG.
4.1 Milling and soldering the board
For explanation on how to prepare the PCB file for cutting pleaso go back to my week's 8 assigment
4.2Soldering
5. Programming
For the programming, I used Arduino IDE. The code itself is not complicated. I wanted to make the NeoPixel ring change intensity in 3 levels as the button was pressed. I also wanted the water pump and the mist maker to turn on and off with a different button. When this button is pressed the first time, the water pump turns on. When it is pressed a second time, the mist maker turns on as well as the water pump. When the button is pressed a third time, both components turn off


Result