2d sketching
week 022D sketching!
For this week's assignment in 2D sketching, I decided to compare two types of software: one vector-based (Illustrator) and the other raster-based (Procreate). What does this mean? Essentially, vector software like Illustrator allows you to resize illustrations without losing resolution, making it ideal for logos or designs that need to be printed in various sizes and materials. In contrast, raster software like Procreate is limited to a specific resolution set before you start sketching. This means that if you resize the illustration, it may lose resolution. Both types of software serve different purposes. Below, I'll document my process experimenting with each one and discuss the best situations to use them.
Procreate
Procreate is a intuitive raster-based drawing and painting app designed for iPad. It offers a wide range of brushes, tools, and features for digital artists, illustrators, and designers. One of its key advantages is its natural drawing experience, mimicking traditional art techniques. It is the closest to drawing on paper but digitally! Procreate supports extensive layering, and a vast array of customization options, making it perfect for detailed and complex artwork.
Even though Procreate is very intuitive to use, here are some of my favorite basic features:
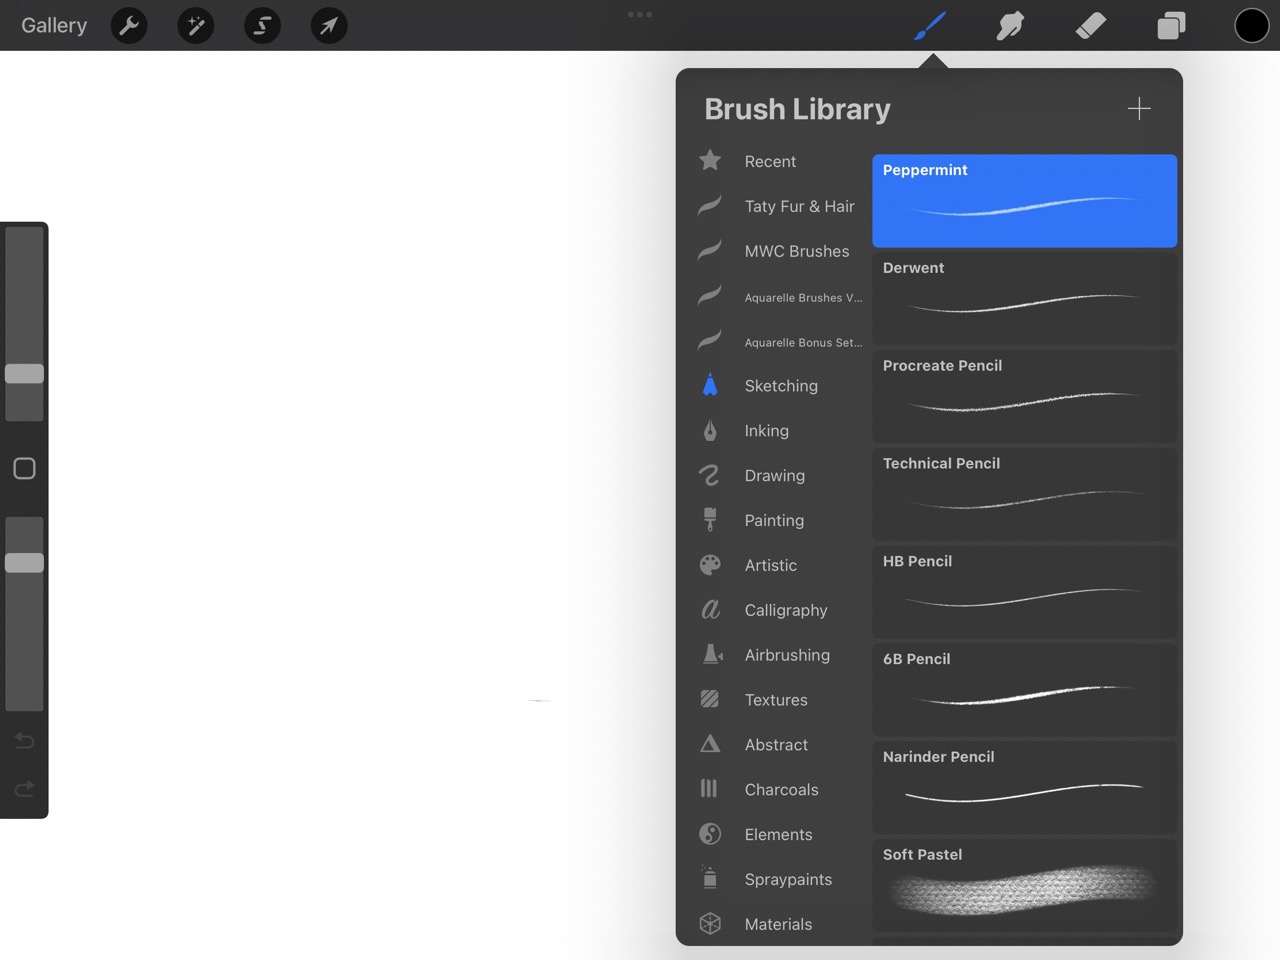
- Brushes: Procreate offers a vast library of pencils, brushes, pens, and more. An amazing feature is the ability to create custom brushes or download and import complete brush libraries.
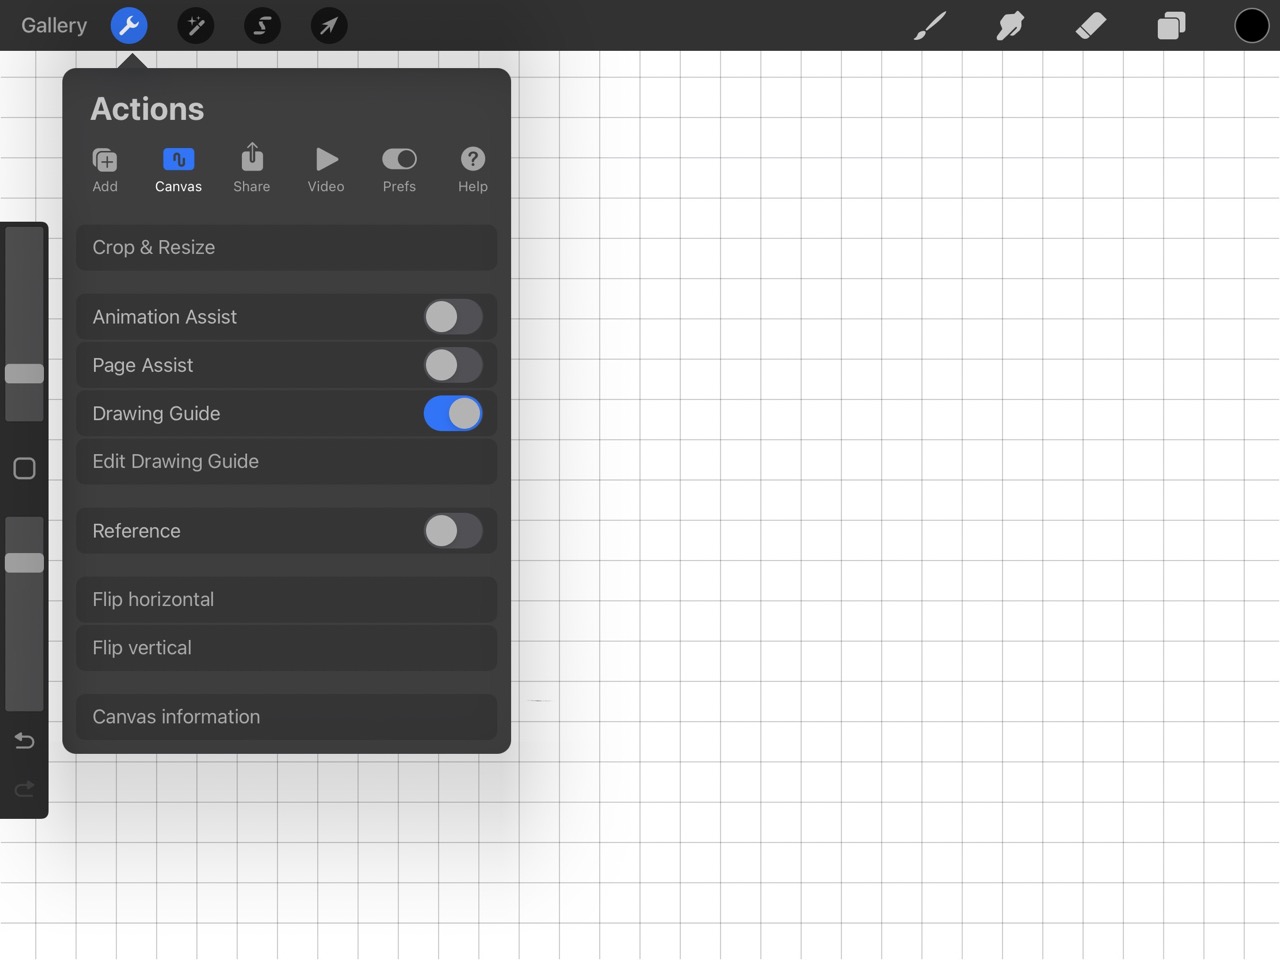
- Drawing Guide: My favorite tool so far is the drawing guide, which lets you choose between grid paper, isometric, or perspective guides. These serve as line guides for sketching.
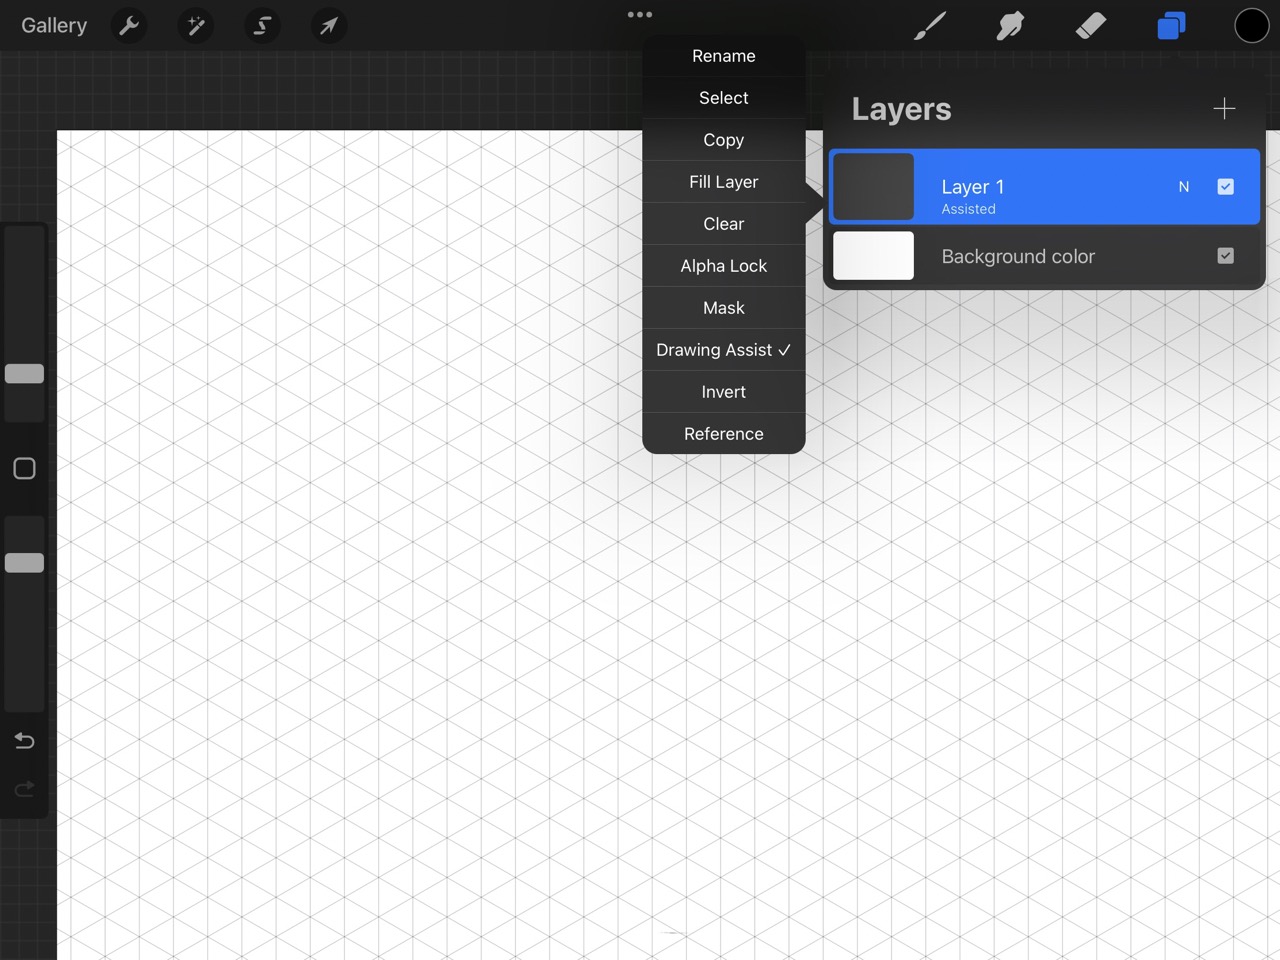
- Drawing Assist: This feature, which can only be used if a drawing guide is selected, snaps your lines to the guide, helping you create perfectly straight lines.
- Layering: Similar to Photoshop, Procreate supports layering. This makes error correction easier and allows for more versatile illustrations.
- Two-Finger Tap Command: This accessibility feature lets you undo the last action by simply tapping two fingers on the screen.
- Three-Finger Tap Command: By tapping three fingers on the screen, you can redo the last action, making it easy to correct mistakes.
Exploration
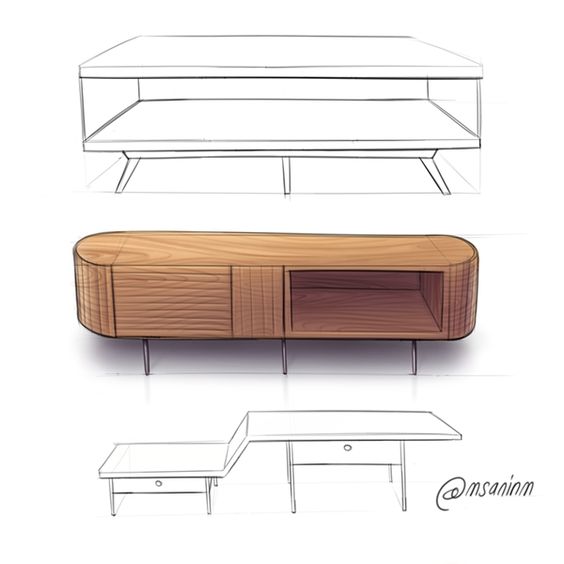
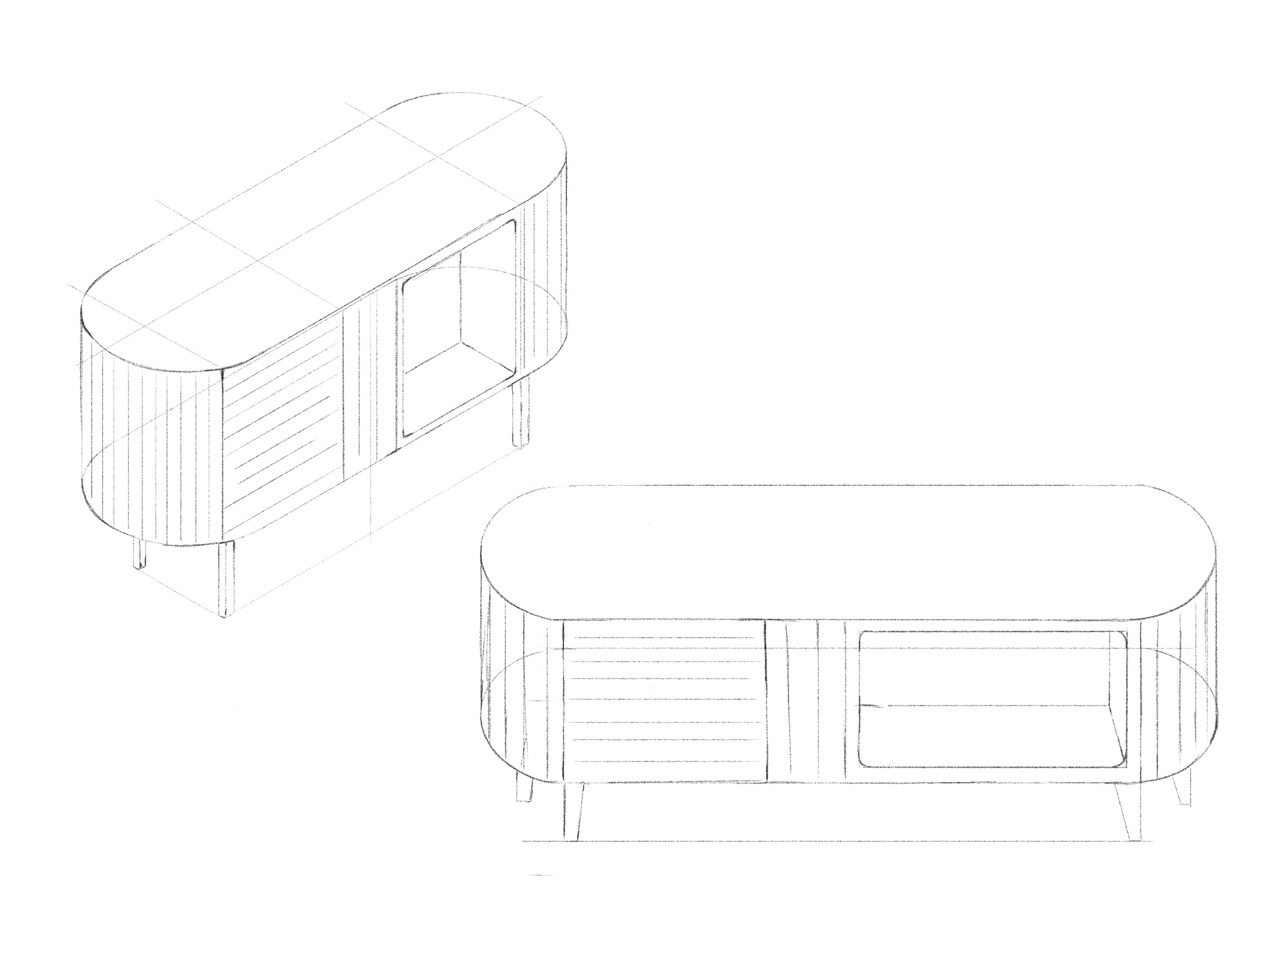
I find Procreate very useful for rapid sketching and brainstorming design ideas. It closely resembles sketching on paper, making it perfect for visualizing an idea before 3D modeling or starting a project. For this example, I decided to replicate a sketch by the famous designer @msaninm, known for his Procreate sketches. I used his sketch from Pinterest, and I'll leave the link below.
- Started by creating a new document in Procreate.
- Selected the "Peppermint" pencil from the "Sketching" menu.
- Turned on the "Drawing Guide."
- Created a new layer and enabled "Drawing Assist" for straight lines.
- Began sketching the main shape.
- For the circles, pressed one finger on the screen while drawing to create perfect circles.
- Once the drawing was complete, created a new layer to emphasize certain parts of the sketch, making it more refined and sketch-like.
- Selected all the layers and created a group for easier organization.

Result
Illustrator
Illustrator is a vector graphics editor developed by Adobe, widely used for creating scalable graphics, illustrations, and designs. Its key advantages include the ability to create high-quality vector art that can be resized without losing resolution, making it ideal for logos, icons, and print materials. Illustrator offers precise control over shapes, paths, and colors, along with a vast array of tools and features such as gradients, effects, and typography. Its integration with other Adobe Creative Cloud applications enhances workflow efficiency, allowing for seamless collaboration and compatibility across different design projects.
Exploration
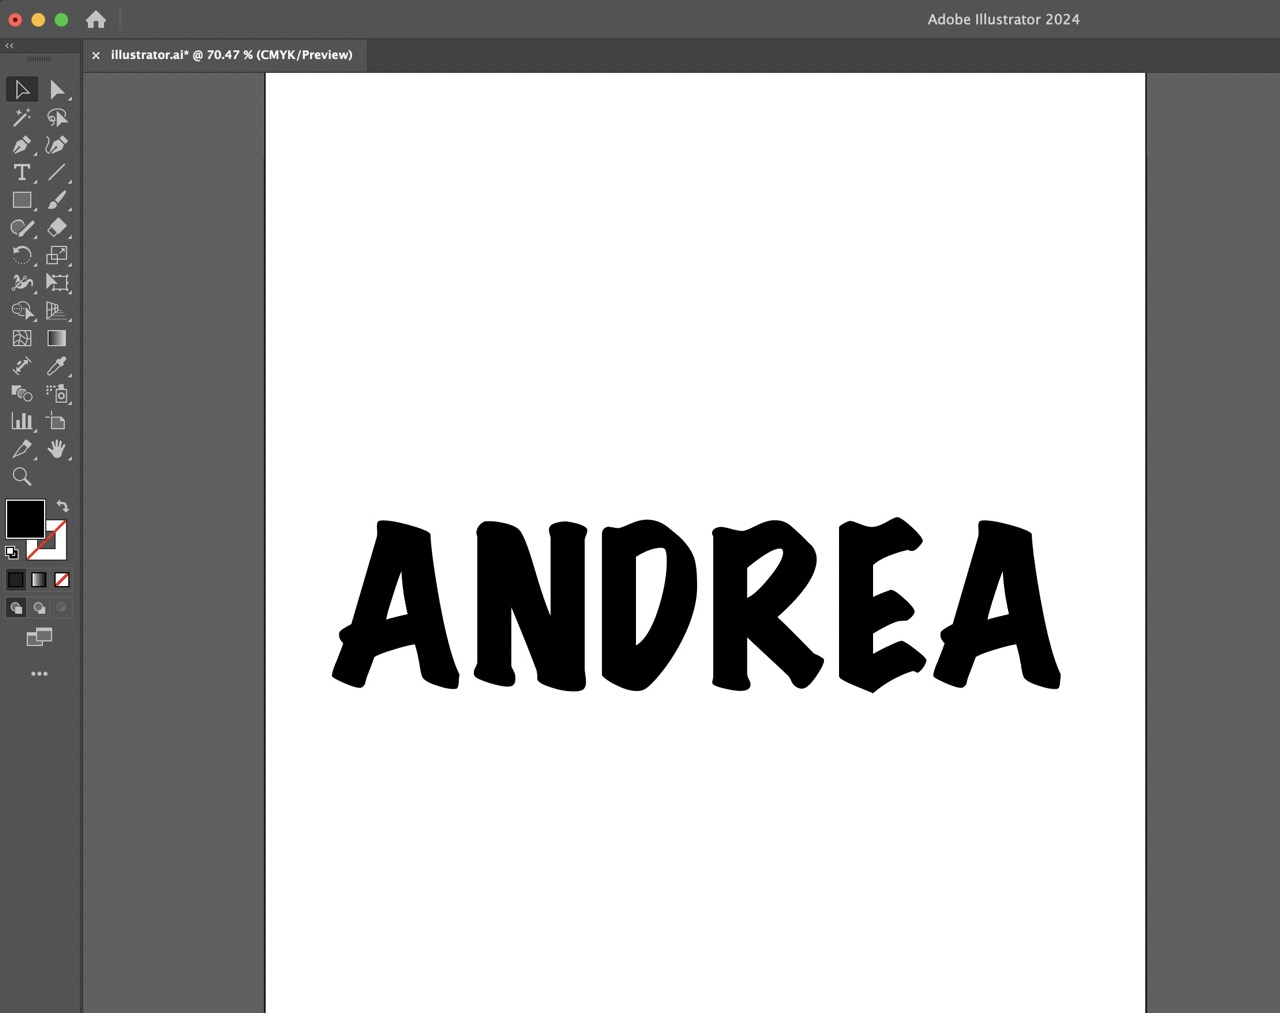
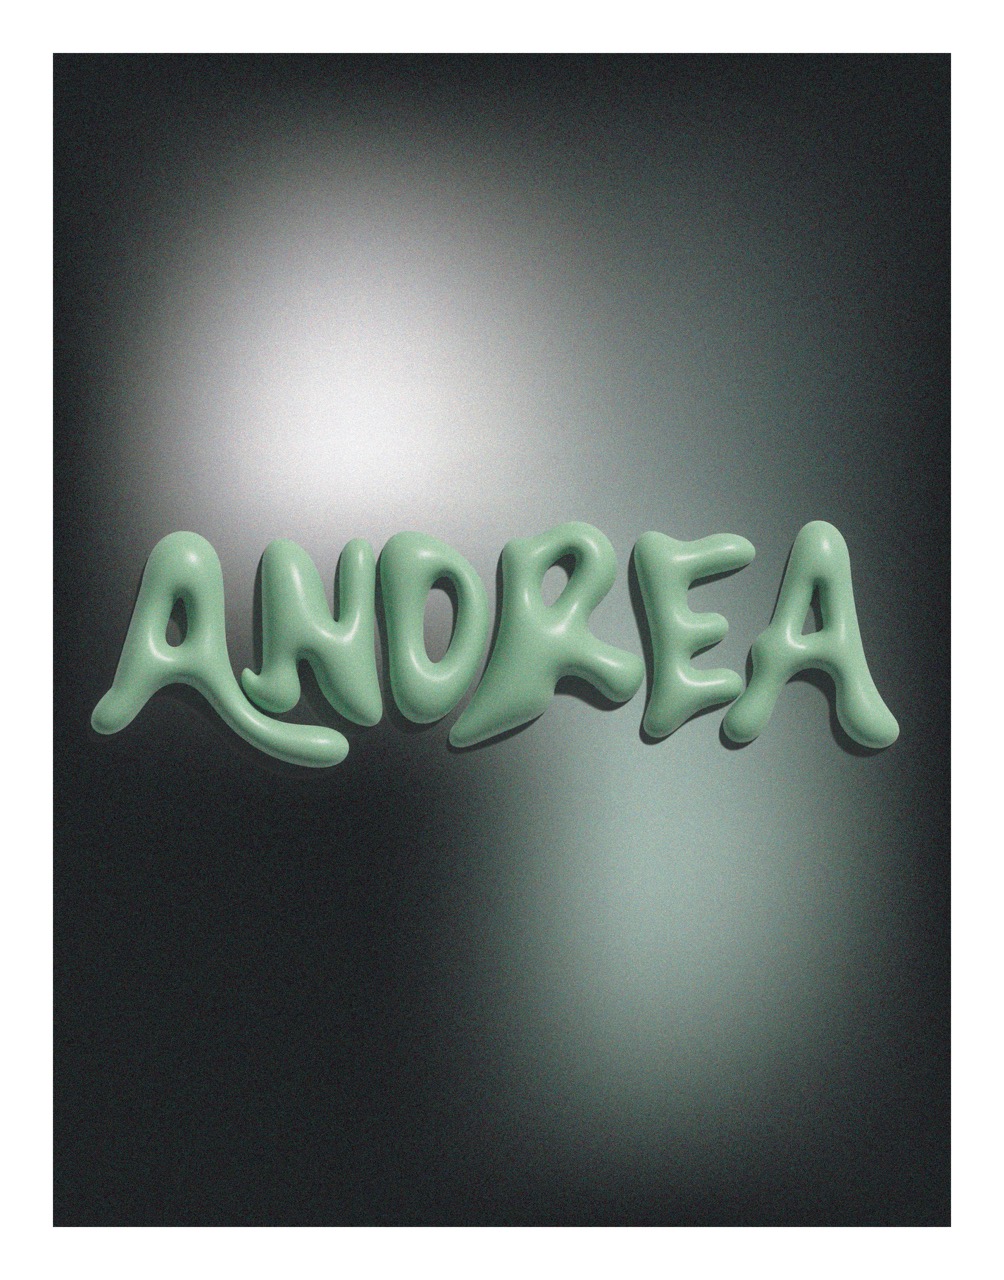
I like using Illustrator for graphic design and achieving a polished, finished look for illustrations. Illustrator's features make it easier to create realistic illustrations quickly. For this exploration, I'll design a graphic of some balloon letters.
For a similar outcome youn can follow this youtube's tutorial
- Created a letter-sized document in Illustrator.
- Added the text and changed the font.
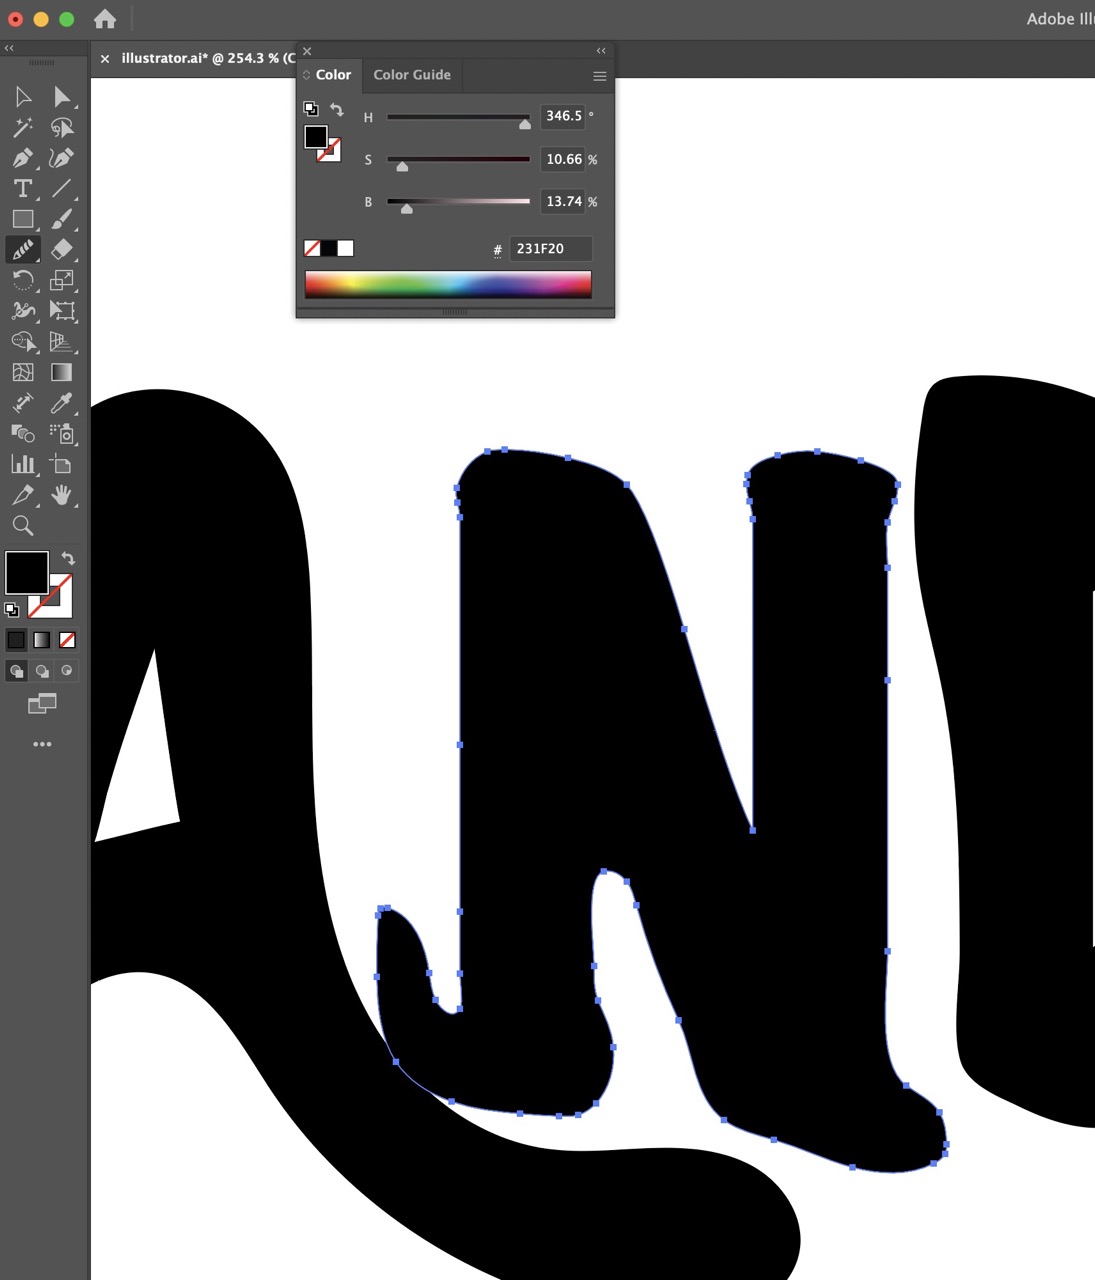
- Right-clicked and selected the "Create Outlines" option.
- Ungrouped the text.
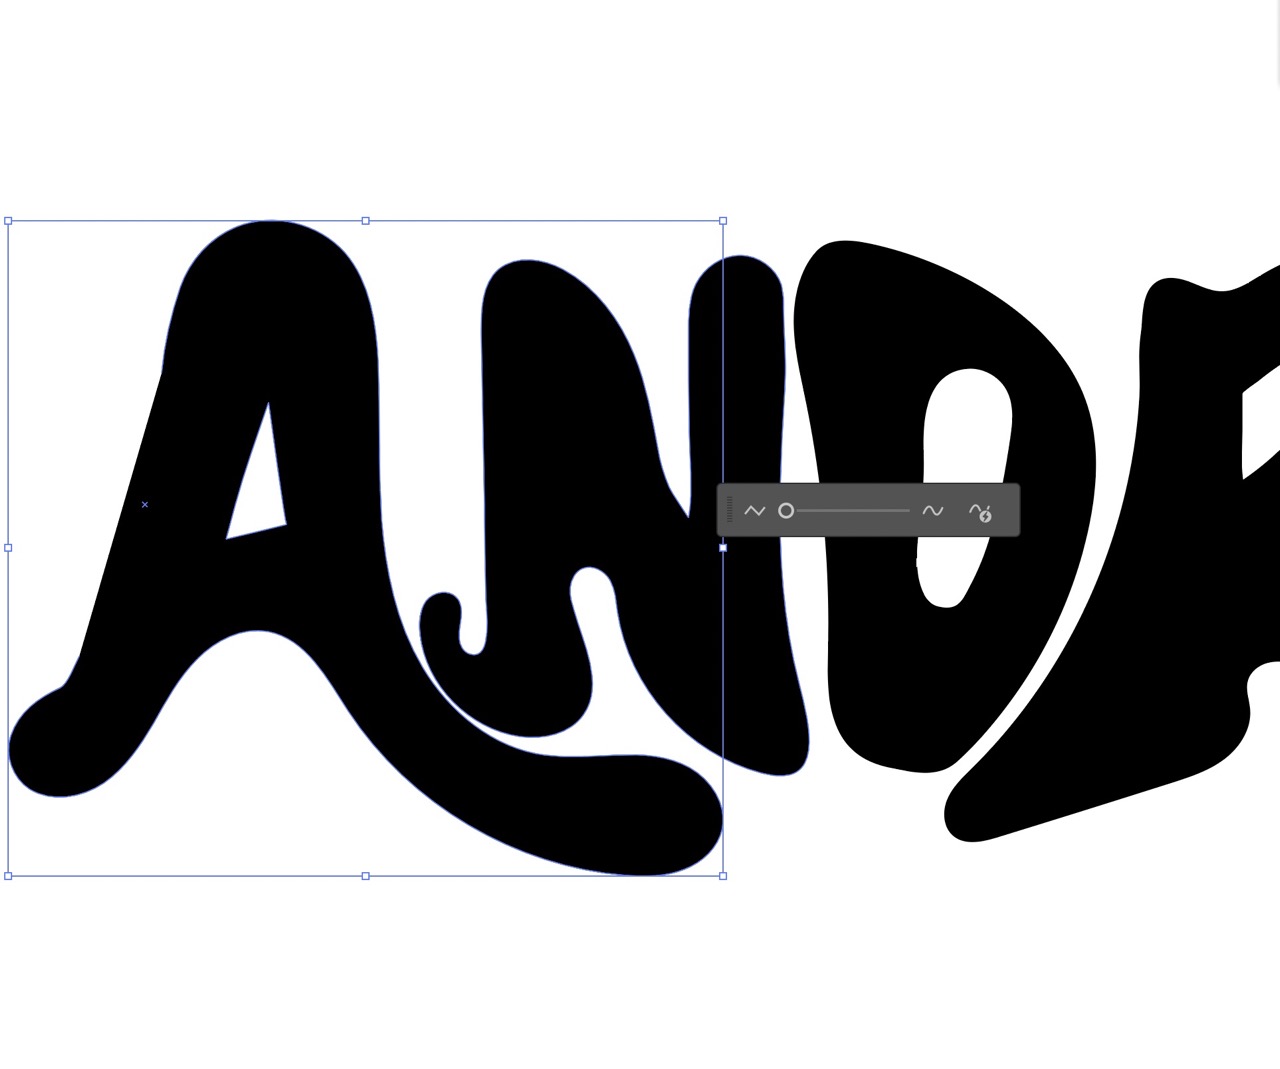
- Selected each letter with the white arrow tool and used the pencil tool to reshape the letters, making them more bubbly.
- Selected each letter, went to the Object menu, chose Path, and then selected Smooth.
- Grouped the text and opened the Effect menu, then clicked on 3D.
- Turned on the shadow option under the Lighting menu and adjusted the depth.
- Created a black rectangle for the background.
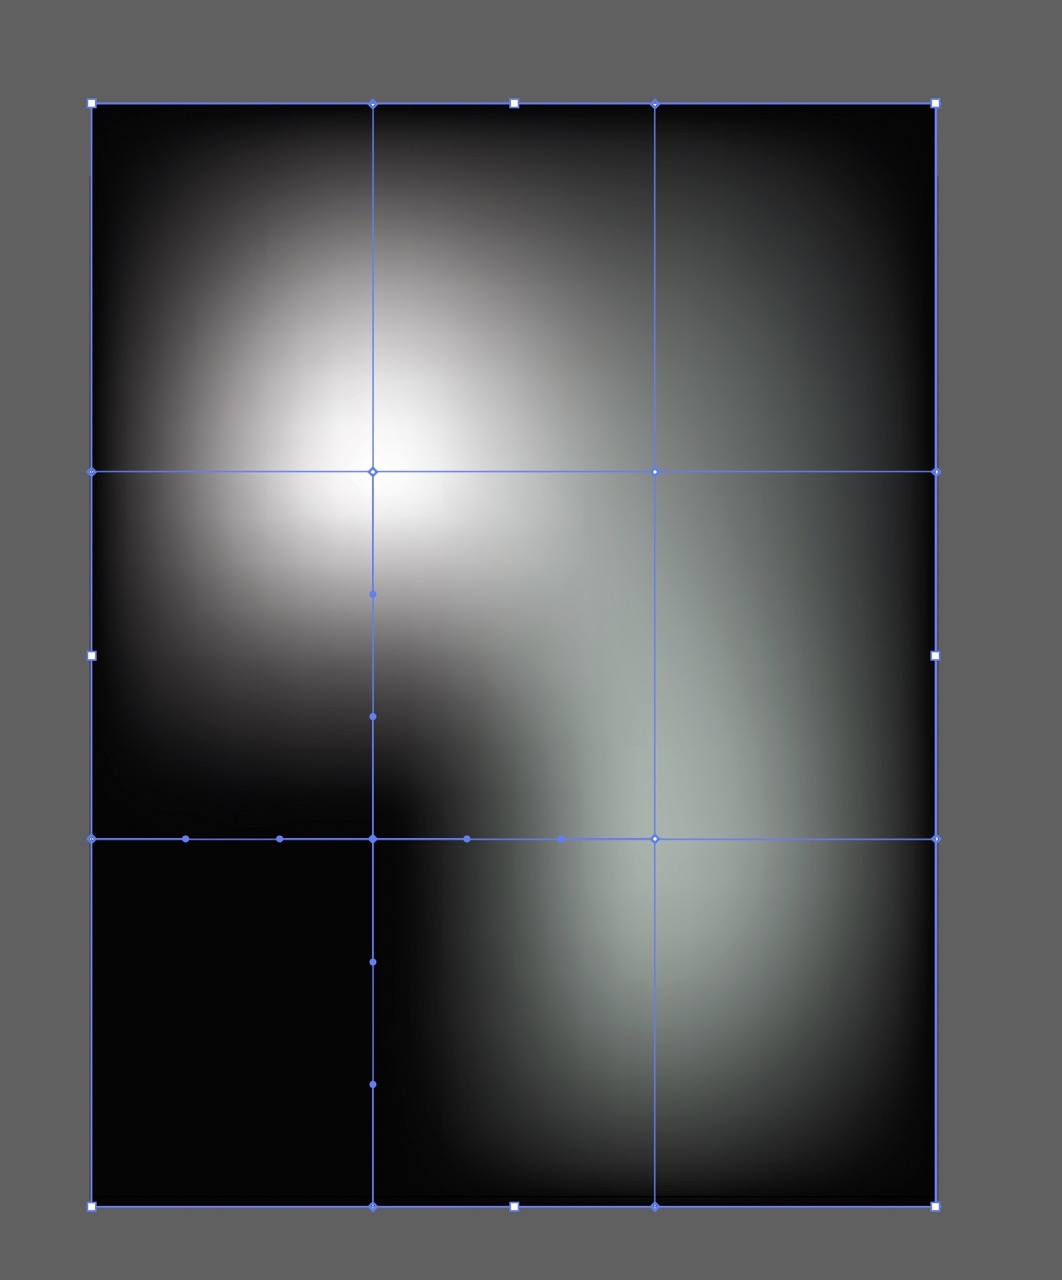
- Clicked on Object and chose Create Gradient Mesh.
- Selected the mesh option, clicked on each point, and changed its color.
- Selected the rectangle and added the Texture effect, choosing Granulate, and applied it to both the background and the text.
WHAT I LEARNED FORM THIS ASSIGMENT
After experimenting with both Procreate and Illustrator, I've found that Procreate is ideal for sketching and achieving a natural, paper-like drawing feel. It's excellent for rapid prototyping and exploring shapes easily, and its wide range of brushes makes it great for creating realistic, artistic drawings. However, Procreate's downside is that it's not vector-based, which means the resolution of illustrations can suffer and it's not as versatile as vector graphics. On the other hand, I prefer Illustrator for graphic design and illustrations intended for printing or cutting. Illustrator's features make it easier to create different textures and effects compared to Procreate, which feels more like traditional, handmade drawing. Illustrator's digital approach allows for more precision and versatility. In my workflow, I find that Procreate and Illustrator complement each other well. I often sketch in Procreate for an easier tracing experience, then import the drawing into Illustrator to use its tracing feature. This combination is especially useful for logo design and pattern creation. I believe 2D sketching is crucial before moving on to 3D modeling. Being able to create detailed drawings from different perspectives is essential before beginning the modeling process.