3D modeling
week 02Parametric Design!
I’ve never used parametric design for modeling and wow it was a game changer. I initially thought that it only let you change the meassurements whenever you wanted to but this week made me realize that there’s more to it. You can set parameters of meassurments to later use them as a dimension for every sketch throughout the modeling proccess. What I liked the most was setting different parameters and then using them to create a new one that changes depending on the other two. For instance, if you set a parameter called "Length" and then another that is a non-numerical value named "Number of Pieces", then you can create a third one named "Length per Piece" and set its value to Length/Number of Pieces. That will give you the total Length of the object divided by the number of pieces, resulting in equal-sized pieces that fit perfectly within the original piece!
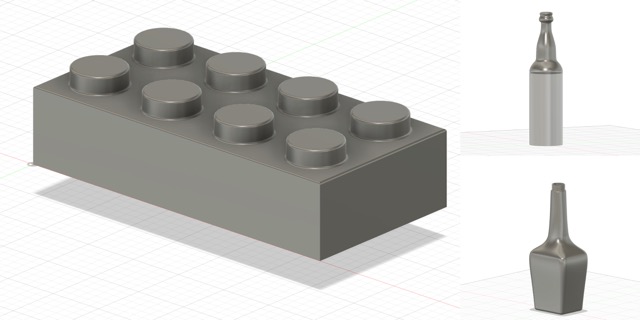
On this second week, I immersed myself in learning Fusion 360, a software I've been eager to use for some time. My experience with parametric software was limited to Rhino and SolidWorks, but I hadn't dived into the parametric aspects of either, especially since SolidWorks isn't available on iOS. My journey began with a series of YouTube tutorials from the channel “Product Design Online”titled "Fusion 360 User Interface Tutorial 2023." These tutorials were essential into familiarizing myself with the interface. Following these videos I modeled two different bottles, an ice cube tray, and a Lego block, employing 2D sketching, offset planes, extrude and revolve features, sweep and loft options with rails, fillet, mirror, and pattern creation. These tutorials are an excellent starting point, and I highly recommend them to anyone looking to learn. I'll leave a link below for those interested. I’ll leave some photos for you to see the models, I don’t include any explanation since there is a better one in the video tutorials.
MODELING ON FUSION 360 FROM SCRATCH
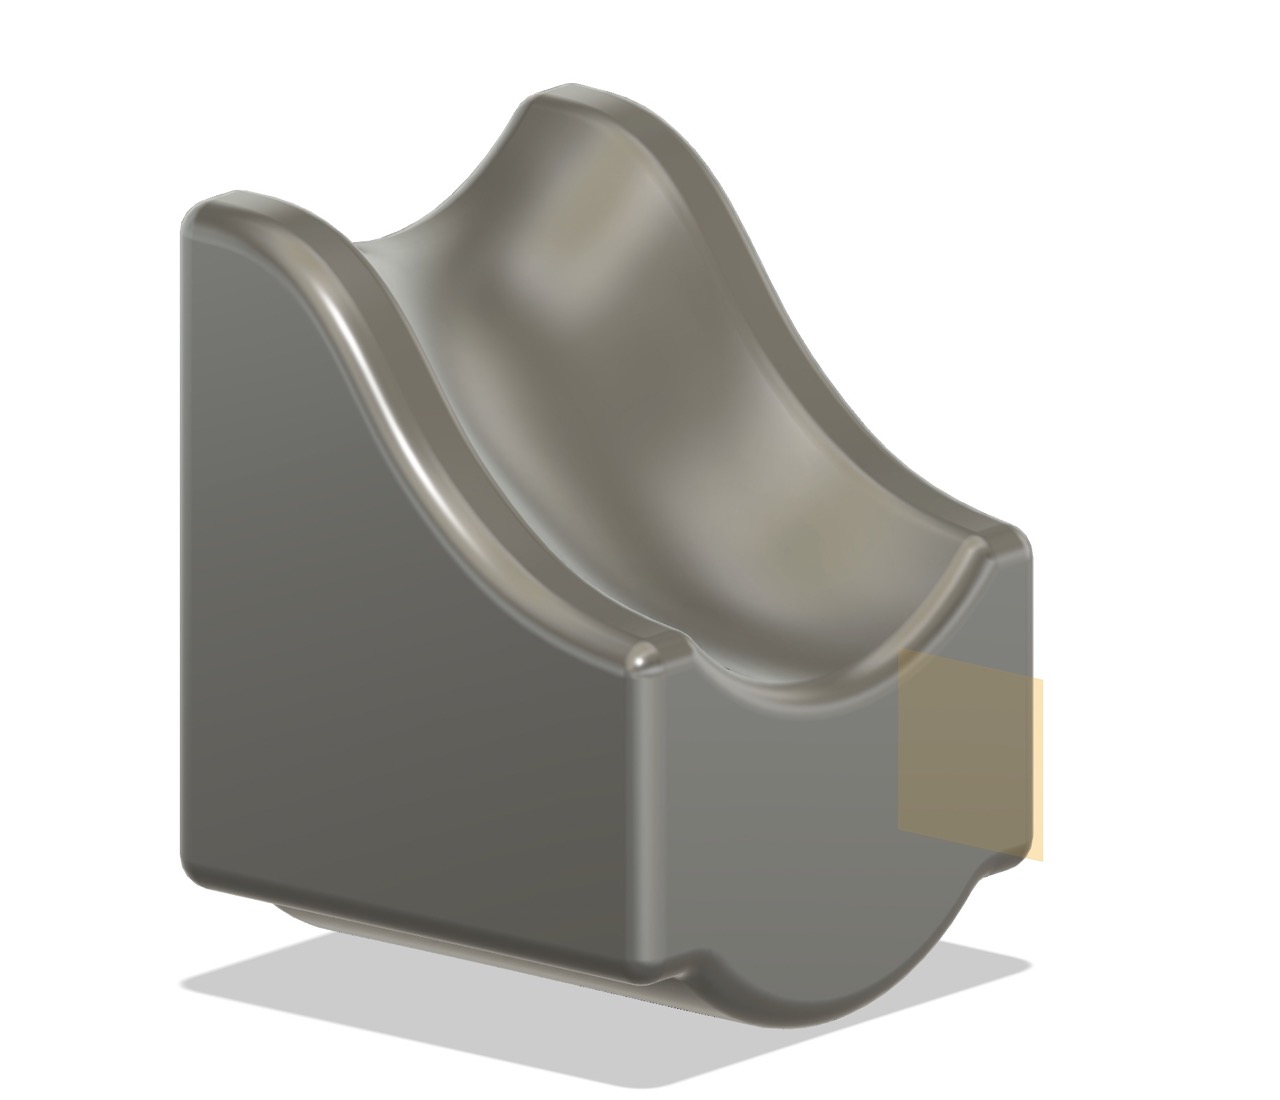
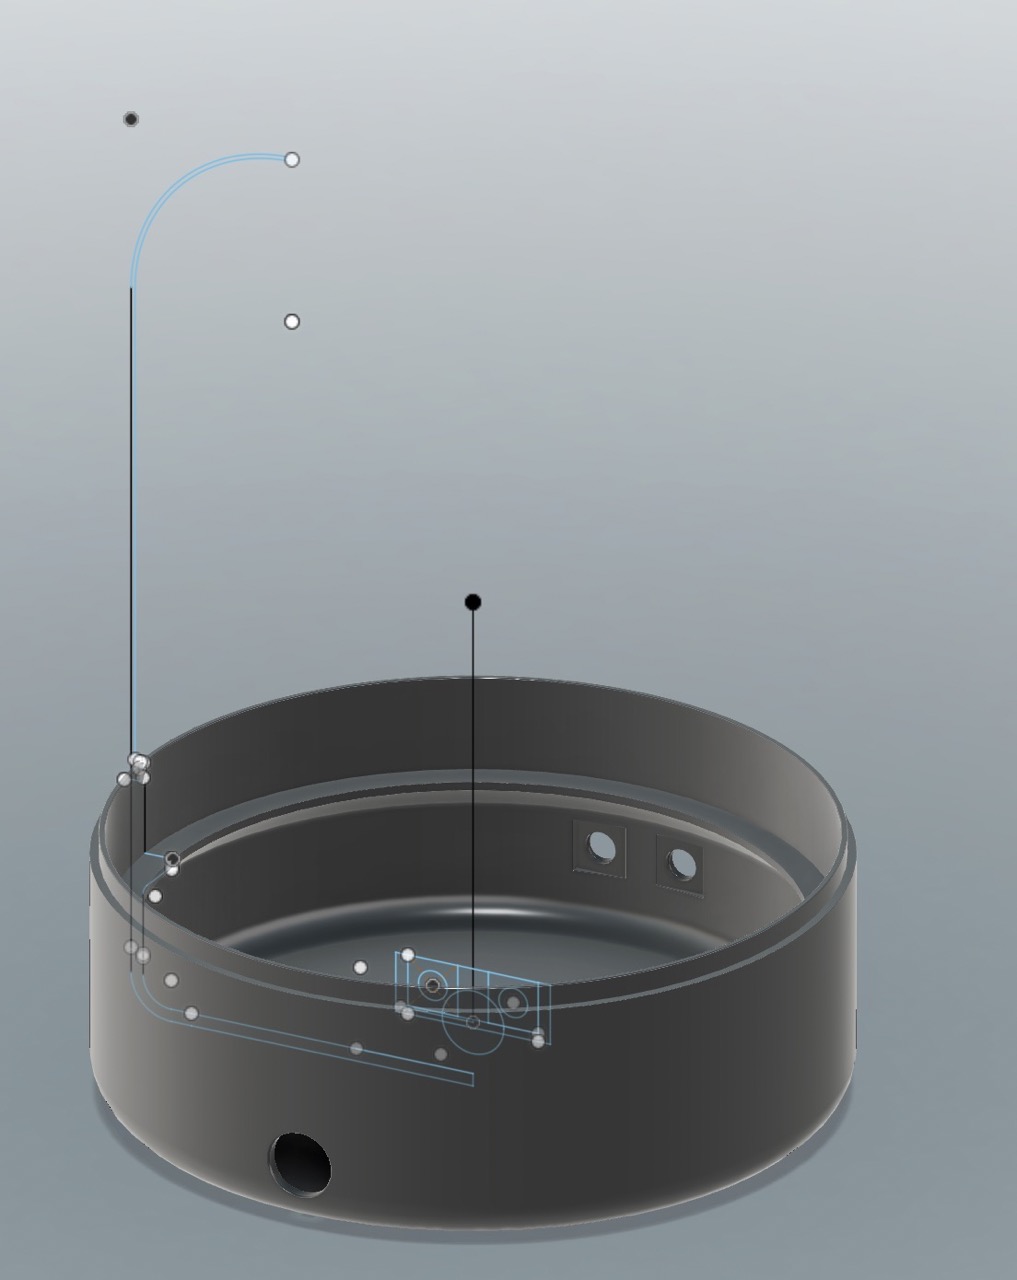
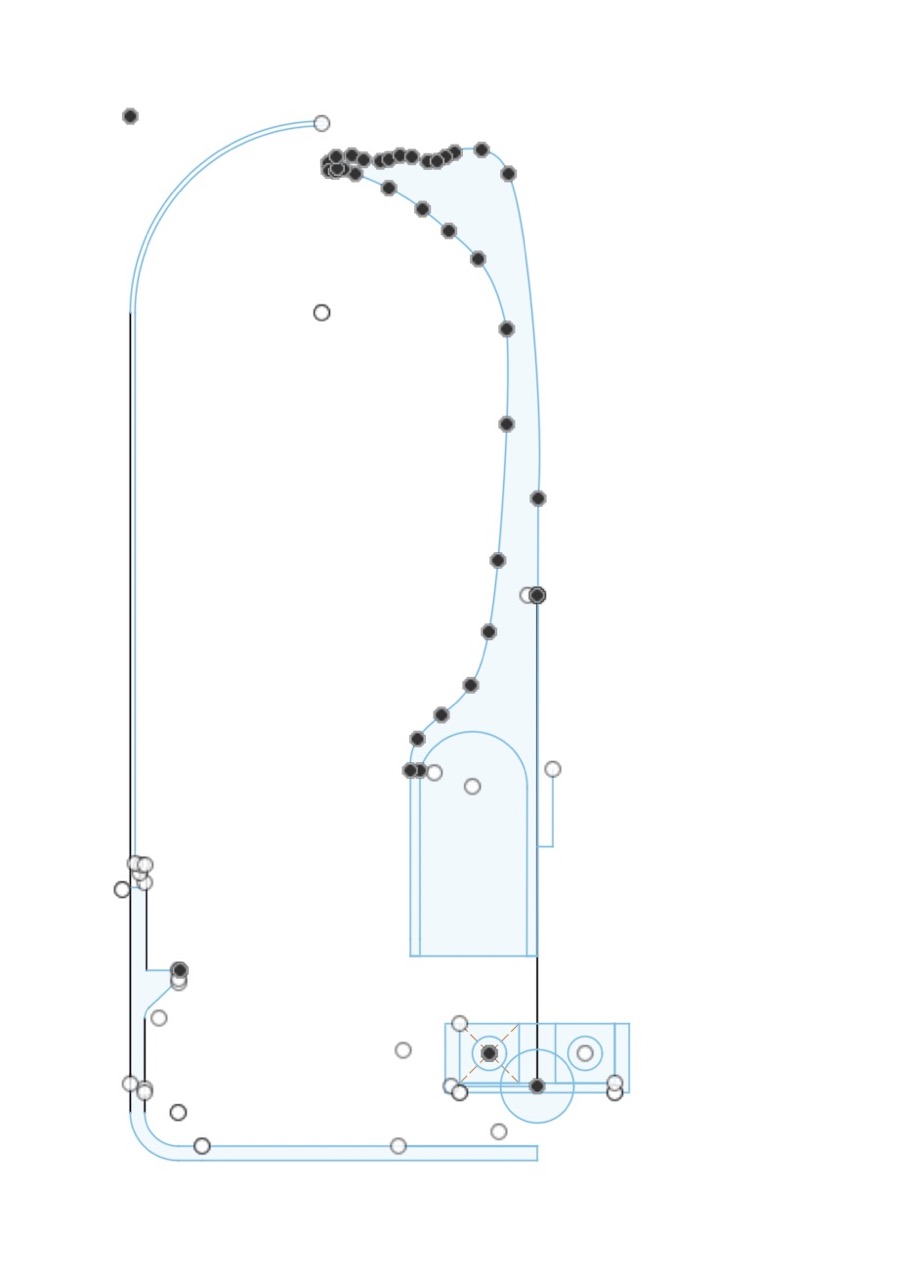
To further experiment with Fusion, I revisited a toy I had designed in Rhino for a project last semester. This toy consists of modular pieces that interlock to create a marble track, made possible by the uniform dimensions of the blocks, of which there are seven different types. I’ll leave a photo of the final model first so the explanation makes sense and is easier to follow.
I began by setting parameters in the solid tab, adjusting them in the modify section, and finally changing parameters to establish the following:
Parameters:
- Block Length (BL) 140 mm
- Block Width (BA) 70 mm
- Block Height (BH) 40 mm
- Block Number (B) 2 or 1, depending on the block
- Base Block (BB) 140 / B, a crucial parameter for adjusting block length equally
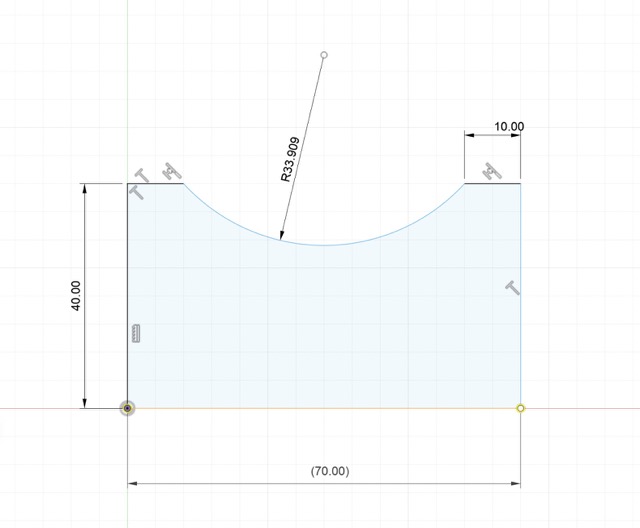
- Radius of the Circle (R) 33.9 mm
- Length of Line Next to the Curve (Lc) 10 mm
- Fillet 4 mm
For the bases:
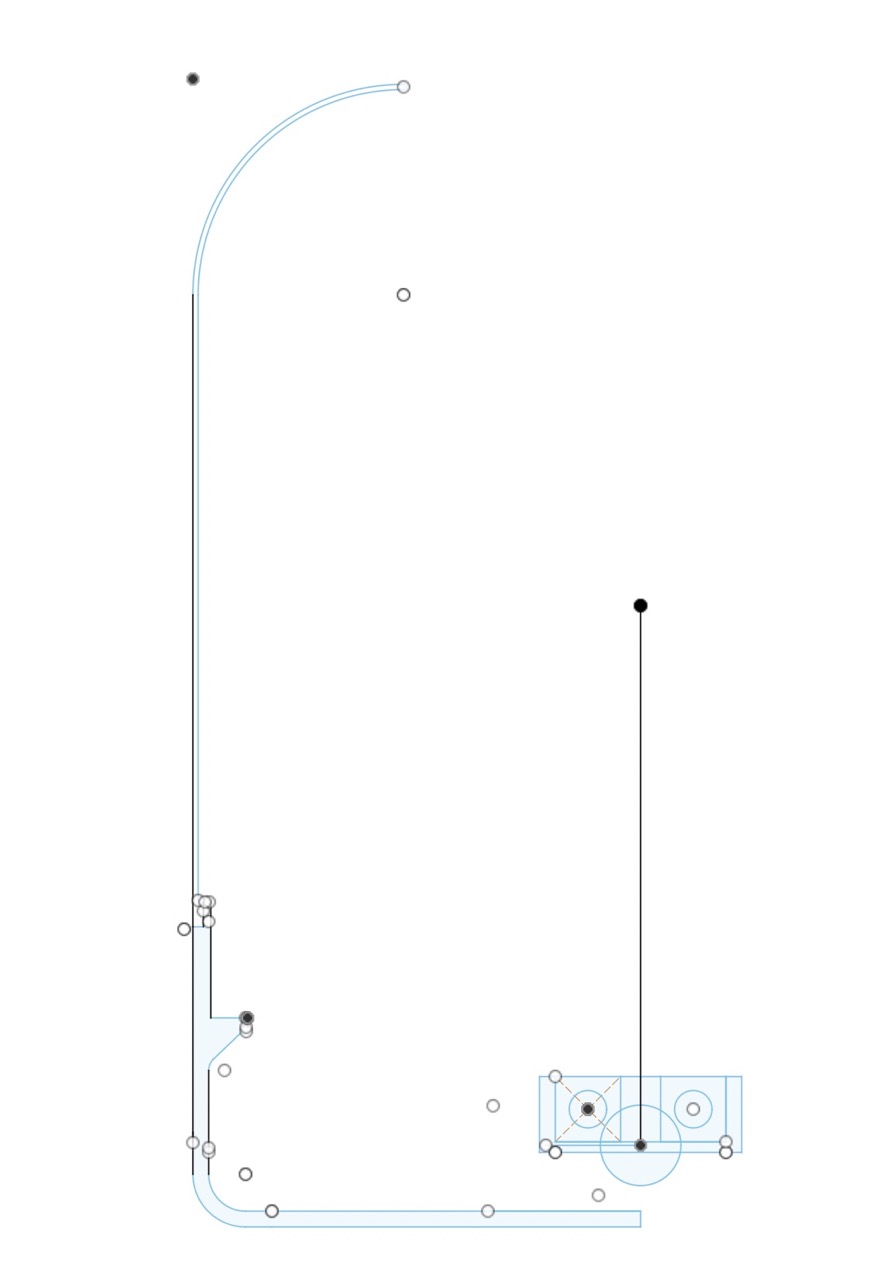
- I initiated a new sketch on the XZ plane
- I used the line tool to draw the shape and added a 3-point curve
- The sketch dimension command helped me add the established parameters
- I completed the sketch and extruded it to the desired length (140mm)
- For the shorter block, adjusting the Block Number (B) parameter to 2 automatically changed its length
- I copied and mirrored the sketch lines adjacent to the arc (Lc) to the sketch's bottom
- A new 3-point arc was created, setting its radius automatically with the parameter Ra
- TThe sketch was then extruded
- Changing the Block Number to 2 in the parameters tab adjusted the length for the shorter block automatically
- I replicated the sketch on the XY plane and redid it on the YZ plane
- The sketch's general form was outlined, and dimensions were defined using the sketch dimension feature and pre-established parameters
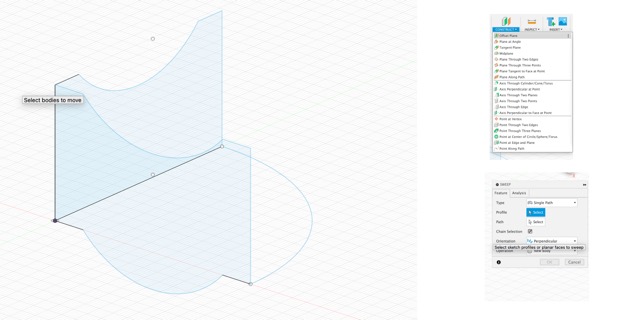
- Another sketch was created from the bottom view, drawing a 2-point circle that bridged the two sketches
- The sweep option (single path) was utilized to form the block
- Using the base sketch on the XY plane, I created an offset plane, inputting the Base Block (BB) parameter and setting the Block Number (B) to 2 for a shorter block
- On this plane, a new sketch was drawn, mirroring the general shape but adjusting the height to 80 mm to allow marble passage
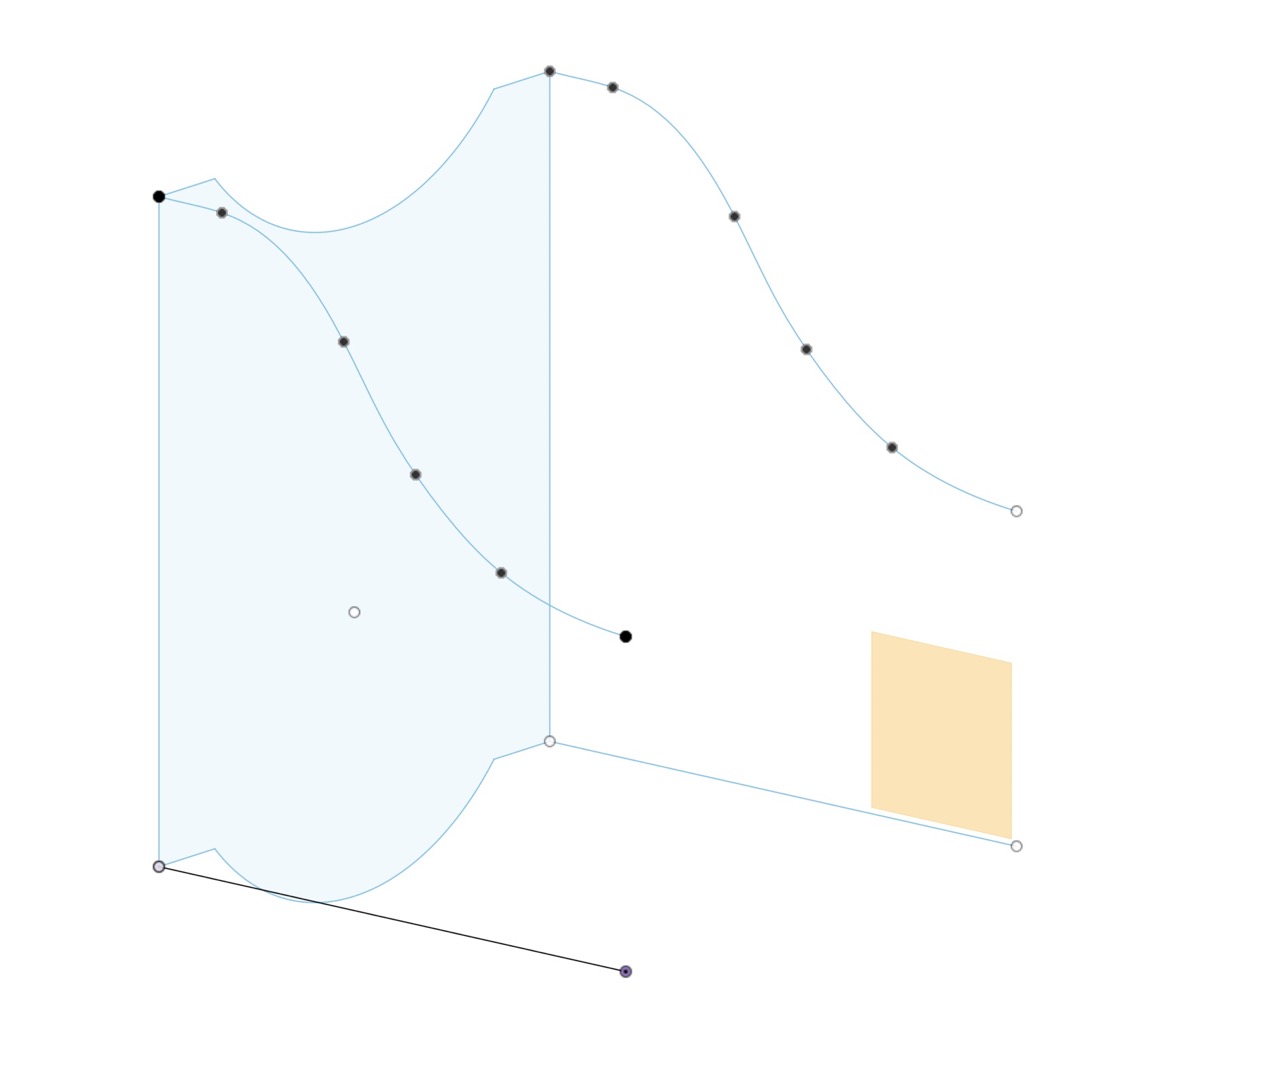
- A new sketch on the YZ plane featured a Fit Point Spline, creating a curve that connected the first and second sketches
- Ensuring the points were aligned with the Coincident constraint, I selected the 4 points
- A straight line connected the two lower points, mirrored to the opposite side
- The middle points of both curves were joined by a straight line
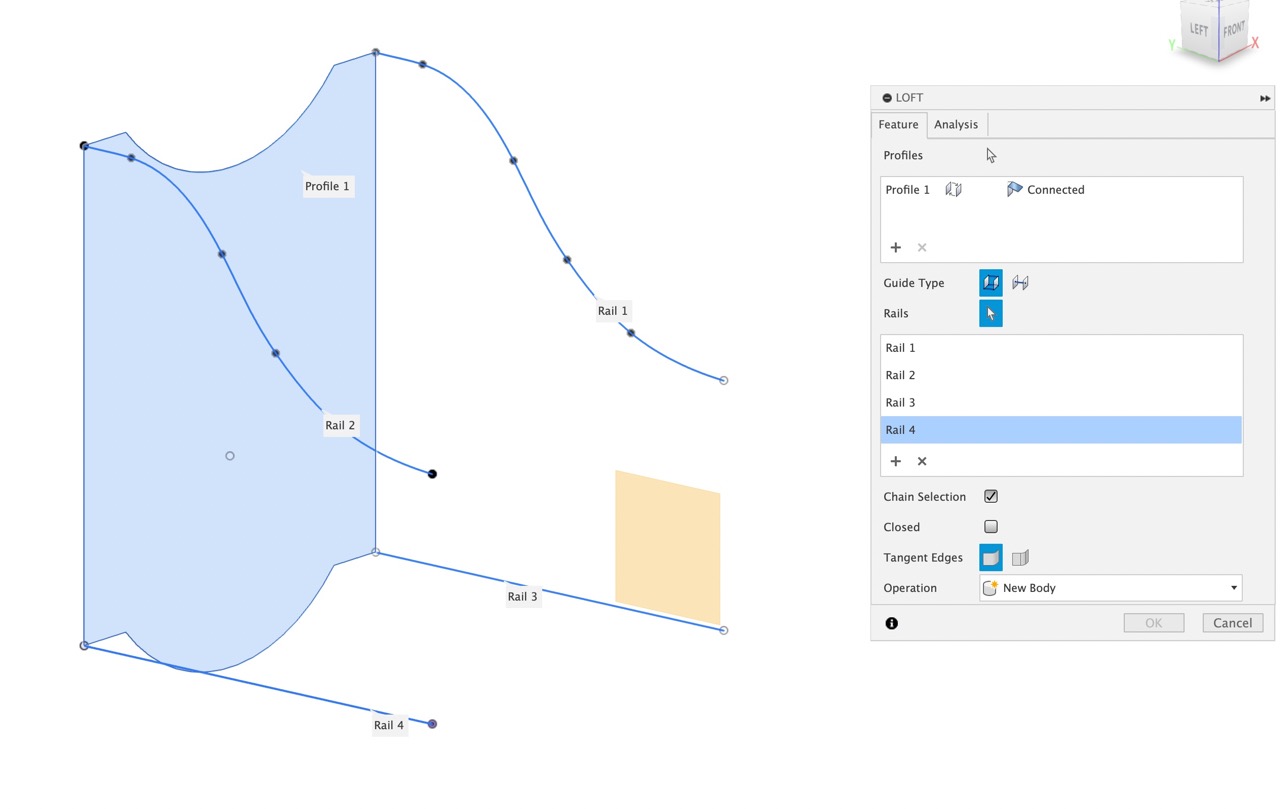
- Using the loft feature, I selected the two form sketches as profiles and added the rails by selecting all the previously drawn lines
- Exported each piece individually as an obj from Fusion 360
- Opened Blender
- Imported the different OBJ and proceeded to move them with the shortcut "g" which means grab and then cliking the x,y or z depending on the direction wanted.
- Clicked on the "Shading menu"
- Selected the model that I wanted to apply the texture to
- Clicked on "add new material", named it
- Selected the new texture and used the "Shift + Control + T" short cut to acces my computer's files and choose the wanted texture that I had already downloaded a while ago.
- Changed some parameters in the texture, specially the "scale" one to get the look just as I wanted it.
- Added light. I'll leave a very good tutorial
- Added cameras. I'll leave a youtube tutorial
- The CG Essentials
- Blender Guru
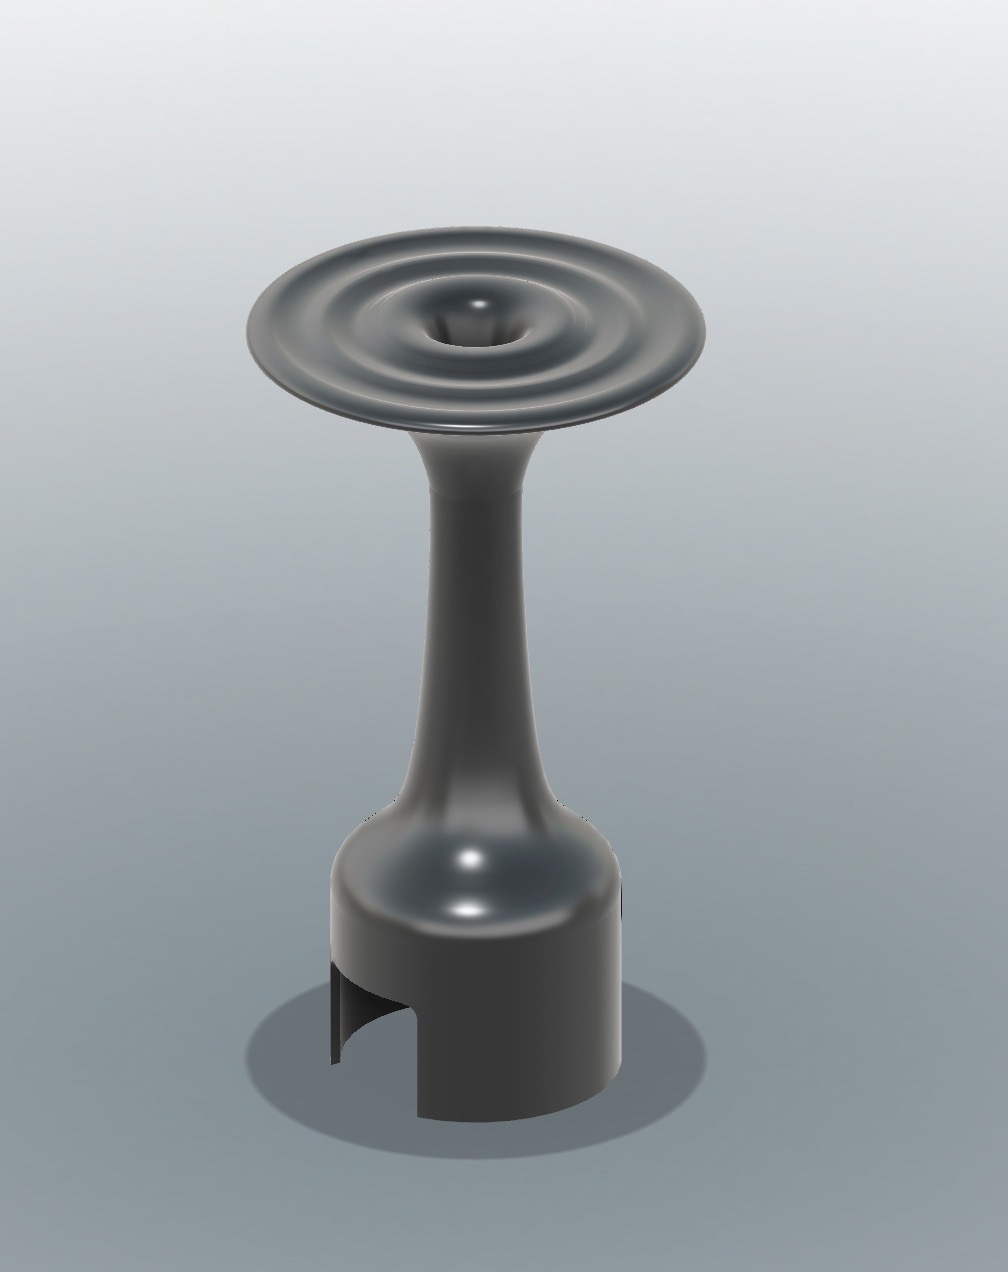
- Before modeling it is very important to have an sketch of the design so that no detail is forgotten.
- I started by drawing just one side of the product to be able to revolve it.
- Then I revolve each component separately.
- Then I did the water fountain sketch and revolved it.
- I started each model in Fusion 360 creating a new component but then when I wanted to add another one the first one dissapeared so I had to model each piece in a different document. I still need to learn how to create several component in one document.
For the principal pieces:

For the curved base piece:
For the slide block:
Rendering
I used Blender for rendering since I already knew how to create textures and add HDRs


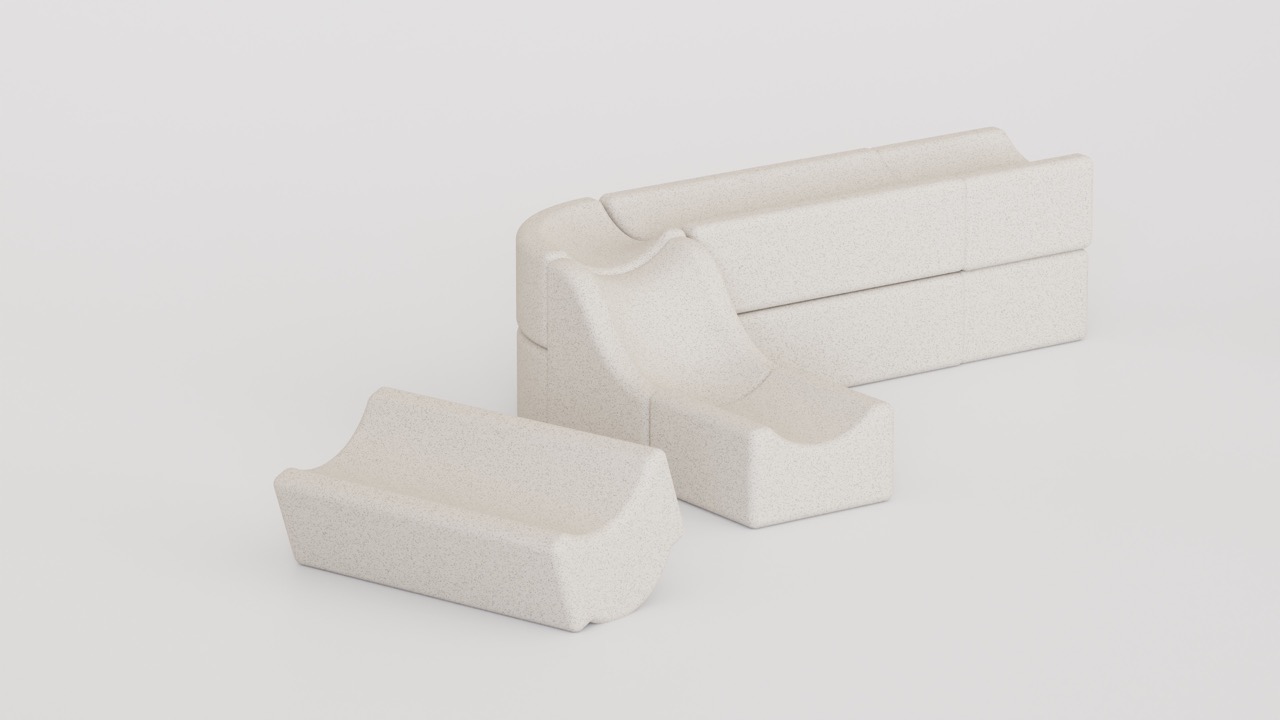

I learned how to apply textures and use blender by doing a How to make a donut tutorial which in my opinion is really good. link to the tutorial. But it you want a shorter video on how to add textures to blender I'll leave you this tutorial that goes straight to the point
What I like about blender is that there are so many tutorials only on how to use the interface and how to model very interesting things. I would totally recommend using blender for rendering since the light can look very natural and the textures look realistic.
In case you are intereste in Blender, I'll leave the steps I followed to render this weeks assigment
I'll leave some of my favorite youtube channels for learning Blender
3D Modeling my final project
For modeling my final project I decided to use Fusion 360 because it is a parametric software which means that I can adjust the measurements as many times as I want to allowing me to iterate in the design proccess if needed.


Challenges faced
Tutorial's link: https://www.youtube.com/watch?v=WKb3mRkgTwg&list=PLrZ2zKOtC_-C4rWfapgngoe9o2-ng8ZBr
WHAT I LEARNED FORM THIS ASSIGMENT
From this assignment, I learned the importance of parametric software, especially for designing products. Parametric software makes it much easier to iterate and modify measurements. I had never used parametric software before, but I really liked it and would recommend using Fusion 360 in the future. It has a very intuitive interface, and there are a lot of tutorials available online. Fusion 360 follows the same logic as Rhino and Inventor but includes parametric features. I will definitely continue using it and hope to become more proficient with it. The biggest takeaway from this assignment is that parametric design is essential for digital fabrication. It ensures that different components fit perfectly within each other, and if they don't, you can easily go back and change the tolerance in the modeling. I'm looking forward to learning more about parametric software!