3D Scanning and Printing
Photogrammetry
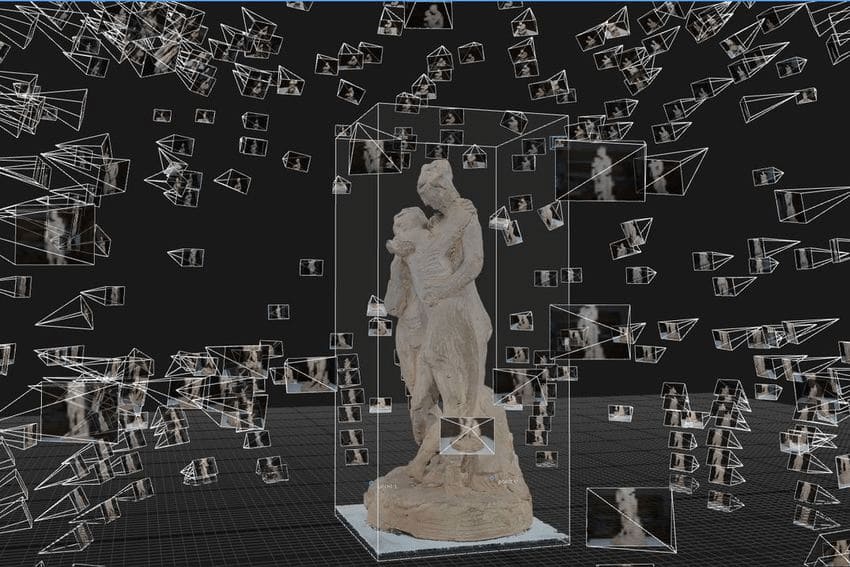
Photogrammetry is a method used to construct a three-dimensional model from multiple photographs. By capturing images from every conceivable angle, the structural and depth aspects of an object can be accurately represented in the resulting 3D model.
Once we have this collection of images, there are several software options available to us that can assist in creating this 3D mesh. The following list will provide a selection of these software:
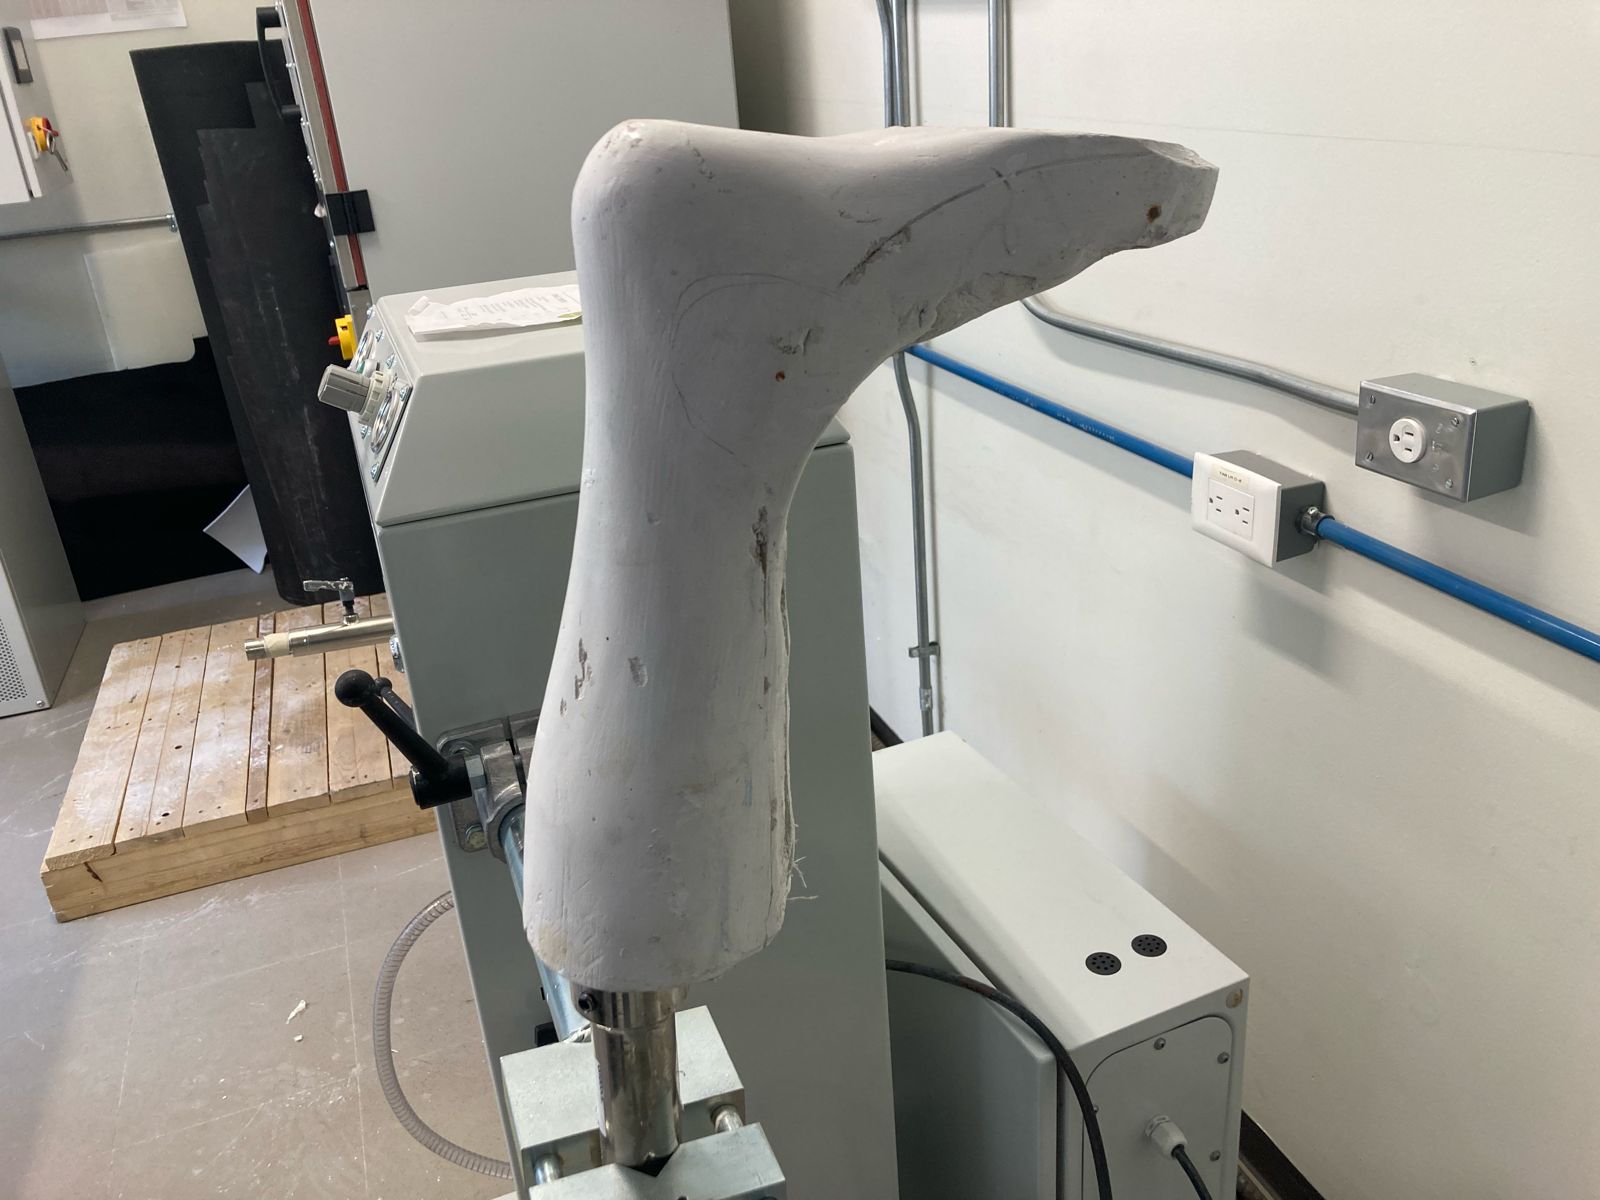
To create a 3D scan I decided to use Kiri Engine, It is quite easy to use and does not charge for the basic options. To start I decided to use a foot mold that is commonly used to create ankle-foot orthosis. To create a scan it is needed to take photos from all possible angles. Kiri will only allow us to upload 70 pictures in the free version, so I needed to circle around my object and then the software will automatically process all the pictures and create a OBJ model. I used a clamp to keep my object fixed in the position so it wouldn’t move. For lightnig conditions I only made sure to have adequate sun light that would not be direct as the object is white and too much light could mean that the camera and software could not process everything in the right way. Taking the pictures was a bit dificult as there was not a lot of space behind the clamp as you can see, however I managed to get quite a good result.
This is the leg that has been previosly taken a mold out of.
Medical Imaging
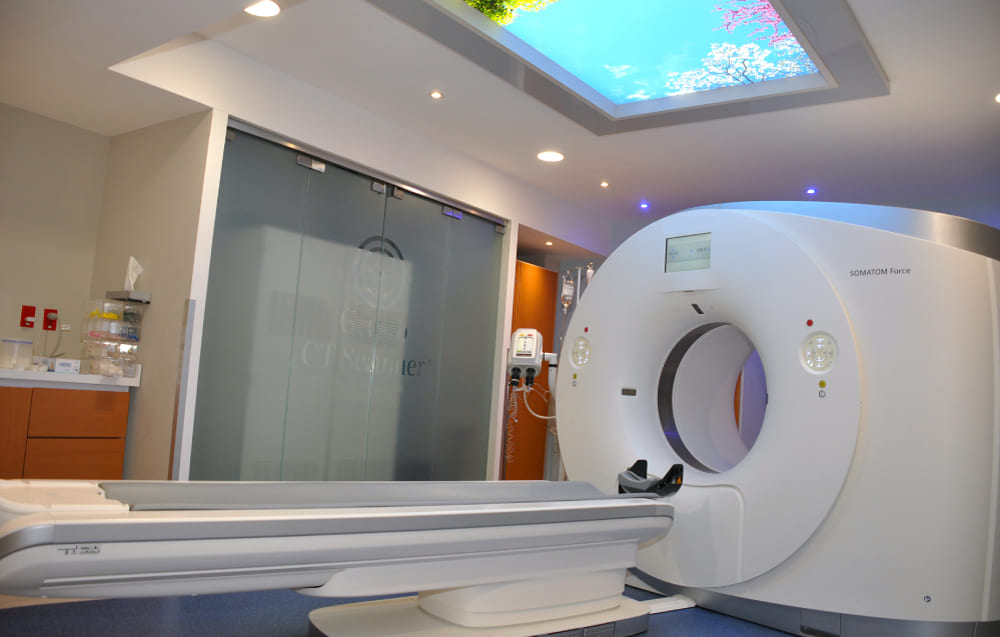
An interesting idea would be to create a 3D model based on an Magnetic Resonance Imaging (MRI) or Computarized Tomography (CT) Both of this medical imaging proceedures are great to look at anatomical structures of a patient like bones, muscles, organs and even the overall body. For this assignment I decided to take a look at CT as a Photogrammetry alternative for a niche sector.
To use a CT scan, I used 3D Slicer, a free, open source software for visualization, processing, segmentation, registration, and analysis of medical, biomedical, and other 3D images and meshes; and planning and navigating image-guided procedures.
I will use a CT scan of a hand that I found at embodi3D, a community of biomedical 3D printing enthusiasts. In particular I Will use a Left hand CT scan. This scan will include three views: coronary, sagittal and axial. With this 3 perspectives we will be able to recreate the hand on the software.
Image segmentation to create a 3D volume
In the next carousel I will explain the use of the Slicer software and a the steps I followed to segment the CT to create a 3D volume that will be exportable as an STL file to print or go into further modifications.

Add file
To add the file we will go file > Add Data and select our file.

Image segmentation
We will proceed to start the segmentation. In this case we will only use the hand and we will ignore all internal structures. However, if we intended to use a bone the steps would be the same. To start we will go to "segment editor" and add a new segmentation, then we select "Add" to create a sub-segmentation for our CT.
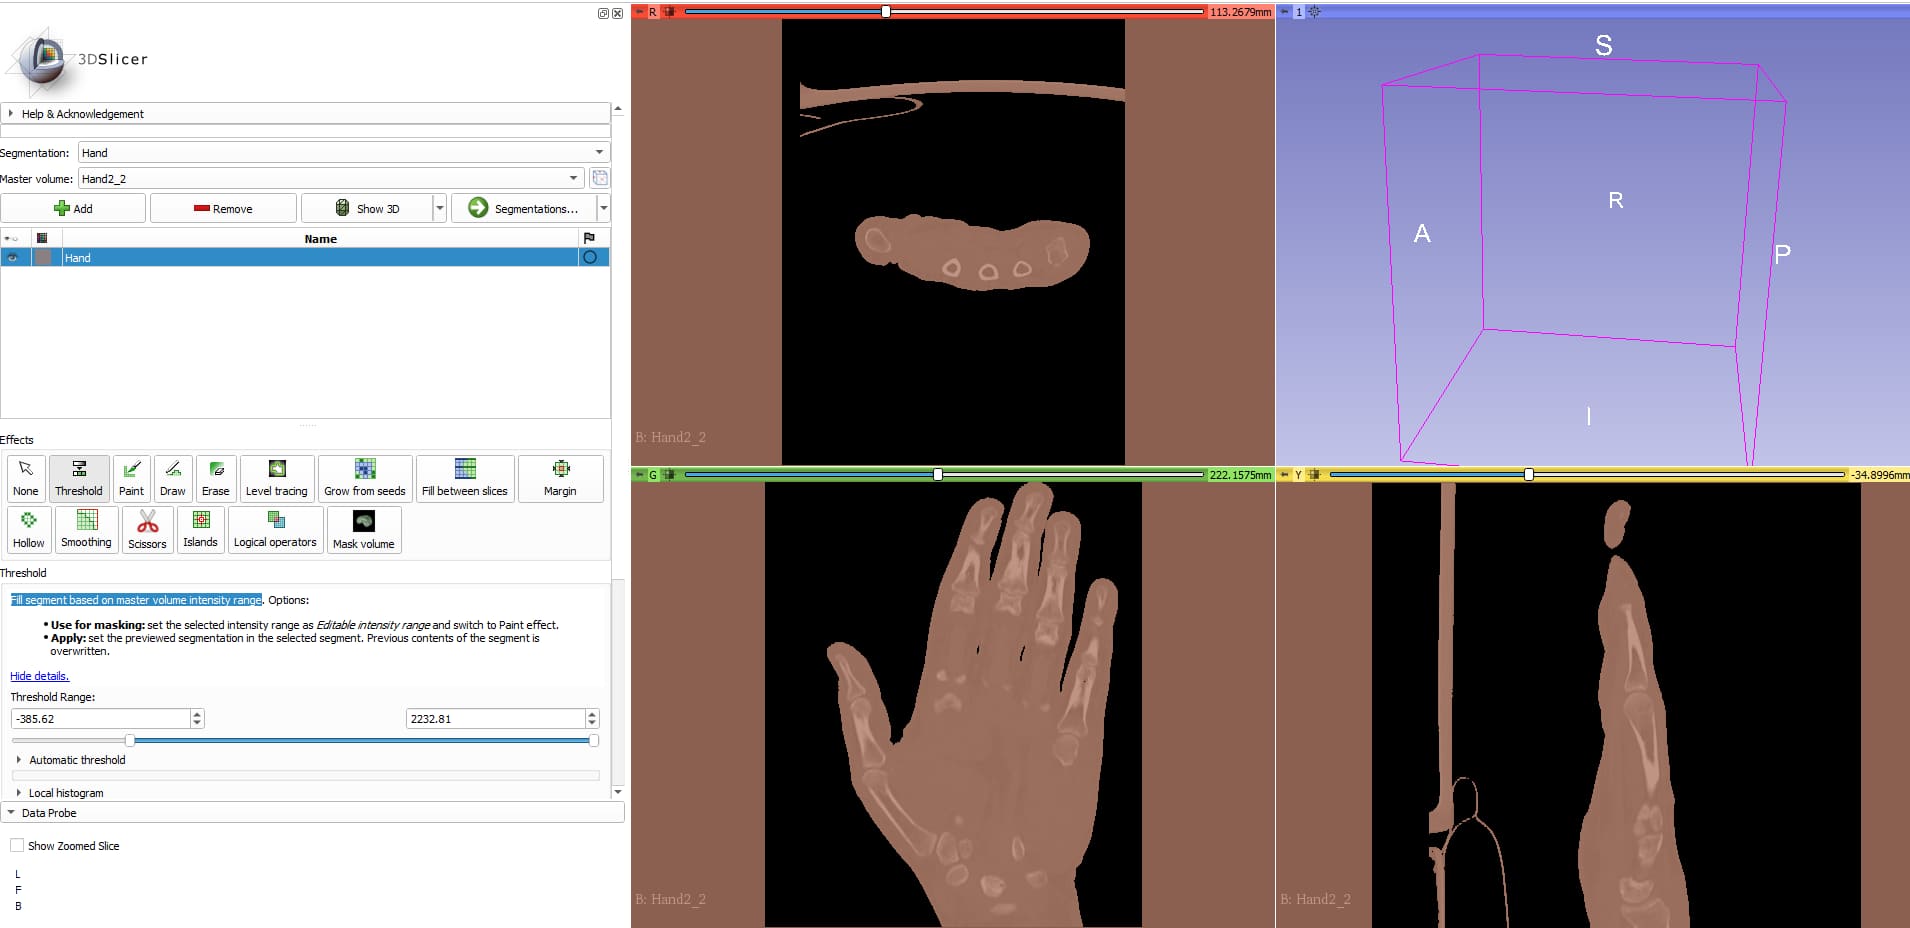
Image segmentation - Threshold
To select only our structure of interest in the segmentation tool we will use is “Threshold” where we Fill a segment based on master volume intensity and range. In the following image we see that a pinkish color appears in all the parts that are inside our range. This Threshold will select a all the gray values according to the range we create. It is important to take into account that each CT may vary, however, some thresholds are already preestablished in literature according to the density and other physiological characteristics.
3D volume
After we apply the range we can select the view 3D volume option and see our first glance to the hand!.

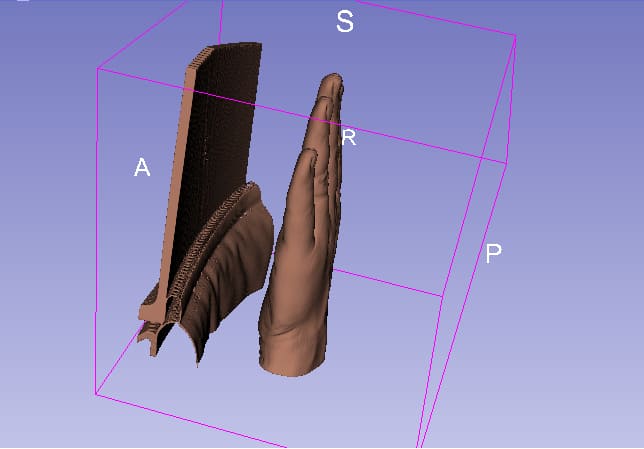
Cleaning the image
As we can see the volume includes a portion of the bed where the CT took place, to eliminate this, we will use the scissors tool and select on the sagittal perspective the object. This will automatically eliminate the object.
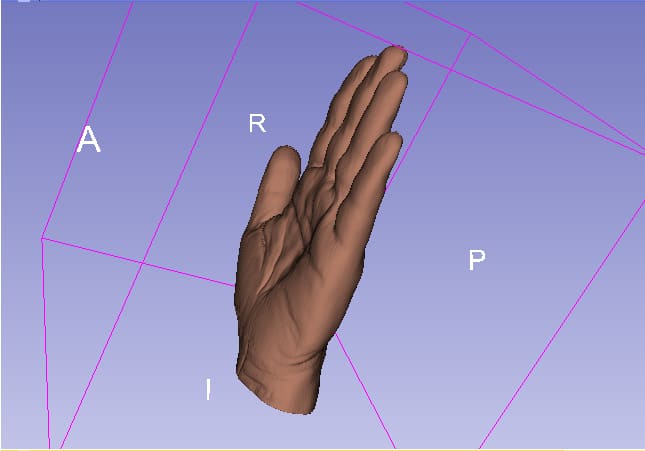
3D Volume
Once the scissors tool was used, the volume is created. and have a clean surface that could potentially be 3D printed.
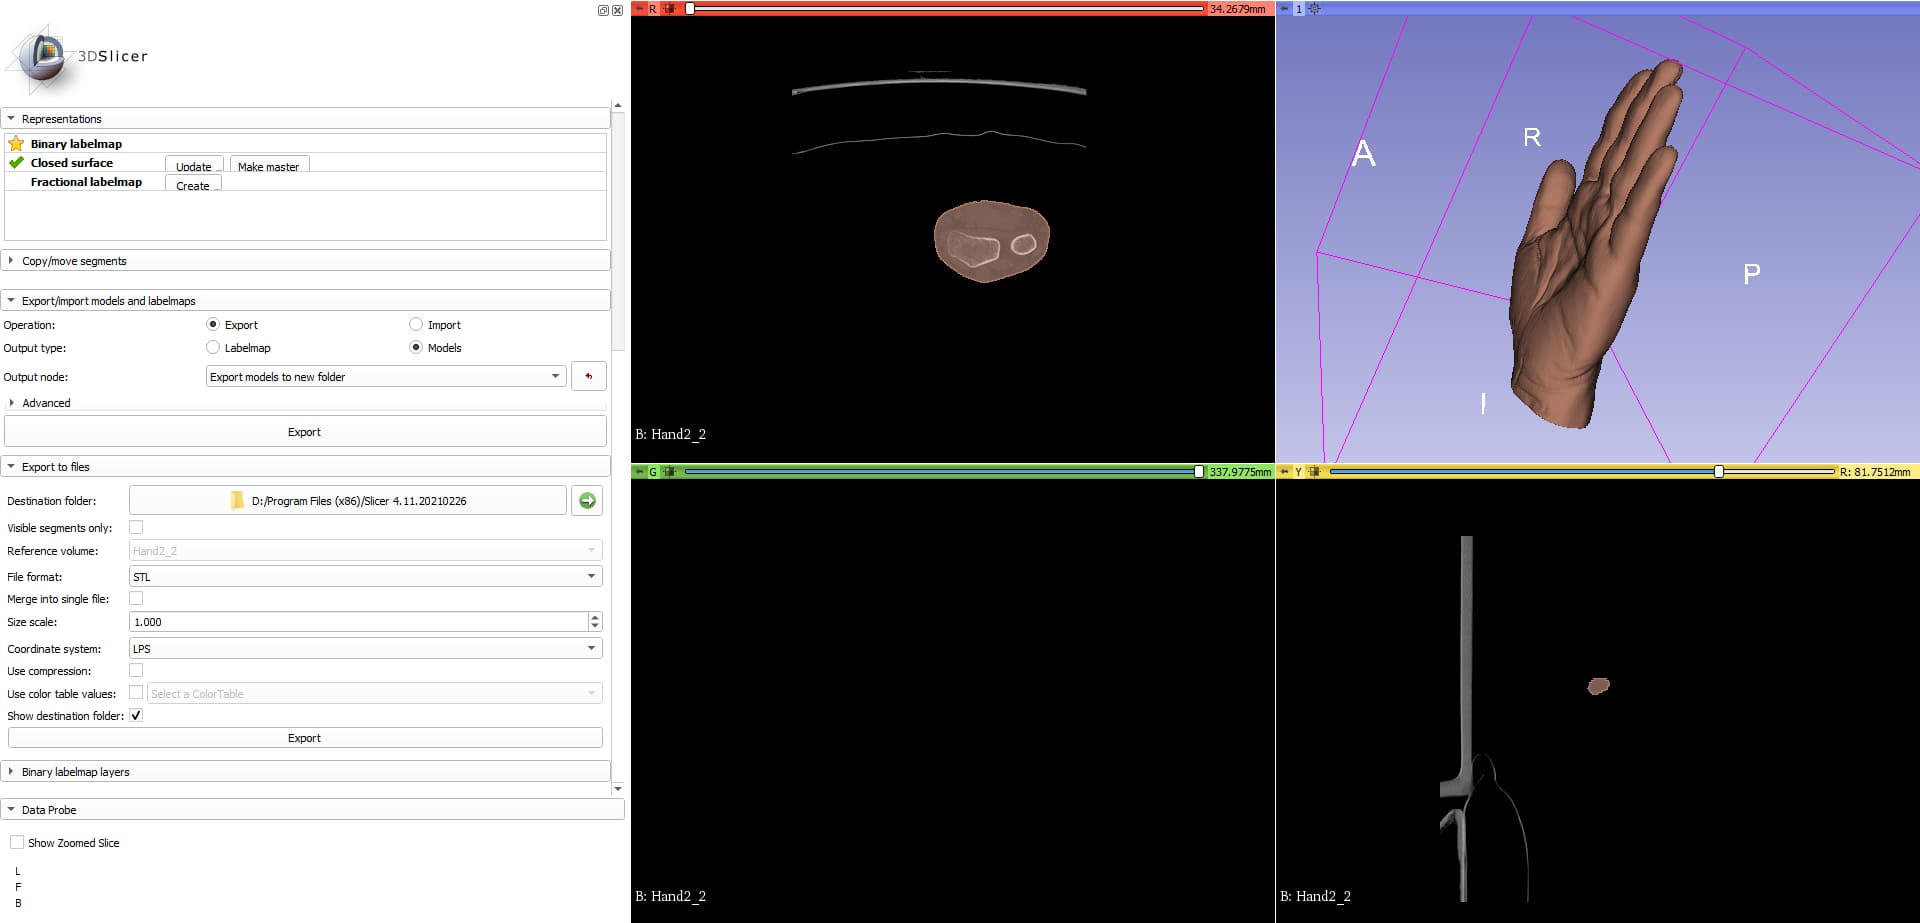
Export 3D Volume as stl
To export our file we go to the "segments section" and export our file as a STL.
To 3D print our hand, I will use a Bambu Lab X1-C with PETG filament. As the print will not be used for any structural purpose, the infill will be at a 15% with a gyroid pattern All the other parameters will be as default and no supports will be added as the angles of the hand do not create a difficult printable angle.
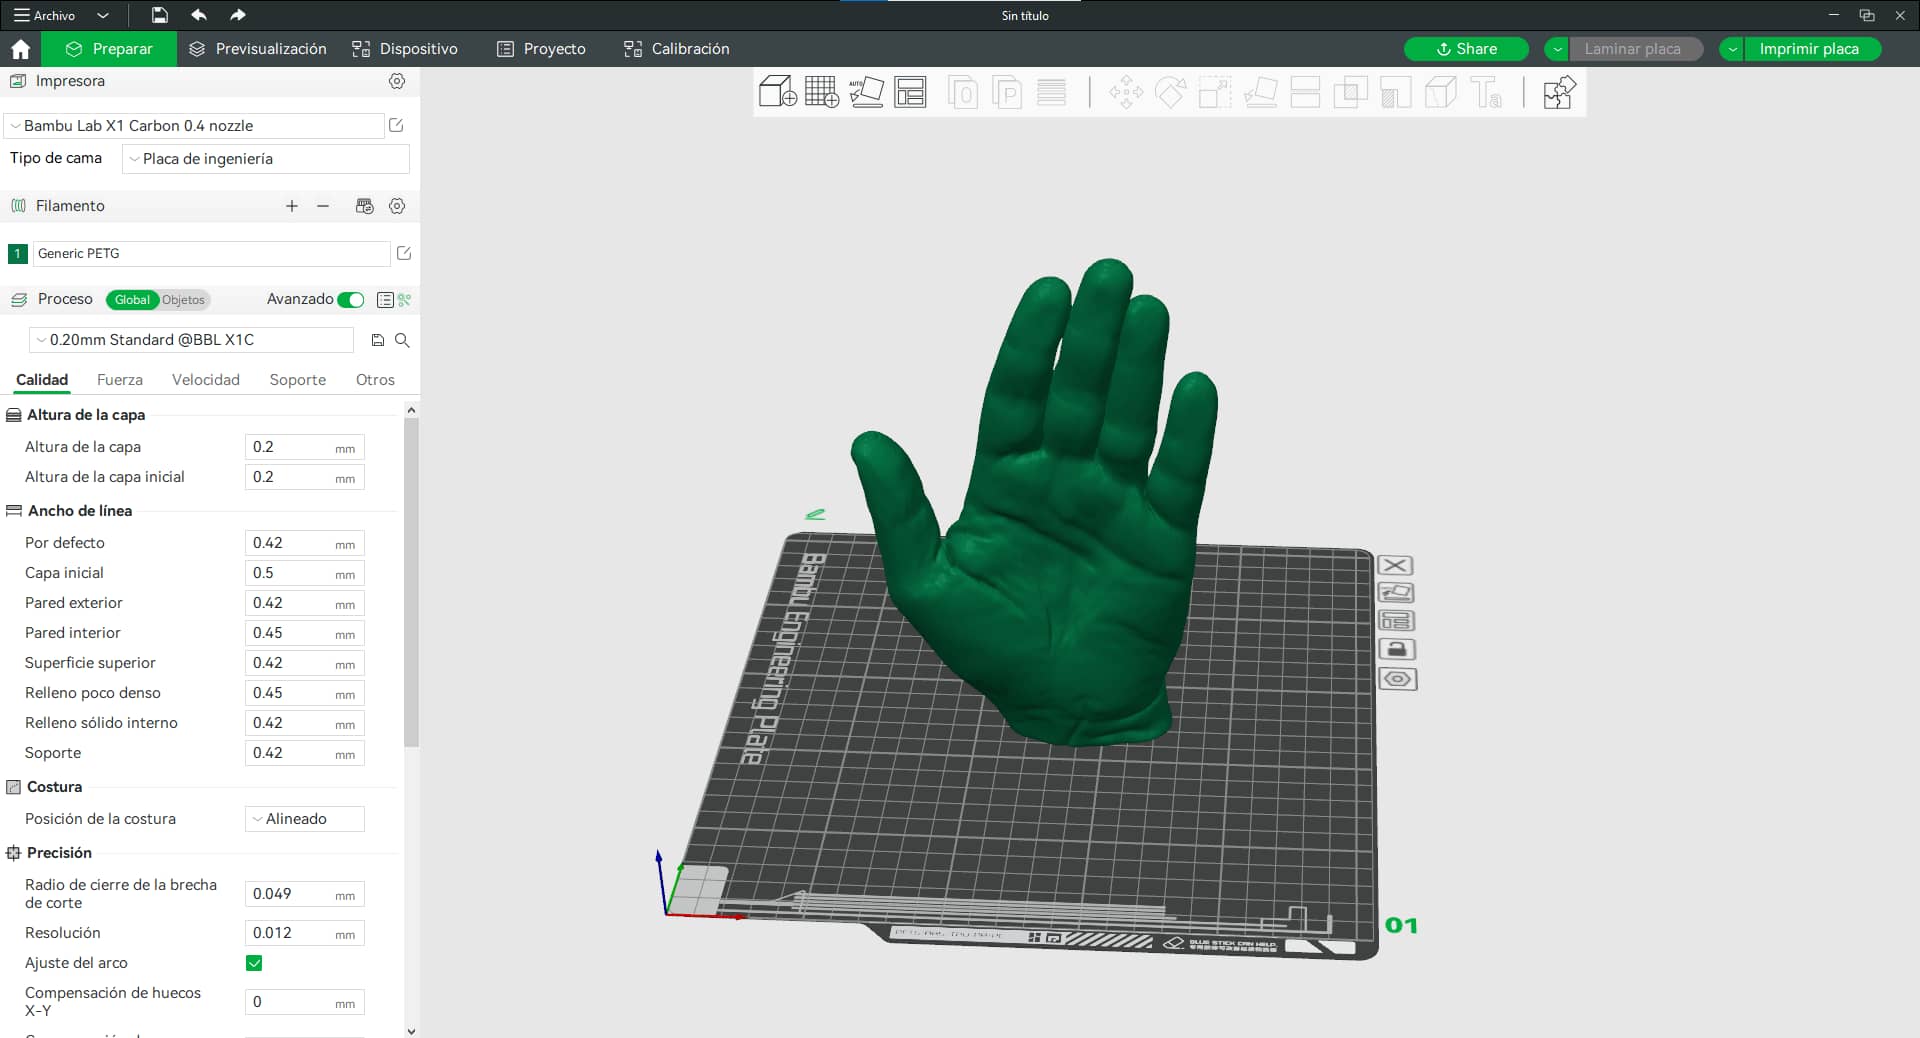
After just a few hours the 3D printer successfully printed the hand in a real dimensions. Something I am really proud of is the skin texture that I was capable to retrieve from the scan, even the fingernails can be seen on the model.

3D printing design
To properly create a design we need to follow all of the 3D design rules and limitations according to our available 3D printers. You can take a look at this by visiting ourgroup assignment where we test our printers limits and the design accordingly
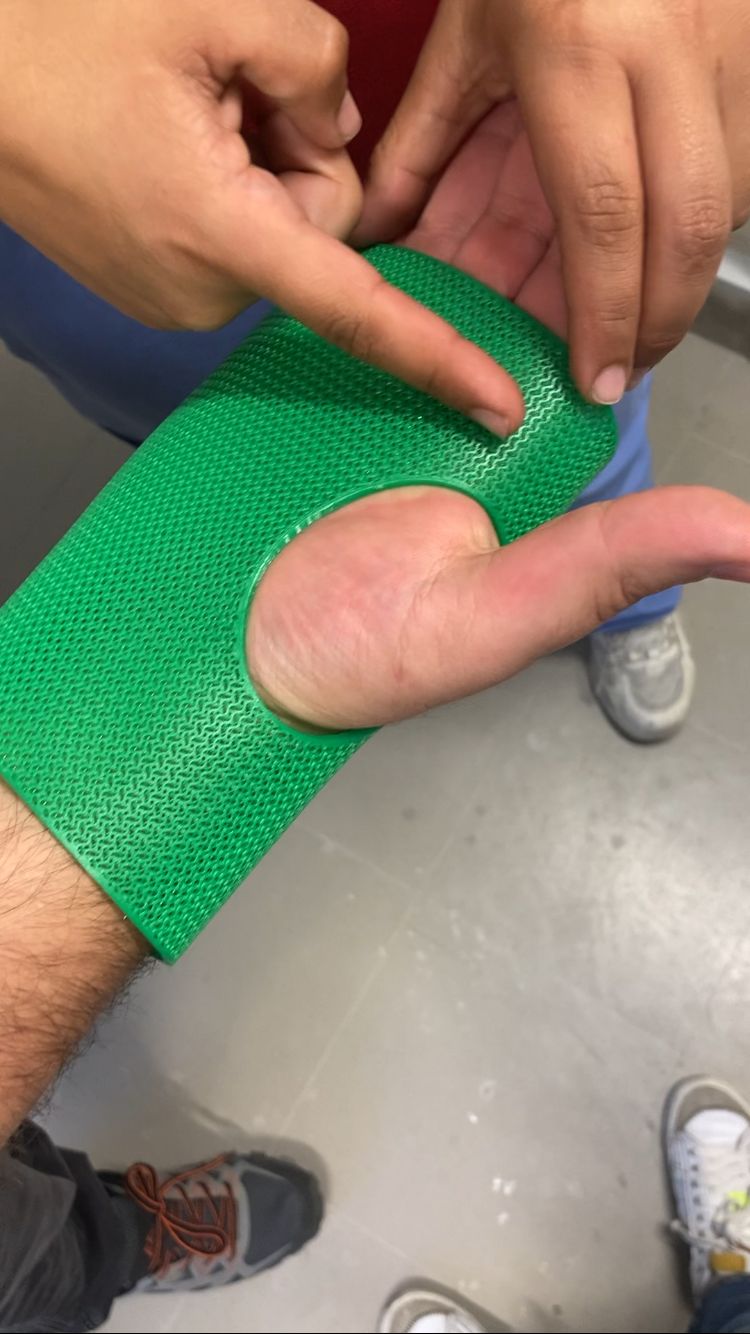
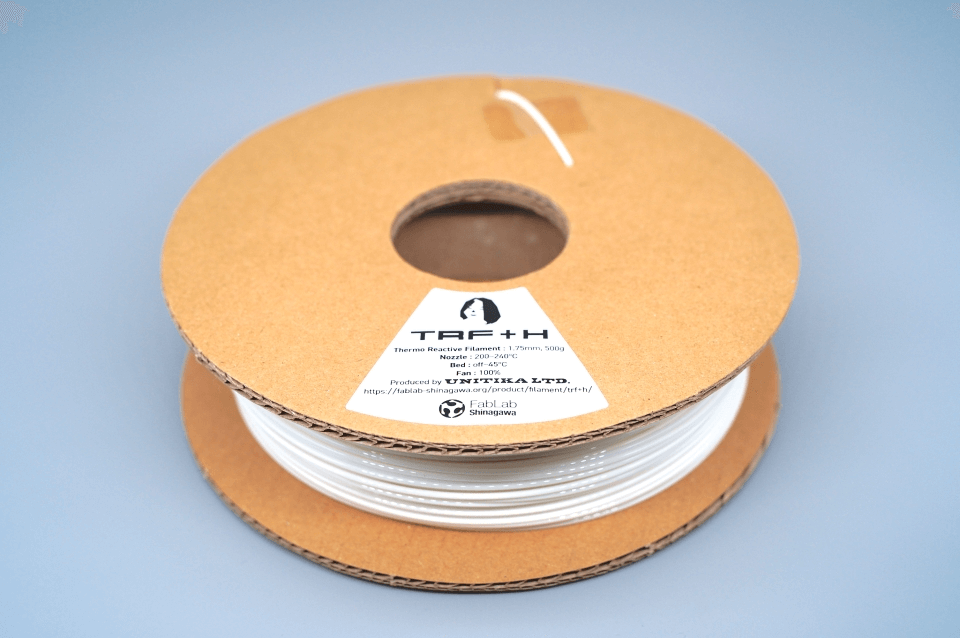
To create a 3D object that could only be created by a additive manufacturing, I decided to create a hand splint using TRF+H filament created by FabLab Shinagawa. TRF+H is a temperature-sensitive filament for FDM 3D printers, which softens and changes shape when heated to 45°C or higher with a hair dryer after output. This filament is really interesting and will change the way we create splints and assistive technology around the world.
To design the splint, I took measurements of the hand I previously 3D printed using a measuring tape at 4 different points as it can be seen on the following image


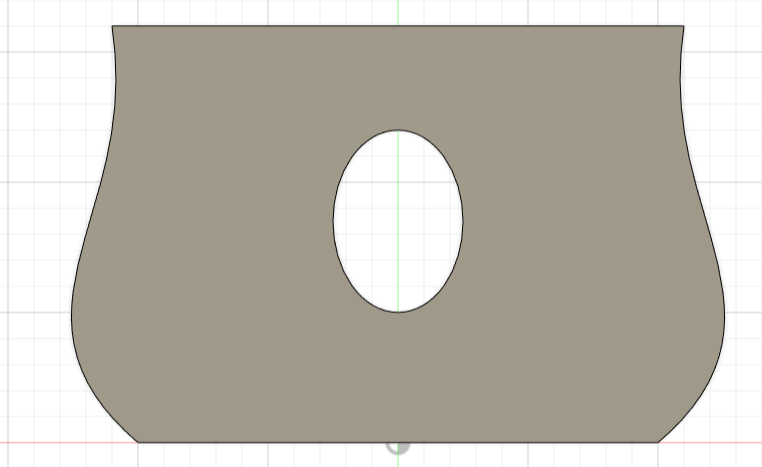
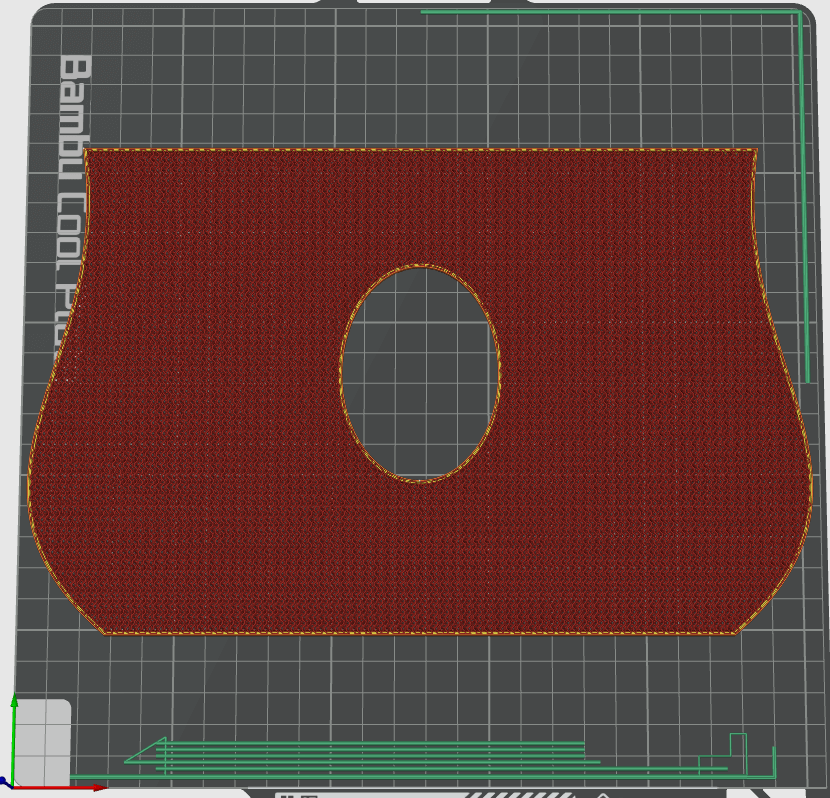
This measurements helped me to create a flat design that would wrap the hand all around and maintain the wrist fixed in a certain position that could be stablished by a physician. The splint was design as a solid in Fusion 360 using the spline function to create a more ergonomic design.

To have the final design, I exported the file as a STL and have a post-edition on the Bambu Studio. Although the slicers are not typically used to edit a file, we will use some of the parameters to have the file slightly changed. In the first place we will turn off the upper and lower layer and will use a 20% gyroid infill.
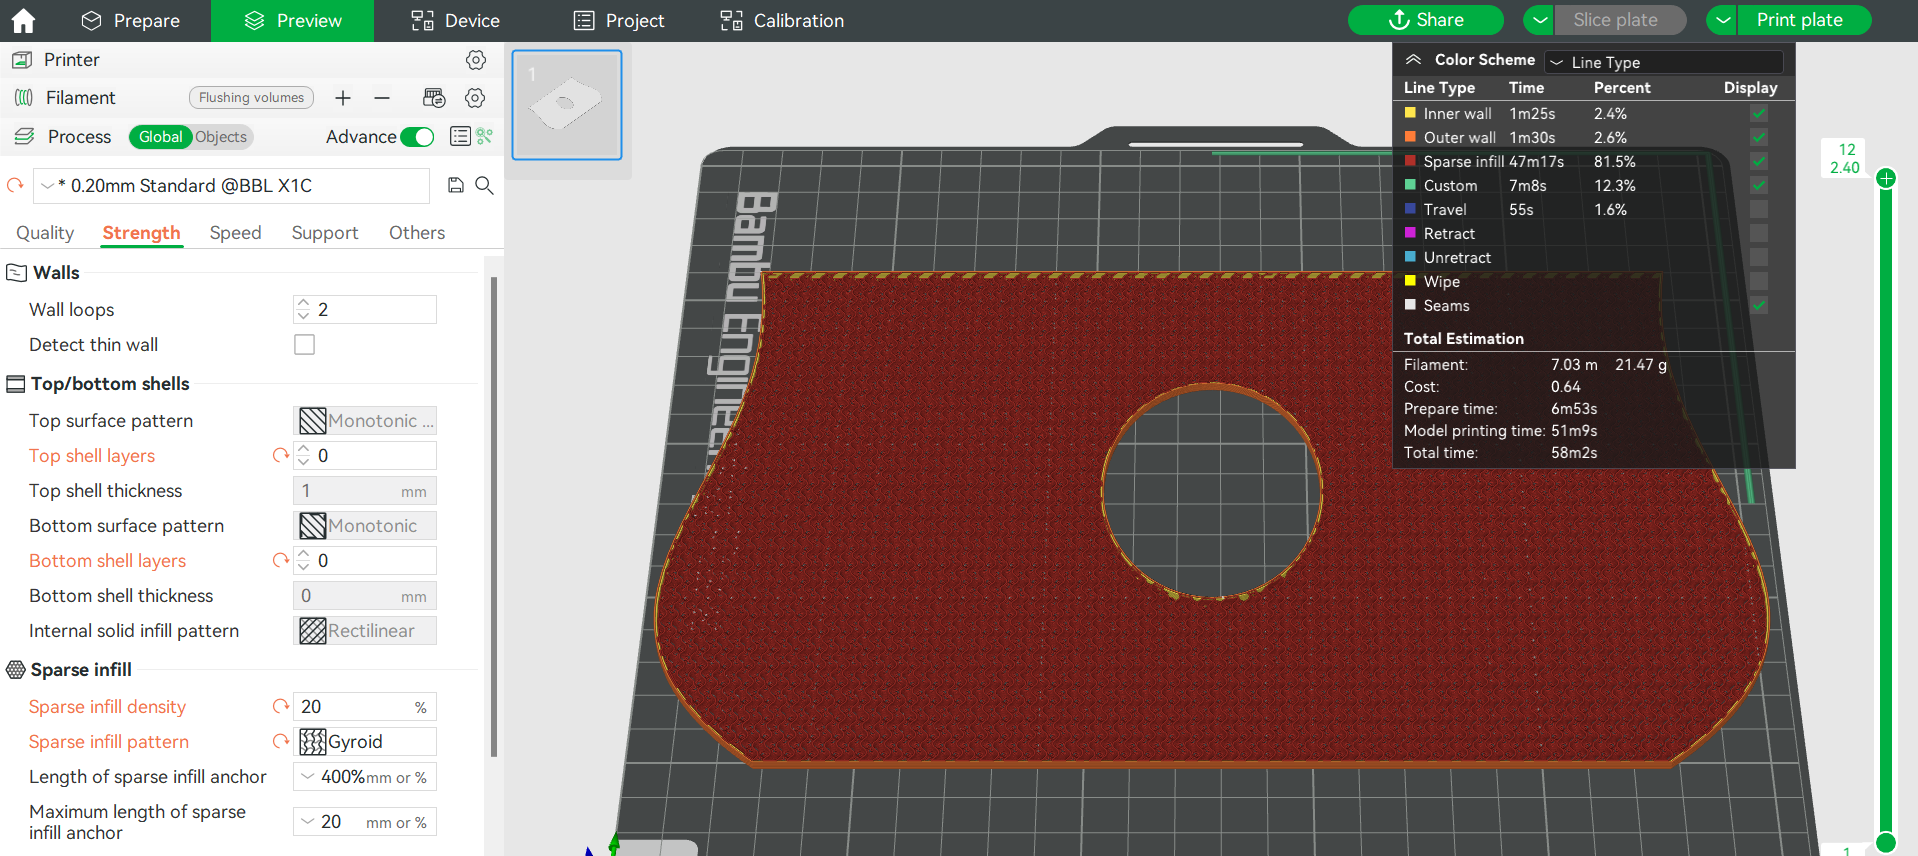
After this, we will have a model that looks as follows:

Printing
The print was made in a Bambu Lab X1C with the parameters that are specified by FabLab Shinagawa of 210° C for the nozzle temperature, fan at a 100% and a bed temperature of 30°, also it was used a little of glue stick to assure the bed adhesive between the TRF+H and the bed due to the big printing surface.

To have the splint take a anatomical figure, it was heated with a heat gun until the structure was moldable and the it was pressed against my hand to modify it and give it an anatomical structure.

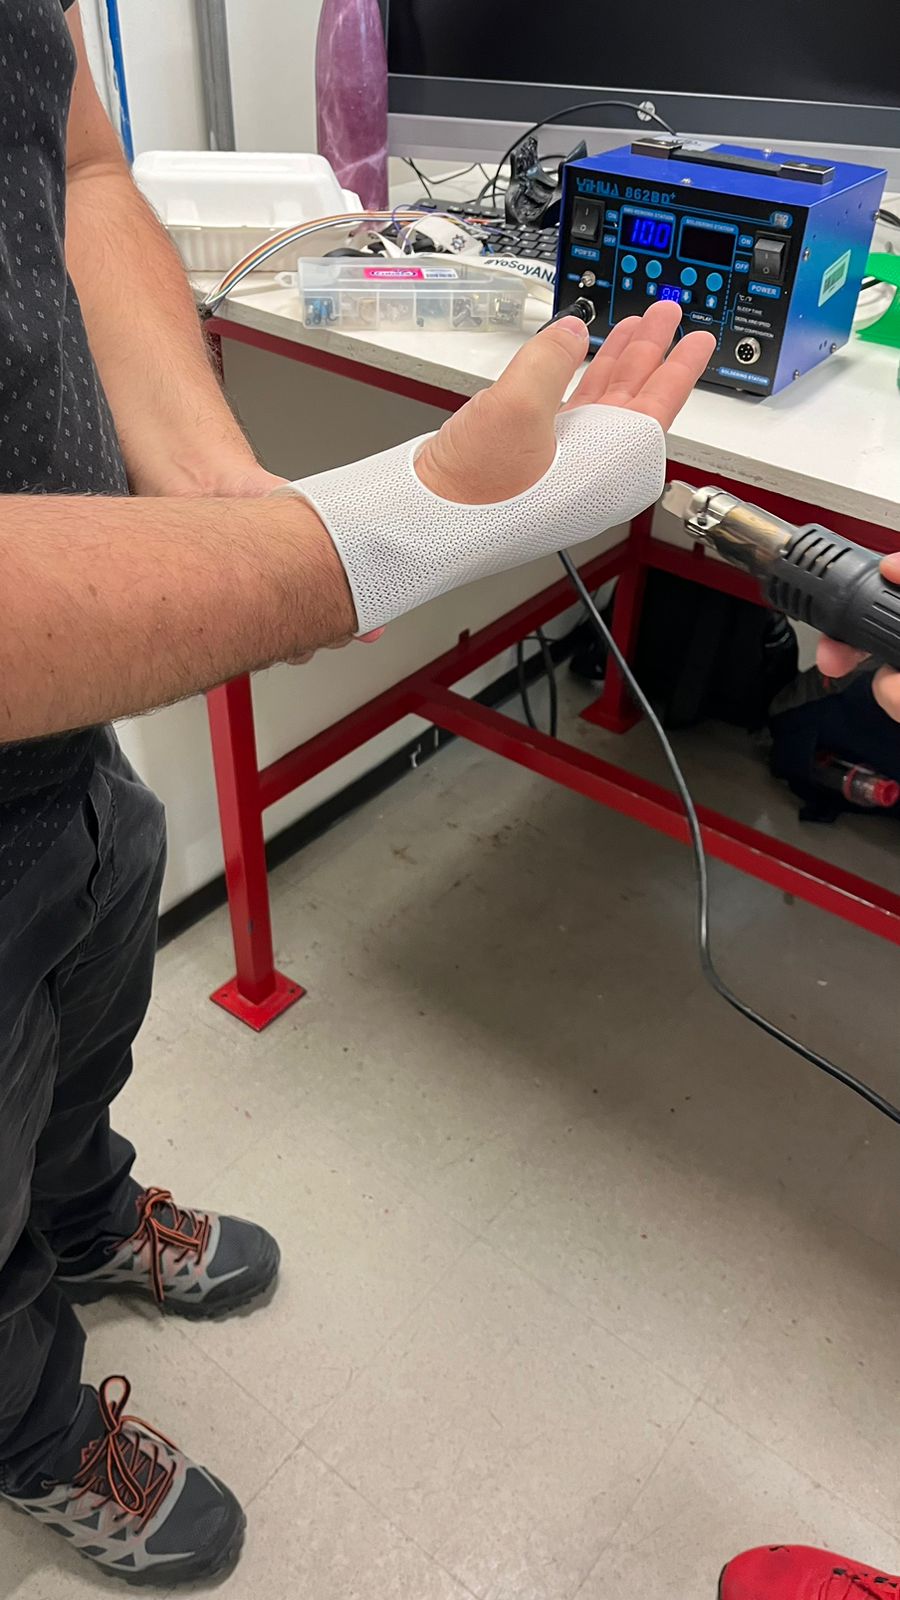
A little problem I had with this process was that the heat gun did not provided a uniform extended area of heat and was really small, so I planned on using a infrared oven at 60°C for 30 seconds to provide a uniform heat to the model and then press it against my hand. The outcome was better as a more uniform heat means that the model can adjust better to the hand structure.

Just for fun
At IBERO Puebla we have a Prosthetics lab, where a oven is used to create splints in a traditional way by heating materials like copolymers. My idea is to print a tougher material like PETG with the same geometry as the TRF+H and use the oven to soften the material and mold to my hand geometry. As you can see on my video and picture, it can be done, how ever, I would recomend getting the temperture at 80° C and have a 30-45 seconds per side to let the material flexible and be careful when putting it on the skin as it could potentially lead to burn injuries.