Week13. Networking and Communications
Assignments
- Group assignment:
- Send a message between two projects
- Document your work to the group work page and reflect on your individual page what you learned
- Individual assignment:
- Design, build, and connect wired or wireless node(s) with network or bus addresses and local input &/or output device(s)
Hero Shot
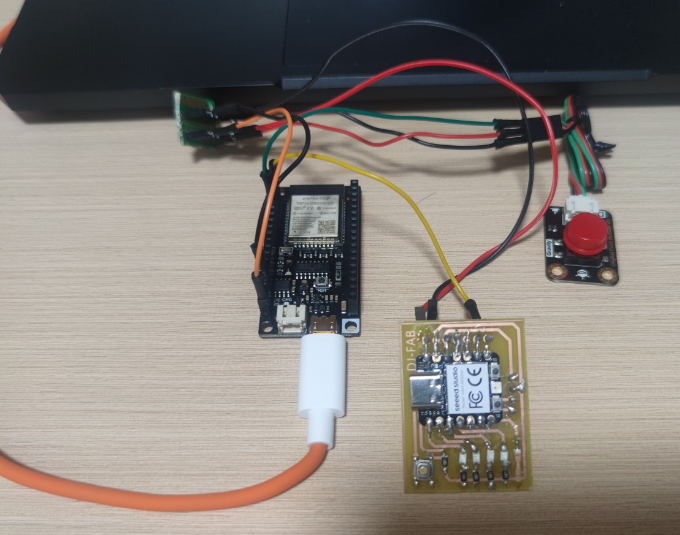
Group Assignment and Individual Assignments
This week, I will study the communication methods between microcontrollers and use different methods to send information. From the perspective of communication methods, there are primarily wireless and wired communication methods. Wireless communication includes Bluetooth and WiFi; wired communication can be conducted through serial ports. I plan to learn three communication methods and use them to send some information. Therefore, I have chosen to study the Seeed XIAO RP2040 microcontroller and the XIAO esp32C3 microcontroller, which I encountered during my FabAcademy journey, as well as the DFRobot microcontroller that I have worked with.
1.Microcontroller
Seeed XIAO RP2040
Seeed XIAO RP2040 carries the powerful Dual-core RP2040 processor that can flexible clock running up to 133 MHz which is a low-power microcontrollers. On the Seeed Studio XIAO RP2040 there is also 264KB of SRAM, and 2MB of on-board Flash memory which can provide more program to save and run. On the other hand, this little board has good performance in processing but needs less power. Most importantly, it supports serial communication.

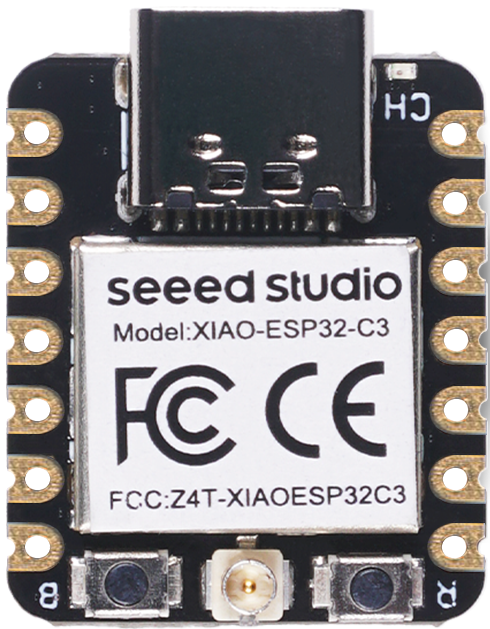
XIAO esp32C3
XIAO ESP32C3 is an IoT mini development board based on the Espressif ESP32-C3 WiFi/Bluetooth dual-mode chip. ESP32-C3 is a 32-bit RISC-V CPU, which includes an FPU (Floating Point Unit) for 32-bit single-precision arithmetic with powerful computing power. It has excellent radio frequency performance, supporting IEEE 802.11 b/g/n WiFi, and Bluetooth 5 (LE) protocols. This board comes included with an external antenna to increase the signal strength for your wireless applications. It also has a small and exquisite form-factor combined with a single-sided surface-mountable design. It is equipped with rich interfaces and has 11 digital I/O that can be used as PWM pins and 3 analog I/O that can be used as ADC pins. It supports four serial interfaces such as UART, I2C and SPI. There is also a small reset button and a bootloader mode button on the board.
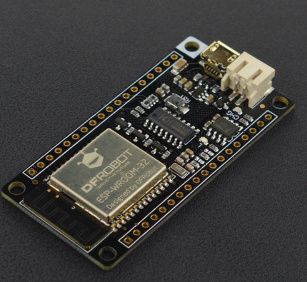
DFRobot Microcontroller
The DFRobot microcontroller is a low-power microcontroller specifically designed for the Internet of Things (IoT). It features an onboard ESP-WROOM-32 dual-core chip that supports both WiFi and Bluetooth dual-mode communication, and is compatible with low-power peripheral hardware designs. The main controller supports two power supply methods: USB and an external 3.7V lithium battery, enabling automatic power switching between the two. It also supports two charging methods: USB and external DC. With its compact size, convenient interfaces, and ease of use, it can be directly applied to low-power IoT projects.
2.Communication
Transmission Control Protocol(TCP)
TCP is a connection-oriented, reliable transport layer protocol used to transmit data in computer networks. It is part of the Internet Protocol Suite, commonly used with the Internet Protocol, known as TCP/IP. TCP ensures that data is transmitted reliably across the network and arrives at its destination in order.
- Principle
- Three-way handshake (establishing a connection)
- Step 1: The client sends a SYN (synchronization sequence number) message to the server indicating that it wishes to establish a connection.
- Step 2: After receiving the SYN message, the server replies with a SYN-ACK (synchronization sequence number and acknowledgement sequence number) message, indicating that it agrees to establish the connection and confirms the sequence number of the client.
- Step 3: After receiving the SYN-ACK message, the client sends an ACK (acknowledgement sequence number) message to the server to confirm the connection establishment.
- Data transmission
- Once the connection is established, the client and server can send data to each other. TCP divides data into segments, each containing a sequence number to ensure that data is transmitted in sequence.
- After receiving the data, the receiver will send an ACK message to acknowledge the received data. If the sender does not receive the ACK message, the data will be retransmitted.
- Four waves (close connection)
- Step 1: The party actively closing the connection sends a FIN (End Sequence Number) message indicating that no more data will be sent.
- Step 2: After receiving the FIN message, the other party replies with an ACK message to confirm receipt.
- Step 3: The other party also sends a FIN message indicating that no more data will be sent.
- Step 4: After receiving the FIN message, the party actively closing sends an ACK message to confirm the connection is closed.
Bluetooth LE
Bluetooth Low Energy (BLE), also known as Bluetooth Smart, is a wireless communication technology designed for low power consumption and cost-effective implementation while maintaining a communication range similar to Classic Bluetooth. BLE was introduced in Bluetooth 4.0 and has since become a cornerstone for many IoT applications, including wearable devices, smart home appliances, and health monitoring systems.
- Key Features
- Low Power Consumption
- BLE is optimized for applications that require periodic data transmission, making it ideal for battery-operated devices.
- Devices can remain in sleep mode for most of the time and only wake up to transmit data, significantly extending battery life.
- Short-range Communication
- Typically operates within a range of up to 100 meters, depending on environmental conditions and device configurations.
- Speed and Throughput
- While BLE prioritizes power efficiency, it supports sufficient data rates for most IoT applications, with maximum speeds around 1 Mbps.
- Multi-Device
- Point-to-point: Direct communication between two devices.
- Broadcast: One device sends data to multiple devices without establishing a connection.
3.Application Examples
Bluetooth LE: XIAO esp32C3*2
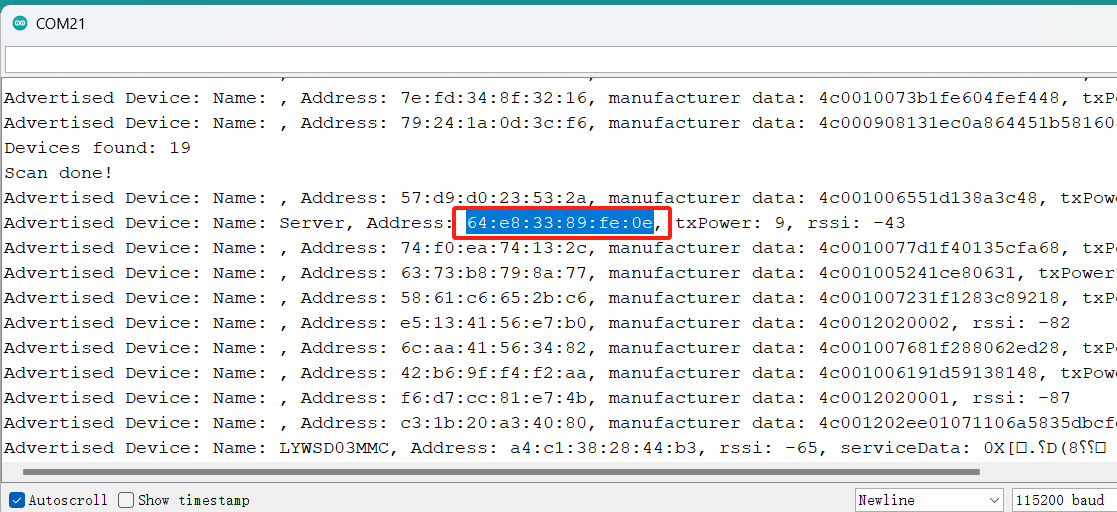
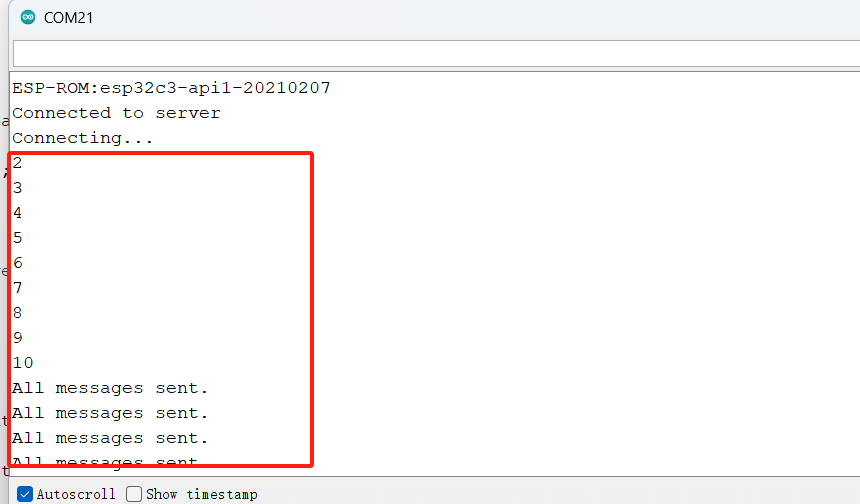
When using XIAO esp32C3 for Bluetooth communication, I need to use one of them as a server to broadcast information, and the other as a client to connect to Bluetooth to receive information, so I must first determine the MAC address of the server, so I wrote a program according to XIAO esp32C3 documents to scan for Mac addresses; secondly, confirm the SERVICE_UUID and CHARACTIC_UUID required for Bluetooth communication, and start writing very = programs for communication. What I want is for the server to send 10 numbers from 0 to 1 to the client.
Scanning Code:For hardware address of microcontroller
            //Scanning Code
            #include
              #include
              #include
              #include

              int scanTime = 5; // In seconds
              BLEScan* pBLEScan;

              class MyAdvertisedDeviceCallbacks: public BLEAdvertisedDeviceCallbacks {
                  void onResult(BLEAdvertisedDevice advertisedDevice) {
                    Serial.printf("Advertised Device: %s \n", advertisedDevice.toString().c_str());
                  }
              };

              void setup() {
                Serial.begin(115200);
                Serial.println("Scanning...");

                BLEDevice::init("");
                pBLEScan = BLEDevice::getScan(); // Create new scan
                pBLEScan->setAdvertisedDeviceCallbacks(new MyAdvertisedDeviceCallbacks());
                pBLEScan->setActiveScan(true);
                pBLEScan->setInterval(100);
                pBLEScan->setWindow(99);
              }

              void loop() {
                BLEScanResults* foundDevices = pBLEScan->start(scanTime, false);
                Serial.print("Devices found: ");
                Serial.println(foundDevices->getCount());
                Serial.println("Scan done!");
                pBLEScan->clearResults();
                delay(2000);
              }
SendMessages Code & Recieved Code
            //SendMessages Code
            #include
              #include
              #include
              #include

              #define SERVICE_UUID        "4fafc201-1fb5-459e-8fcc-c5c9c331914b"
              #define CHARACTERISTIC_UUID "beb5483e-36e1-4688-b7f5-ea07361b26a8"

              BLEServer* pServer = NULL;
              BLECharacteristic* pCharacteristic = NULL;
              bool deviceConnected = false;
              bool oldDeviceConnected = false;

              class MyServerCallbacks : public BLEServerCallbacks {
                  void onConnect(BLEServer* pServer) {
                    deviceConnected = true;
                  };

                  void onDisconnect(BLEServer* pServer) {
                    deviceConnected = false;
                  }
              };

              void setup() {
                  Serial.begin(115200);
                  delay(1000);

                  BLEDevice::init("Server");
                  pServer = BLEDevice::createServer();
                  pServer->setCallbacks(new MyServerCallbacks());

                  BLEService* pService = pServer->createService(SERVICE_UUID);
                  pCharacteristic = pService->createCharacteristic(
                                                       CHARACTERISTIC_UUID,
                                                       BLECharacteristic::PROPERTY_READ |
                                                       BLECharacteristic::PROPERTY_WRITE |
                                                       BLECharacteristic::PROPERTY_NOTIFY
                                                     );

                  pService->start();
                  pServer->getAdvertising()->start();
              }

              void loop() {
                  // Check if device is connected
                  if (deviceConnected) {
                      for (int i = 1; i <= 10; i++) {
                          pCharacteristic->setValue(String(i).c_str());
                          pCharacteristic->notify();
                          Serial.println("Sent: " + String(i));
                          delay(1000); // 1 second delay between messages
                      }

                      // Send the final message
                      pCharacteristic->setValue("All messages sent.");
                      pCharacteristic->notify();
                      Serial.println("Sent: All messages sent.");

                      // Wait until device disconnects
                      while (deviceConnected) {
                          delay(100);
                      }
                  }

                  // Disconnect handling
                  if (!deviceConnected && oldDeviceConnected) {
                      delay(500); // give the bluetooth stack the chance to get things ready
                      pServer->startAdvertising(); // restart advertising
                      Serial.println("start advertising");
                      oldDeviceConnected = deviceConnected;
                  }

                  // Connect handling
                  if (deviceConnected && !oldDeviceConnected) {
                      oldDeviceConnected = deviceConnected;
                  }
              }
              //Recieved Code
              #include
                #include
                #include
                #include

                #define SERVICE_UUID        "4fafc201-1fb5-459e-8fcc-c5c9c331914b"
                #define CHARACTERISTIC_UUID "beb5483e-36e1-4688-b7f5-ea07361b26a8"

                BLEClient* pClient = NULL;
                bool connected = false;

                class MyClientCallbacks : public BLEClientCallbacks {
                    void onConnect(BLEClient* pClient) {
                        connected = true;
                        Serial.println("Connected to server");
                    }

                    void onDisconnect(BLEClient* pClient) {
                        connected = false;
                        Serial.println("Disconnected from server");
                    }
                };

                void setup() {
                    Serial.begin(115200);
                    delay(1000);

                    BLEDevice::init("Client");
                    pClient = BLEDevice::createClient();
                    pClient->setClientCallbacks(new MyClientCallbacks());

                    BLEAddress serverAddress("64:e8:33:89:fe:0e"); // Replace with server's Bluetooth address
                    if (pClient->connect(serverAddress)) {
                        Serial.println("Connecting...");
                    } else {
                        Serial.println("Failed to connect to server");
                    }
                }

                void loop() {
                    if (connected) {
                        BLERemoteService* pRemoteService = pClient->getService(SERVICE_UUID);
                        if (pRemoteService != nullptr) {
                            BLERemoteCharacteristic* pCharacteristic = pRemoteService->getCharacteristic(CHARACTERISTIC_UUID);
                            if (pCharacteristic != nullptr) {
                                String value = pCharacteristic->readValue(); // Get the value as Arduino String
                                Serial.println(value); // Output the information received from the server
                            } else {
                                Serial.println("Failed to find characteristic");
                            }
                        } else {
                            Serial.println("Failed to find service");
                        }
                        delay(1000); // Add delay to avoid continuous reading
                    }
                }
WiFi: XIAO esp32C3*2
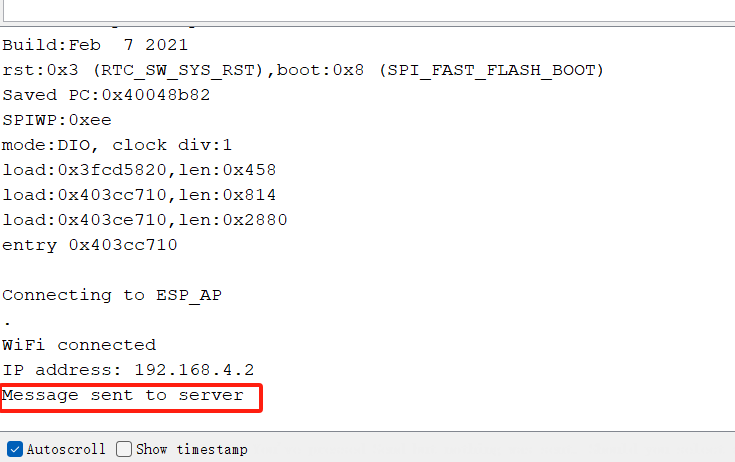
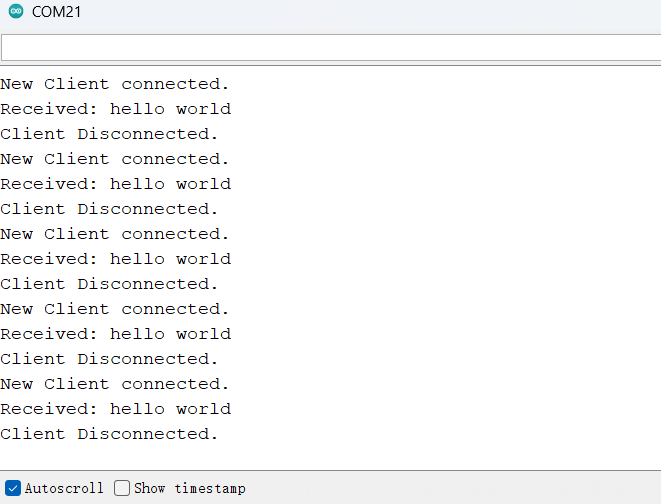
XIAO esp32C3 has built-in WiFi module, which can be used as AP or client. Therefore, I prepared two XIAO esp32C3, one of which acts as an AP access point to receive data transmitted by the client and output it through serial port; the other acts as a client to connect to the AP hotspot and send data.
            //STA Code
            #include
              #include

              const char* ssid = "ESP_AP";
              const char* password = "123456789";
              const char* host = "192.168.4.1"; // AP ESP32 IP
              const uint16_t port = 80;

              WiFiClient client;

              void setup() {
                  Serial.begin(115200);
                  delay(10);

                  Serial.println();
                  Serial.print("Connecting to ");
                  Serial.println(ssid);

                  WiFi.begin(ssid, password);

                  while (WiFi.status() != WL_CONNECTED) {
                      delay(500);
                      Serial.print(".");
                  }

                  Serial.println("");
                  Serial.println("WiFi connected");
                  Serial.print("IP address: ");
                  Serial.println(WiFi.localIP());

                  if (client.connect(host, port)) {
                      client.println("hello world"); // SEND "hello world"
                      client.stop();
                      Serial.println("Message sent to server");
                  } else {
                      Serial.println("Connection to server failed");
                  }
              }

              void loop() {
                  delay(5000);
                  ESP.restart();
              }
            //AP Code
            #include
              #include

              const char* ssid = "ESP_AP";
              const char* password = "123456789";
              WiFiServer server(80);

              void setup() {
                  Serial.begin(115200);
                  delay(10);

                  Serial.println();
                  Serial.println("Setting up AP...");
                  WiFi.softAP(ssid, password);

                  IPAddress IP = WiFi.softAPIP();
                  Serial.print("AP IP address: ");
                  Serial.println(IP);
                  server.begin();
                  Serial.println("Server started");
              }

              void loop() {
                  WiFiClient client = server.available();
                  if (client) {
                      Serial.println("New Client connected.");
                      String currentLine = "";
                      while (client.connected()) {
                          if (client.available()) {
                              char c = client.read();
                              currentLine += c;
                          }
                      }
                      Serial.print("Received: ");
                      Serial.println(currentLine);
                      client.stop();
                      Serial.println("Client Disconnected.");
                  }
              }
Serial Communication: XIAO seeed RP2040*1, DFRobot Microcontroller*1
To get started, I read the relevant data files about the DFRobot Microcontroller core board to understand the use of UART serial ports and determine pins; secondly, I connected the hardware according to the designed functions. The function I envisioned was to connect a key to the ESP32 control board, press the key, and the control board sends data to another main control board via RX and TX, and after it gets the data, controls the LED lights to turn on or off.

Programming
            //Send: DFRobot Microcontroller

            #define BUTTON_PIN 26 // Button pin
            #define TX_PIN 1      // Pin used for sending data, can be changed as needed

            void setup() {
              pinMode(BUTTON_PIN, INPUT); // Set button pin as input mode
              Serial1.begin(115200);       // Initialize serial communication on Serial1 at 115200 baud
              Serial.begin(115200);        // Initialize serial communication on Serial at 115200 baud
            }

            void loop() {
              static bool buttonState = false; // Variable to store button state
              bool currentButtonState = digitalRead(BUTTON_PIN); // Read current button state

              // Check for button state change
              if (currentButtonState != buttonState) {
                delay(50); // Delay for signal stability
                currentButtonState = digitalRead(BUTTON_PIN); // Read button state again
                if (currentButtonState != buttonState) { // If button state still changes
                  buttonState = currentButtonState; // Update button state
                  if (buttonState == HIGH) { // If button is pressed, send data "1" and print message
                    Serial1.println('1');
                    Serial.println('1');
                  } else { // If button is released, send data "0" and print message
                    Serial1.println('0');
                    Serial.println('0');
                  }
                  delay(1000);
                }
              }
            }
            //Recieved: XIAO Seeed RP2040

            #define LED_BUILTIN 26 // The built-in LED pin on XIAO Seeed RP2040 is 26
            #define RX_PIN 1       // Select the pin used for receiving data, can be changed as needed

            void setup() {
              pinMode(LED_BUILTIN, OUTPUT); // Initialize the built-in LED pin as output mode
              Serial1.begin(115200);         // Initialize serial communication on Serial1 at 115200 baud
              Serial.begin(115200);
            }

            void loop() {
              if (Serial1.available() > 0) { // If there is data available on Serial1
                char data = Serial1.read();   // Read data from Serial1

                // Check if the received data is '1', if so, turn on the LED
                if (data == '1') {
                  digitalWrite(LED_BUILTIN, HIGH); // Turn on the LED
                  Serial.println("Received command: 1, Turning on LED");
                }
                // Check if the received data is '0', if so, turn off the LED
                else if (data == '0') {
                  digitalWrite(LED_BUILTIN, LOW); // Turn off the LED
                  Serial.println("Received command: 0, Turning off LED");
                }
                delay(1000);
              }
            }