We take a closer look at the components, functions, dimensions and other features that will help us evaluate the performance of our machines.
Identifying the material
The materials and their thicknesses are the most important in the development of this task, and their recognition is important to improve the quality of the final product.
The first drawings
After the recognition of the material, of the machinery, comes the most fun moment, the drawing and its endless possibilities.
Getting started with design...
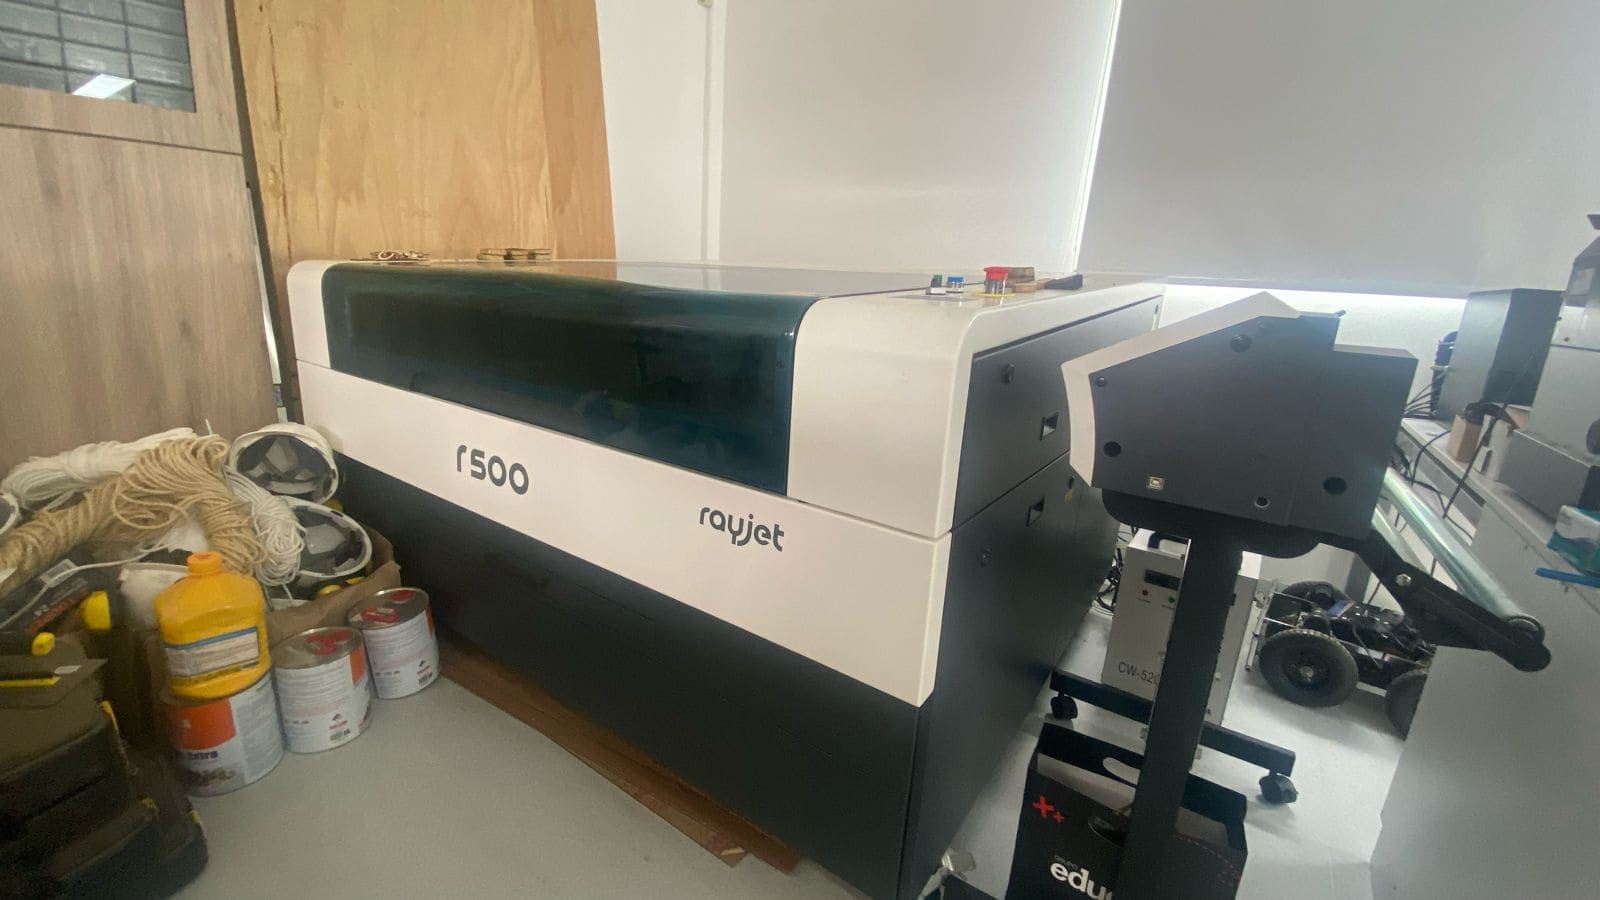
Starting with the main features of our machinery, we have the Rayjet R500 with the following technical specifications.
WORK SURFACE
1300 x 900 mm
LASER POWER
SEALED LASER CO2 DC 60 / 100 / 120 W
LASER SYSTEM POWER CONSUMPTION
100 - 250V, 1100 - 1500 W
MAX PROCESSING SPEED
1 m/s
Thicknesses and diversity!
With this machinery you can cut different materials in thickness and texture, some of them can even be glazed, and it not only makes the core but also engraves them, our first test will be on 3mm Plywood and also on 4mm Cardboard
Step 1
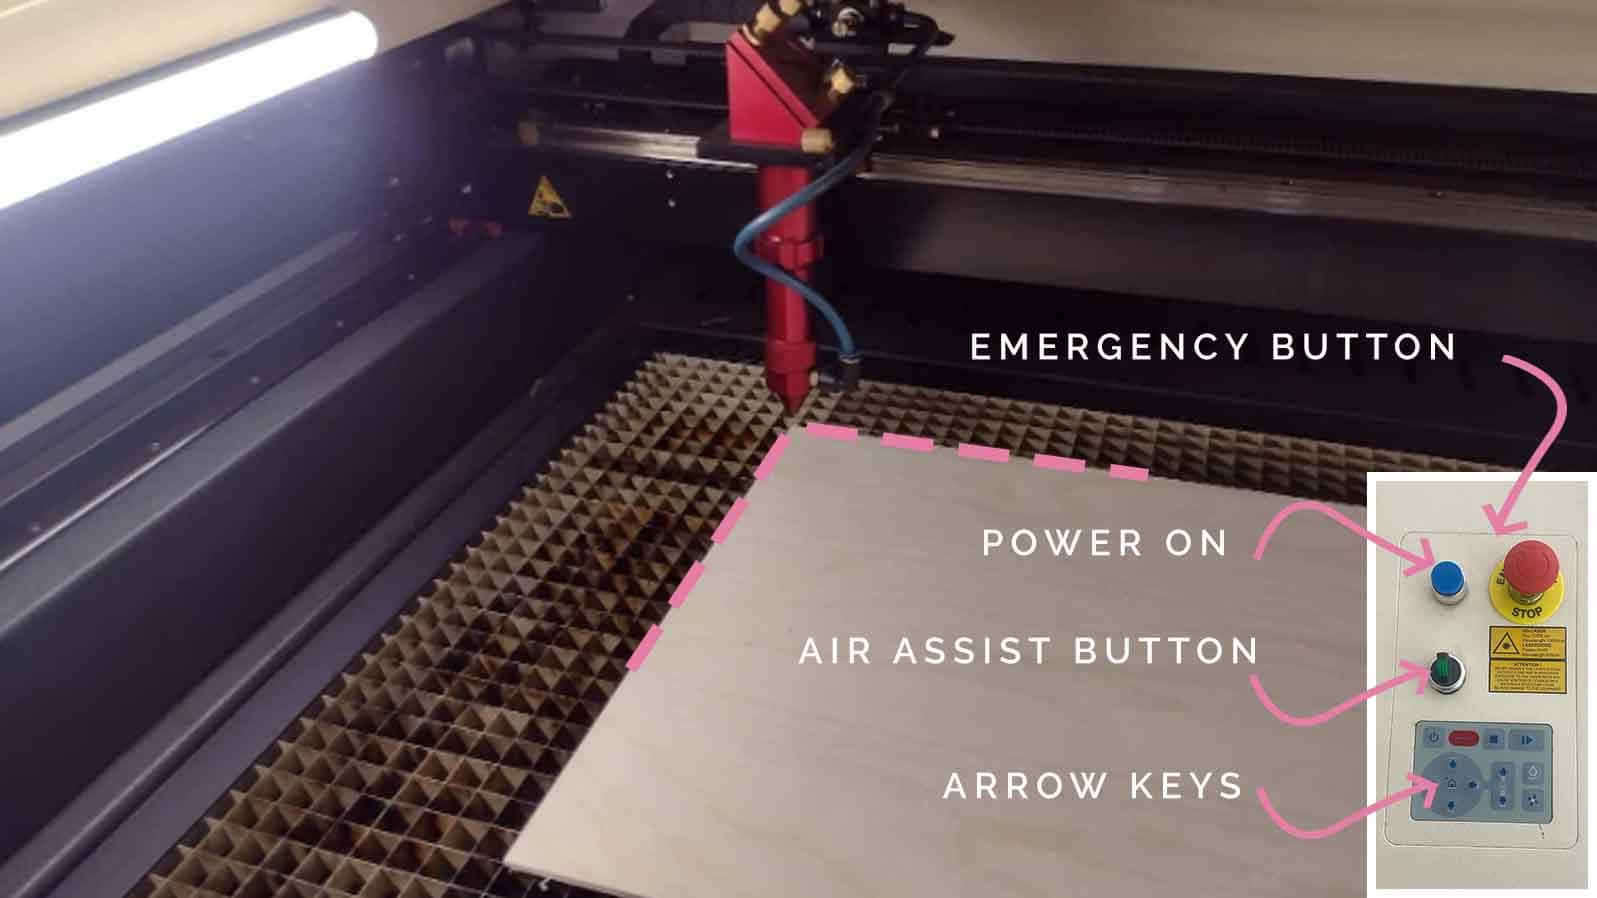
Ignition and position of the axes
We turn on the machinery with the blue button and green lever to start operations, we will automatically see how the red cannon will go to the upper left corner of the cutting plate, from here we can move it with the arrows found on the operations panel, Make sure before sending it to be cut. Lower the safety cover of the machine!
Step 2
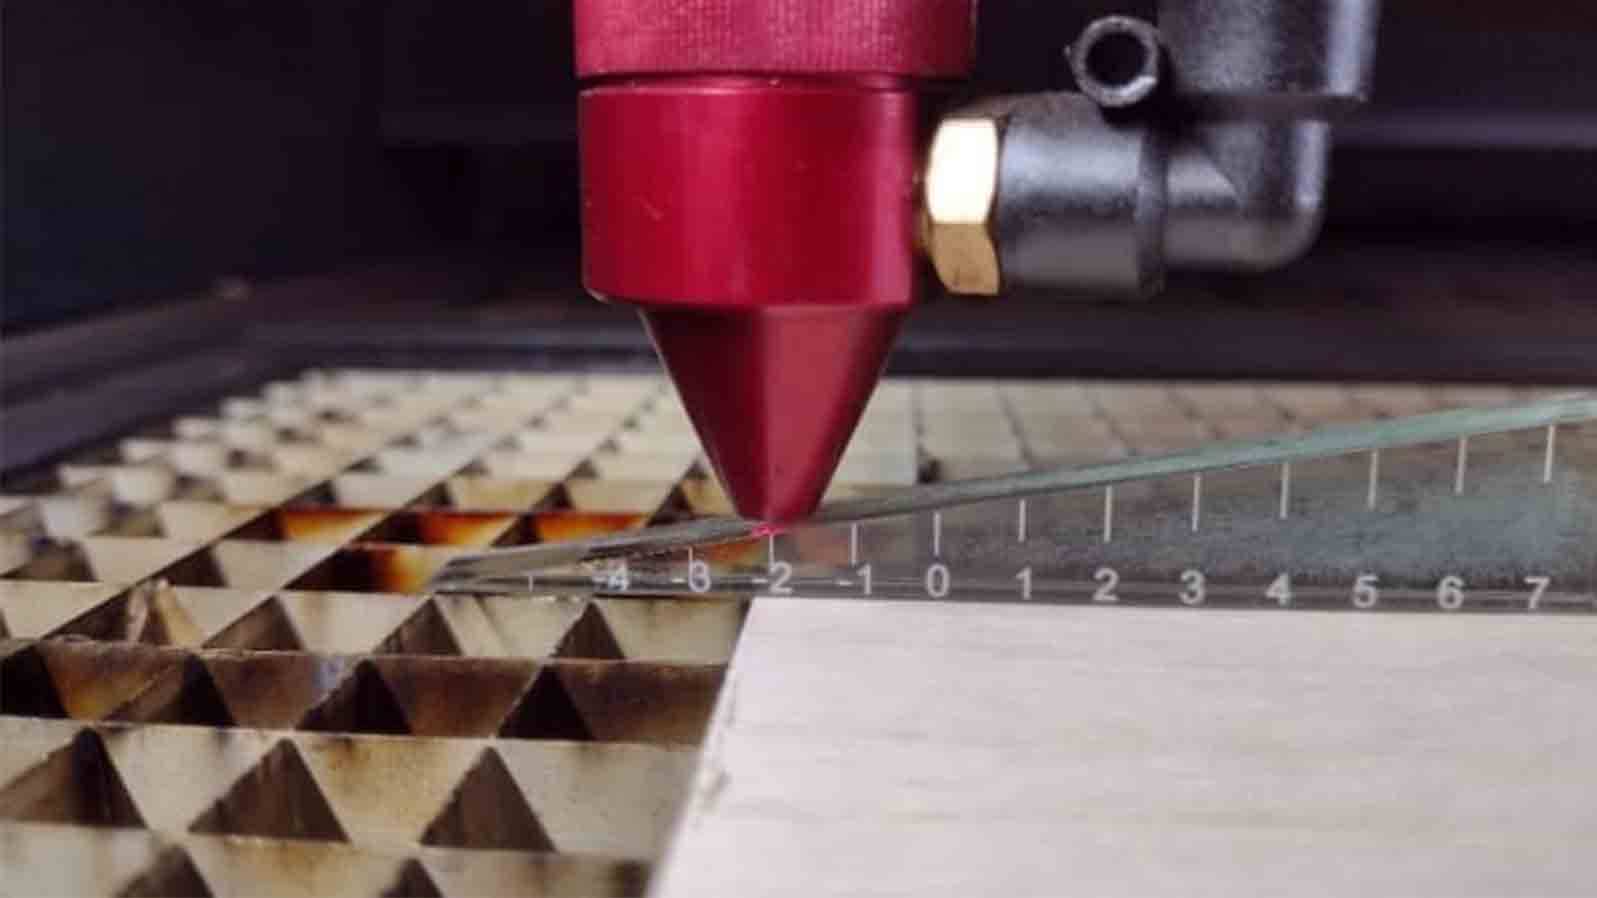
Calibration
To make the correct calibration, the Rayjet tool kit is used, from which the acrylic triangle is used to recognize cutting height and depth, we recommend the value of -2.
A very useful
weekend
Many tests and great lessons learned
The cutting tests
First CAD drawings
The first CAD drawings to get closer to a desired product
Calibration tests in program
Power and speed tests helped us determine a final product
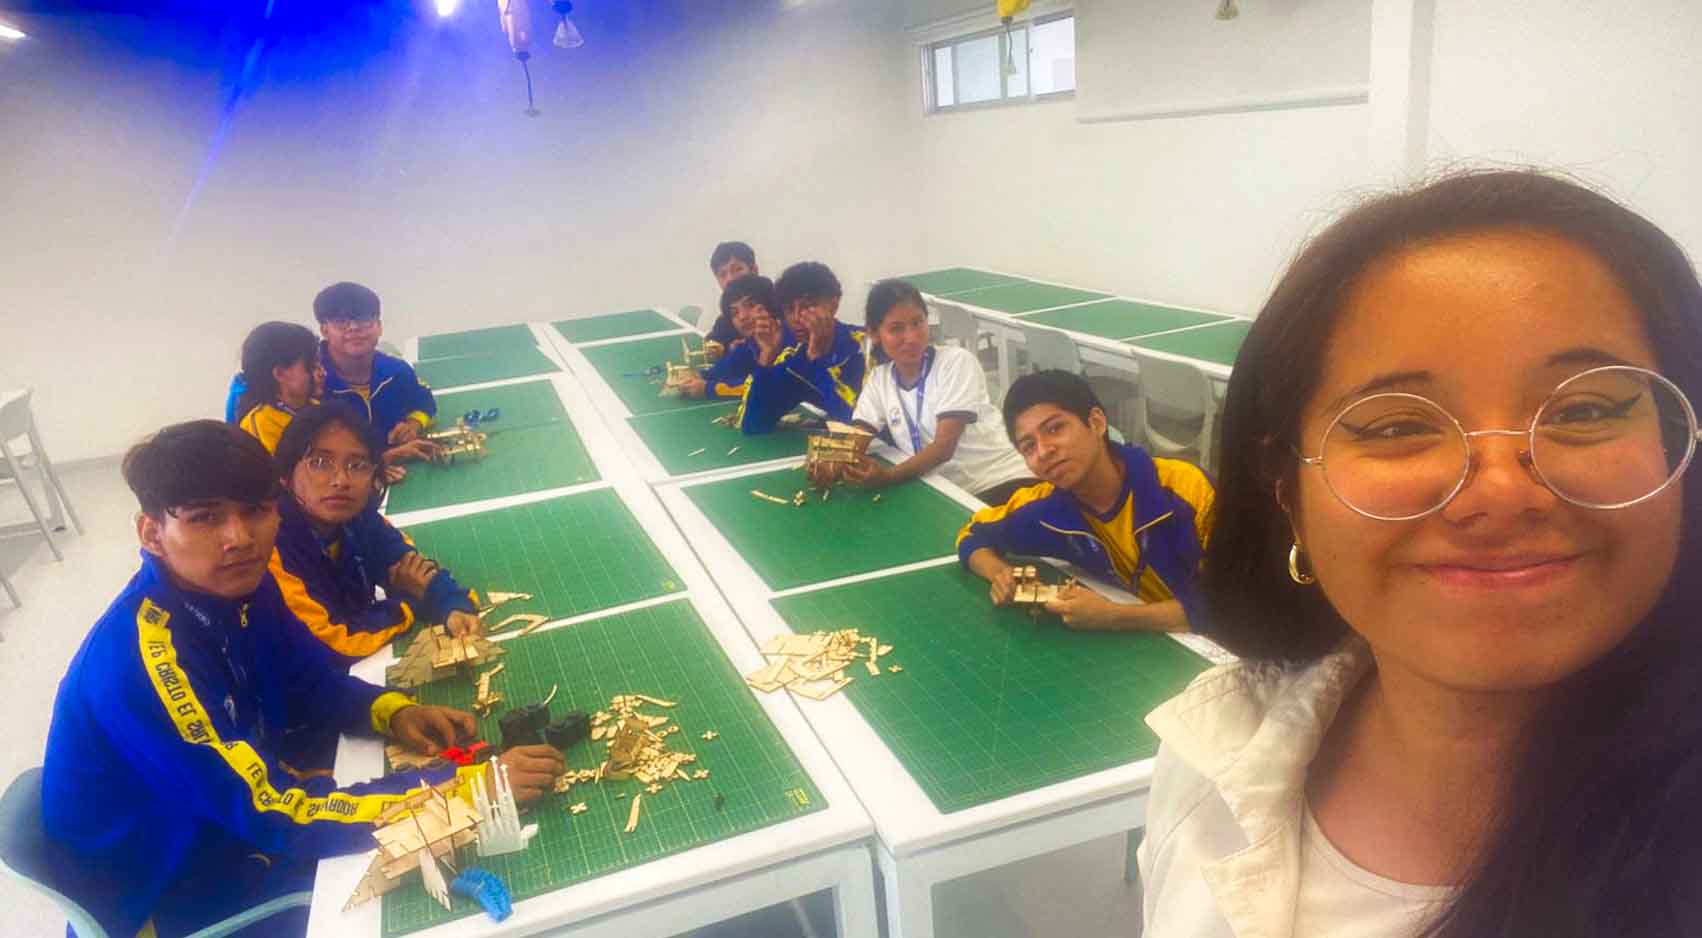
Start of testing
Using the machine was the most fun, we learned a lot
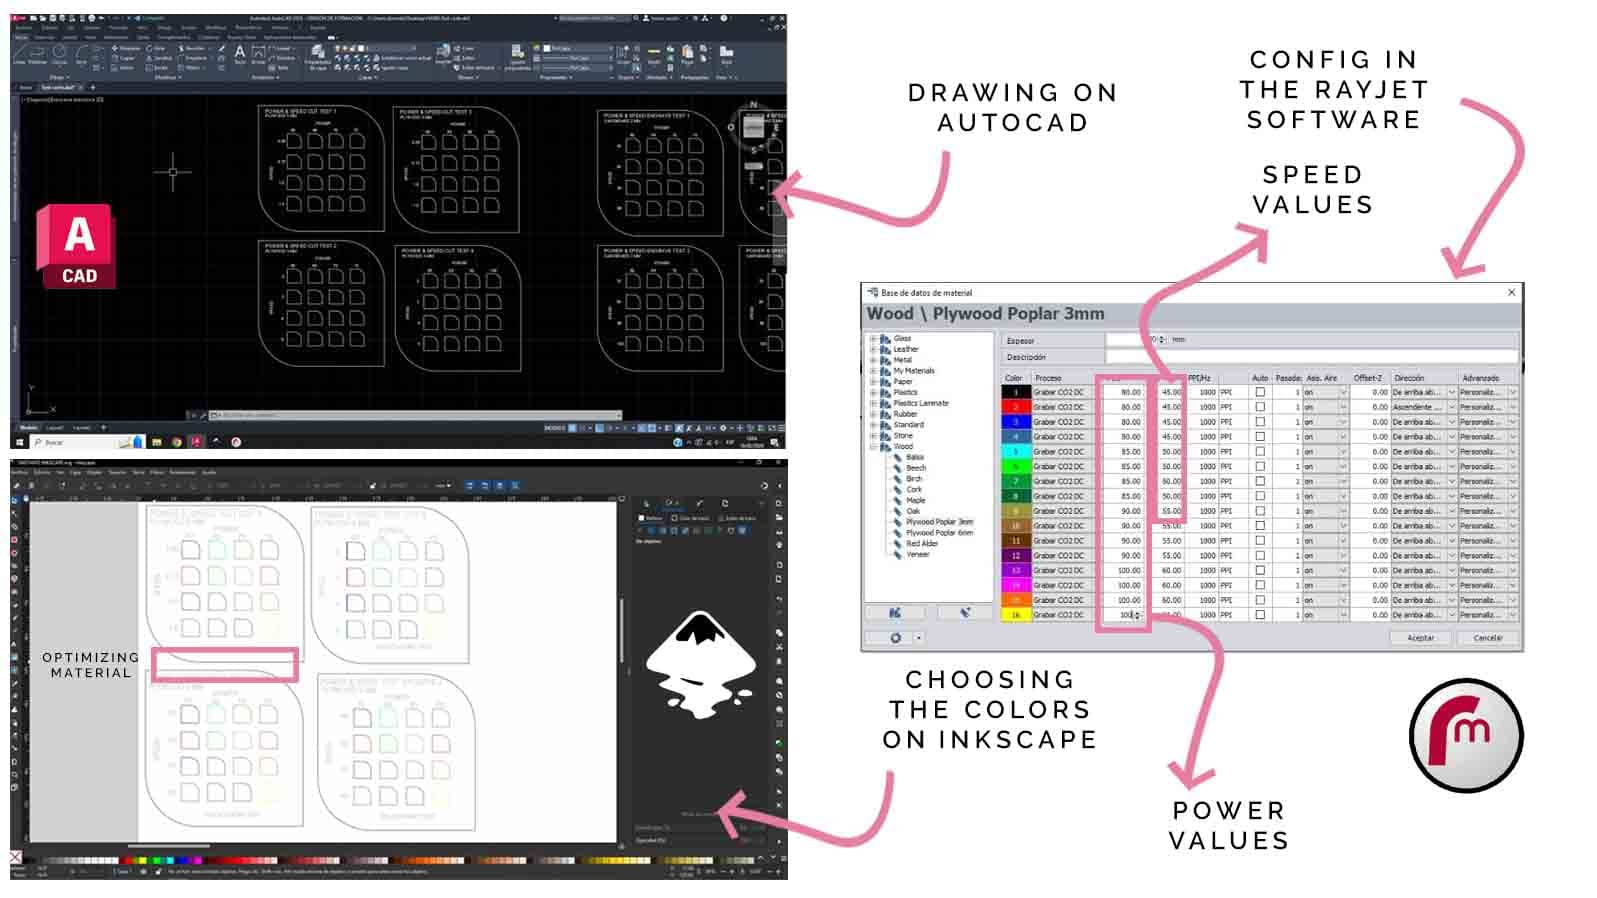
Drawings, layers and colors
The first thing was to make tables and values of power, speed drawn in AutoCAD, to be able to determine cutting intensities and depths, after that it was necessary to go to Inkscape to place the respective colors, we considered doing this more detailed from this software because we made sure that have the same layer color as in the laser machinery program.
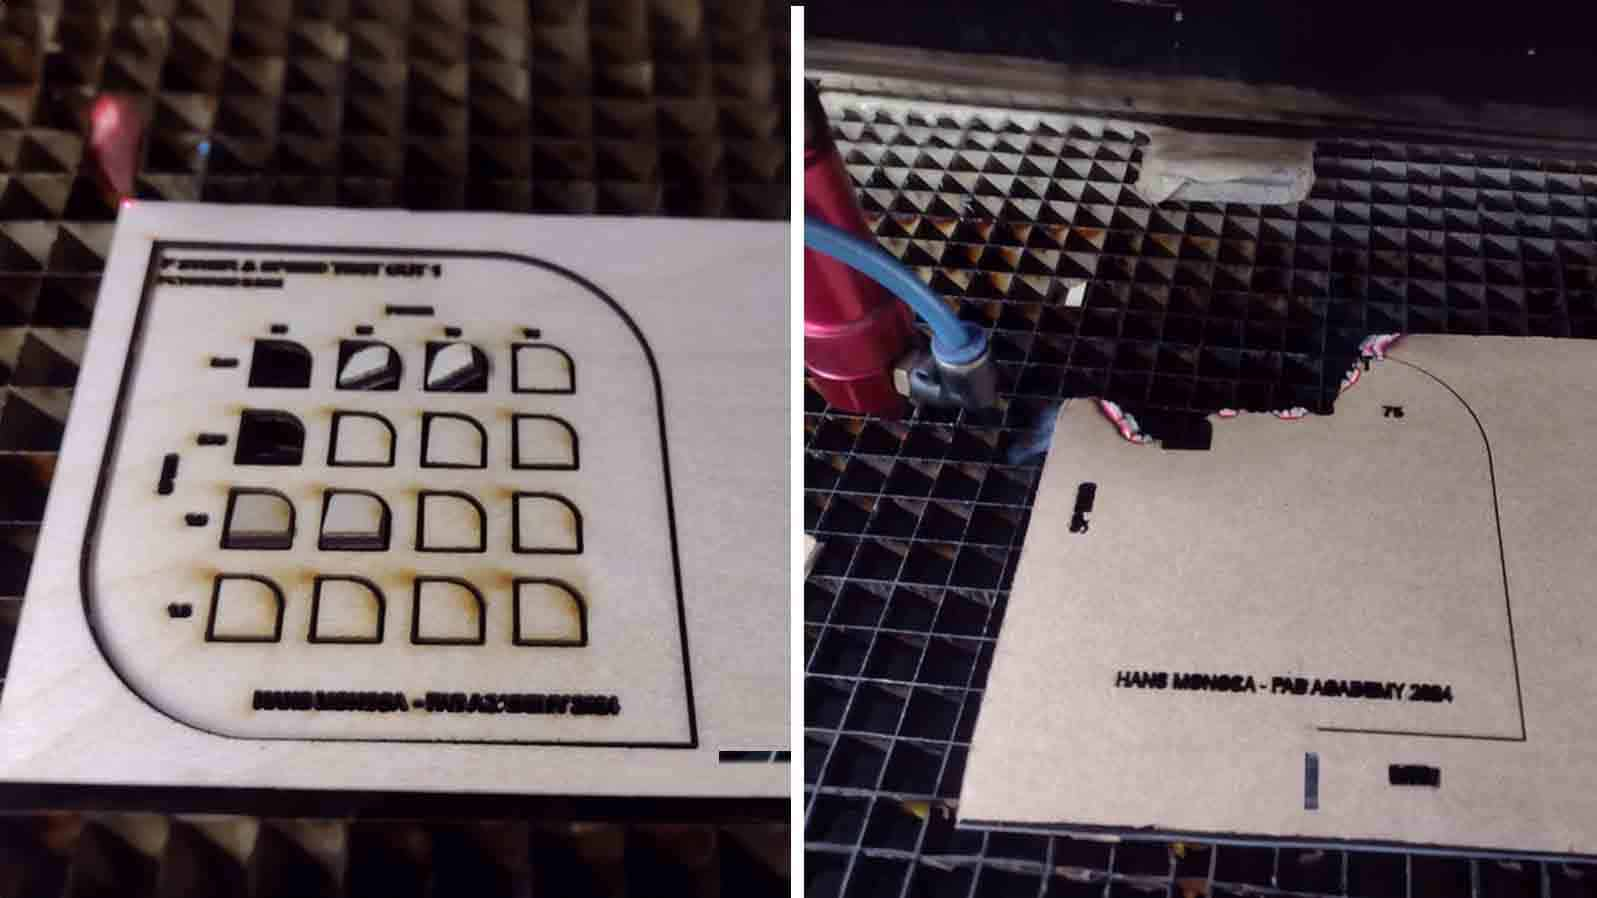
After some modifications in the layers and tests with the laser, some disasters occurred, first that the cannon burned the cardboard, second that the values were wrong and for this reason the burning was caused.
After verifying them, the material was cut and engraved, here are the results.
Improvement and calibration
After improving the calibration, a different material (plywood) is cut, so that the most correct way to make detailed cuts in the material is identified.
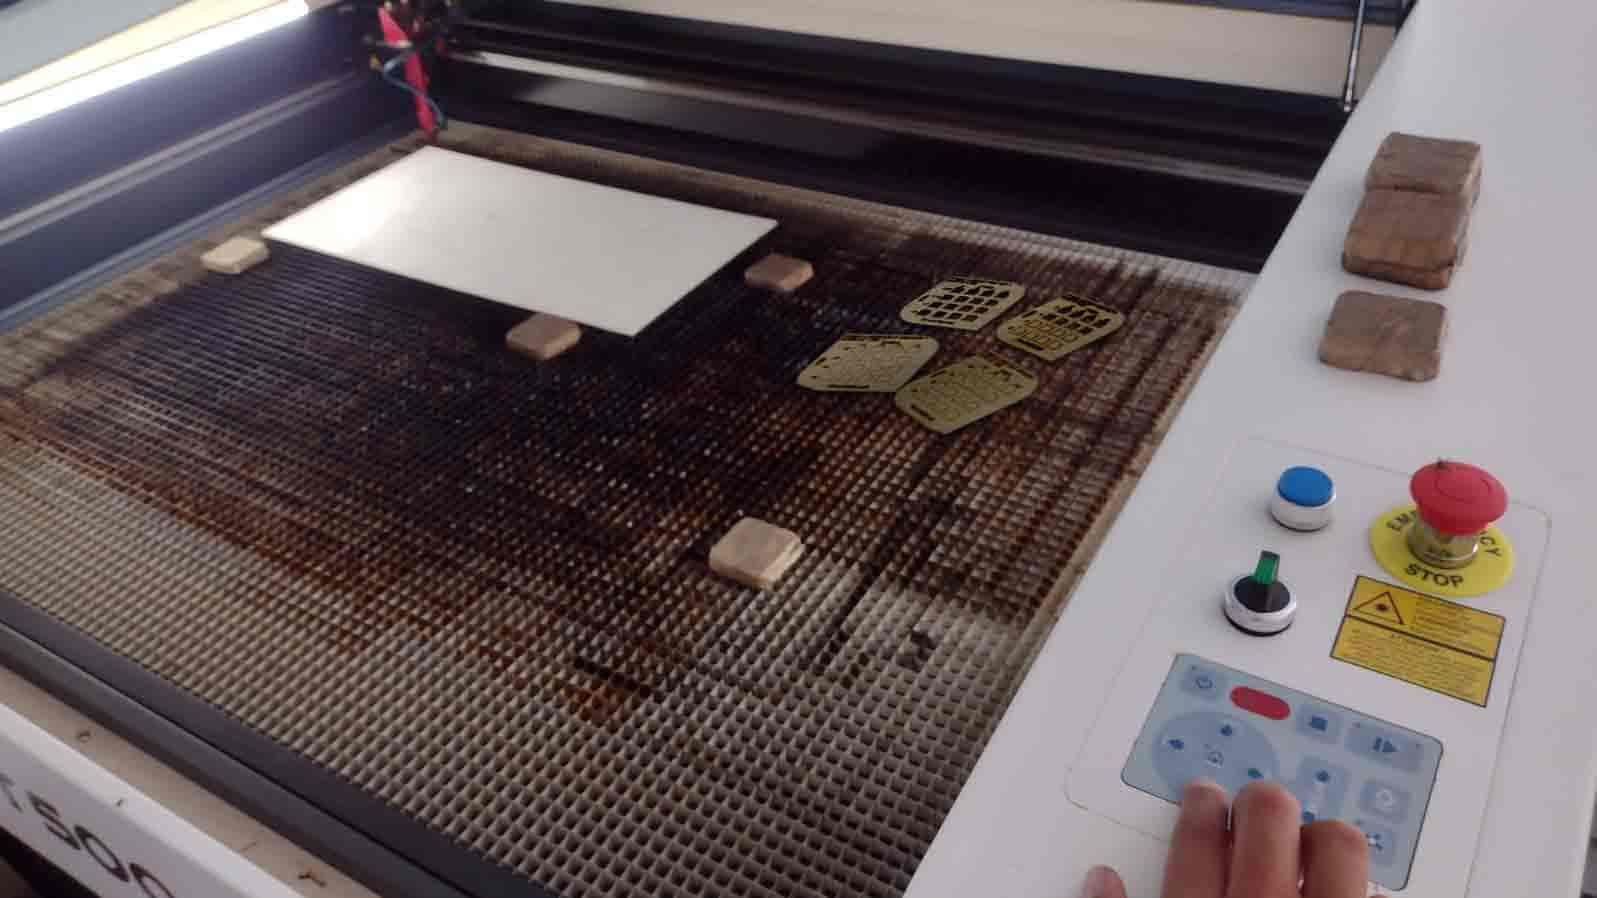
Some tips could be:
- Clean the work area and place weights on the material so that the air assistant does not lift it.
- Prevent the closure of machinery for its operation.
- Consider the use of masks due to the smoke that may arise during the cut.
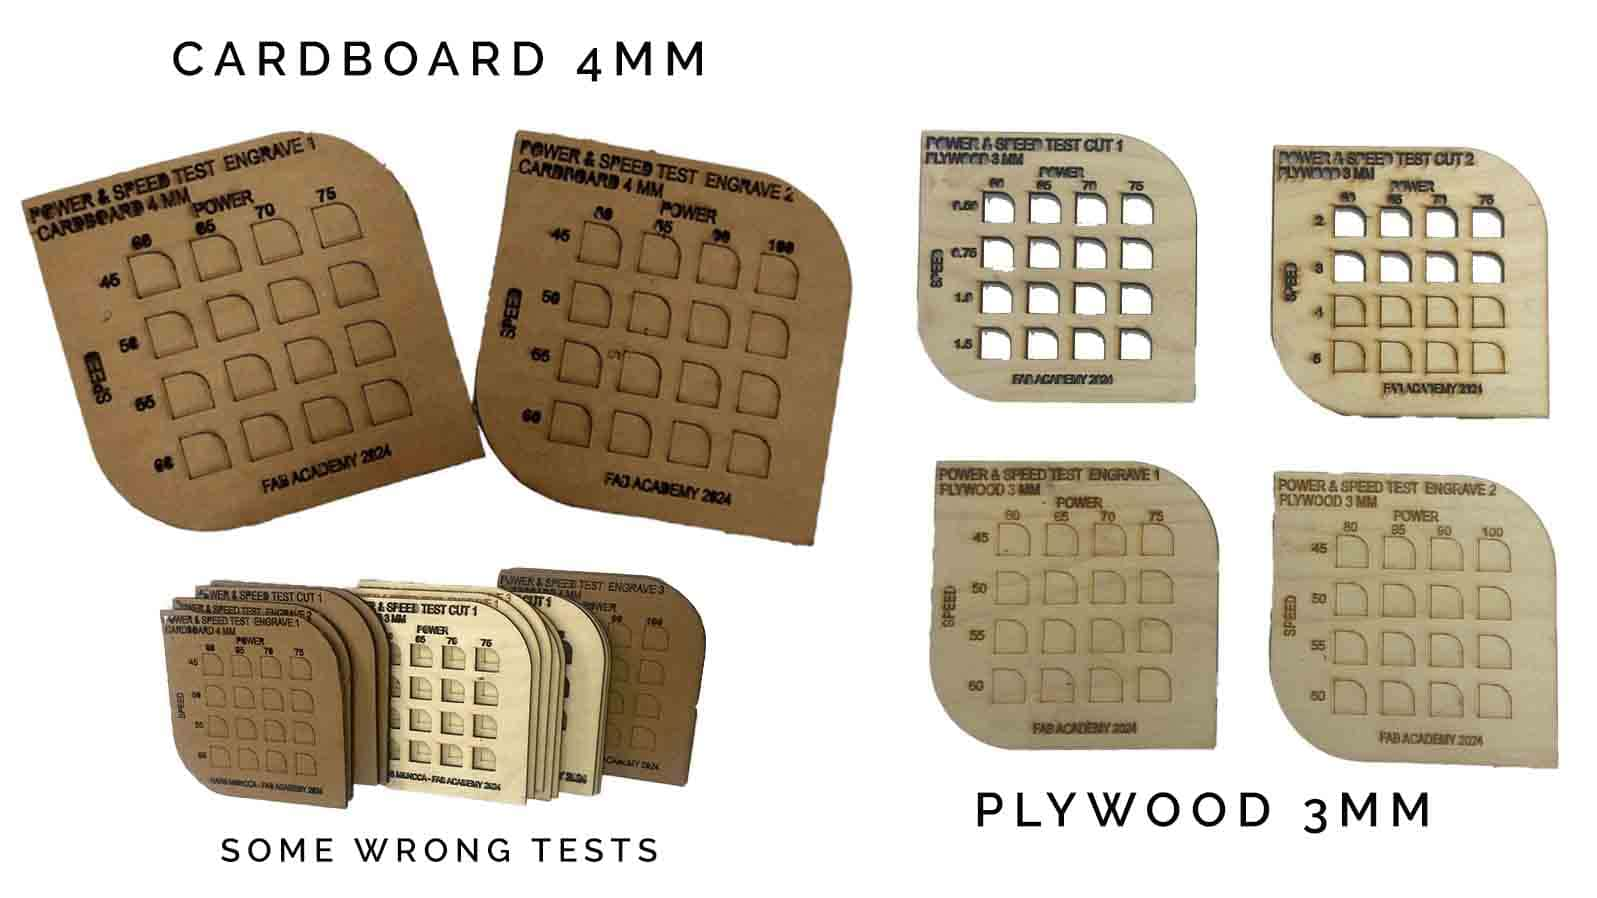
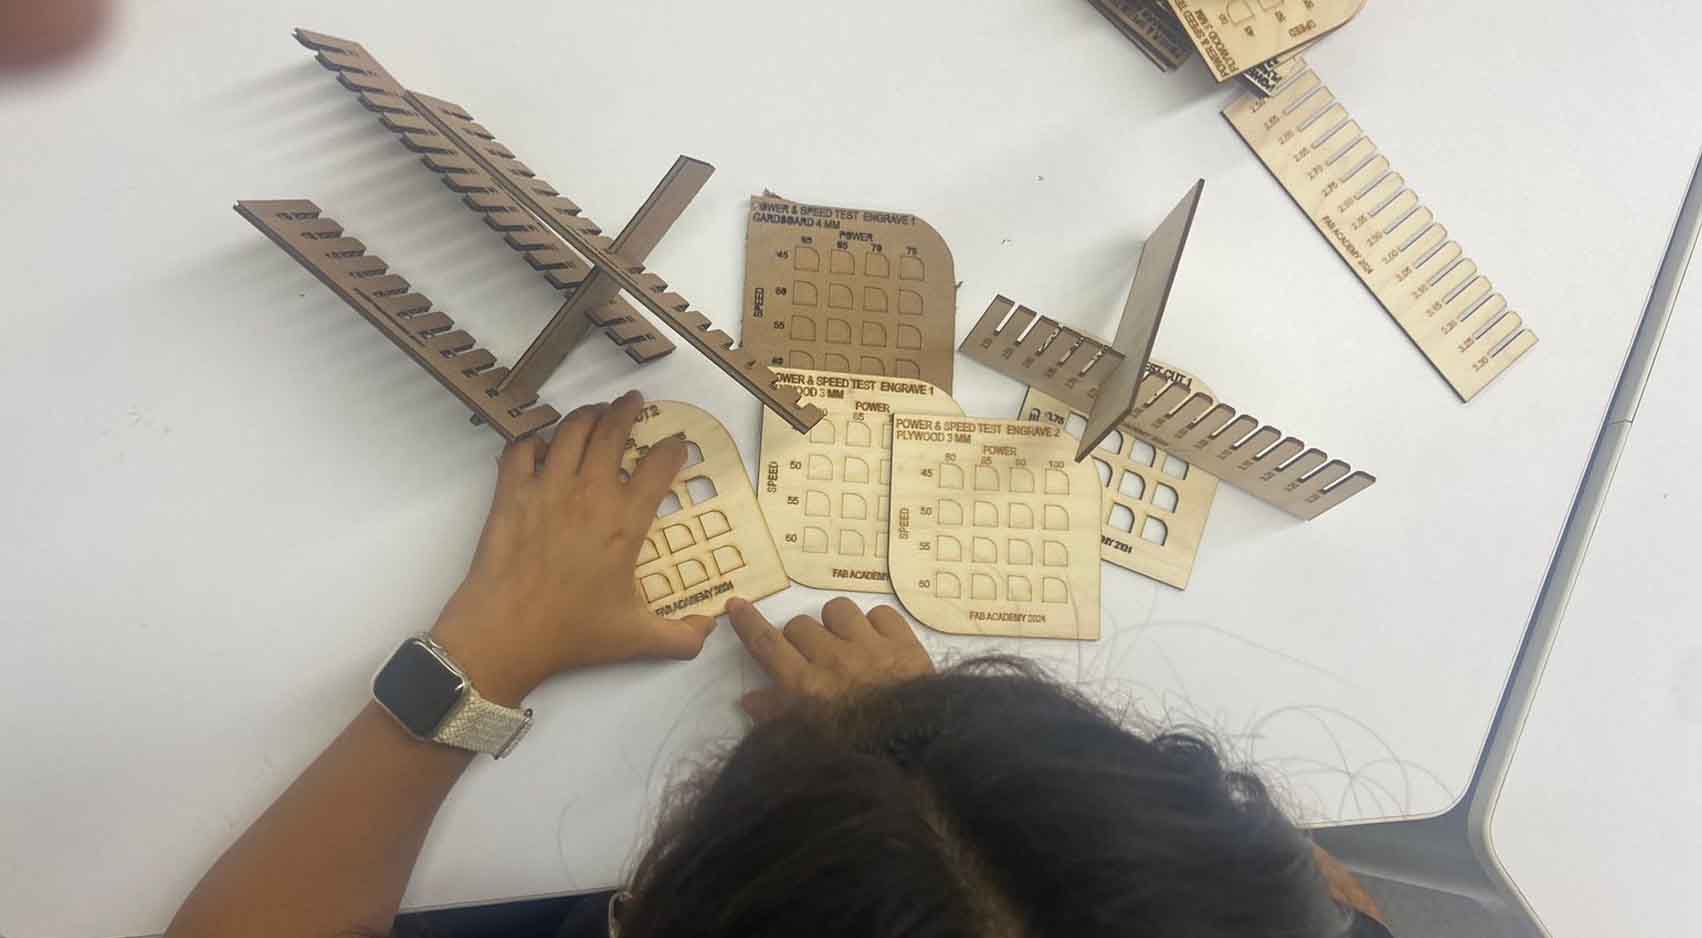
Results in different materials
In both cardboard and Plywood, we were able to determine the powers, speeds, cutting and engraving.
Detailed shots are taken to verify it.
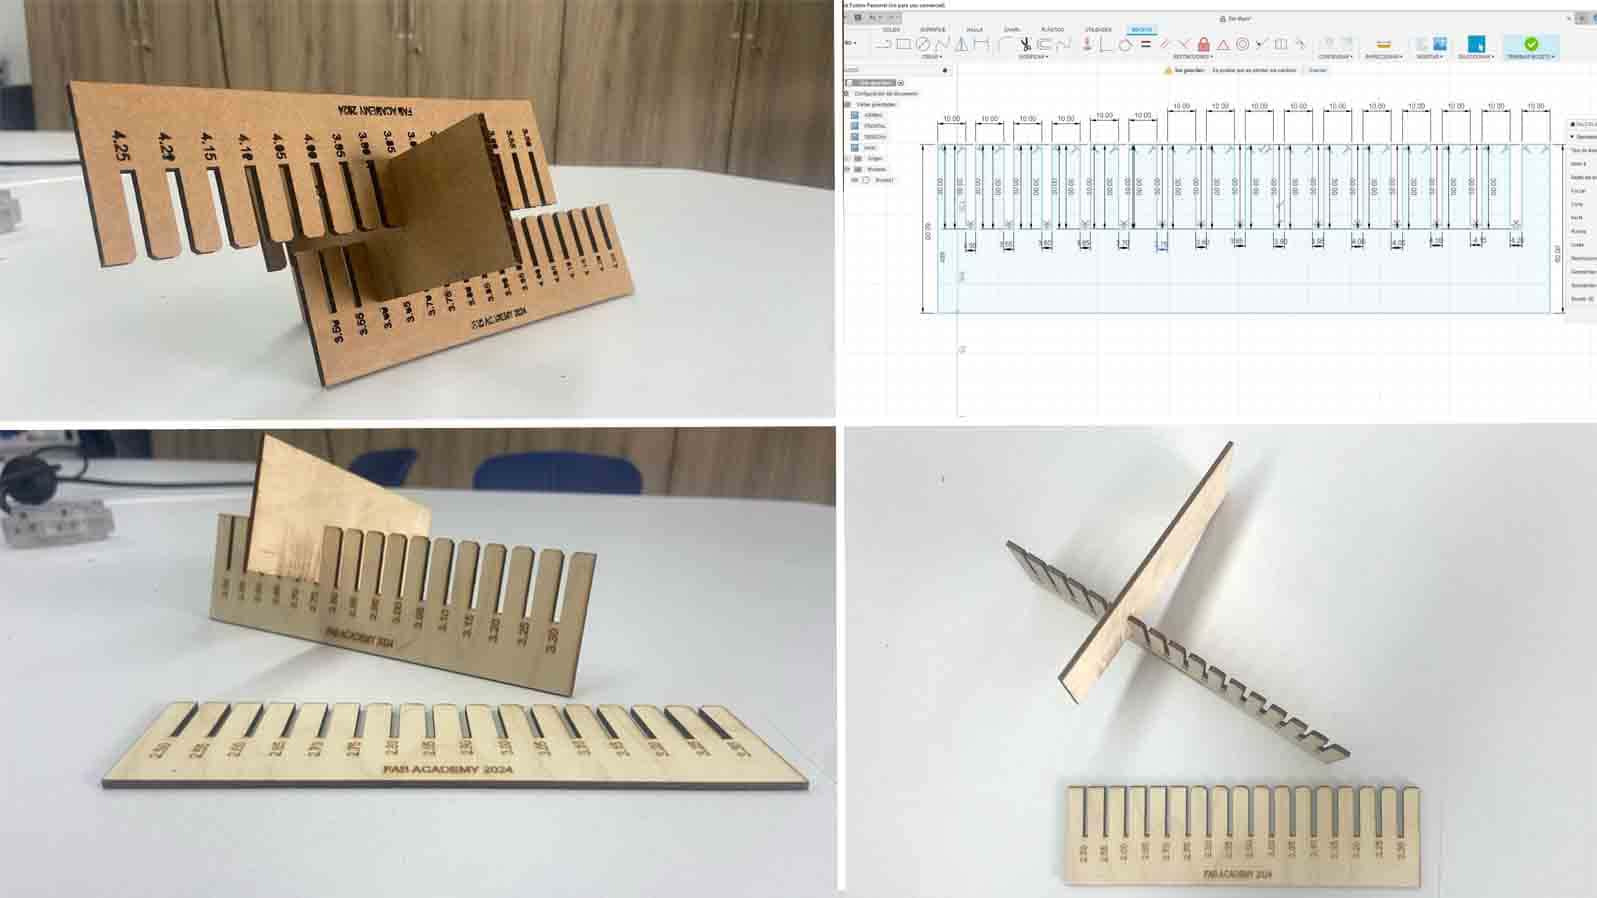
The Comb
Pressure and fit test
For this test, Fusion 360 is used, applied to both types of materials as well (Plywood + Cardboard).
Let's remember to always "Chamfer" in the corners, so that we can test the pressure and the material is not damaged quickly.
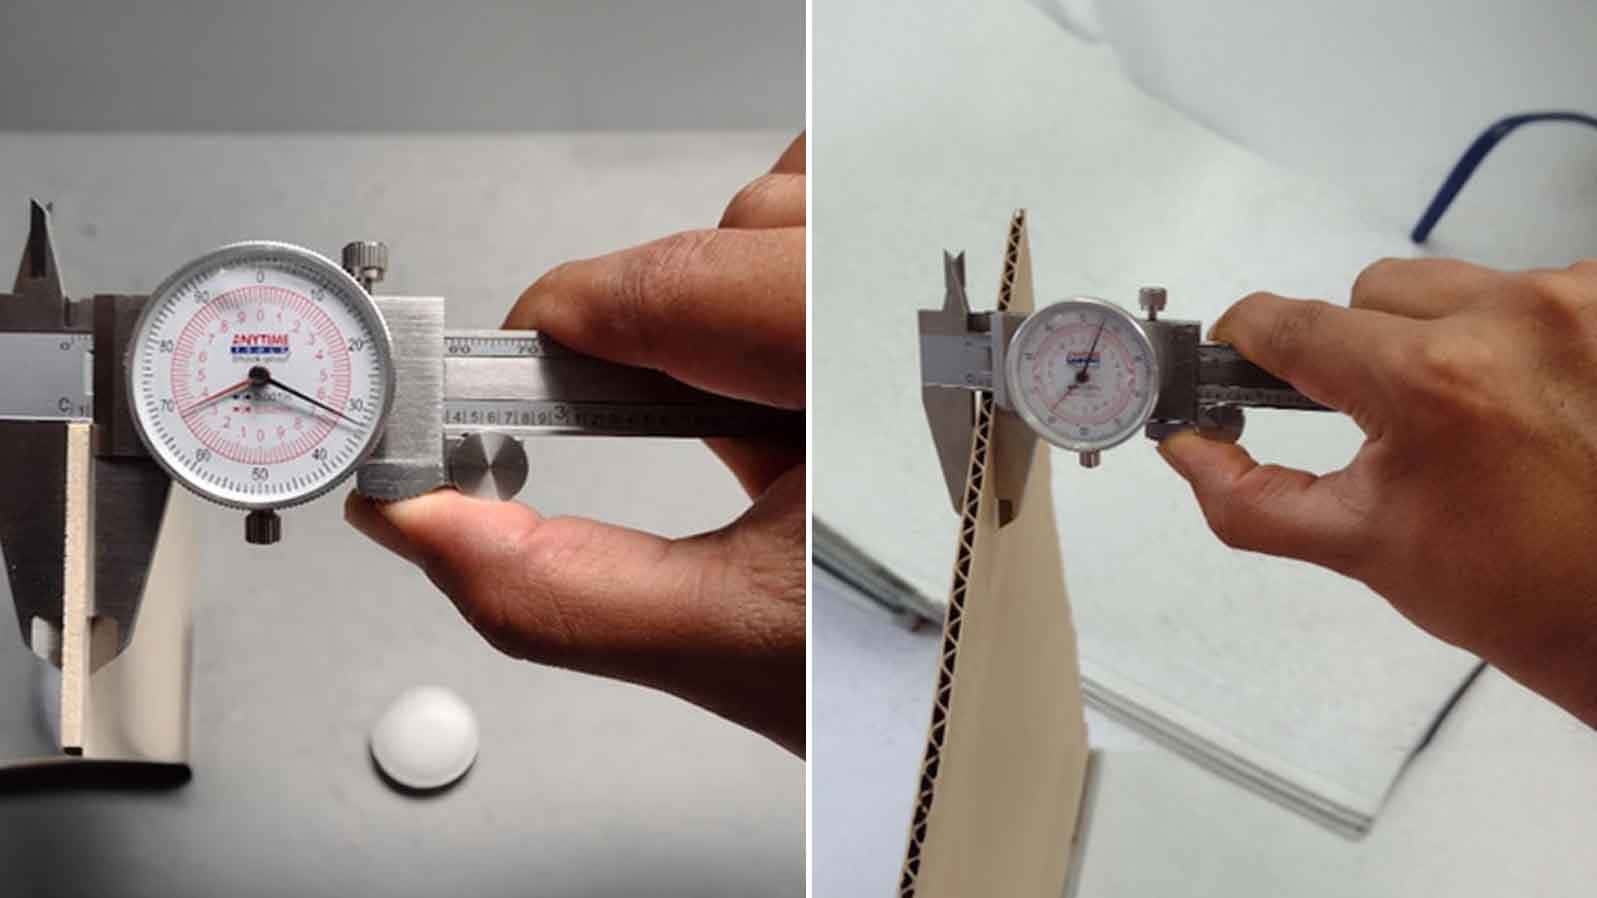
From here we can see in detail and fastenings of the material to each other, currently we are left with the following values:
Actual plywood thickness: 3.00 mm - actual fit: 2.75 mm = KERF PLYWOOD cut: 0.25 mm
Actual cardboard thickness: 4.00 mm- actual fit: 3.65 mm = KERF CARDBOARD cut: 0.35 mm
The vinyl part
First ideas
The first thing is to learn how to place the vinyl, turn it on and connect to the PC, basic.
Calibration tests
The most important part is to practice cutting, if possible change tools to expand the field of application.
Results
Some smaller and larger applications, further detailing the designs with immense possibilities
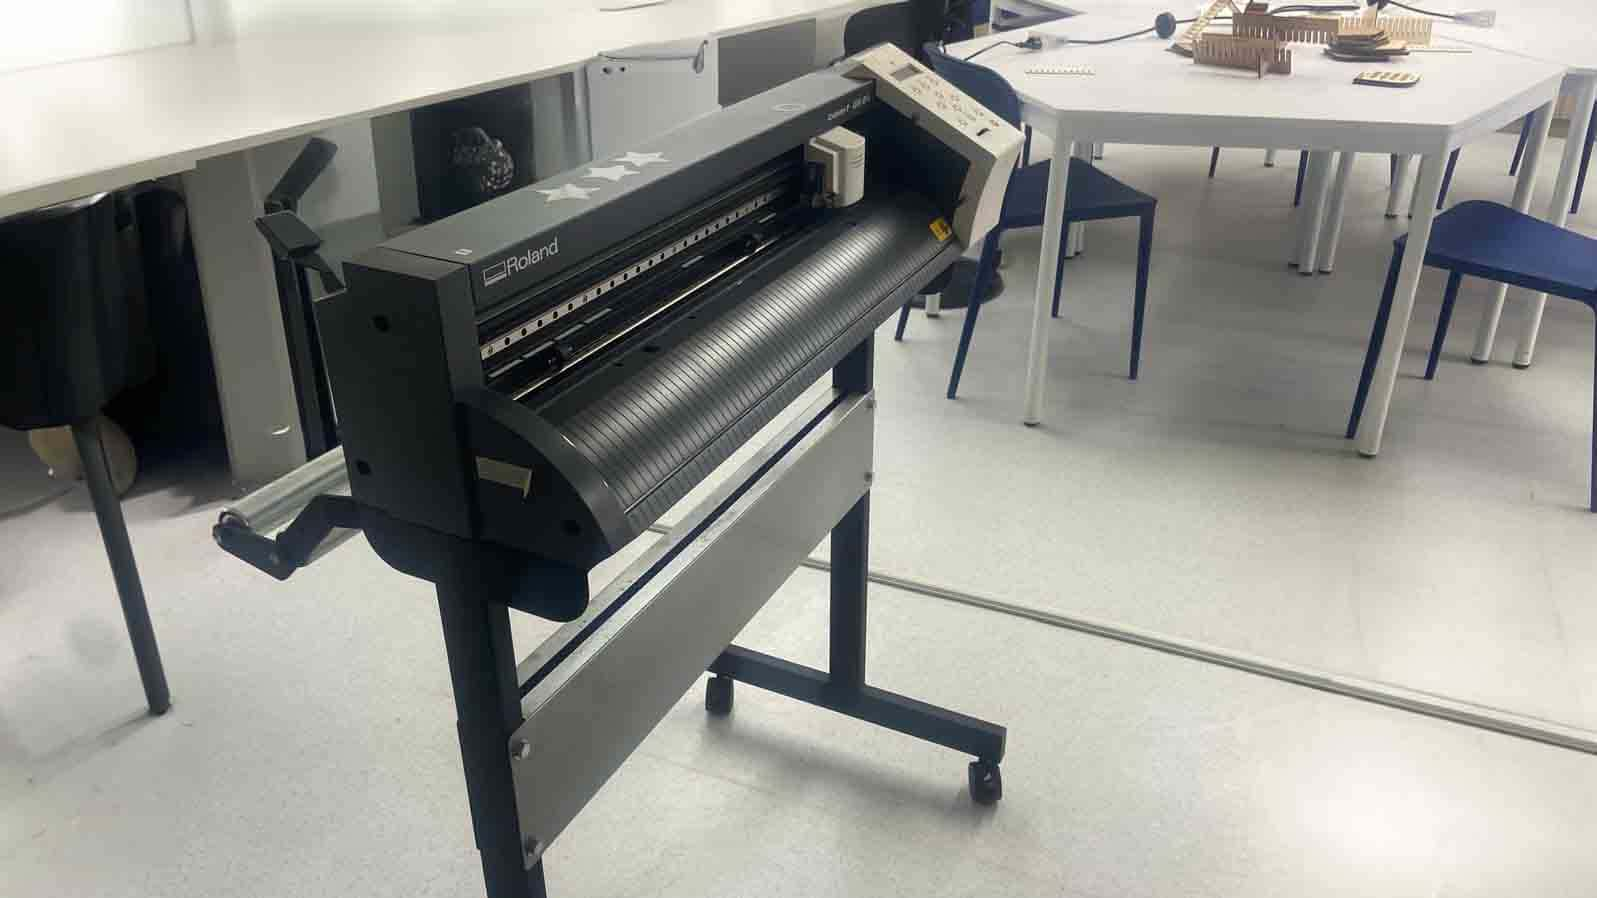
Recognition
The model we have in the laboratory is the Roland GS-24 which contains the following specifications:
CUTTING SPEED
10 - 850 mm/s
CUTTING FORCE
30 - 500 gf
CUTTING WIDTH
584 mm
CUTTING LENGTH
25 m
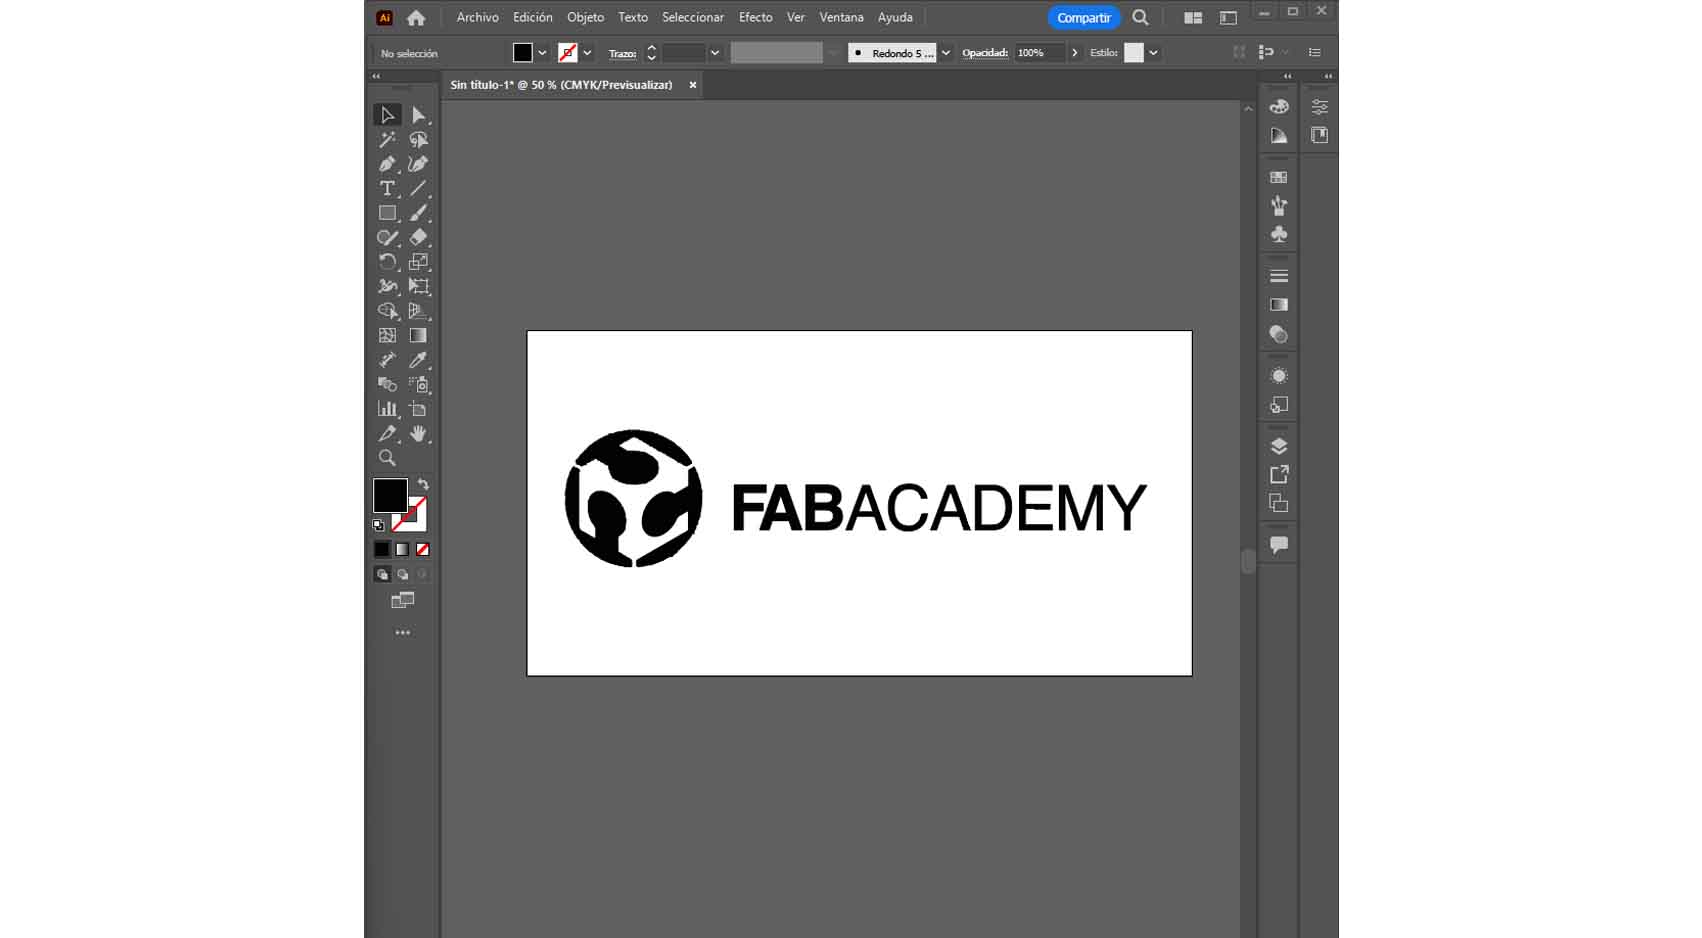
USING VINYL FOR THE FIRST TIME
First steps
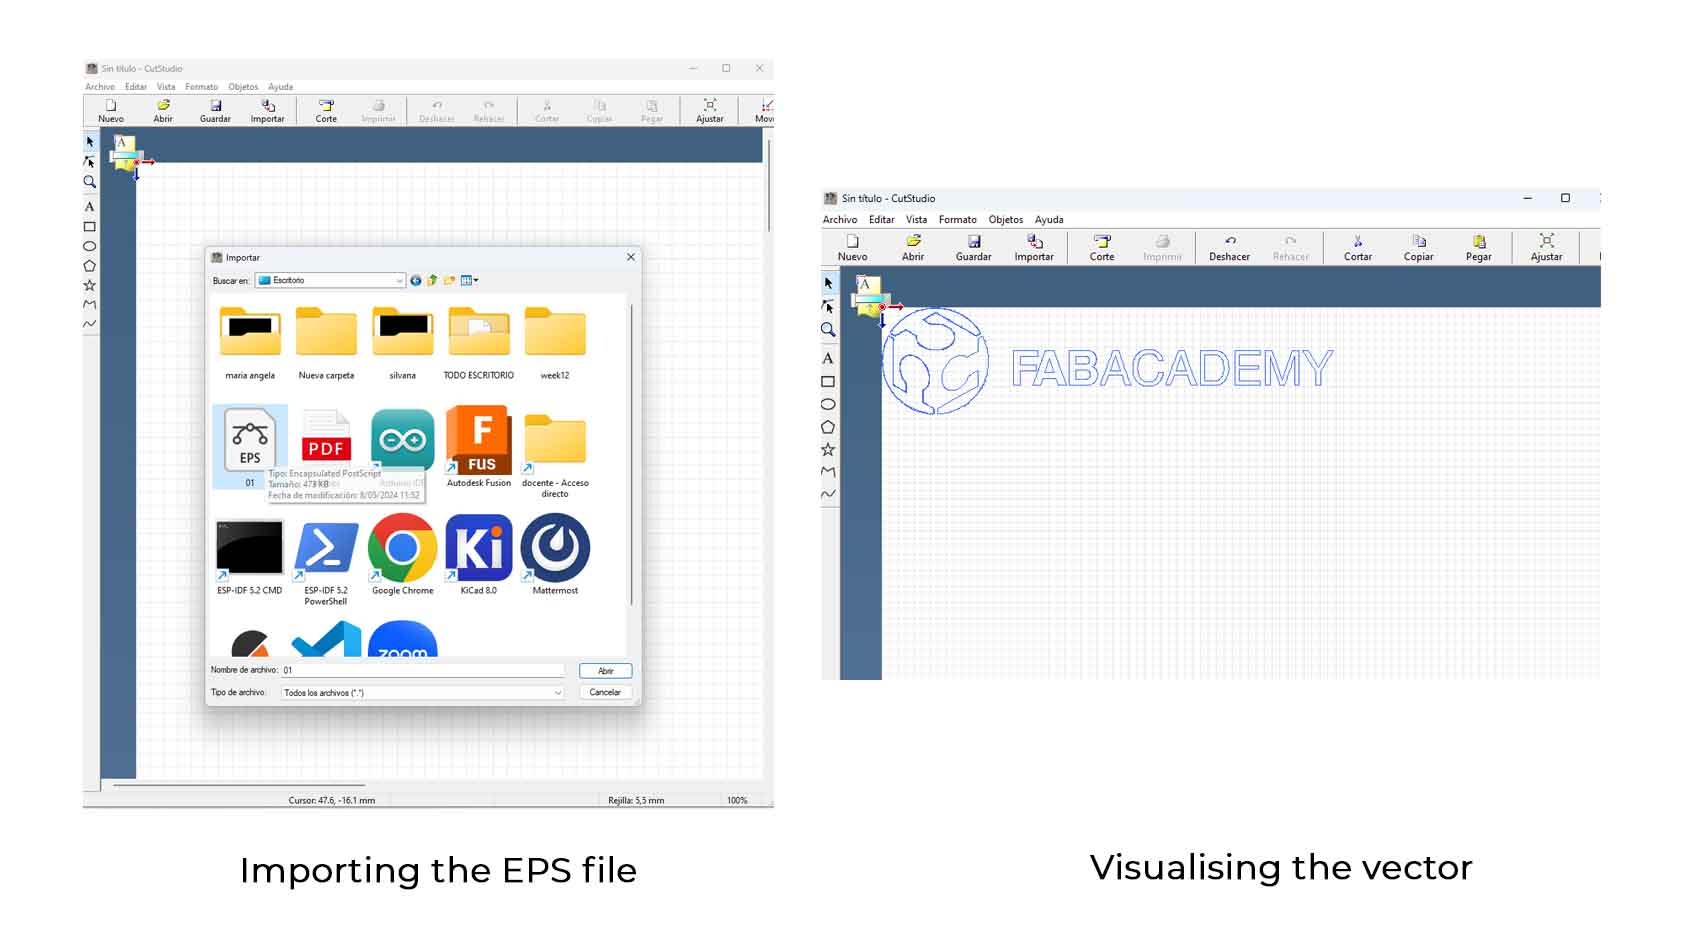
Starting with the simplest, first defining what I wanted to cut, I drew it in Illustrator, using the Drawing tools.
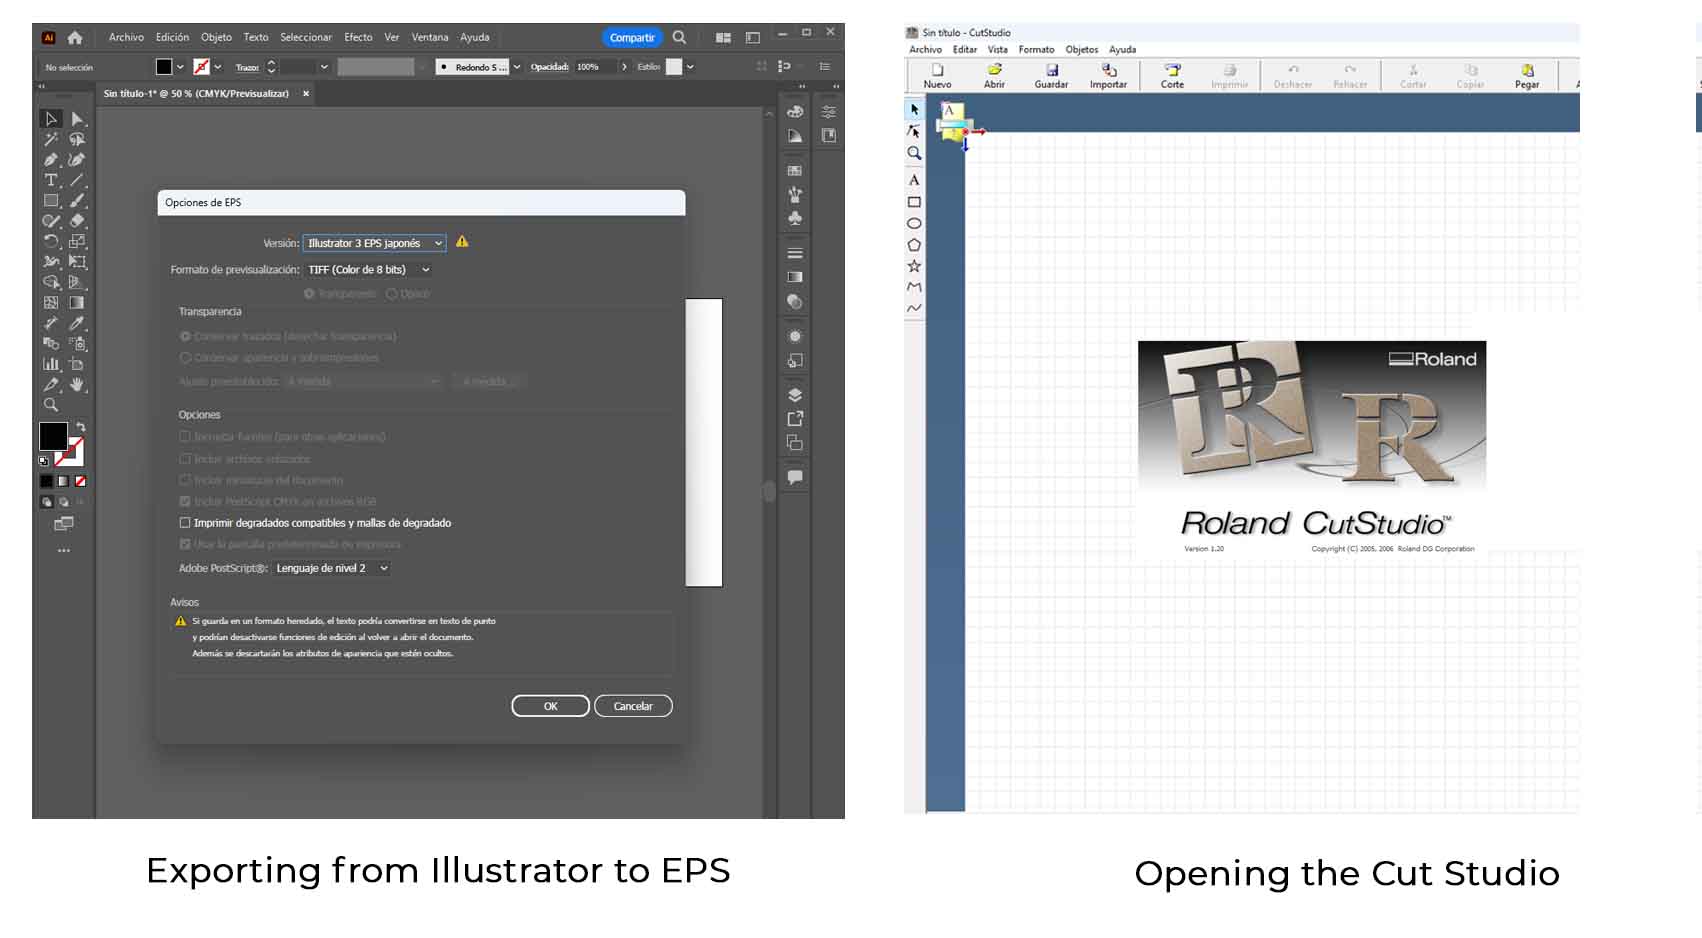
Second, I exported this work in Japanese EPS format so it could be used in the CUT STUDIO program that was installed when the CAMM-1 was purchased.
In this program, I was able to import the EPS file, center the model and then calibrate the vinyl
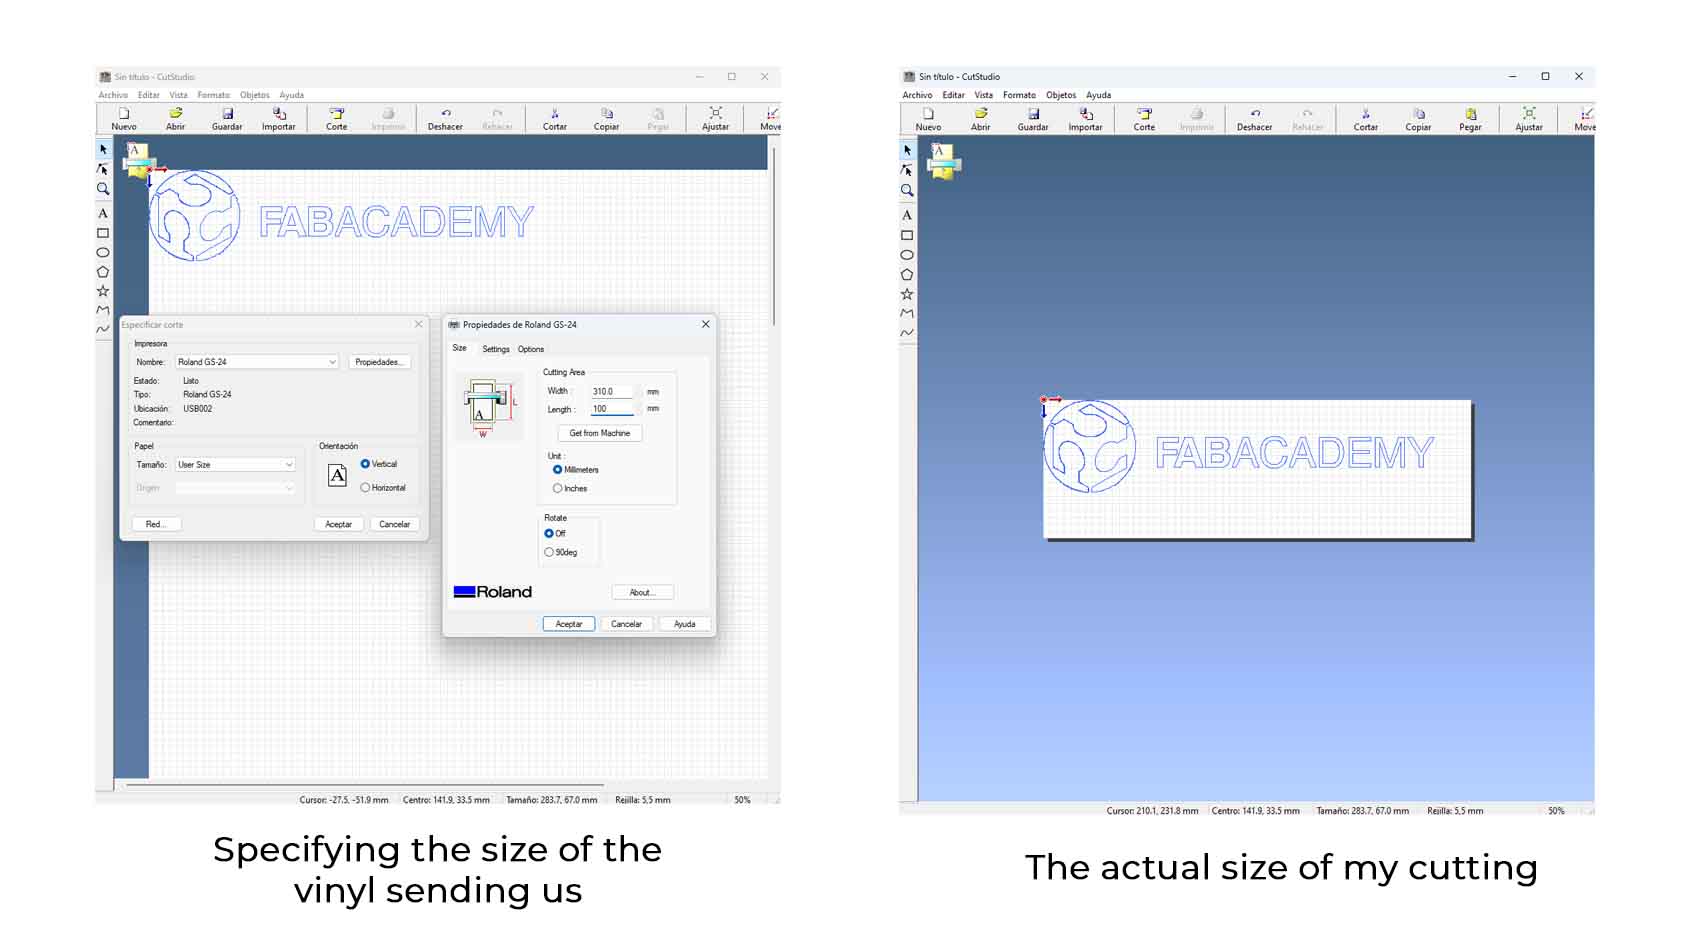
According to the vinyl, it gave me a measurement of 310 mm of Sheet width, which means that when loading the roll, I must consider the width specified in the machine and load it directly (the measurement) from the program option in SPECIFY CUT, when placing the measurement and accept it, I make the canvas take the indicated size
From here we correctly arrange the vectors and press CUT, OK and start cutting, always verify that the lever is securing the vinyl roll
After some tests, we arrived at the final designs. The process of taking off the pieces is quite complex, but with practice it is much easier each time you try.
More Results
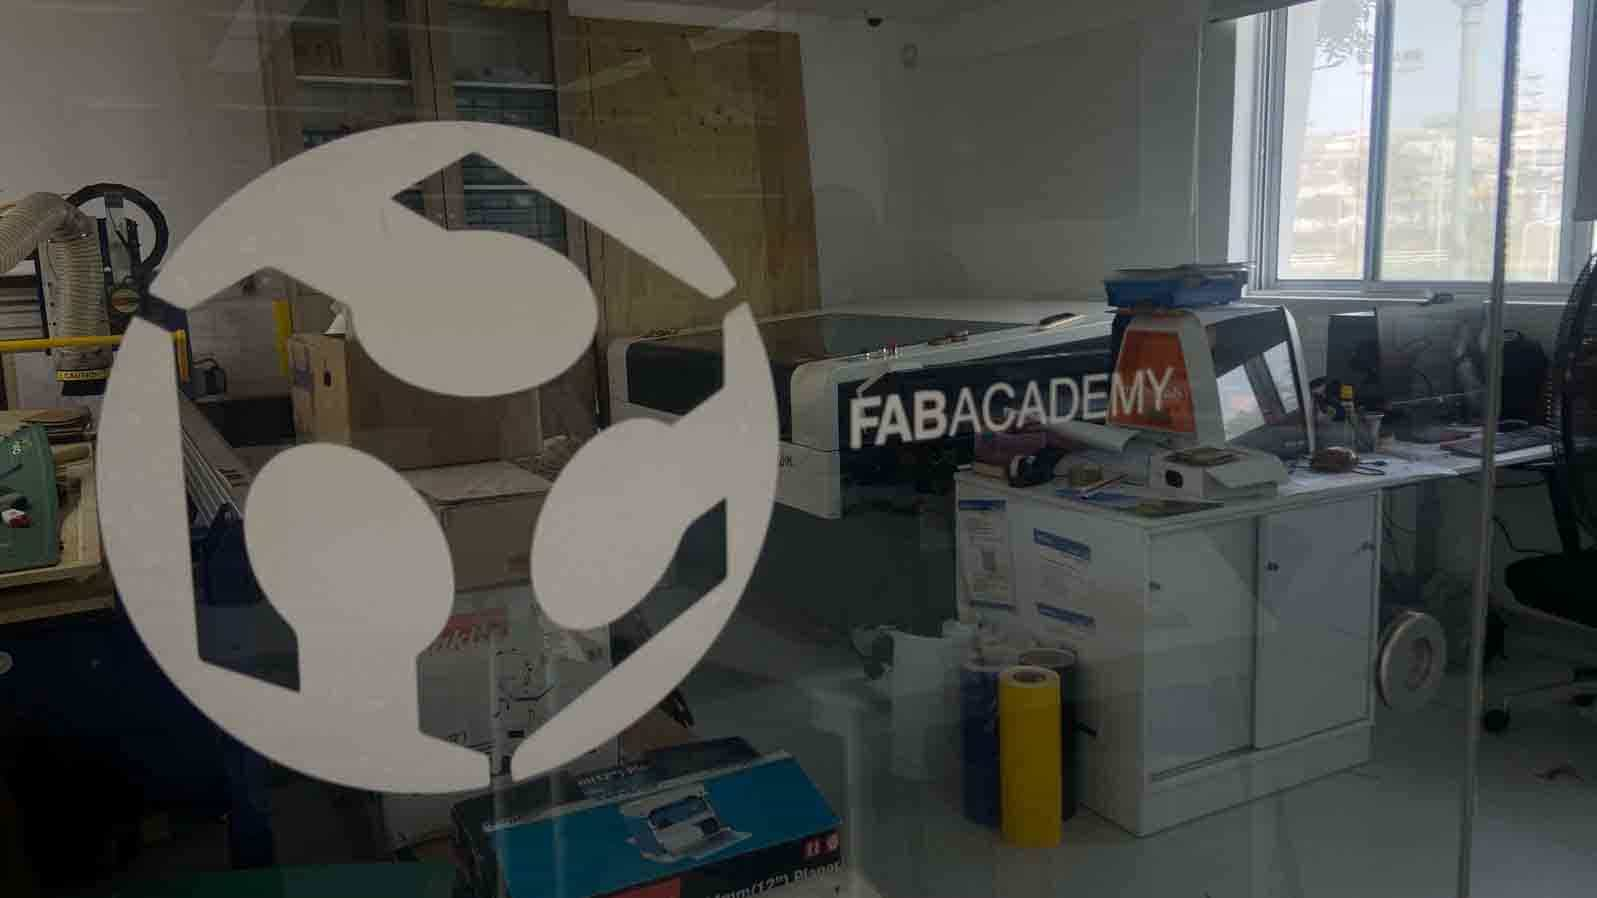
Finally, we were able to create the Fab Academy logo in our laboratory, so that it would be visible from the entrance to the space.
It turned out very well and was a lot of fun.
Individual Assignment
First ideas
Recognition of materials and assembly of designs for laser and vinyl cutting.
Calibration tests
The tests were based on accommodating the pressure, power and speed of the cutting tools for different materials
Results
Impressive results were achieved in a matter of minutes
WHICH IS WHAT I WILL DO
First Idea
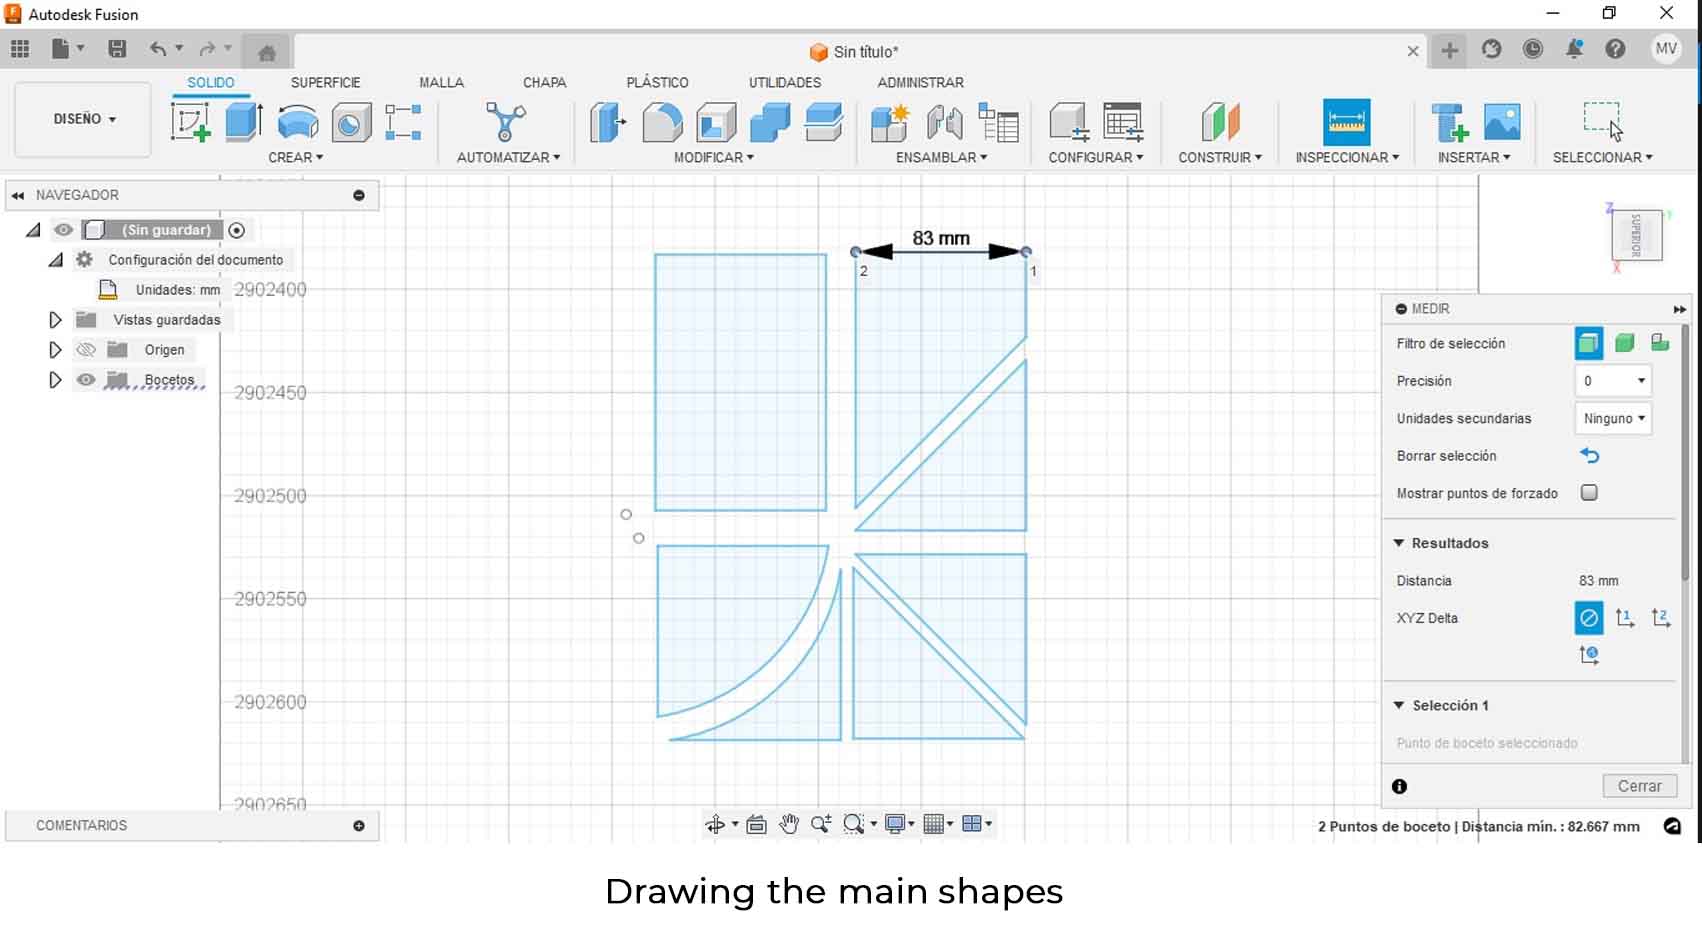
First of all, the idea of creating my PARAMETRIC KERF is to be able to develop modular pieces that can fulfill the function of prototypes of platforms that defy gravity and link it to a dynamic architecture to be used in the living workshops of this career at Universidad Cientifica del Sur, where I currently work, so I started drawing some basic shapes in FUSION 360.
After going through the basic shapes, such as rectangle, triangle, some inverted curved shape, the intention is to fit them all inside a 20.5cm x 16.5cm rectangle so that the pieces can fit in that size.
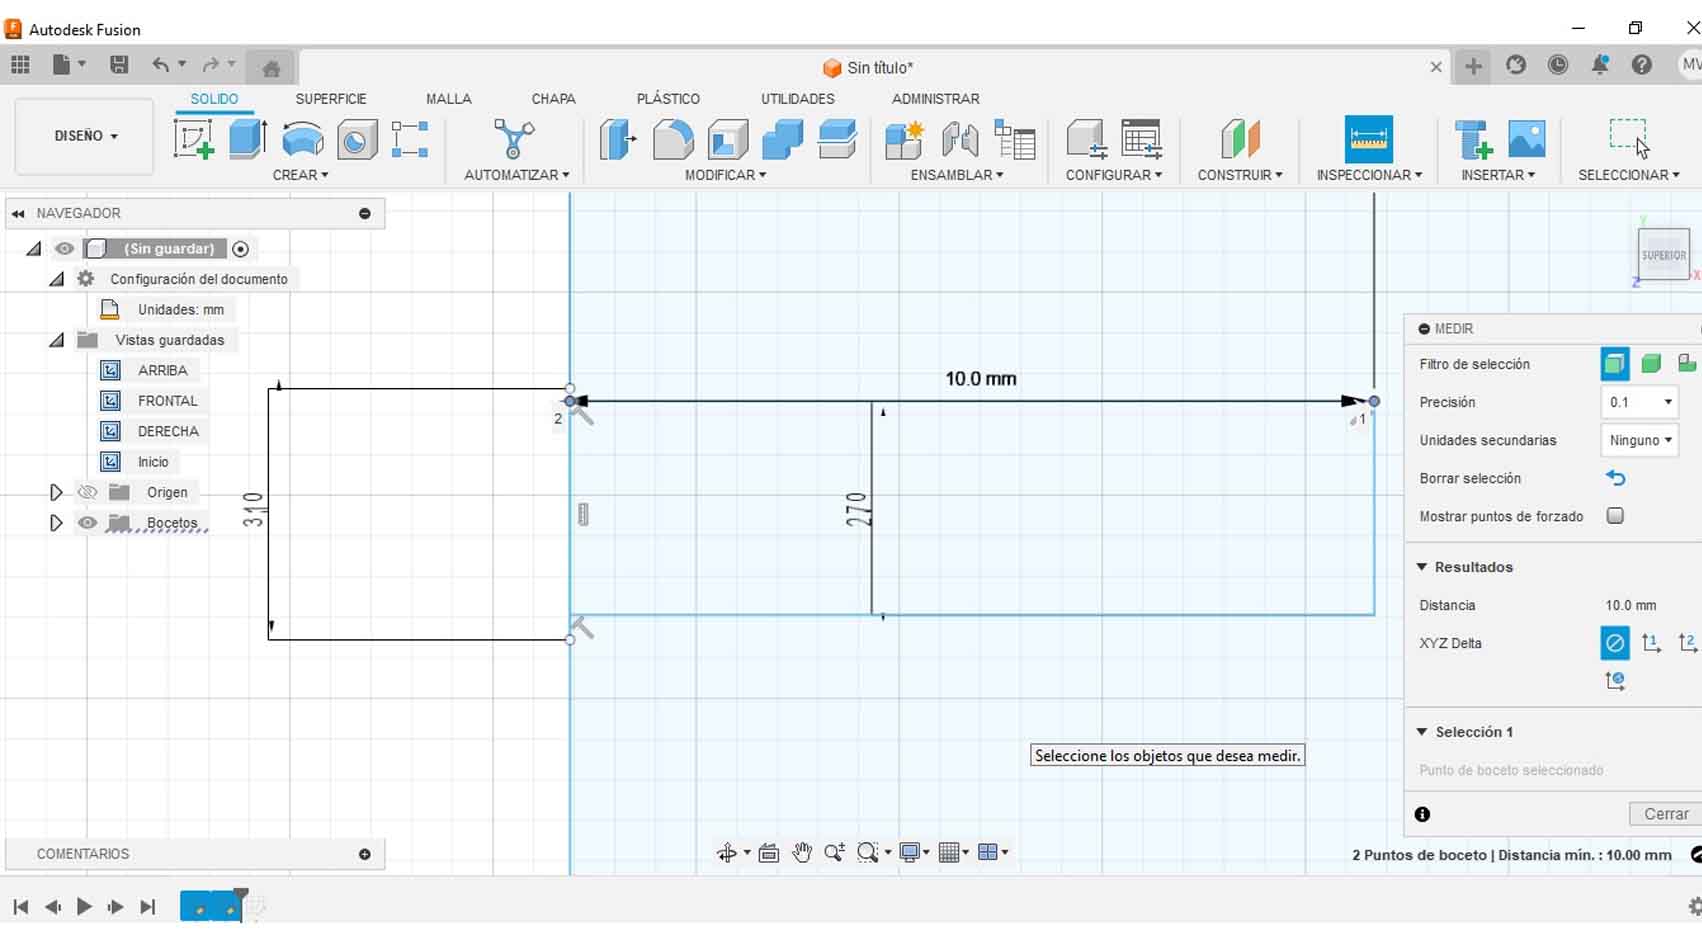
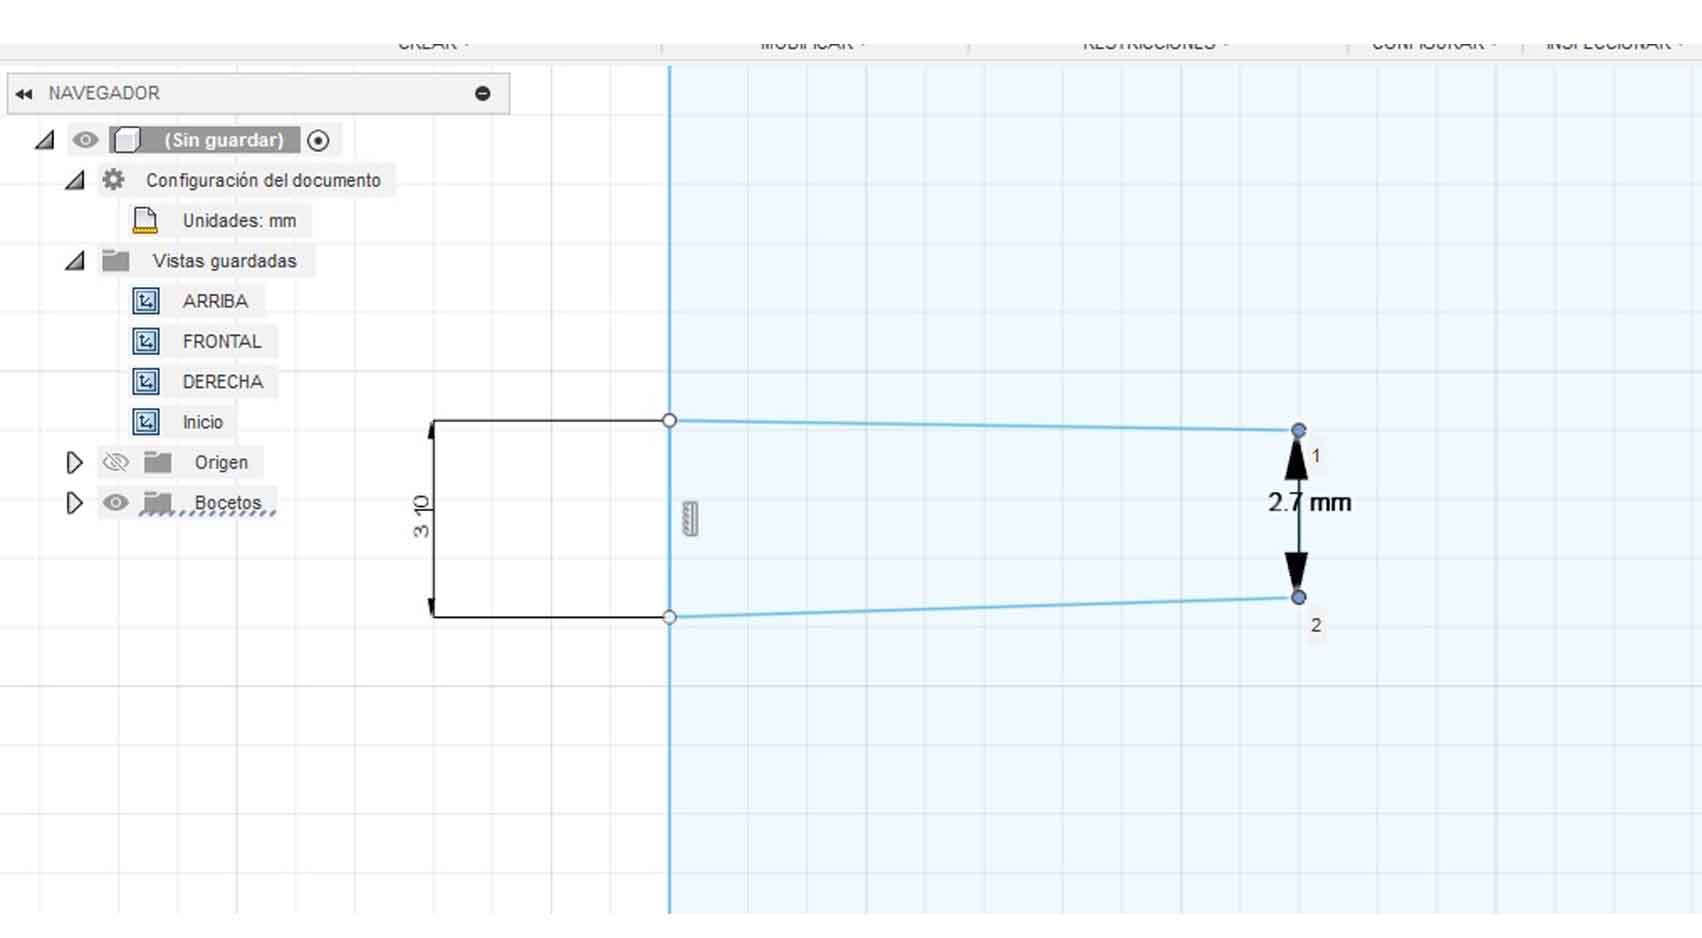
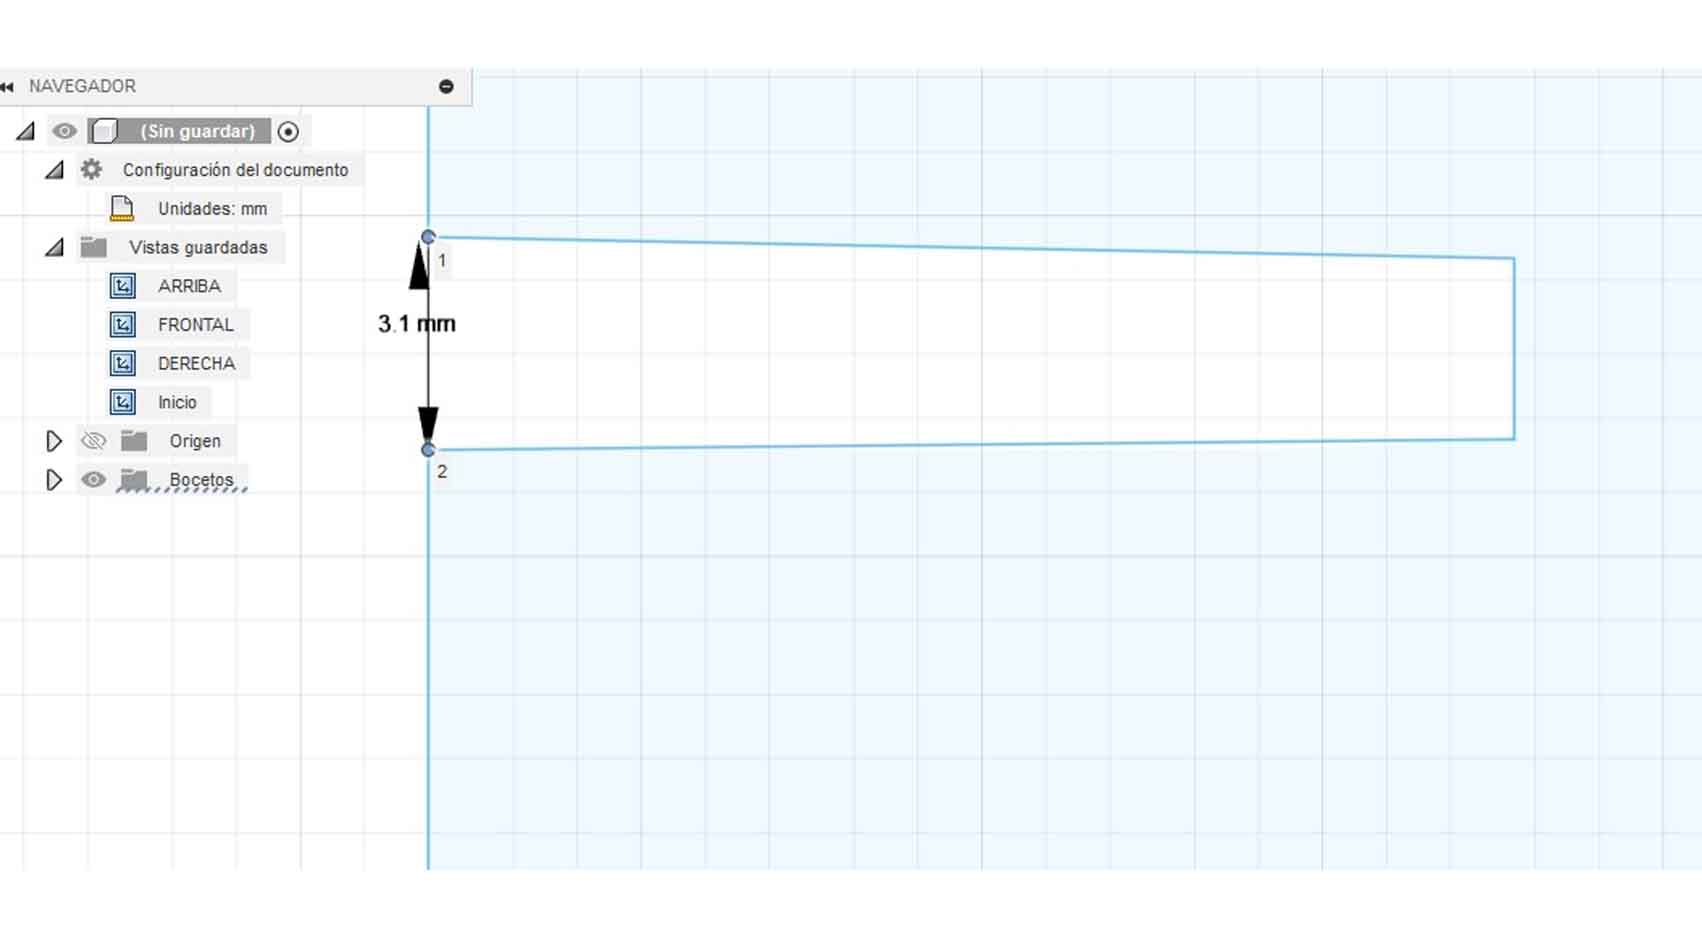
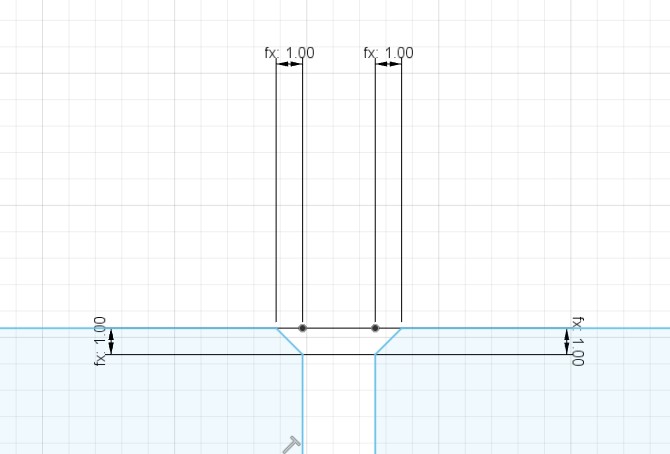
To make the kerf, I use two measures, the first is the thickness + 1mm of the thickness of the 3mm piece of Plywood, that is 31mm, I place this measure on the outside (of the connecting piece), so that it has more HOLGURA in the connection and can fit the pieces more easily; the second measure I place 2.7mm, this is for the PEINE tests that I made in the Group Assignment, for the reason that the pieces will connect with mator final adjustment and also ensure that they will not come out.
Here is the process in Fusion 360, where I create a line with the measure of 31mm and place it on the outside, then I put it on the outside face exactly from the middle to the axis of the measure of 2.7mm to connect in the middle and ensure the same amount of mm on each side.
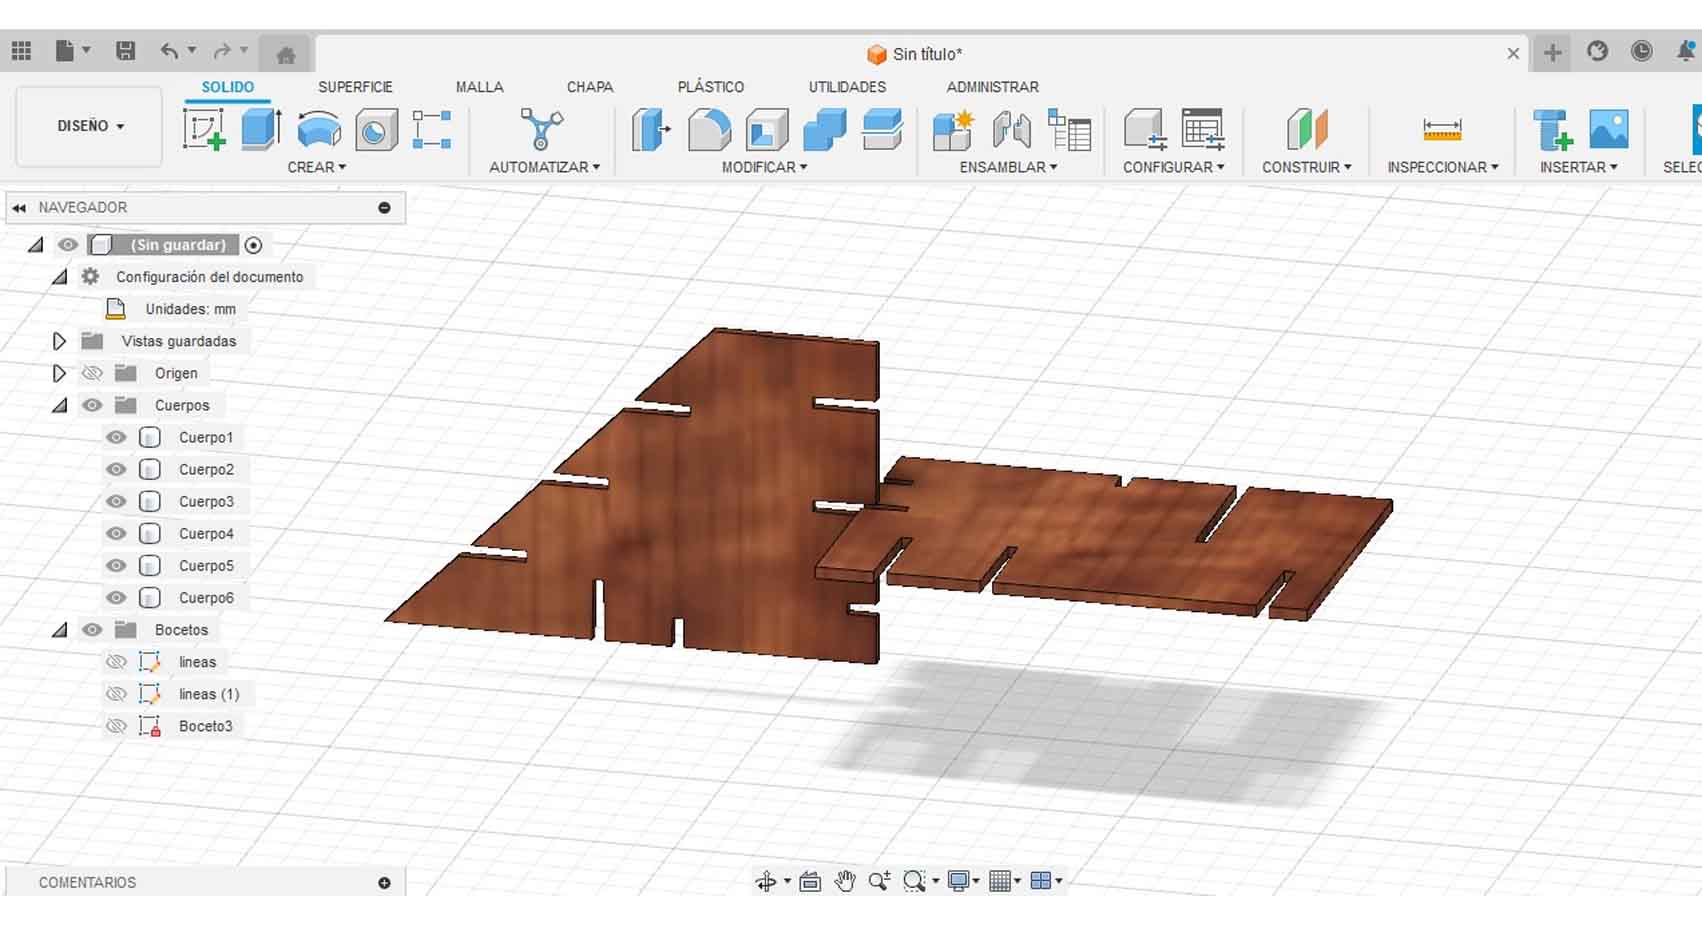
After creating all the parts, I was able to place material on them to make a small 3D simulation and finally send them to cutting to ensure the fit!
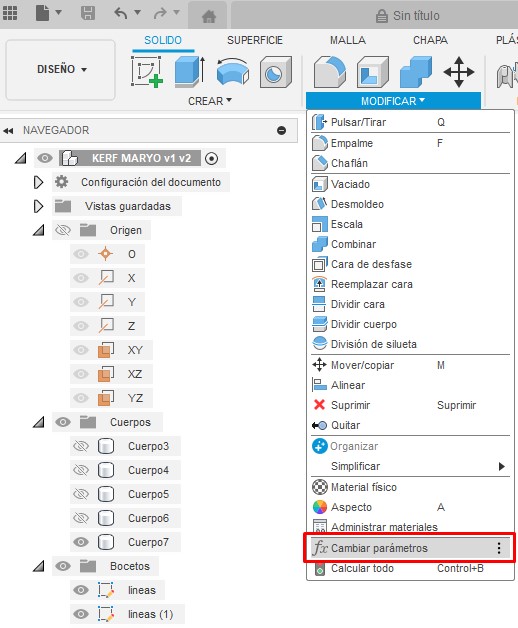
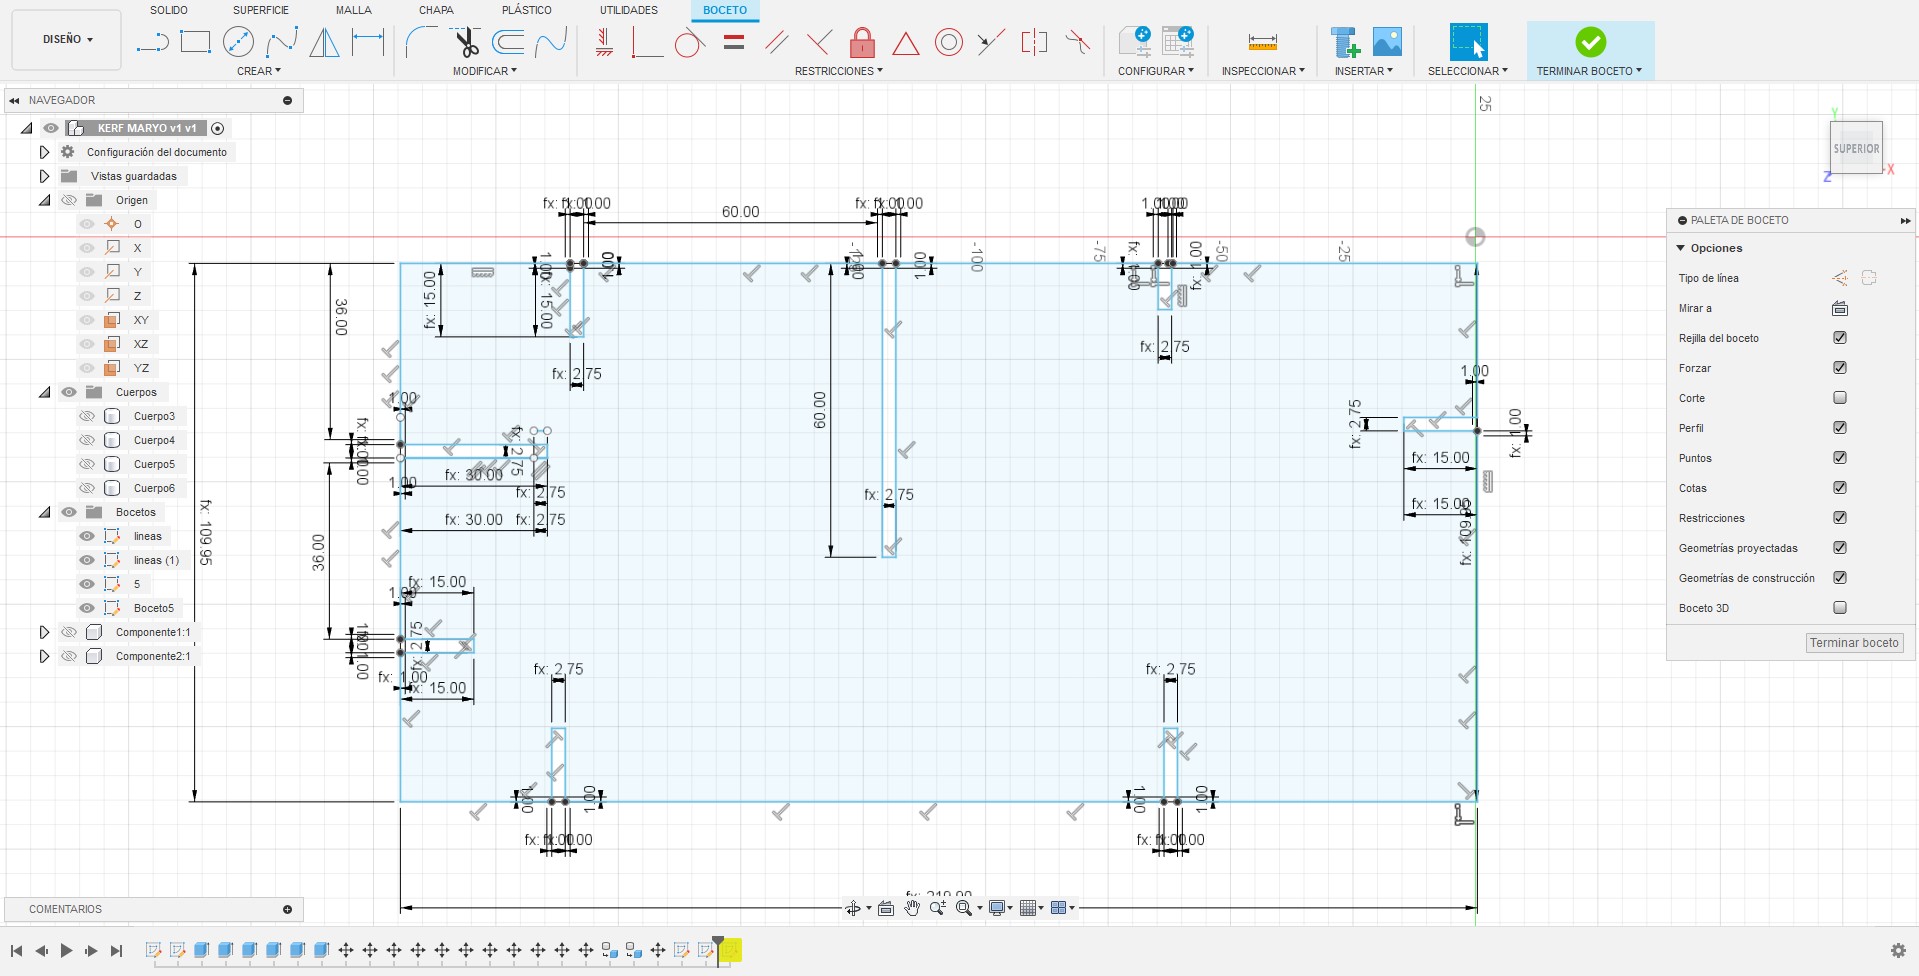
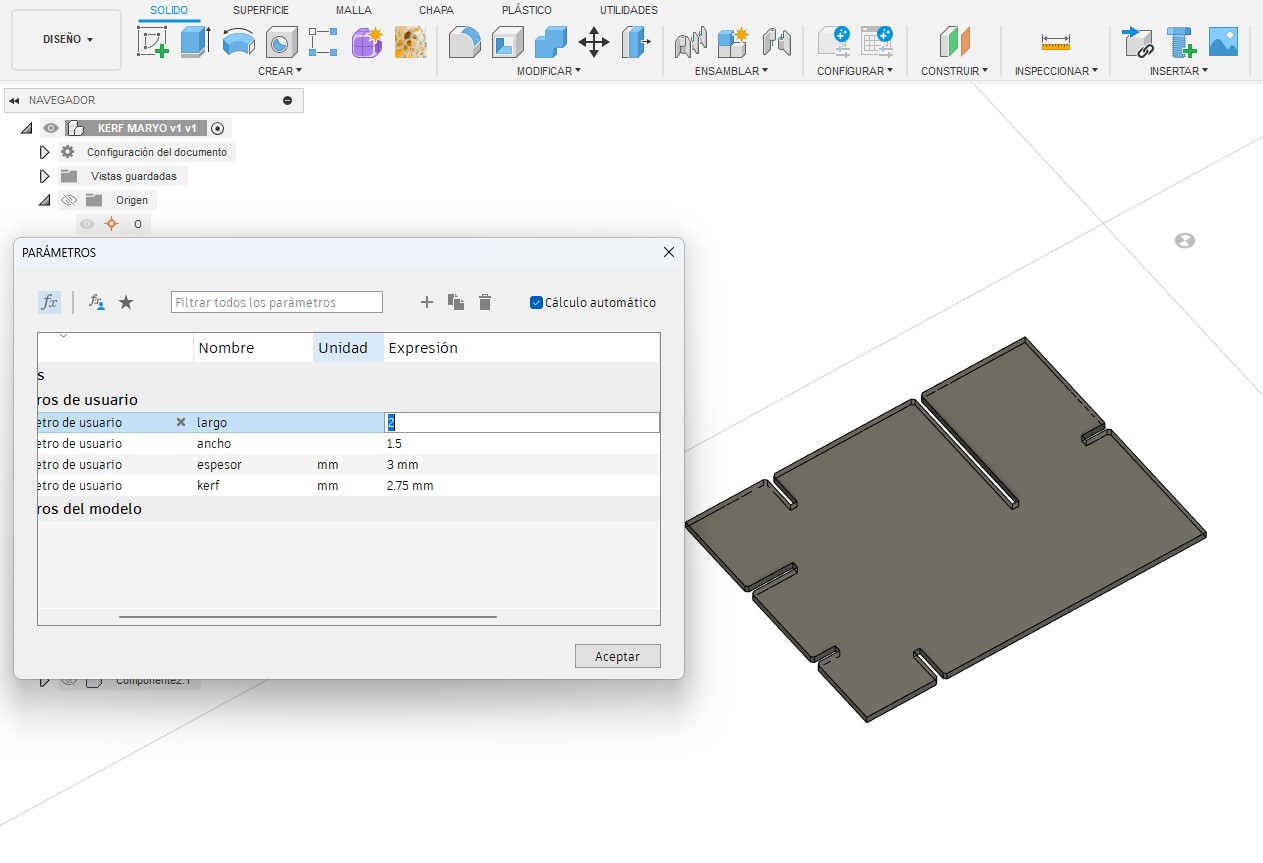
Editing the Parameters
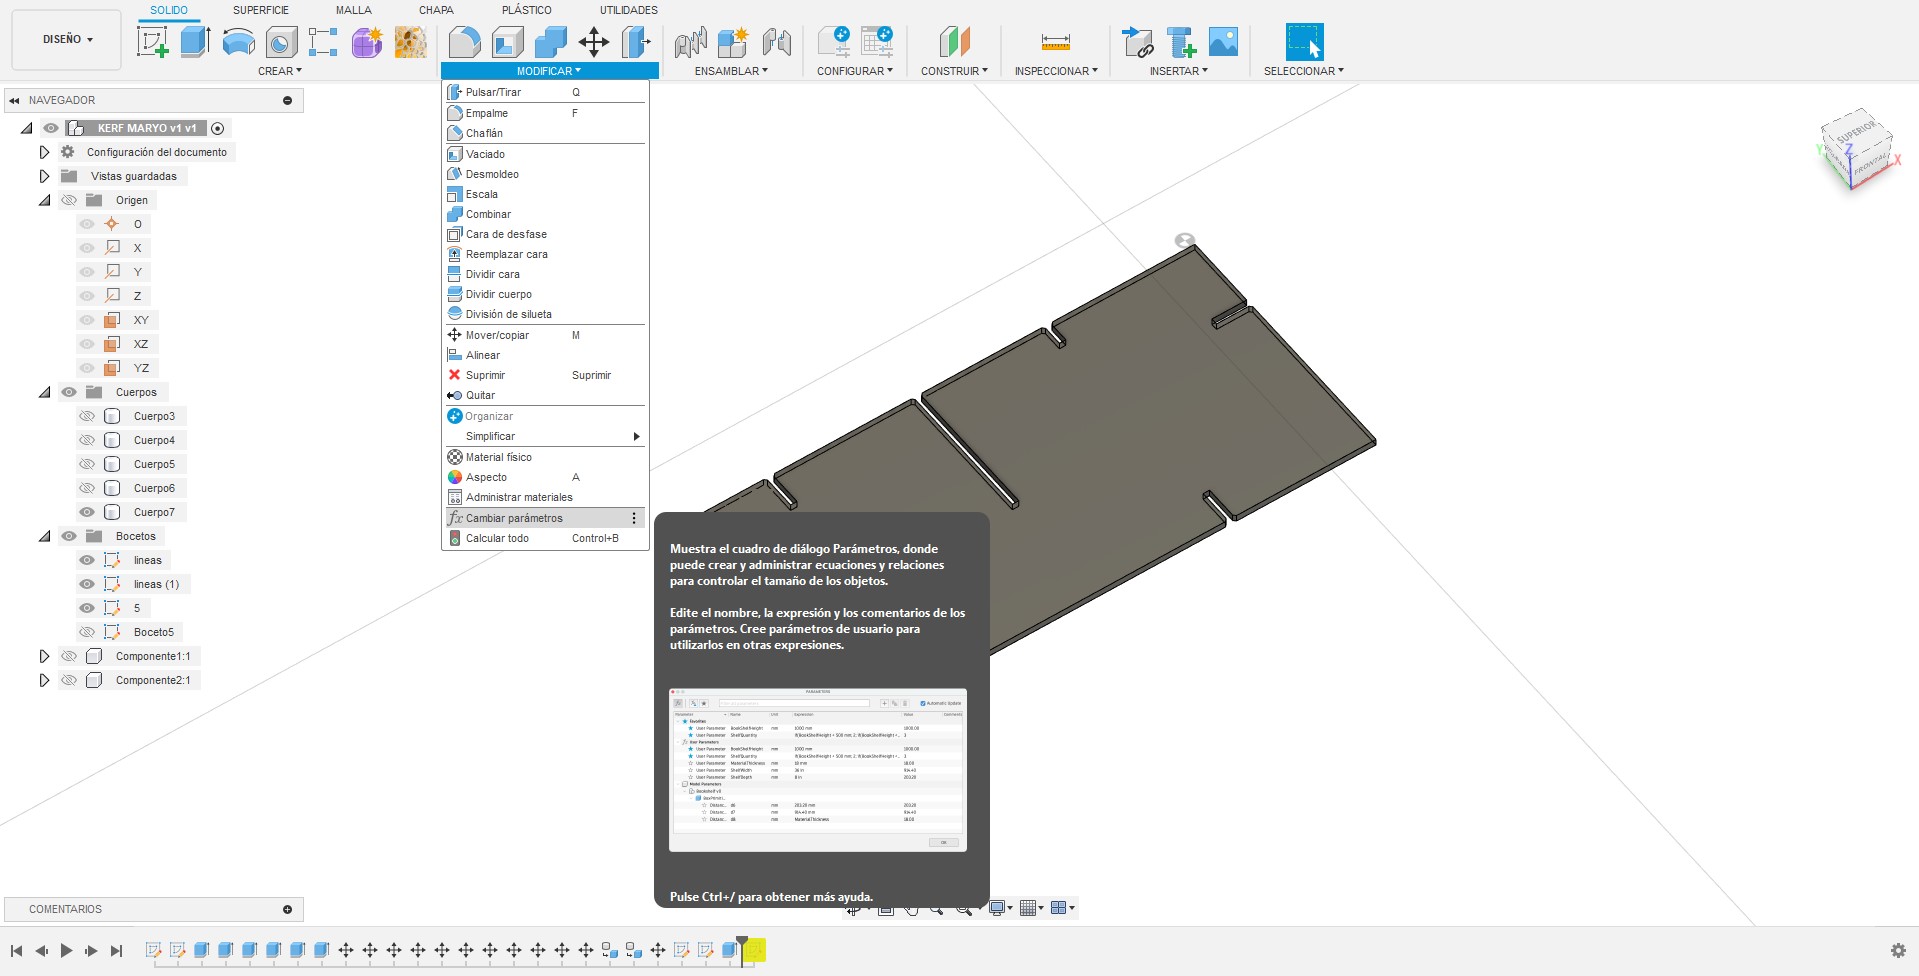
To start setting up the editable parameters from Fusion, we will start with the creation of parameters from the tab MODIFY, from here we will use the option CHANGE PARAMETERS, from here we add 4 important parameters, the Length, Width, Thickness and Chamfer, we identify the proportions without units of the length and width of 2:3 respectively and for the case of thickness we leave it with a fixed measure of 3mm which is the thickness of the material, but also you can put the thickness of another materiales with diferents thickness ans it still working, also I configure the CHAMFER in the below part. After that, we will go on to make the sketch.
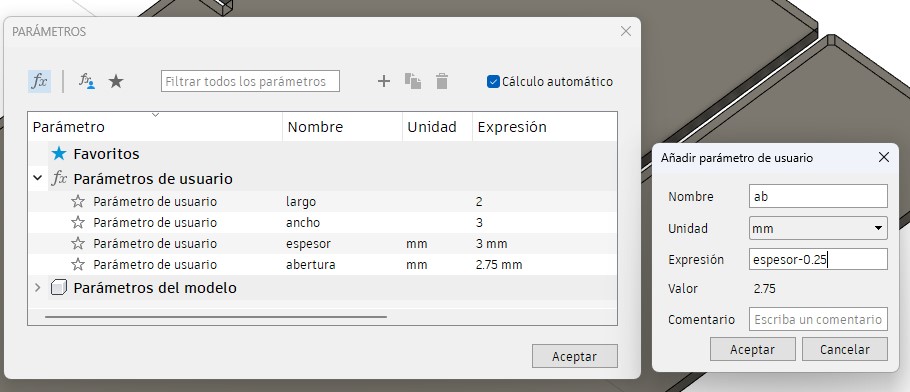
A view of the created parameteres
Once the parameters were created, I went on to make the first sketch, starting with the outline of the shape of my piece, using the proportions indicated, in the case of the LENGTH * 70 and the WIDTH * 70 to achieve a standard measurement of 110x220mm.
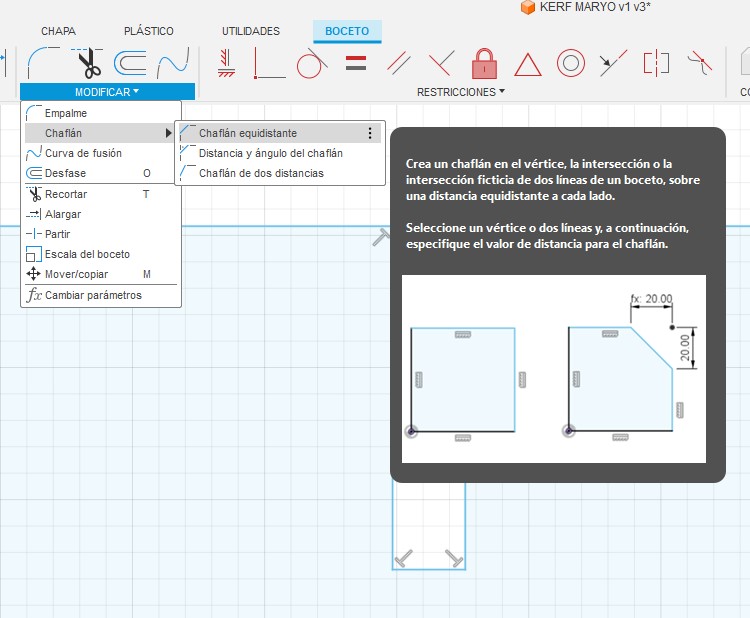
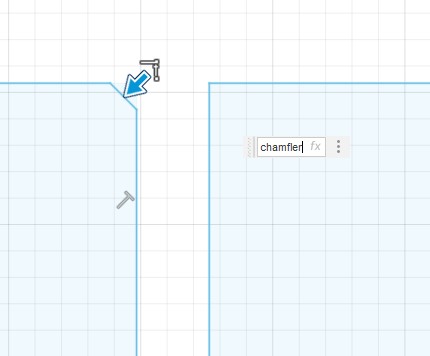
After that, we will detail the interior measurements of the openings in more detail, I have added a 1mm CHAMFLER for better bracing between them. The intention of creating the biggest piece of all is that from this one, modifications can be made and it can experience changes in width and height without modifying the parametric, so that the final shape will be more assured.
Here are the steps to set the chamfer, the formula we use is the THICKNESS minus its value minus one millimetre.
I put a lot of restrictions because of the same growth in shape, thickness of my pieces and the care I have to take for each opening, remember that for this case I am using the parameterisation of the opening with the formula of THICKNESS - 0.25 (this last value is the KERF) found from my comb.
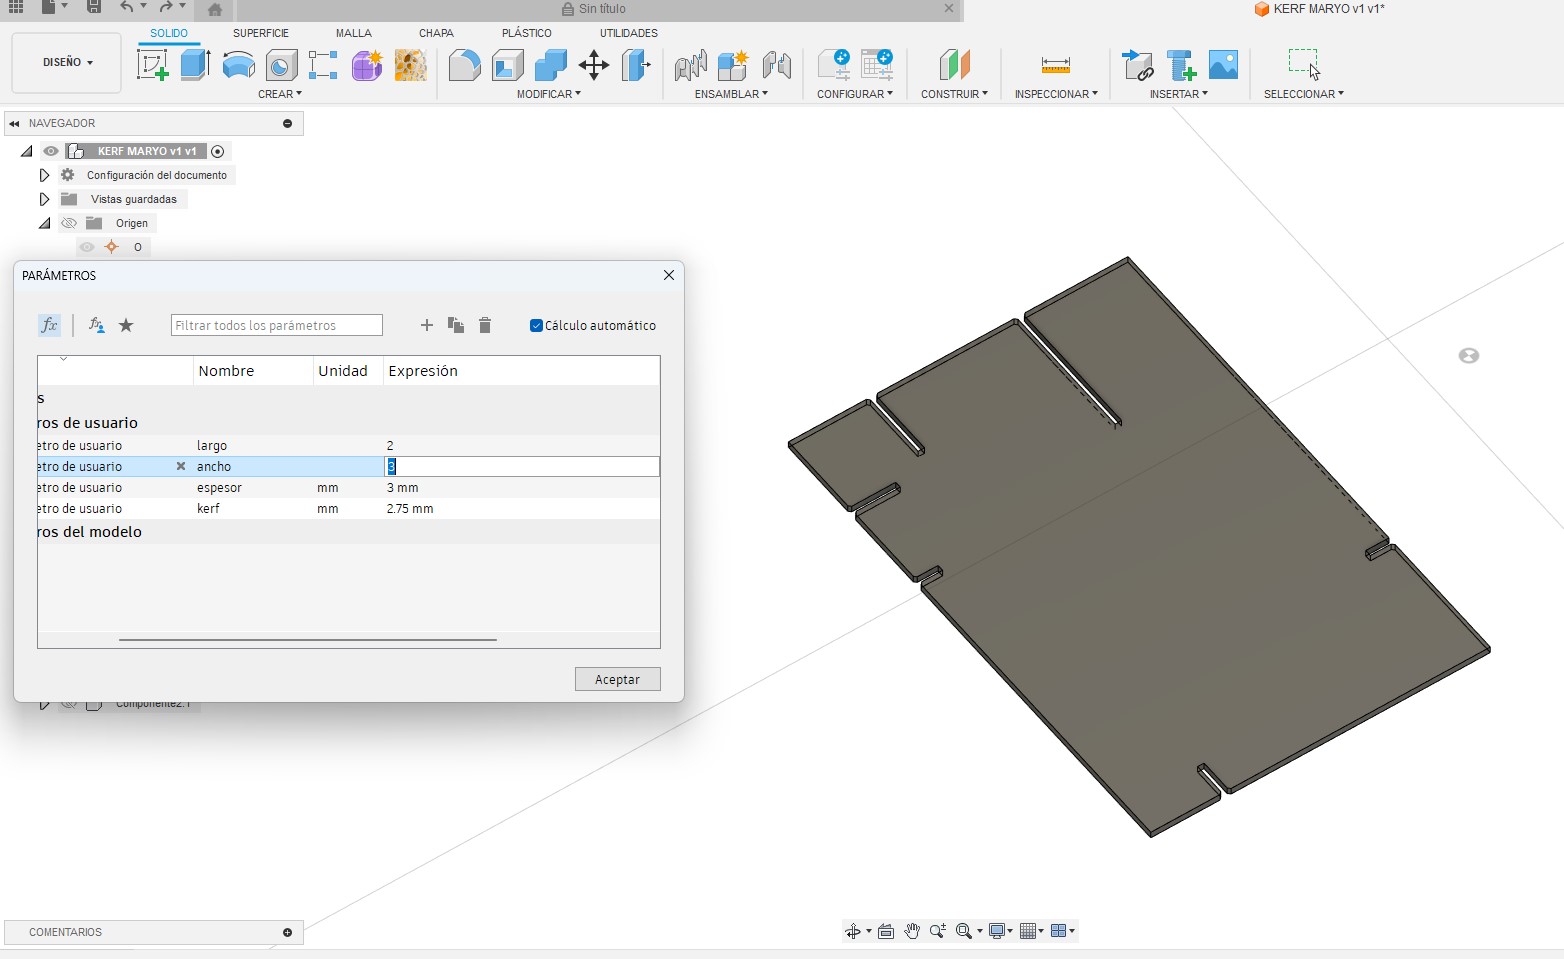
The modifications of the measurements are made from the same parameter box, it should be noted that for each new part it is necessary to create a new component as well.
Here is the process of changing parameters
I leave a video for more detail
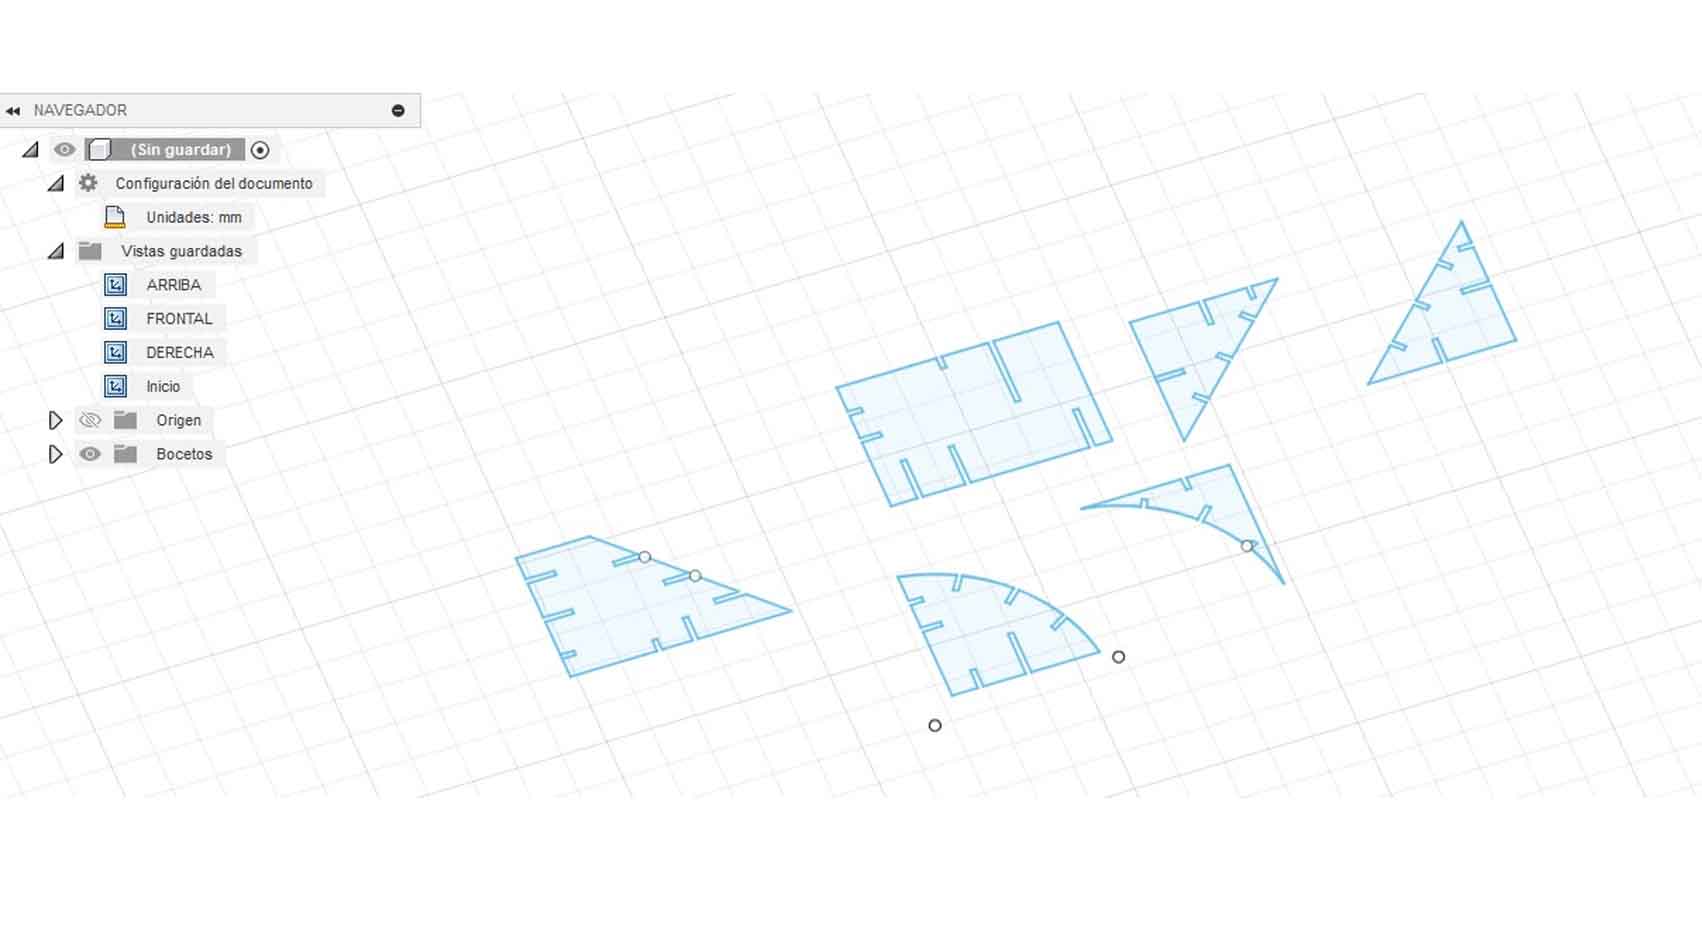
These are all the pieces I made
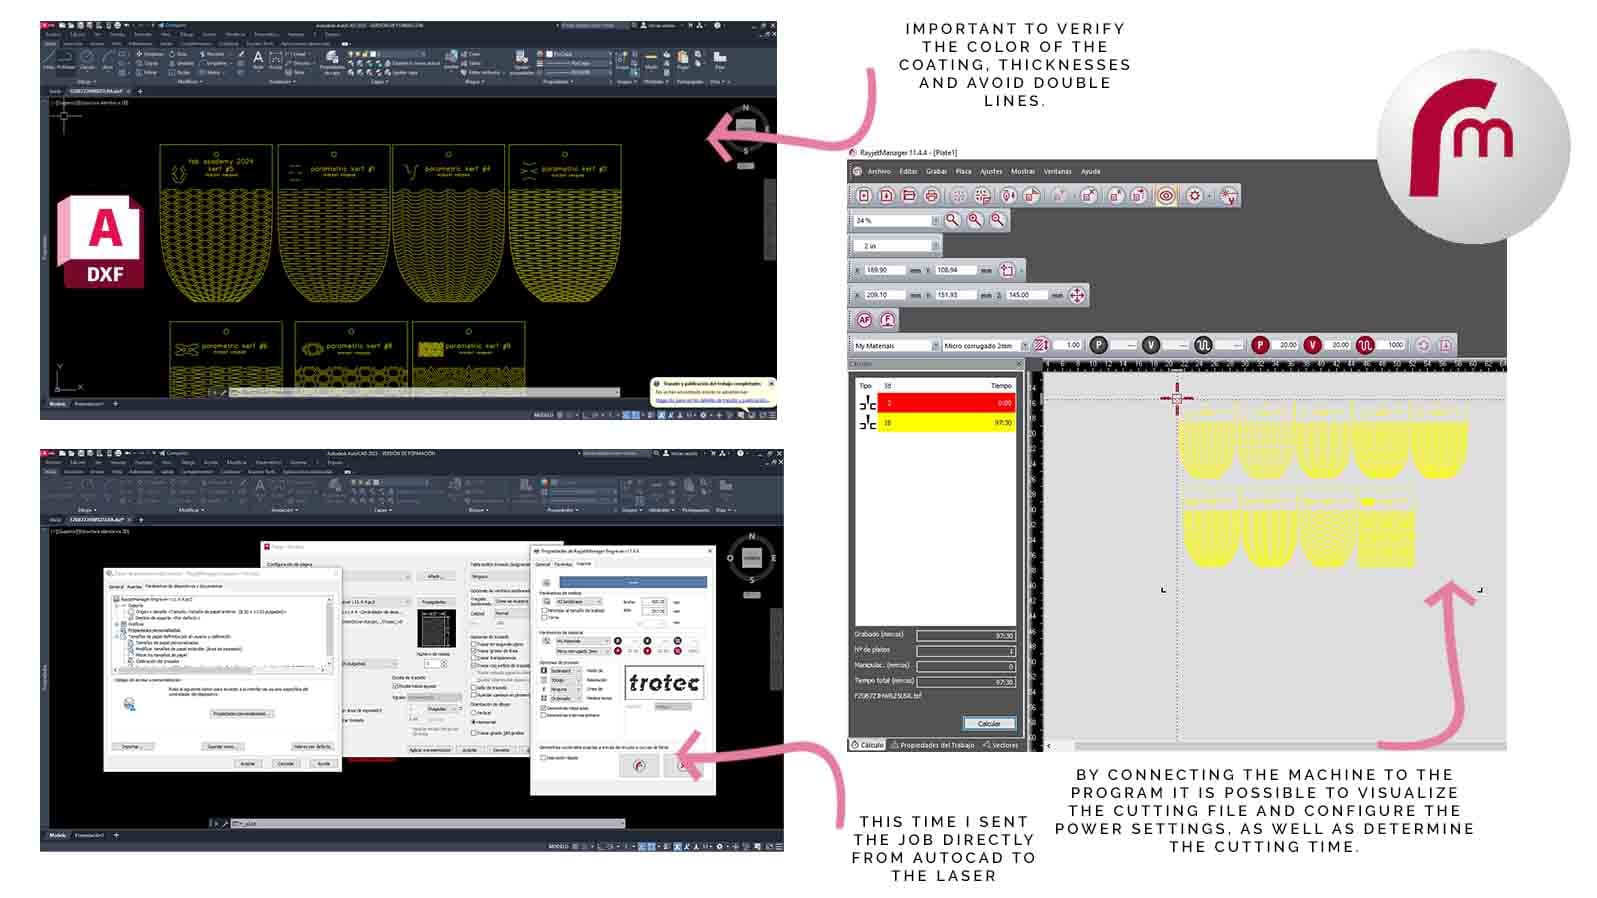
The Configuration
For the configuration of my vectors in the program, I leave you a final image of how the module is getting with its correct measures.
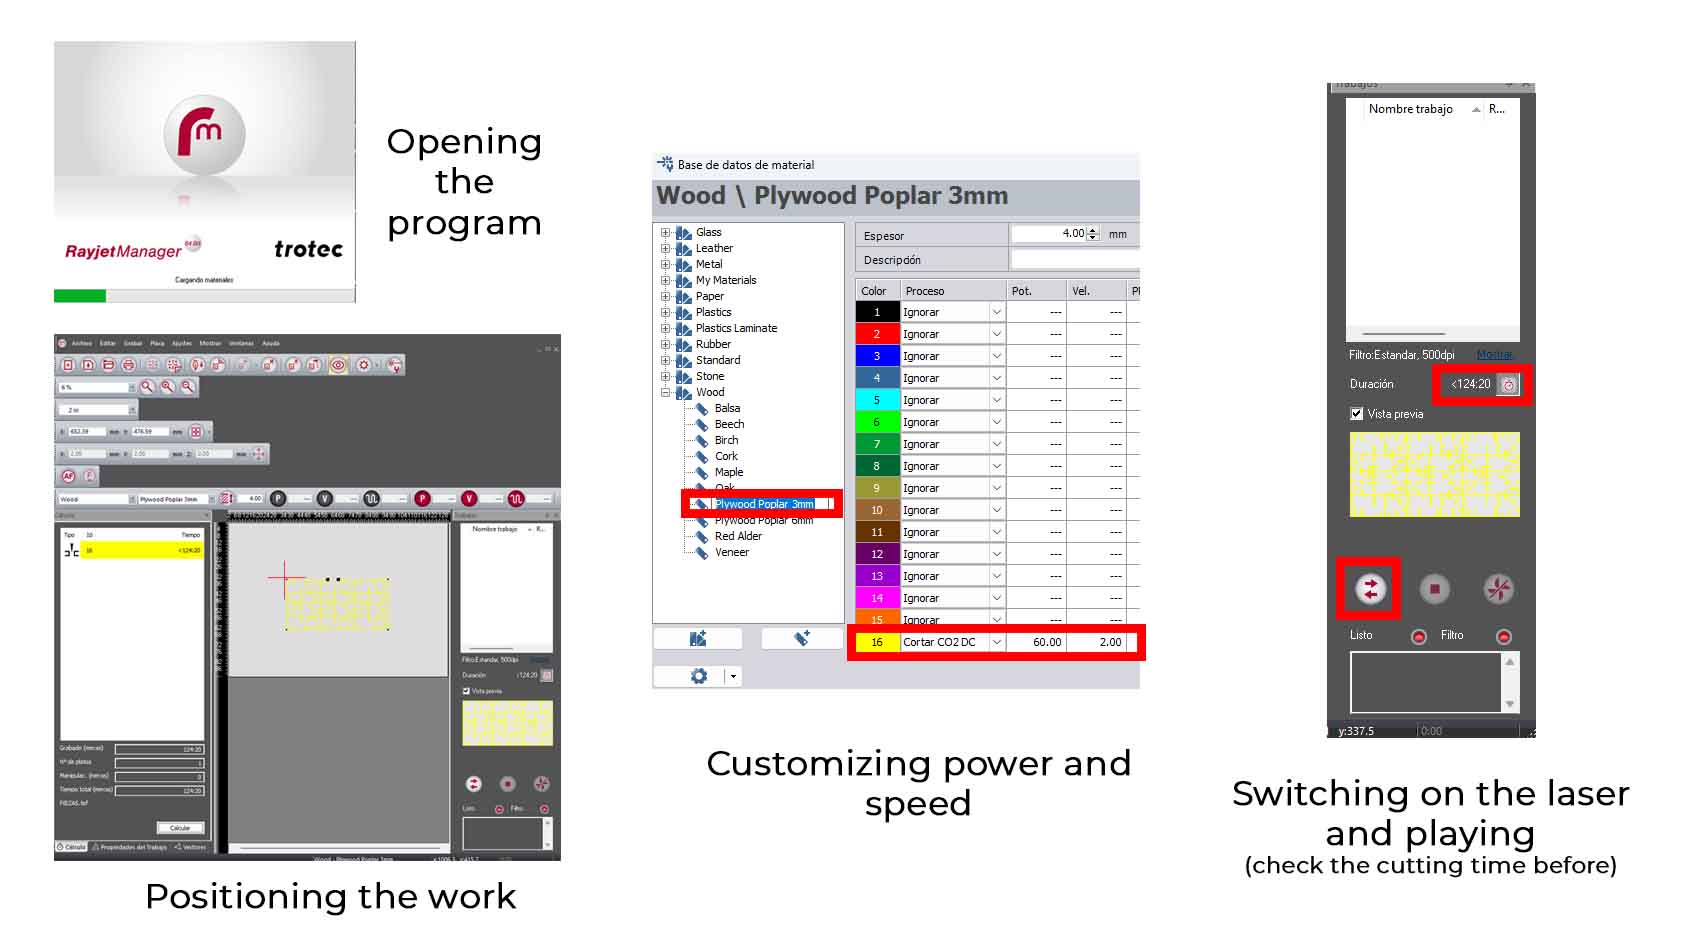
After that, and after having arranged them in the size of a 3mm Plywood sheet (60x30cm), I go to print with CONTROL + P , to open the print settings and choose the RAYJET R500 machine, in doing so, I will go to the settings and properties of the machine to enter to adjust the dimensions of the material, the type of material and giving accept to return to my print window to send to open the laser calibration program and see my file to be positioned and cut.
In the program I calibrate the performance of the laser in terms of Speed and Power according to the color of my vectors, leaving it at 60 power and 2 speed, after that, I click OK and finish by placing the exported file on the laser pointer, ready to hit PLAY.
The fitting tests
Once the cuts were finished, I moved on to place the pieces and form some prototypes, defying gravity and proposing a didactic exercise to be used in the experiential workshops.
Here I ventured to perform some parametric tests with the intention of having fun and testing the flexibility of these pieces to use them in the coming weeks in Week 05
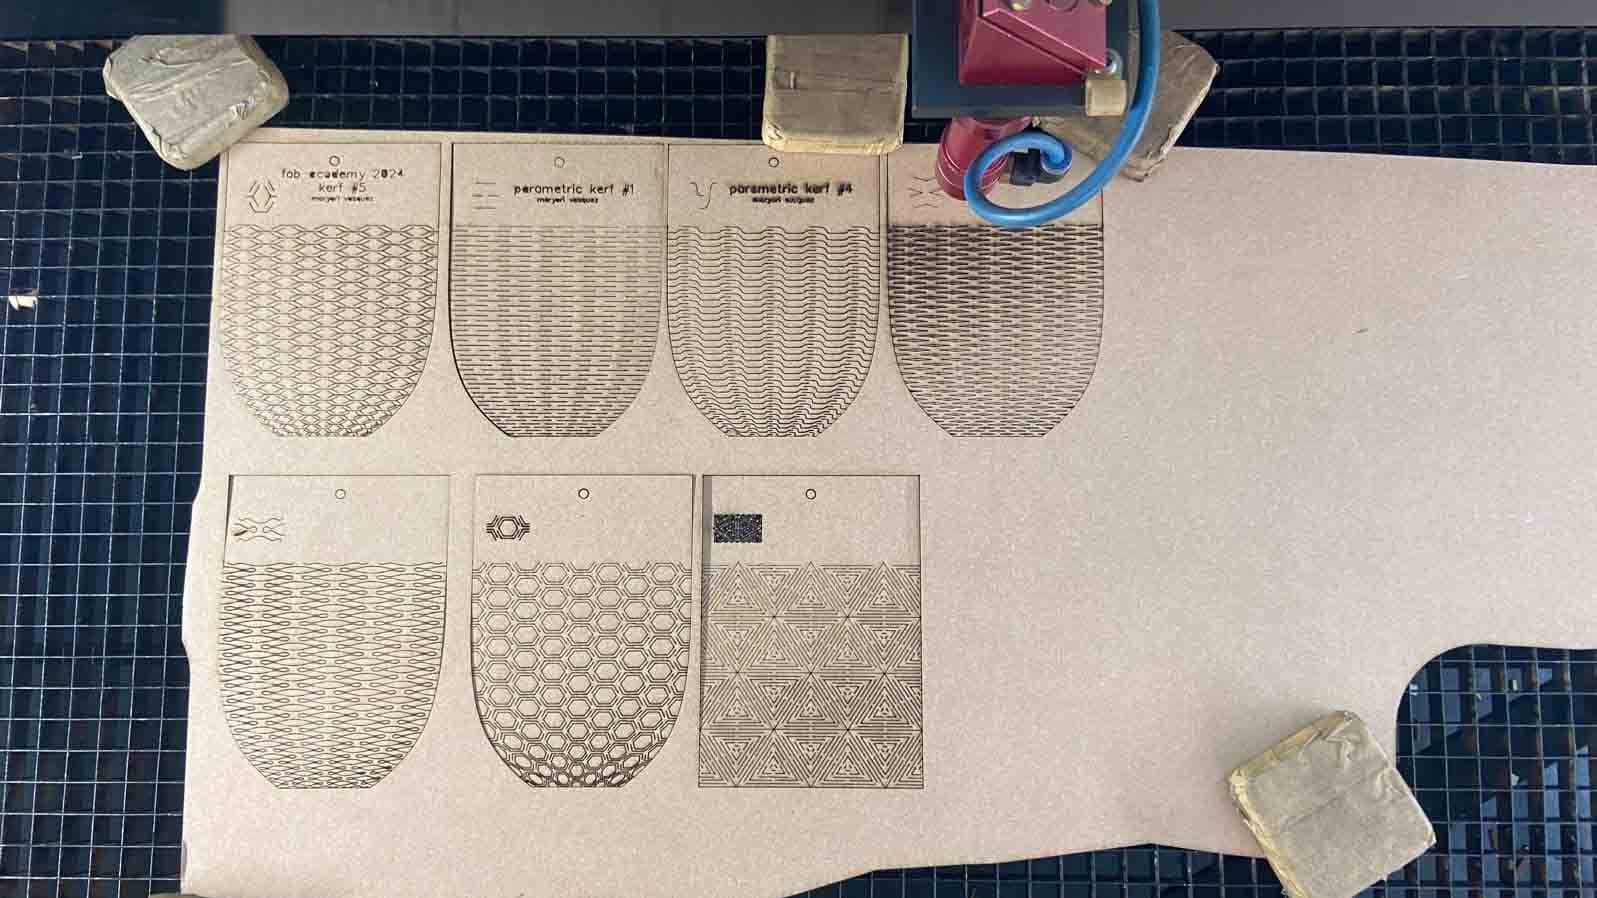
Parametric textures, tests were made on 2mm micro corrugated cardboard for cutting tests, thanks to the web :
So that the results in coordination with the calibration of the machinery, resulted in a fairly flexible and aesthetic texture, 7 tests were performed on different patterns, here is the explanation of the procedure to achieve the cut and calibration values
Results
You can see from the sgt evidence the detail of the textures, their thicknesses and the way they are cut.
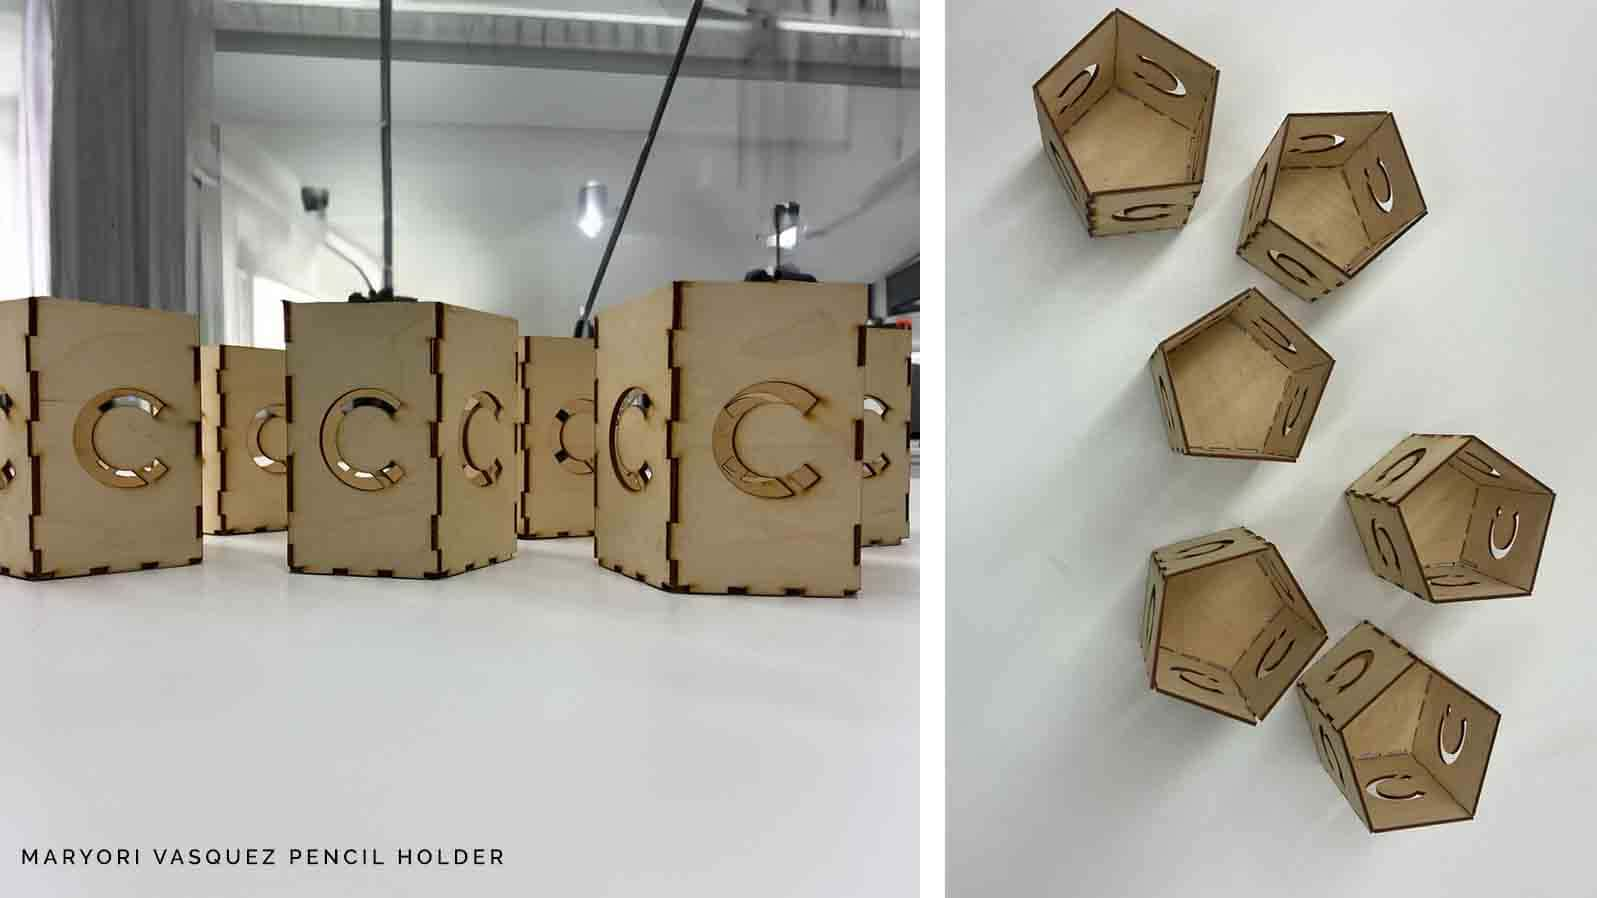
Pencil holder
I also took the opportunity to make a Pencil Holder, based on the kerf I had made previously.
To make this pencil holder, the basic shape of a pentagon is drawn, helping me with the laser comb I could determine the best hooking for the pieces, everything is made in 3mm plywood, I leave the files in the following link:
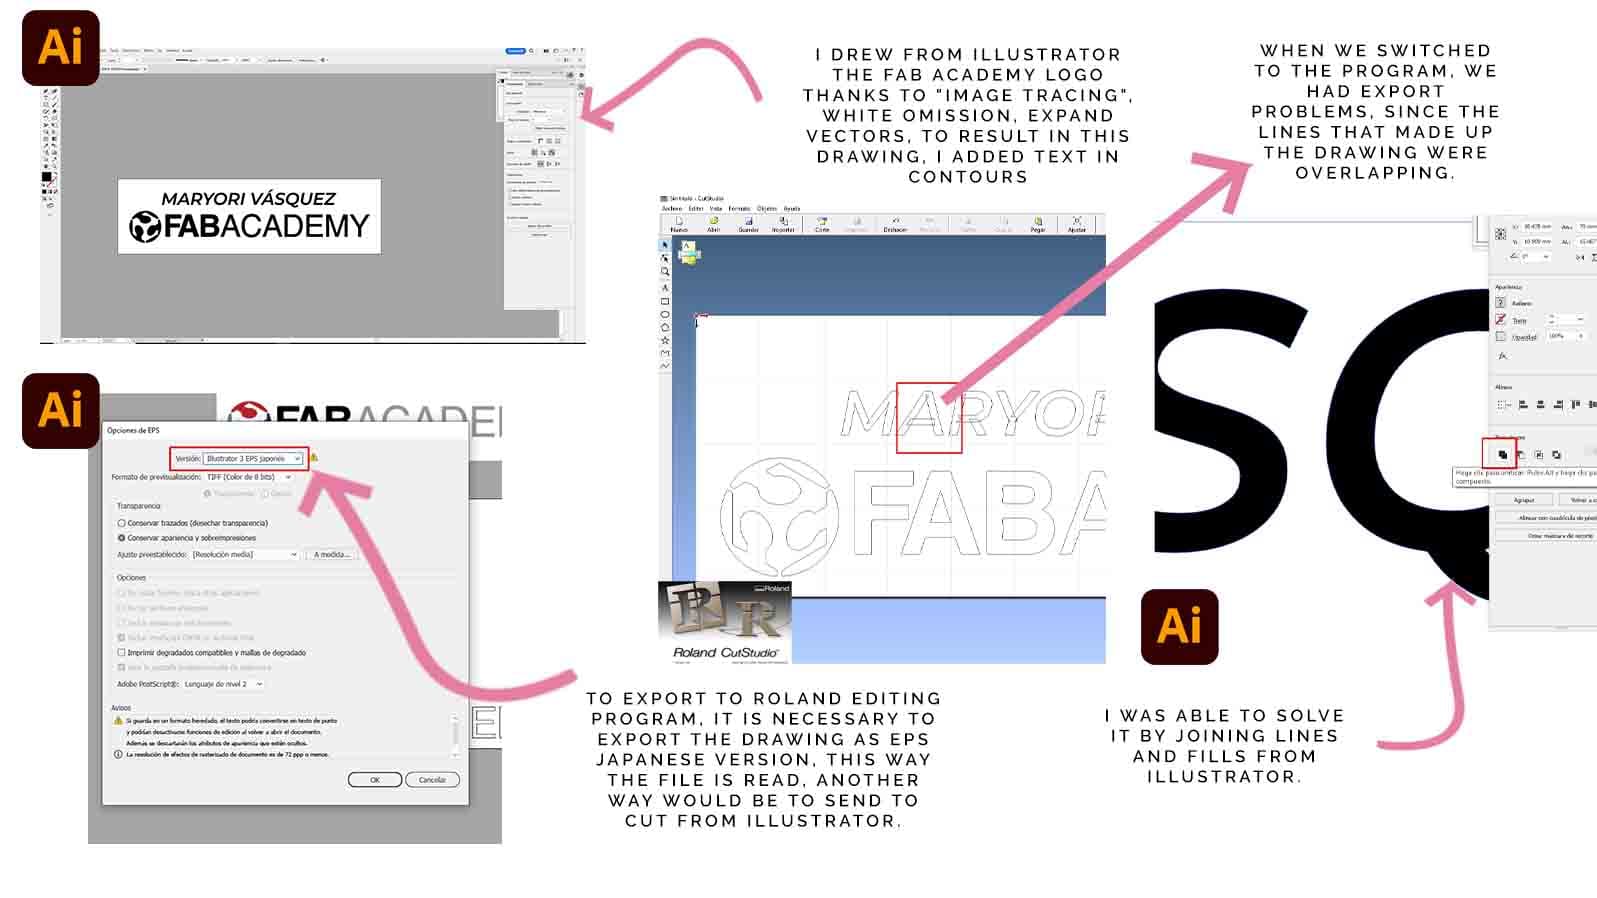
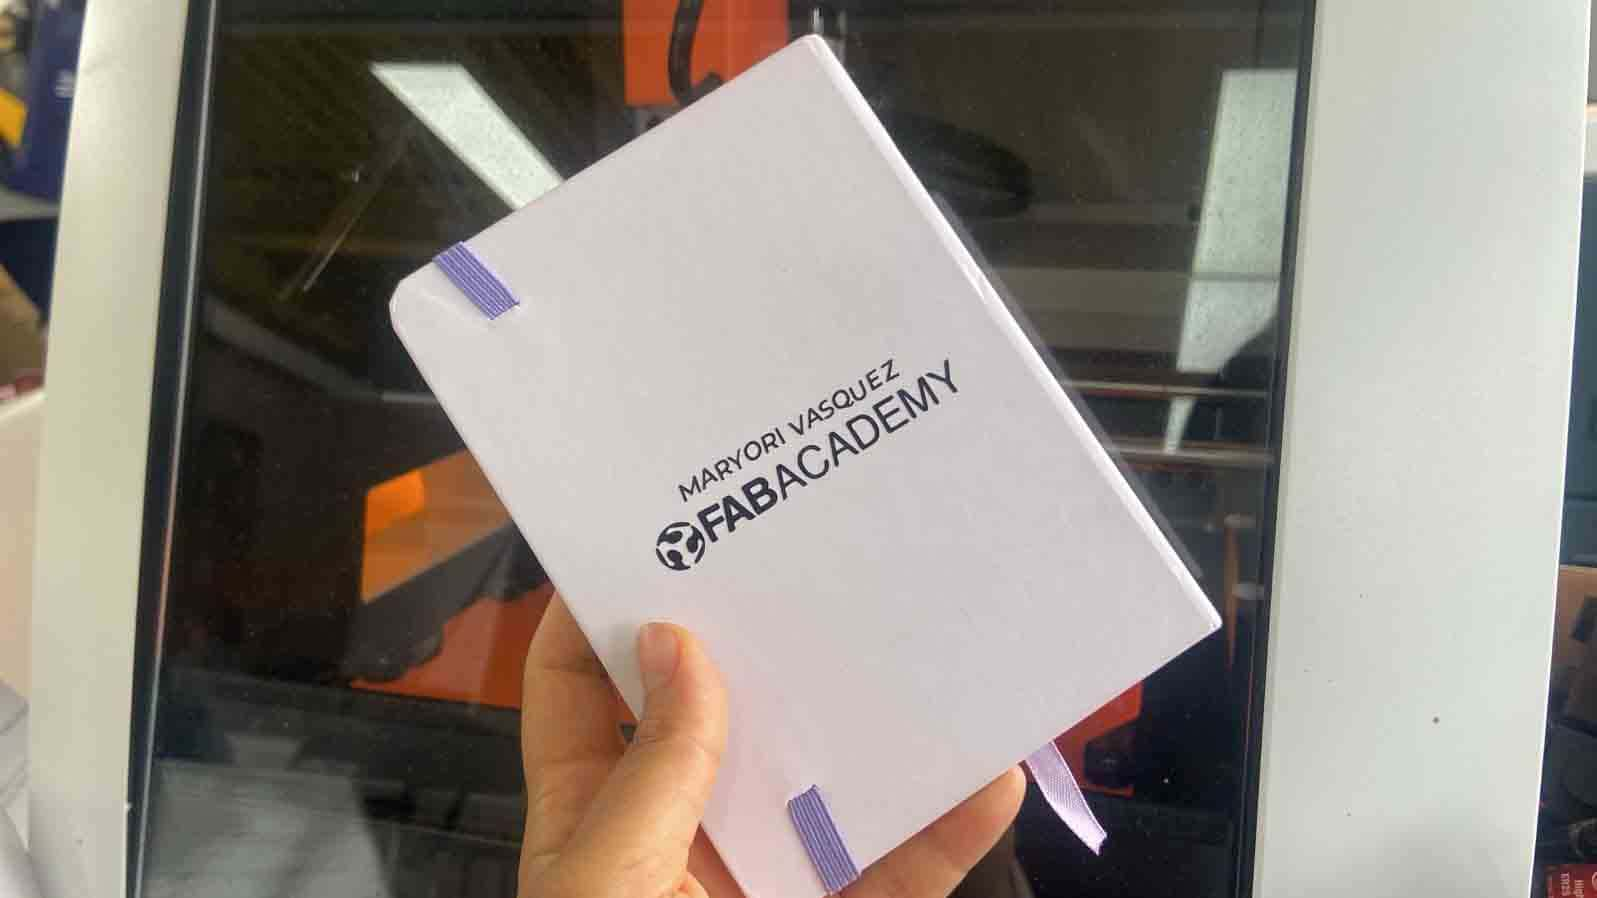
I developed the vinyl lettering and logo design to put on my notebook, it should be noted that everything was done from Inkscape but I had problems importing into the Roland GS-24's Cut Studio program, so we had to switch to Illustrator and export in EPS Japanese version 3.
Only this way the program read the file, evidence is attached.
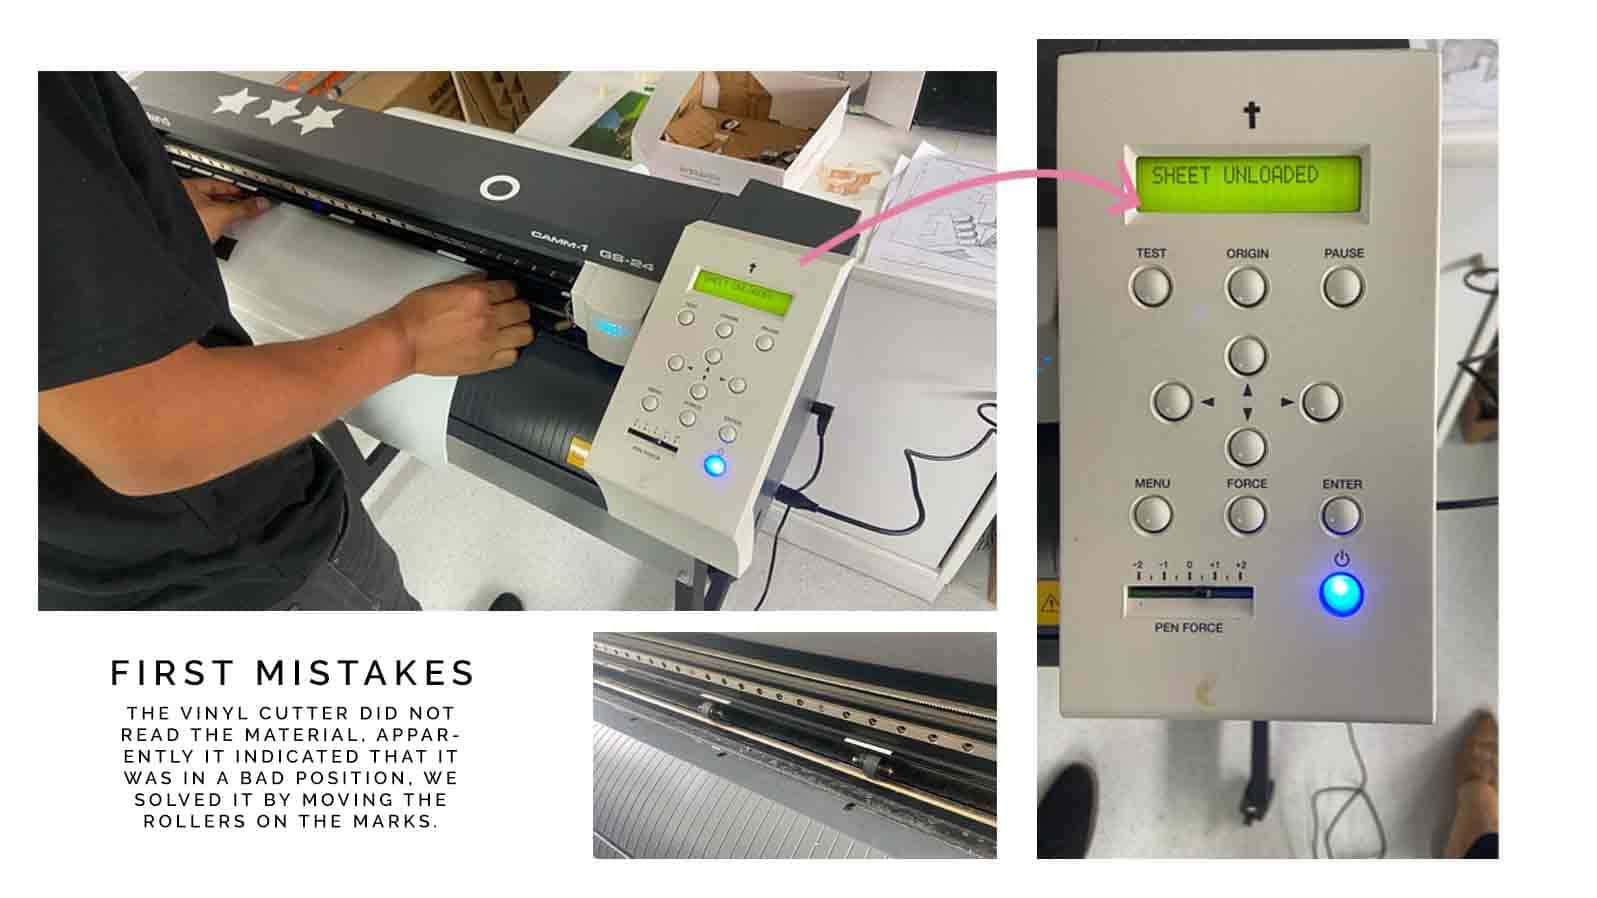
Always keep in mind that the calibration of the vinyl is very special in the case of positioning the rollers on the cutting material, so that it will only cut what is between the marks, since the screen will indicate the millimeters of width to be configured in the program manually.
The Result!
I had difficulty in peeling all the letters, but finally it was possible, with a lot of patience and detail it could be glued, the process is shown in the video!