This week's assignment was:
Before starting the Fab Academy course I always used the typical PHOTOSHOP and Illustrator programs since for my profession they were very important to know. Now I find myself discovering new programs that during this week I began to know and use.
2D DESIGN
INKSCAPE
After class I was encouraged to use Inkscape since many of my classmates from previous years used it a lot. So I decided to install it and learn from this program.
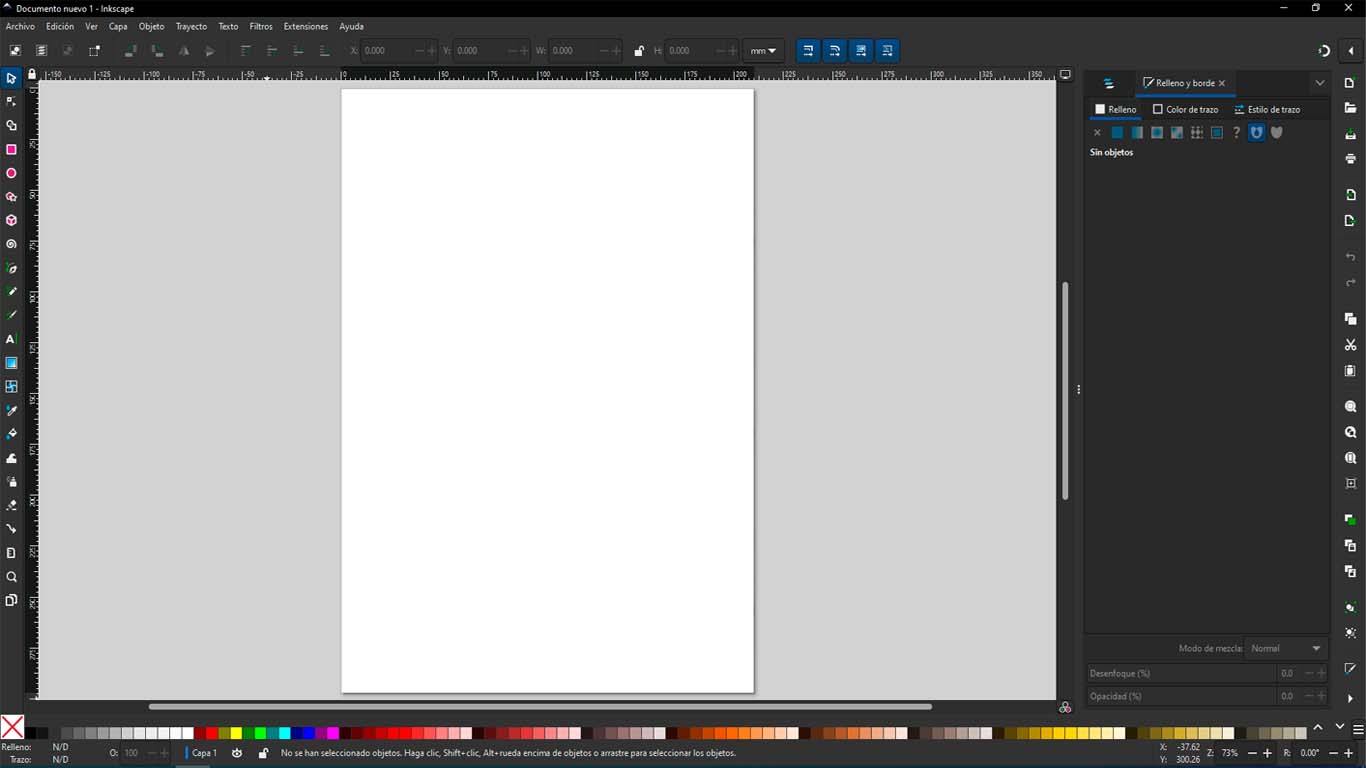
When I entered the program, I realized that it has a good design, I like it because I feel that all the instruments or tools that I am going to use are in the same work area. So I started to investigate a little more about it.
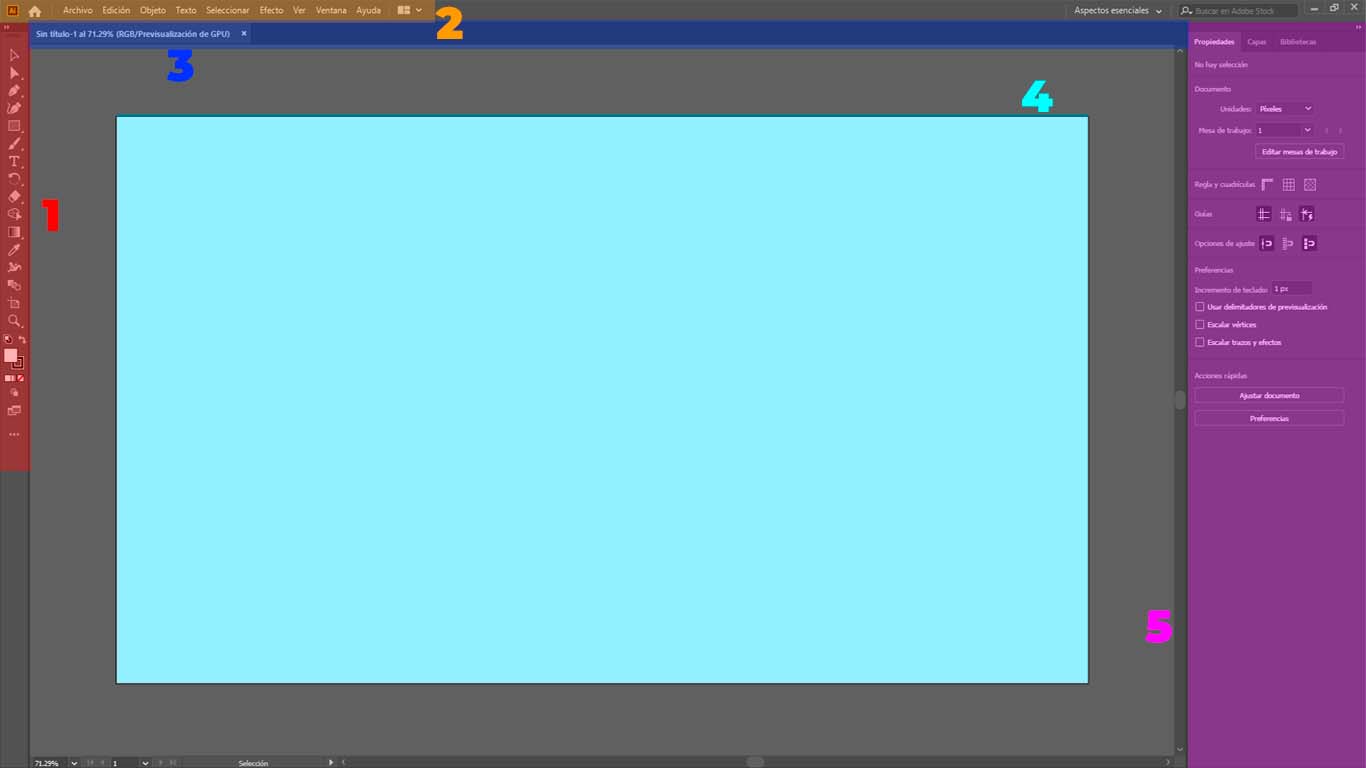
Here I made a small graph of how the INKSCAPE work area is divided, the truth is that it surprised me because it is a program that does not weigh much and has everything at hand, that is, all the tools we need are in the same area. work and it is not very difficult to find them or search for them. Here is a photograph of how I guided myself through the parts of the work area.
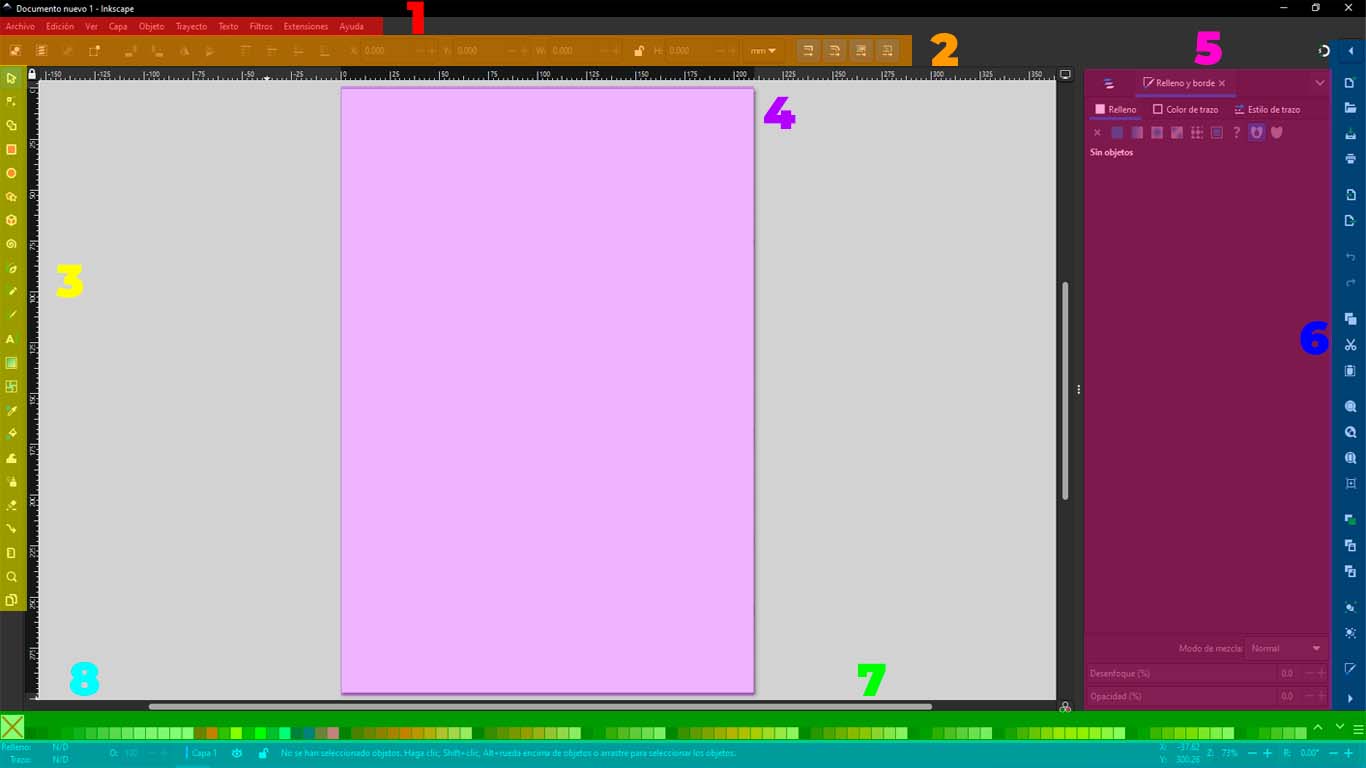
1. Tool bar
2. Main menu bar
3. Tool options
4. Work area
5. Panels or pallets
After knowing a little more about the location of tools and the work area. I will try to make the same design of my final project in Illustrator. Here the drawing and elaboration process.
STEP 1: First I will draw the base of my final project, I had thought of it in a rectangular way, here is a screenshot of it.
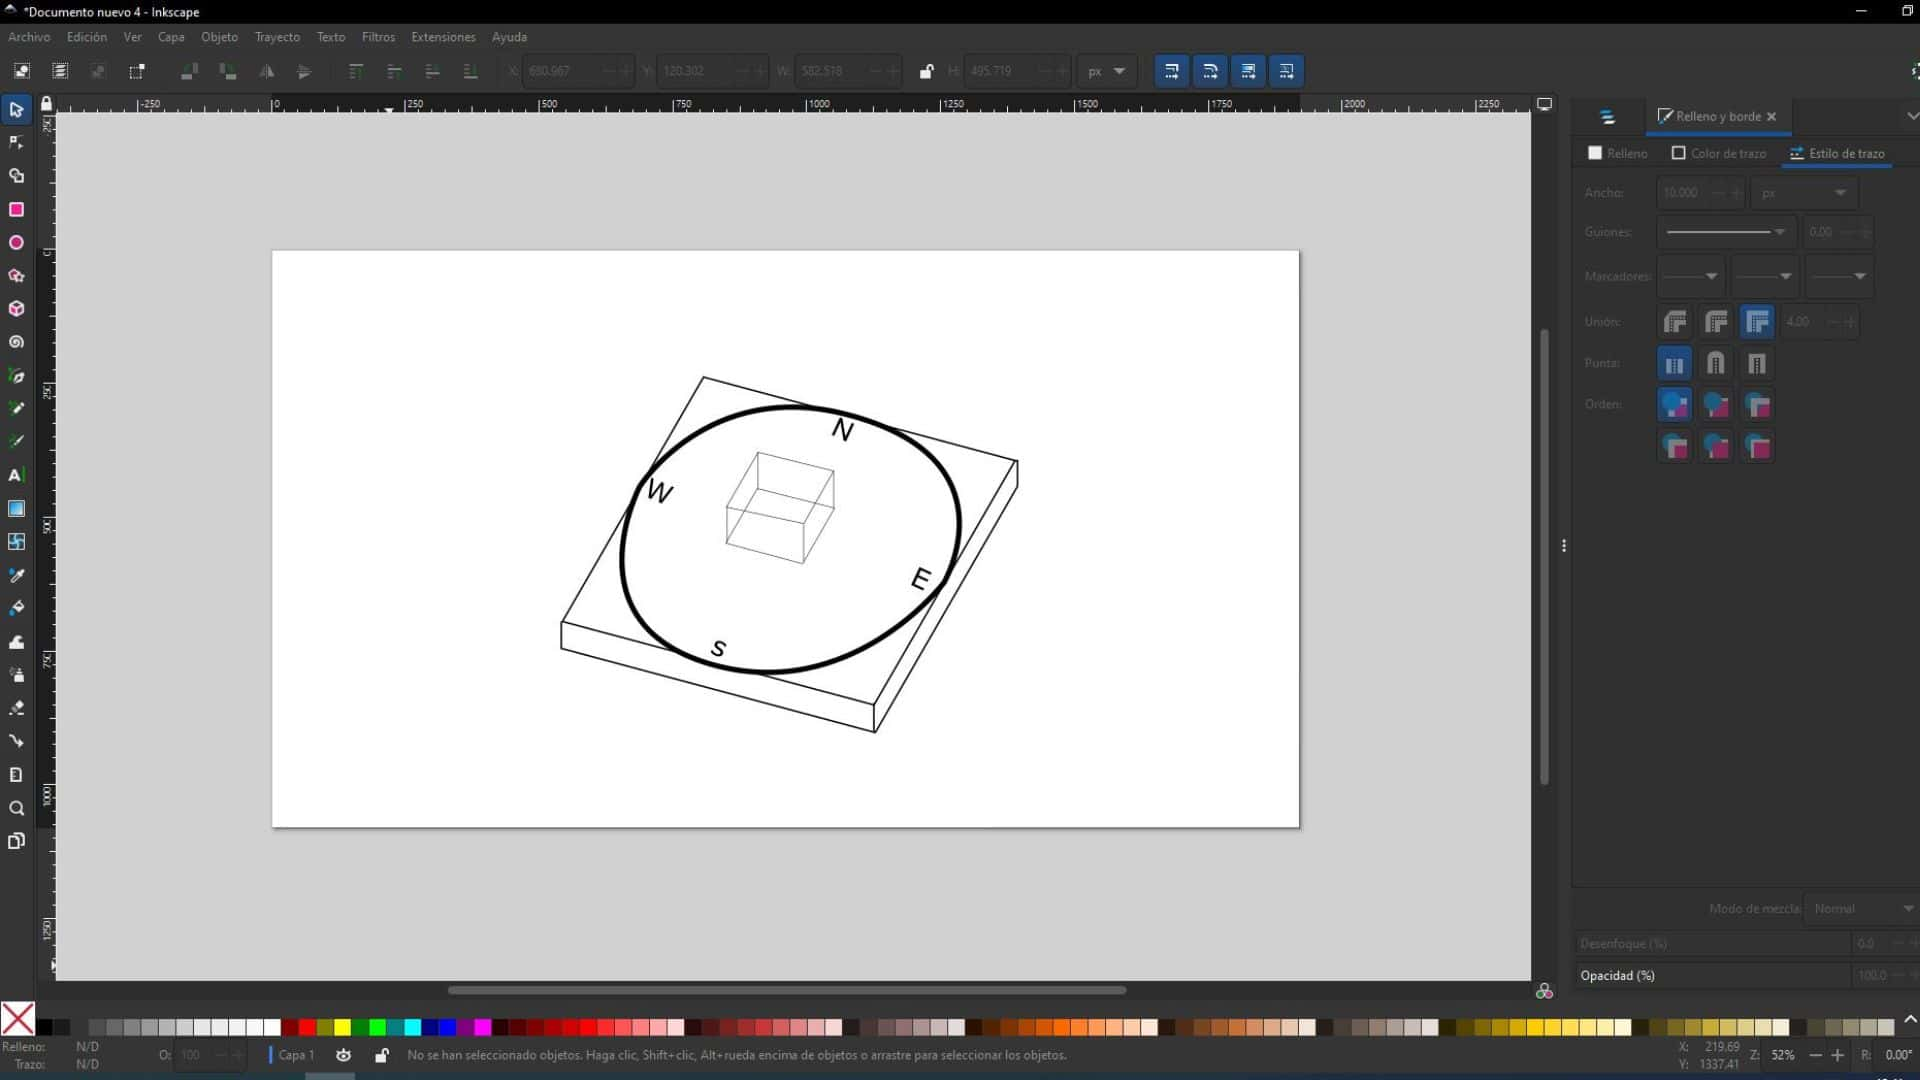
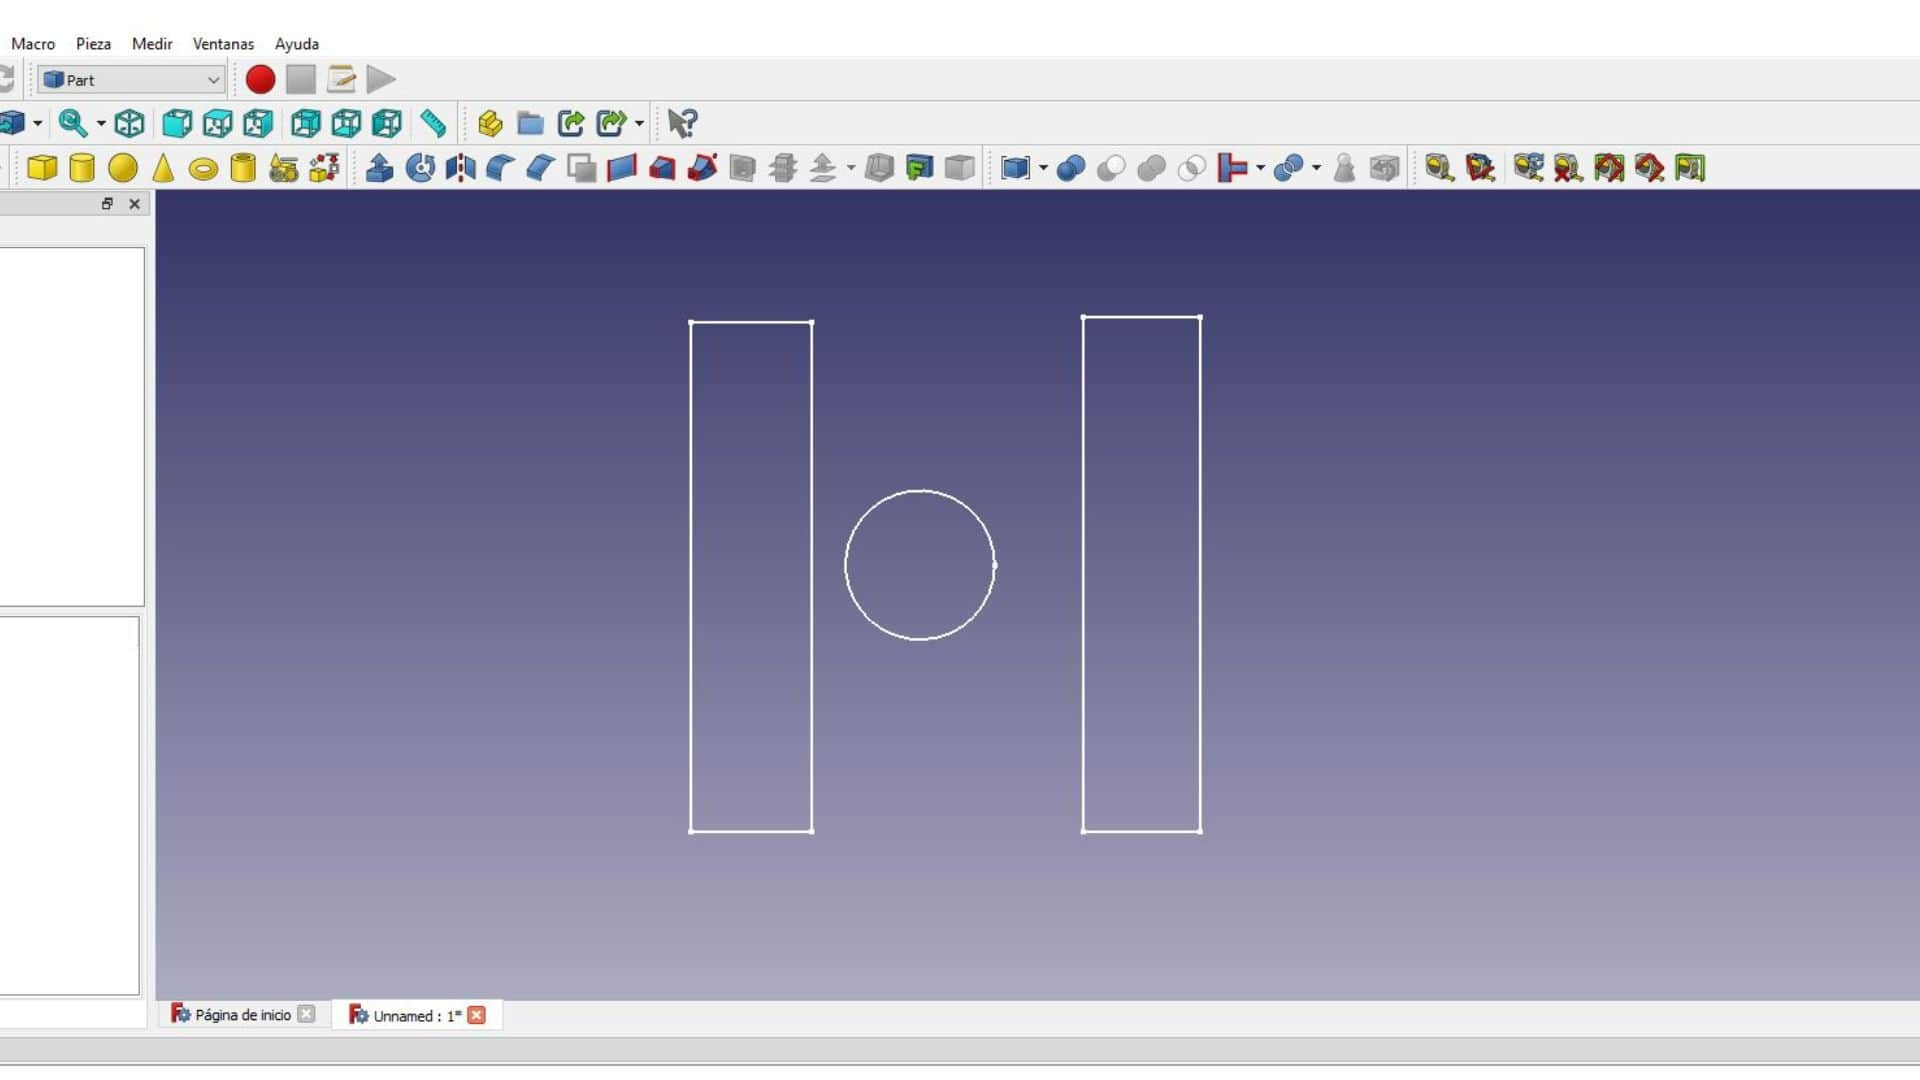
STEP 2: We generate the circle and then order the cardinal points that are important for the project
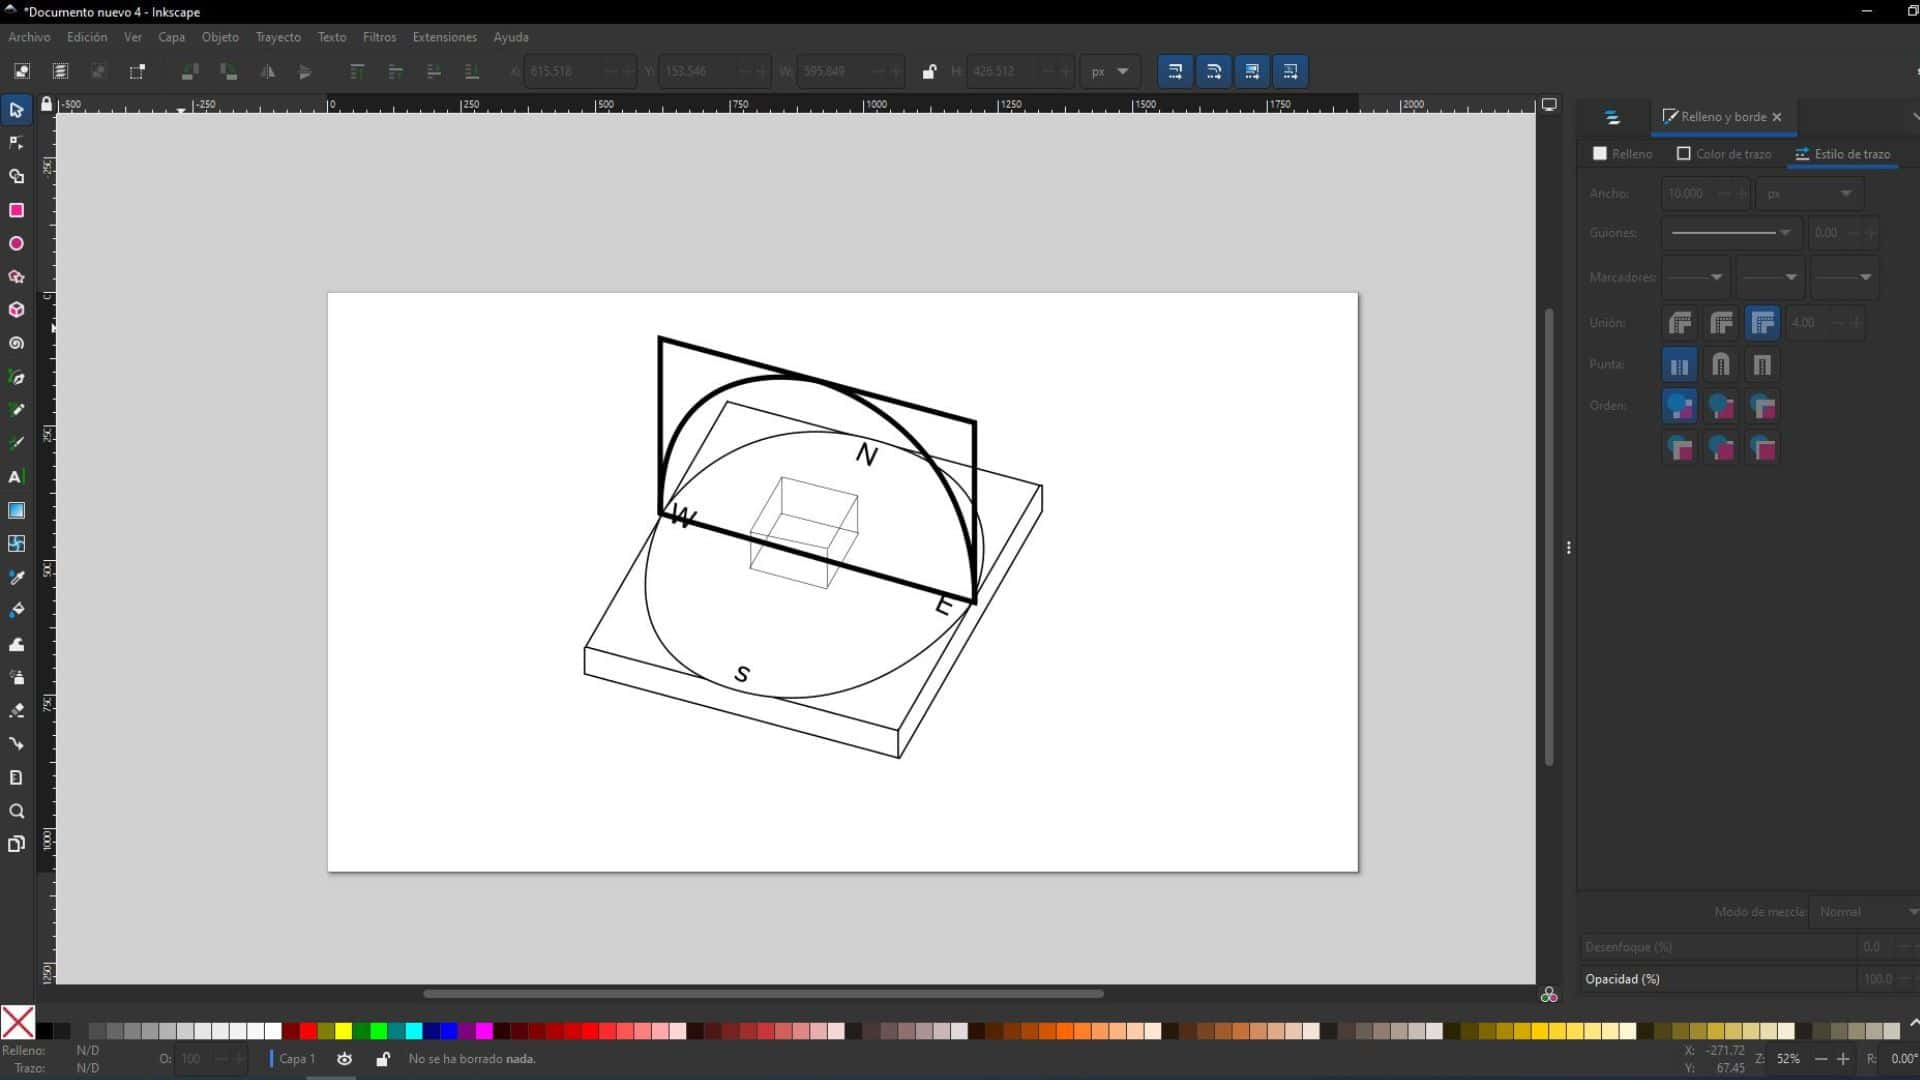
STEP 3: We generate a vertical plane with a rectangular plane to achieve a semicircle that will be the route of the artificial lighting that will simulate the sun.
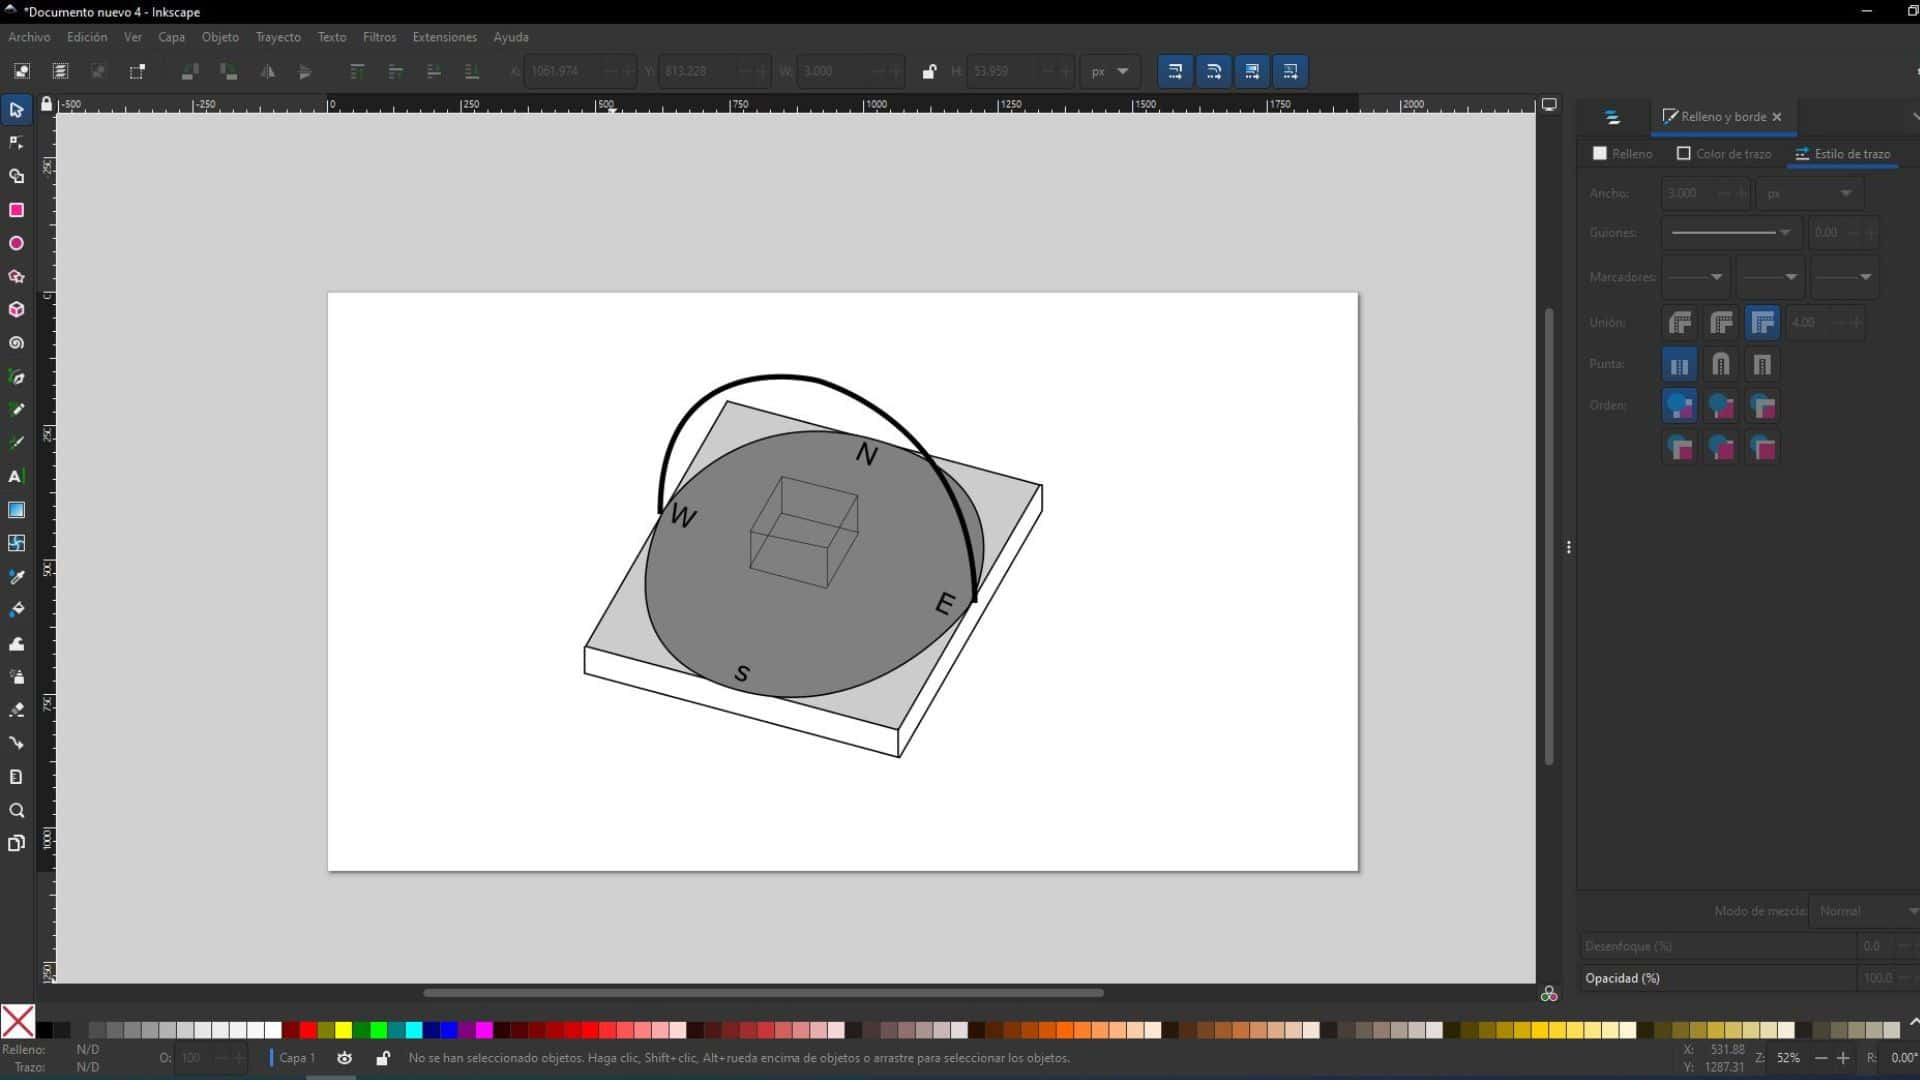
STEP 4: Finally we paint and obtain the sketch in vector form. Here you can see my file: 2D DOCUMENT
ILLUSTRATOR
Illustrator was a program that I used during my university years and it helped me a lot to create some vector images for diagrams. It's been a long time since I used it and I remember how I used it.
The Illustrator work area seems more sober to me, but I feel that it is more professional and that it is not so friendly to people who want to enter the vector world. Here is a photograph of the desktop and similar to Inkscape, showing its component parts.
1. Menu bar
2. Command Bar
3. Toolbox
4. Work area
5. Control Bar
My first exercise in the program was to design from my sketches of the final project called LIGHTDOM. I designed my final project in Inkscape to get an idea of the professional quality that can be obtained. I wanted to start designing in 2d to learn the useful tools that the program presents and I tried to convert my initial sketch to a better quality.
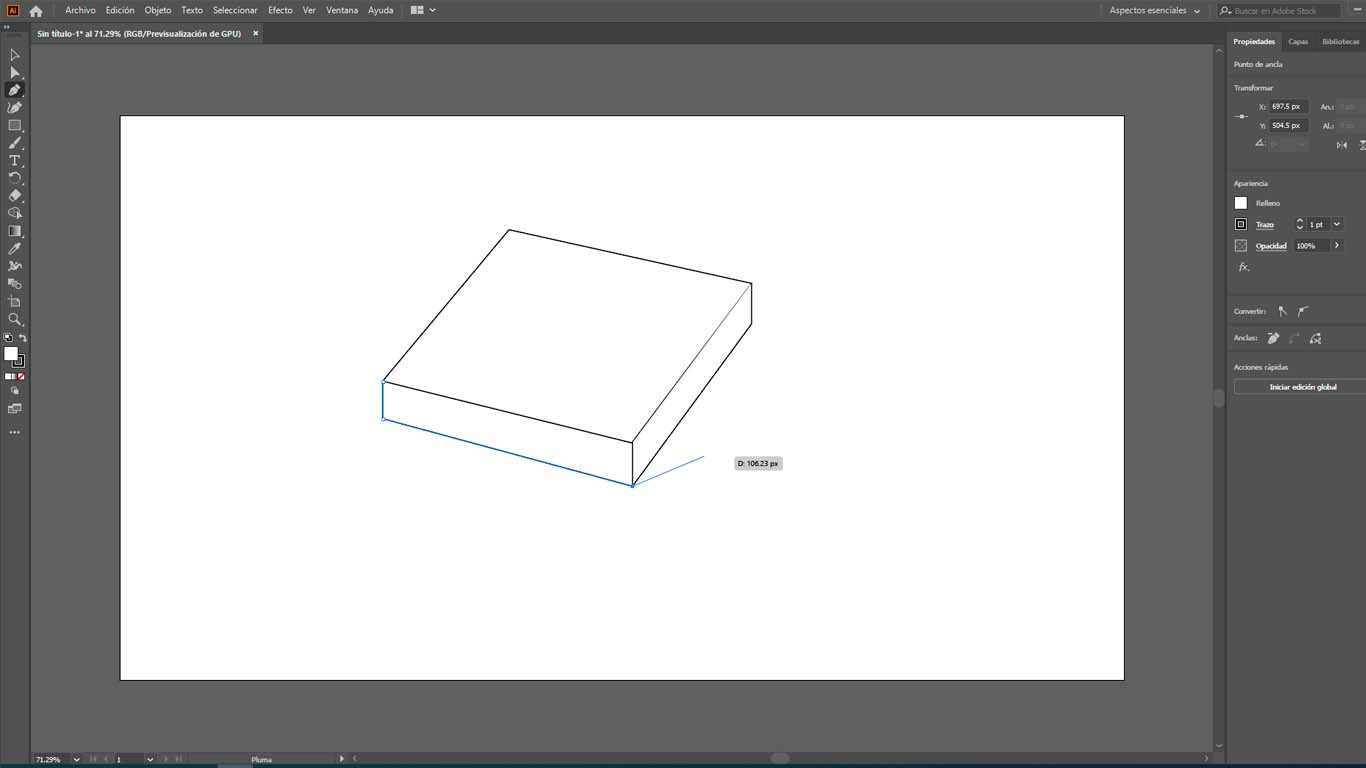
STEP 1: We generate a base to guide us and achieve a perfect circle to generate the base of Lightdom
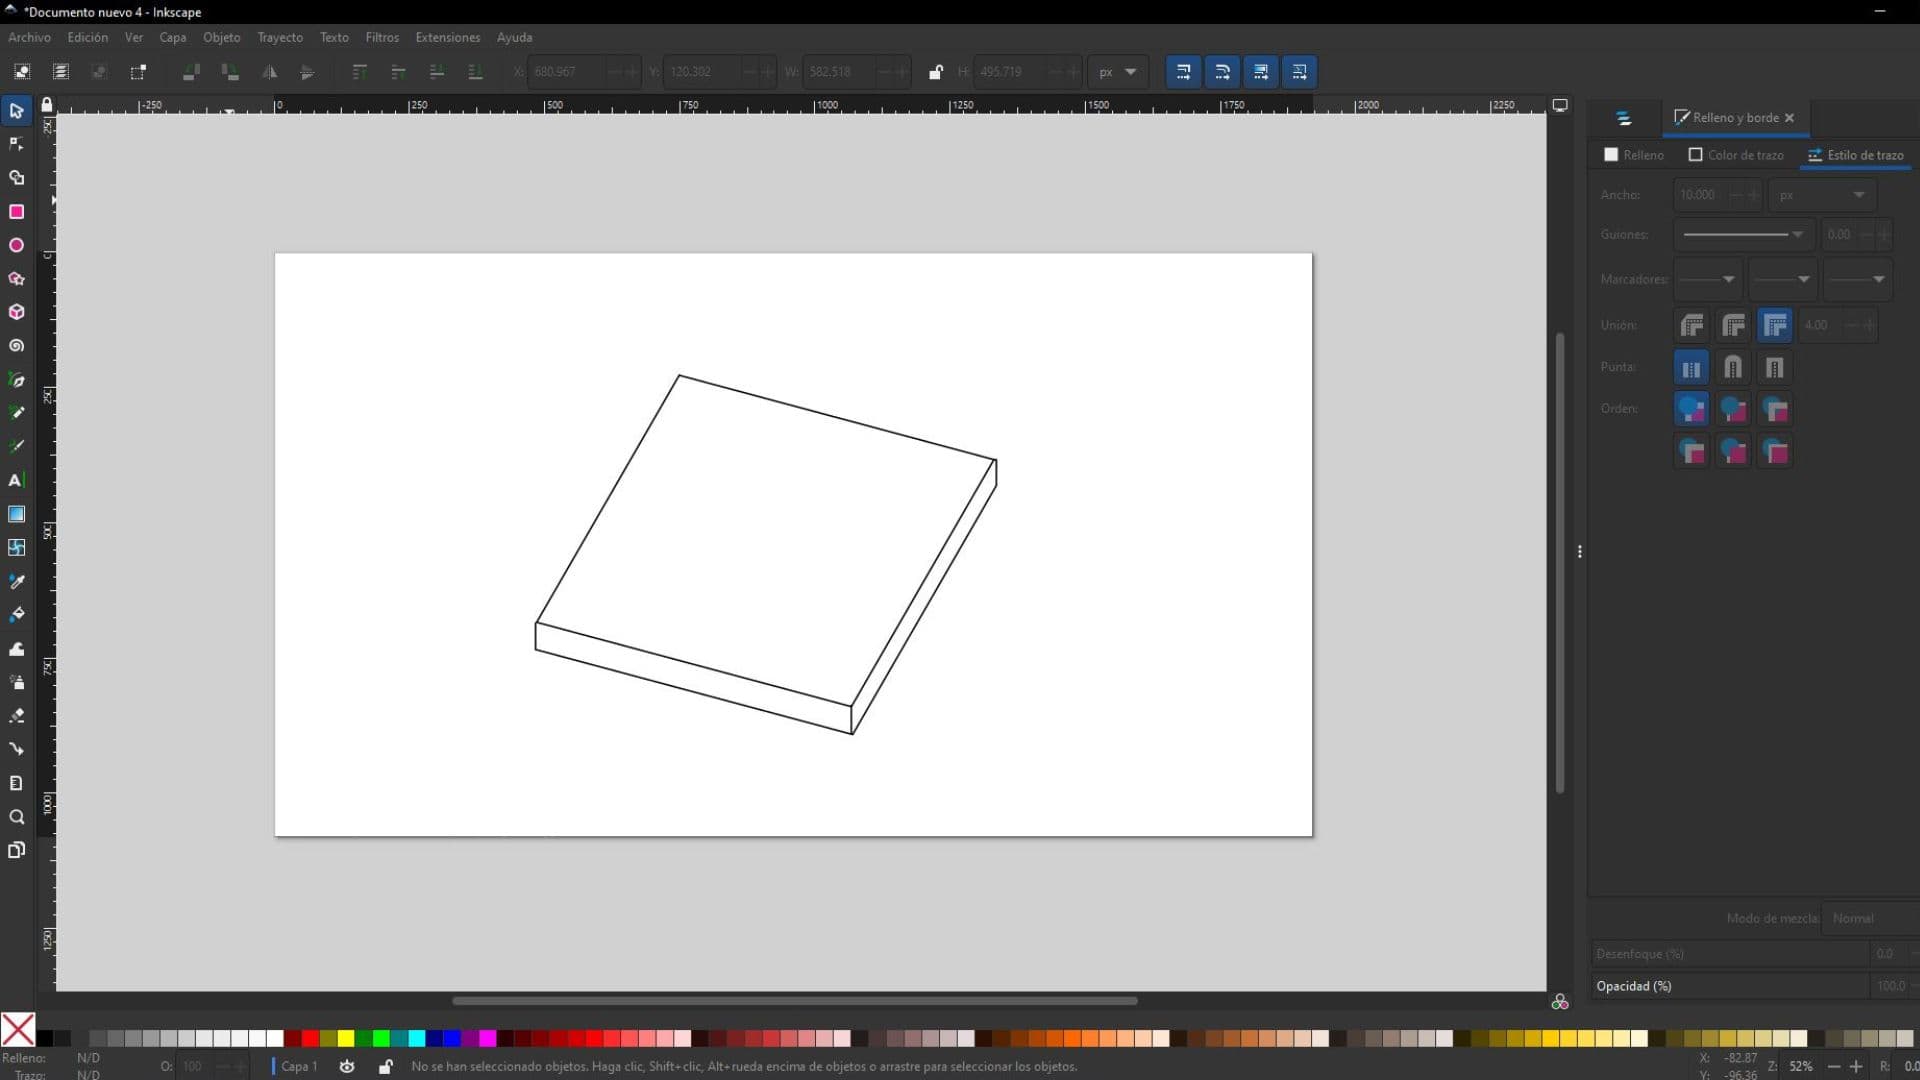
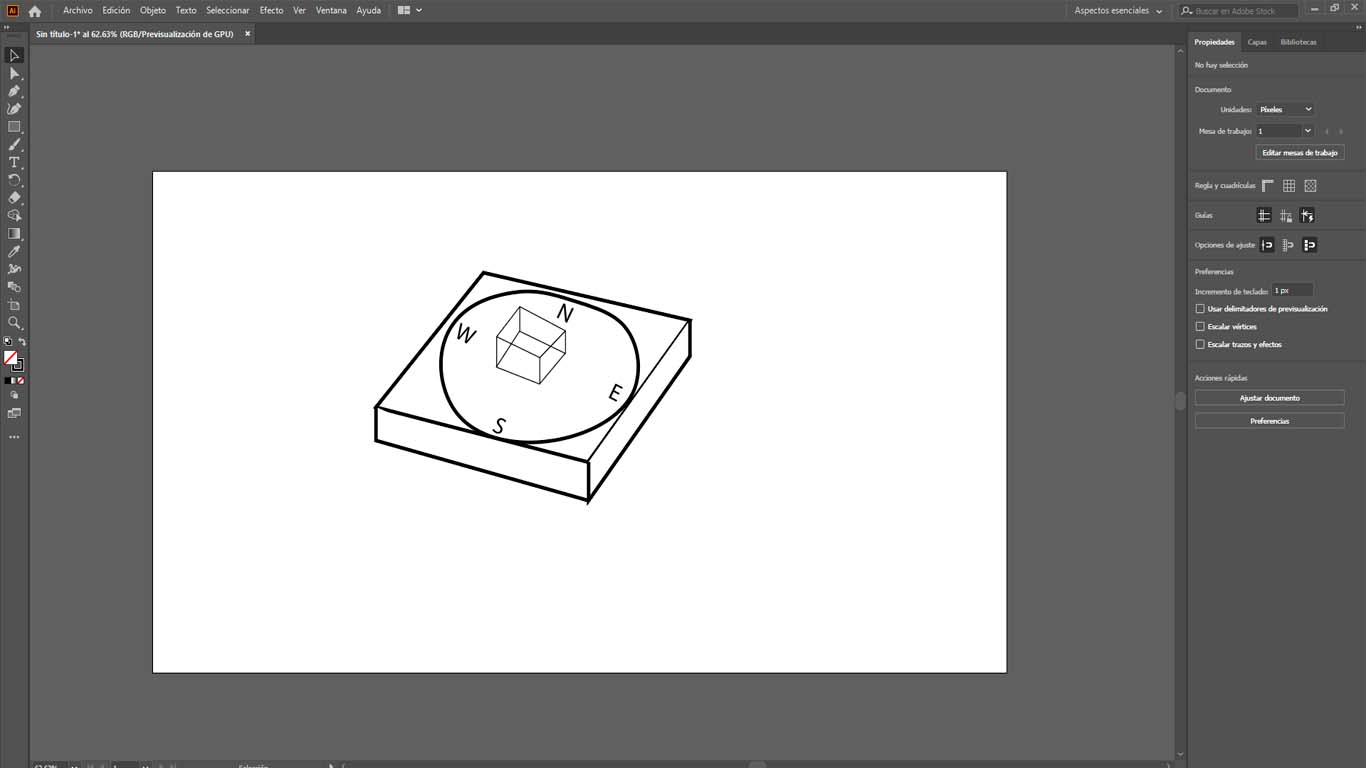
STEP 2: Now draw the circle and a cube to simulate the base and the model respectively. It took me a lot more time than I thought because I had problems when I clicked on each edge, the lines I had made were deleted and I thought it would be easier
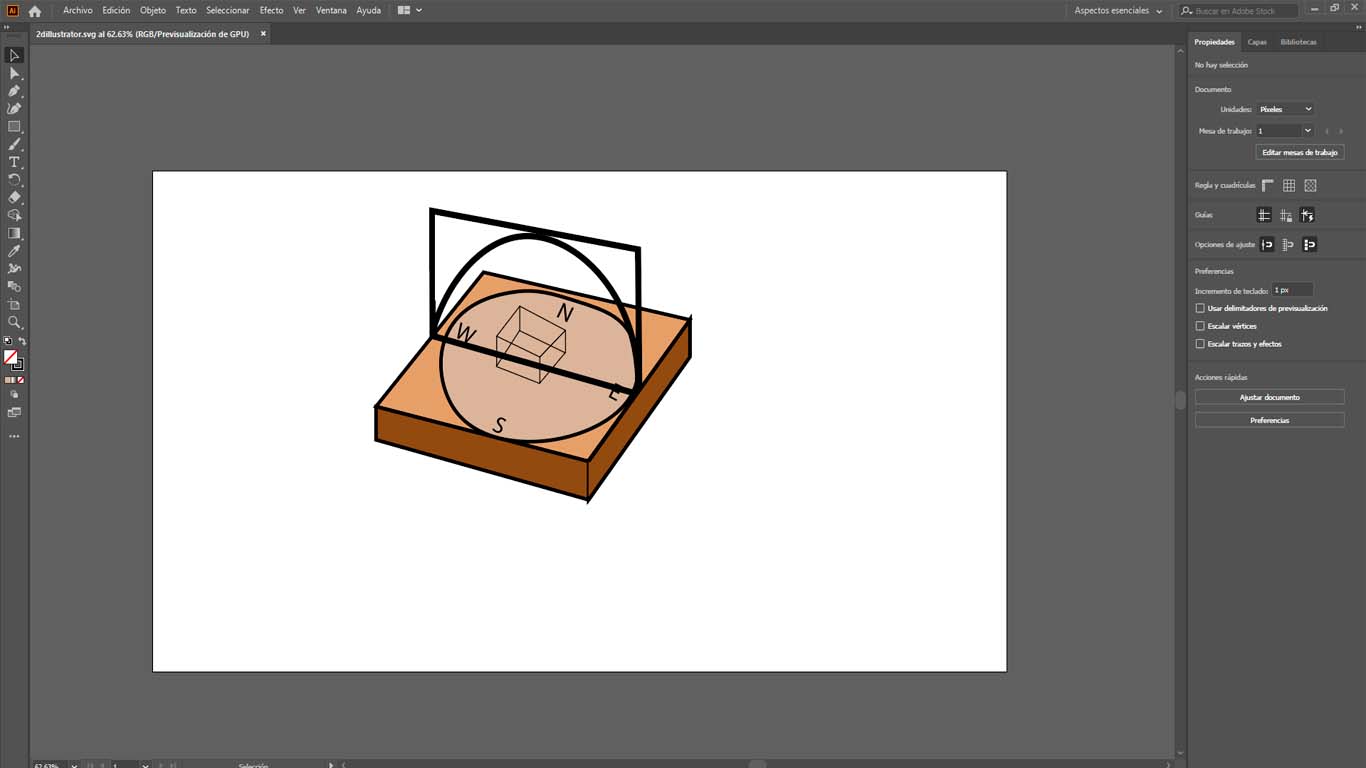
STEP 3: Here is a screenshot trying to design the arch of my final project. It took me a long time to achieve it because every time the lines were joined, the size of the arc was modified or sometimes even eliminated, but in the end we achieved it.

STEP 4: Finally I tried to paint it and eliminate some lines but it was very complicated since everything was eliminated and unified. I tried to separate the lines but I couldn't. Here is the file of my drawing in Illustrator. 2D DOCUMENT
CONCLUSIONS 2D PROGRAM
From my perspective, I feel that INKSCAPE is a very versatile and simple program for a person who wants to start designing in vector. It has a very simple work area and all the tools are nearby to make a design faster and easy to understand. On the other hand, I see that ILLUSTRATOR is a professional program and that an amateur in the field would find it difficult to start with the program. It is not very accessible to everyone and can take much more time to understand than INKSCAPE. The truth is that INKSCAPE surprised me because it is a "simple" program that has almost all the features of ILLUSTRATOR and you can achieve things faster. As a recommendation, I would say that if you are new to this, start with INKSCAPE, the program makes drawing much easier and requires a lot of practice, switching to ILLUSTRATOR to improve the quality.
3D DESIGN
FREECAD
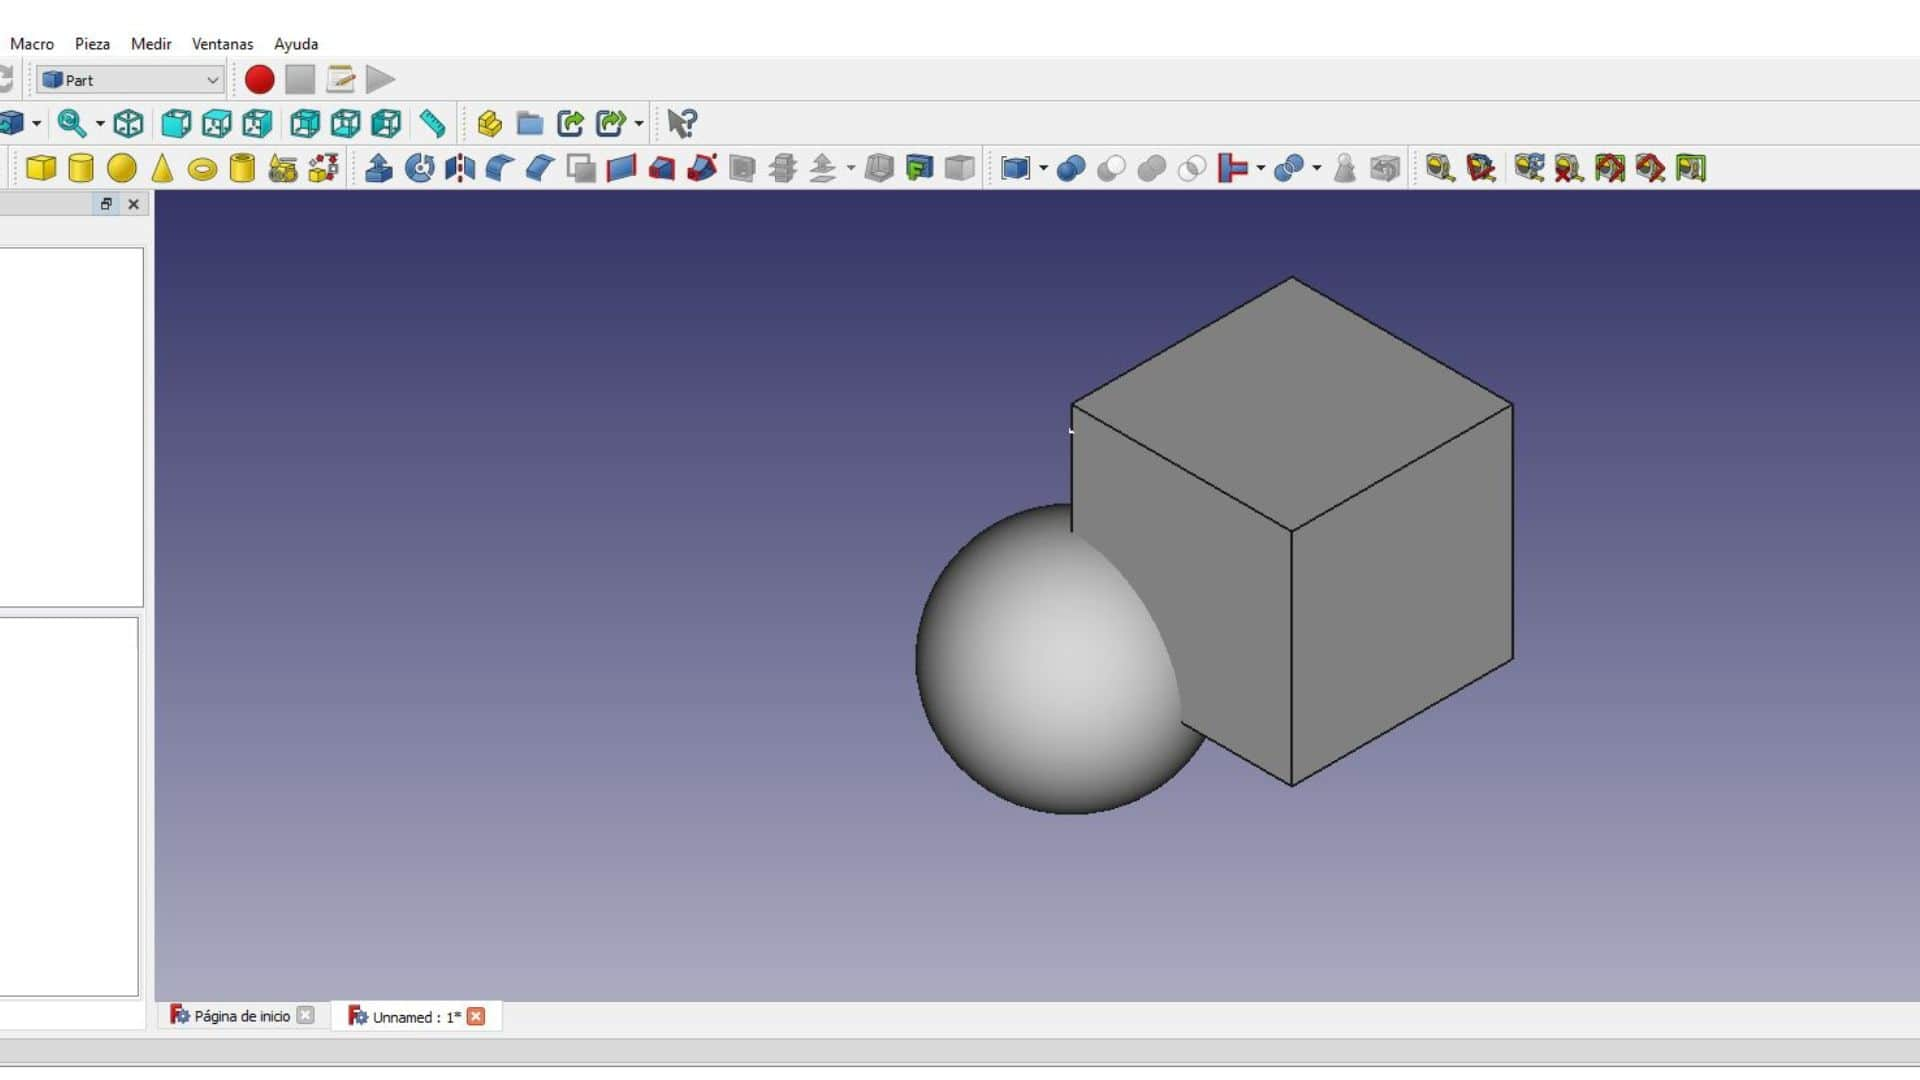
At first I wanted to use FREECAD to do my 3D modeling of my final project, but I didn't fully understand it and it was very difficult for me to do the modeling in this program.
I was barely able to make simple figures in the sketch and I was able to convert them into 3D, but I couldn't modify the data and it became very complicated. I guess at another time I'll have to give the program a chance.
AUTODESK FUSION 360
I decided to install Fusion 360 since I had previously had the opportunity to do some simple modeling and since it became more familiar to me. So I started modeling my base for my final project, well, a try.
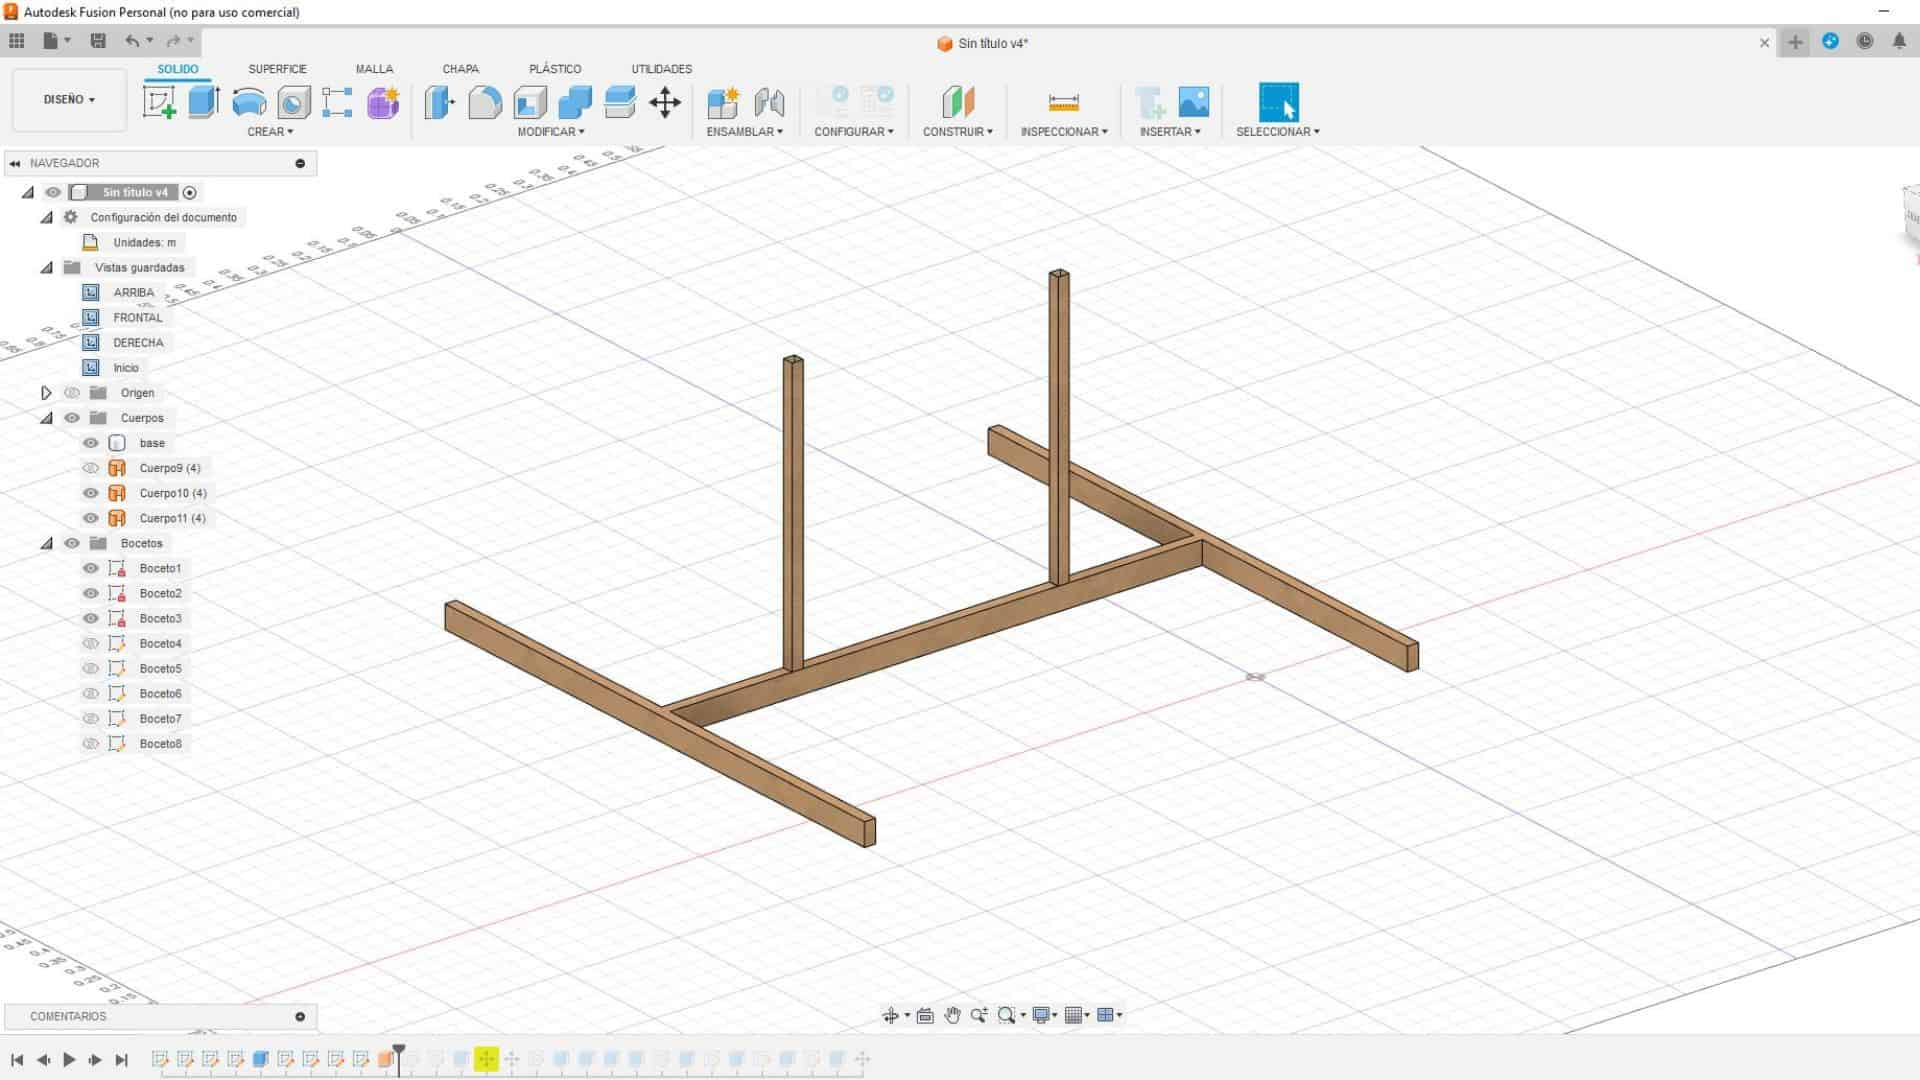
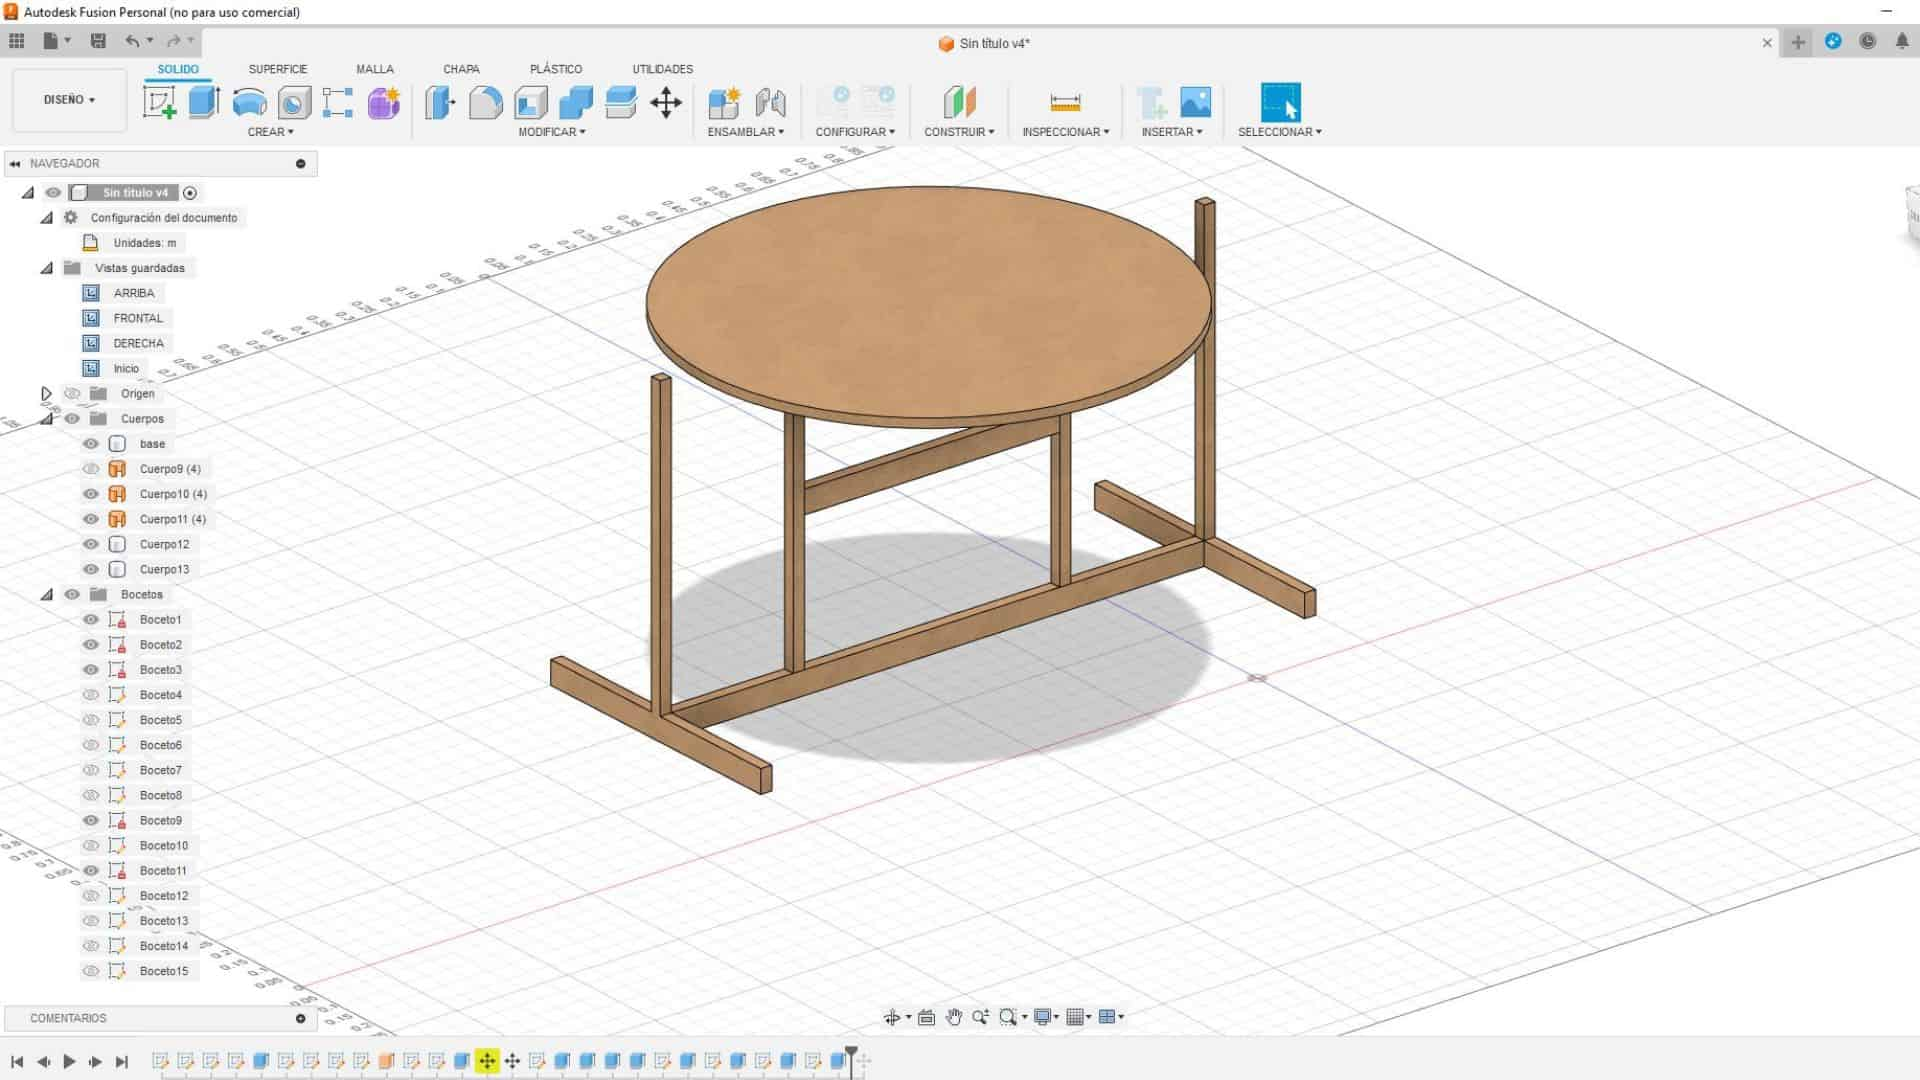
STEP 1: I began to create the structure to support my entire project, I was able to model and understand how the main tools of the program work.
STEP 2: Then you can model the base where the mockups will go for the solar analysis that my project is about and I was able to place where I really wanted.
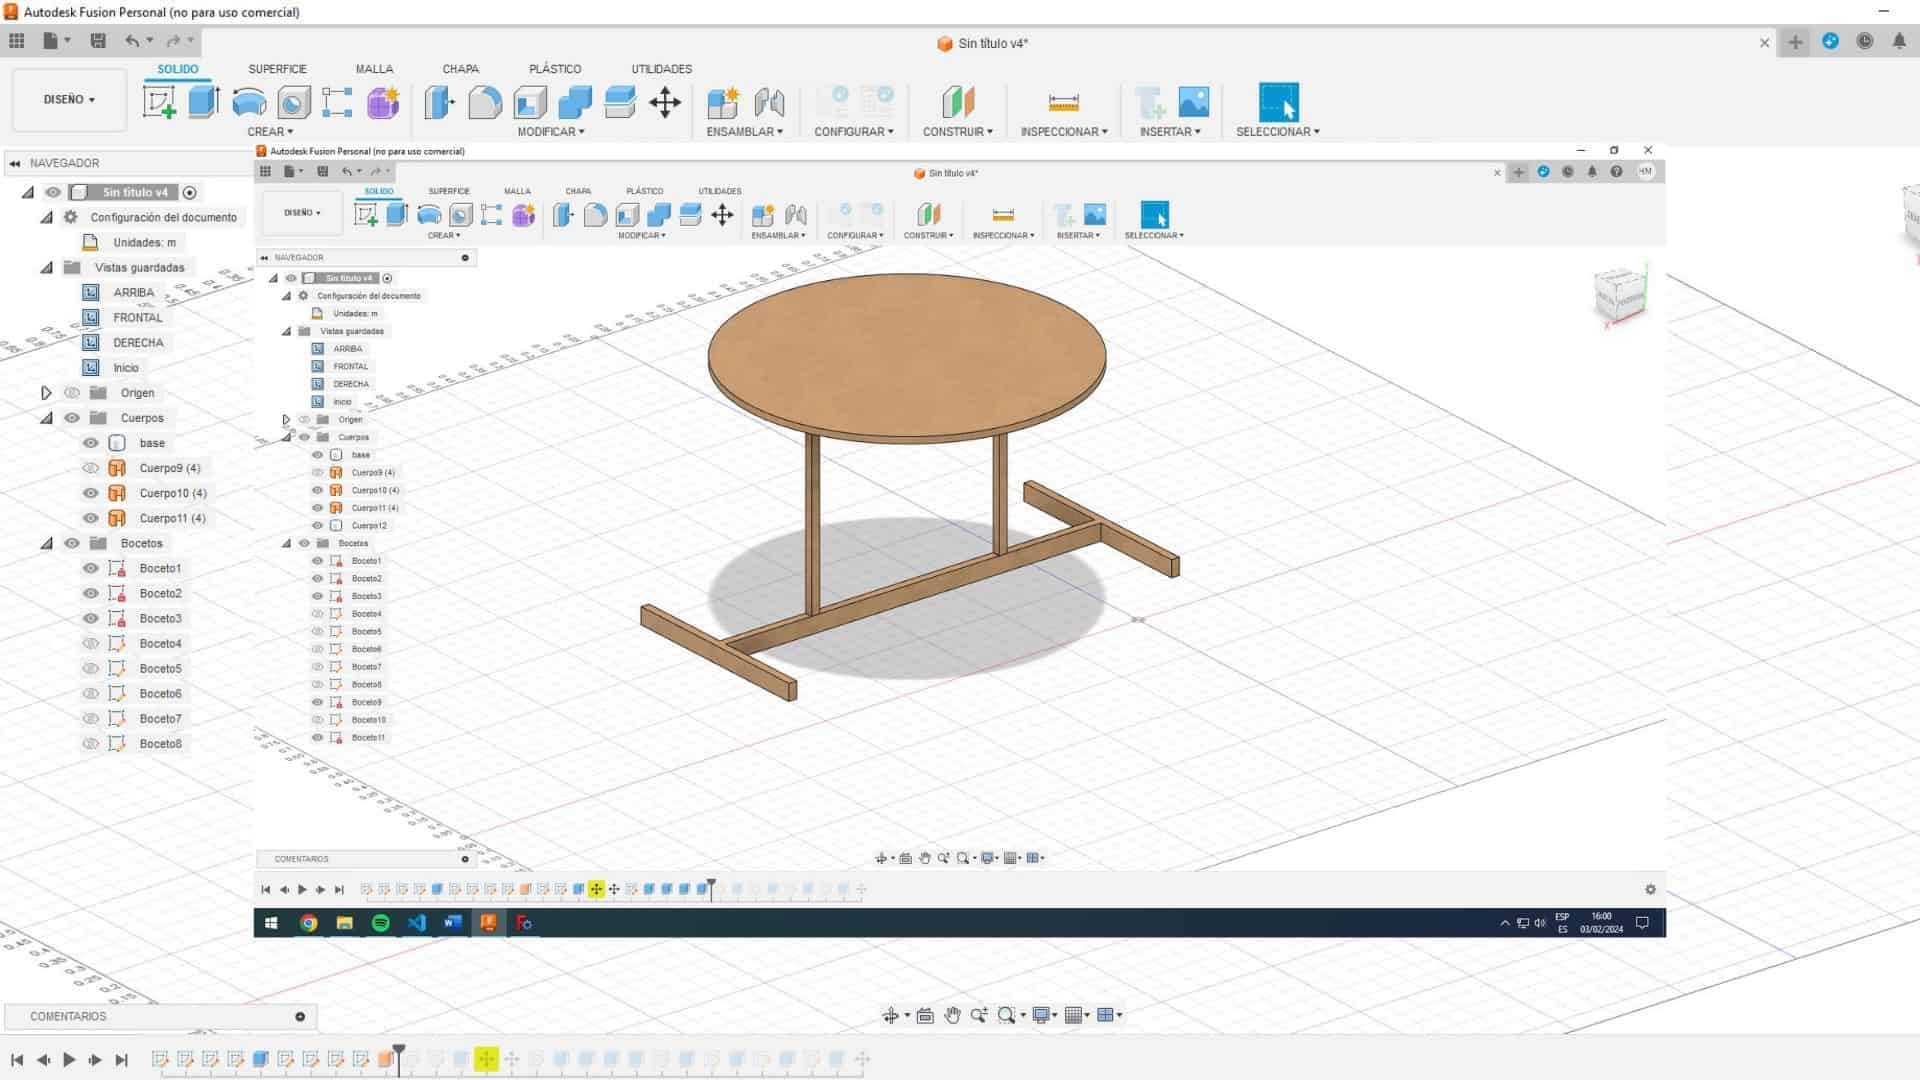
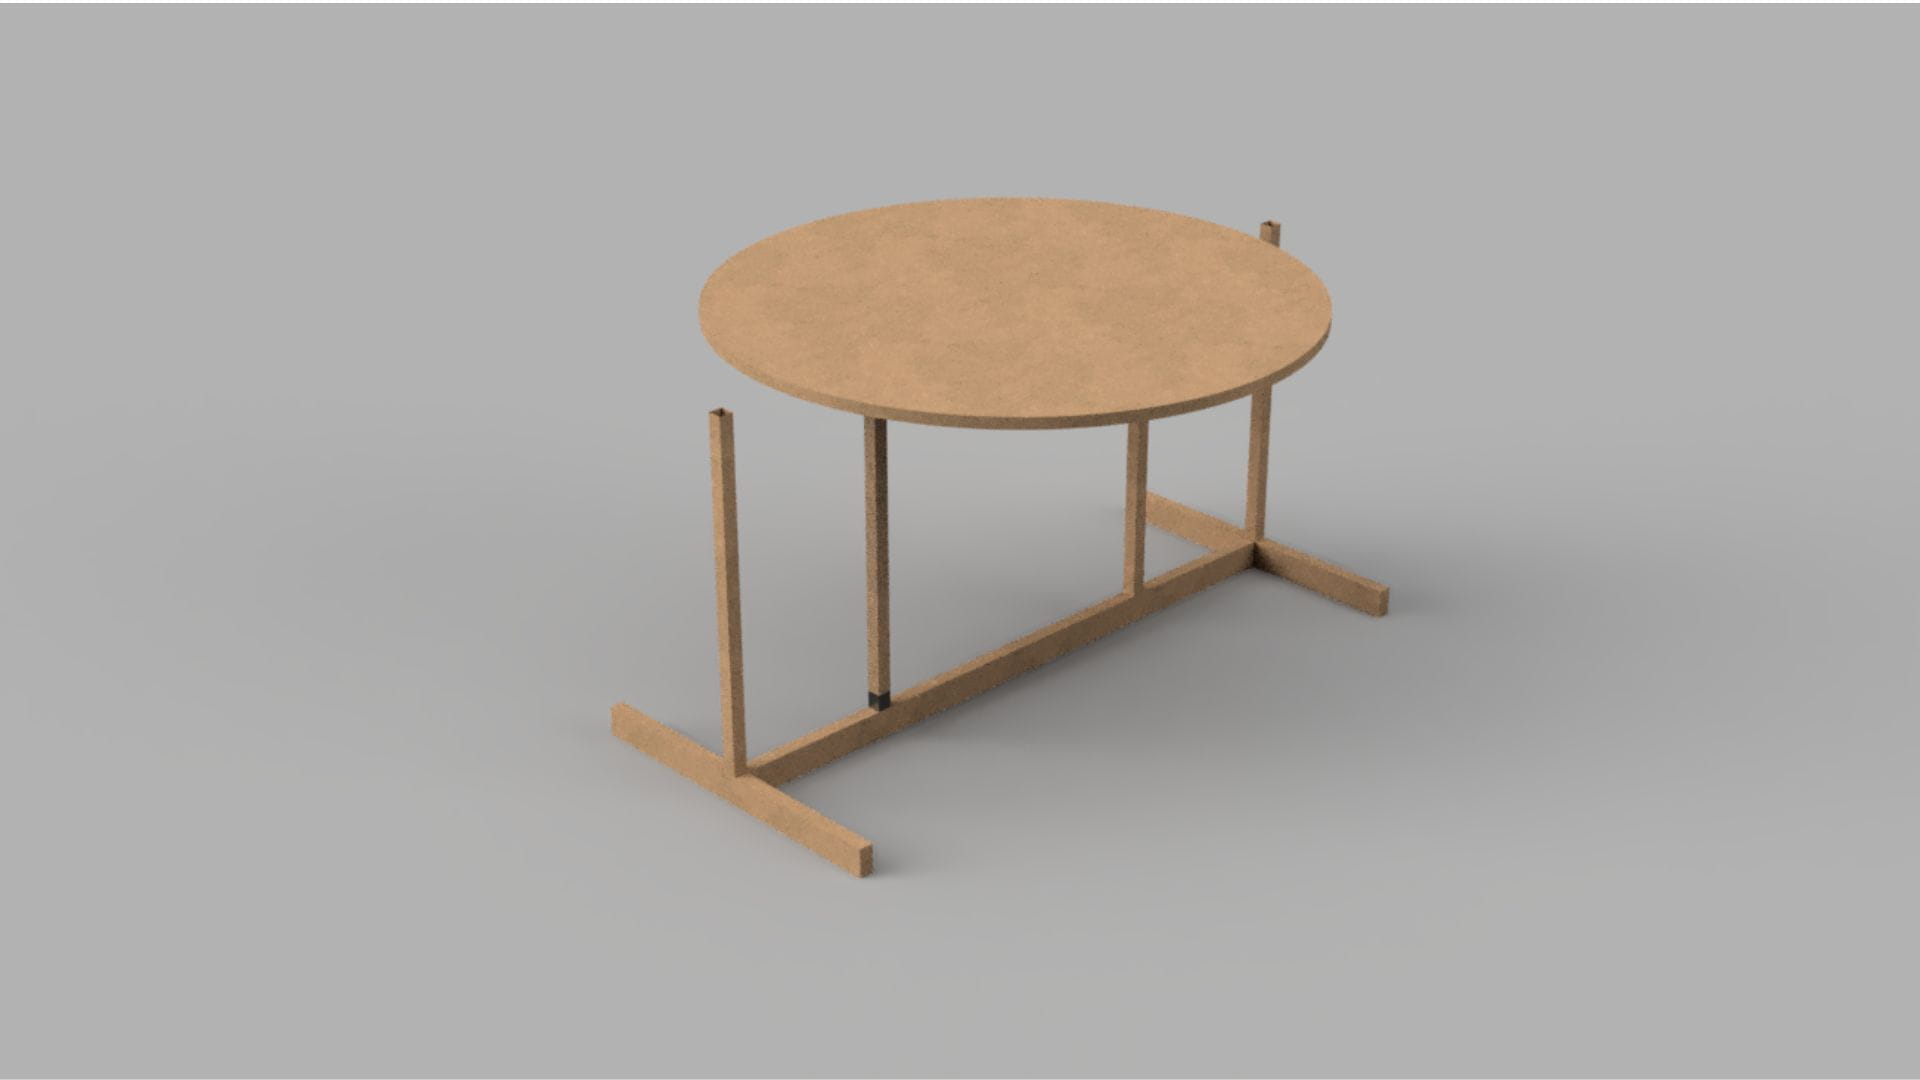
Finally, when I was assembling and structuring the entire base, I realized that the structure was not going to work since the circular base was not going to support itself properly and would fall apart when something was placed on top of it. And I was also able to render to practice and get to know that tool, here I became more interested in the program, now I am going to develop the real project.
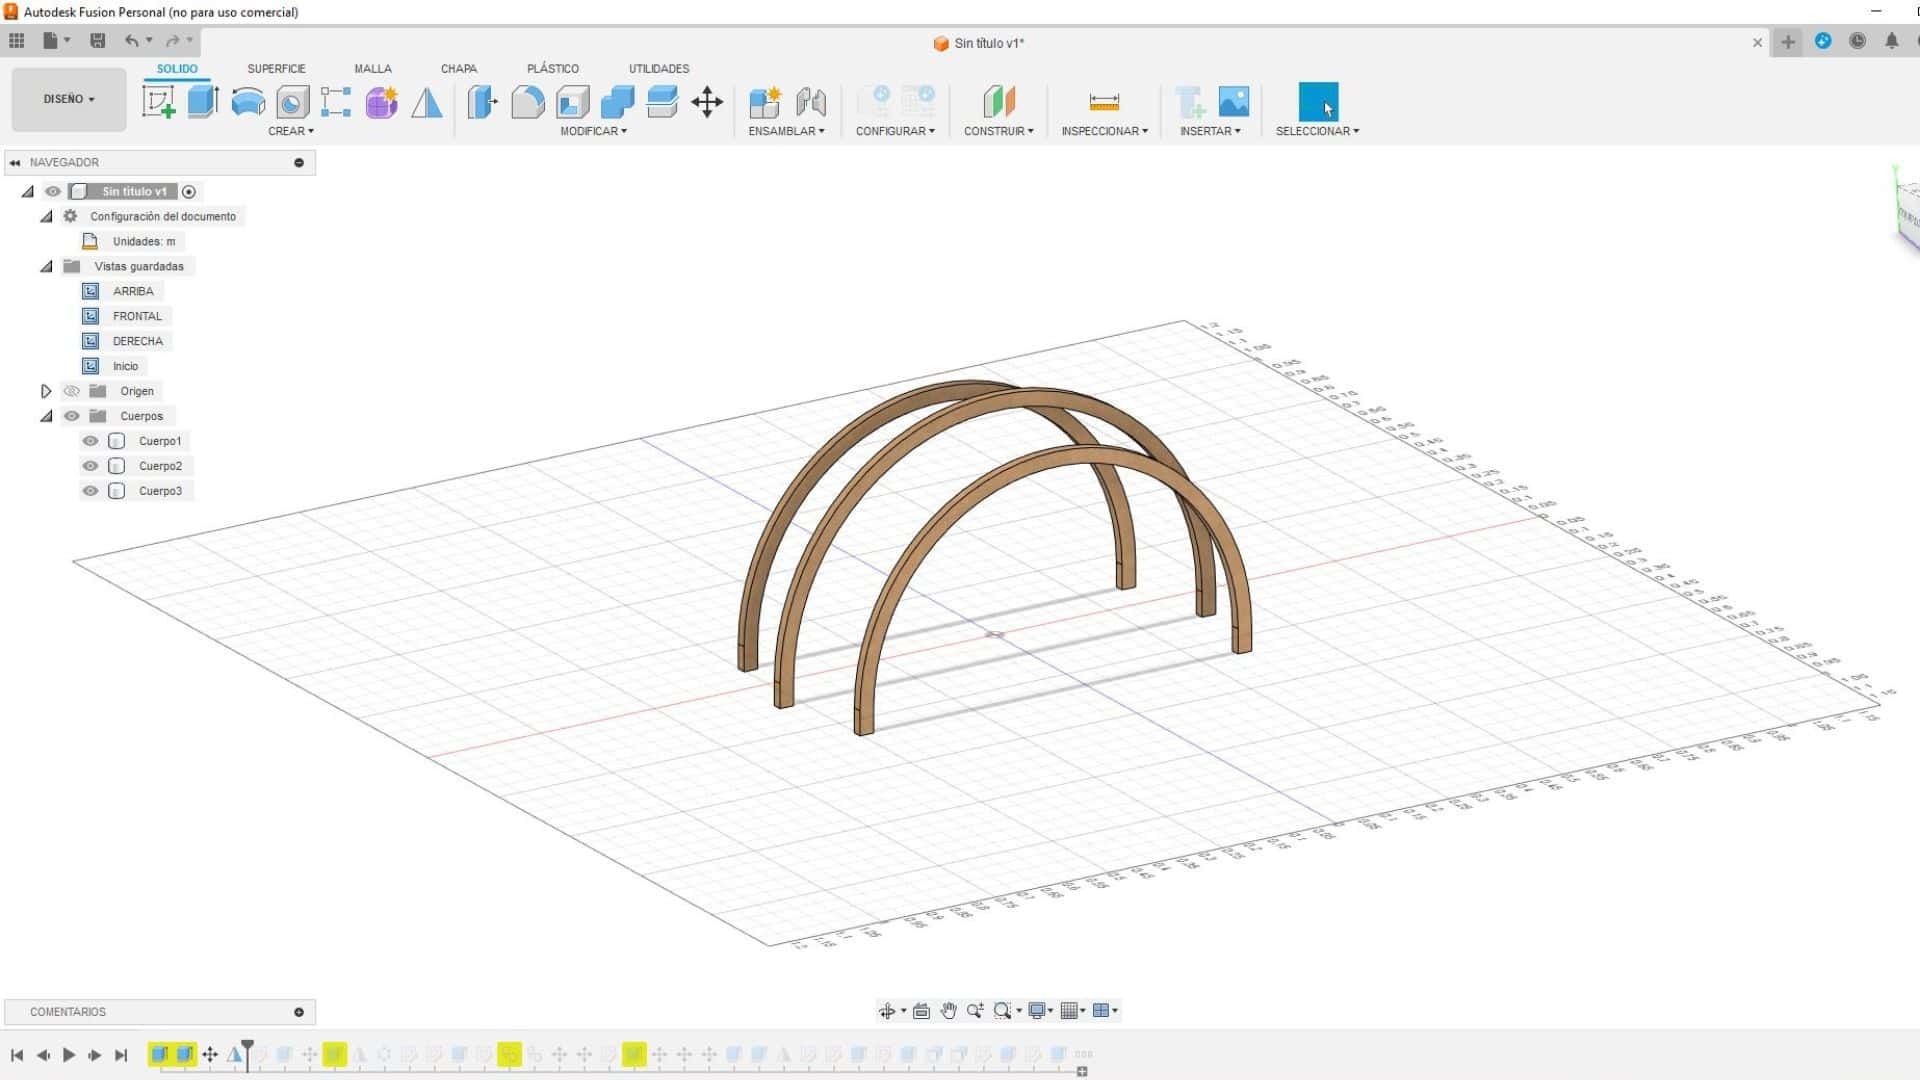
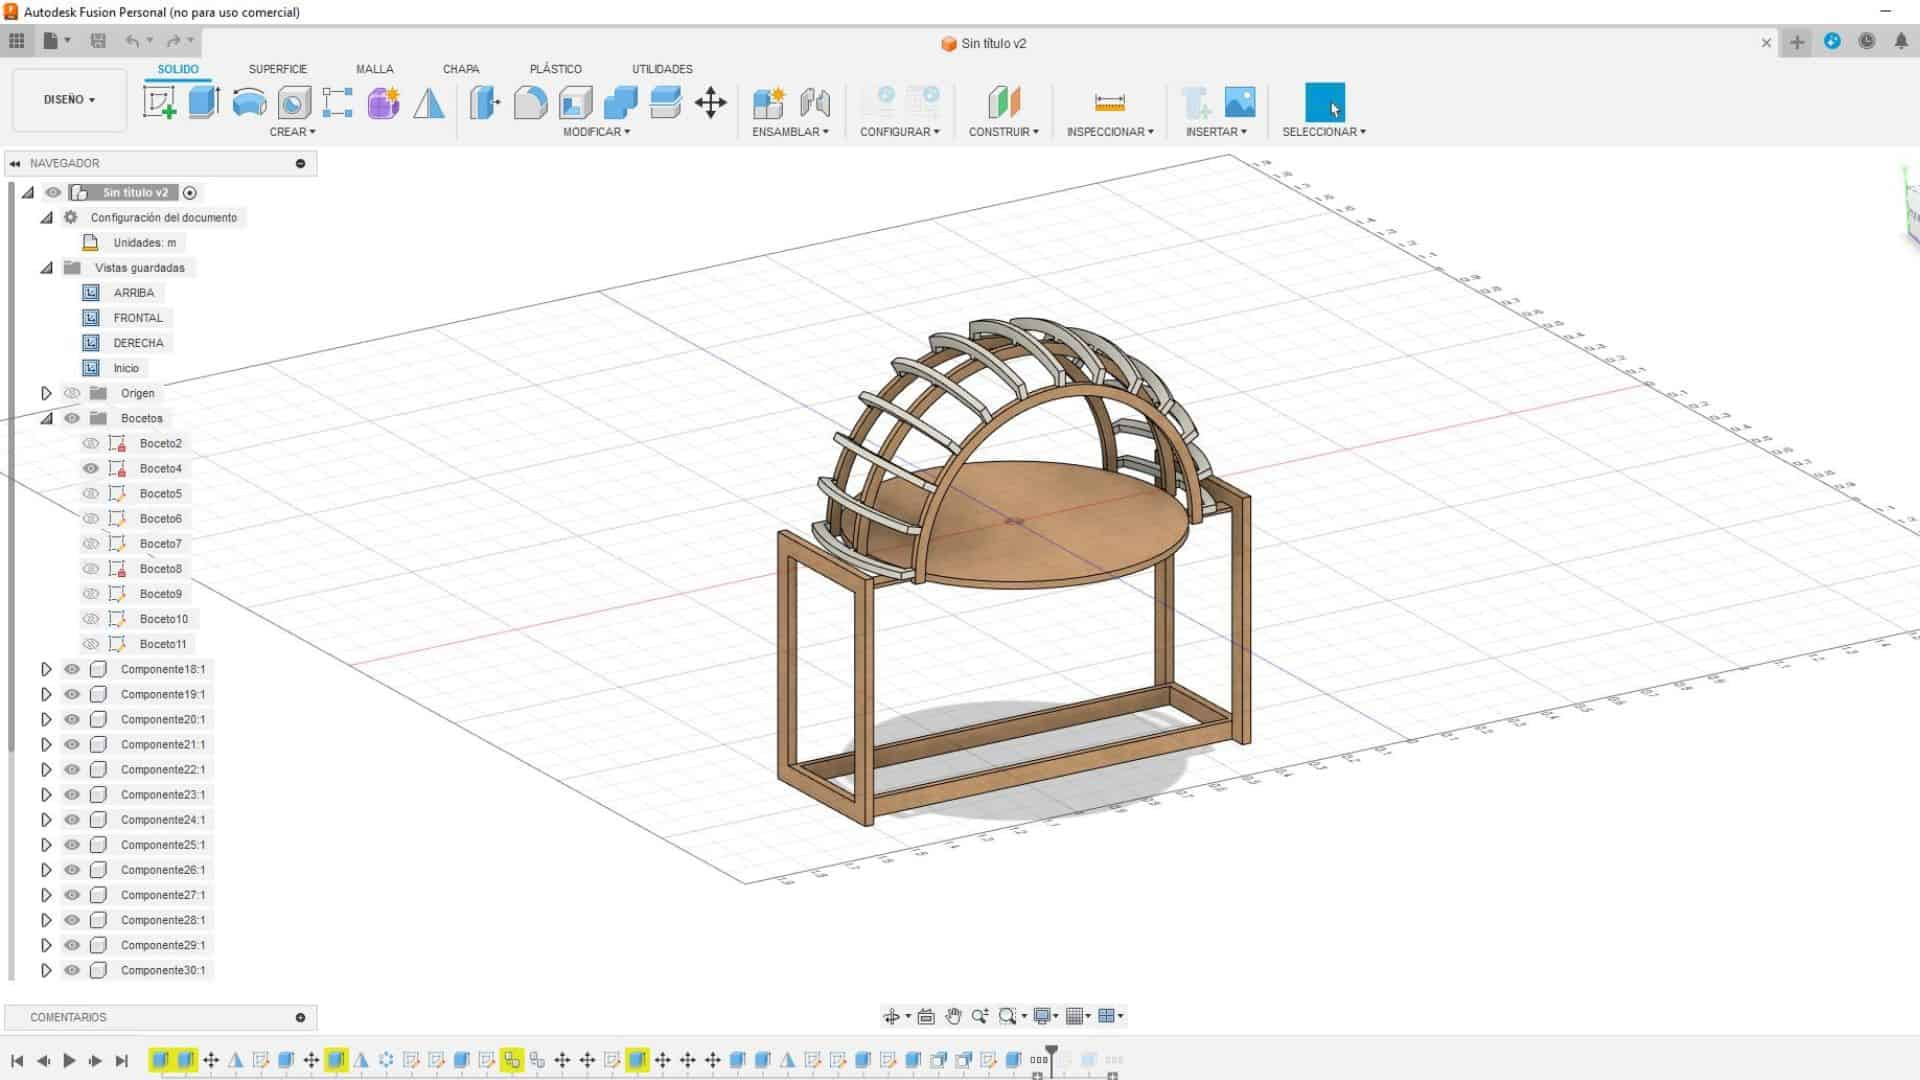
For the modeling, we began with the arcs of the solstices and equinoxes that the sun travels and the base was modeled where the models will go for the respective analysis.
Then they began to model a structure to tie the arches and which fulfill the function of being the hours of the day.
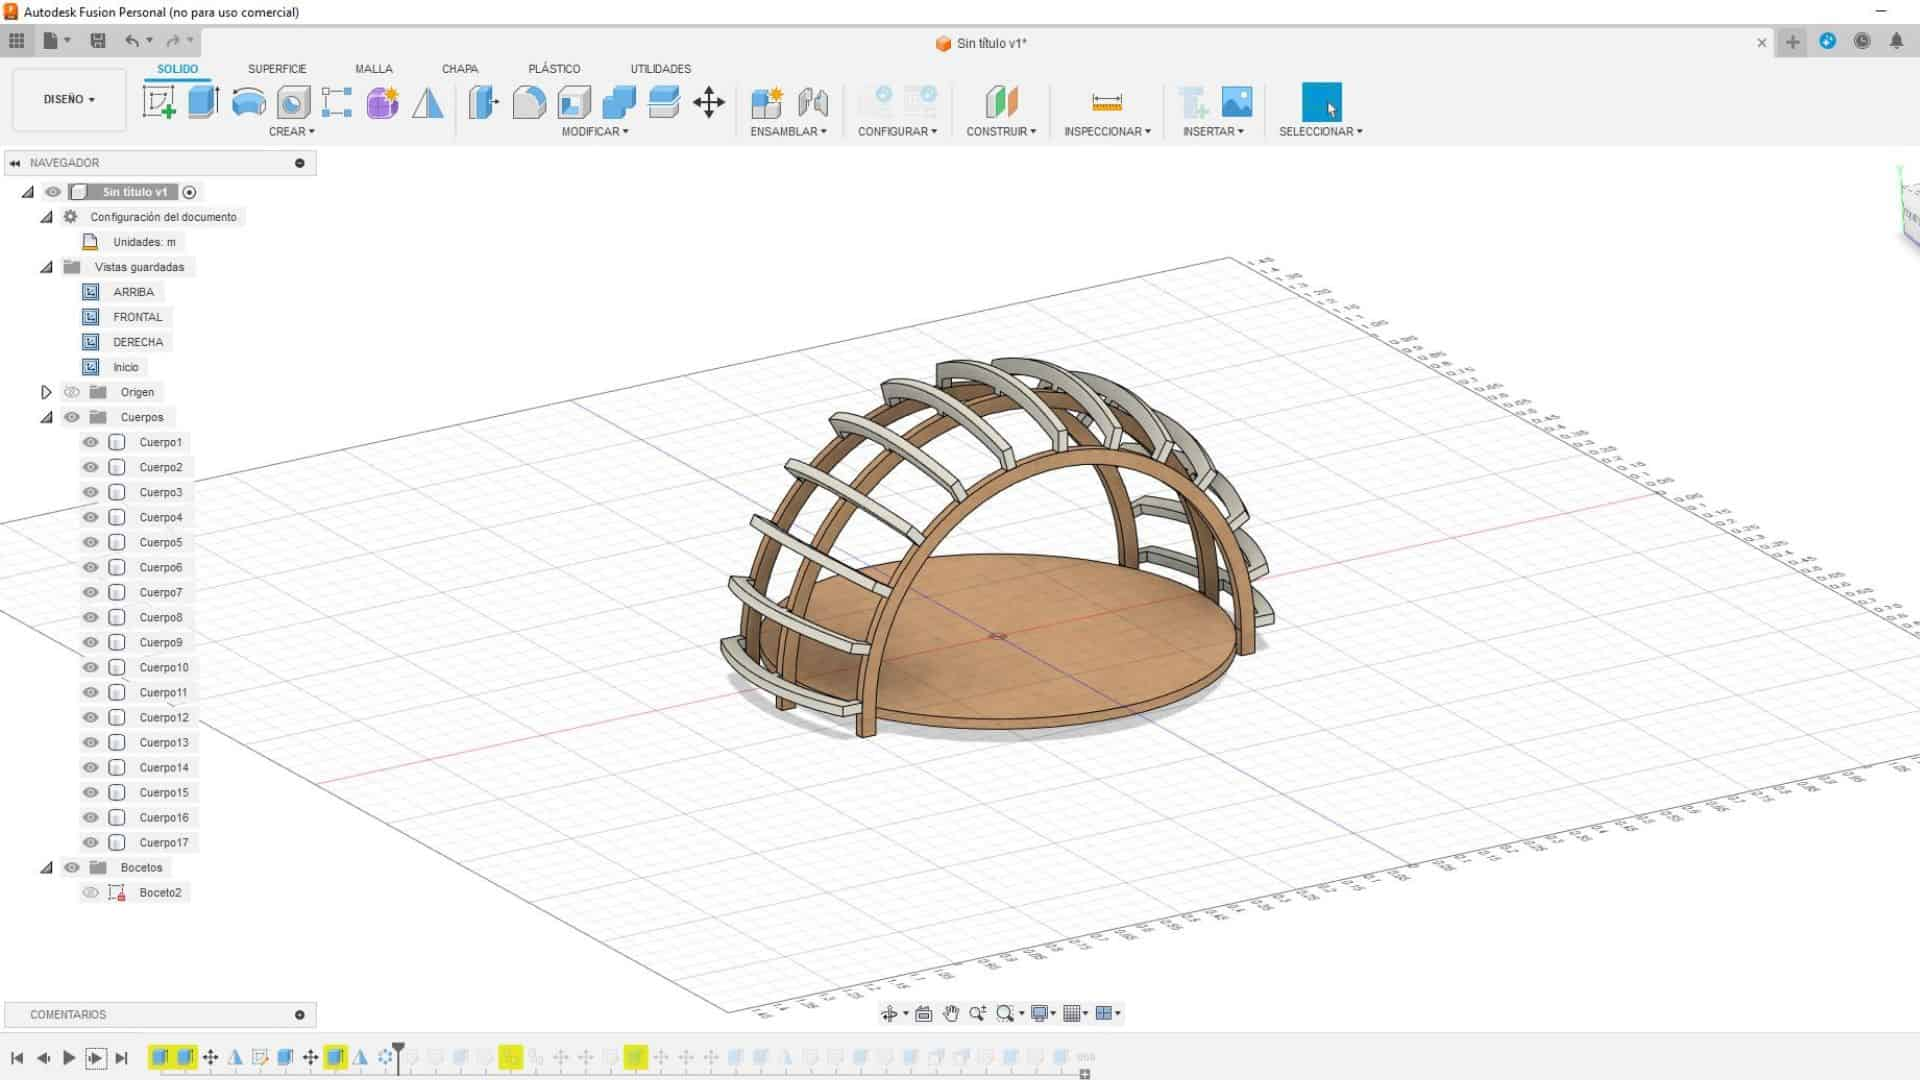
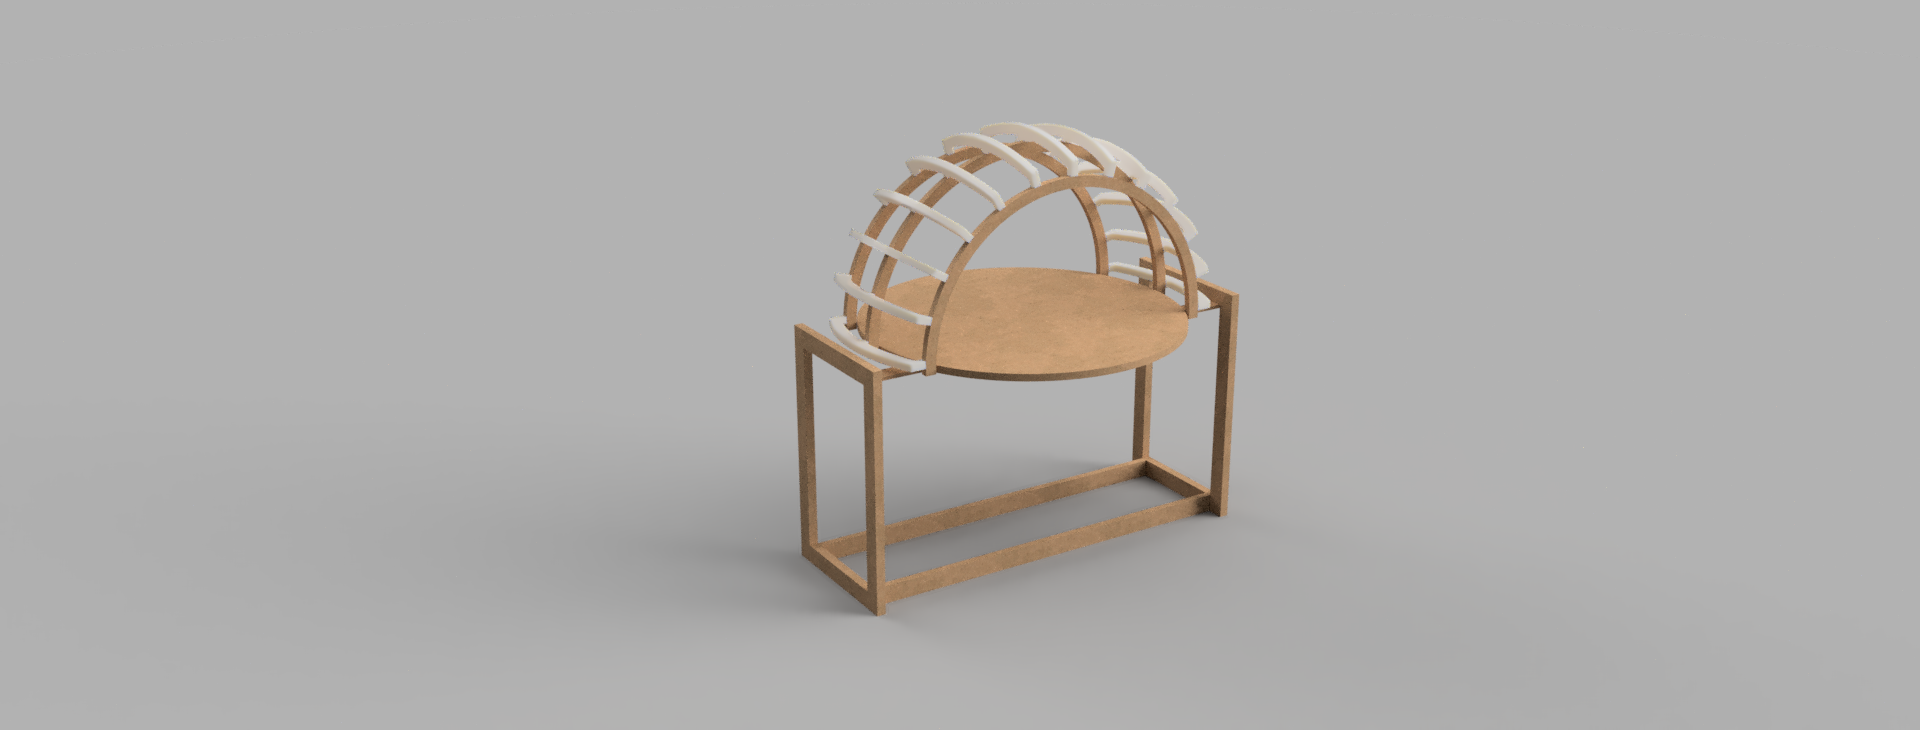
Finally, the base of the artifact began to be modeled, for now there is a simple proposal in the base, I hope to improve it and achieve a more interesting base. Here you can see my file:LIGHTDOM 3D
BLENDER
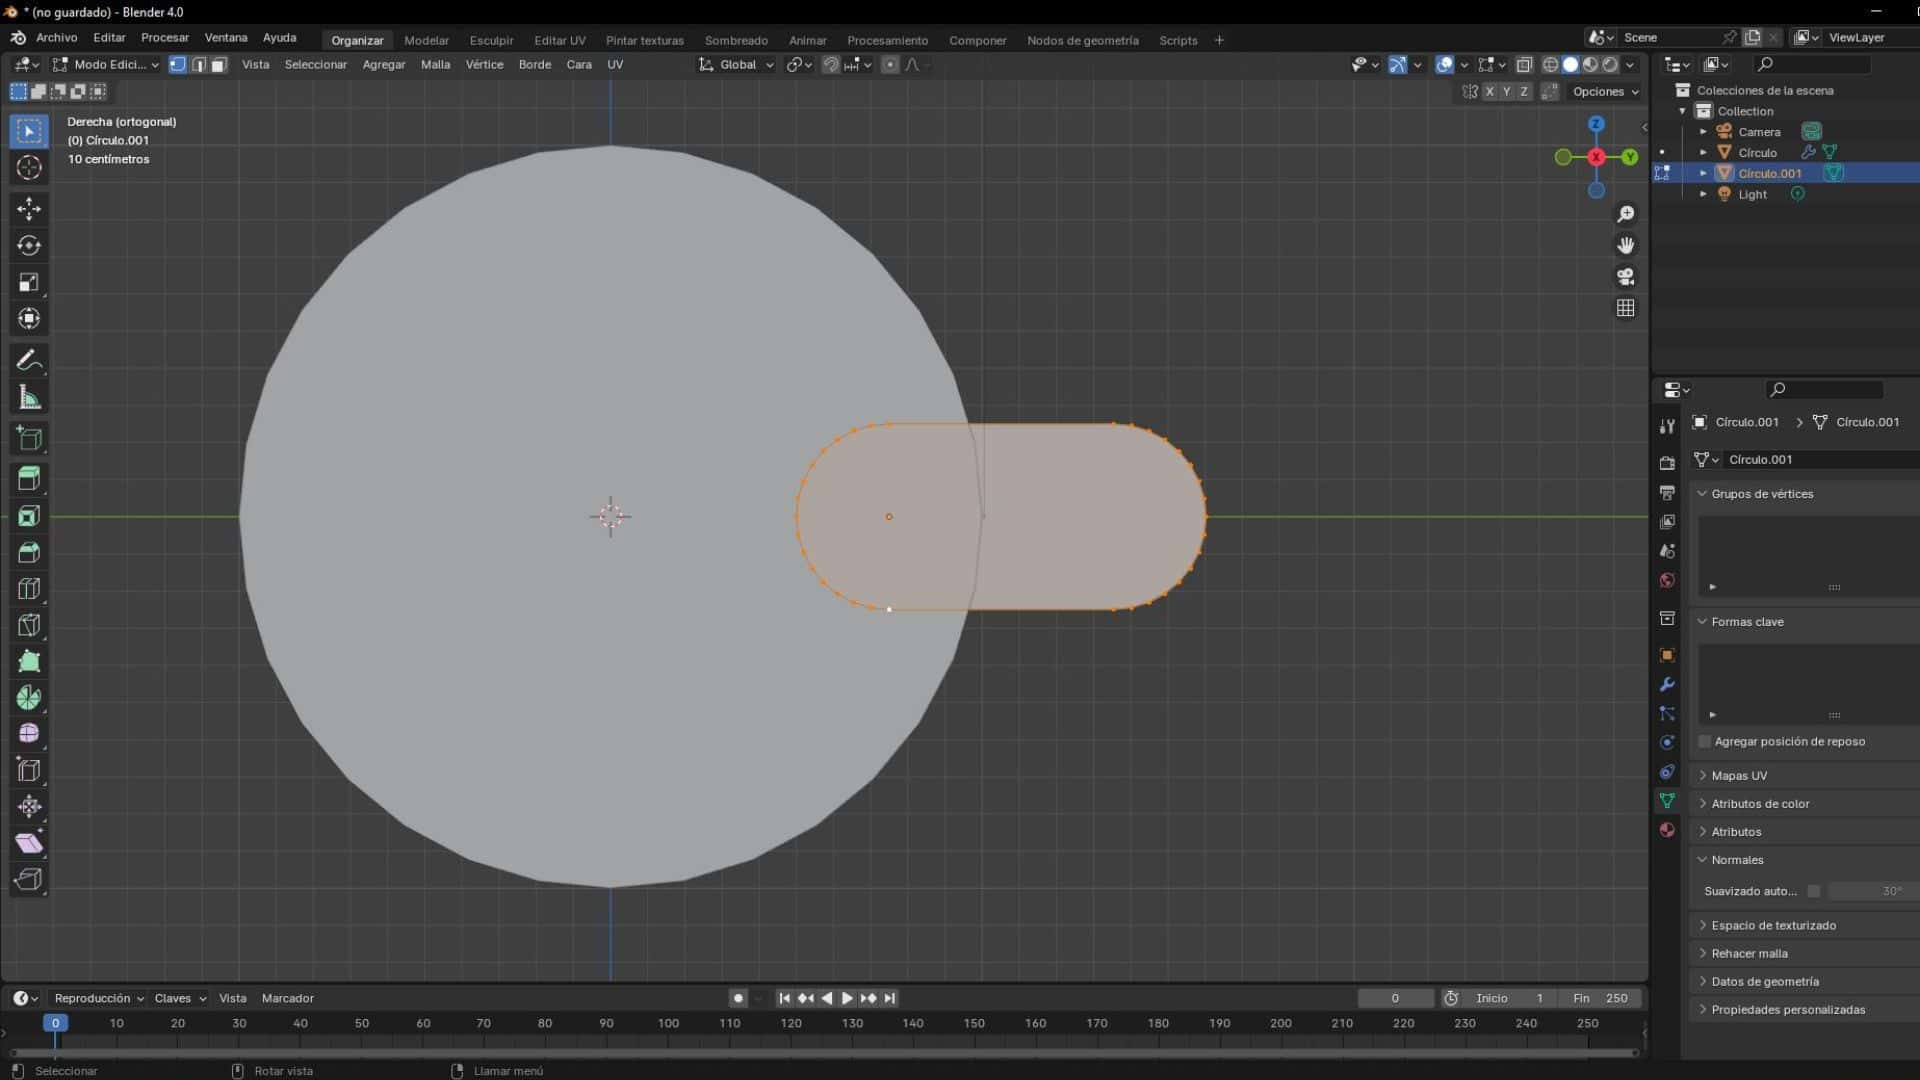
It is the first time that I will start with the Blender program, I had heard about it, but I had never used it, now it seems important to me to know so that I can show my ideas for the final project and give more production to the modeling. To start in the program, I used some videos to make simple shapes and understand the basic tools of the program. On this occasion I made an engine piston. Here we can see the 2D modeling.
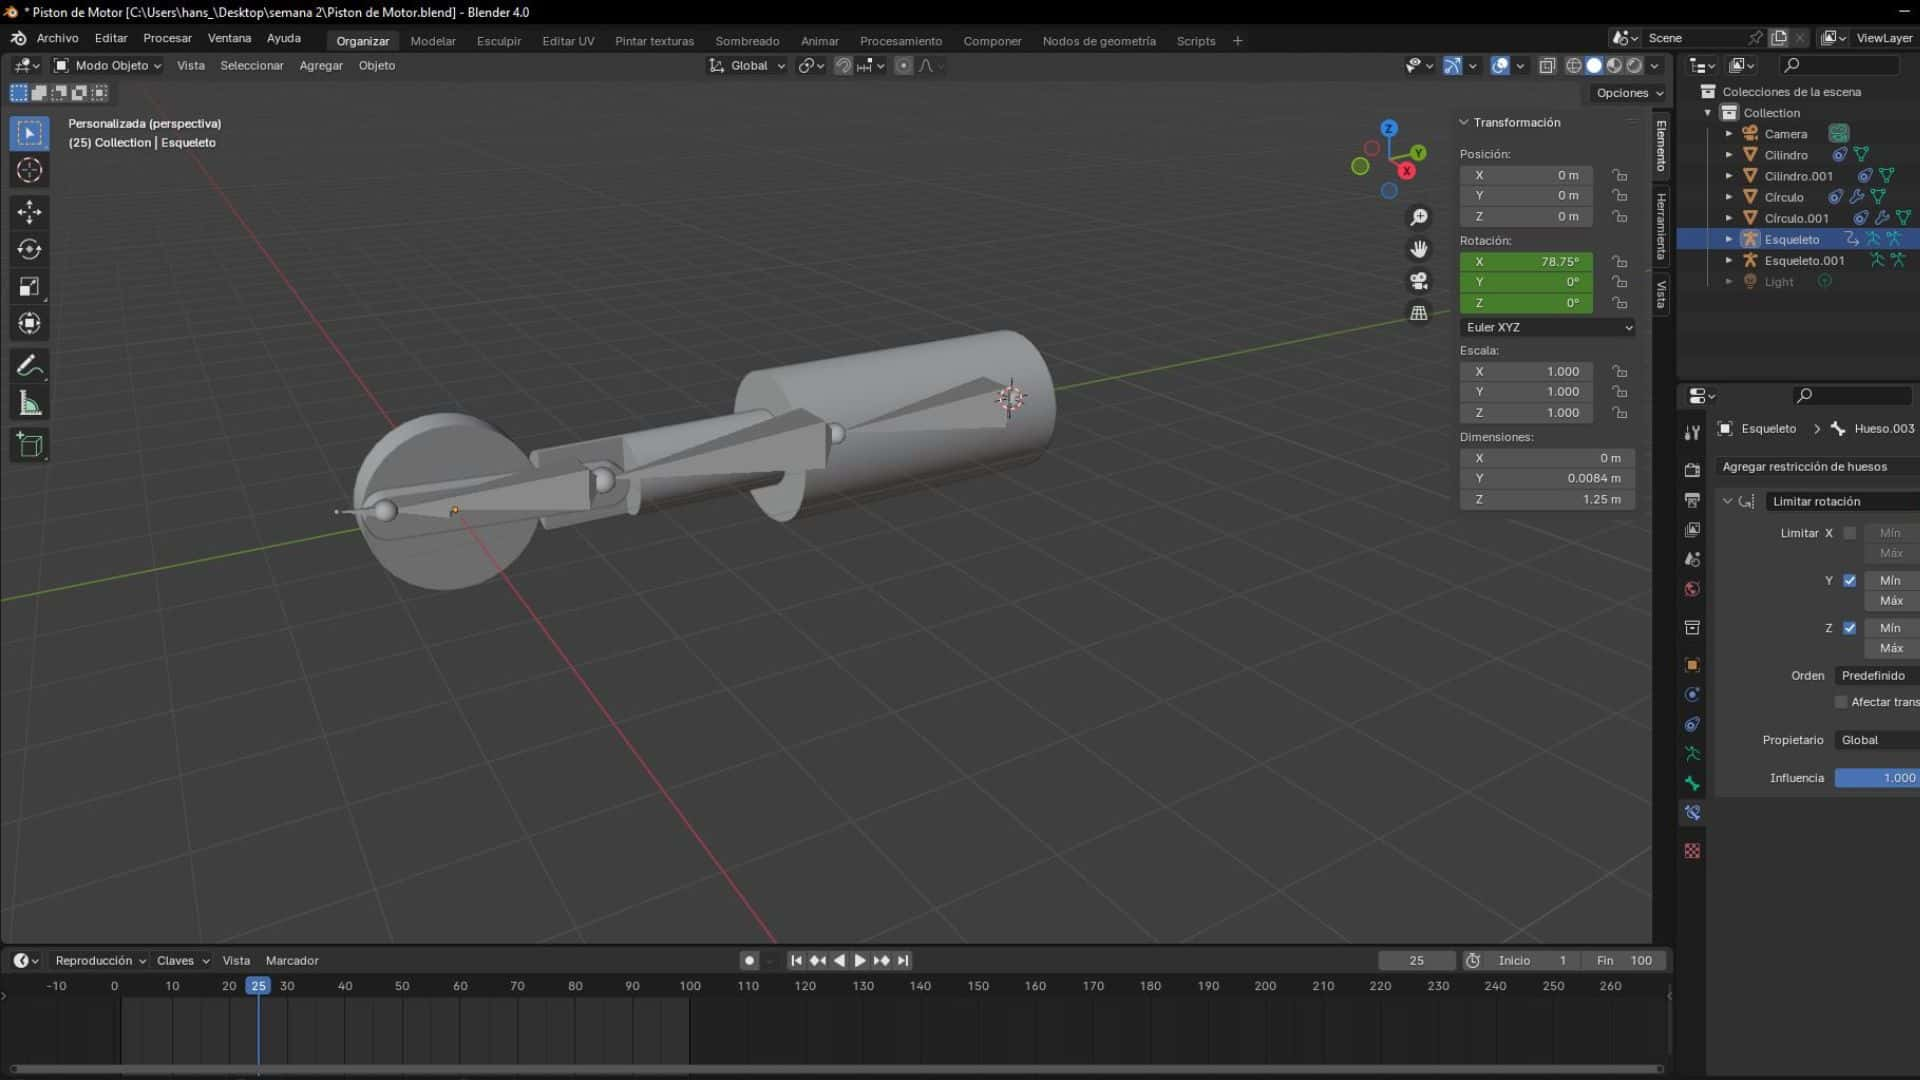
The next step is to convert and model all the parts that a piston has and convert the 2D figures to 3D and then start making animations. In the following image you can see what the 3D modeling of the entire engine piston would look like
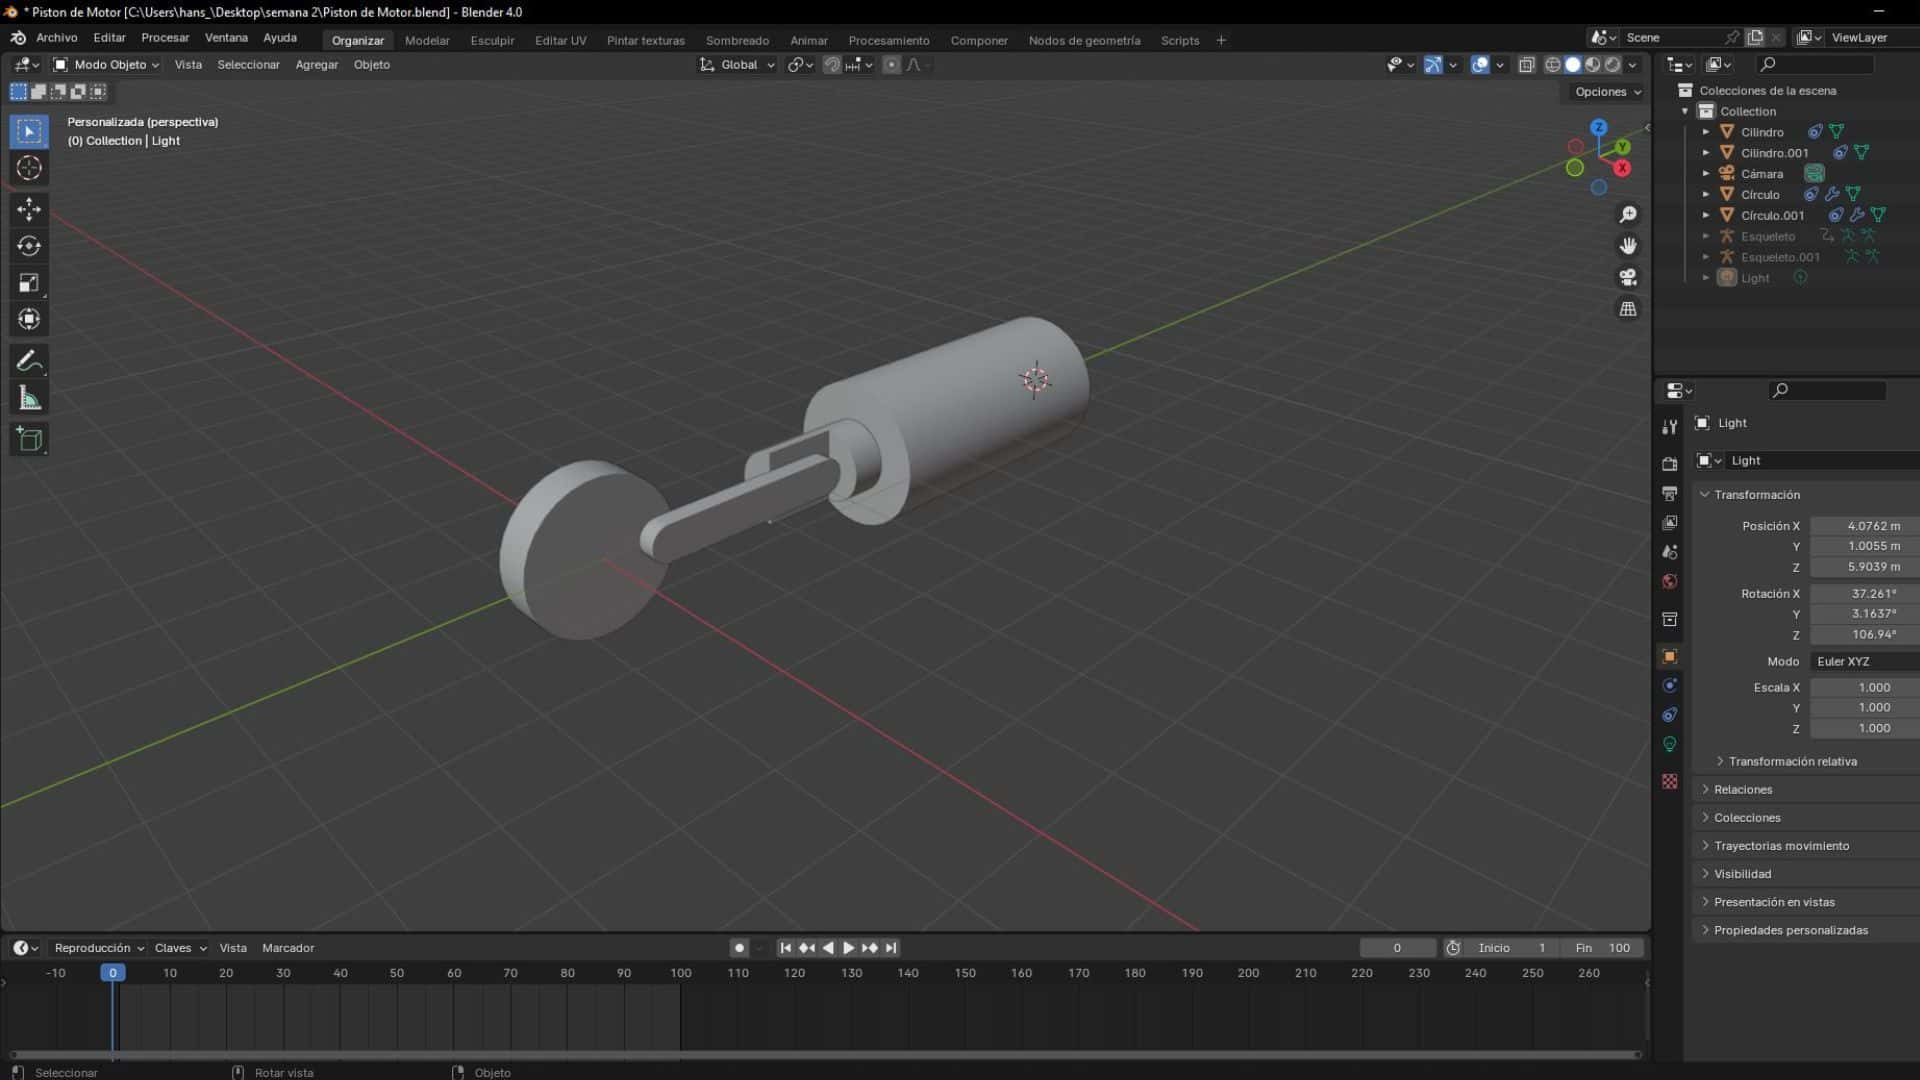
Finally, I tested skeletons and bones, key tools for animating objects in BLENDER, and I was able to make a small animation of the movement of the engine pistons. I liked the program, now I will try to make some animation of my project.
EXPORT FROM 2D to 3D
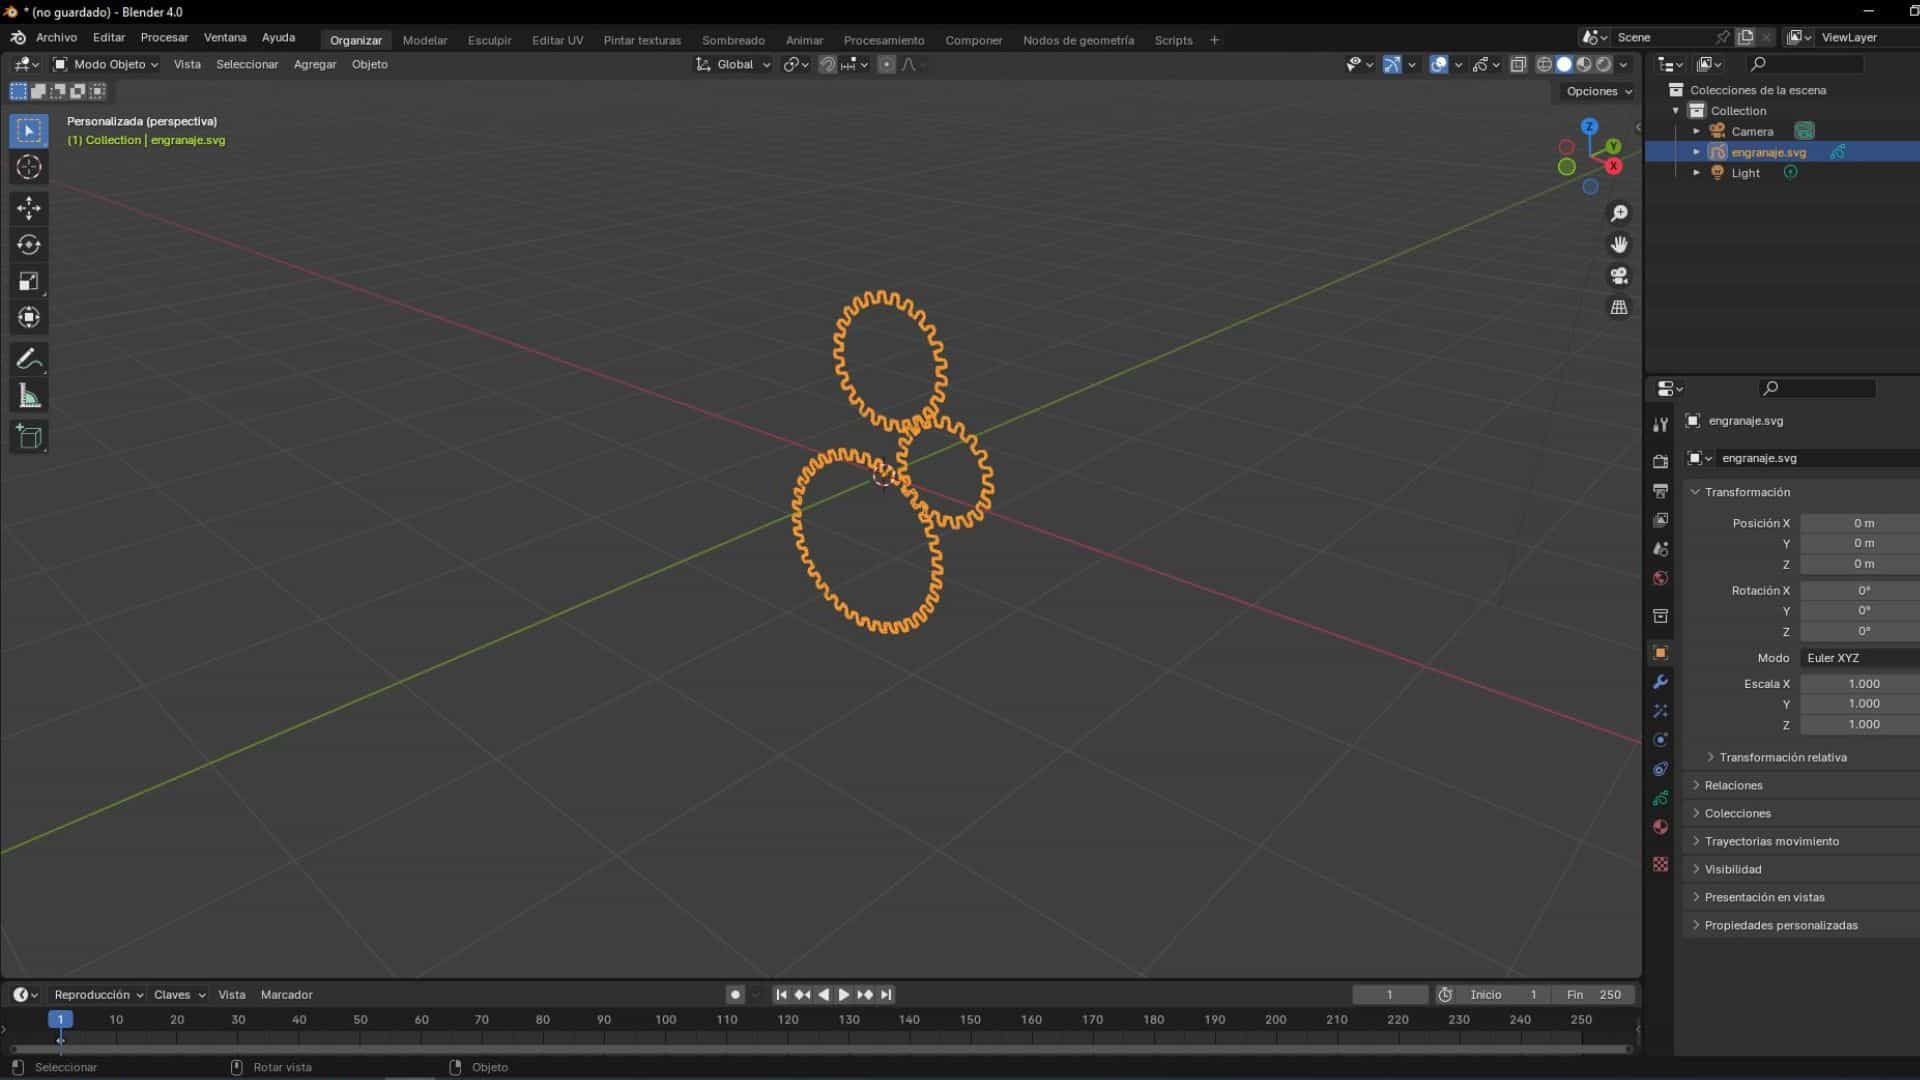
Researching BLENDER and INKSCAPE, programs that I used in the exercises shown, I wanted to know if it was possible to export 2D designs to 3D. So I found out that from INSKCAPE I can make vector designs and move on to 3D programs like BLENDER for modeling and rendering. For this reason, I made gears in vector to later convert them to 3D and animate them since I consider that they are elements that I am going to use in my final project.
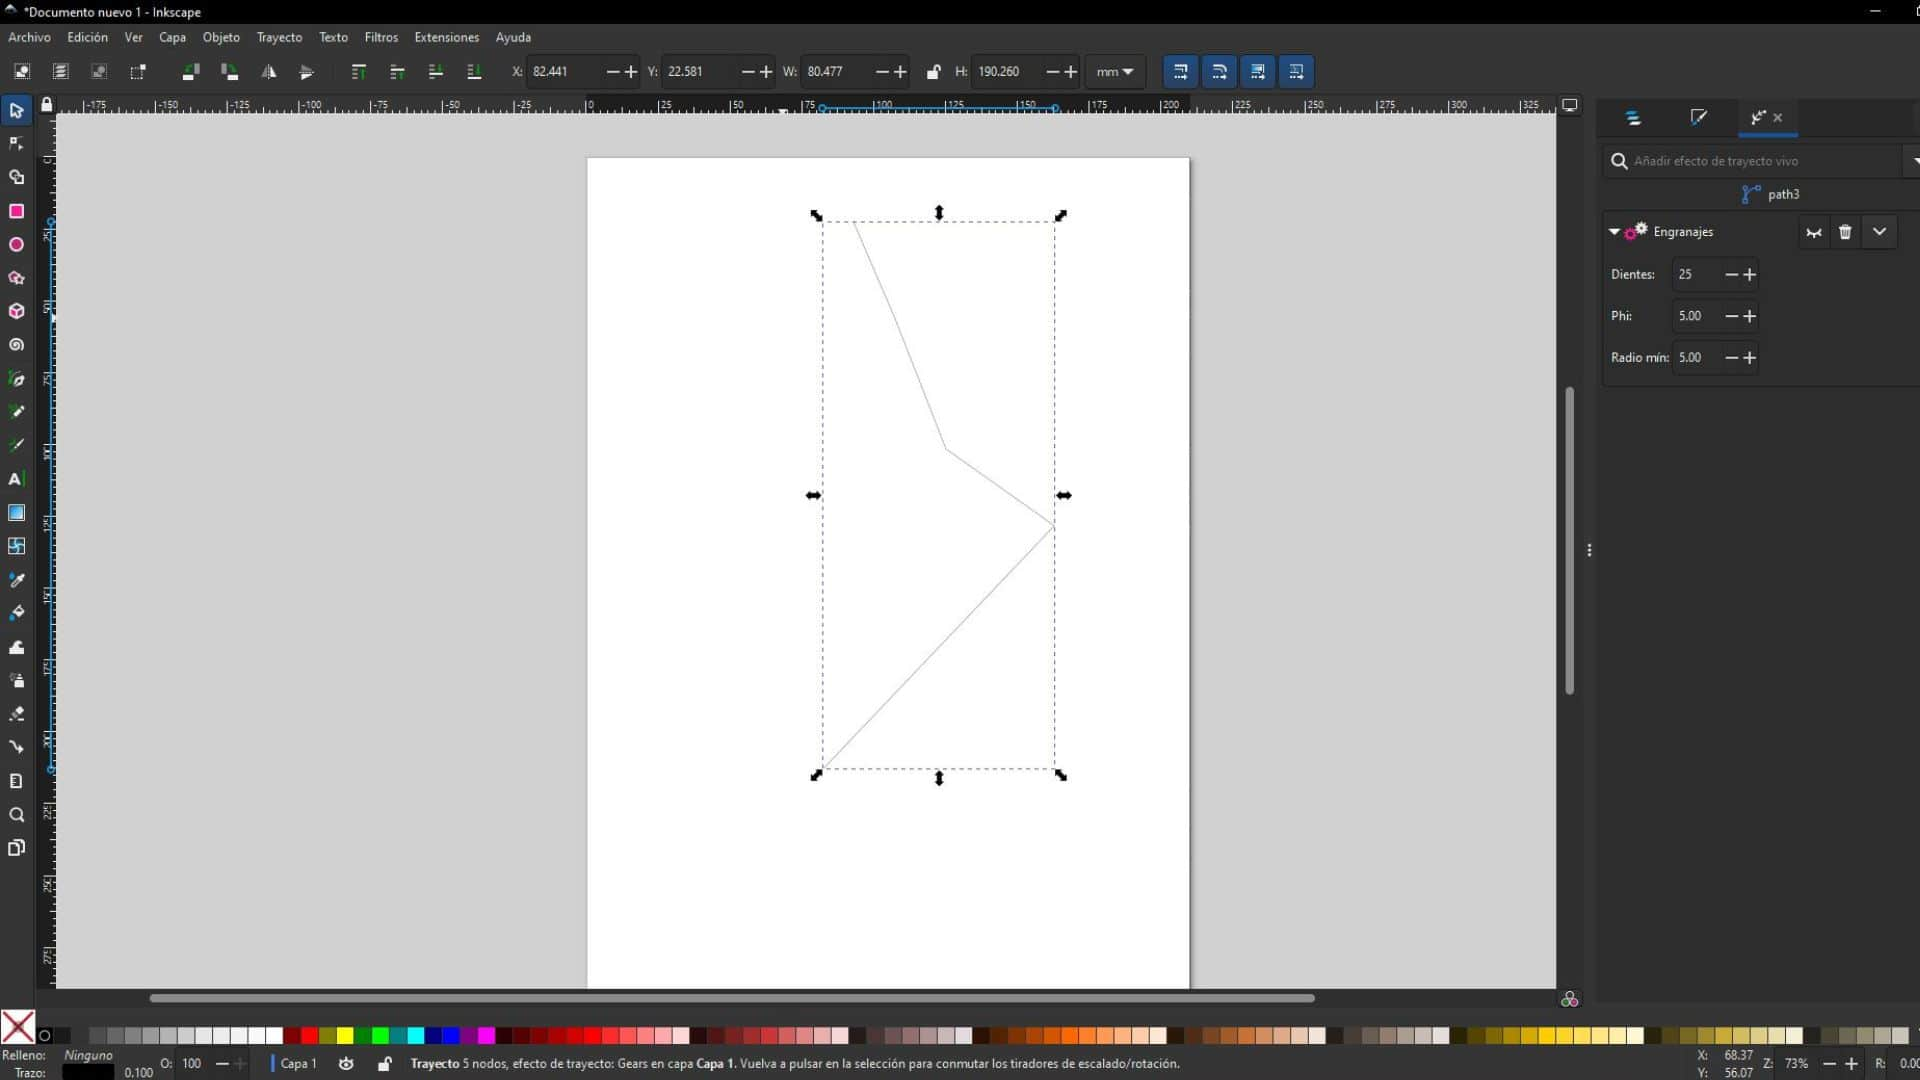
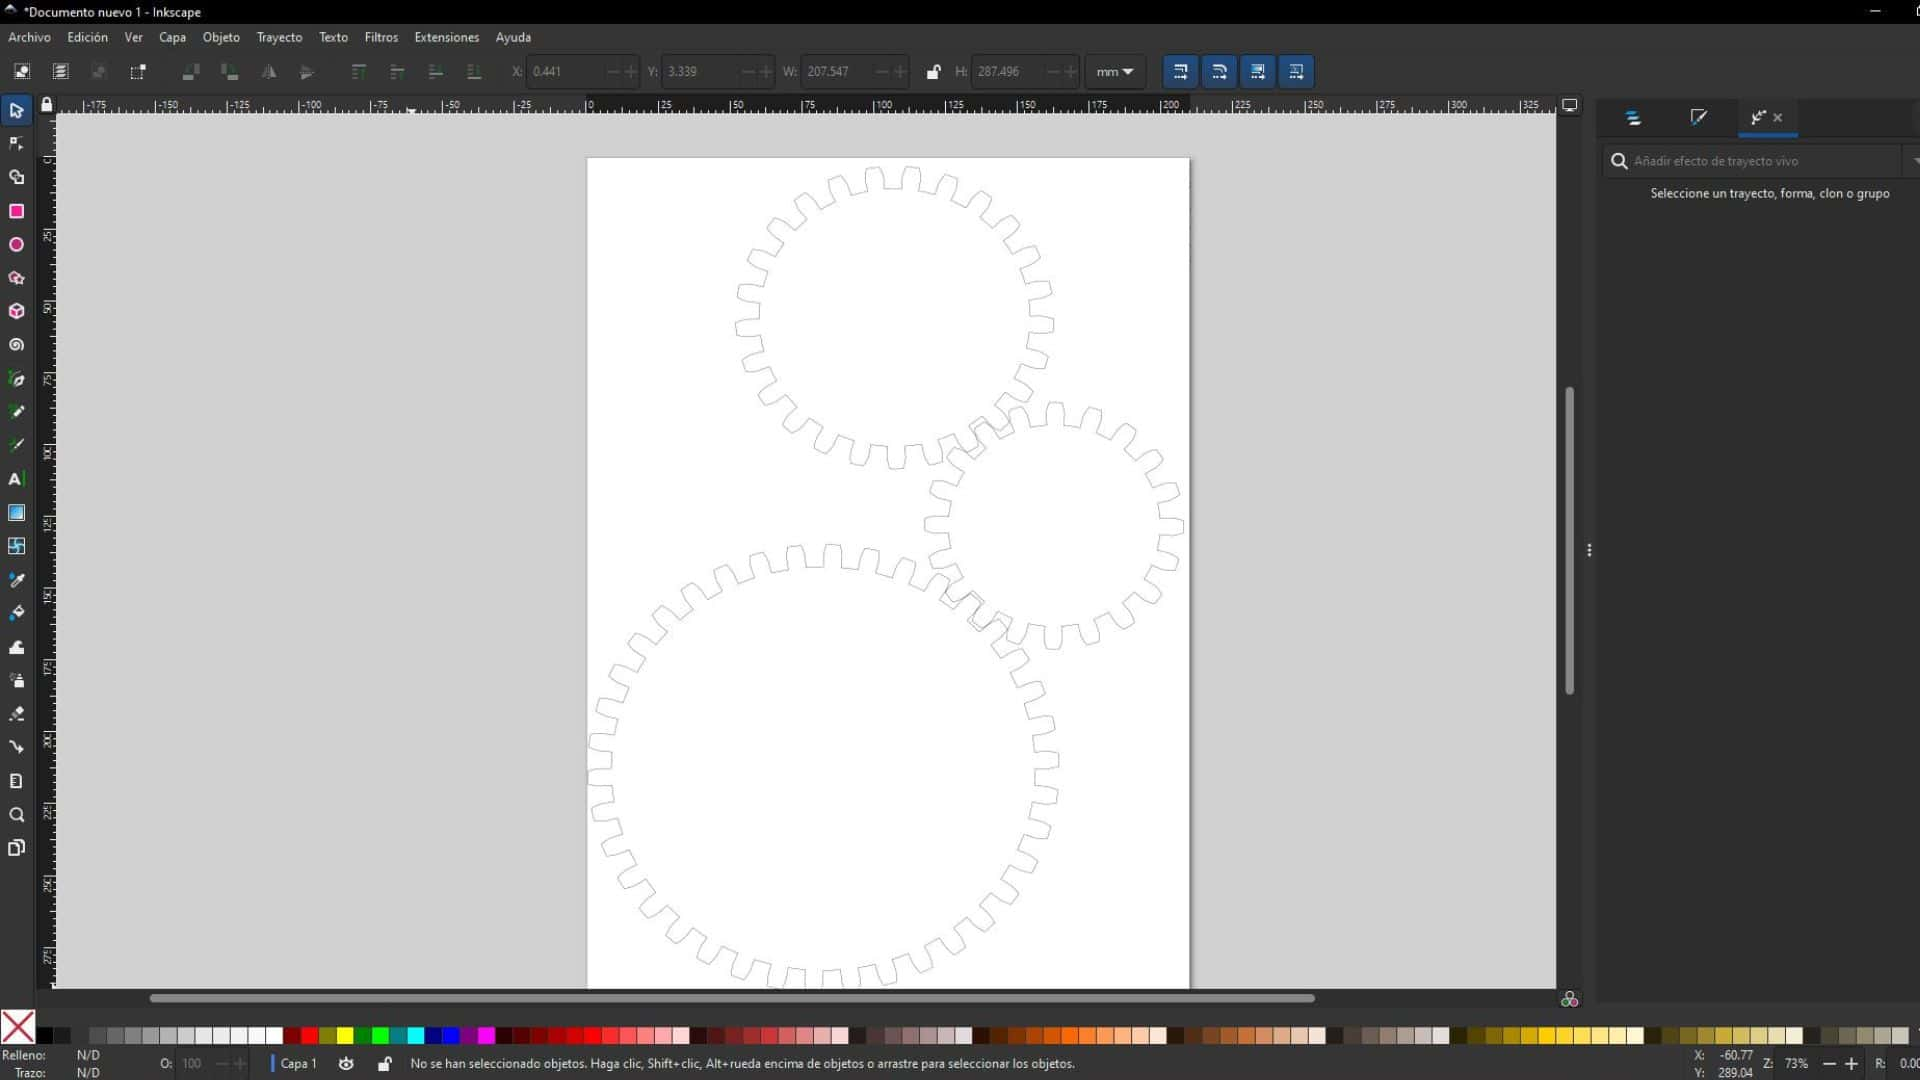
First of all, I drew a polygonal in the INKSCAPE program (first image) and then using a tool in the program called “GEARS” gears are generated according to your needs and properties that you want to develop for your projects (second image).
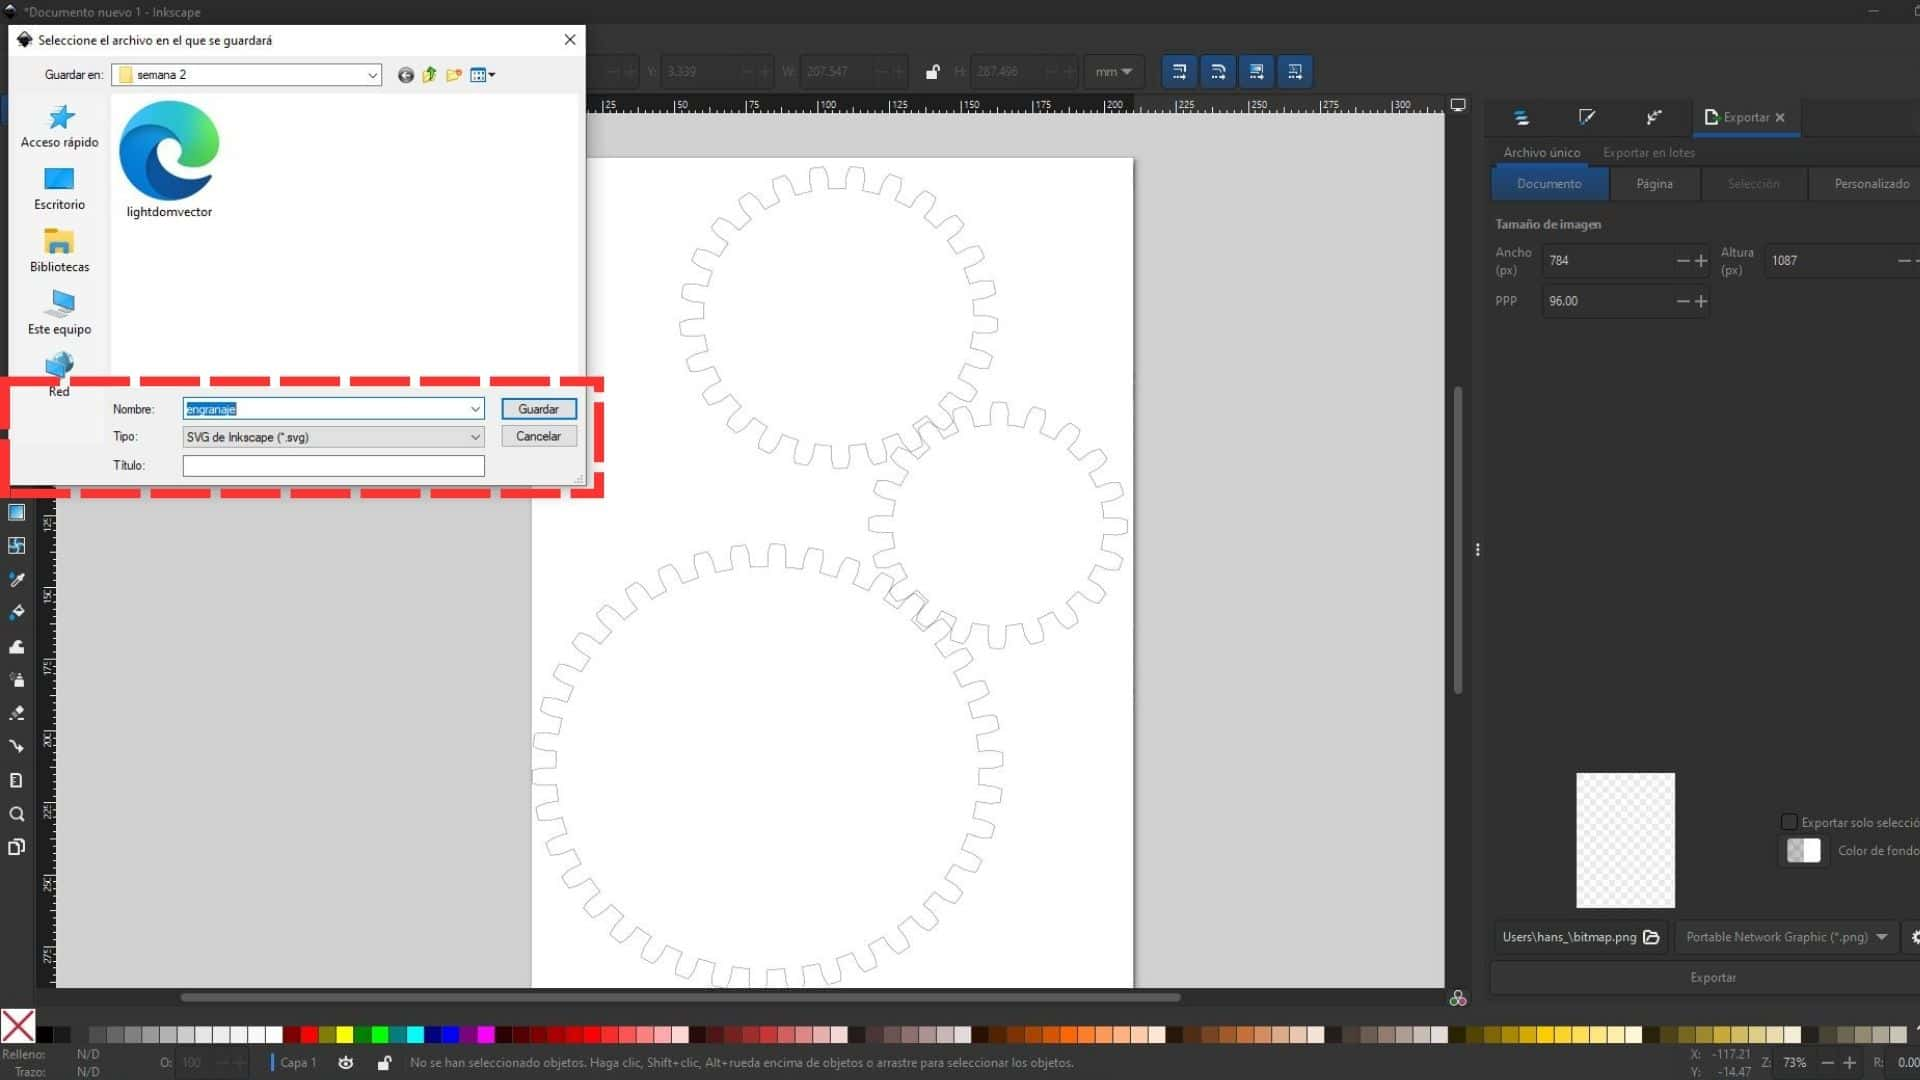
Then to be exported to a 3D program, which in this case will be BLENDER, you only have to save it as a file with an SVG extension, which will allow us to work in BLENDER with any type of vector design and be able to model it according to what we need.
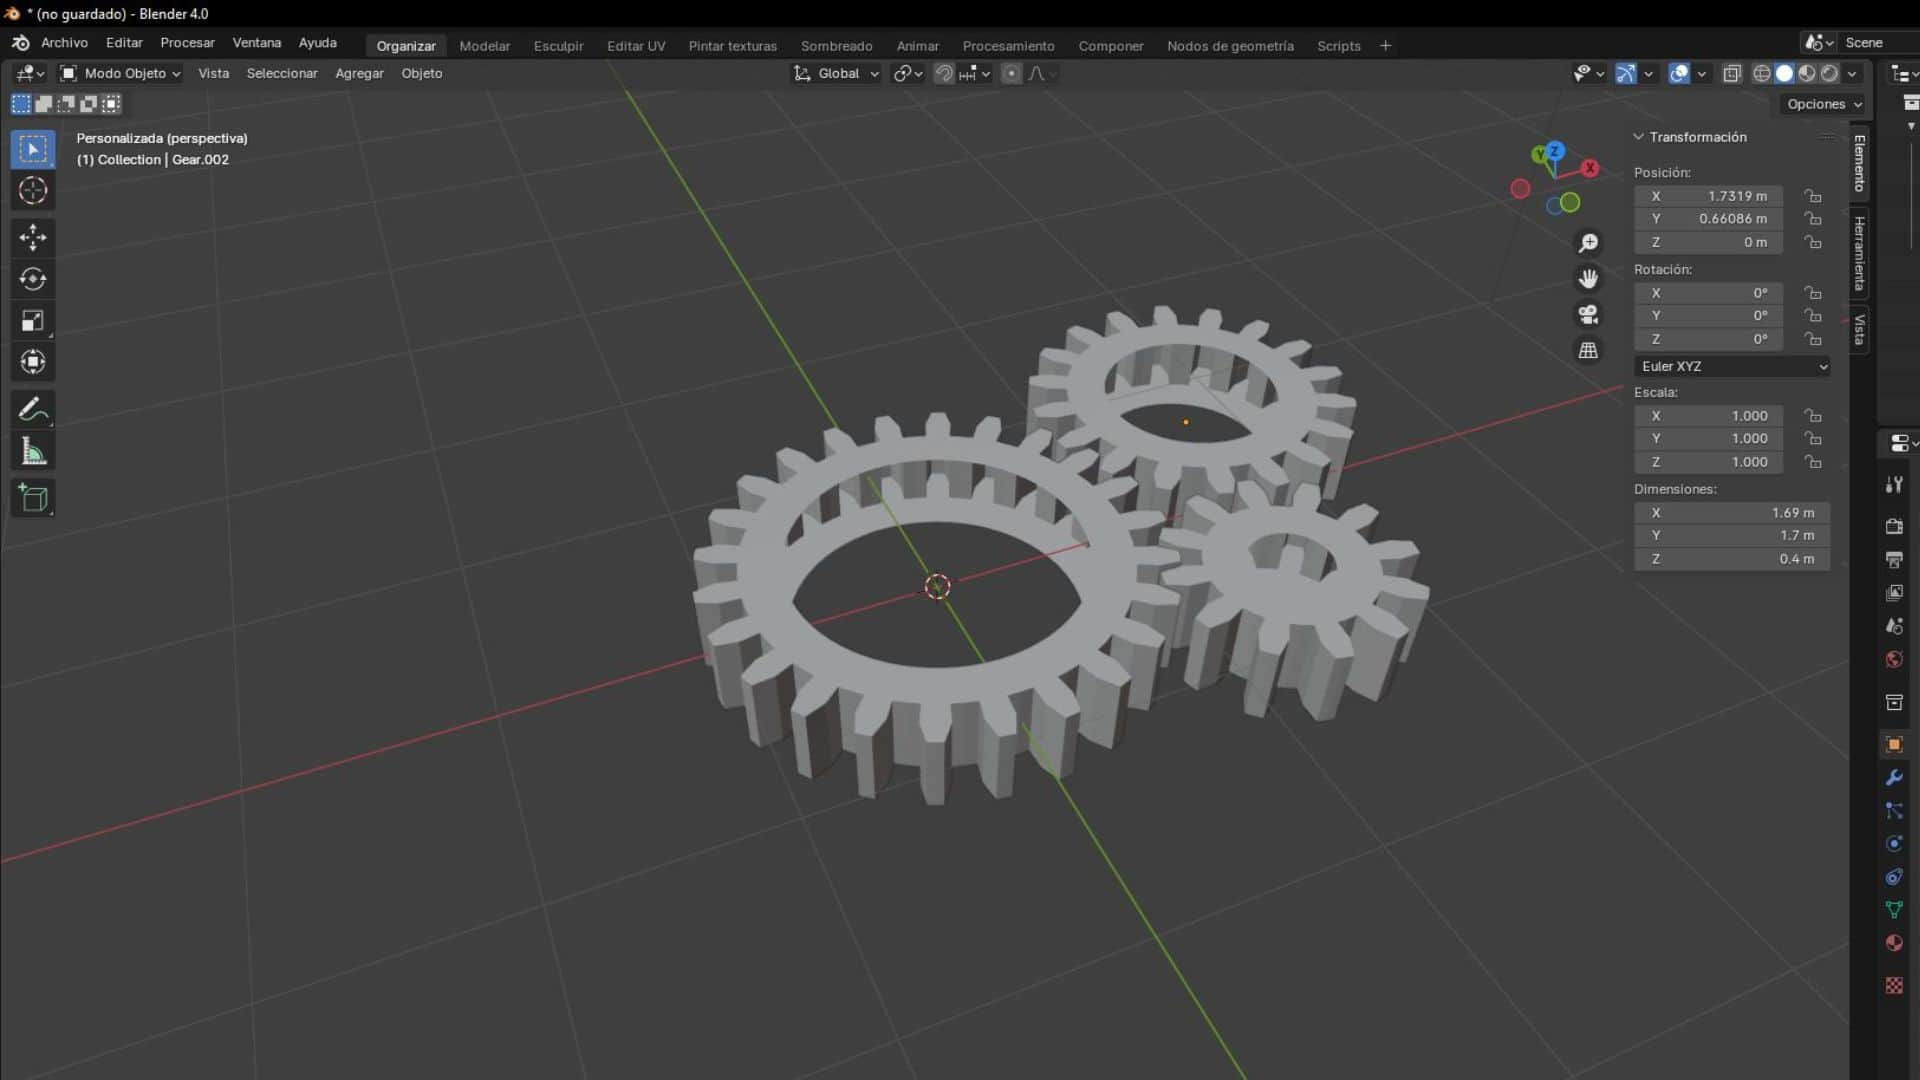
We open BLENDER and import the SVG file that we saved in our folder. We will get the vector image in it and this is where we can start to model all our drawings in 2D and convert them to 3D.
We can create any volume according to what we want and we can start modeling the 3D, along with its rendering and animation.
CONCLUSIONS 3D PROGRAMS
After using the programs mentioned above, from my perspective I recommend people use FUSION. I feel that it is a program that has the concept of INKSCAPE in features, being a simple program to design your models. I suffered a lot with FREECAD because I see that it is a very technical program and that for a person who does not use much of a 3D program, it will be very complicated. Finally, I feel that Blender has both characteristics because it is an accessible program and that it can achieve many things, but I prefer to use it to achieve the final part of the 3D, which would be finishing and rendering. Obviously without forgetting that its animation is very characteristic, it is a little complicated to understand but it does provide a more professional appearance. As a recommendation, if you are new to these programs, start with FUSIÓN, it helps you a lot and it is very easy to understand or draw from 2D or sketches that you have on the same page.
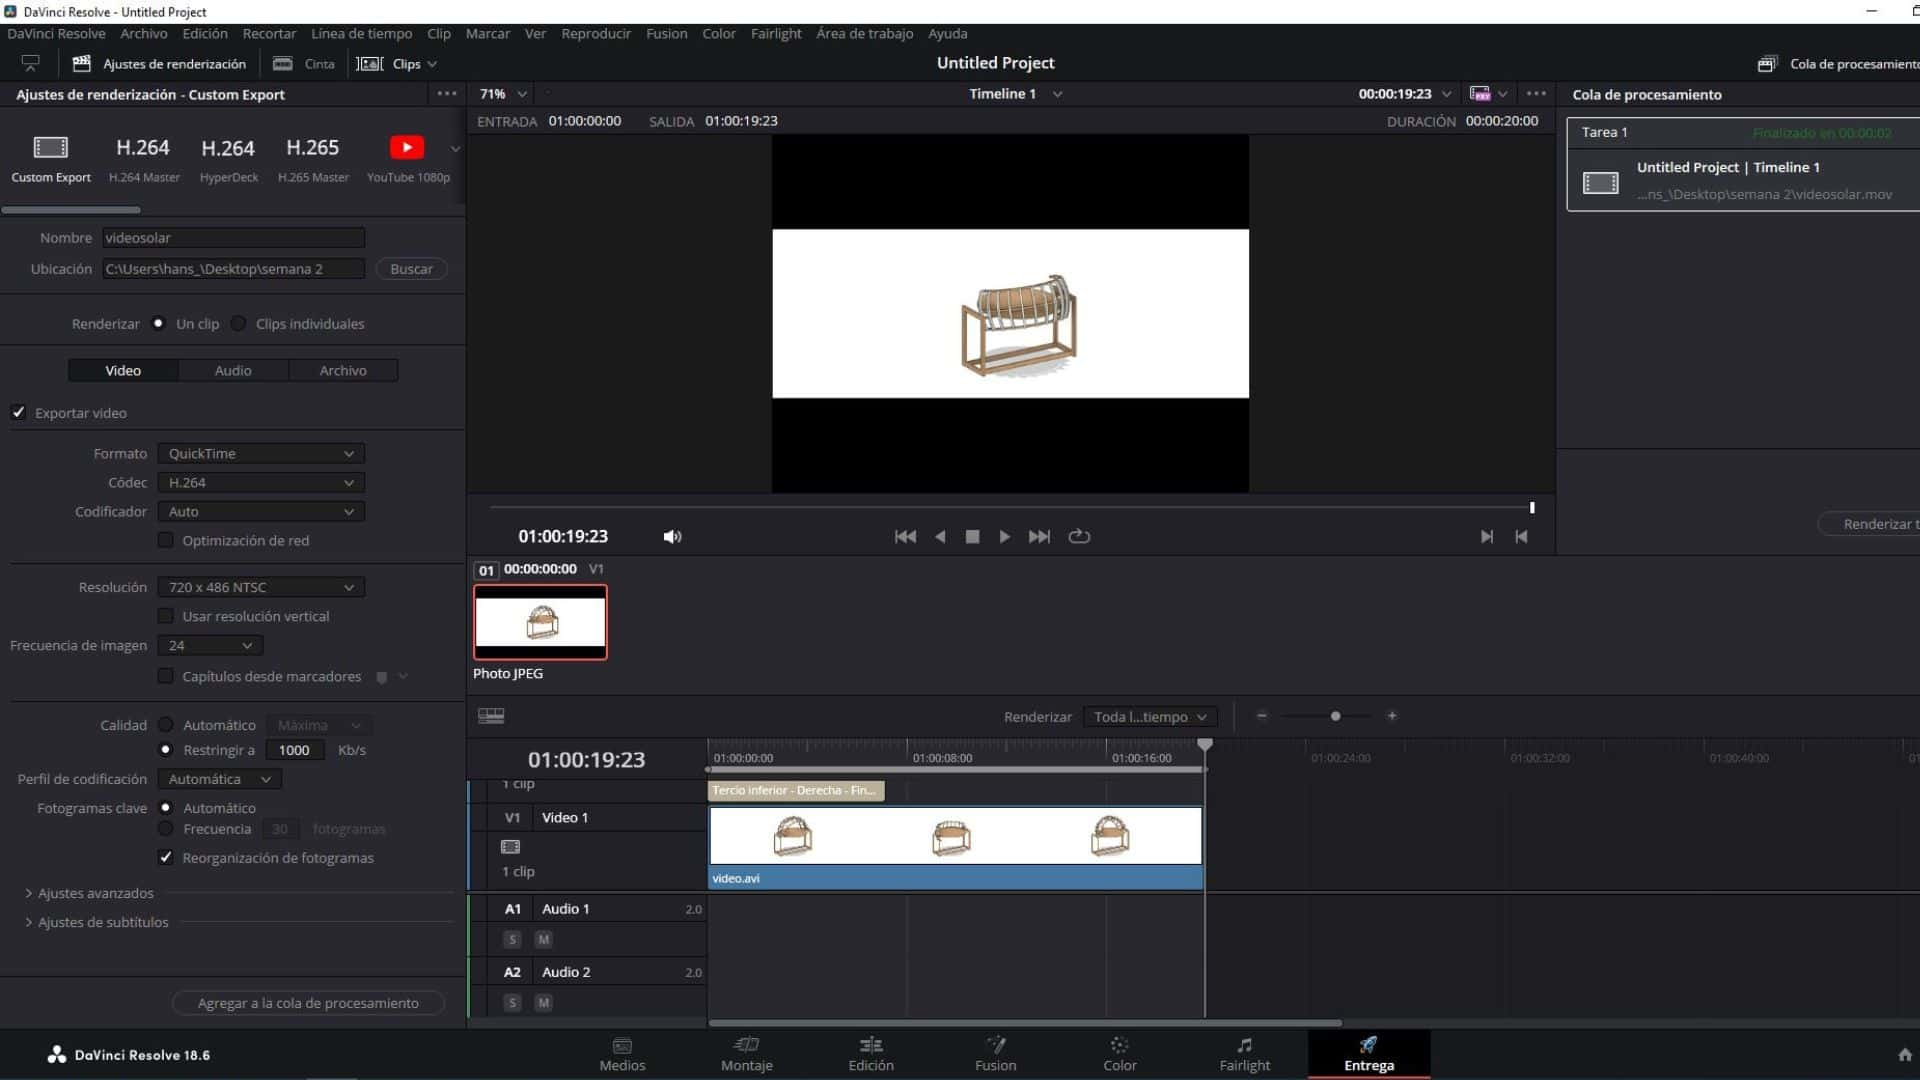
SOUND AND VIDEO
For video and sound editing, I practiced with DAVINCI RESOLVE, which seems to me to be a very simple program in interface and with a quick design. In addition, it has many tools to reduce the weight of the videos but maintaining the quality. So I decided to use this program for editing my future weekly tasks.
FILES
Here I attach my downloadable files for this week's assignment. I wanted to practice for my final project and give myself a more concise idea of what it could look like, how it would work, and to explain to my instructors with something more concise and constructible: