This week's assignment was:
PROJECT MANAGEMENT
I have to mention that this part was one of the most complicated during the week because it was very difficult for me to understand GIT in all aspects. But with patience and a lot of research we can achieve the goal. Here I show you a little how I performed the procedure, with the help of my instructors and my friend Maryori 😊
GIT AND VISUAL STUDIO CODE
STEP 1: We have to download and install the GIT program that we can find in our search engine. On the other hand, we can also take the opportunity to download the VISUAL STUDIO CODE that will help us clone our repository to our local "local, I mean our computer".
STEP 2: While the programs are downloading we can enter our GITLAB account to know 3 important things:
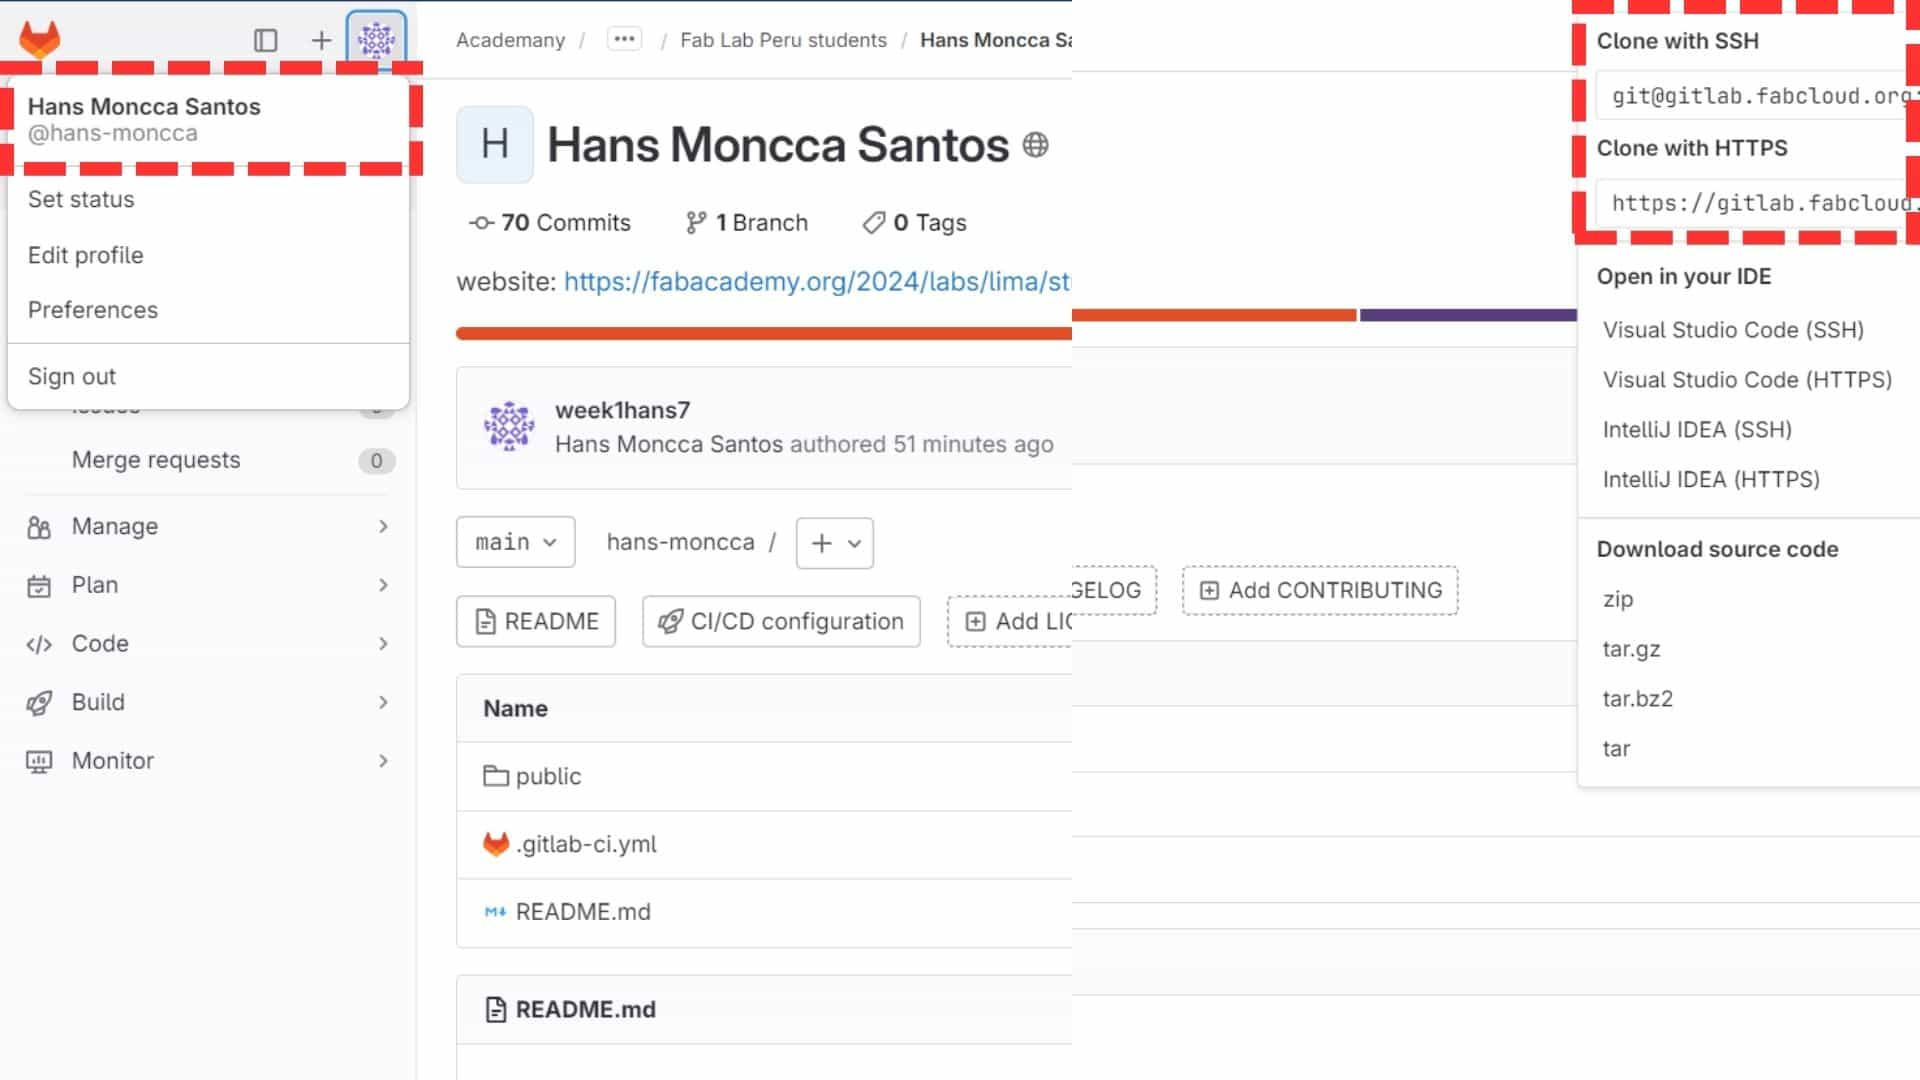
REPOSITORY CLONING FOR OUR LOCAL
I want to mention that I could not document all the errors I had in this part since due to ignorance and desperation I could not upload everything. But I am sure that I will renew this part to be able to help my colleagues.
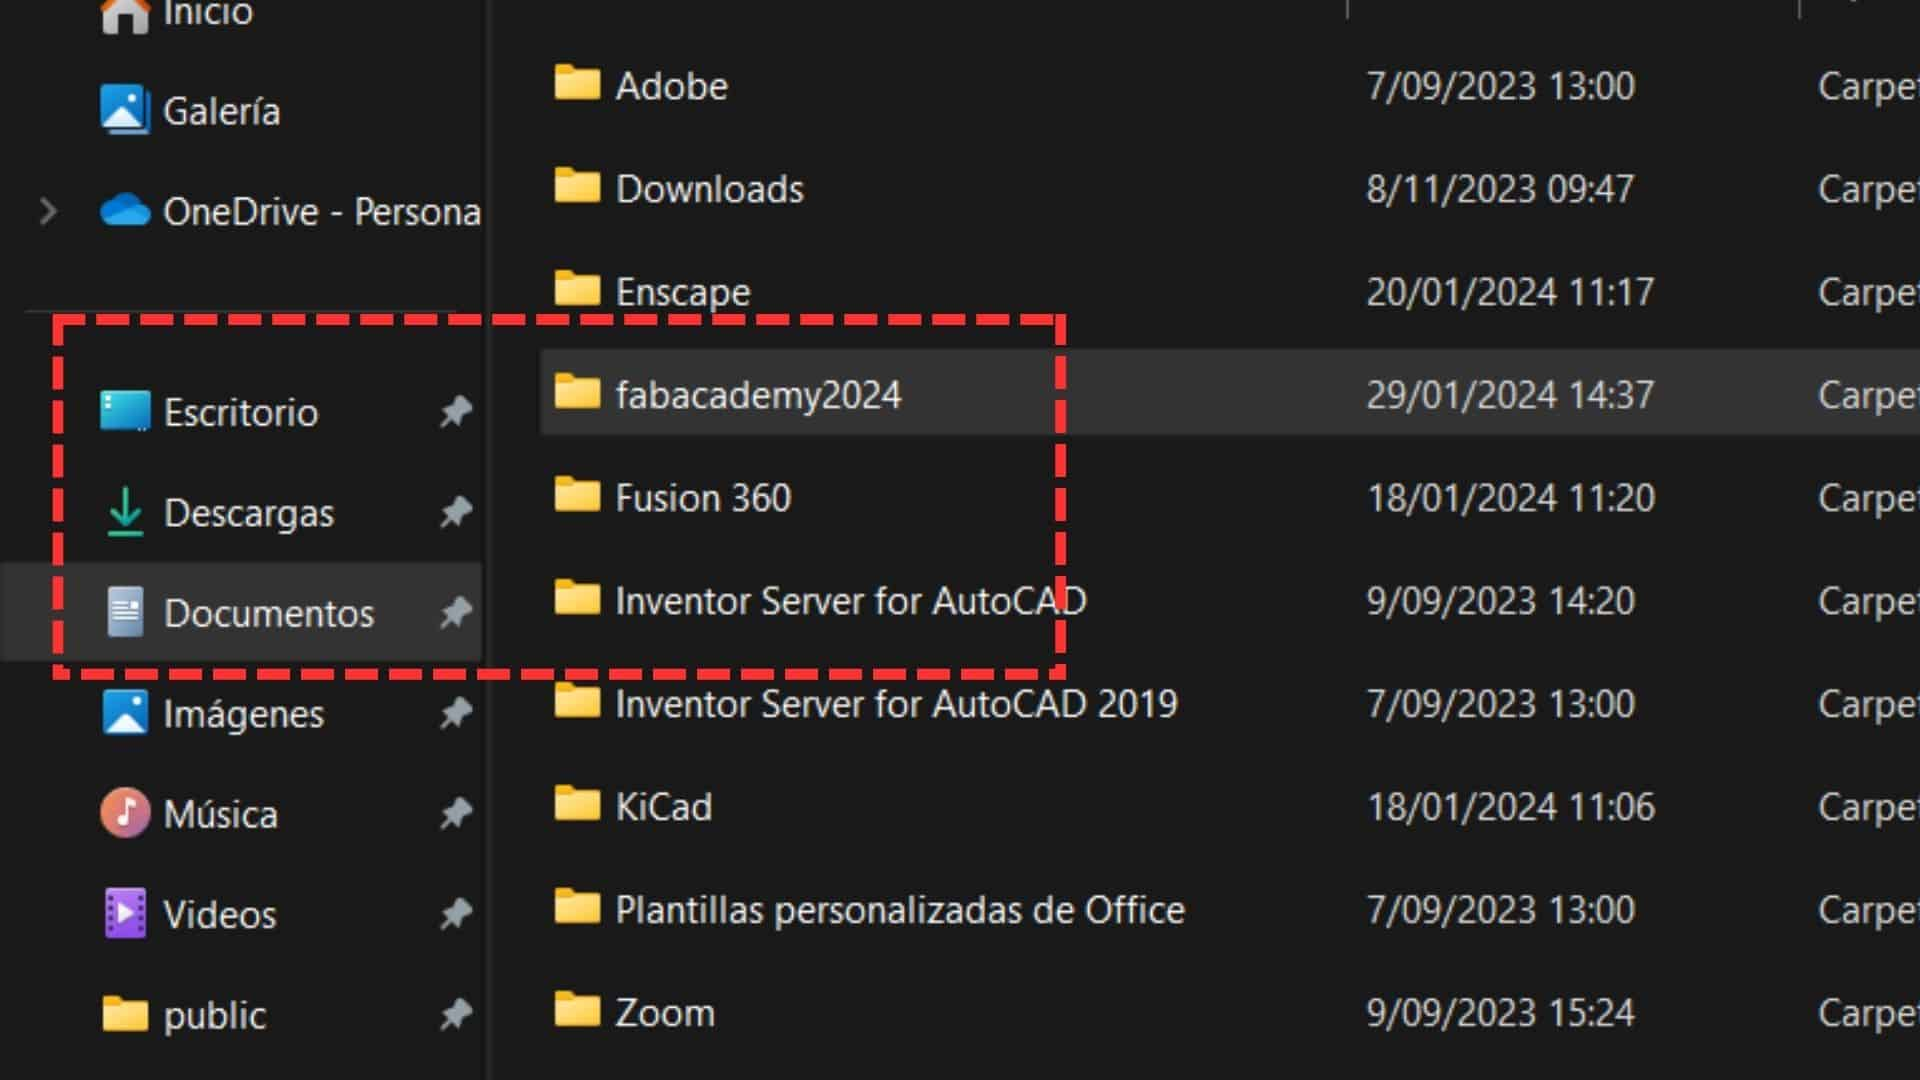
STEP 1: Before starting the cloning we have to create a folder in “DOCUMENTS” to avoid future problems and where it will be the place where we will store our entire repository.
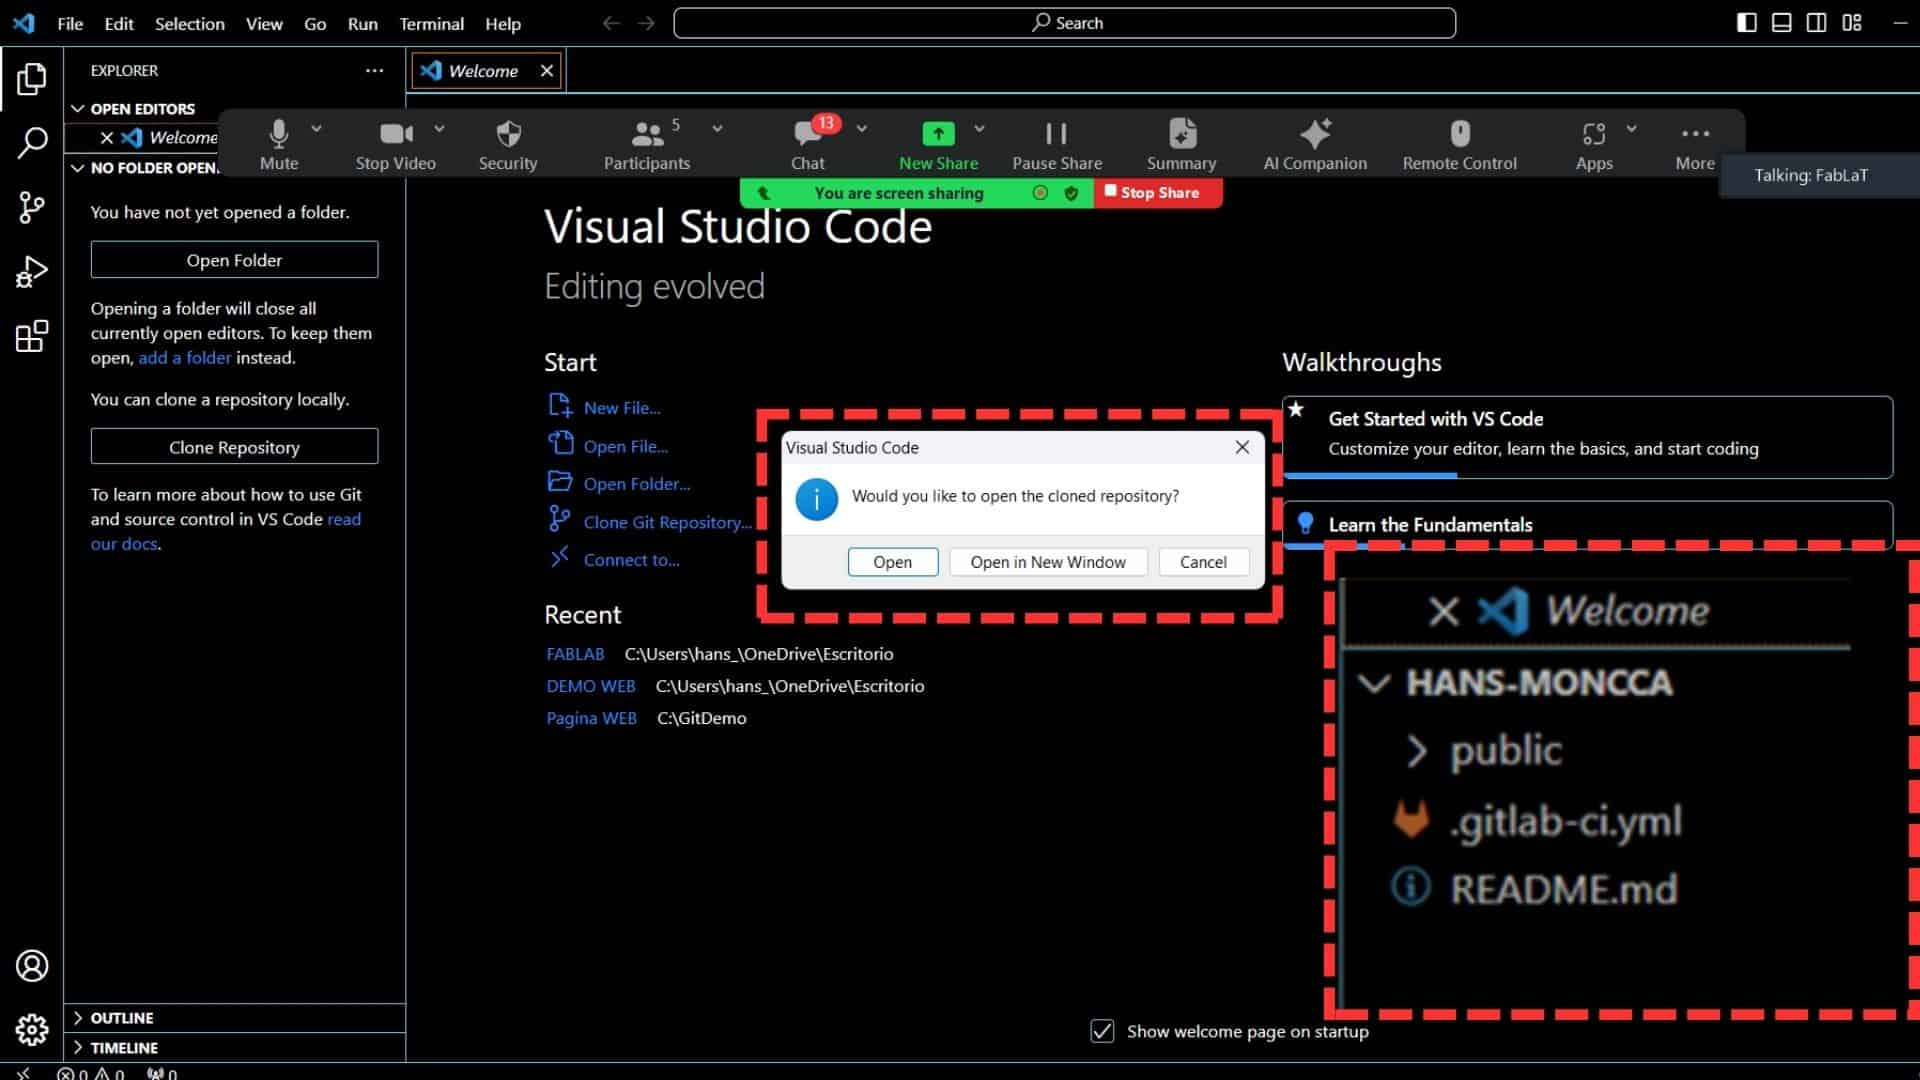
STEP 2: We open our VISUAL STUDIO CODE to start cloning our remote repository.
In the second image you can see how my documents from the repository could be cloned to my computer.
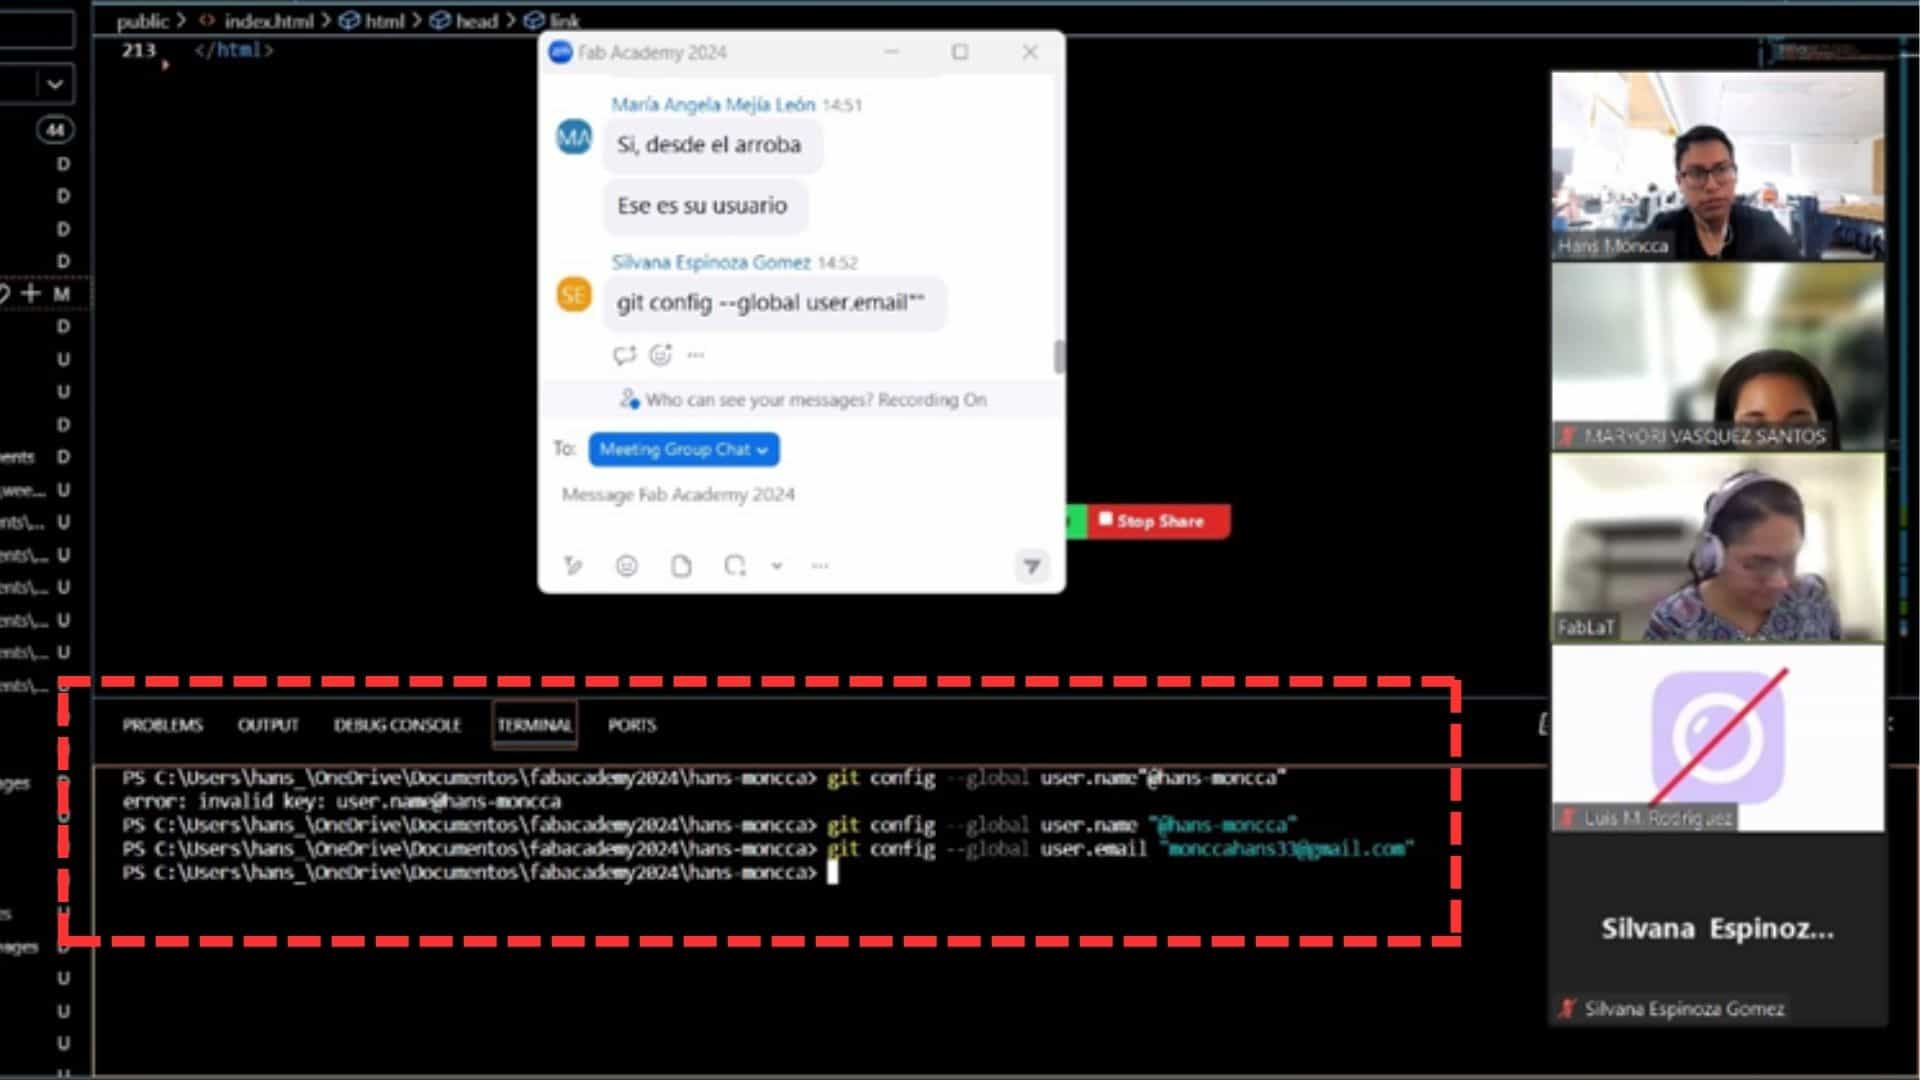
STEP 3: Now we have to open the TERMINAL, which we find at the top and that is where we put the email and user mentioned above for correct PULL and PUSH.
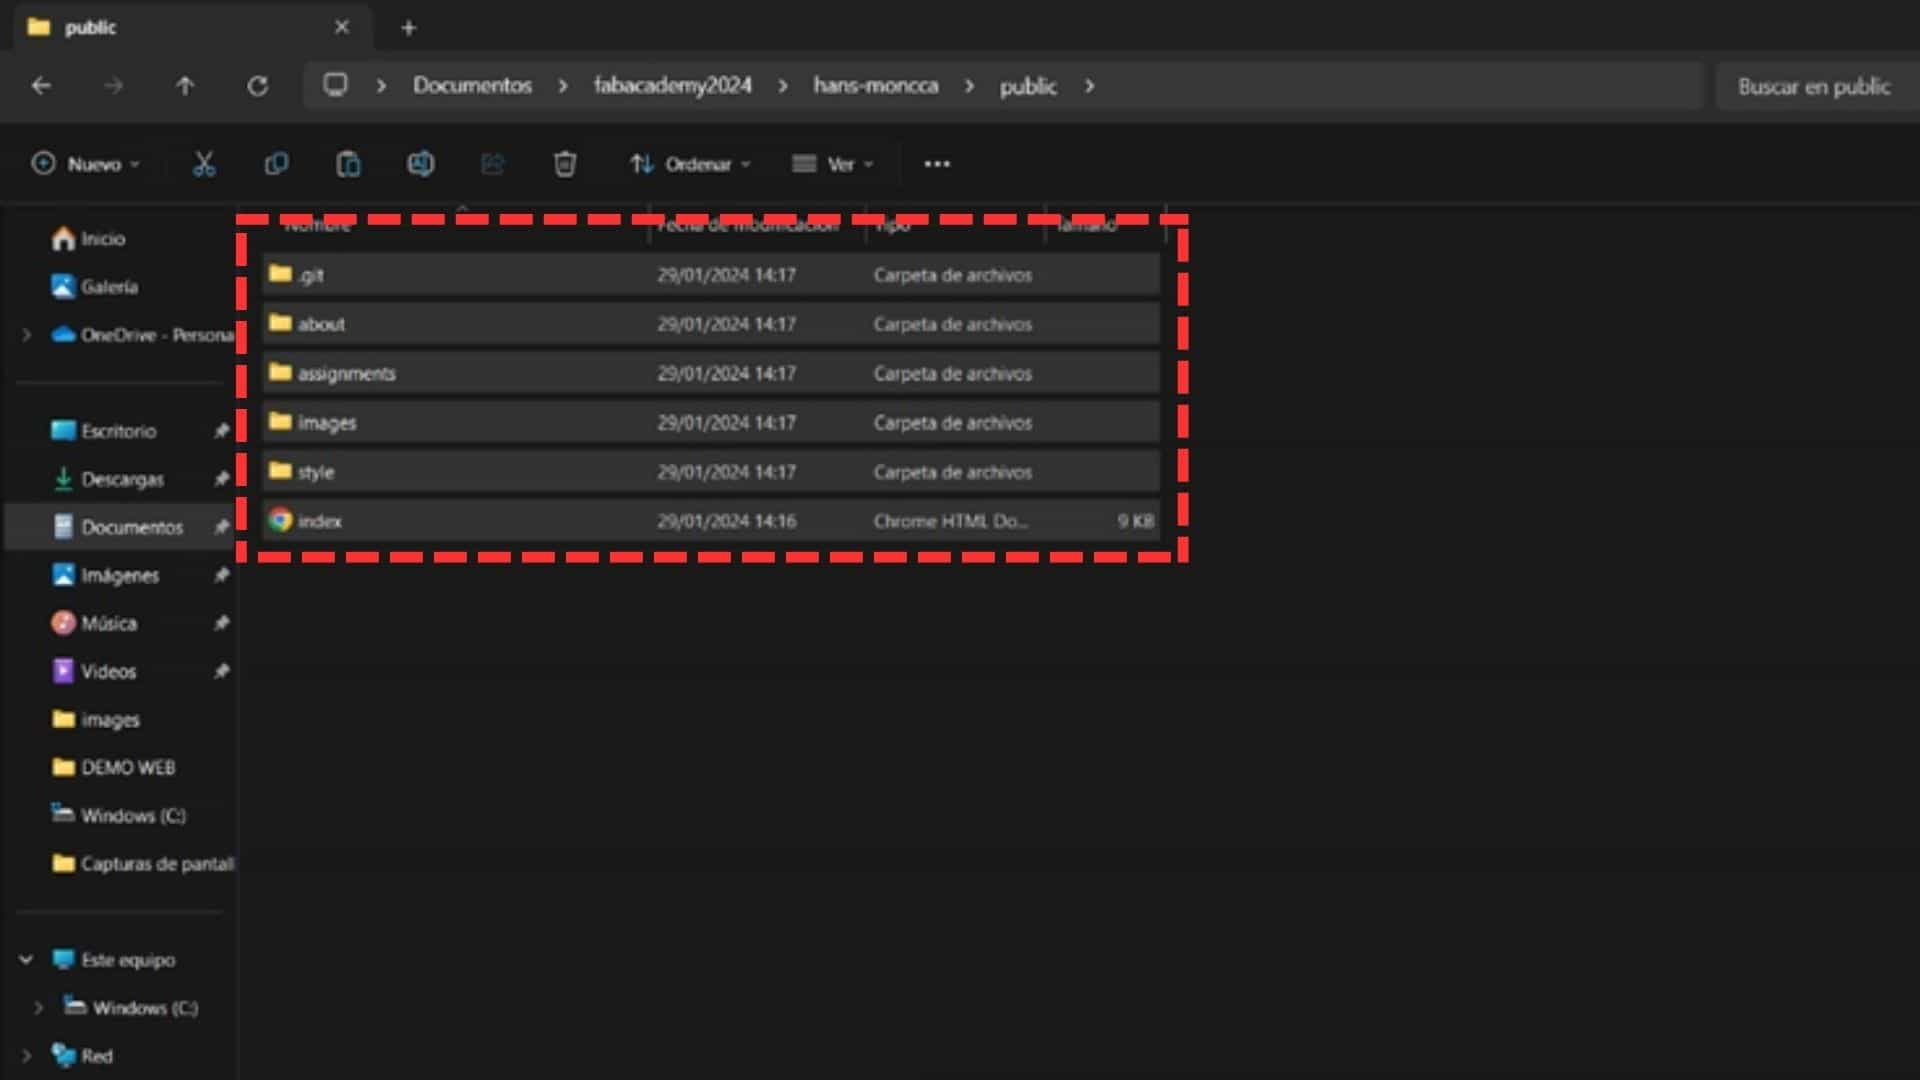
STEP 4: In my case, I had to delete the documents found in the PUBLIC folder since I created my own website and did not take as reference what was provided by the FAB ACADEMY. And since I had worked on the entire HTML and CSS design of my website at my location, I had to move it from my folder to the folder where my repository is located.
STEP 5: Now we only have to work on all the changes and updates in the VISUAL STUDIO CODE and it gives us the ease of being able to do the COMMIT and PUSH when necessary. Remember to make big changes and not just small changes, as you will have a lot of COMMITs which is not good. ☹

And now you can design, play, enjoy and improve your website.

MAKE A WEBSITE
In my case, I have to confess that I never knew how to make a website and even worse know the processes and design to follow. I started researching HTML and CSS for beginners with the goal of designing a simple website. By watching videos, reading websites and with the help of ChatGPT, I was able to understand the basic things about websites. I didn't want to start with a template because it seemed very stressful to have so much information and I didn't know what each one of them was.
So I started designing from scratch, I organized myself to know the structure or layout and that is where I worked to be able to generate the website I want. The truth is that I am proud to present my website to you. How did I do it? I believe that research, review of videos and web pages help a lot to understand new things. Don't forget that the hours spent getting information are also very important for this..
PERSONALIZATION
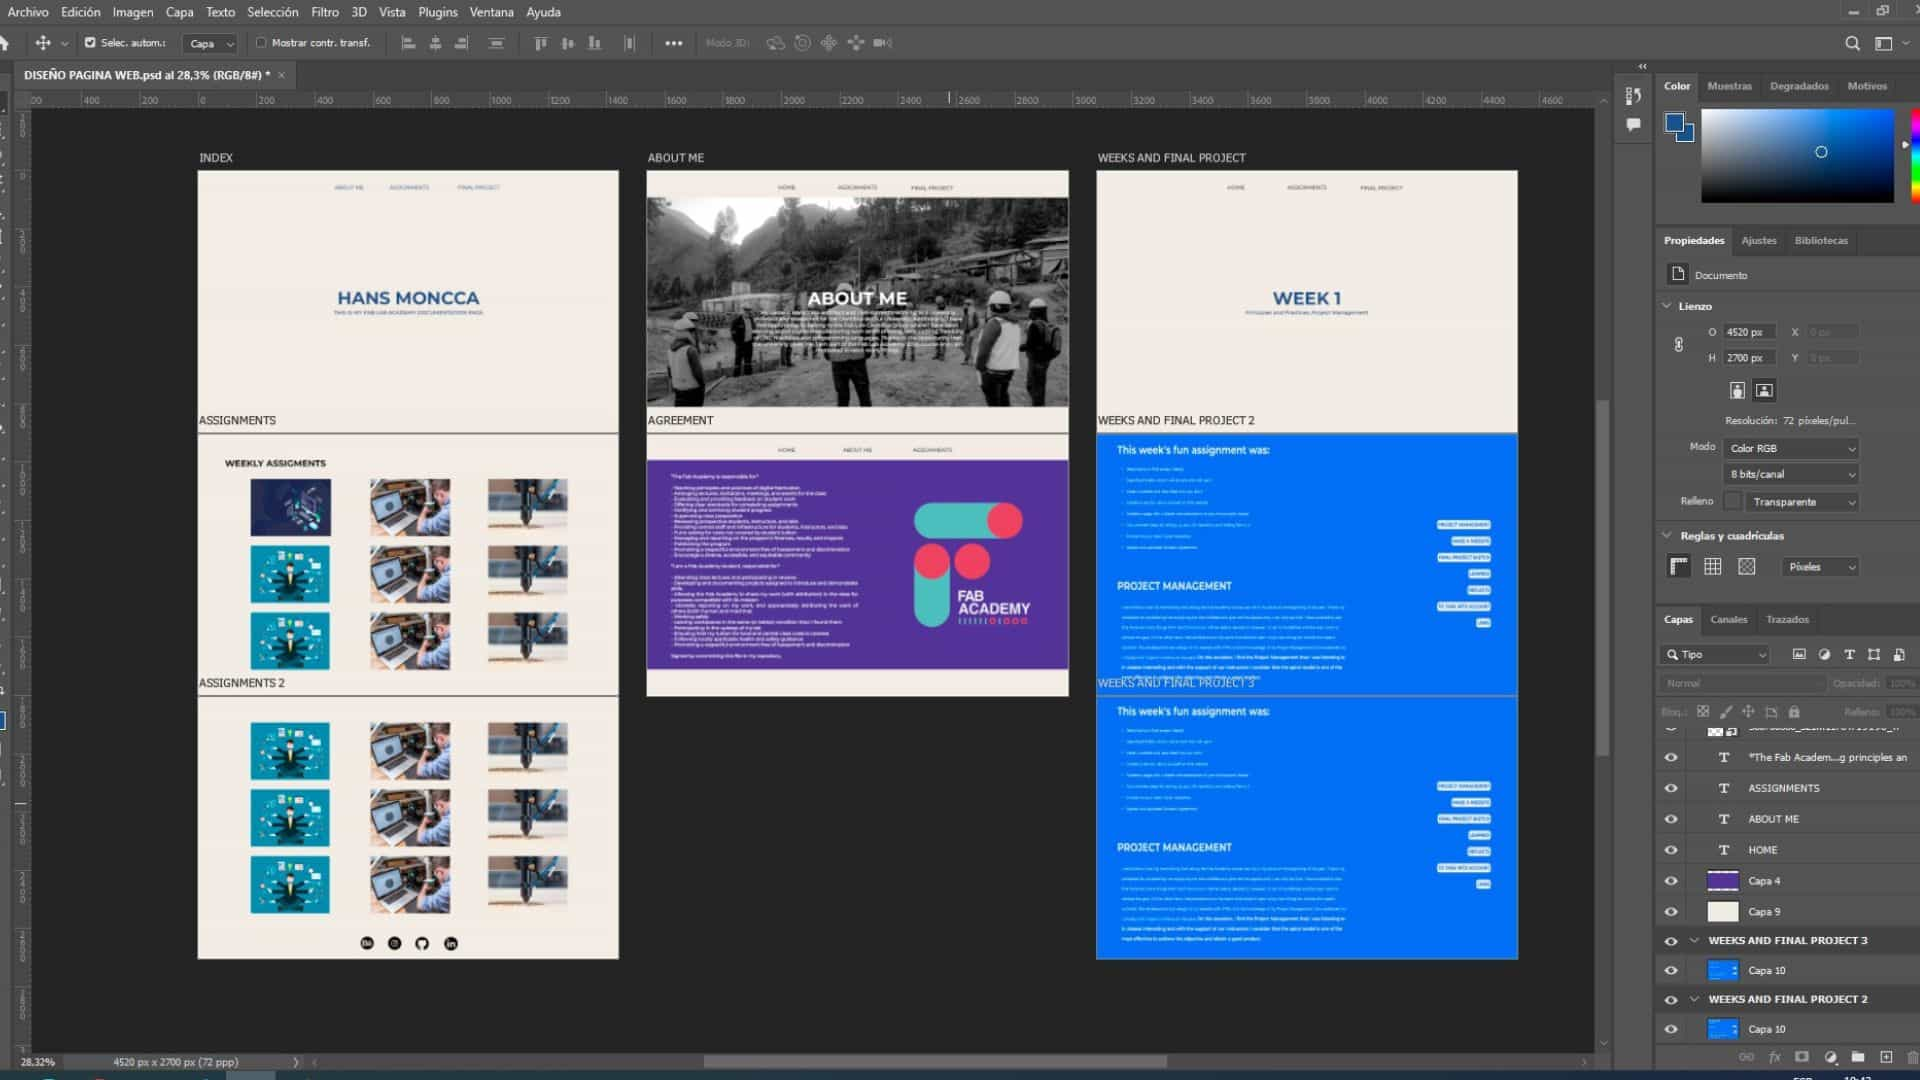
First, I started with the design and layout in PHOTOSHOP to have a template of what my website would be like. As I mentioned before, I didn't want to work with a template because it seemed like it had too many things and it stressed me too much to review line by line of the HTML for changes.
COMPRESS AND UPLOAD IMAGES
The process I chose was to have all the images I needed in a folder that is not on the website, upload them to the CANVAS website and then transfer them to the SQUOOSH website, which helps us reduce the weight of each image so that the website is not so heavy.
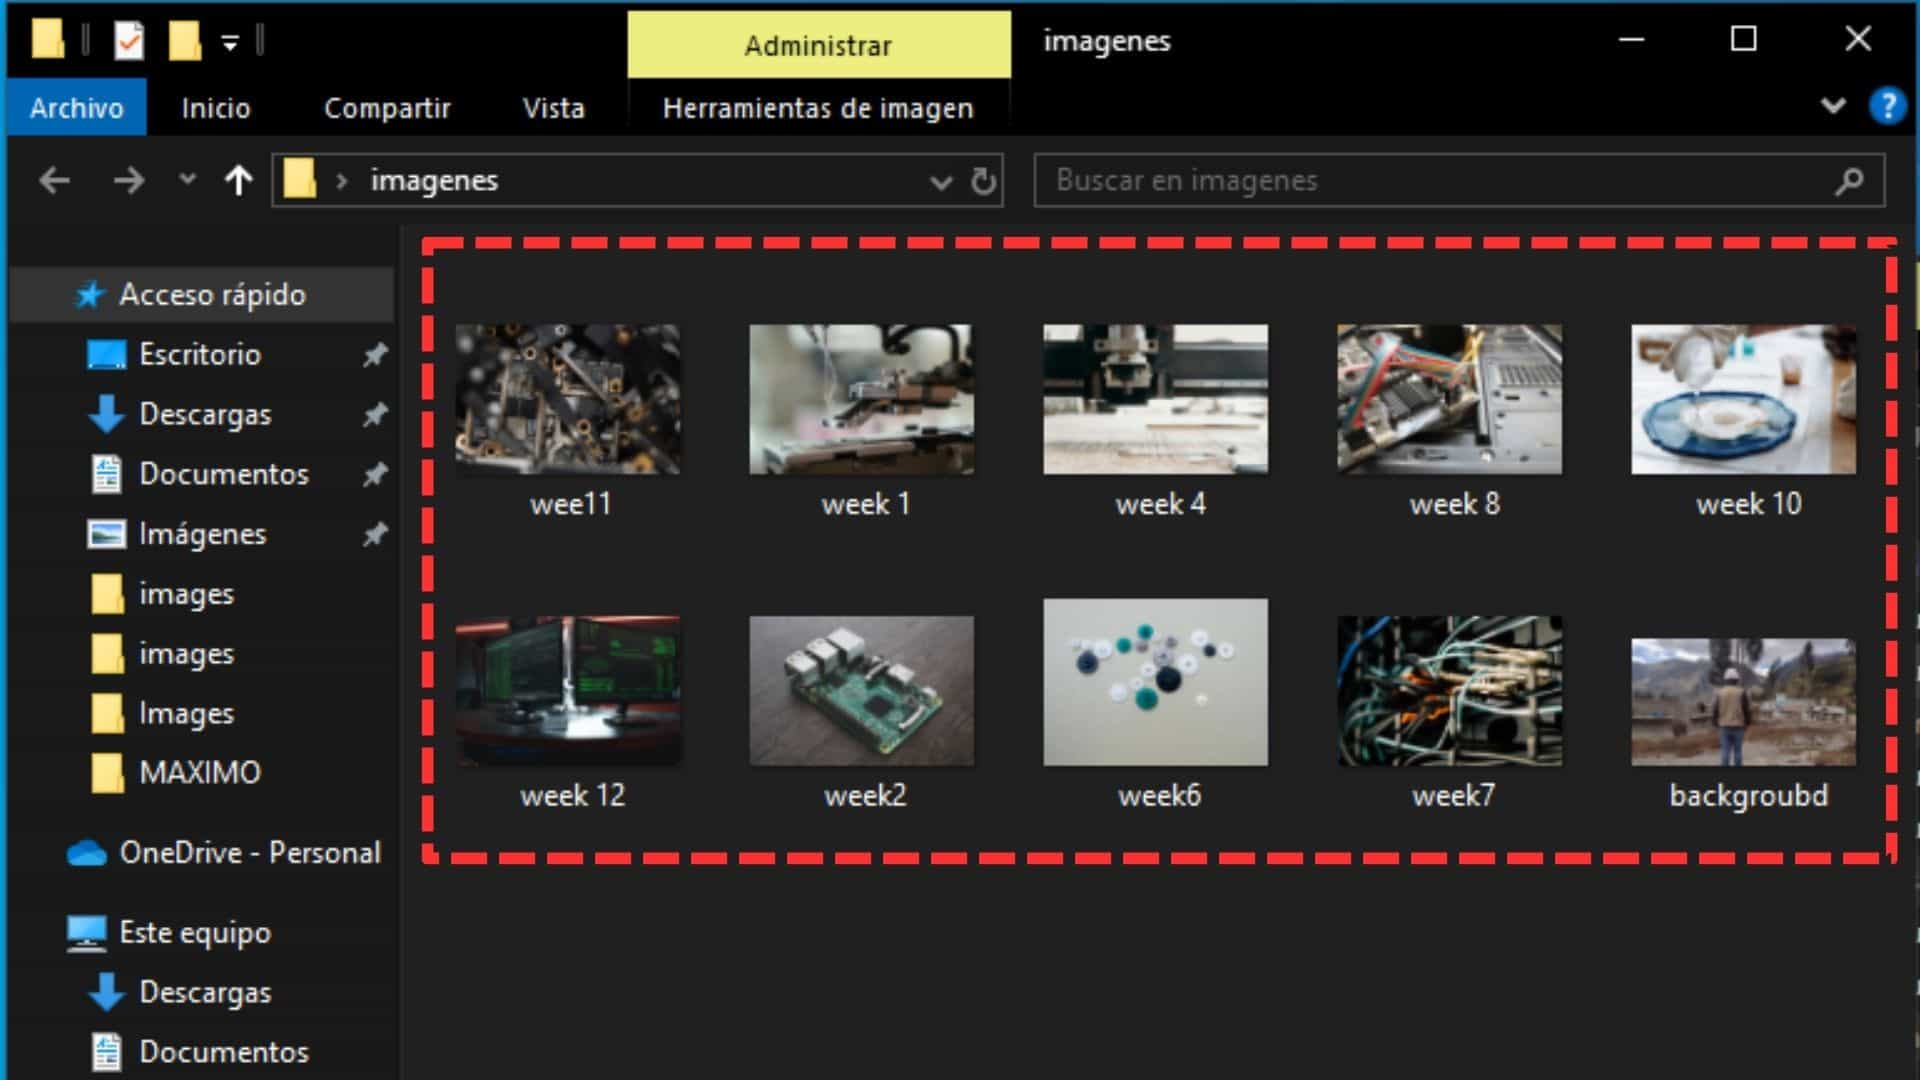
I put all the images I was going to need in a folder:
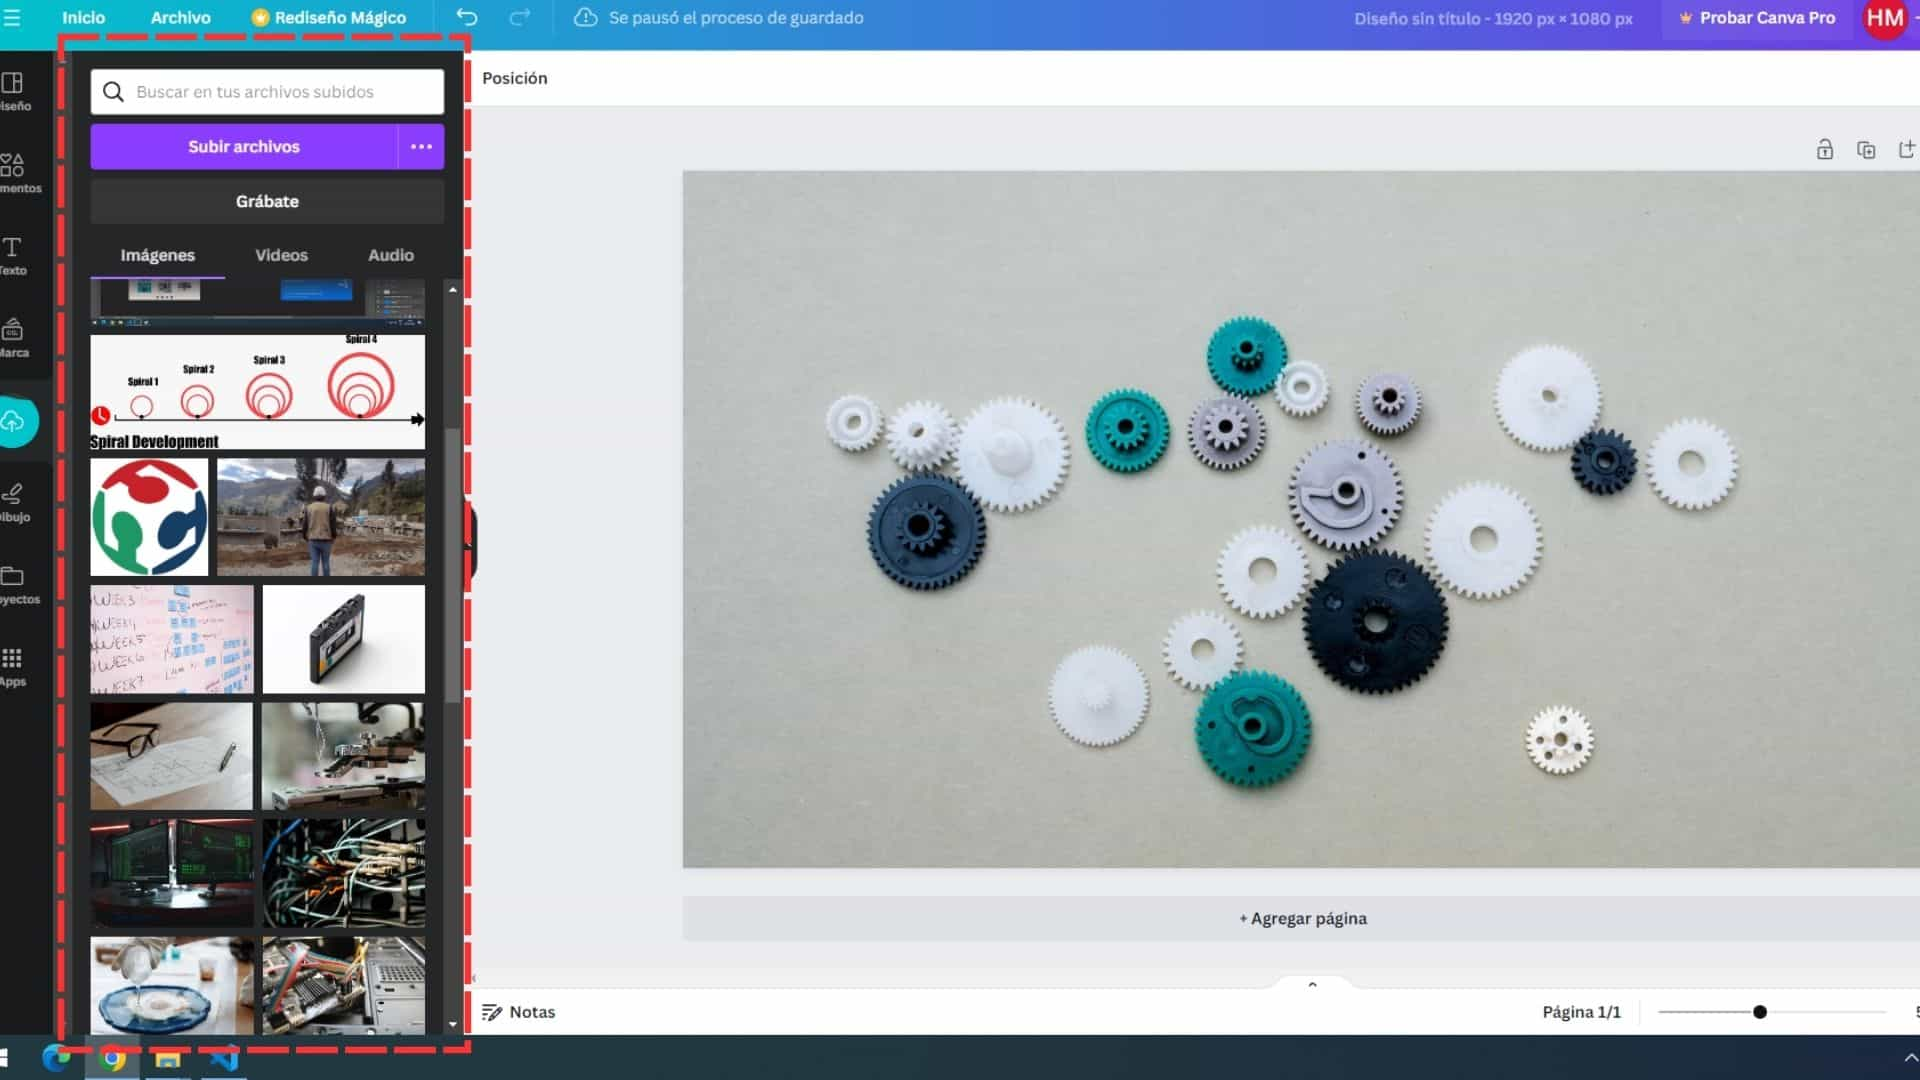
I uploaded the images to the Canvas website to later download them in 1920 x 1080 format:
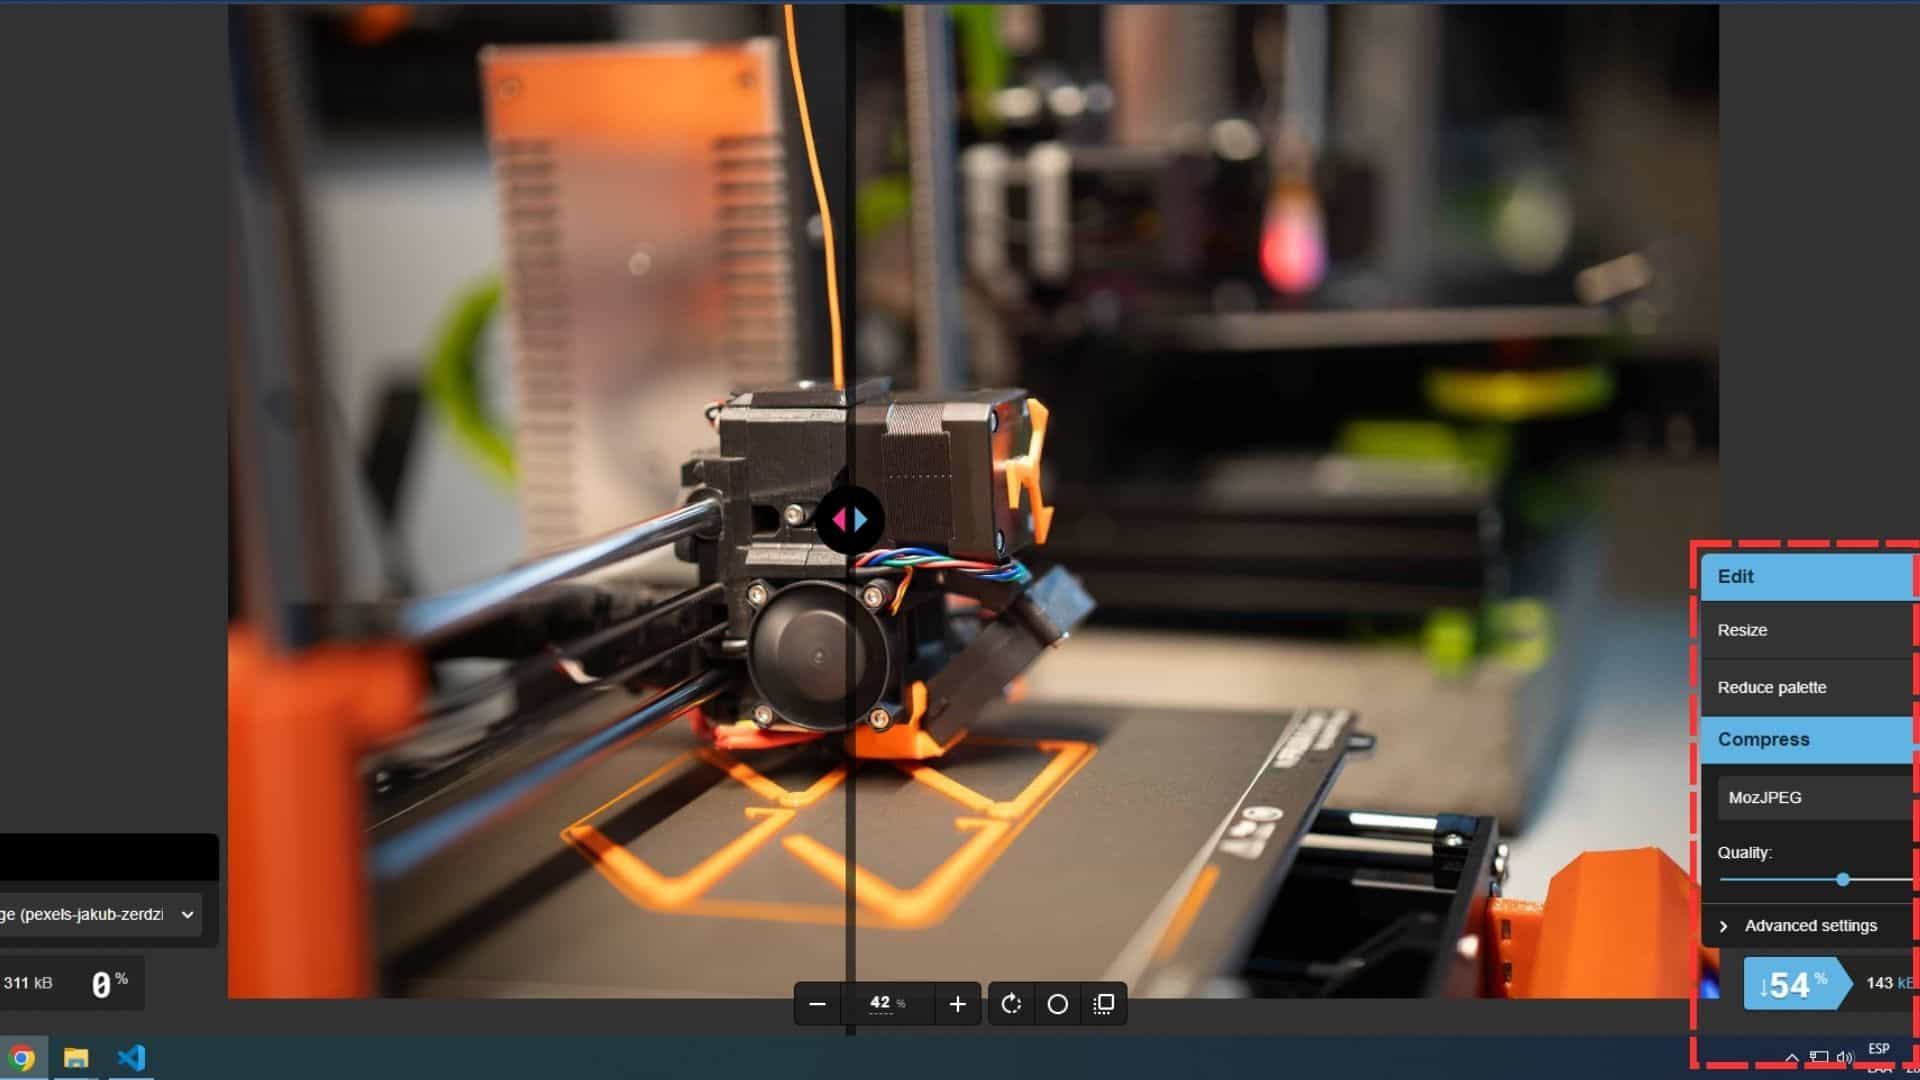
And finally, export to the SQUOOSH website to compress the image without losing much quality:
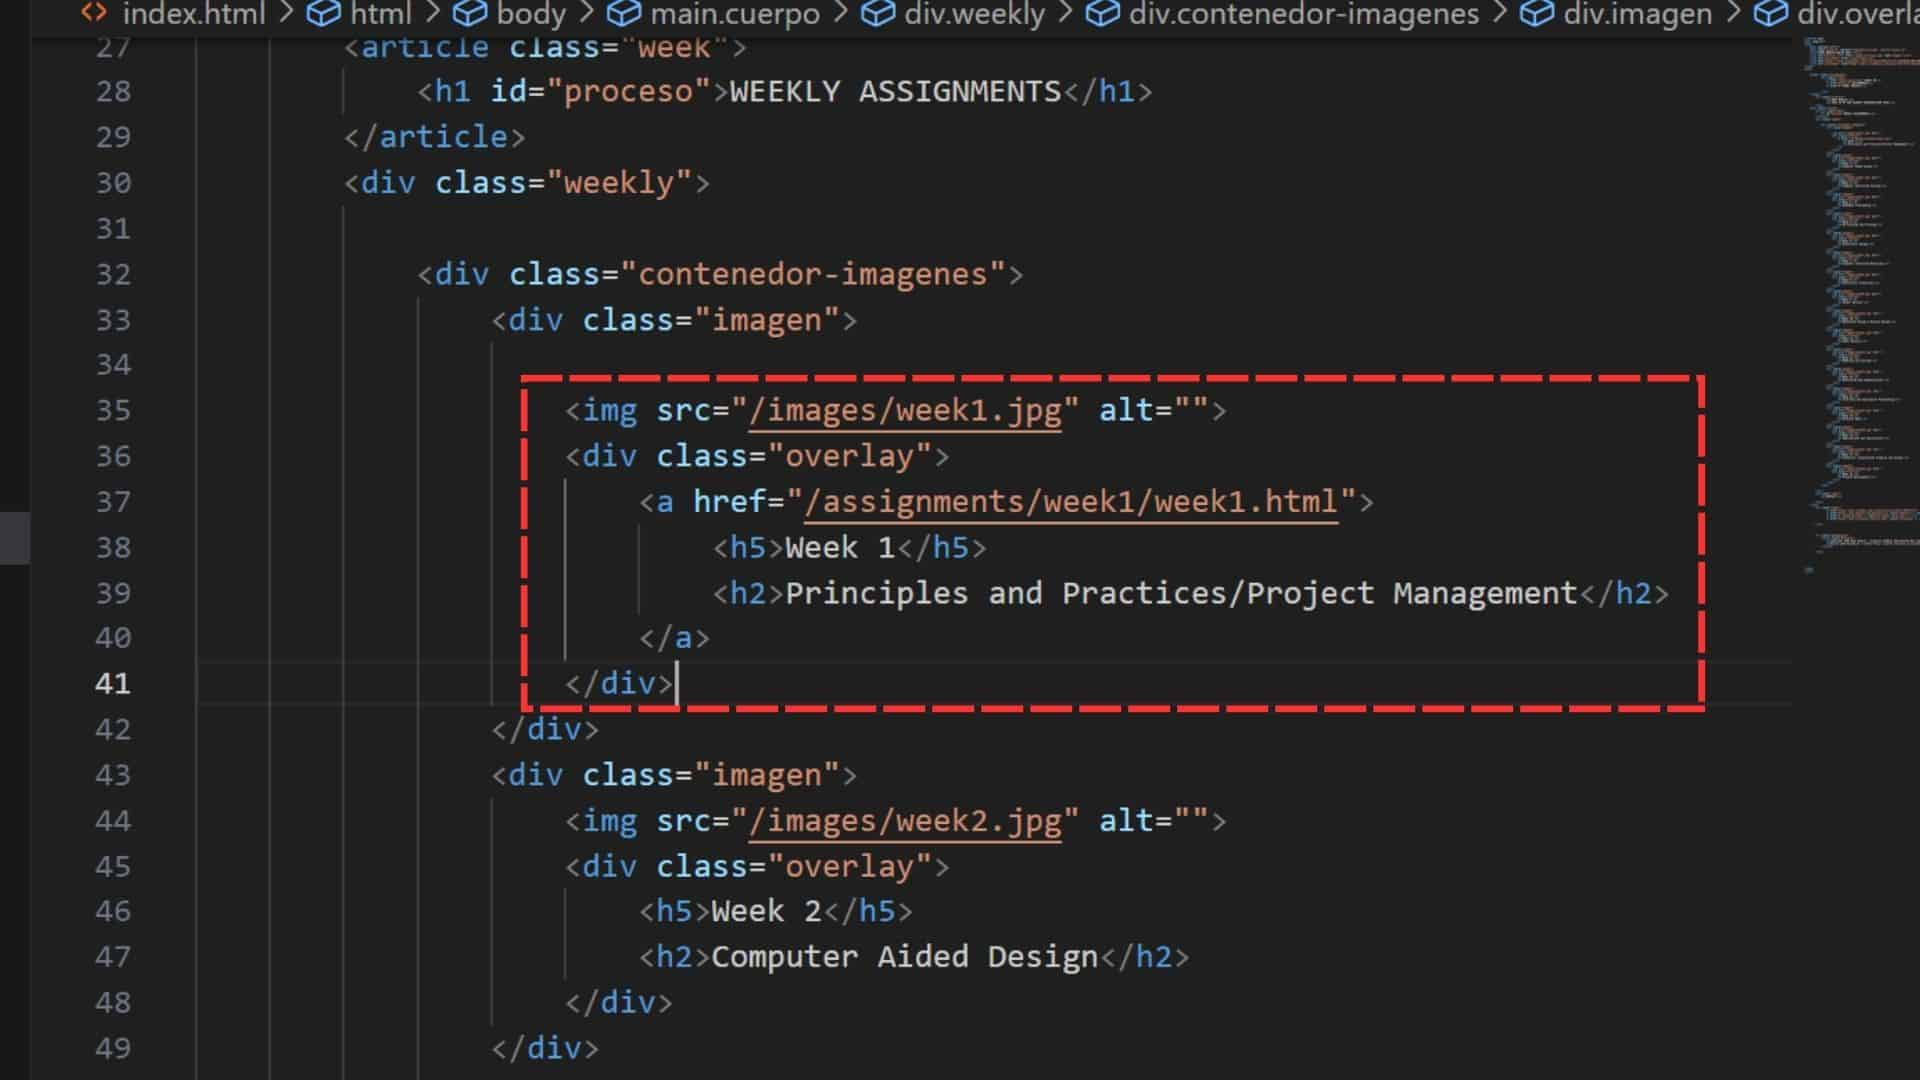
When we have all the images compressed, we upload them to VISUAL STUDIO CODE, in our HTML or SCC, to be able to display them on our website:
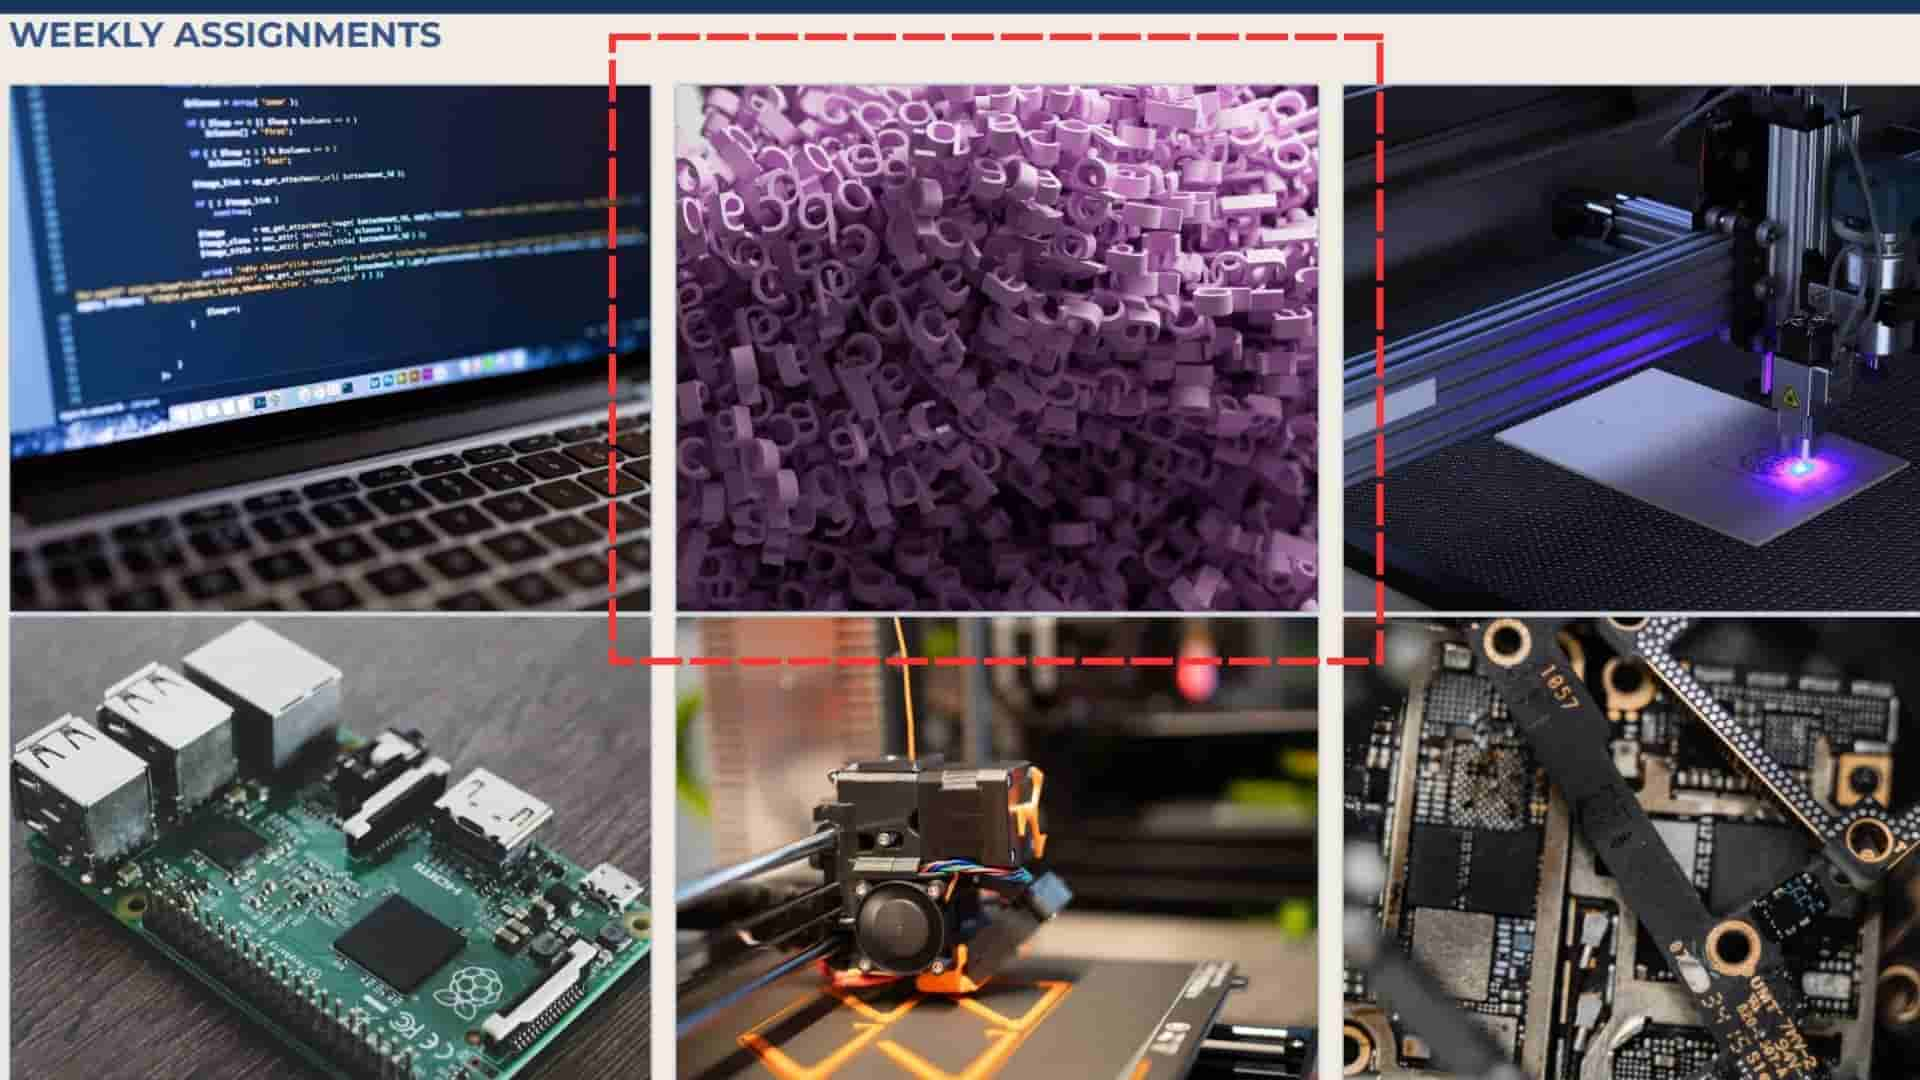
And we can see our images on our website.
FINAL PROJECT SKETCH
LIGHTDOM: BIOCLIMATIC ARTIFACT
LIGHTDOM is an artifact that simulates the path of the sun with the intention of being applied to architectural projects. The objective of the project is to provide students with an artifact that helps them analyze the solar incidence that their architectural projects receive.
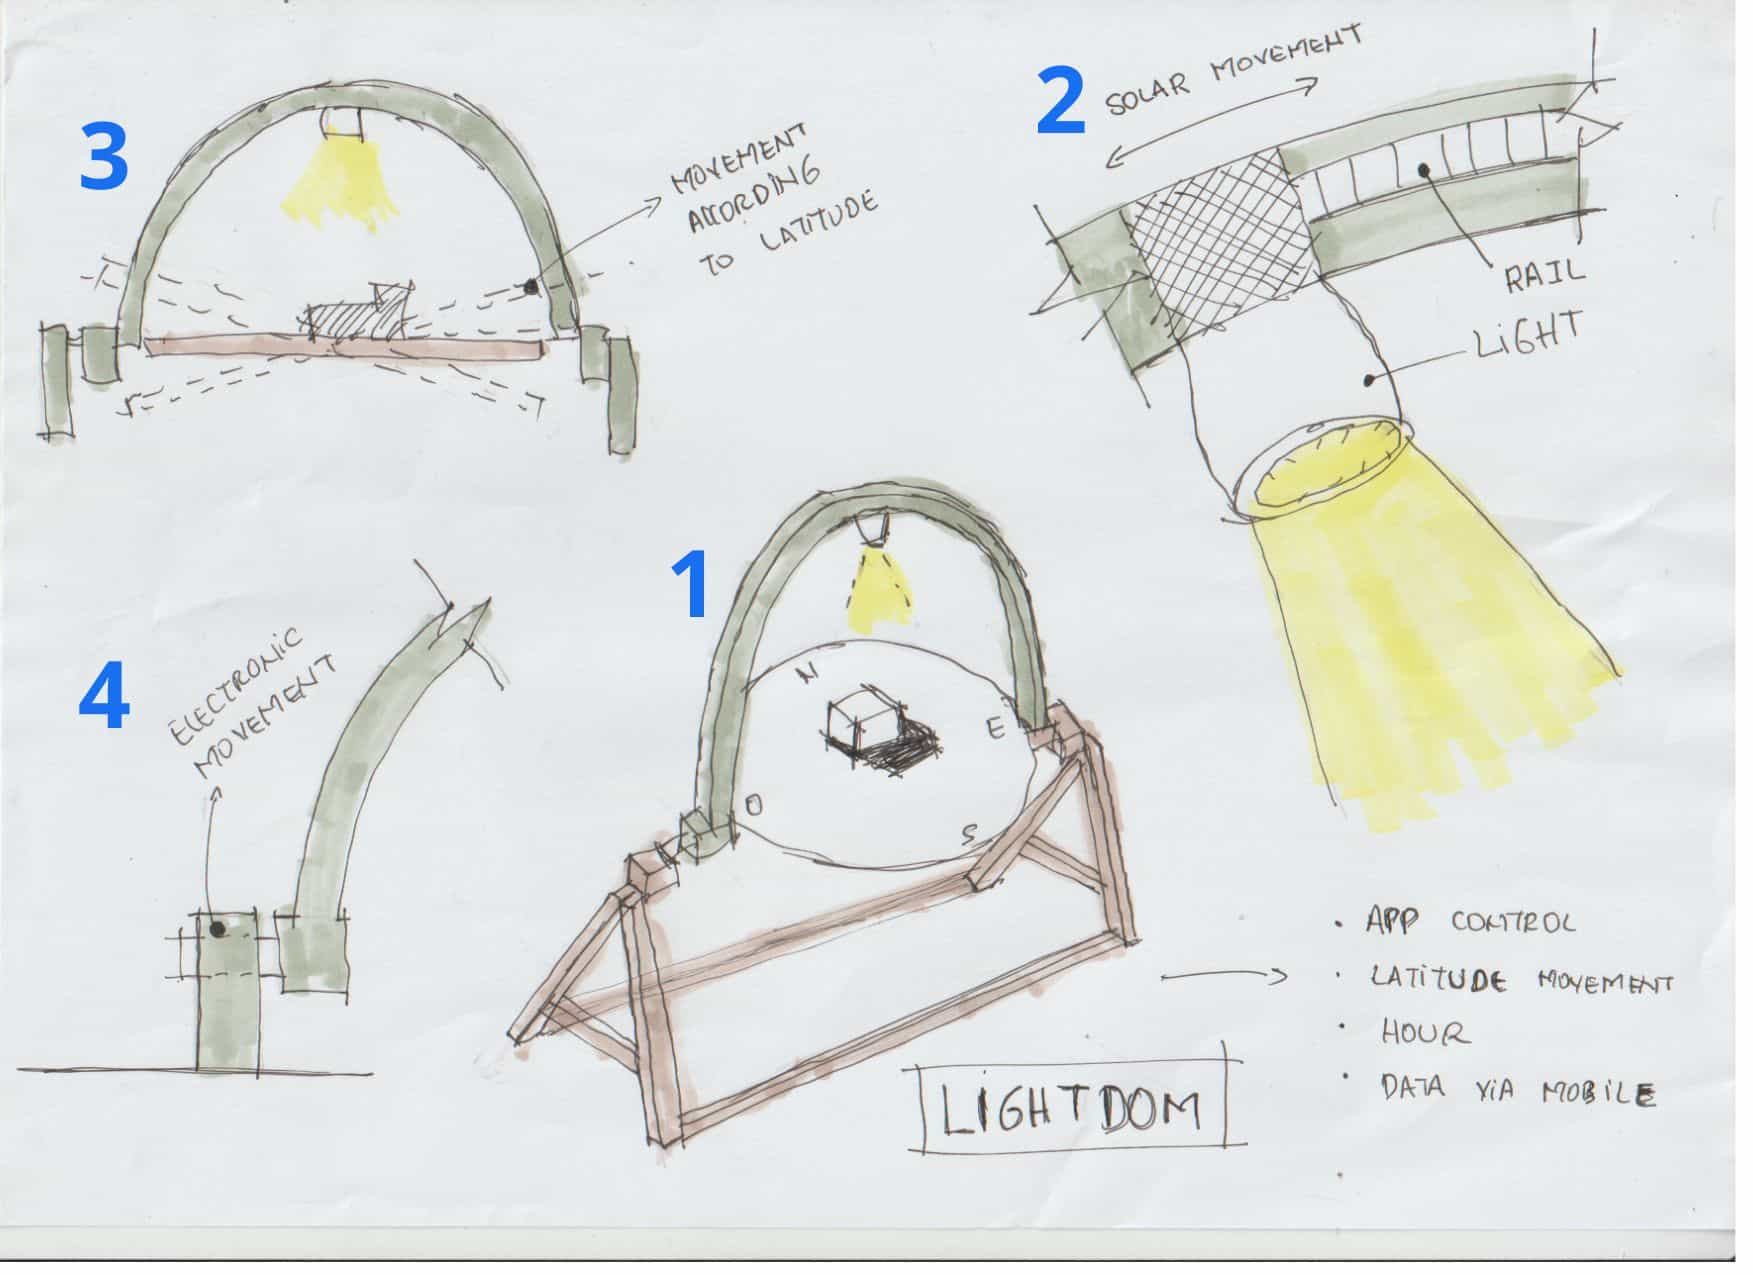
1.The artifact is based on the HELIODON concept, which is used to analyze solar incidence in architectural models. The idea is to analyze the impact on the solstices and equinoxes of the year that different architectural projects receive in different places in the world. In addition, we can program through an application so that the artifact can be located at the latitude, month and time that we wish to analyze. Likewise, the idea is to extract information from GPS or other devices to objectively analyze the projects.
2.The idea is to simulate the incidence of the sun through artificial lighting that has automated movement through rails and can be located according to our requirement.
3.The base where the models will be located must present movement according to the latitude where the architectural project is to be analyzed. The objective is to achieve automation that can, by itself, locate the artifact in the data being sought.
4.The idea of moving the solar travel rings is through electrical and automated movements using motors to move each ring and these can be located according to the angle, month and time needed.
WHAT WILL IT DO?
LIGHTDOM will be an artifact that simulates the apparent movement of the sun to be applied in the bioclimatic analysis process for architectural designs. The idea is to show the solar incidence that the sun has at different latitudes, months and times in architectural designs. The objective is to analyze the way in which projects must have strategies to take advantage of or avoid solar incidence and the artifact will physically provide us with a simulation that the sun will have in both university and professional architectural designs.
WHO WILL USE IT?
The target user is the architecture and environmental urban planning students of the Cientifica del Sur University. My concern and my contribution with LIGHTDOM is to teach and demonstrate that for the architectural design of any project we must take into account many aspects and one of them is solar incidence. The university is characterized by having the environmental component, where it has great contribution when designing and planning projects. Therefore, with this artifact I want to support the teaching of students about how the sun is a key component when it comes to design and that analyzing it is an important component in architecture. On the other hand, I feel that teaching without instruments or artifacts makes student learning a little difficult and therefore, through this artifact I want to show in their own designs the things that they can analyze and achieve taking into account such an important aspect in architecture. like the sun. Furthermore, the idea is to turn it into a professional artifact so that any architecture studio can use it in their projects.