Output devices
This week we will work on connecting output devices to the board we previously built.
The assignment was:
Group assignment: measure the power consumption of an output device.
Individual assigment: add an output device to a microcontroller board you've designed, and program it to do something.
Group assignment
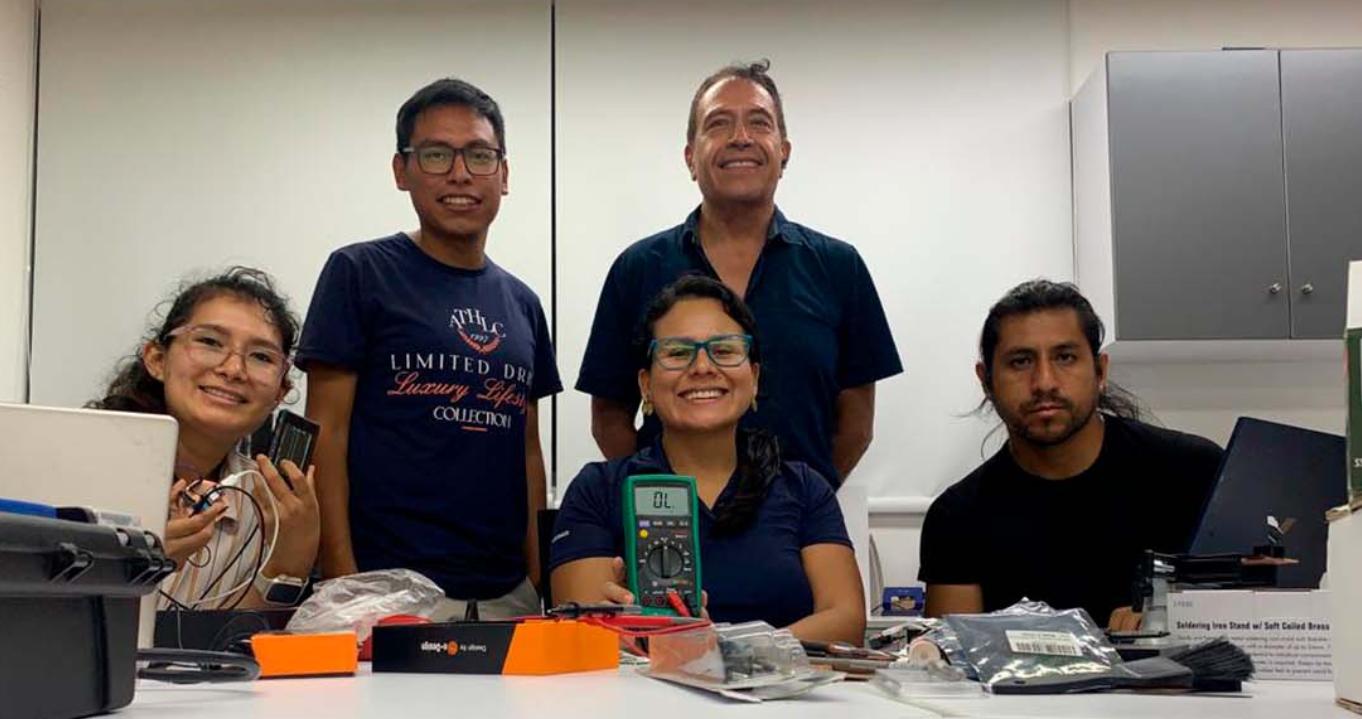
Once again for this group assignment we visited the Fab LAb of the Scientific University of the South.
You can see the documentation on the group's web page
what I learned?
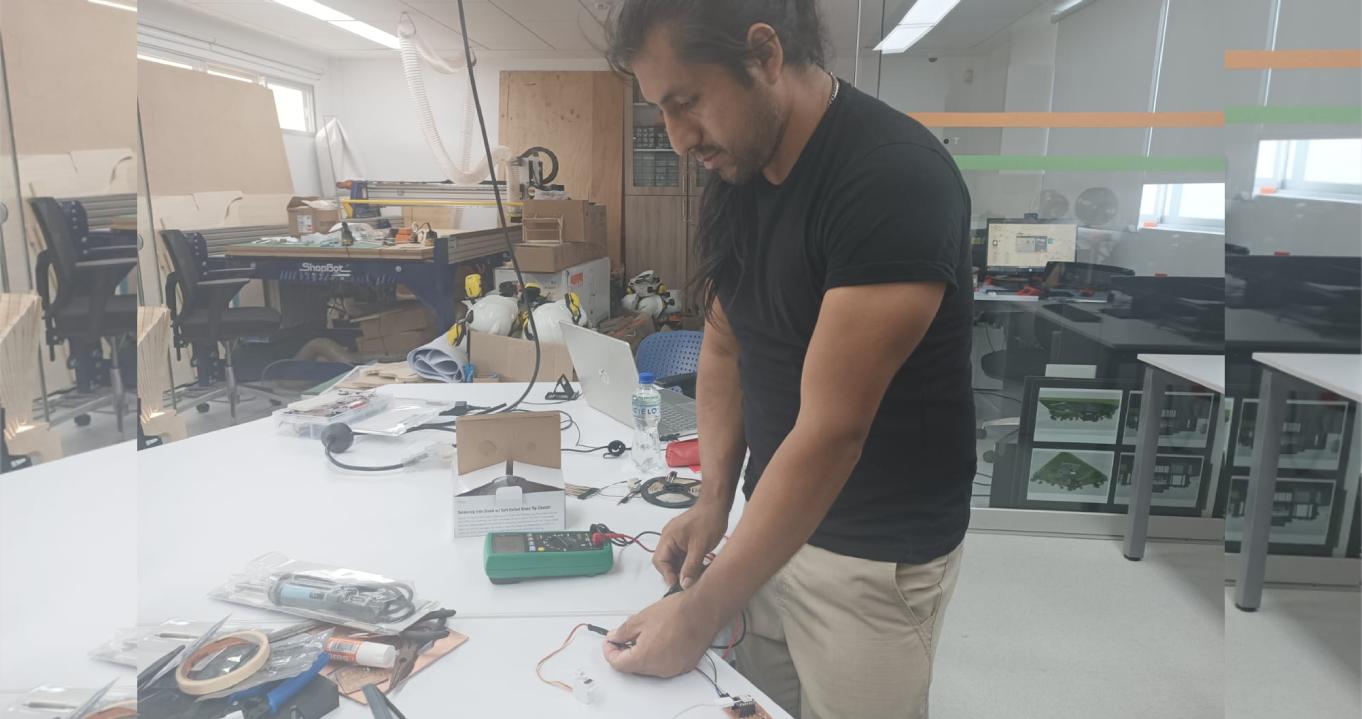
Perform a direct measurement with the multimeter and therefore calculate the energy consumption.
View the current waveform with the oscilloscope.
The oscilloscope offers more precise and detailed measurements than multimeters.
Individual assignment
In the previous week I designed and manufactured a PCB board called Crisduino, you can see complete information at electronics design
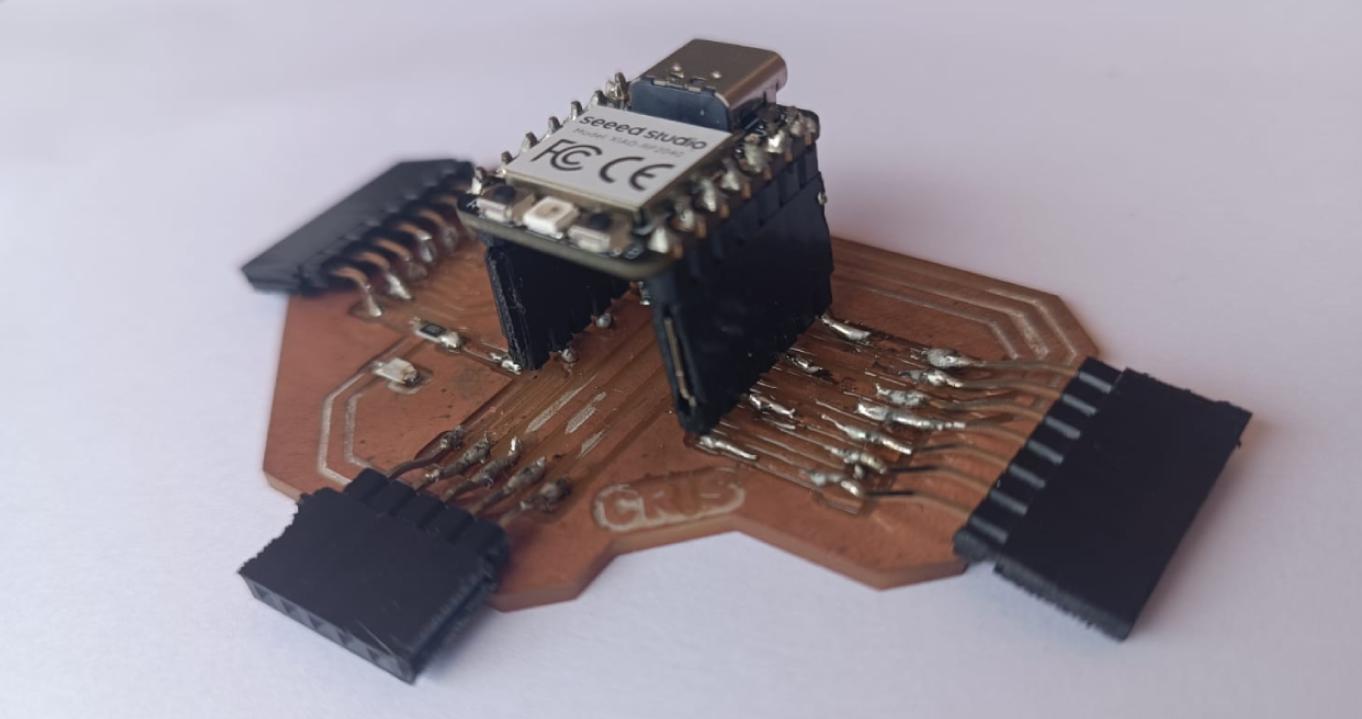
In this assignment we will connect a buzzer to generate audible tones as the Crisduino output device.
What is a buzzer?...A buzzer is an electromechanical device that produces an audible sound when an electric current is applied to it.
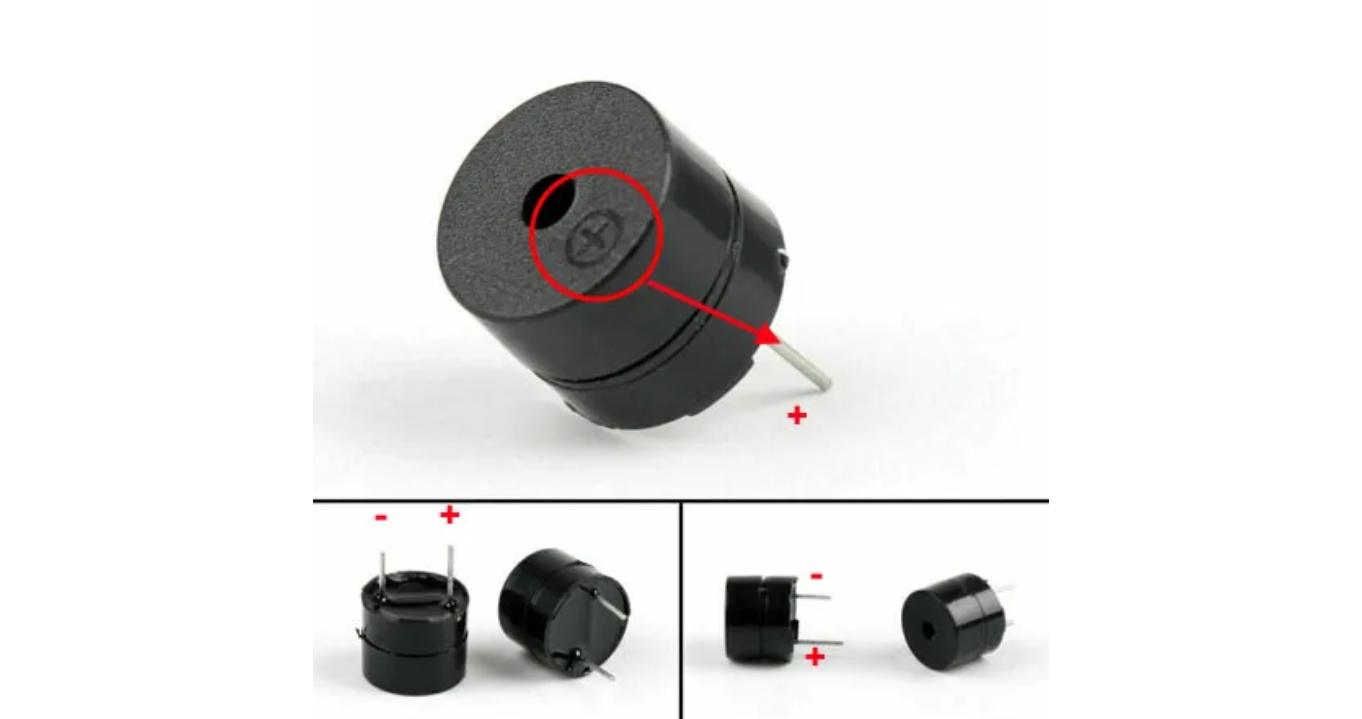
1. We connect the positive side of the buzzer to the GND pin of the Crisduino using the purple cable.
2. We connect the digital signal from the buzzer to pin D4 using the gray cable.
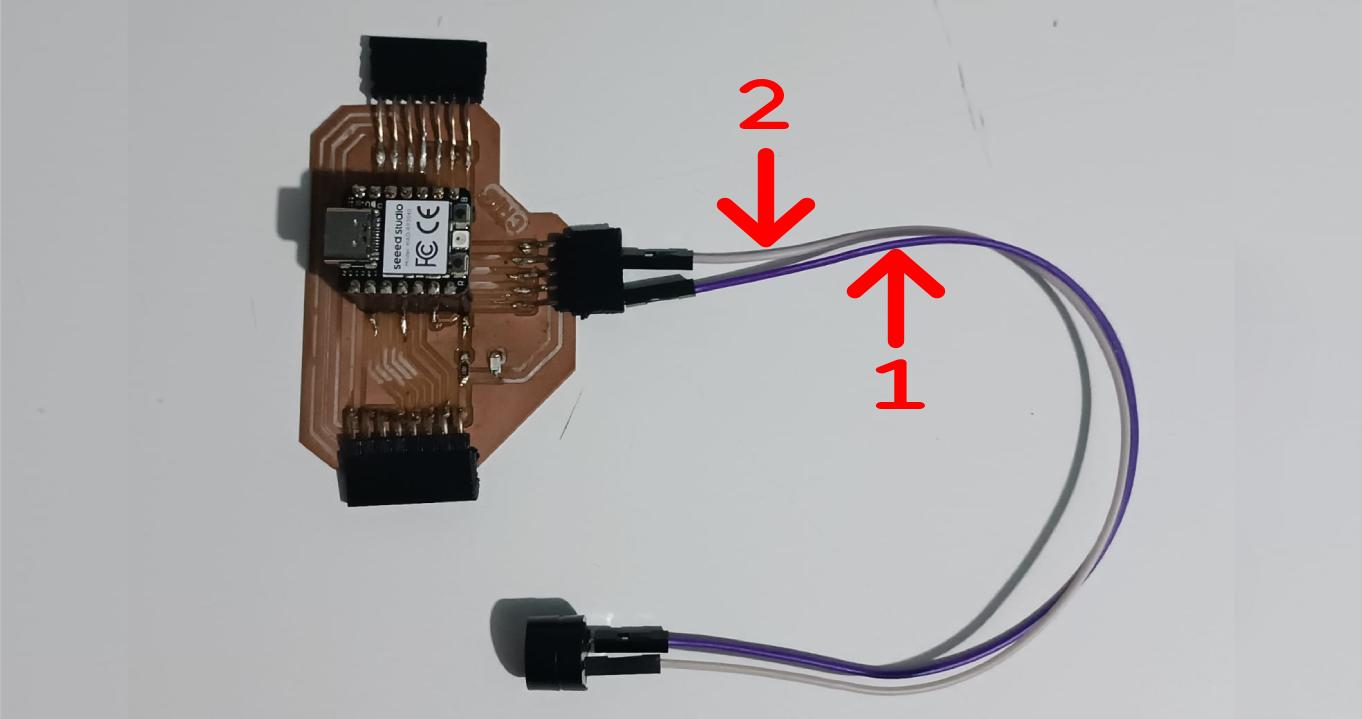
We copy the code of the Imperial March of the Star Wars written by Robson Couto, 2019.
This code implements the Star Wars "Imperial March" melody using a buzzer as an output device to generate the tones.
Notes are defined.
The time and pin of the buzzer are configured.
The melody is defined.
the duration of the note is calculated.
the tone and pause are generated.
    /*
    Imperial March - Star Wars
    credits: Robson Couto, 2019
    */

    #define NOTE_B0  31
    #define NOTE_C1  33
    #define NOTE_CS1 35
    #define NOTE_D1  37
    #define NOTE_DS1 39
    #define NOTE_E1  41
    #define NOTE_F1  44
    #define NOTE_FS1 46
    #define NOTE_G1  49
    #define NOTE_GS1 52
    #define NOTE_A1  55
    #define NOTE_AS1 58
    #define NOTE_B1  62
    #define NOTE_C2  65
    #define NOTE_CS2 69
    #define NOTE_D2  73
    #define NOTE_DS2 78
    #define NOTE_E2  82
    #define NOTE_F2  87
    #define NOTE_FS2 93
    #define NOTE_G2  98
    #define NOTE_GS2 104
    #define NOTE_A2  110
    #define NOTE_AS2 117
    #define NOTE_B2  123
    #define NOTE_C3  131
    #define NOTE_CS3 139
    #define NOTE_D3  147
    #define NOTE_DS3 156
    #define NOTE_E3  165
    #define NOTE_F3  175
    #define NOTE_FS3 185
    #define NOTE_G3  196
    #define NOTE_GS3 208
    #define NOTE_A3  220
    #define NOTE_AS3 233
    #define NOTE_B3  247
    #define NOTE_C4  262
    #define NOTE_CS4 277
    #define NOTE_D4  294
    #define NOTE_DS4 311
    #define NOTE_E4  330
    #define NOTE_F4  349
    #define NOTE_FS4 370
    #define NOTE_G4  392
    #define NOTE_GS4 415
    #define NOTE_A4  440
    #define NOTE_AS4 466
    #define NOTE_B4  494
    #define NOTE_C5  523
    #define NOTE_CS5 554
    #define NOTE_D5  587
    #define NOTE_DS5 622
    #define NOTE_E5  659
    #define NOTE_F5  698
    #define NOTE_FS5 740
    #define NOTE_G5  784
    #define NOTE_GS5 831
    #define NOTE_A5  880
    #define NOTE_AS5 932
    #define NOTE_B5  988
    #define NOTE_C6  1047
    #define NOTE_CS6 1109
    #define NOTE_D6  1175
    #define NOTE_DS6 1245
    #define NOTE_E6  1319
    #define NOTE_F6  1397
    #define NOTE_FS6 1480
    #define NOTE_G6  1568
    #define NOTE_GS6 1661
    #define NOTE_A6  1760
    #define NOTE_AS6 1865
    #define NOTE_B6  1976
    #define NOTE_C7  2093
    #define NOTE_CS7 2217
    #define NOTE_D7  2349
    #define NOTE_DS7 2489
    #define NOTE_E7  2637
    #define NOTE_F7  2794
    #define NOTE_FS7 2960
    #define NOTE_G7  3136
    #define NOTE_GS7 3322
    #define NOTE_A7  3520
    #define NOTE_AS7 3729
    #define NOTE_B7  3951
    #define NOTE_C8  4186
    #define NOTE_CS8 4435
    #define NOTE_D8  4699
    #define NOTE_DS8 4978
    #define REST      0


    // change this to make the song slower or faster
    int tempo = 120;

    // change this to whichever pin you want to use
    int buzzer = D4;

    // notes of the moledy followed by the duration.
    // a 4 means a quarter note, 8 an eighteenth , 16 sixteenth, so on
    // !!negative numbers are used to represent dotted notes,
    // so -4 means a dotted quarter note, that is, a quarter plus an eighteenth!!
    int melody[] = {

    // Dart Vader theme (Imperial March) - Star wars
    // The tenor saxophone part was used

    NOTE_A4,-4, NOTE_A4,-4, NOTE_A4,16, NOTE_A4,16, NOTE_A4,16, NOTE_A4,16, NOTE_F4,8, REST,8,
    NOTE_A4,-4, NOTE_A4,-4, NOTE_A4,16, NOTE_A4,16, NOTE_A4,16, NOTE_A4,16, NOTE_F4,8, REST,8,
    NOTE_A4,4, NOTE_A4,4, NOTE_A4,4, NOTE_F4,-8, NOTE_C5,16,

    NOTE_A4,4, NOTE_F4,-8, NOTE_C5,16, NOTE_A4,2,//4
    NOTE_E5,4, NOTE_E5,4, NOTE_E5,4, NOTE_F5,-8, NOTE_C5,16,
    NOTE_A4,4, NOTE_F4,-8, NOTE_C5,16, NOTE_A4,2,

    NOTE_A5,4, NOTE_A4,-8, NOTE_A4,16, NOTE_A5,4, NOTE_GS5,-8, NOTE_G5,16, //7
    NOTE_DS5,16, NOTE_D5,16, NOTE_DS5,8, REST,8, NOTE_A4,8, NOTE_DS5,4, NOTE_D5,-8, NOTE_CS5,16,

    NOTE_C5,16, NOTE_B4,16, NOTE_C5,16, REST,8, NOTE_F4,8, NOTE_GS4,4, NOTE_F4,-8, NOTE_A4,-16,//9
    NOTE_C5,4, NOTE_A4,-8, NOTE_C5,16, NOTE_E5,2,

    NOTE_A5,4, NOTE_A4,-8, NOTE_A4,16, NOTE_A5,4, NOTE_GS5,-8, NOTE_G5,16, //7
    NOTE_DS5,16, NOTE_D5,16, NOTE_DS5,8, REST,8, NOTE_A4,8, NOTE_DS5,4, NOTE_D5,-8, NOTE_CS5,16,

    NOTE_C5,16, NOTE_B4,16, NOTE_C5,16, REST,8, NOTE_F4,8, NOTE_GS4,4, NOTE_F4,-8, NOTE_A4,-16,//9
    NOTE_A4,4, NOTE_F4,-8, NOTE_C5,16, NOTE_A4,2,

    };

    // sizeof gives the number of bytes, each int value is composed of two bytes (16 bits)
    // there are two values per note (pitch and duration), so for each note there are four bytes
    int notes = sizeof(melody) / sizeof(melody[0]) / 2;

    // this calculates the duration of a whole note in ms
    int wholenote = (60000 * 4) / tempo;

    int divider = 0, noteDuration = 0;

    void setup() {
    // iterate over the notes of the melody.
    // Remember, the array is twice the number of notes (notes + durations)
    for (int thisNote = 0; thisNote < notes * 2; thisNote = thisNote + 2) {

        // calculates the duration of each note
        divider = melody[thisNote + 1];
        if (divider > 0) {
        // regular note, just proceed
        noteDuration = (wholenote) / divider;
        } else if (divider < 0) {
        // dotted notes are represented with negative durations!!
        noteDuration = (wholenote) / abs(divider);
        noteDuration *= 1.5; // increases the duration in half for dotted notes
        }

        // we only play the note for 90% of the duration, leaving 10% as a pause
        tone(buzzer, melody[thisNote], noteDuration*0.9);

        // Wait for the specief duration before playing the next note.
        delay(noteDuration);

        // stop the waveform generation before the next note.
        noTone(buzzer);
    }
    }

    void loop() {
    // no need to repeat the melody.
    }
Great, the Star War imperial march works!!!
What problems did I have and how did I solve it?
The connection is simple and I had no problems connecting it.
The code is somewhat complex, it was difficult for me to understand it, but with patience I was able to achieve it.
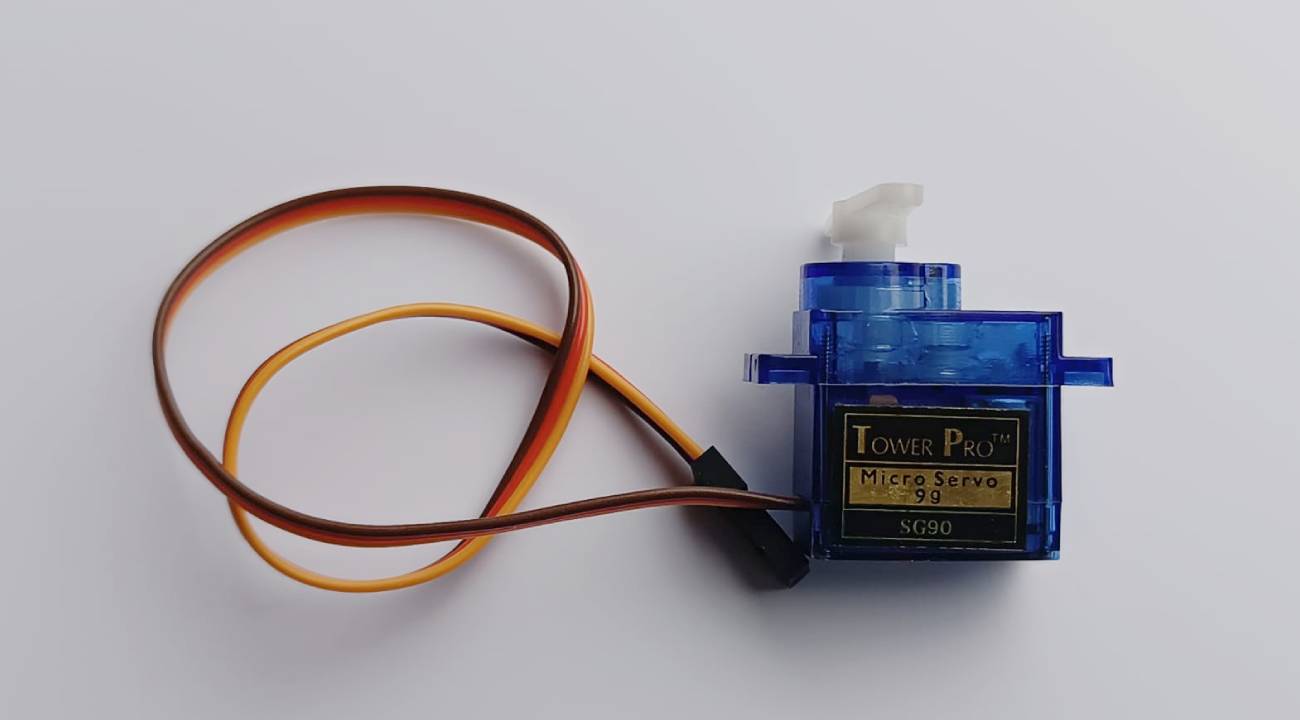
Now we will test an SG90 servo motor connected to the XIAO RP2040 microcontroller.
Principle:
A servomotor is a direct current motor, designed to move at a fixed angle and maintain that position until a new command.
All servos used for robotics have a 3-wire connector. VCC (red), GND (brown) and signal (orange):
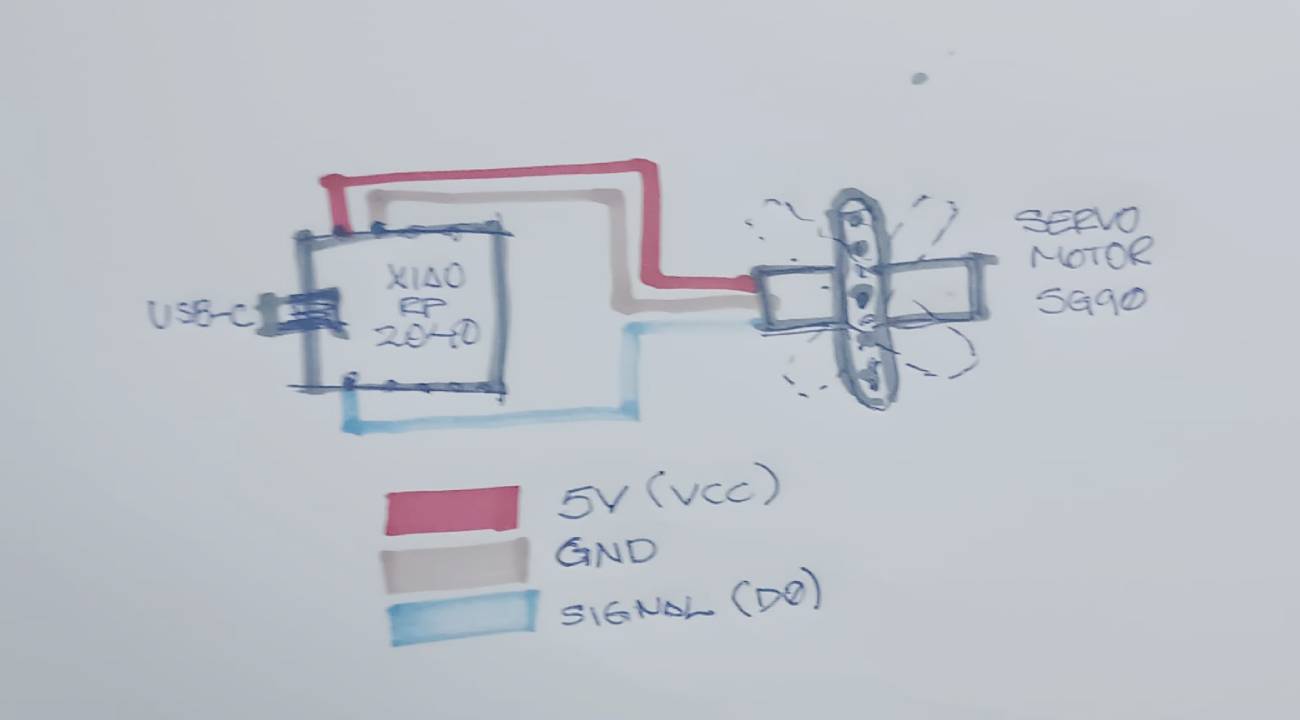
Connection diagram.
XIAO RP2040 microcontroller.
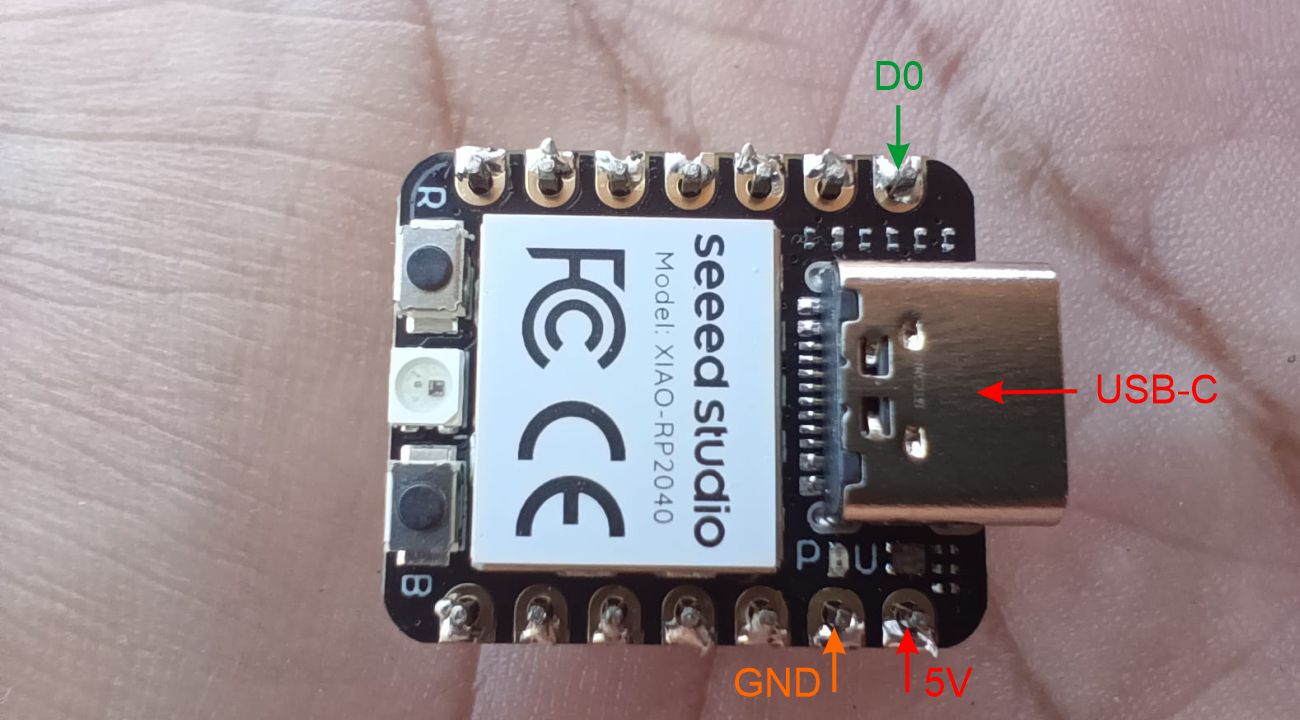
Connection of the servo motor to the "Crisduino" PCB.
1. 5V (VDC)
2. Signal (D0)
3. GND
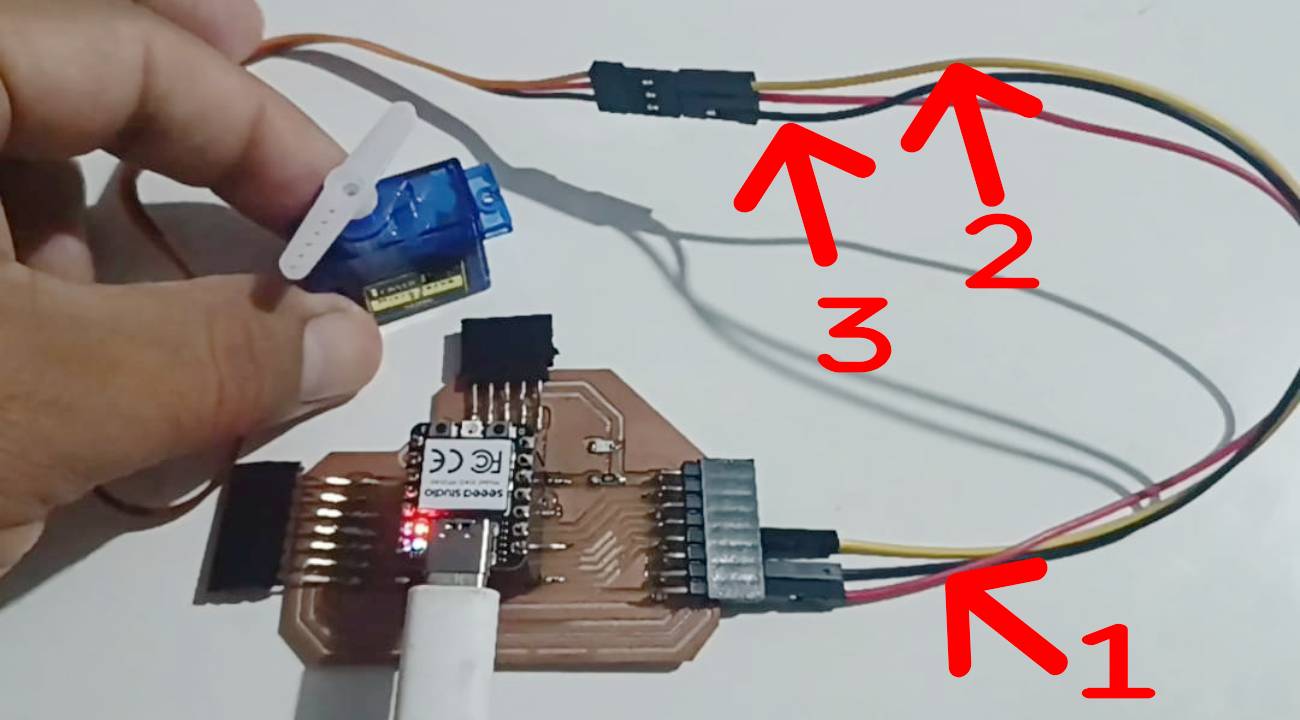
Now we write a simple code to see the movement of the SG90 servo motor connected to the XIAO RP2040 microcontroller.
    #include <Servo.h> //Import library

    Servo servocrisduino;

    void setup() {
        servocrisduino.attach(D0);
    }

    void loop() {
        servocrisduino.write(0);
        delay(2000);  // wait 2 seconds
        servocrisduino.write(90);
        delay(2000);  // wait 2 seconds
        servocrisduino.write(180);
        delay(2000);  // wait 2 seconds
    }
Result of the movement of SG90 servo motor connected to the XIAO RP2040 microcontroller.
Download files
Here we can find and download the design original files