
Interface and Application Programming
The assignments for this week:
- Individual assignment:
- write an application that interfaces a user with an input &/or output device that you made
- Group assignment :
- compare as many tool options as possible
- Graphical User Interface(GUI) A GUI uses visual elements such as windows, icons, menus, and buttons to interact with the system. Users can interact with GUIs using a mouse, keyboard, touchscreen, or other input devices.
- Command-Line Interface (CLI): A CLI allows users to interact with the system by typing commands into a text-based interface. It typically requires users to have a deeper understanding of commands and syntax but can be more efficient for certain tasks.
- Touchscreen Interface: Touchscreen interfaces are common in smartphones, tablets, and other touchscreen devices. Users interact with the interface by touching and gesturing on the screen, enabling intuitive and direct manipulation of on-screen elements.
- Voice User Interface (VUI): VUIs enable users to interact with the system using voice commands. Virtual assistants like Siri, Alexa, and Google Assistant are examples of VUIs that allow users to perform tasks, get information, and control devices using voice commands.
- Virtual Reality (VR) and Augmented Reality (AR) Interfaces: VR and AR interfaces provide immersive experiences by overlaying digital content onto the physical world (AR) or creating entirely virtual environments (VR). Users can interact with these interfaces using specialized VR/AR devices and controllers.
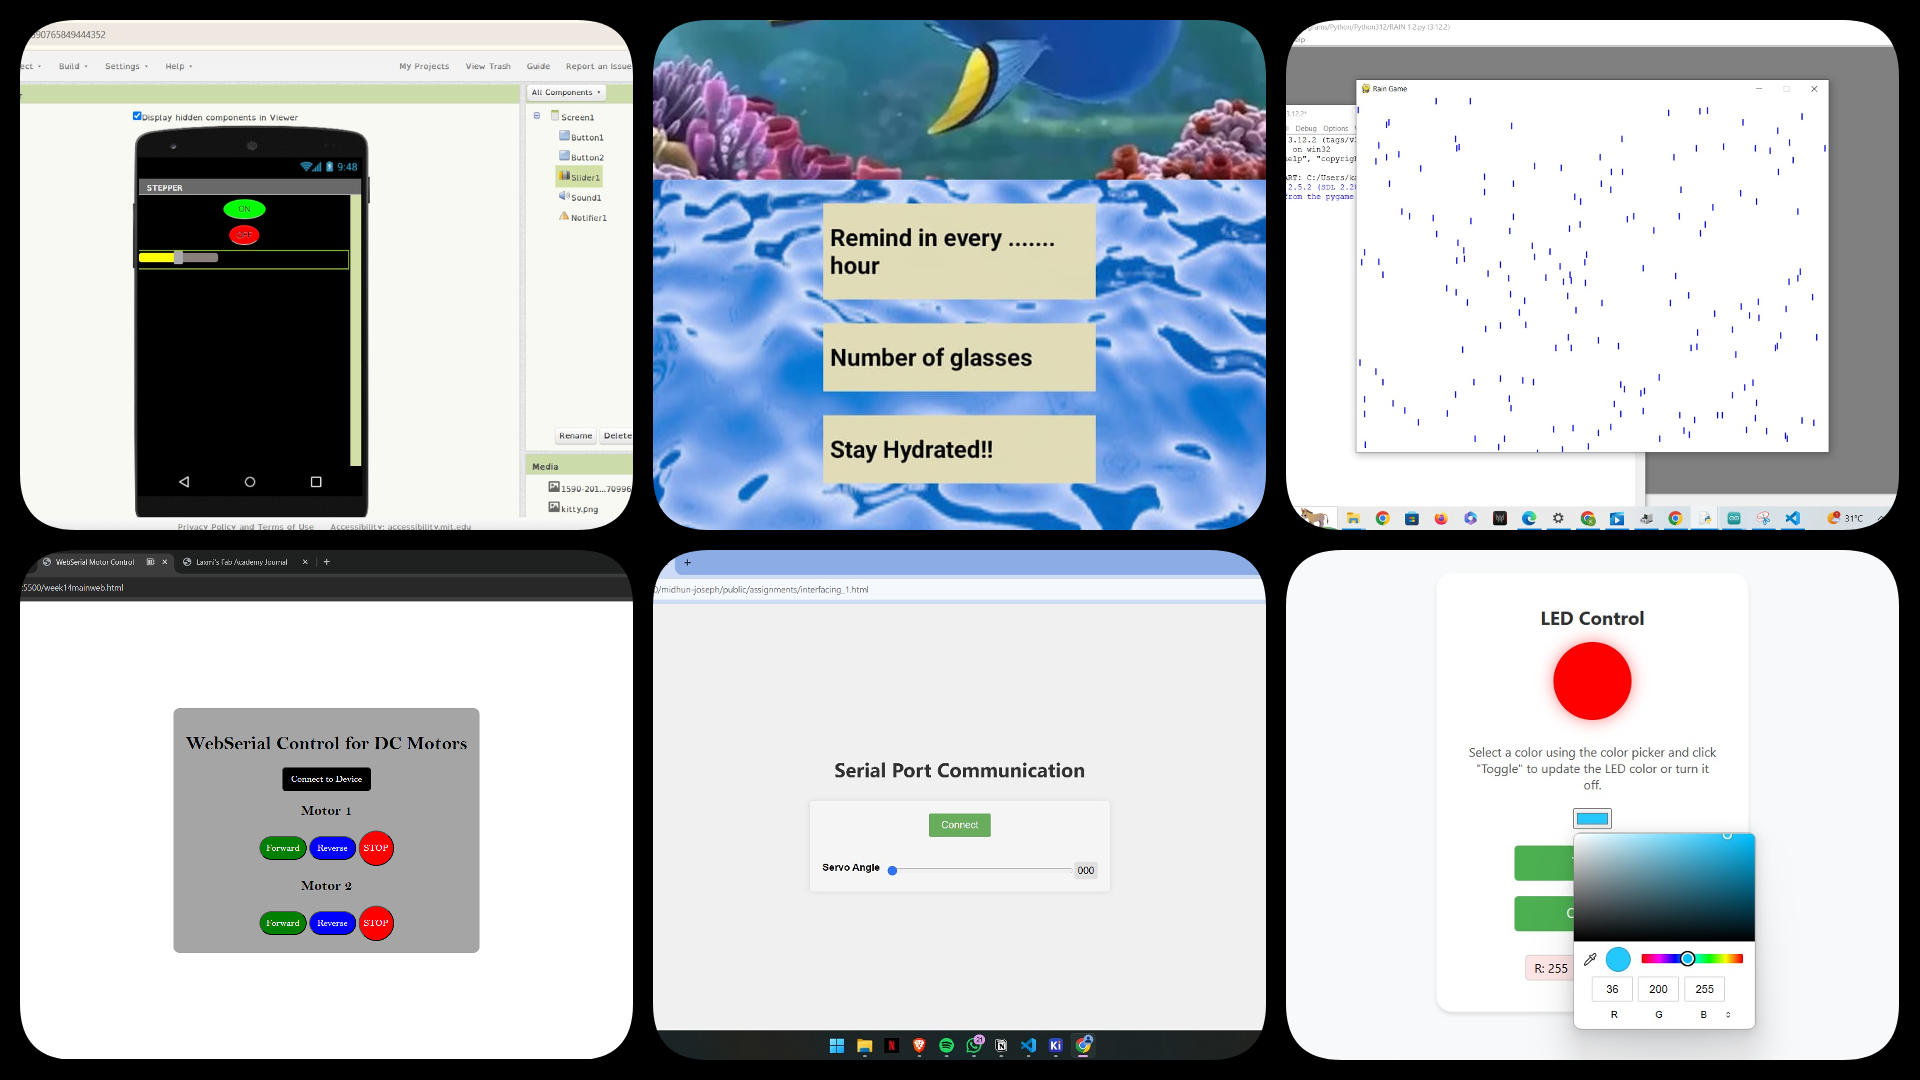
- Initially, we were asked to try to make a GUI in HTML file by writing a code for creating the GUI to interface with two buttons.
- HTML is used to define the structure of the interface by specifying various UI elements such as text, buttons, input fields, dropdown menus, and more. These elements are defined using HTML tags within the document.
- CSS (Cascading Style Sheets) can be used to style the UI elements defined in HTML, making them visually appealing and enhancing the overall user experience. CSS is used to specify properties such as colors, fonts, sizes, layouts, and more.
- While HTML provides the structure and CSS adds style, JavaScript can be used to add interactivity to the wired interface. JavaScript allows for dynamic behavior such as validating user inputs, responding to user actions (like button clicks), updating content without reloading the page
- We can access the wired interface by opening a web browser on the laptop and navigating to the URL where the HTML interface is hosted. As long as the device is connected to the internet and can communicate with the server hosting the interface, we can interact with the wired interface.
- I copied the HTML code provided by my instructor, Midlaj, into the HTML file. This code included the necessary elements and styling to create the interface with buttons for connecting and controlling the LED.
- I connected the Xiao RP2040 board to my computer using a USB cable.
- Using the Arduino IDE, I programmed the Xiao RP2040 board. I made modifications to the code like changing the pin number to 1 to correspond with the LED pin on the board.
- Once the code was uploaded, I connected the Xiao RP2040 board to the required port on my computer.
- With the board connected and the HTML interface open in a web browser, I clicked on the "Connect" button to establish a connection between the GUI and the Xiao RP2040 board.
- After establishing the connection, I clicked on the "LED" button to switch the LED on.
- I verified that the LED on the Xiao RP2040 board turned on as expected.
What is User Interface(UI)?
A user interface (UI) is the means by which a user interacts with a device, software application, or system. It includes all the elements and controls that enable users to input commands, manipulate data, and receive feedback. UI design focuses on creating intuitive, visually appealing, and user-friendly interfaces that enhance the overall user experience. There are several types of user interfaces:
Wired and Wireless connections
Wired connections use cables like USB or Ethernet to send data between devices. They're dependable and don't need Wi-Fi or Bluetooth. Wireless connections, on the other hand, don't need cables. They use technologies like Bluetooth or Wi-Fi to send data without wires, making it easy for devices to talk to each other from nearby or far away.Using HTML for a wired interface typically involves creating a web-based user interface that can be accessed through a web browser on a device connected to the internet.It serves as the foundation for creating the visual elements and structure of the interface.
The GUI to control the LED on the XIAO RP2040
For the code for this interface, Click Here
Using MIT App Inventor and Kodular Creator
I decided to use MIT App Inventor or Kodular as a user interface design leveraging their visual development environments to create intuitive and interactive interfaces for mobile applications without the need for traditional coding skills.They are visual development platforms providing a drag-and-drop interface for building Android applications.You can design UI elements such as buttons, text fields, images, and more by simply dragging them onto the design canvas.
Use the Blocks Editor we can define the behavior and functionality of the UI elements.
They offers various components and features to create engaging user interfaces, including sensors, multimedia, connectivity, and data storage components.
Once the UI design is complete, we can preview and test the application directly on an Android device using the Companion app or by generating an APK file for installation.
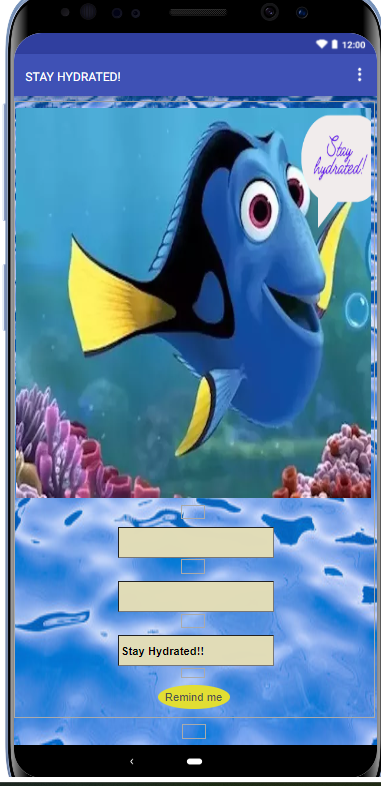
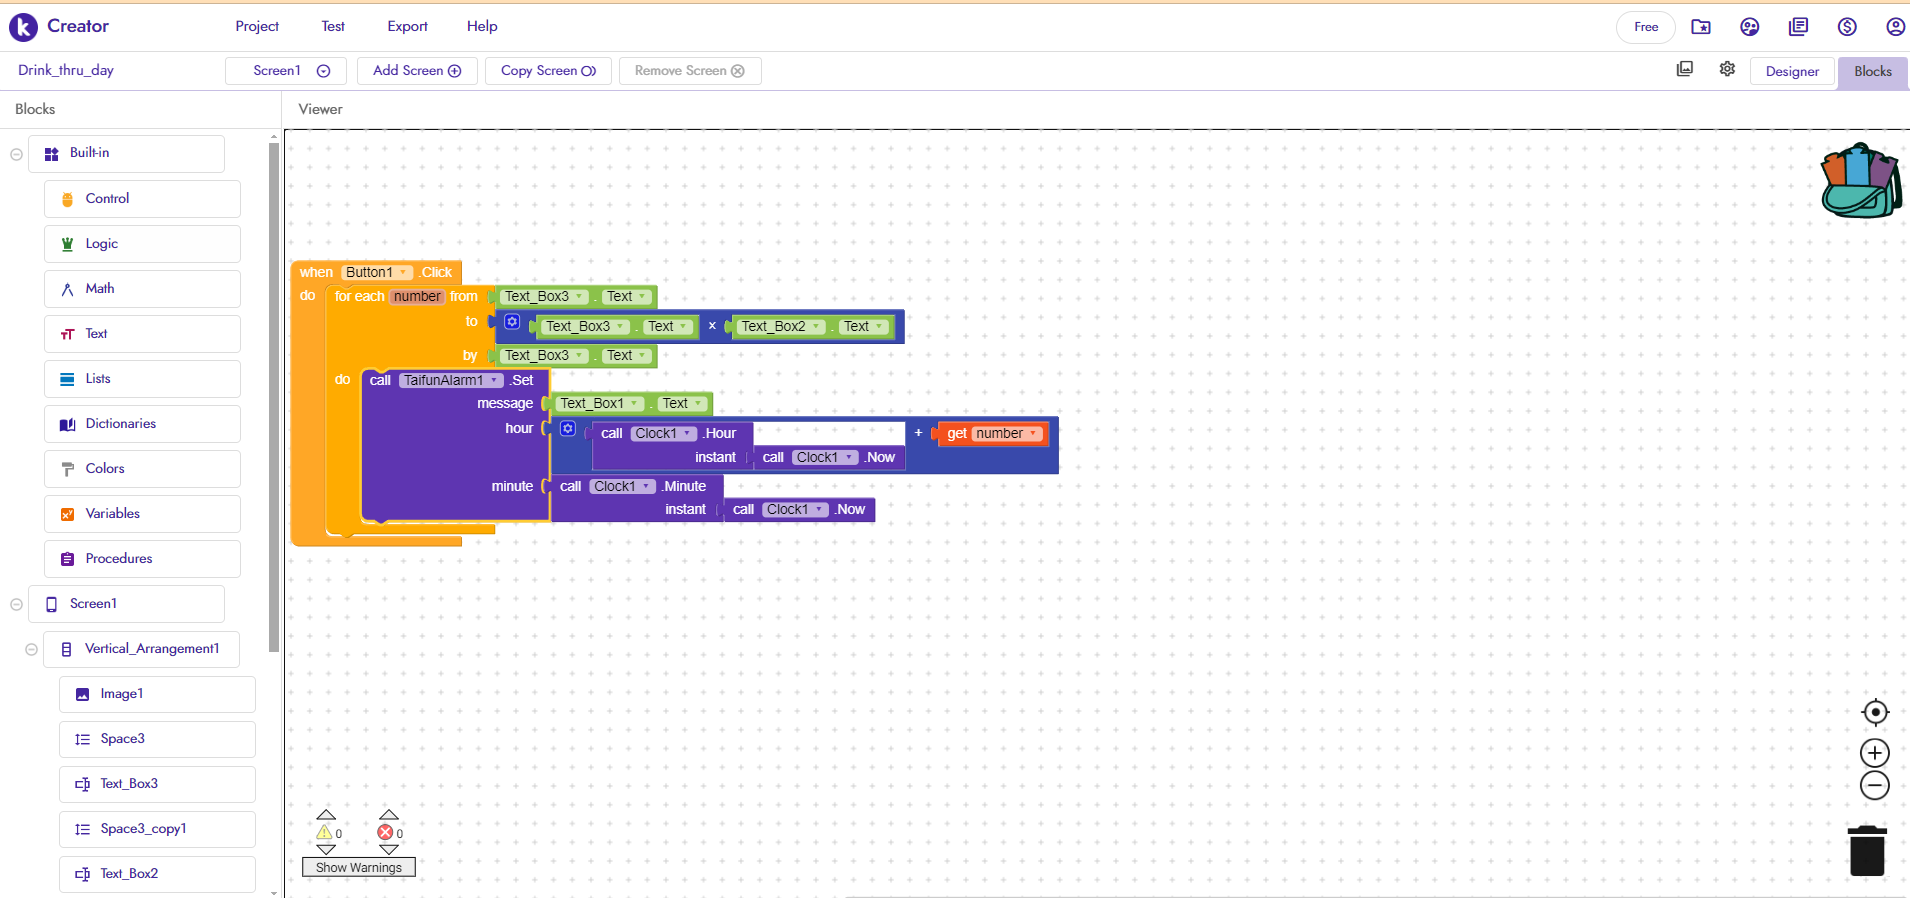
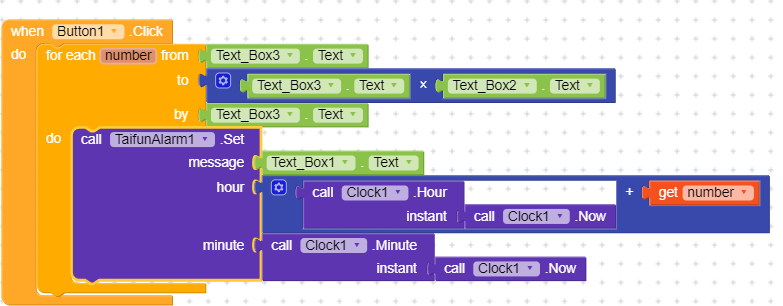
Using Kodular as a reminder to drink water
After trying both, I preferred Kodular. I felt it had more options for customisation.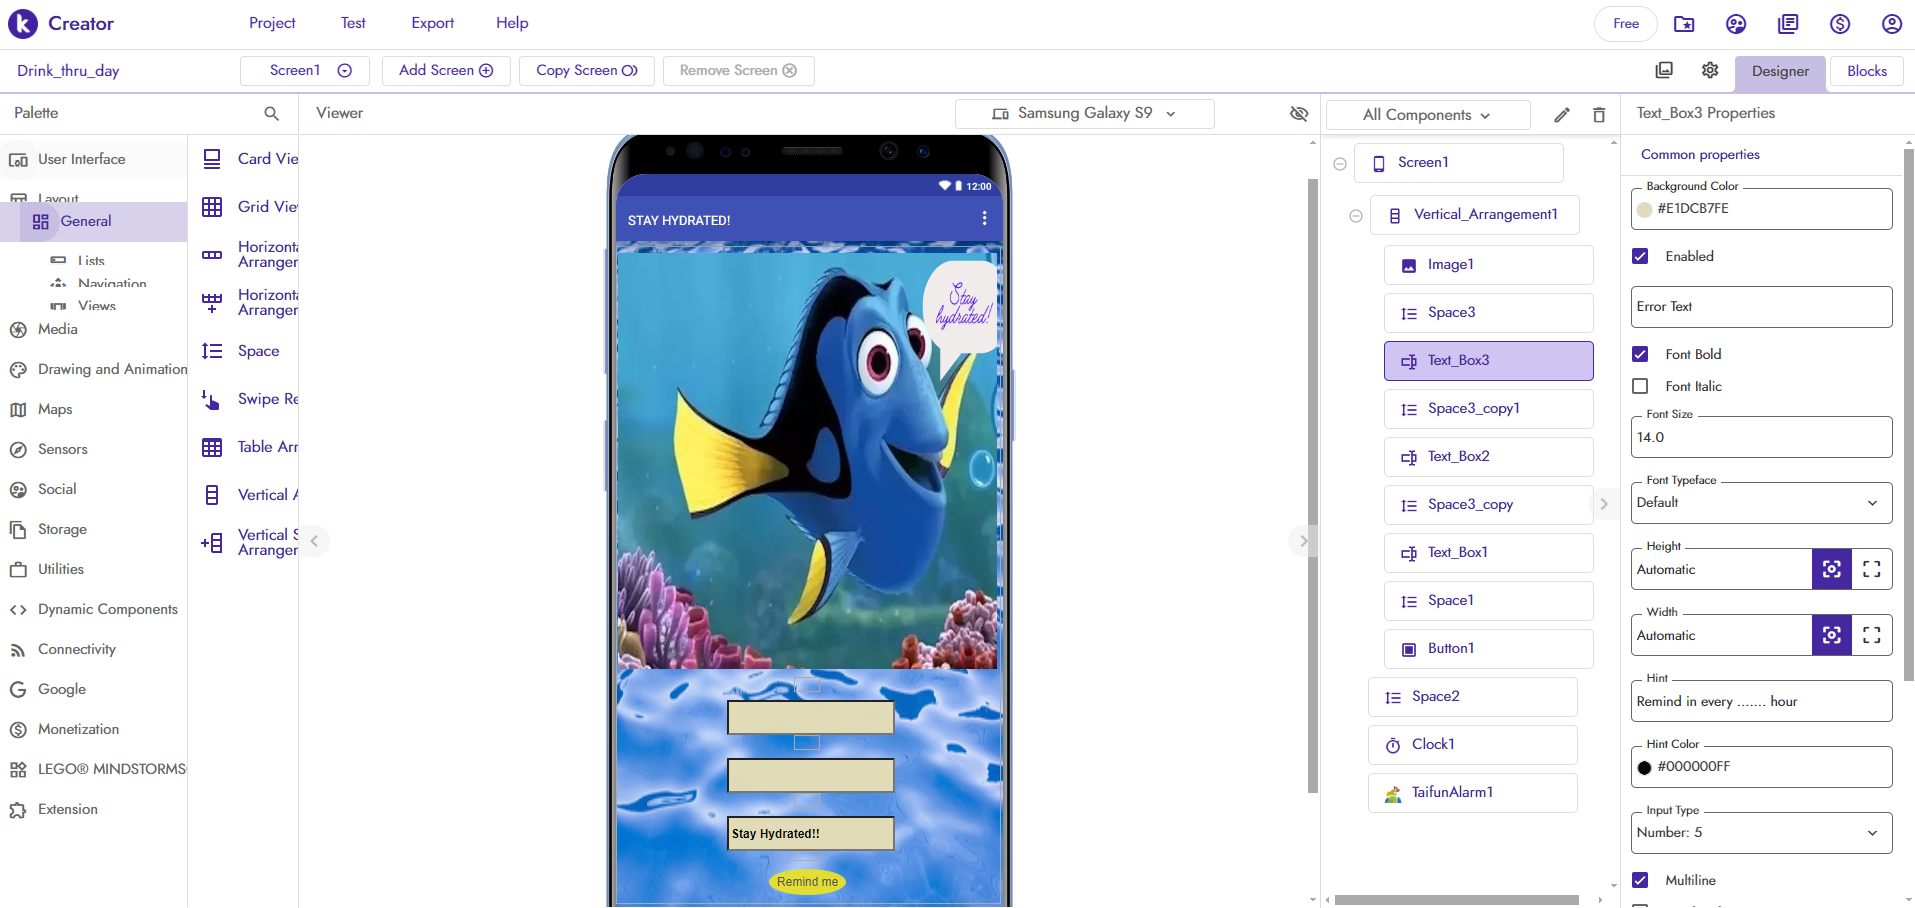
Using Kodular to control the LED in my board
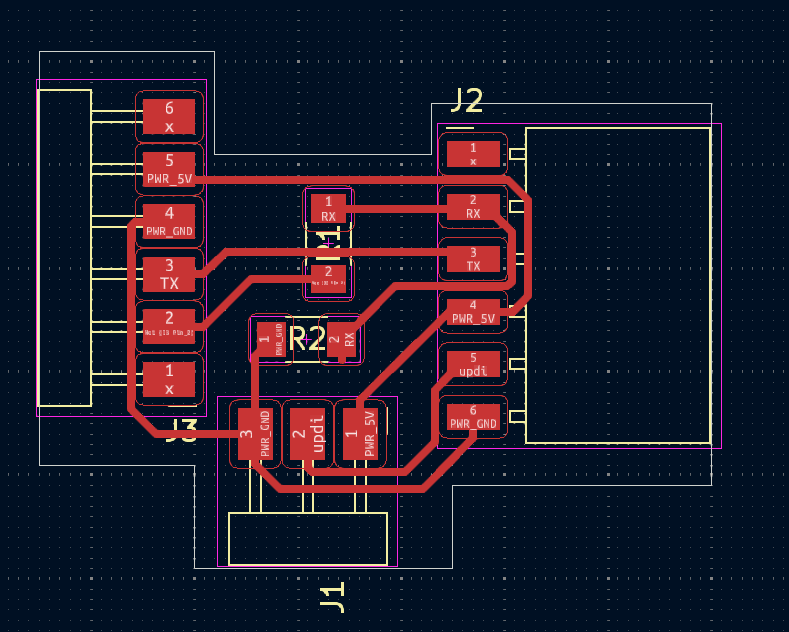
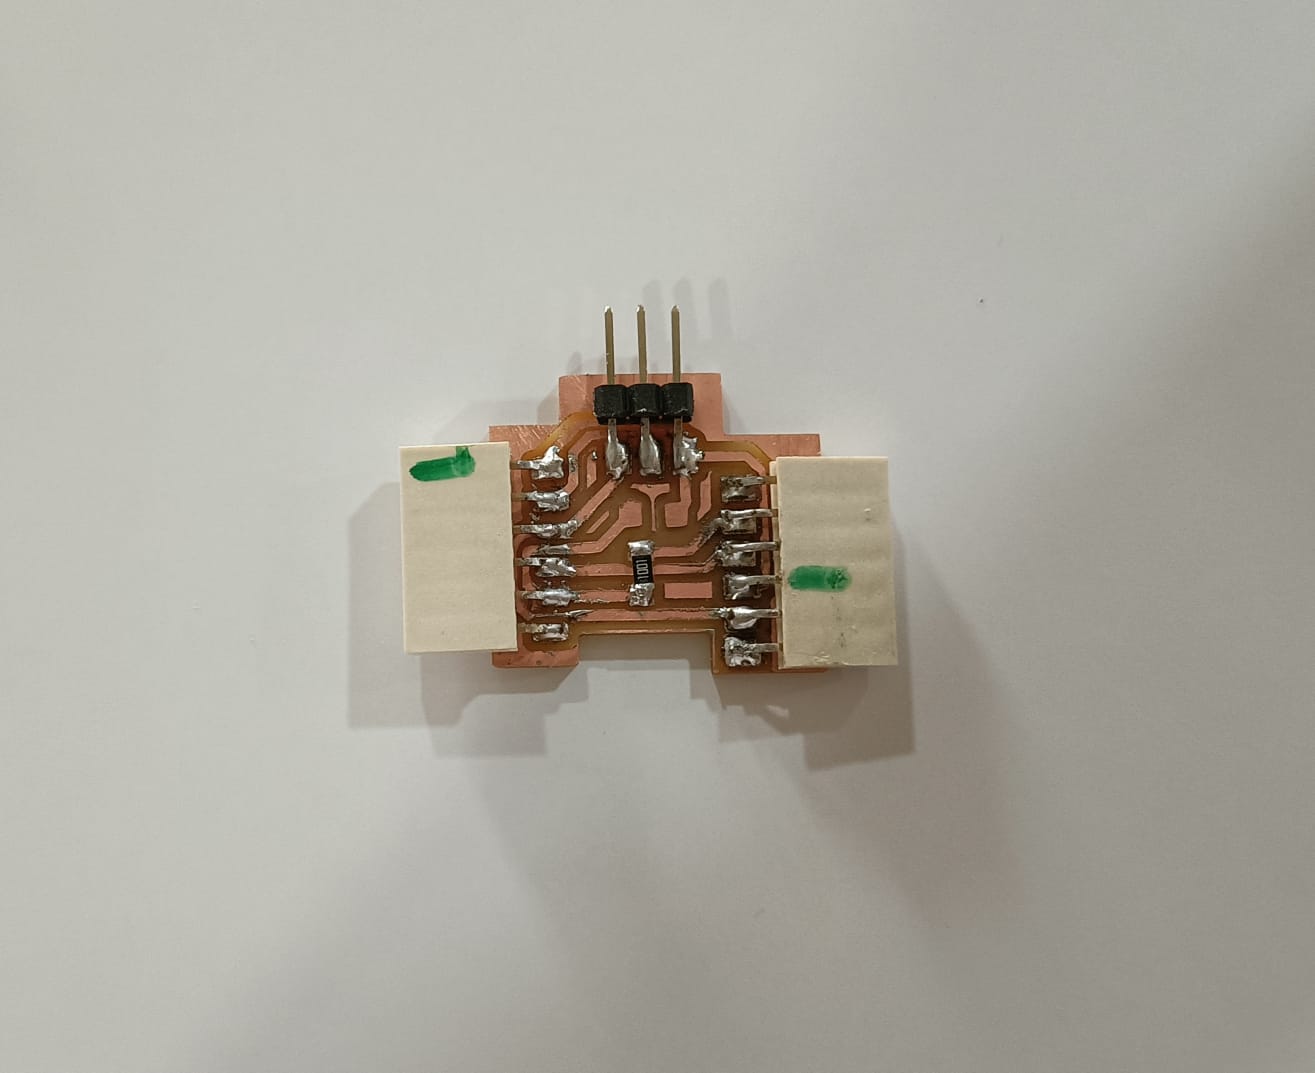
I wanted to use my PCB which has ATtiny1614 as the microcontroller but it didnt have a bluetooth module. , so I had to add a Bluetooth module. I thought of using the Quentorres board to power the board.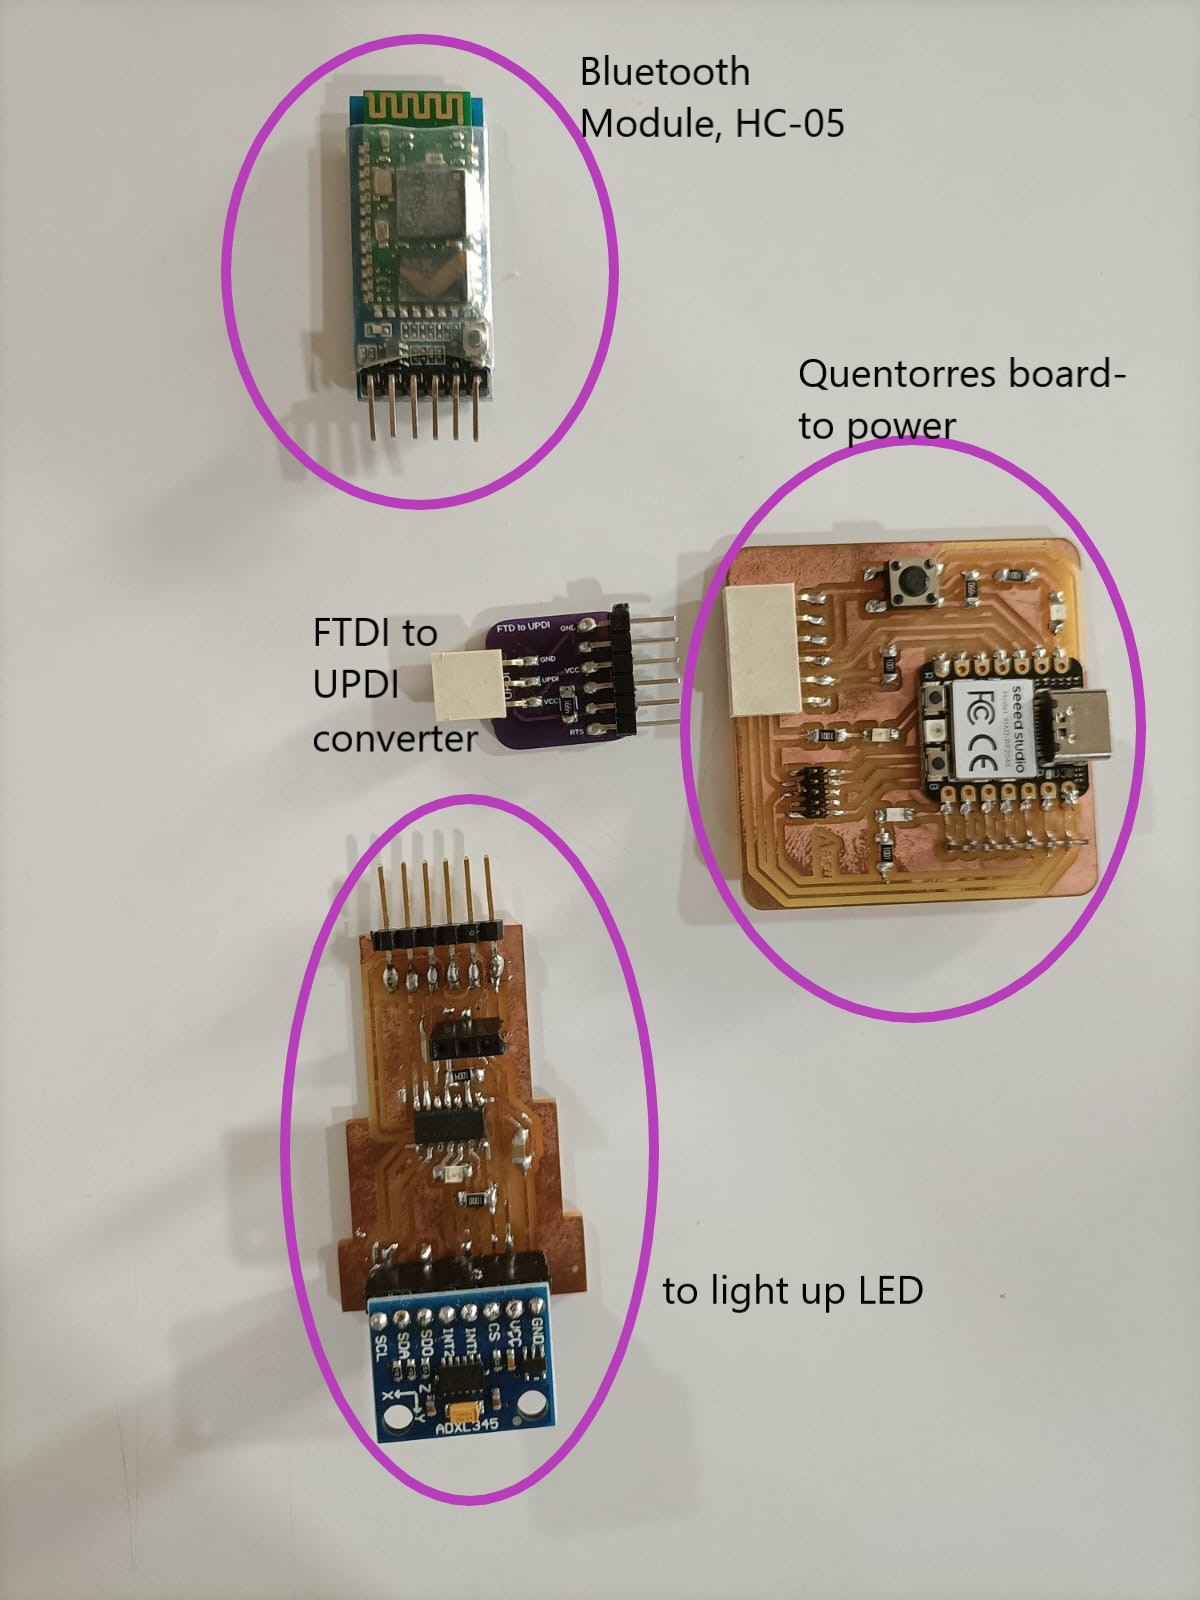

.png)
Here, '1' indicates on and this will be communicated to the board and '0' indicates off.
.png)
    #include < SoftwareSerial.h>

      #define LED_PIN 8 // Define your LED pin

      SoftwareSerial Bluetooth(5, 4); // RX, TX

      void setup() {
      pinMode(LED_PIN, OUTPUT);
      Bluetooth.begin(9600); // Set Bluetooth module baud rate
      Serial.begin(9600); // Optional: For debugging
      }

      void loop() {
      if (Bluetooth.available()) {
      char command = Bluetooth.read();
      Serial.println(command); // Optional: For debugging

      if (command == '1') {
      digitalWrite(LED_PIN, HIGH); // Turn the LED on
      } else if (command == '0') {
      digitalWrite(LED_PIN, LOW); // Turn the LED off
      }
      }
      }
Group assignment:
Interface and Applications Programmings
Design files
Bridge boardHTML for Blink in XIAO RP2040
Kodular file for Reminder to drink water
Kodular file for controlling LED