Molding and Casting
Assignments
- Group Assignment
- Review the safety data sheets for each of your molding and casting materials
- Make and compare test casts with each of them
- Compare printing vs milling molds
- Individual Assignment
- Design a mold around the process you’ll be using, produce it with a smooth surface finish, and use it to cast parts
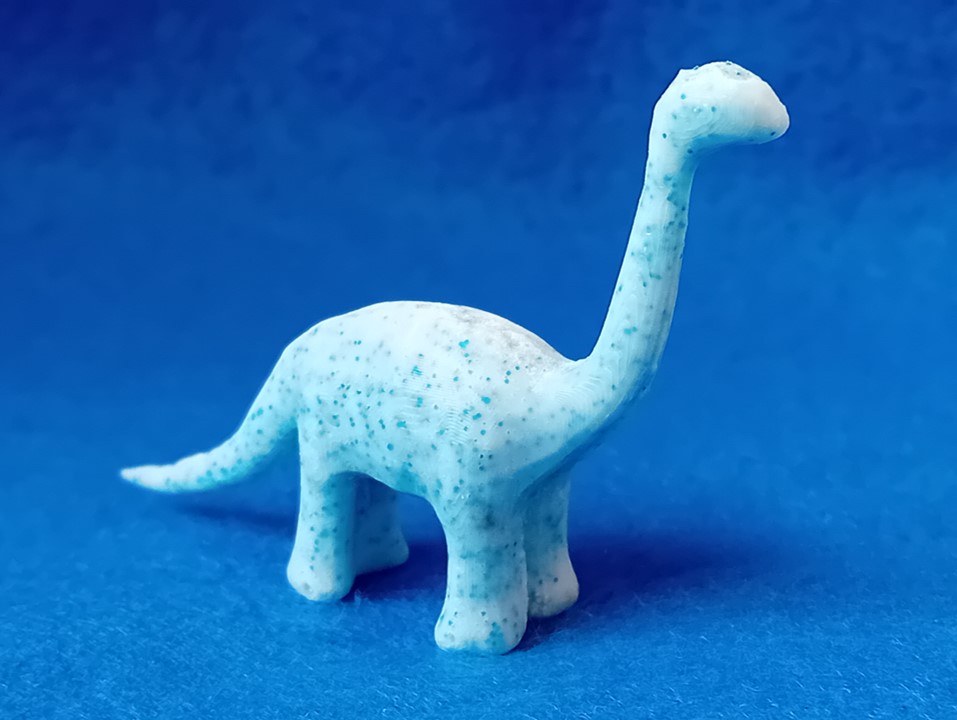
Hero Shot
Design
For this week's assignment, I decided to create a dino key chain. As the design is more organical and less technical (mechanical), it seemed to be a better choice to use Blender. In general, Blender is an incredible tool to create 3D models and animation. Unfortunetly, I always struggle with the operation as the interface and the short cuts are not intuitively for me.
Here are the steps I used to design the dinosaur:
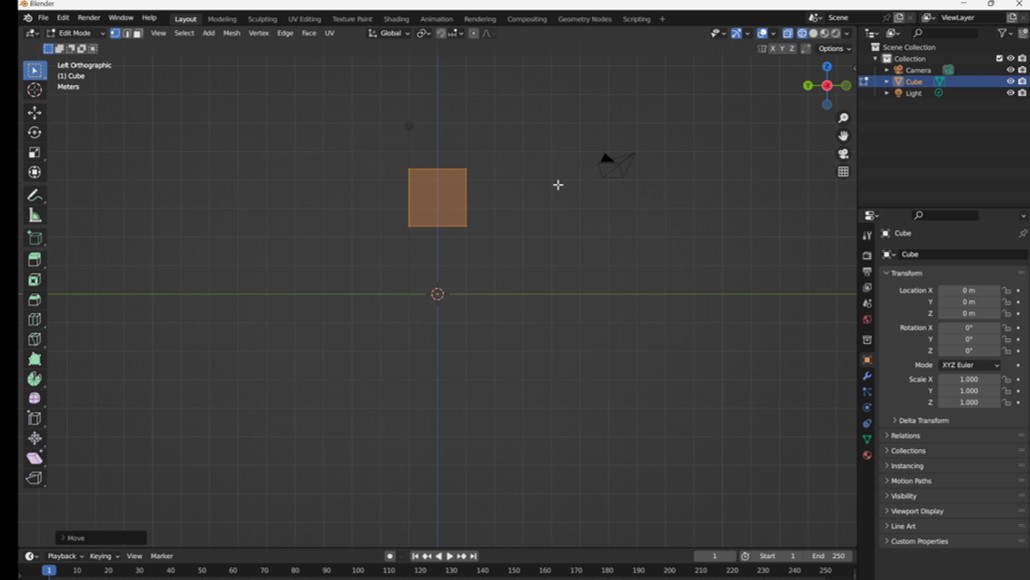
I clicked the default cube in the Blender workspace and went to the edt mode (press Tab)
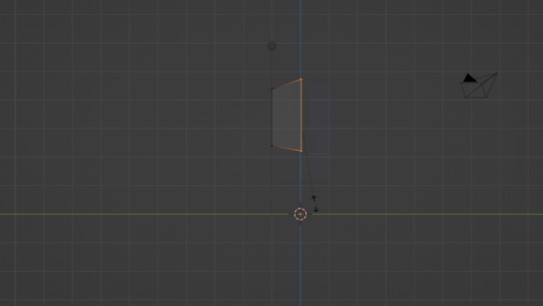
To start with the dinosaur, I decided to creat the body first. Therefore, I marked 4 vertices on one of the sides of the cube and moved them in y direction (press G + Y). To make sure to collect all points (also the one behind the other vertices) press Z. I used the scale tool (press S), the rotate tool (press R), and the extrude tool (press e) to create the basic body shape
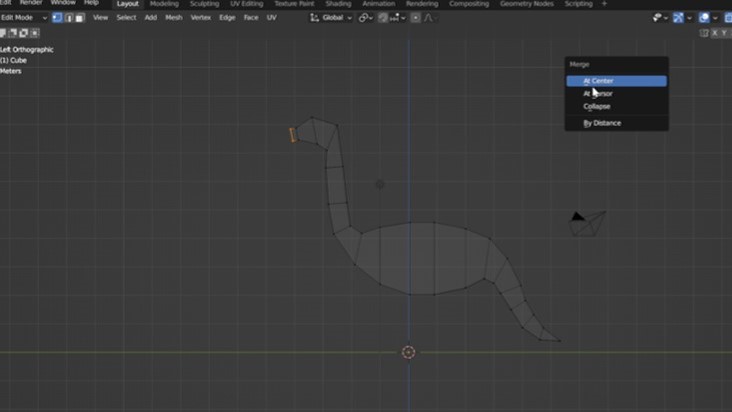
As the end of the body (head and tail) taper to a point I merged the end points (press M) and clicked on "at center"
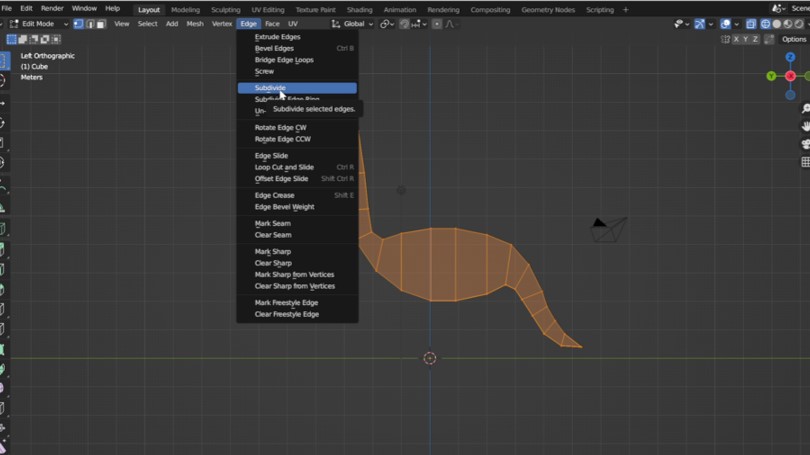
I then decided, as the dino needs more features and a better solution, that a need more vertices and faces. To create them I selected all faces (press A) and click on (edges) to select "Subdivide".
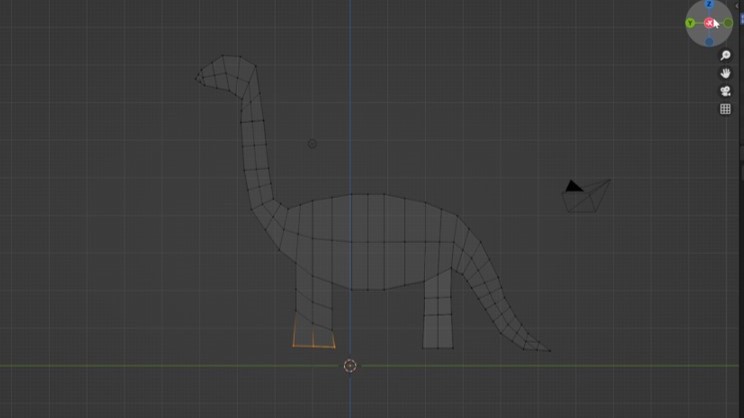
I then created the legs by extruding the faces.
To make the casting easier and ensure the homogenous distribution of casting material and an easier escaping of air bubbles, I did not divide the legs into two, but created just an inprint.
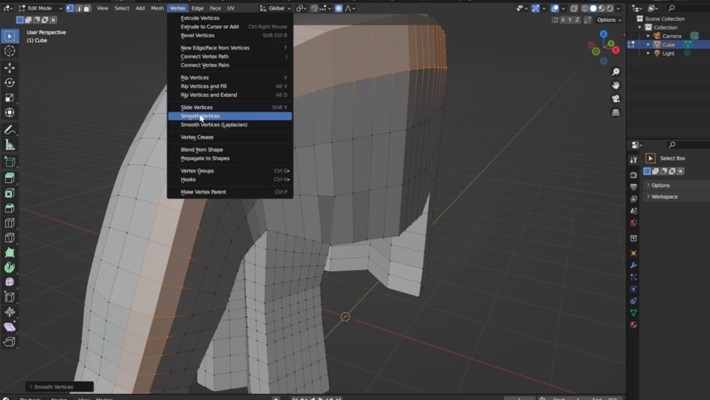
I then used the circle selection (press c) to select edges that I wanted to smooth. To do so go to "vertices" and click on "smooth vertices".

Additionally, I used the circle tool for changing the size of the tail by combining it with the scale tool (press s).

I used the different ways of mesh manipulation ("smooth vertices", "move", "subdivide", "rotate", "scale", and "extrude") to create a satisfying finish for the Brontosaurus.
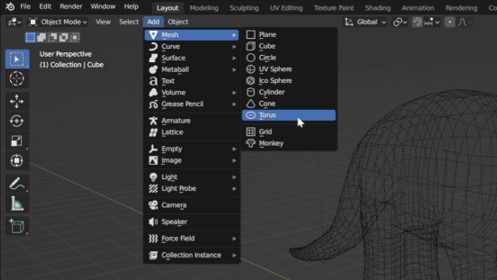
As I wanted to create a key chain, I also included a way to put the dino on a chain with a torus. To create, go to "Add", "Mesh", and click on torus
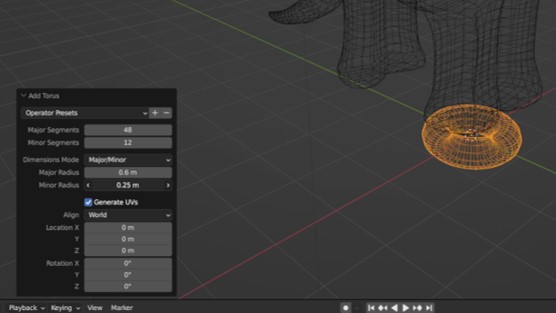
A small window will occur on the left bottom were you can select the desired measurement and resolution for the torus.
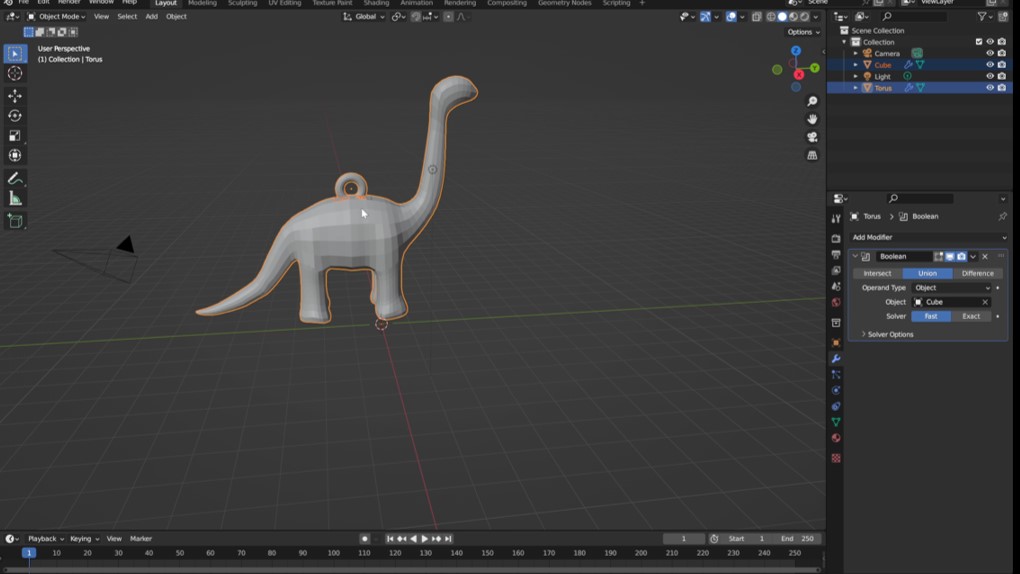
I placed the torus on the body of the dino and used the boolean tool to combine both objects to one. I then exported the object as an .stl
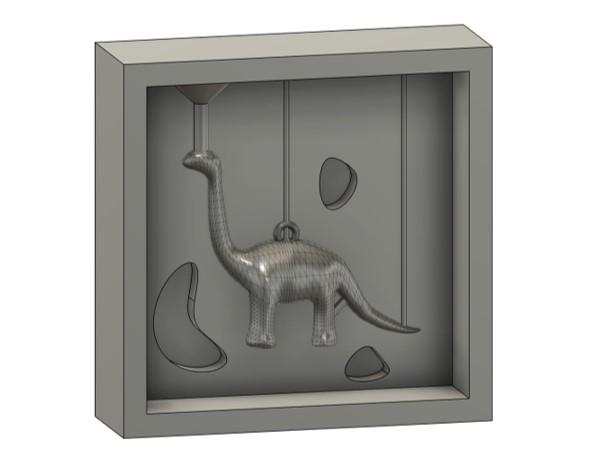
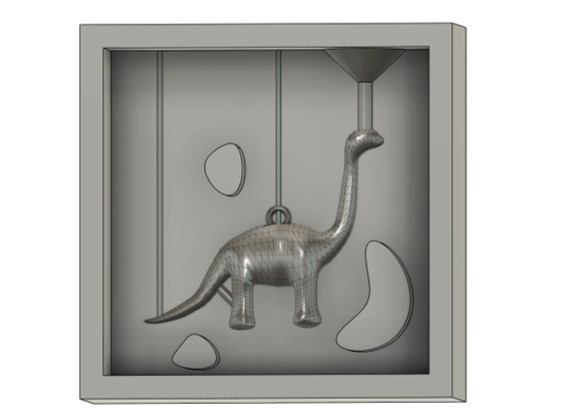
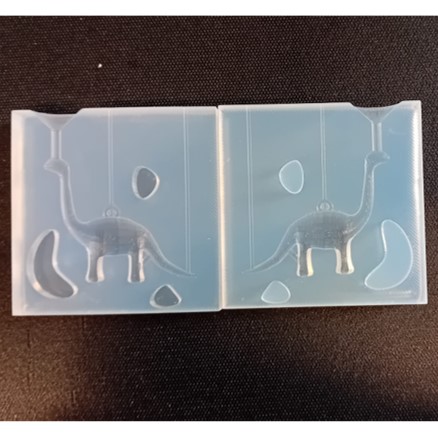
The next step was to create a positive mold, that can be printed. I used Fuion 360 as CAD software to create the mold.
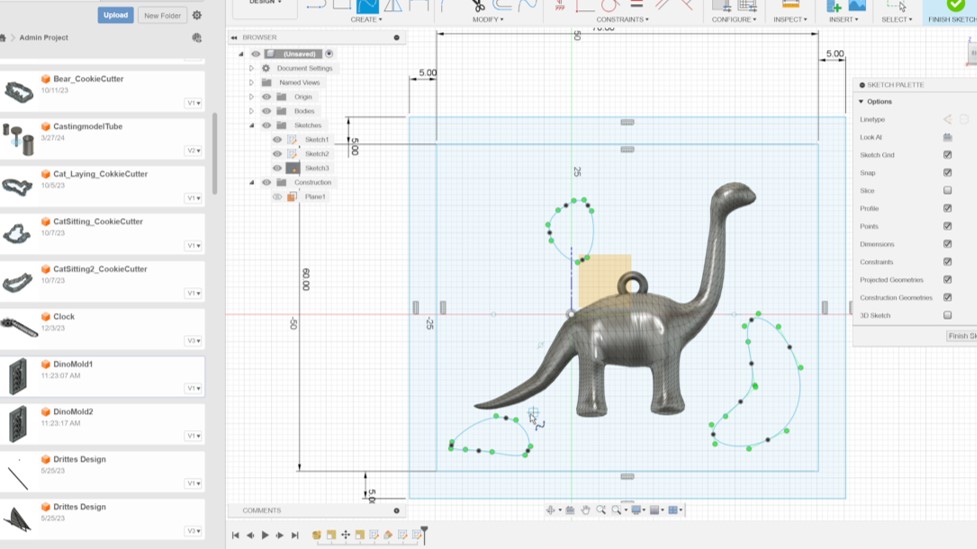
I created the sketch for the box and the recognition pins. i tried to go for unsymmetrical shapes and use at least three od them to ensure a good fit.
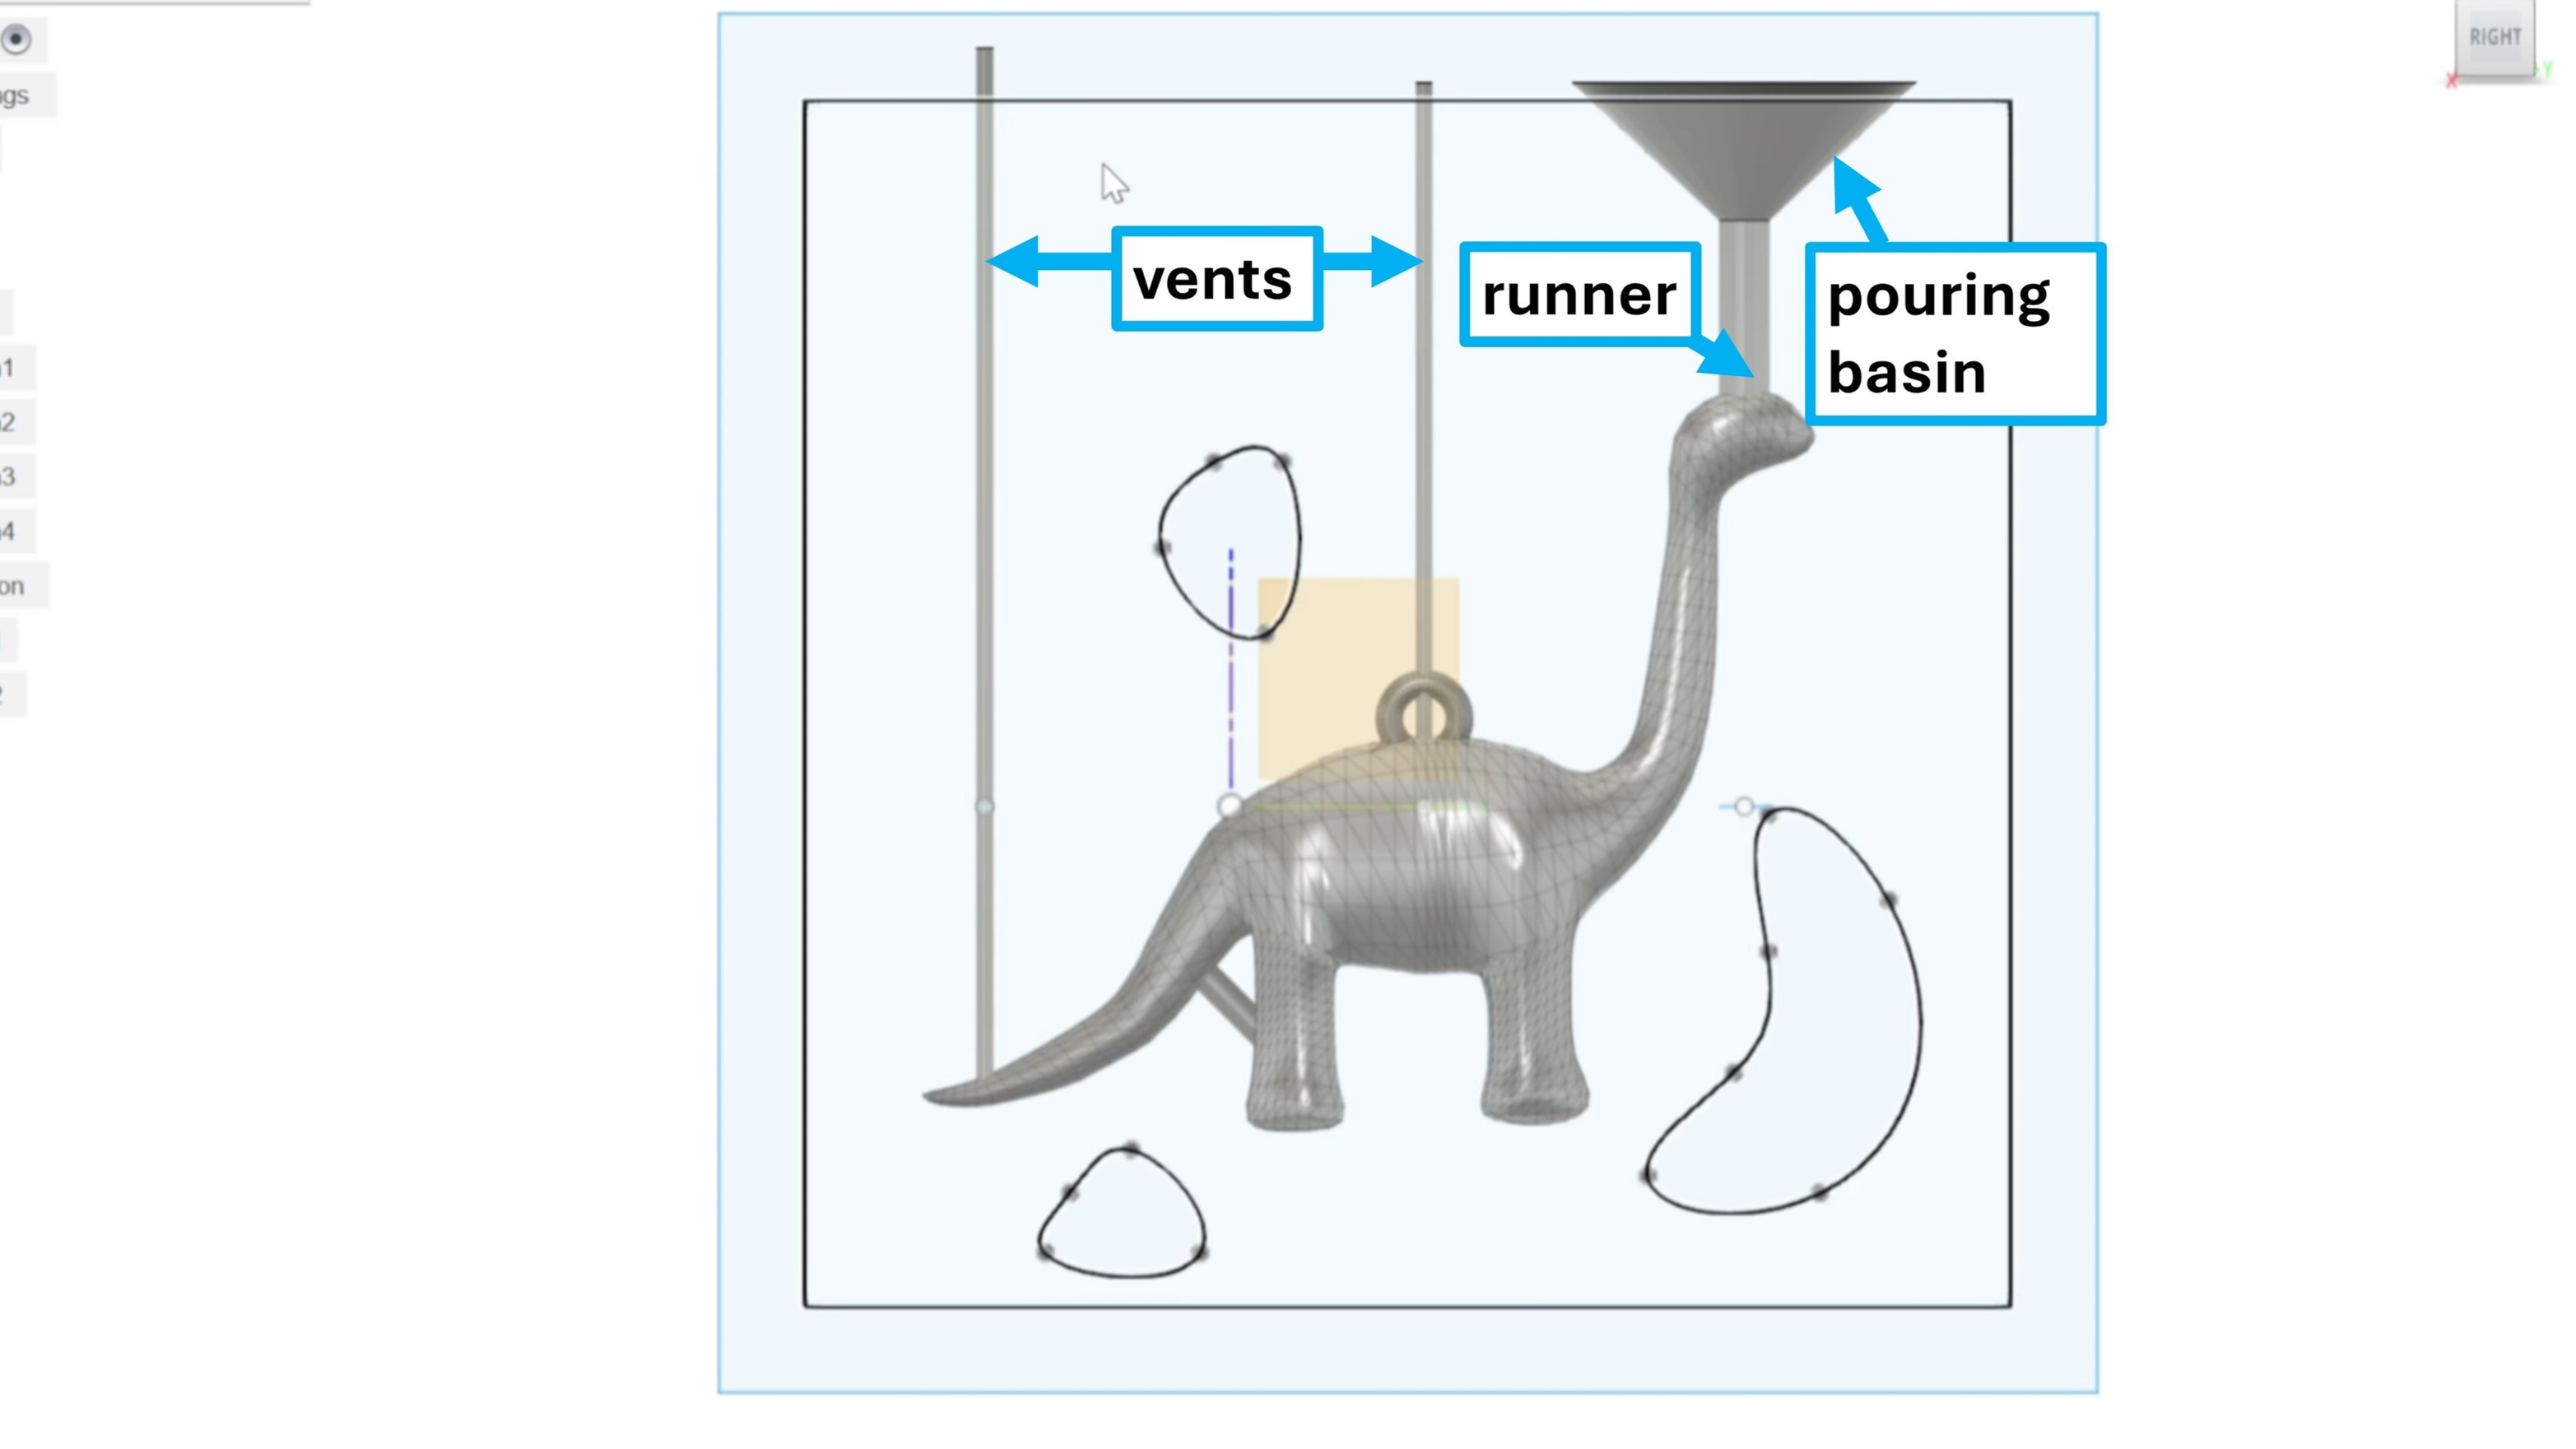
I then created the important features for the casting.
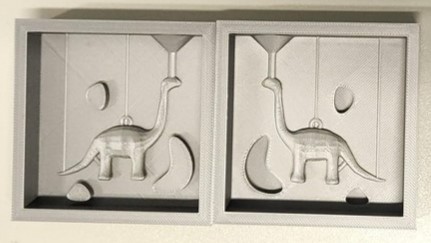
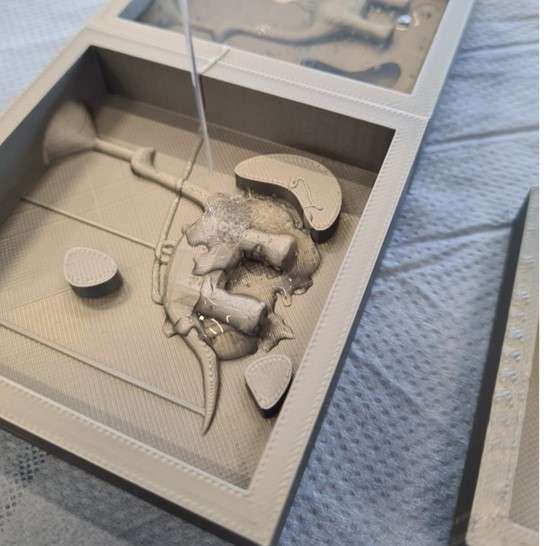
The next step was to create two parts of the positive molds, fitting together for the finish silicone mold. Therefore, I copied the project and created two different mold parts
Printing the positive Mold
The design was printed on a Bambu Lab x1 Carbon with a resolution of 0.08 mm. The material used for the print was PLA.
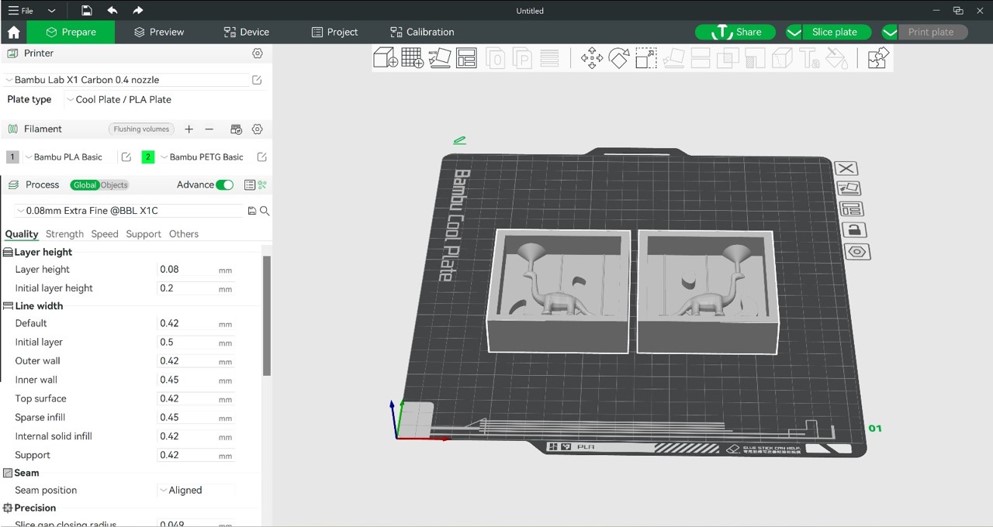
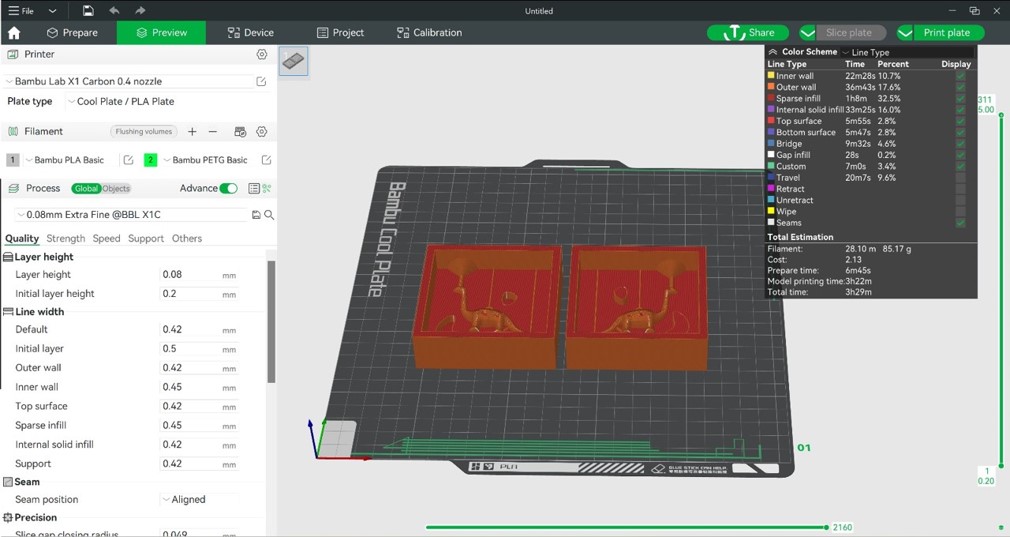
The time for printing was 5,5 h. The print worked out without any issues.

Casting from positive Mold
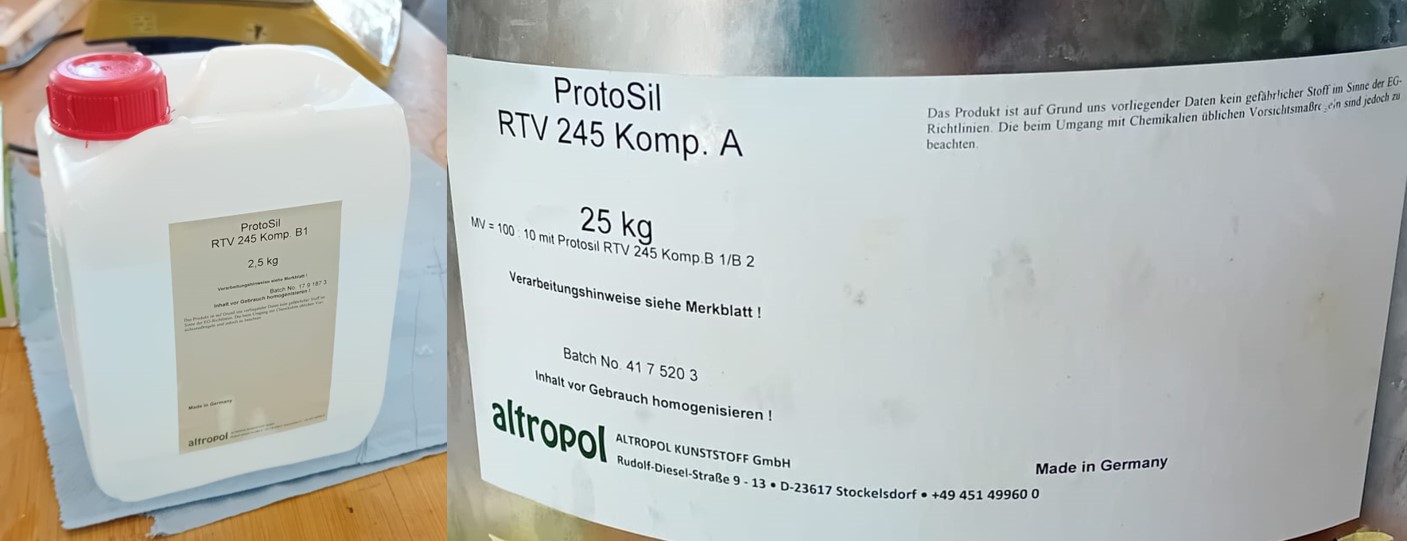
As cast material I used the silicone "ProtoSil" RTV 245. It is a two component silicone, with a weight mixing ration of 10:1 (Comp A : Comp B). As Frauke Waßmuth, Bianca Guimaraes and I were using the same silicone we prepared enough silicone for our molds and the group assignment mold. (see here)
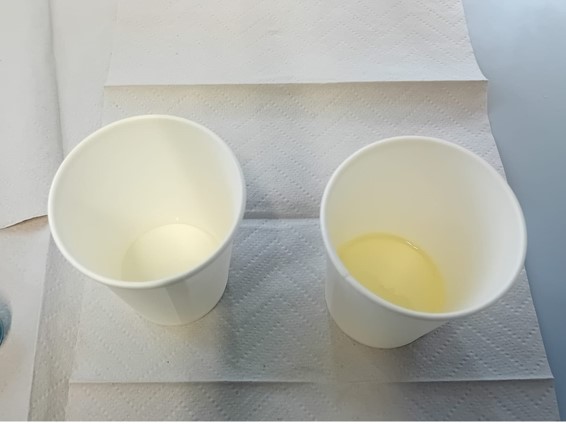
The data sheet recommends to pour Component B in Component A. As Component A is very viscous, it was possible to take it out the barrel with a spoon.
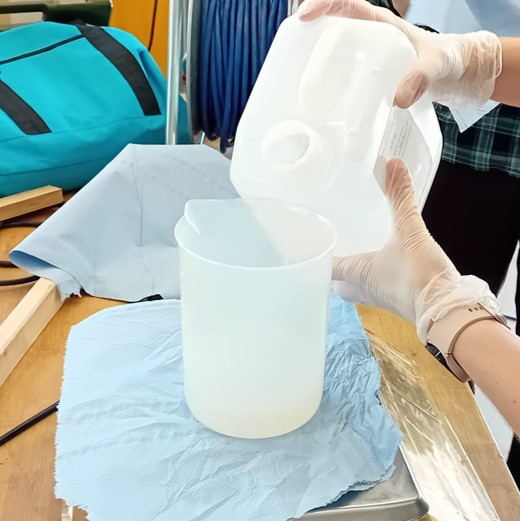
After weighting Component A, we poured 1/10 of the weight of Component B in the container.
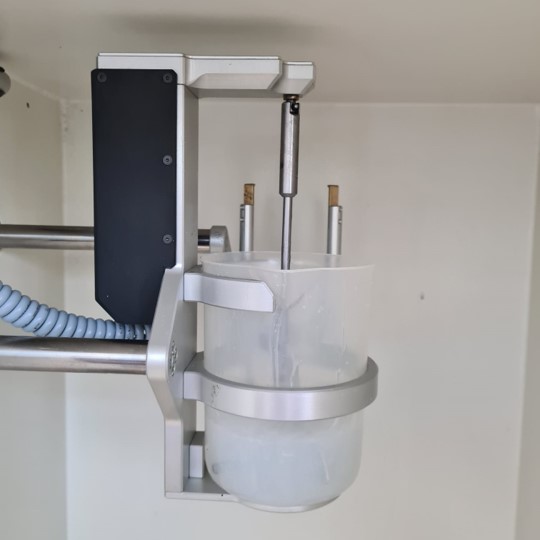
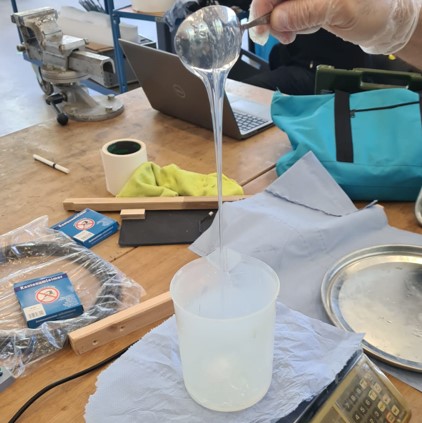
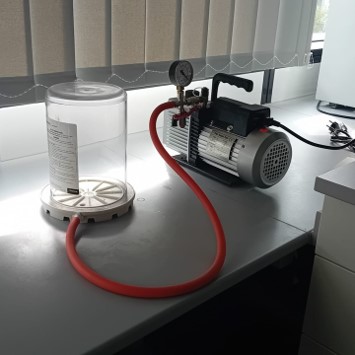
After stirring the components with a spoon, we put the container in the vacuum chamber with the included stirring system.
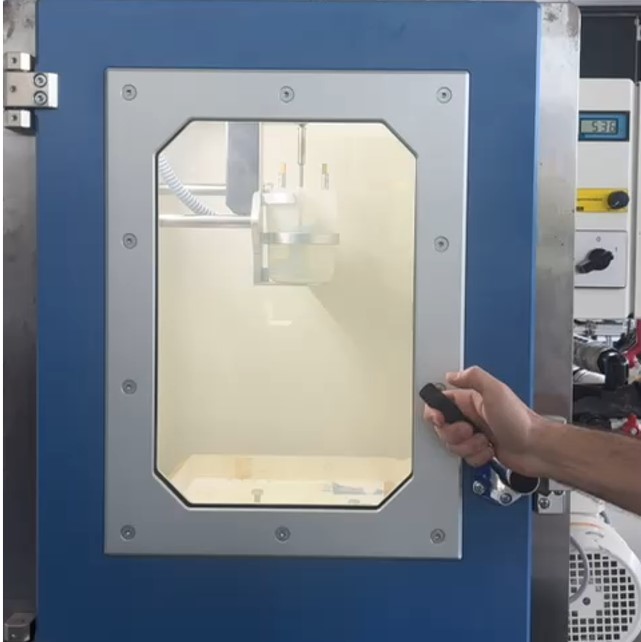
We closed the vacuum chamber.
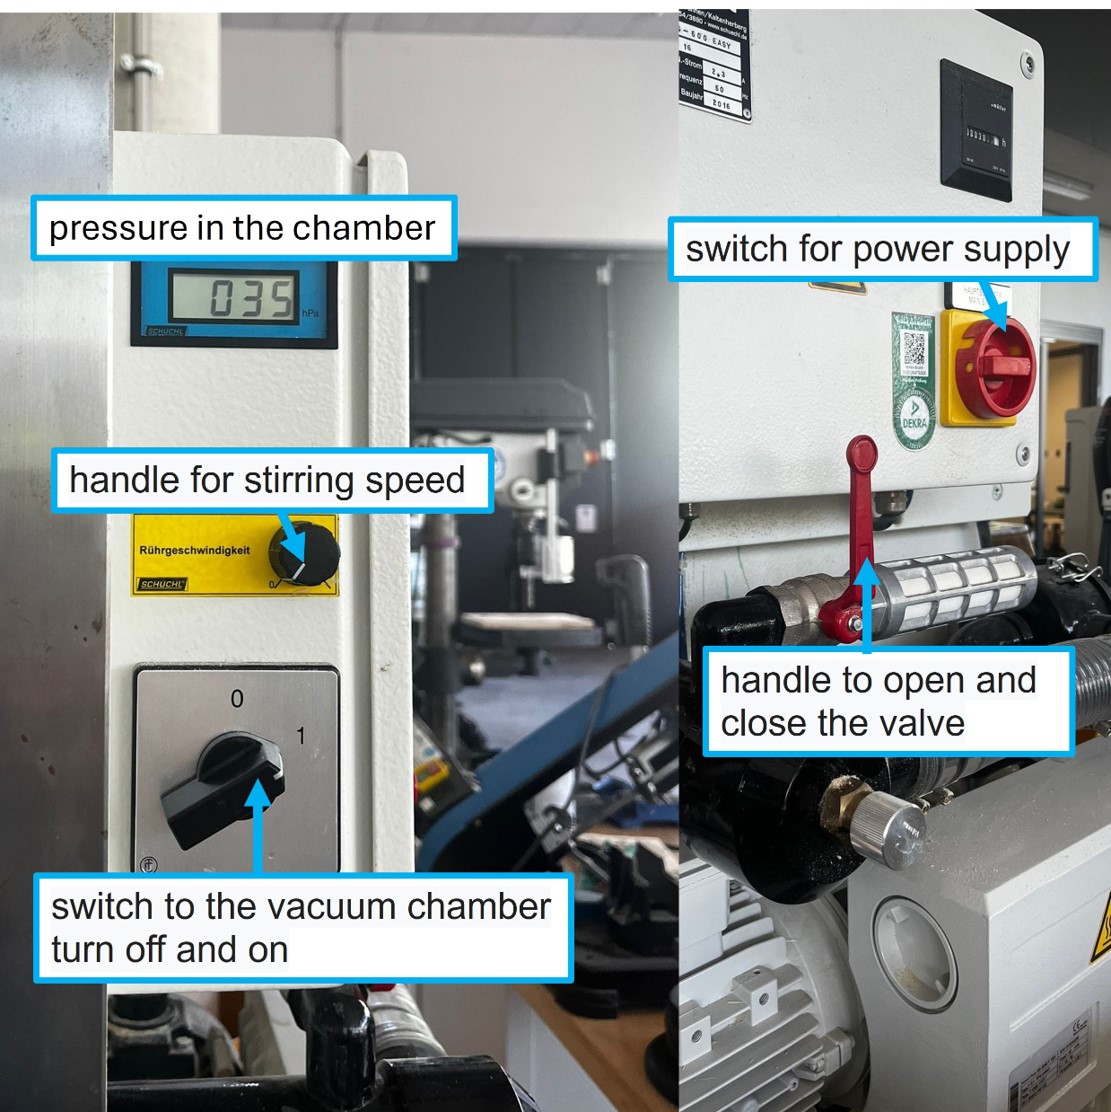
To switch on the vacuum chamber, i is neseccary to have a look, if the power supply is on and and the chamber it self. Before starting the compressor make sure to close the valve. After turning on the compressor the pressure in the chamber can be read on the small screen.
When decreasing the pressure the silicone starts to boil. We left the silicone for 4 min in the chamber to make sure that no air bubbles are traped and the mixture is sstirred to a homogenous fluid.
I started casting the molds by going for the small details first with a vary small stream and from a height of about 30 to 40 cm, which enables a better escaping air bubbles.
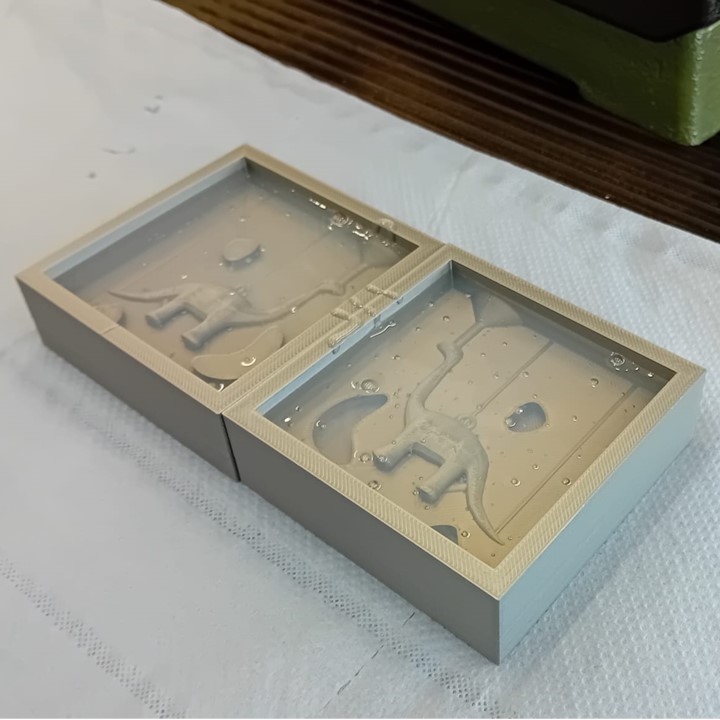
After casting the details I filled up the mold completely.
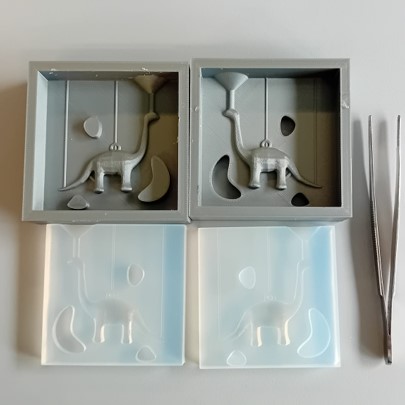
After the casting, I waited for 12 h to let the silicone harden. Therafter, I remove the cast from the mold with the help of tweezers.
Casting from negative Mold
Casting Material
For the casting the negative mold, I used polyurethan Neukadur ProtoCast 105.
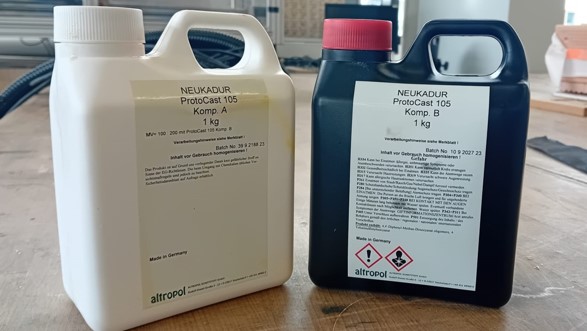
| Characteristics | Data Sheet Information |
|---|---|
| Mixing Ratio (Weight) | 1A:2B |
| Mixed Viscosity (25 °C) | 325 mPa∙s |
| Density (20 °C) | 1.15 g/cm3 |
| Pot Life (25°C) | 5 minutes |
| Demouldable After (70 °C) | 60 minutes |
| Shore Hardness (DIN 53505) | 82 |
| Colour (cured) | White |
| Recommended Layer Thickness | 5 mm |
| Linear Dimensional Change (500 x 50 x 3mm) | 0.3 % |
Casting the Mold
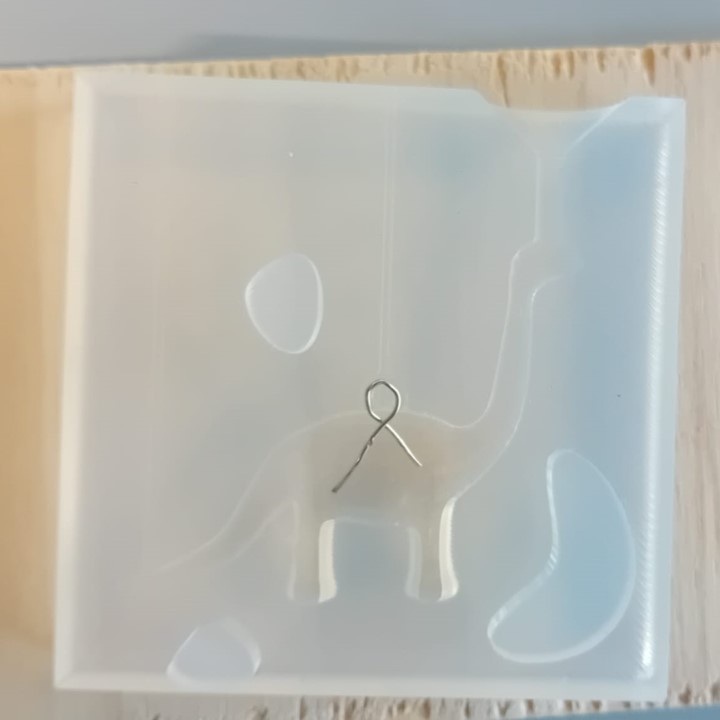
Before starting the molding I prepared the mold by including a piece of wire to the hook for the key chain as I was not sure if the polyurethan itself would take the forces created by using it as a keychain.
Afterward, I assembled the mold parts and sealed the edges with tape.

I used two pieces of plywood and a lot of rubber bands to press the to molds together.
I used a scale to get the correct ration of Component A and B. I included 2 g less of component B as around 1 g of Component A is lost due to the adhesion to the surface of the pouring container. In general, it is recommended to use paper cups as container as the hardening and reaction of the mixture is exothermic and generates heat.
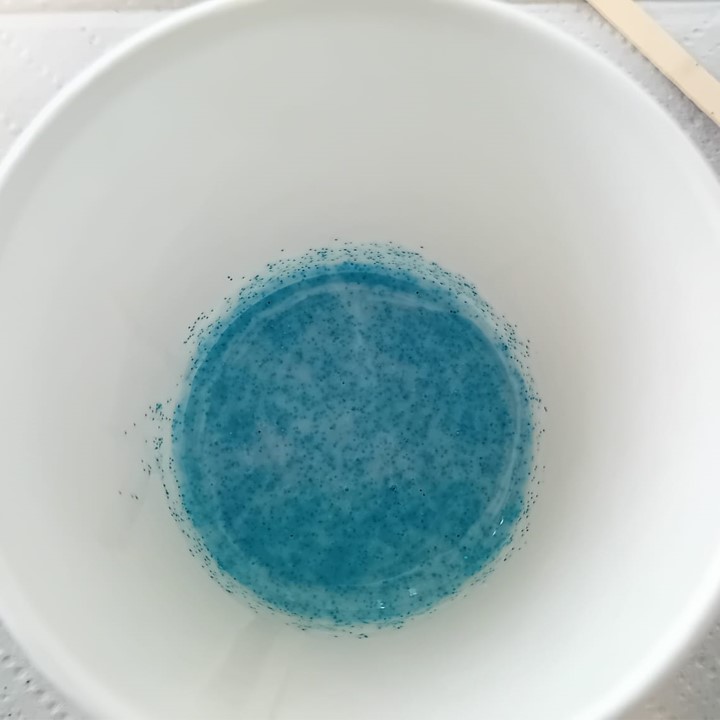
I poured a little bit of blue glitter into Component A and mixed it properly. Thereafter, I used a vacuum chamber to get rig of any air bubbles in Component A.
After pouring Component A into Component B, I thoroughly mixed them by slowly stirring and shearing until they were well combined. It's crucial to ensure that the borders of the container are scraped to ensure that all parts, including the interface layers, are properly mixed.
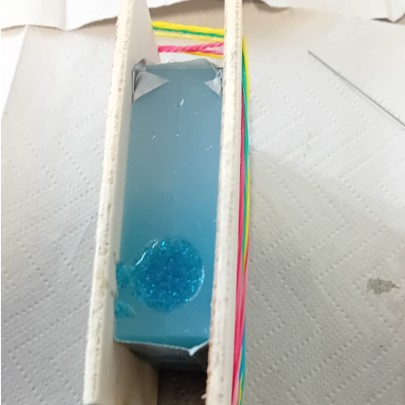
Next, I delicately poured the mixture into the mold to cast the dinosaur. After the pouring basin was completely covered, I waited approximately 30 seconds for the material to settle into the mold. However, I noticed that the polyurethane began to show signs of hardening after just 5 minutes, making the casting process more challenging.
After finishing filling the mold, I put the mold with the casting material into the vacuum chamber again and waited for it to boil for 1 min and then took it out.
Post Processing the Cast
The hardening of the cast took 2h. Thereafter, I opened the mold and remove the rubber band, wood, and the tape.
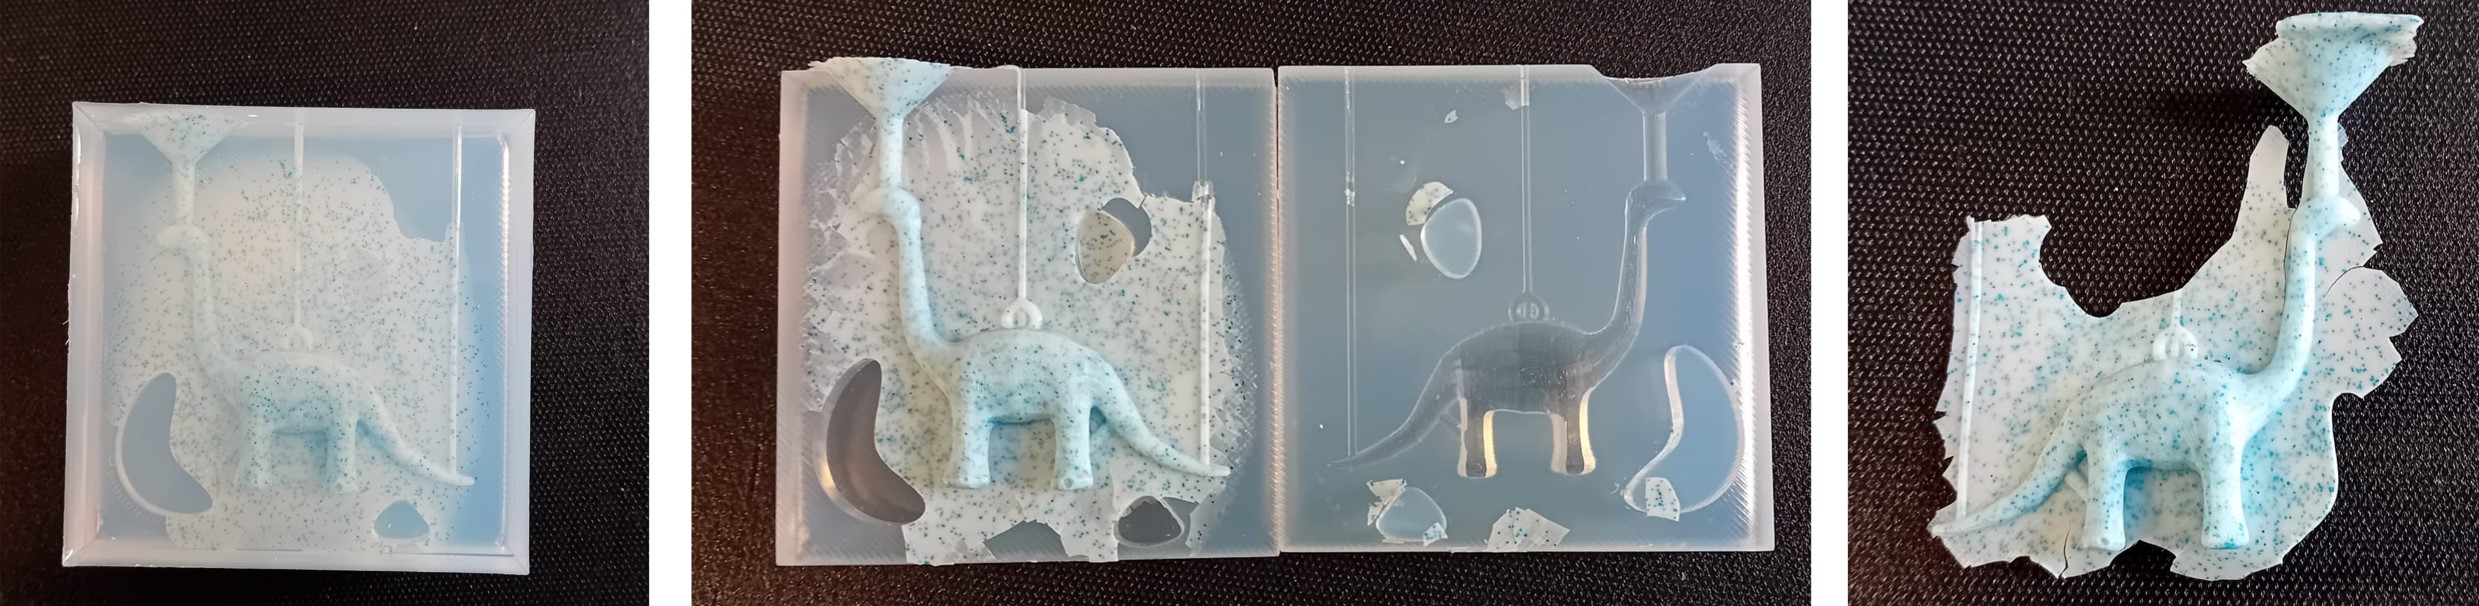
As shown in the picture, the casting material came out on the sides of the cast, which was unfortunate but as the layer of material was really thin it was easy to remove it.
I remove the additional polyurethan with tweezers and sanded the edges carefully.
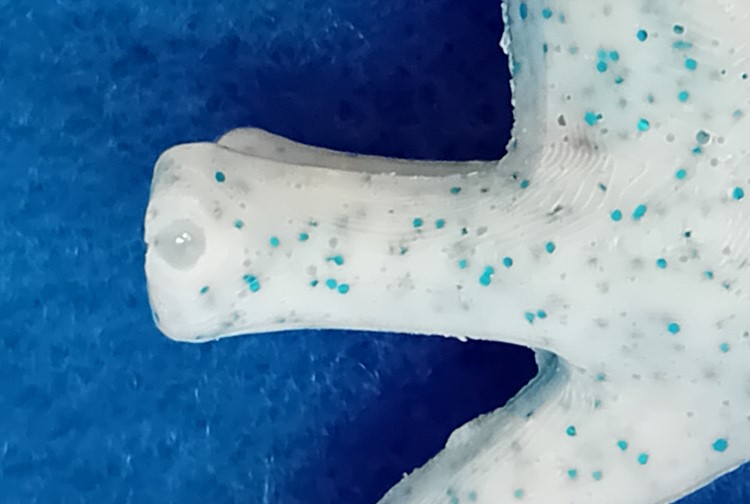
As shown in the picture, some air bubbles were trapped inside the mold especially in the legs. The traces generated by the printer are visible, but only when zooming in (x2).
The use of the glitter seemed to leave a nice finish as the particles get less visible the more far away they are from the surface.
Evaluation
Group Assignment
As a group assignment (see here) we made a small, simple design to test different fabrication techniques for a mold. SLA printing, FDM printing, and Milling in the following table I created a small overview over the advantages and disadvantages of the printing:
| Characteristics | SLA | FDM | Milling |
|---|---|---|---|
| Time | 30 min printing (+20 min Washing, +60 min drying) | ca. 120 min printing | 60 min milling (+ changing of tools) |
| Precision | 0.025 mm | 0.08 mm | 1 mm (tool diameter) |
| Failure Tolerance | Depending on the SLA printer, the Formlabs 3+ SLA printer has a relatively low tolerance for failure. | Bambu Lab is known for its high tolerance for failure. | Due to the manual tool changes and slight positional adjustments that may occur, the milling process is highly susceptible to errors. |
| Complexity of the Mold | Overhangs are possible which gives the mold more dimension | Overhangs are possible which gives the mold more dimension | 2 dimensional |
Manufacturing the Mold
The mold manufacturing process utilized FDM 3D printing. Achieving a highly smooth and detailed surface finish was crucial for this project. However, the standard resolution of FDM 3D printing, which is typically 0.2 mm, fell short of our requirements. Fortunately, the Bambu Lab offers a precision of 0.08 mm, ensuring the desired smoothness.
In addition to the improved resolution, the Bambu Lab features an ironing function that further smoothens surfaces of printed parts. Although I didn't utilize this function for this particular project, it presents an intriguing possibility for comparison against the surface finish of the casted parts.
Another additive manufacturing option besides FDM 3D printing would have been SLA printing. SLA printing boasts very high resolution, which would have resulted in even better surface finishes. However, this method comes with drawbacks in terms of time efficiency and sustainability, as it requires more materials like isopropanol and resin, which are less eco-friendly compared to PLA.
The final option for manufacturing the mold would have been subtractive manufacturing with a mill. Although this method was explored in our group assignment, it proved unsuitable for my design. The design of the dinosaur's legs posed a challenge as they were not conducive to milling with a 3-axis milling machine. Consequently, this manufacturing method did not align with the requirements of my design.
Casting Material
In this assignment, polyurethane was utilized as the casting material. According to the data sheet, this material has a pot life of 5 min. However, in practice,this doesn't allow sufficient time for air bubbles to escape the mold. This rapid hardening proves to be a challenge, especially for larger molds.
While vacuuming the cast after pouring and before hardening can assist in bubble removal, it may also contribute to the material not staying in the mold. To address this issue, one potential solution could involve trying a mold without vacuuming or increasing the size of the vents to provide better pathways for air bubbles to escape.
Postprocessing
In the final product, the hook intended for creating a keychain is missing, as it broke off. The small wire used to ensure a sturdy attachment it seems to have been lost somewhere in the cast. The primary issue with the finished cast lies in the fragility and brittleness of the polyurethane material.
One possible factor contributing to these material properties could be the addition of glitter. However, it's worth noting that even non-glitter polyurethane (as seen in Frauke Waßmuth's assignment) exhibited similar characteristics.
Overall, it appears that polyurethane may not be the ideal material for small molds due to its fragility. Epoxy could potentially offer a better solution in terms of durability and strength.
Download and Files
- Brontosaurus Mold: download