12. Molding and Casting
Assignment
-
Group assignment:
- Review the safety data sheets for each of your molding and casting materials
- Make and compare test casts with each of them
- Compare printing vs milling molds
-
Individual assignment:
- Design a mold around the process you'll be using, produce it with a smooth surface finish, and use it to cast parts.
Group assignment
This week's group assignment we checked the datasheet for all the mold casting materials we have, and used them to cast a standard model as a test.
Link to this week's group assignment
Casting a epoxy light bulb
Modeling
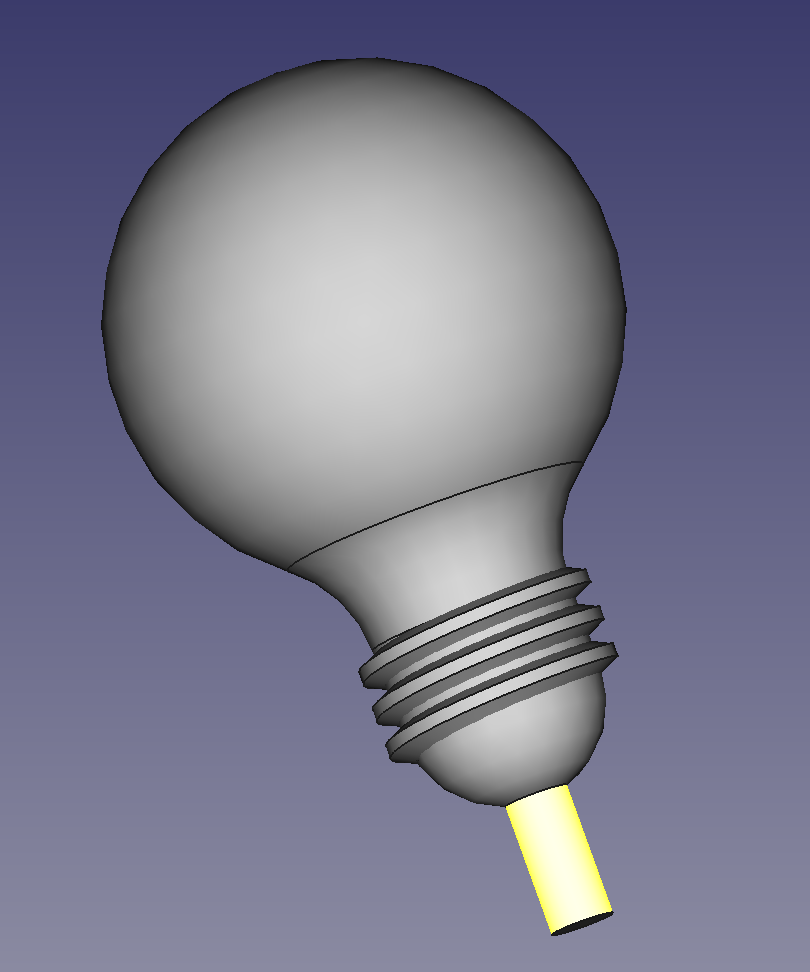
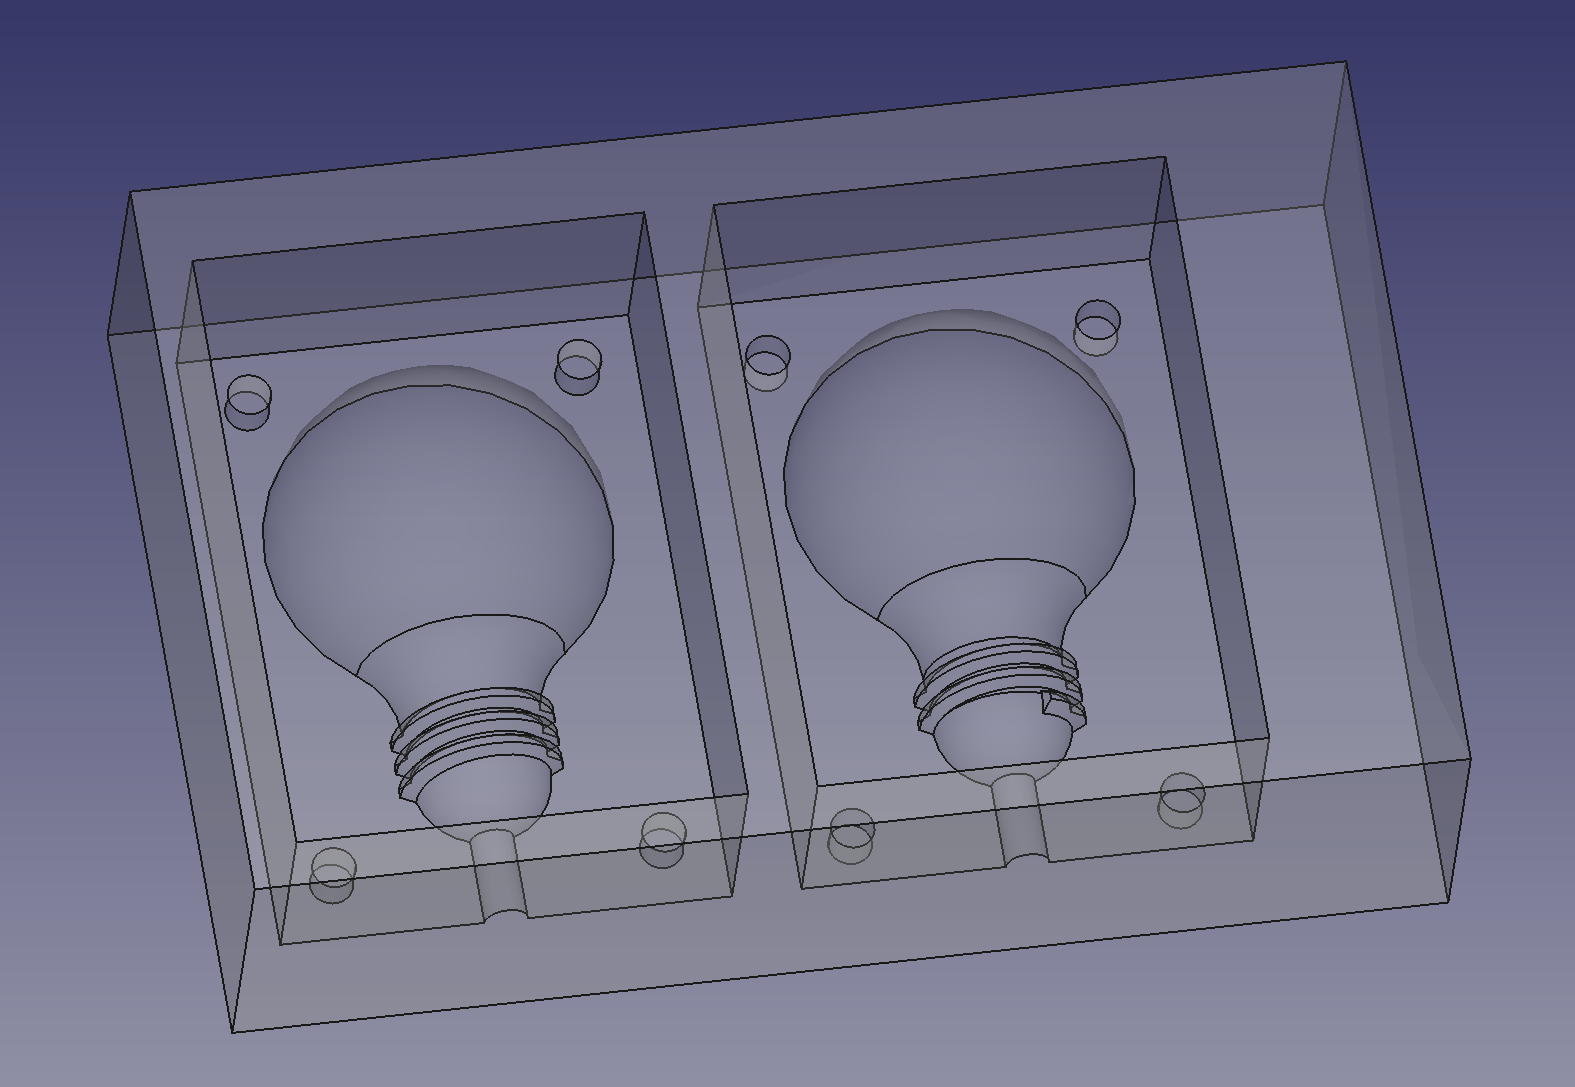
I modeled the bulb and the base mold in FreeCAD, the CAD file is here.
Cutting the Wax Mold
Set Up Tool Path with FreeCAD
Then use the Path workbench to genreate the tool path for cutting out the mold.
The cutting is done in two passes, first using a 4mm diameter end mill to remove large portion of the material and cut out the big features, then using a smaller 2mm end mill to finish the surface of the mold.

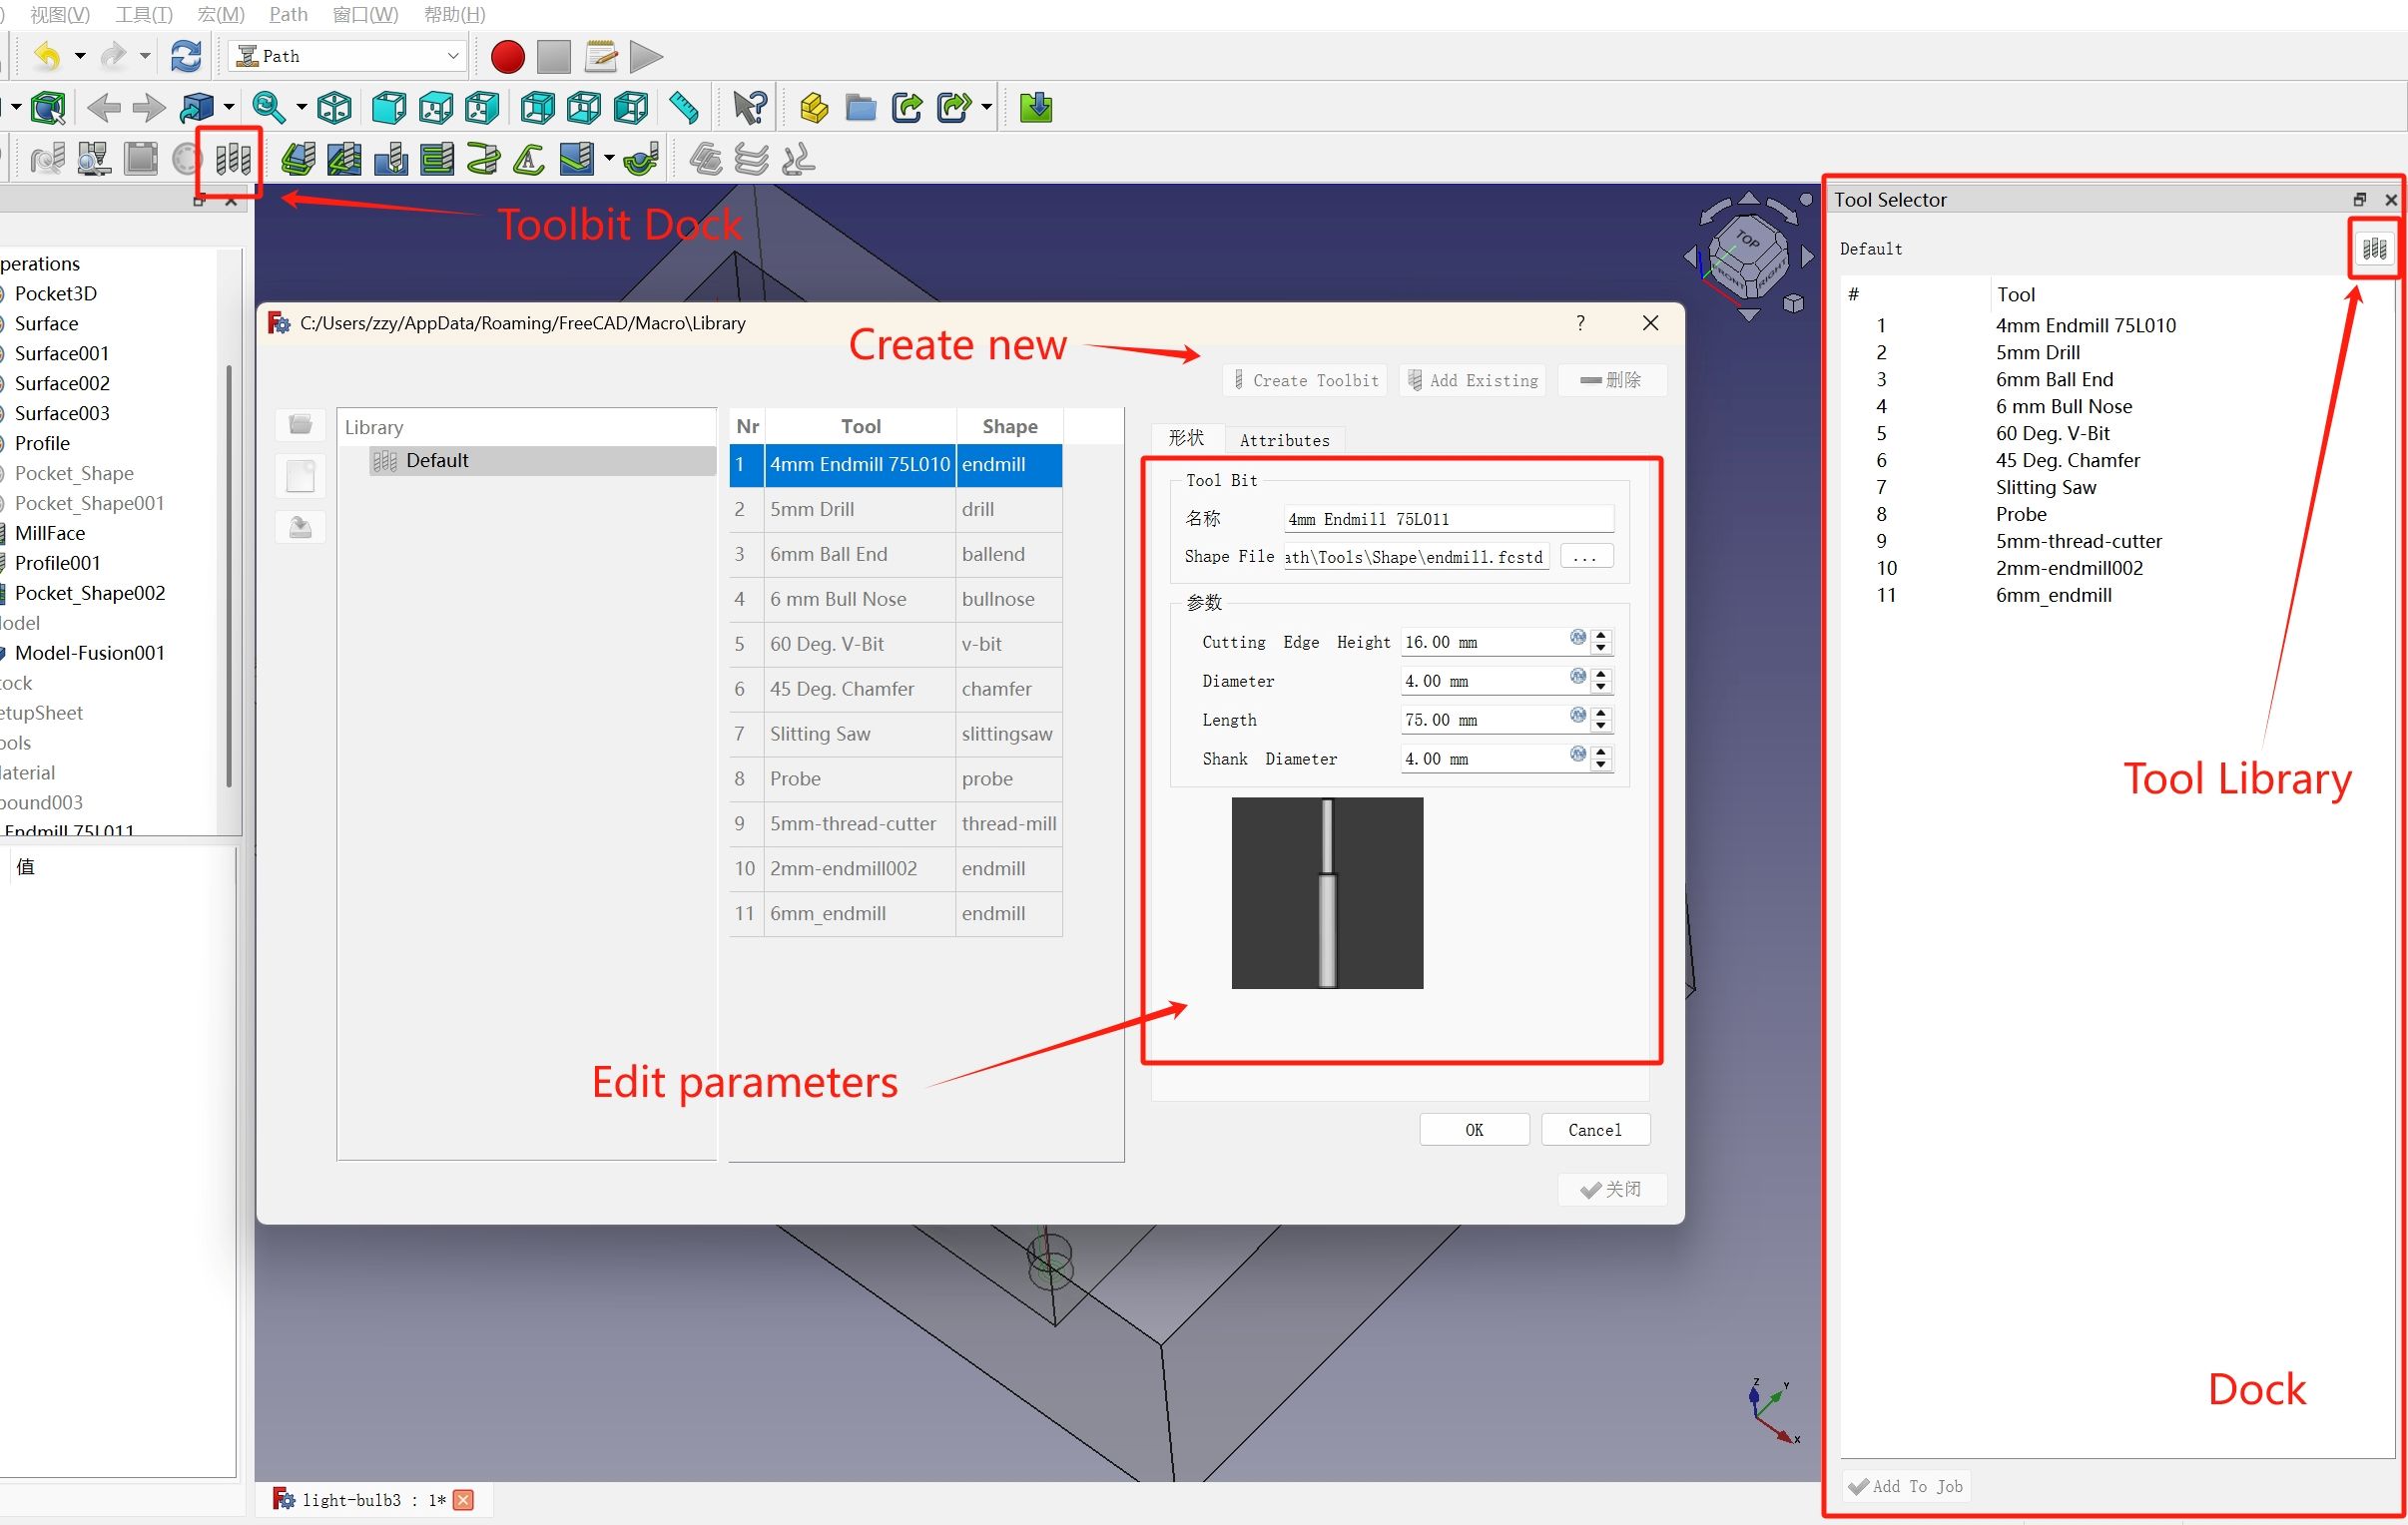
Set up the endmill that will be used in the FreeCAD Path job.
In the Path workbench, first select the Toolbit Dock to open the Tool Selector panel. When opened for the first time FreeCAD asks for a directory to
store the tool bits and shape files. Then click the Tool library button, in
the newly opened window, hit Create Toolbit, select the shape for the end mill
to use and save it to a location. Then double click the newly added tool bit in
the window to set the correct parameters for the tool bit.
Here are the parameters for the two tool bits I used:
-
4mm end mill:
- Cutting Edge Height: 16mm
- Diameter: 4mm
- Length: 75mm
- Shank Diameter: 4mm
-
2mm end mill:
- Cutting Edge Height: 6mm
- Diameter: 2mm
- Length: 50mm
- Shank Diameter: 4mm
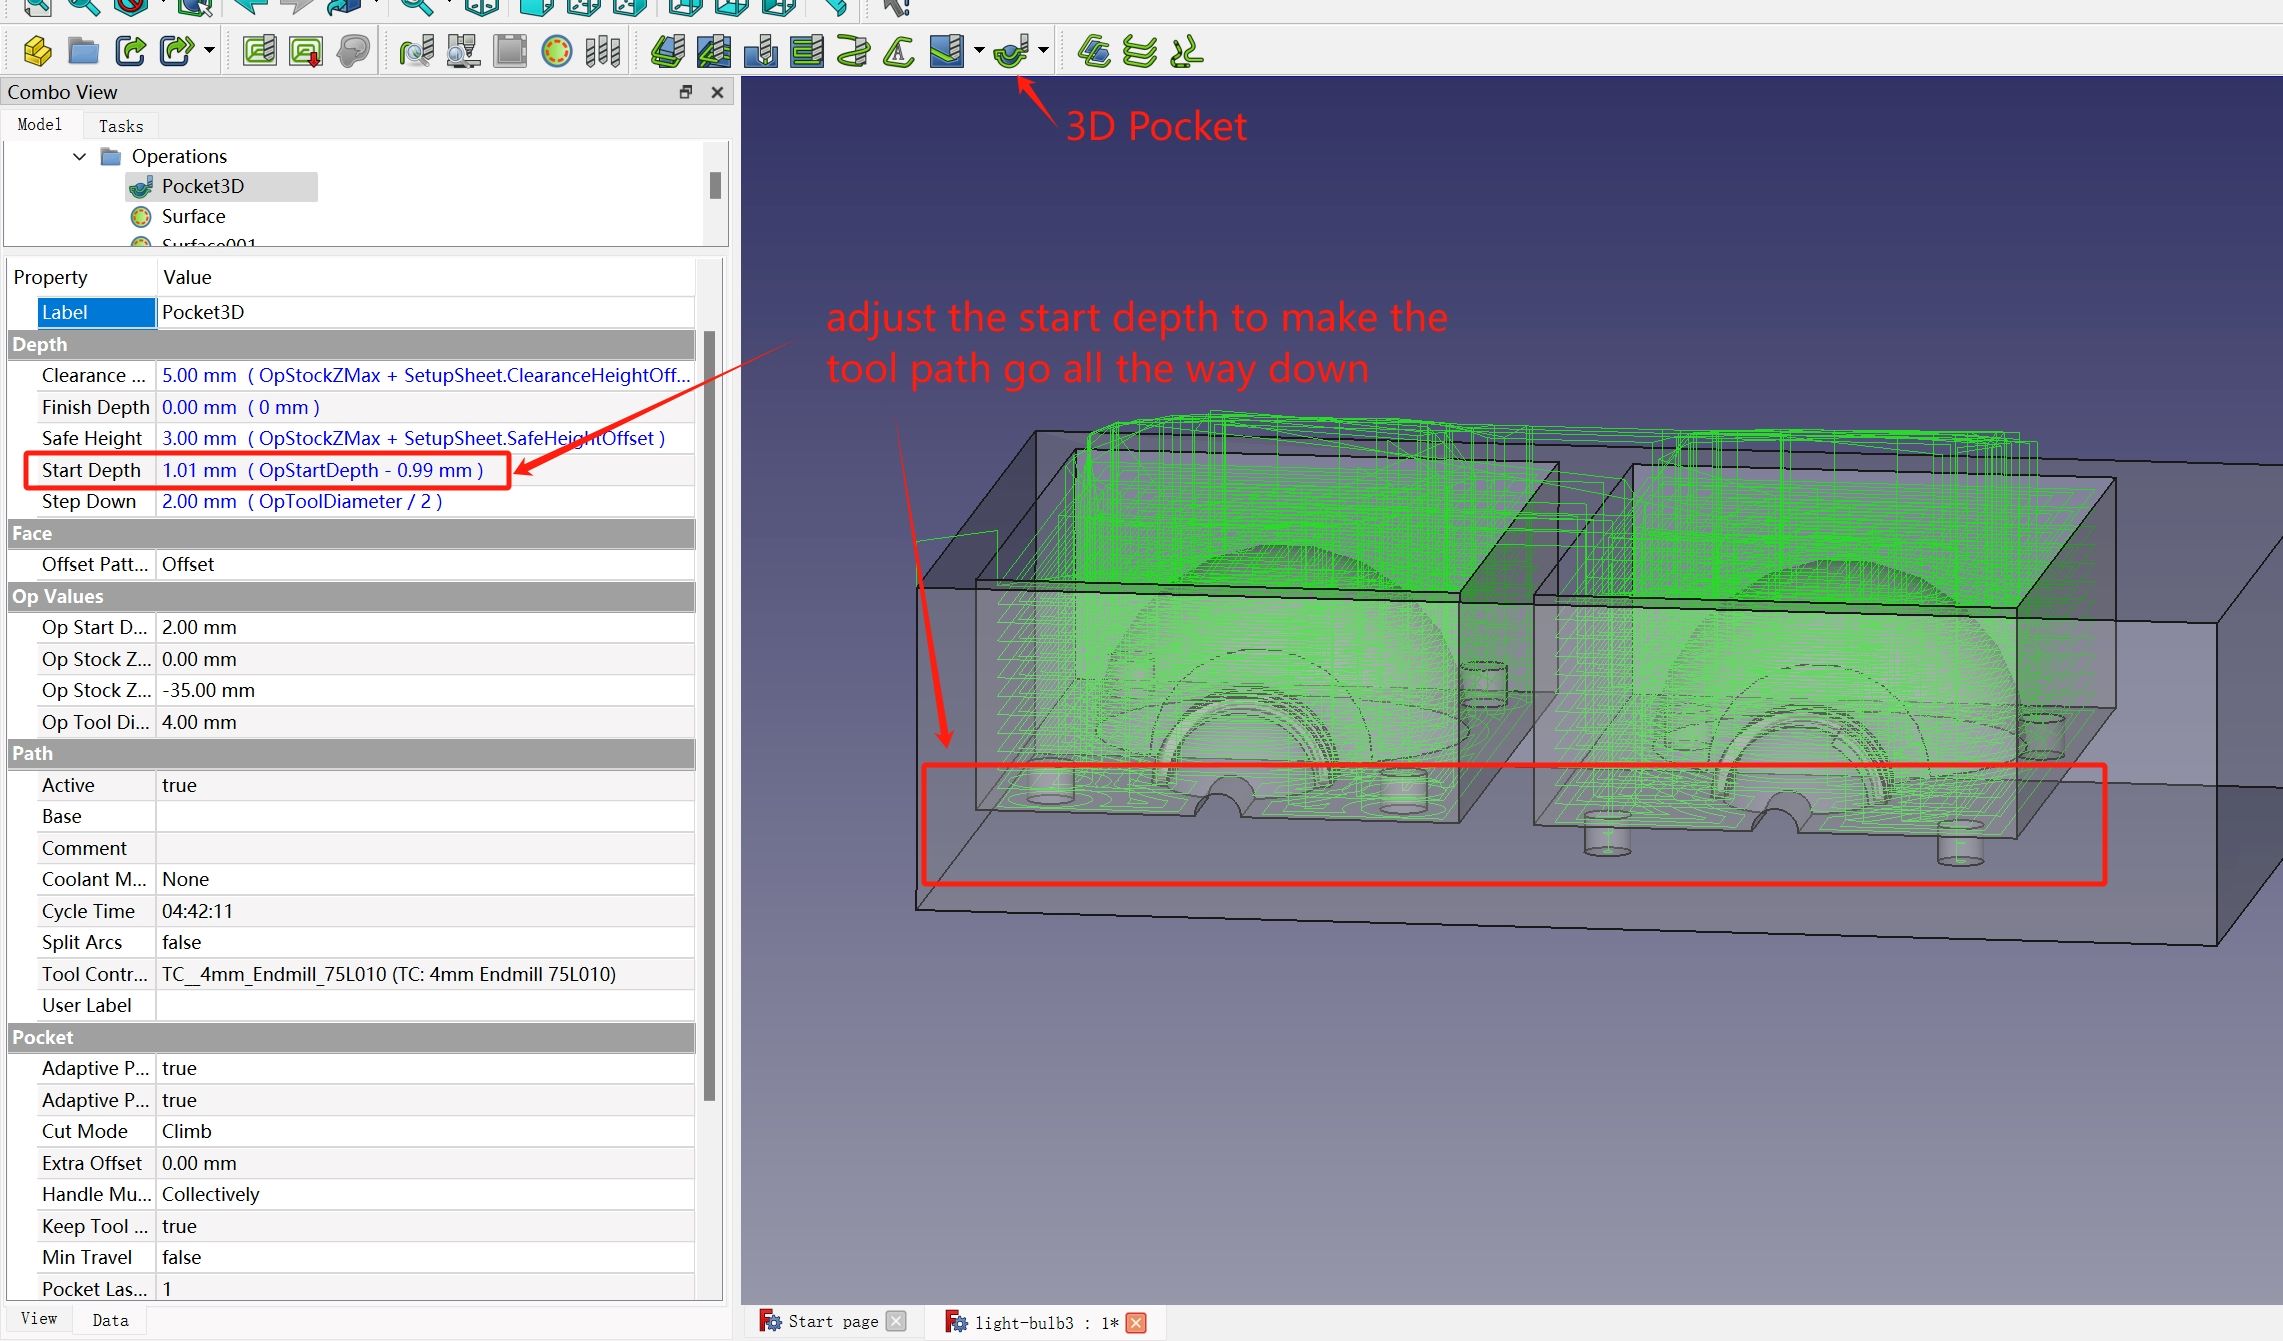
First pass I will use the 4mm endmill to do a 3D pocket operation, to remove large portion of the material.
Running the Pocket
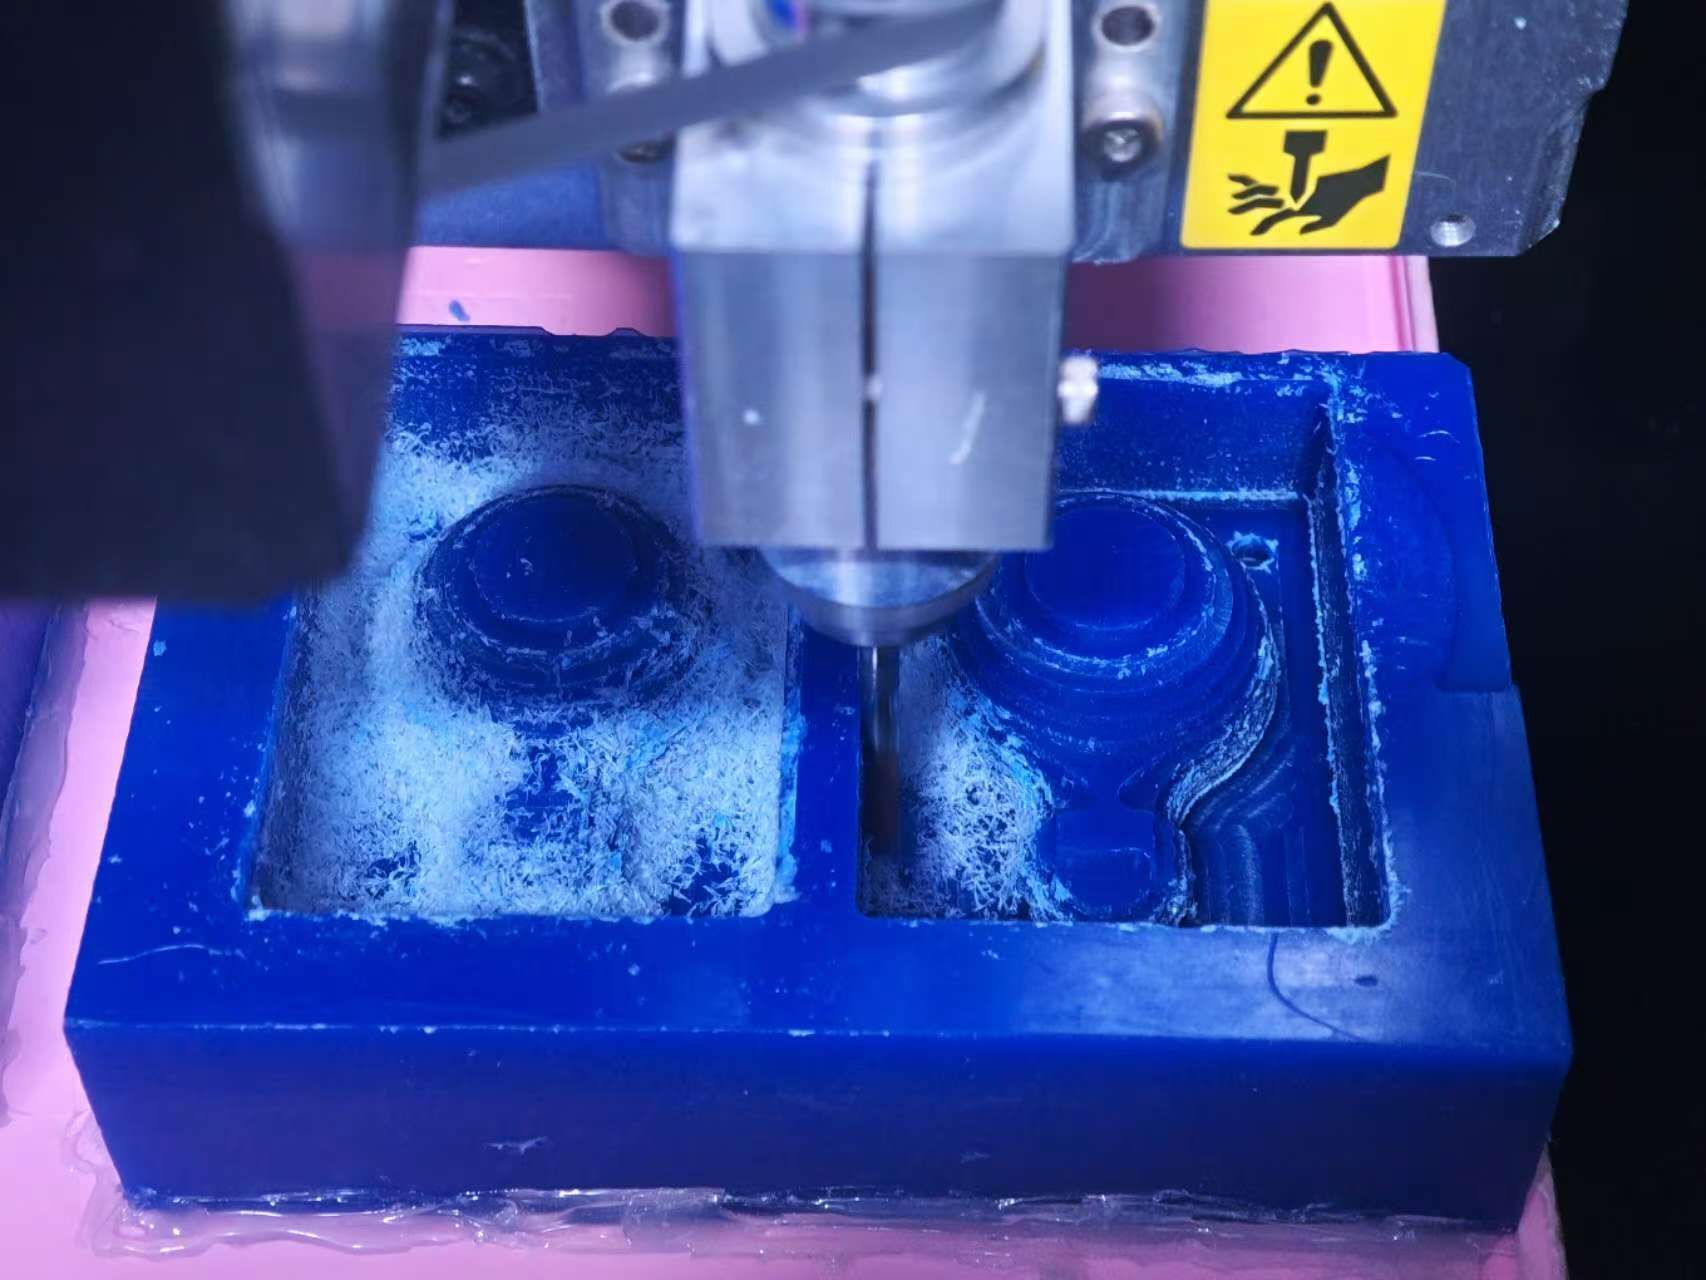
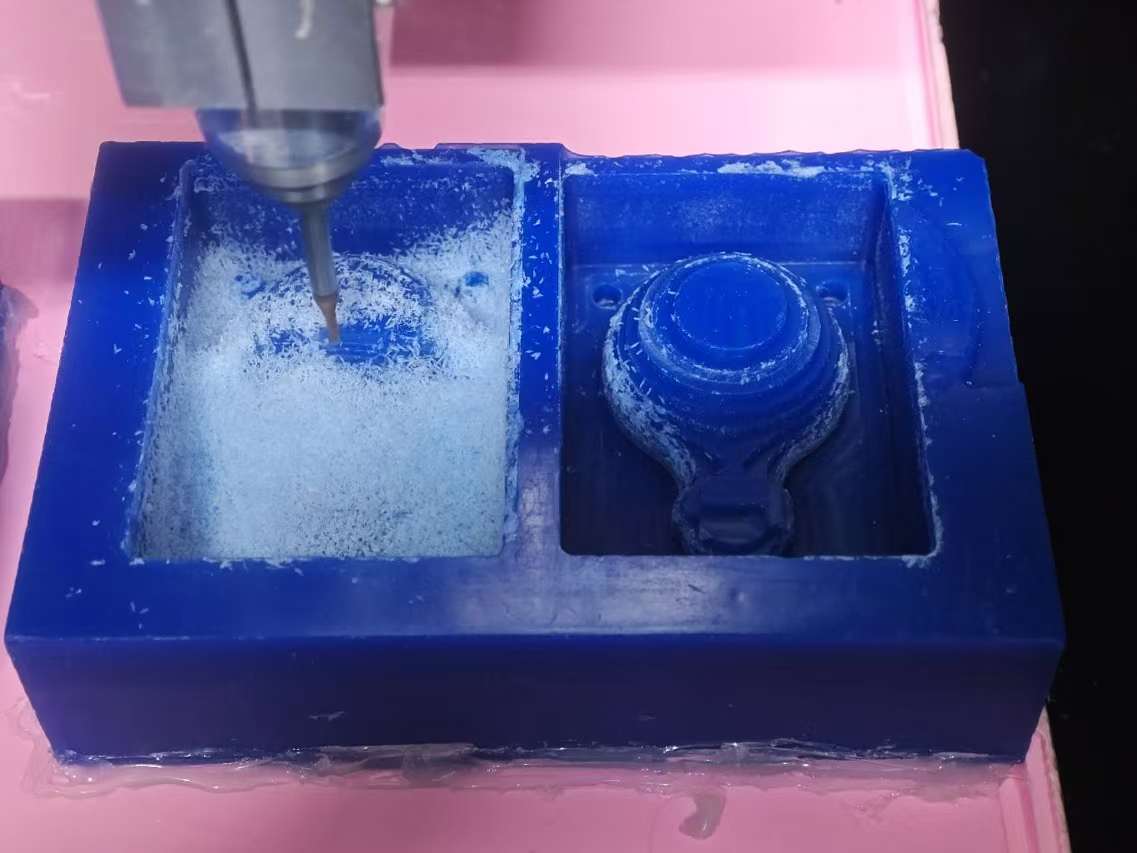
After I finished the tool path for pocketing, I loaded it to the machine to have it cut first. The first pass took 3 hours to run.
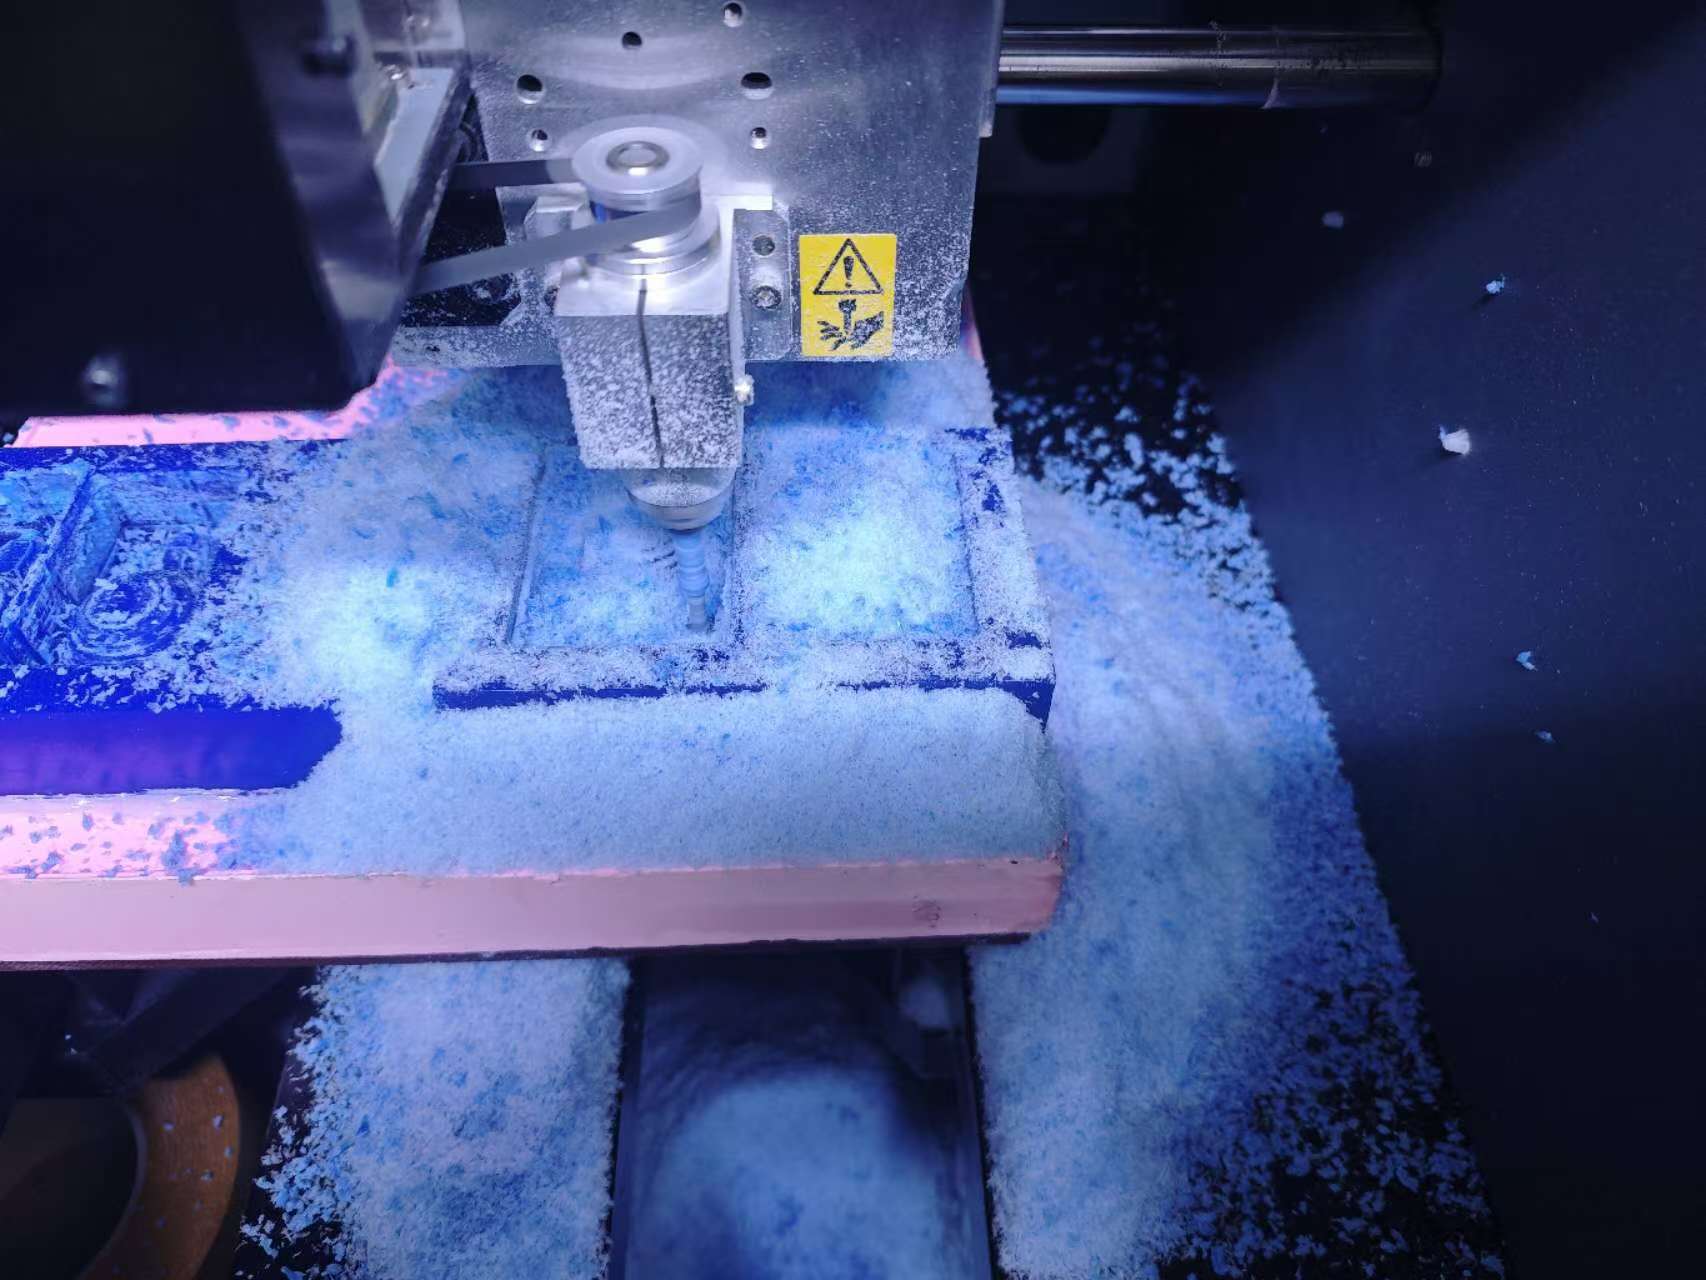
Because some of the removed wax stayed inside the pocket and fused to the end mill, there are some melted wax remained on the wall and inside the pocket.
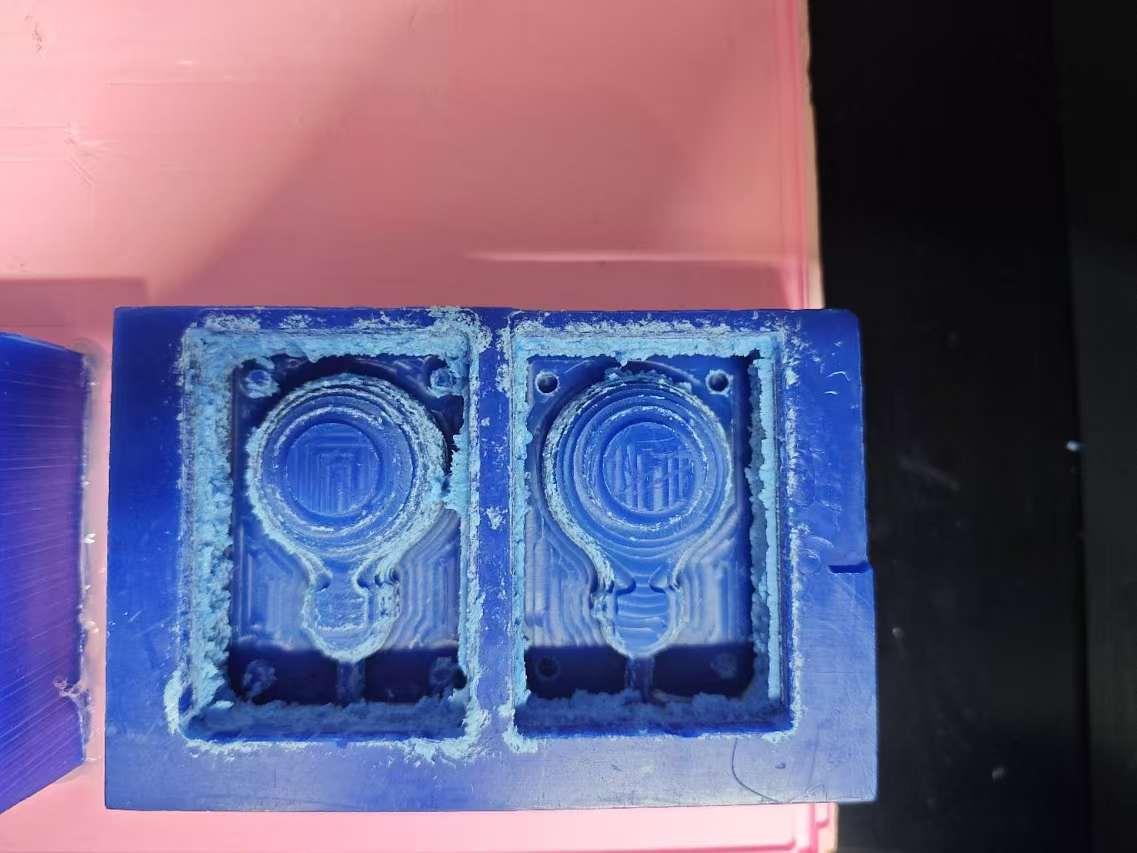
Clear the Remaining Material
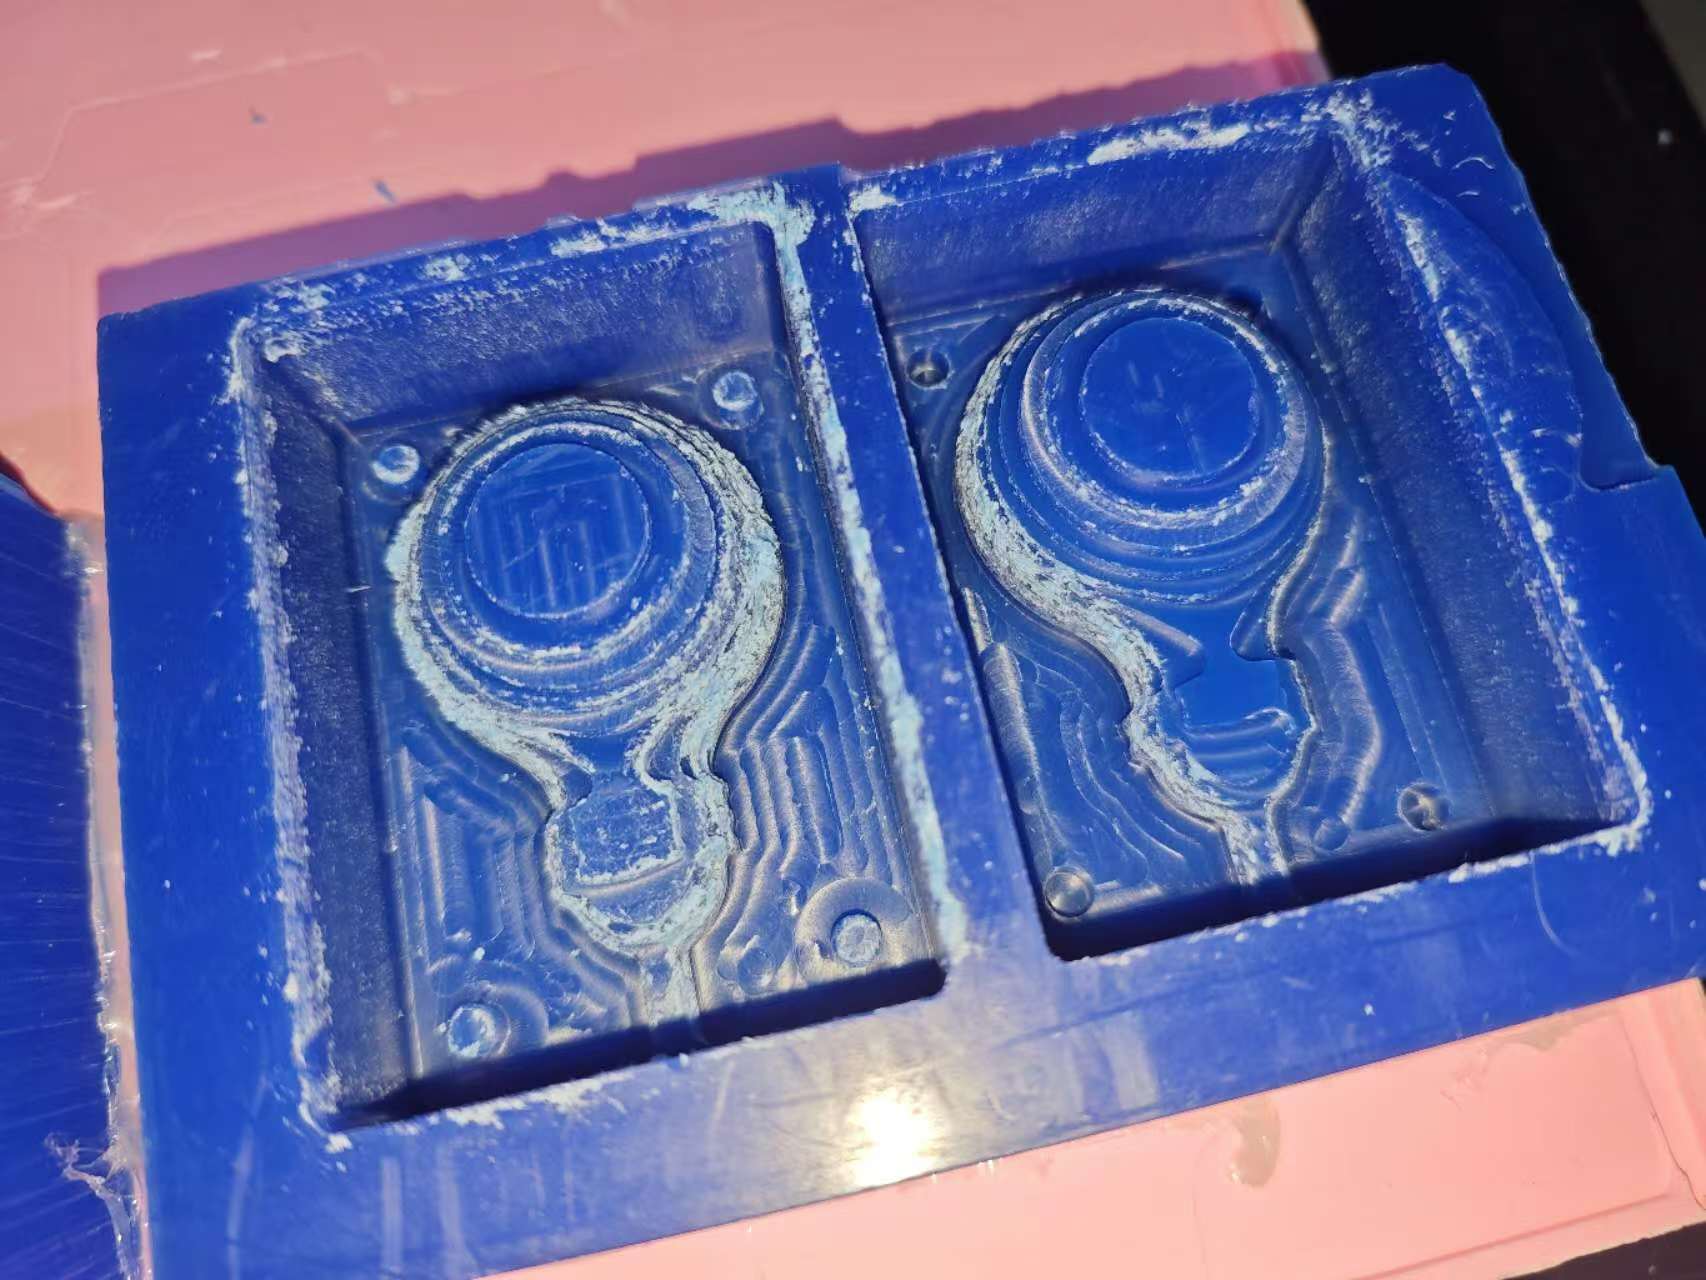
To clean up the remaining wax, I went on making another profile operation alone the wall, and a pocket operation to flatten the bottom surface.
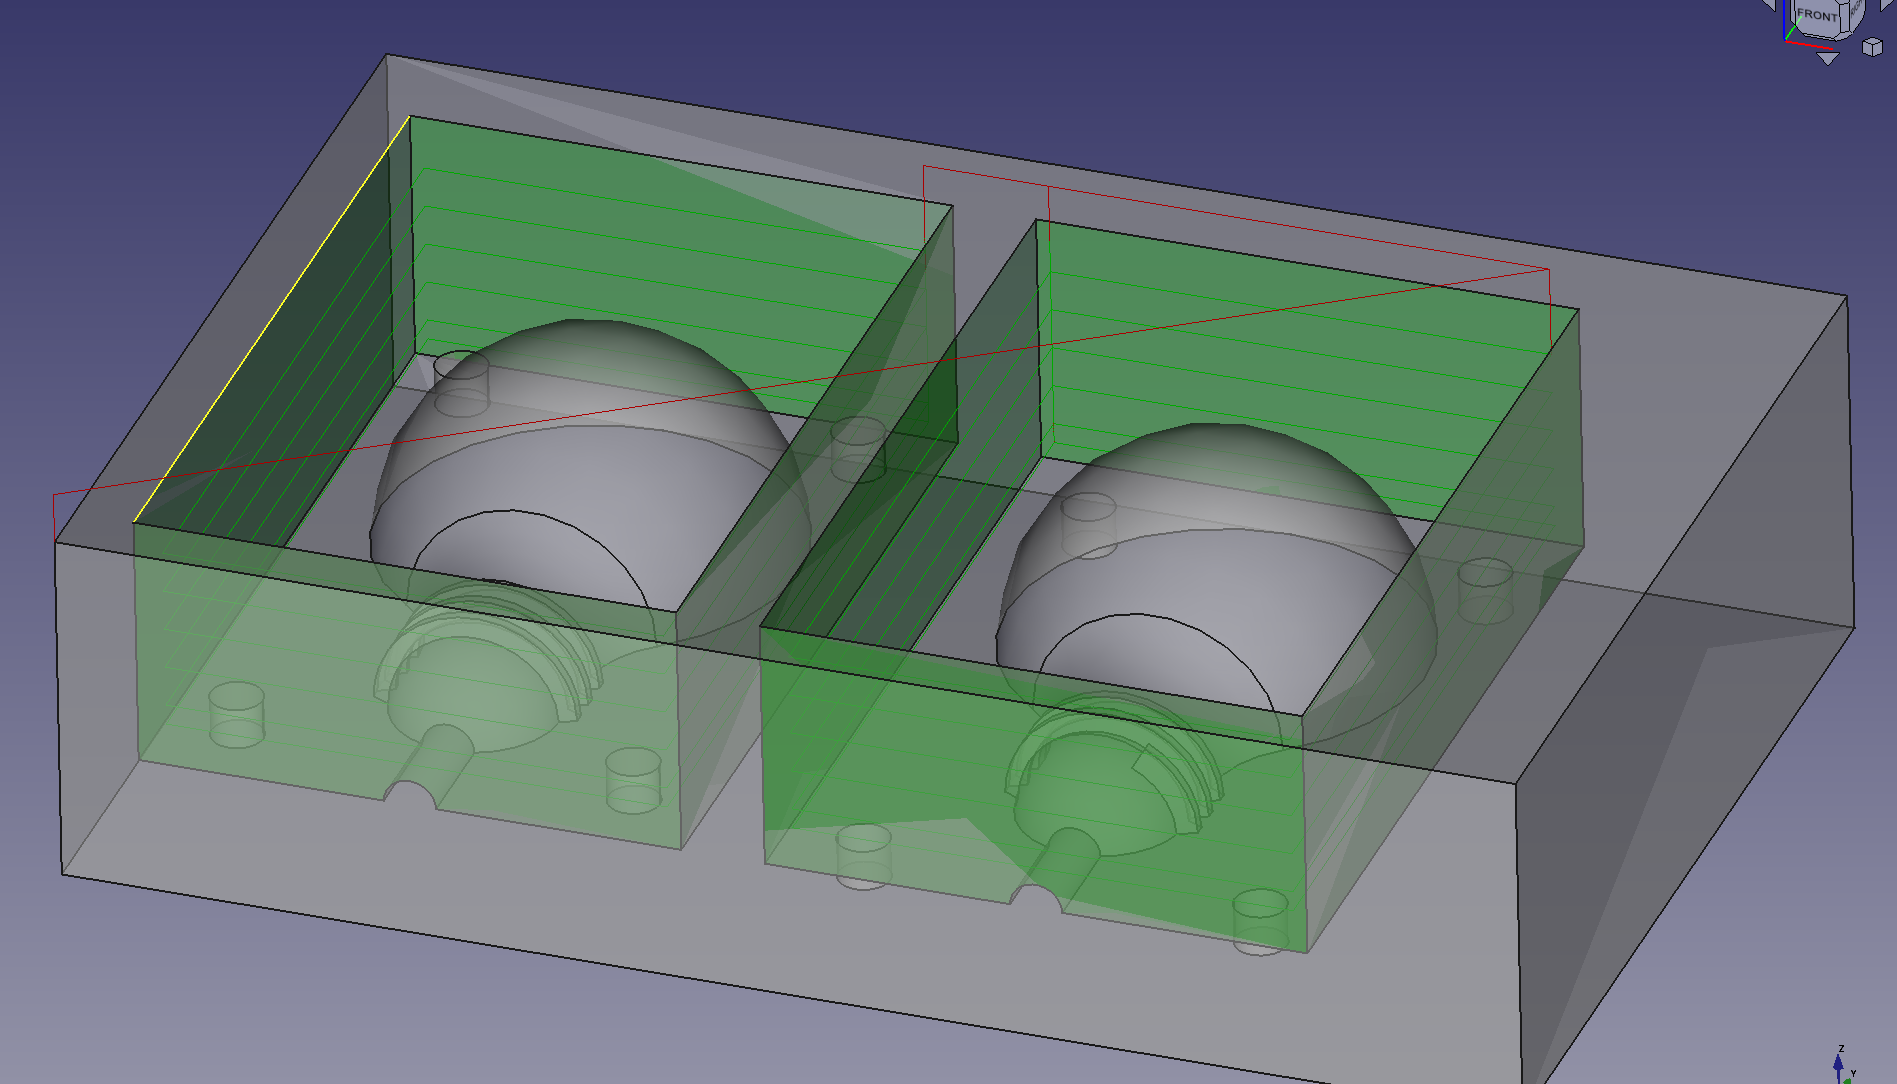
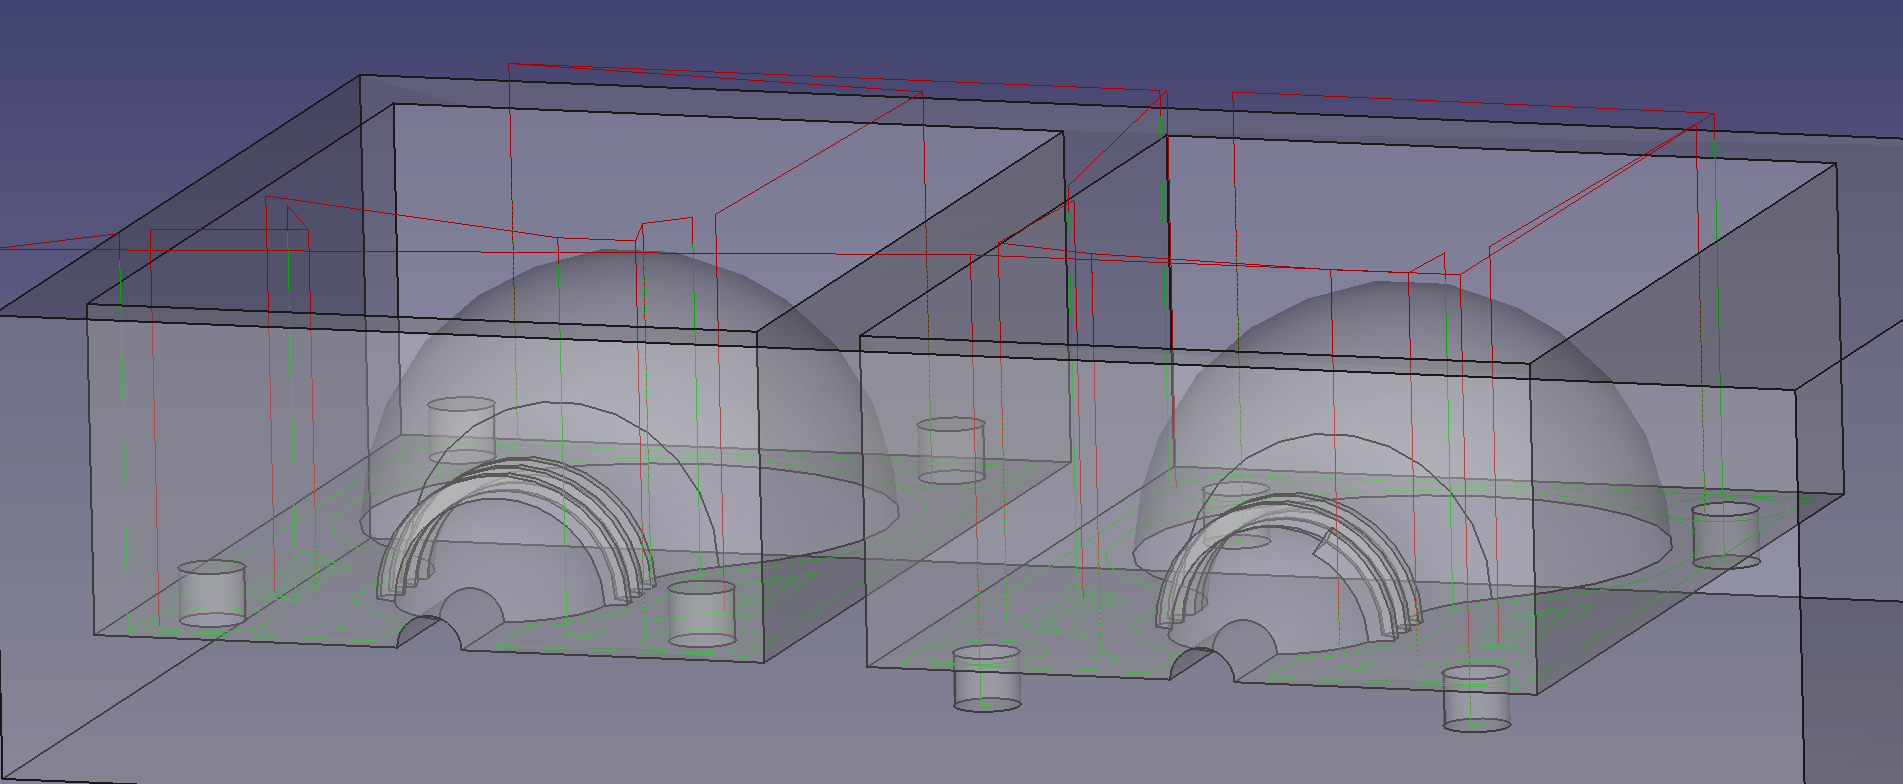
After running the cleaning operations, the unwanted materials are mostly removed.
Surfacing
Then I need to do a 3D Surface operation with a smaller 2mm endmill to produce a finer surface finish.
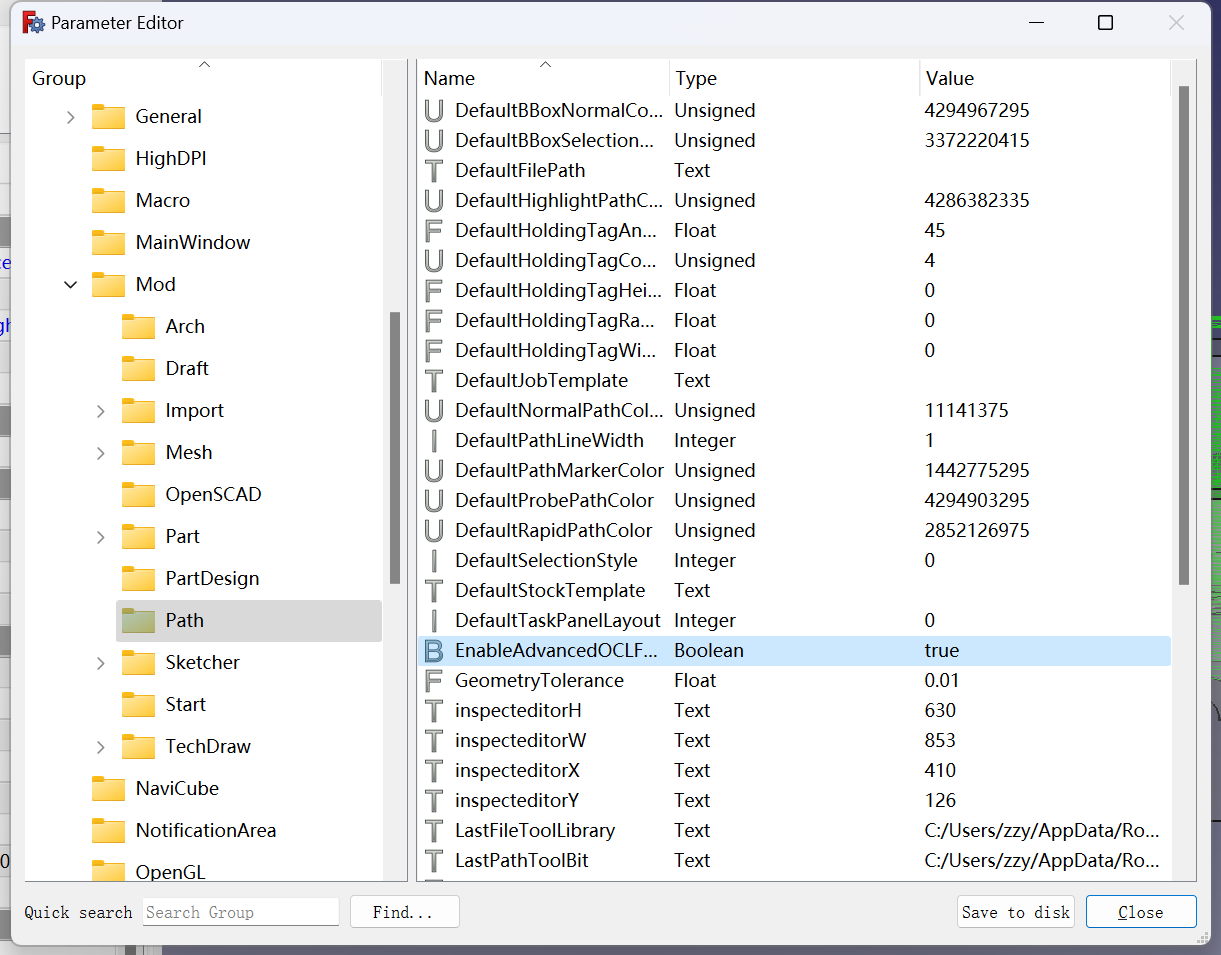
I'm using FreeCAD 0.21.2 when doing this assignment, and as the 3D surface
FreeCAD documentation states, the 3D
Surface is an experimental feature, so it needs some additional
steps to enable the feature, for the
version I'm using, I need to go to Tools > Edit parameters ... from the menu,
and go to BaseApp > Preferences > Mod > Path and find the
EnableAdvancedOCLFeatures parameter and set its value to true. Then restart
FreeCAD.
Now the 3D Surface tool is available in the Path workbench.
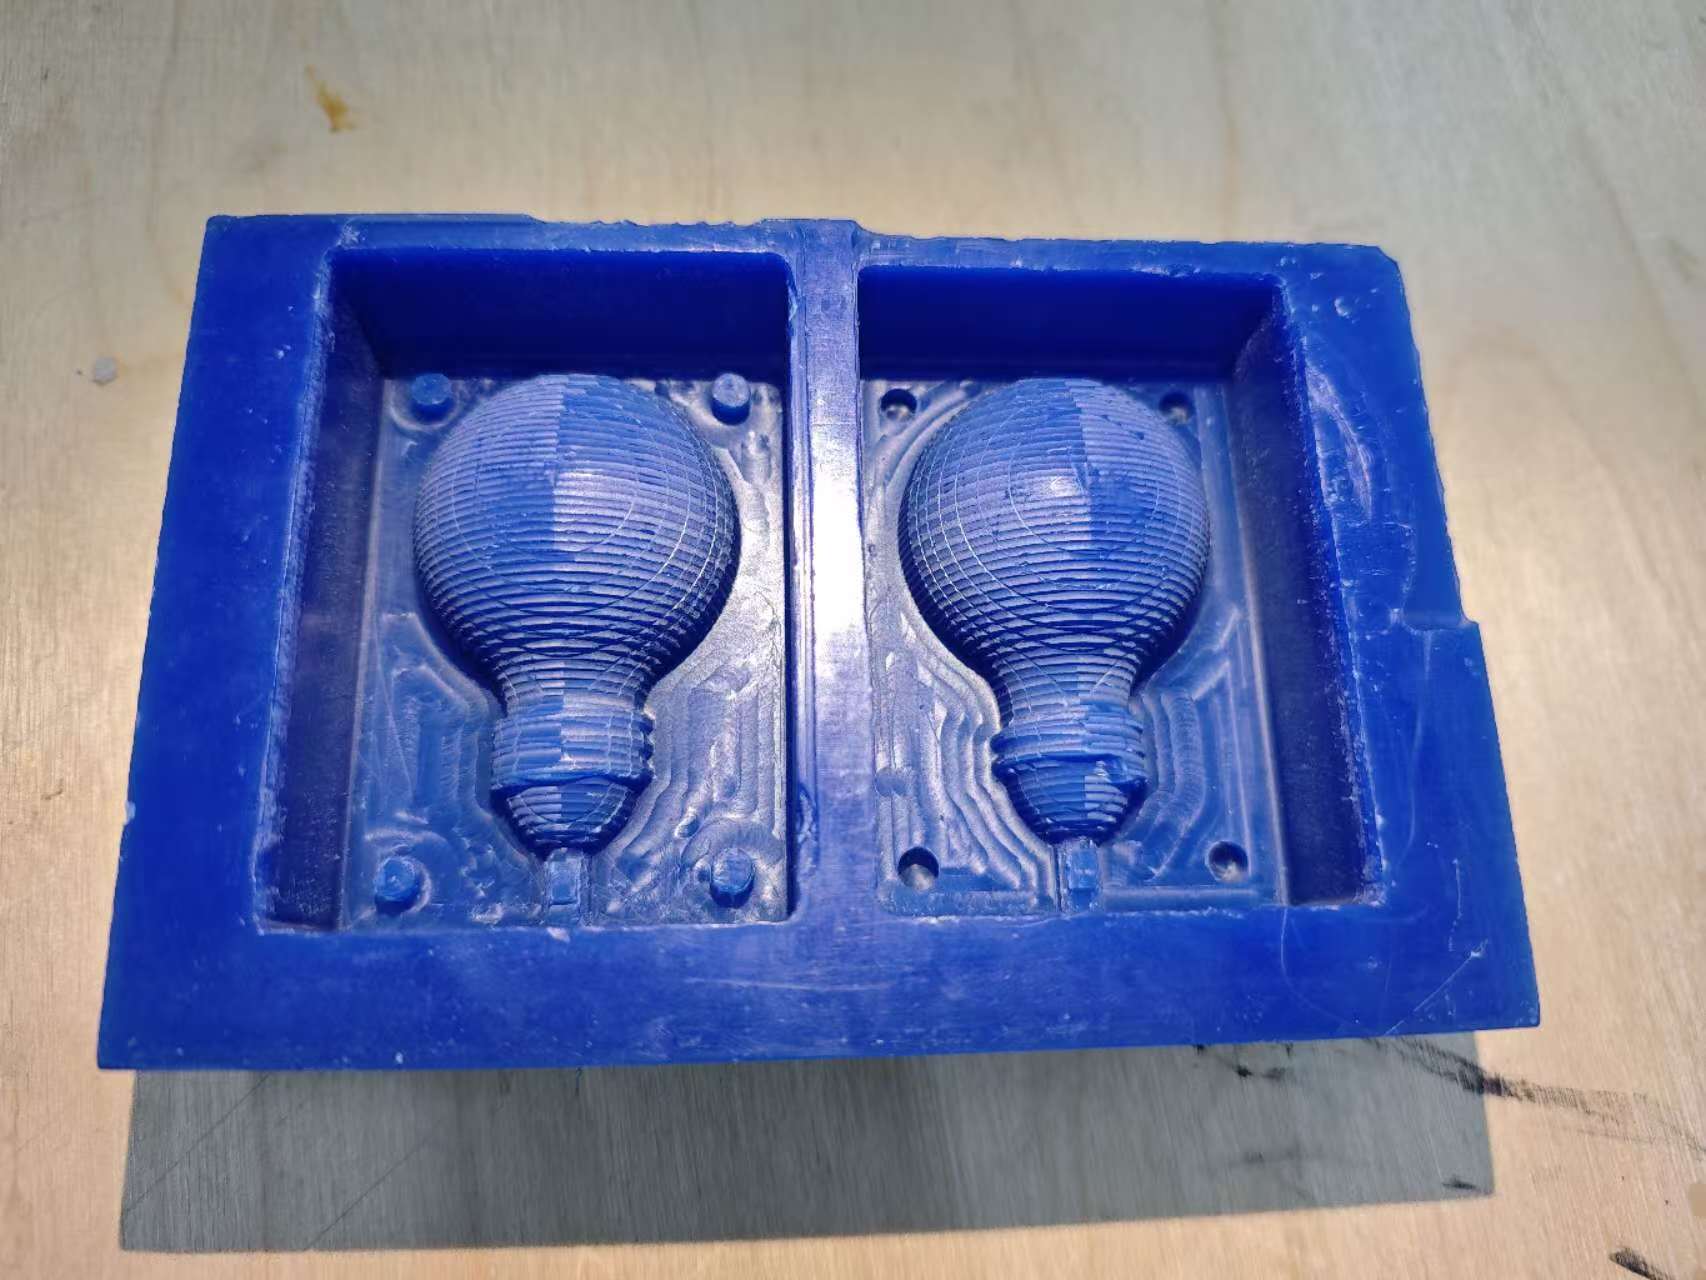
Then just select the faces of the light bulb and generate a 3D surface operation for it.
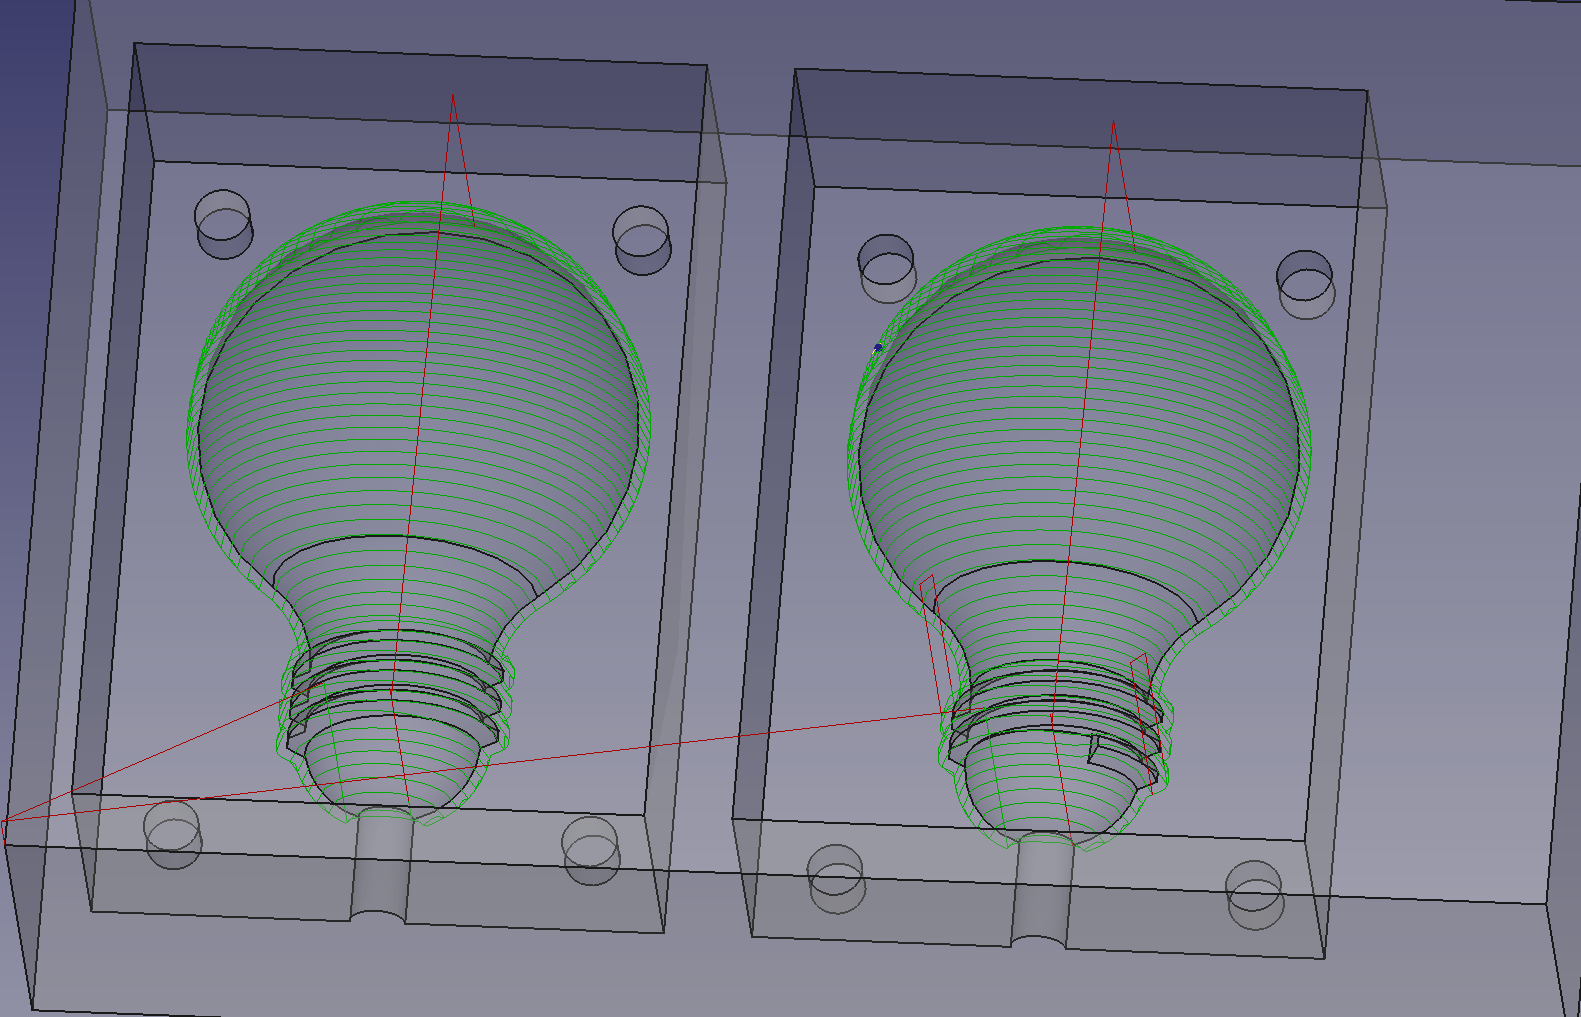
After the surface is done, now it's ready to be filled with silicone to make the actual mold of the bulb.
Silicone Mold
The silicone I used is food grade silicone, with a mix ratio of A:B = 1:1.
![]()
![]()
It took 4-12 hours to solidify, the next day I got a nice two-piece mold for my light bulb.
![]()
![]()
Casting the Bulb with Epoxy Resin
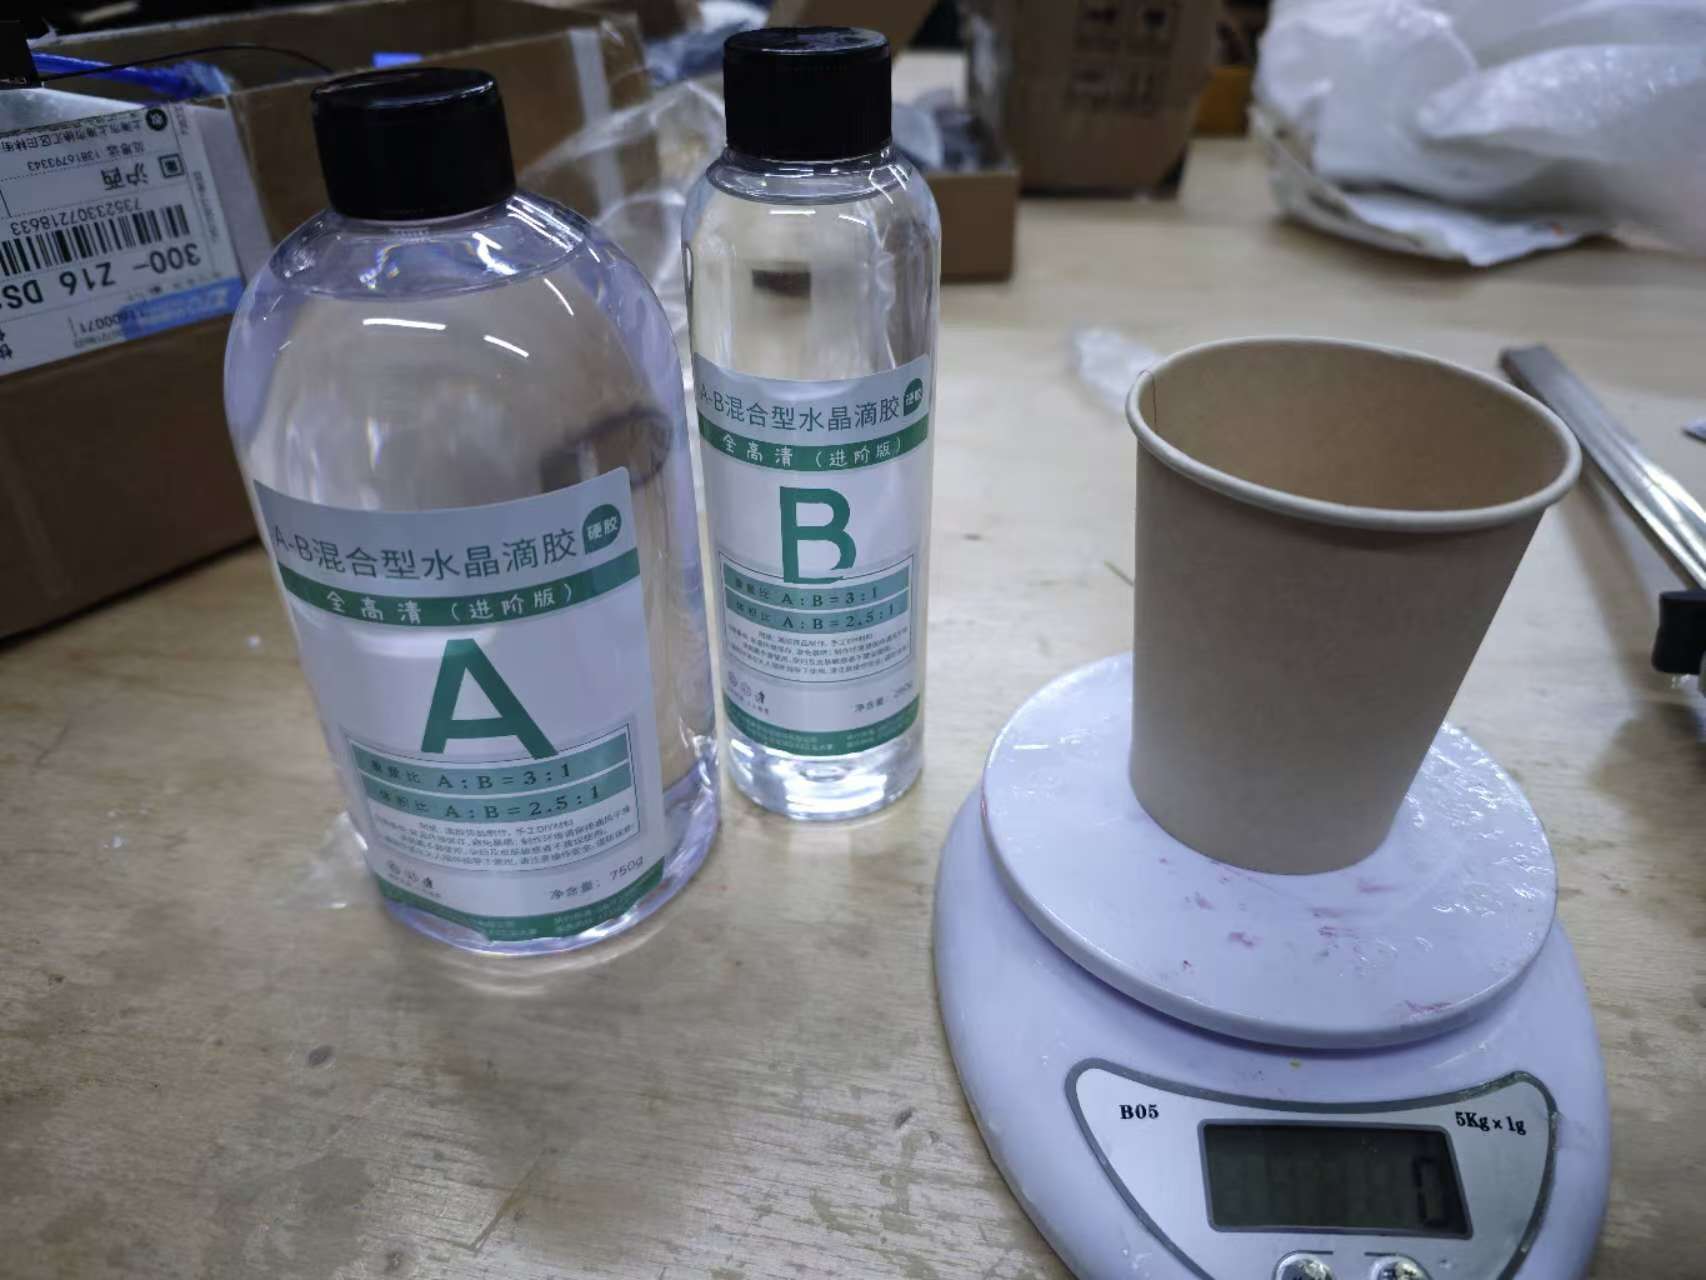
The epoxy resion I used has a mix ratio of weight A:B = 3:1 and size 2.5:1.
Then I soldered two wires to a small LED and used heat shrink tube to protect the joint.
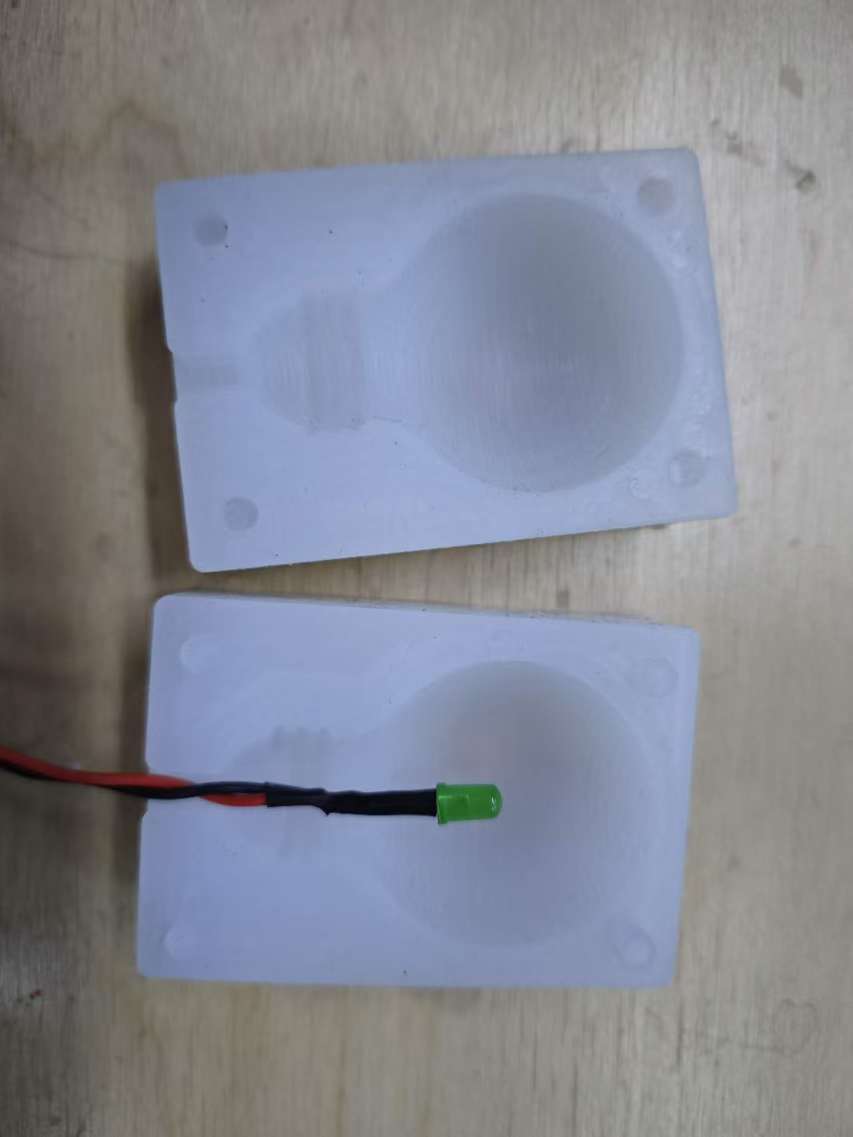
I also made a laser-cut box to hold the mold and use a small funnel to fill in the resin.
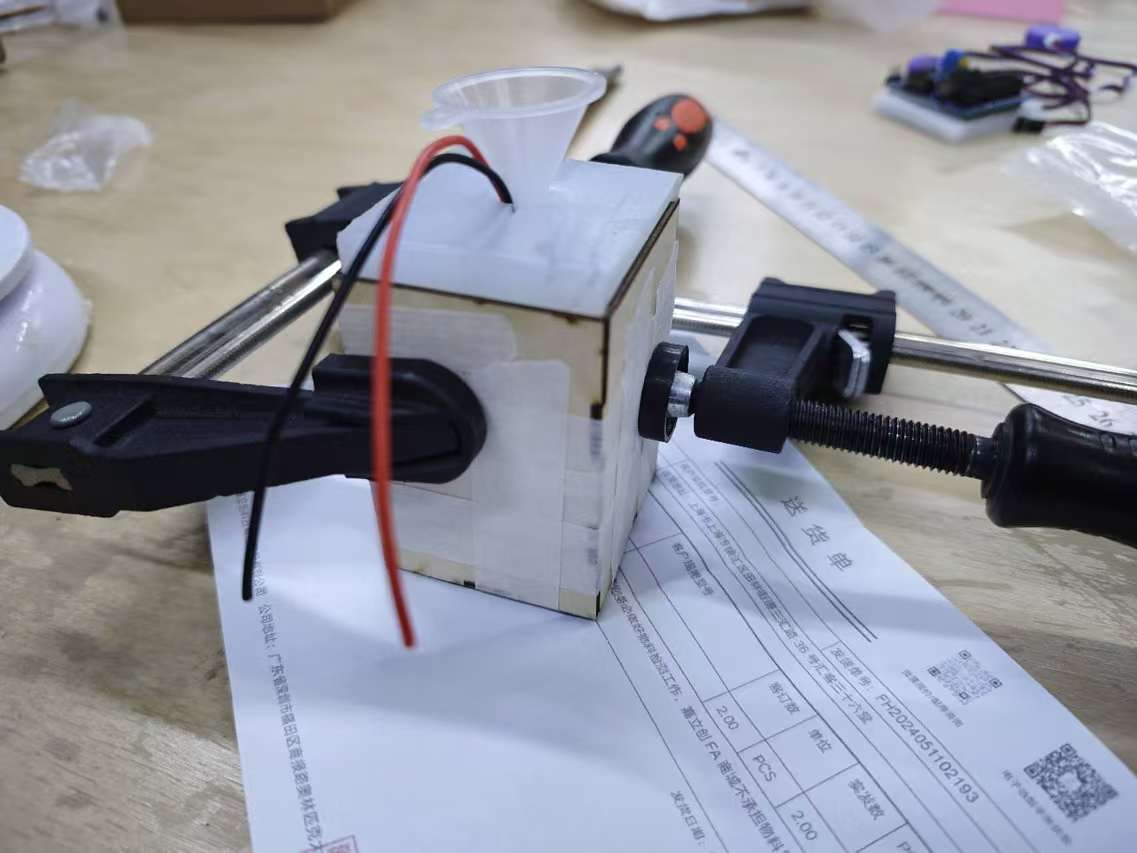
Problem With the Resion Solidification
But the result didn't turn out very well, the resin didn't solidify even after a few days.
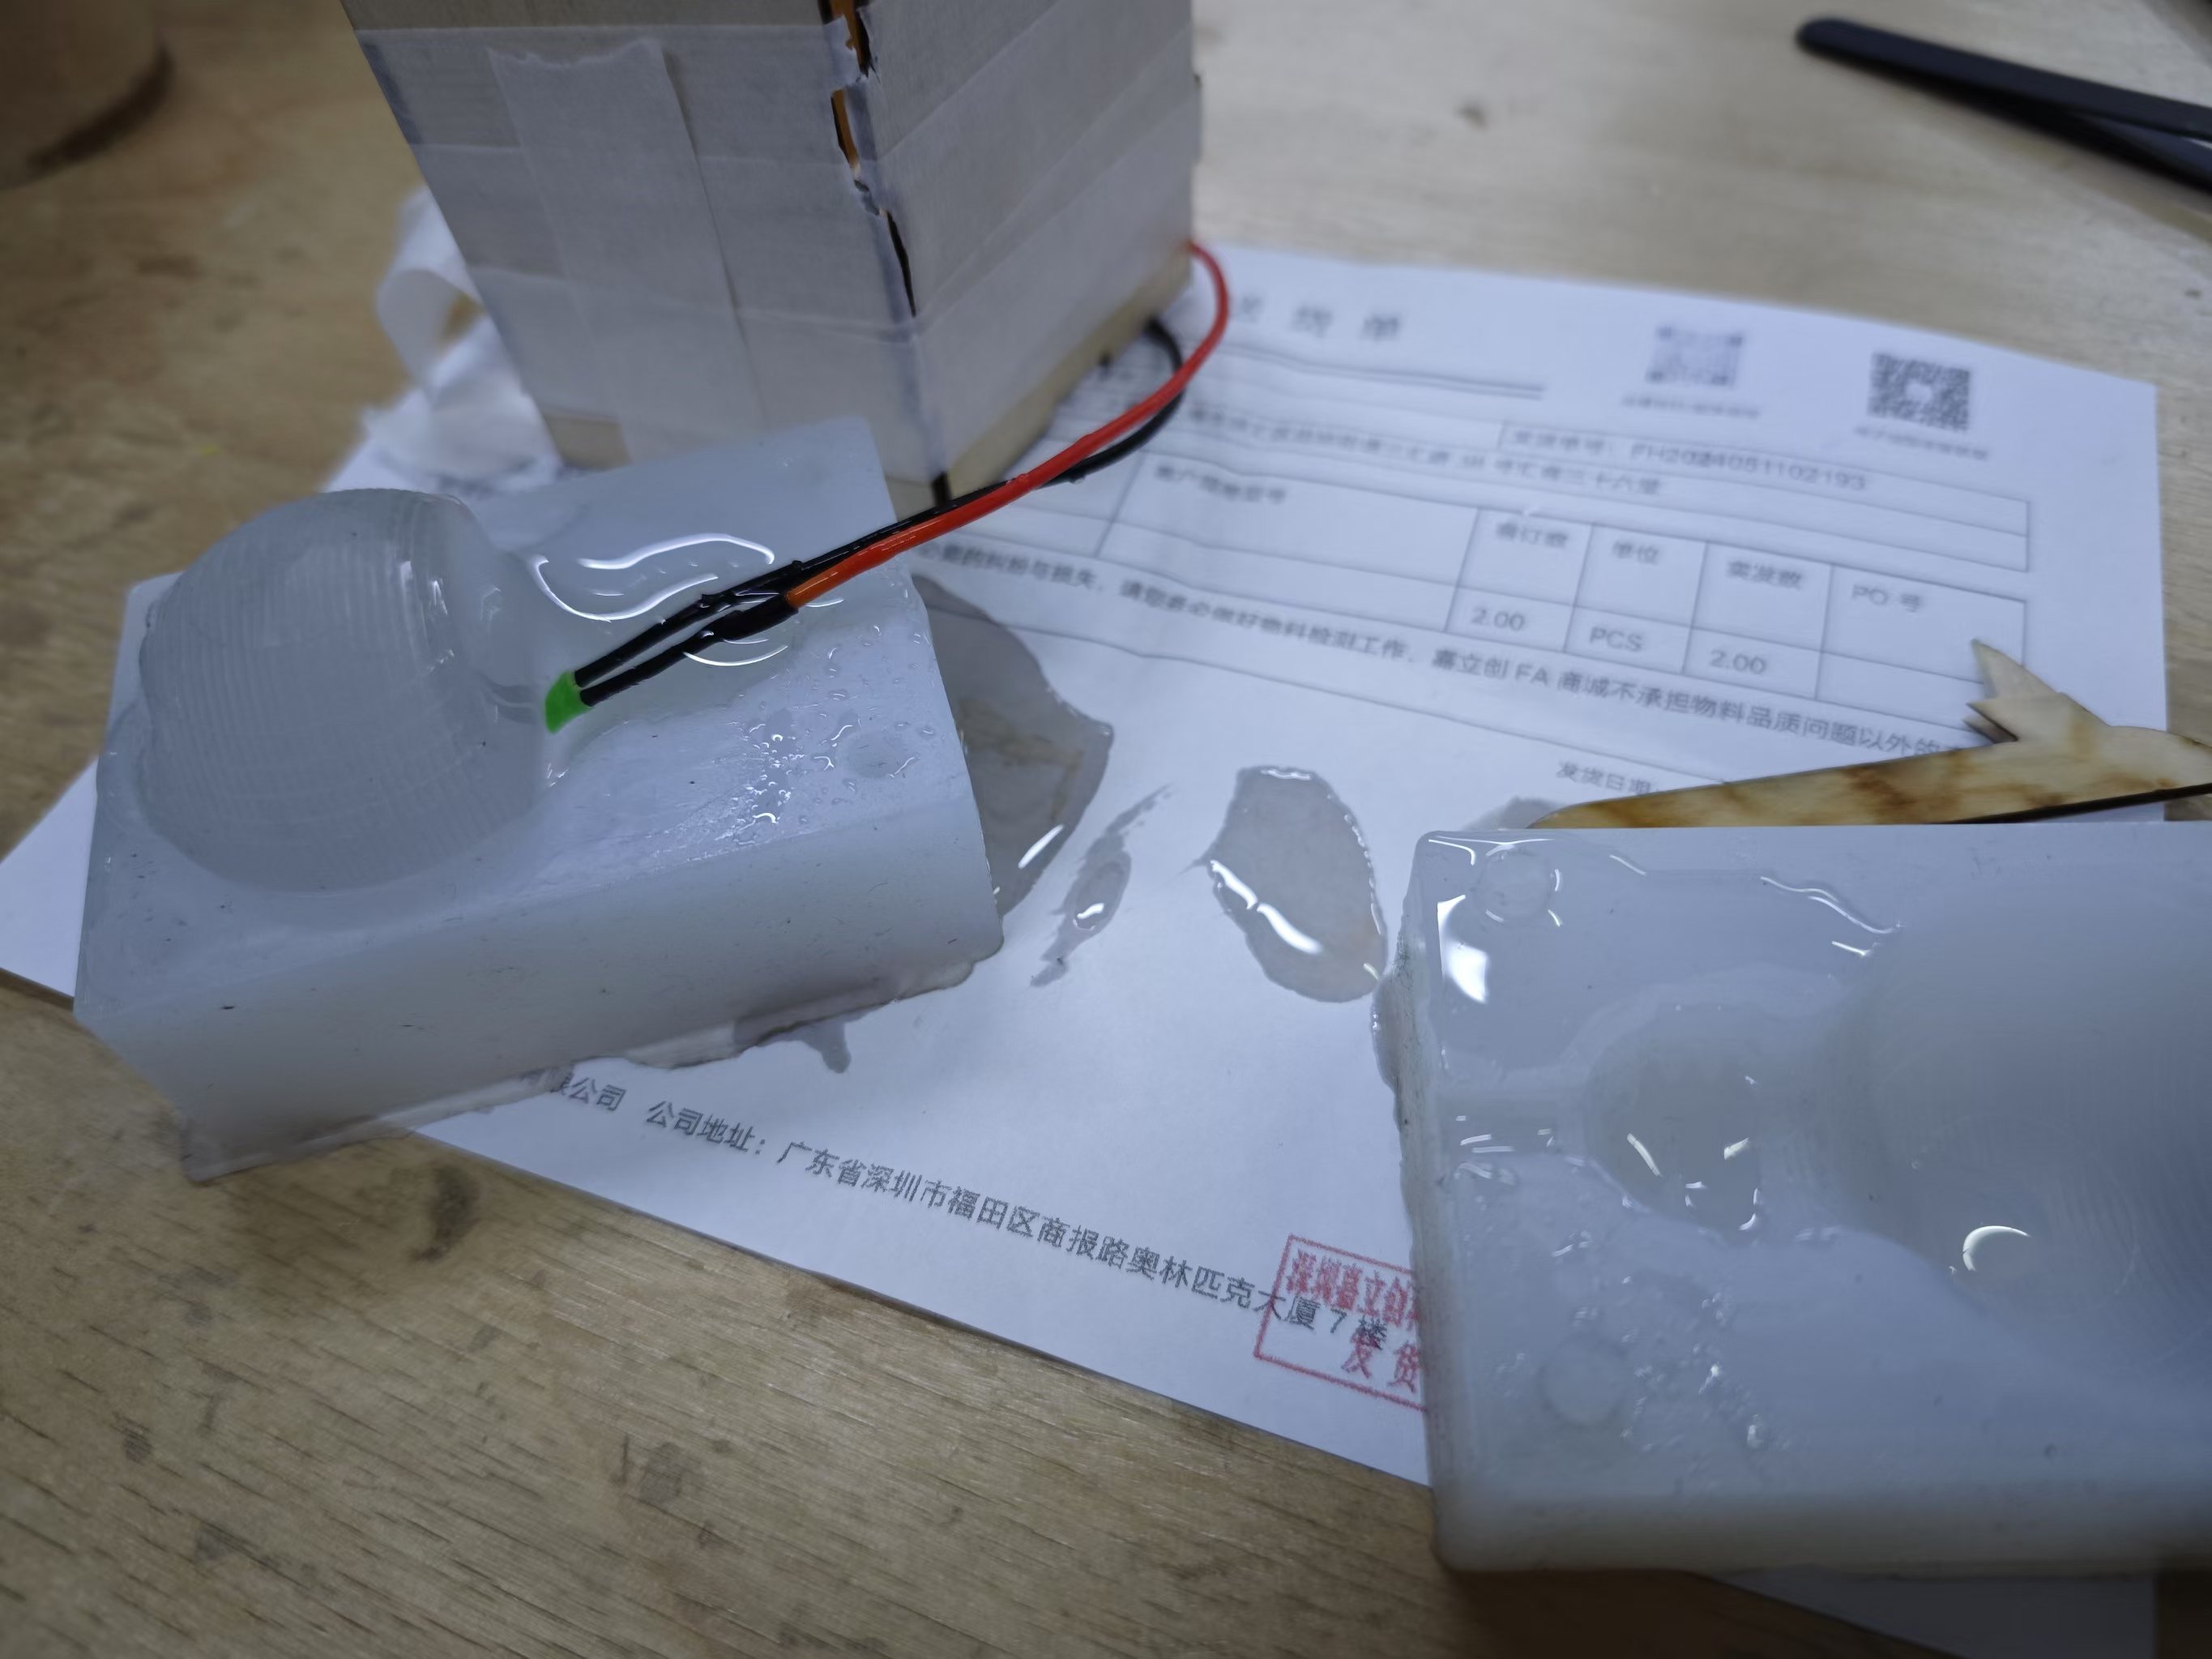
I noticed that the part that didn't solidify was the part that touches the LED, so I suspect there's some chemical reaction happend between the resin and the rubber and plastic part of the LED that prevented the solidification.
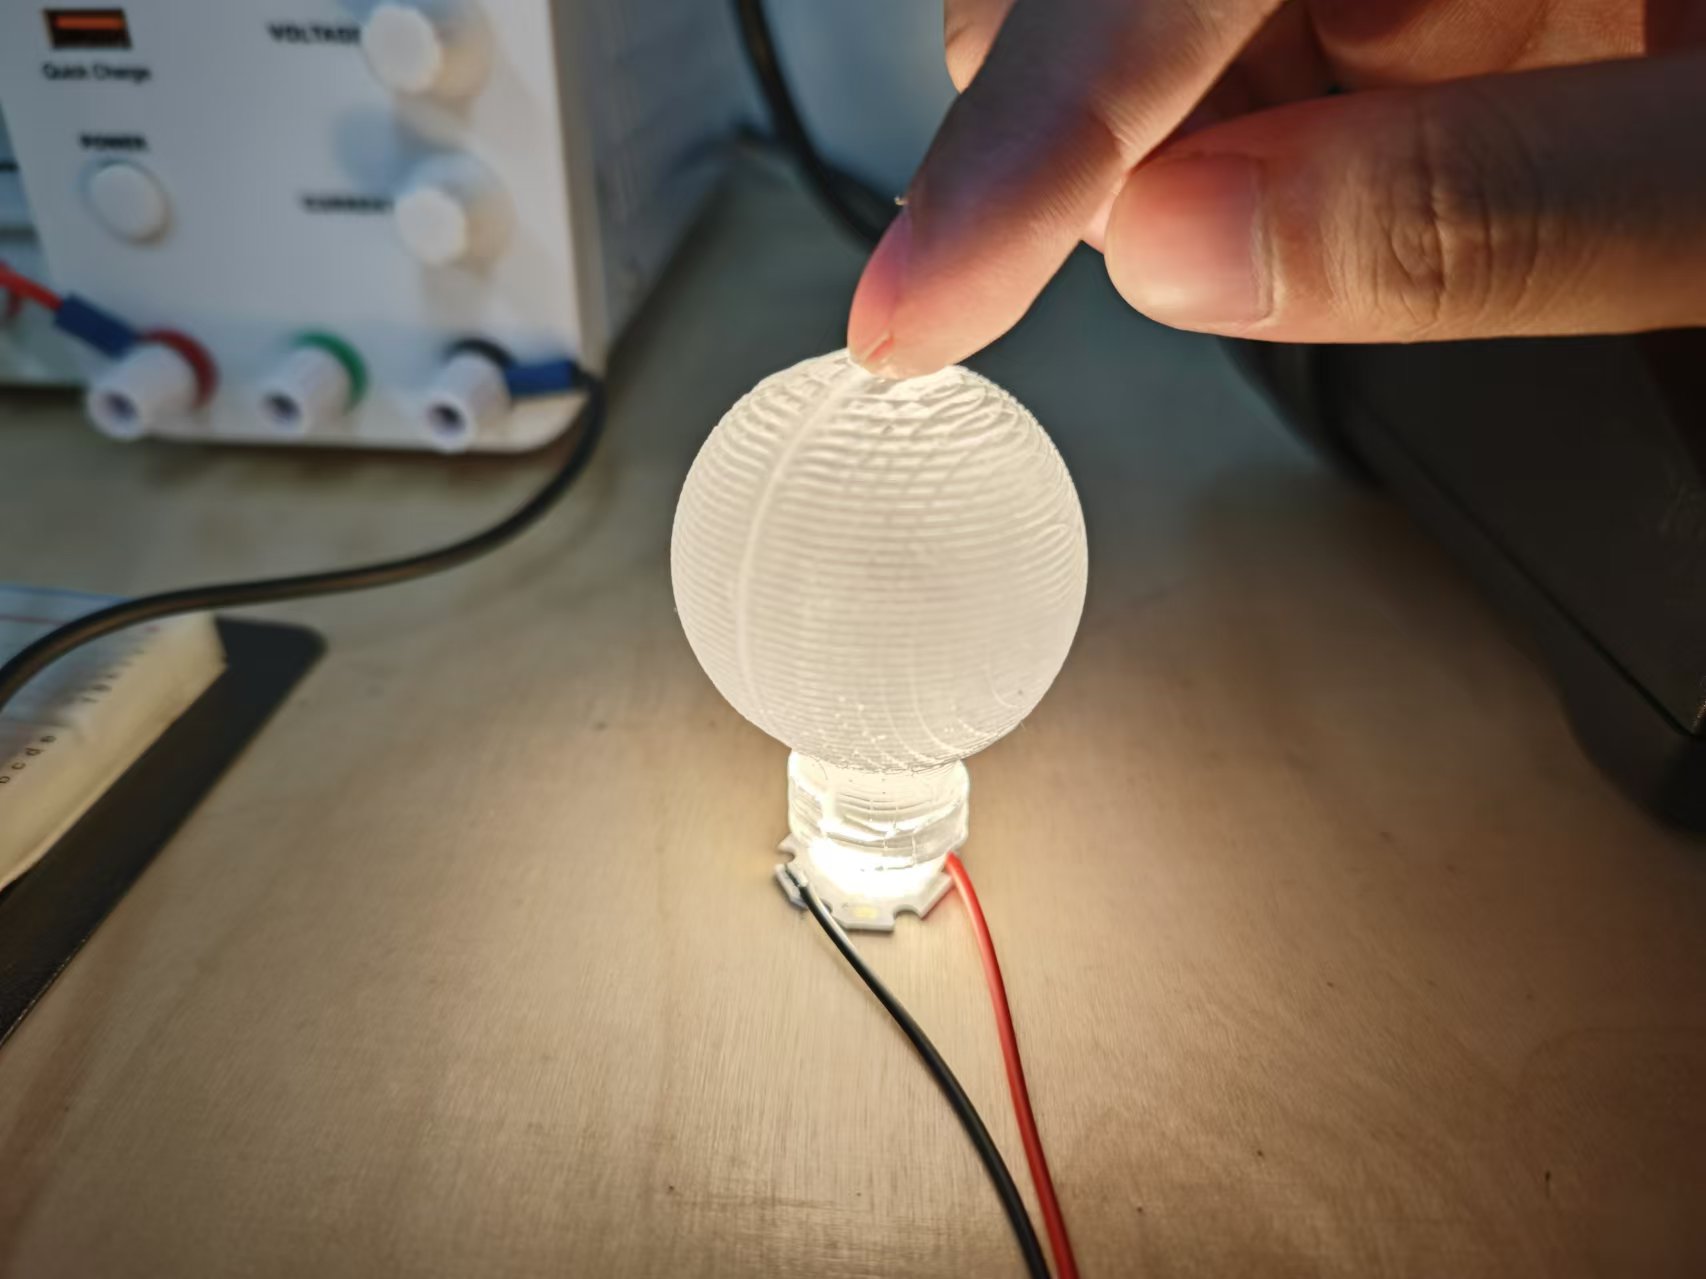
So in the end, I casted the bulb again without the LED being placed inside.
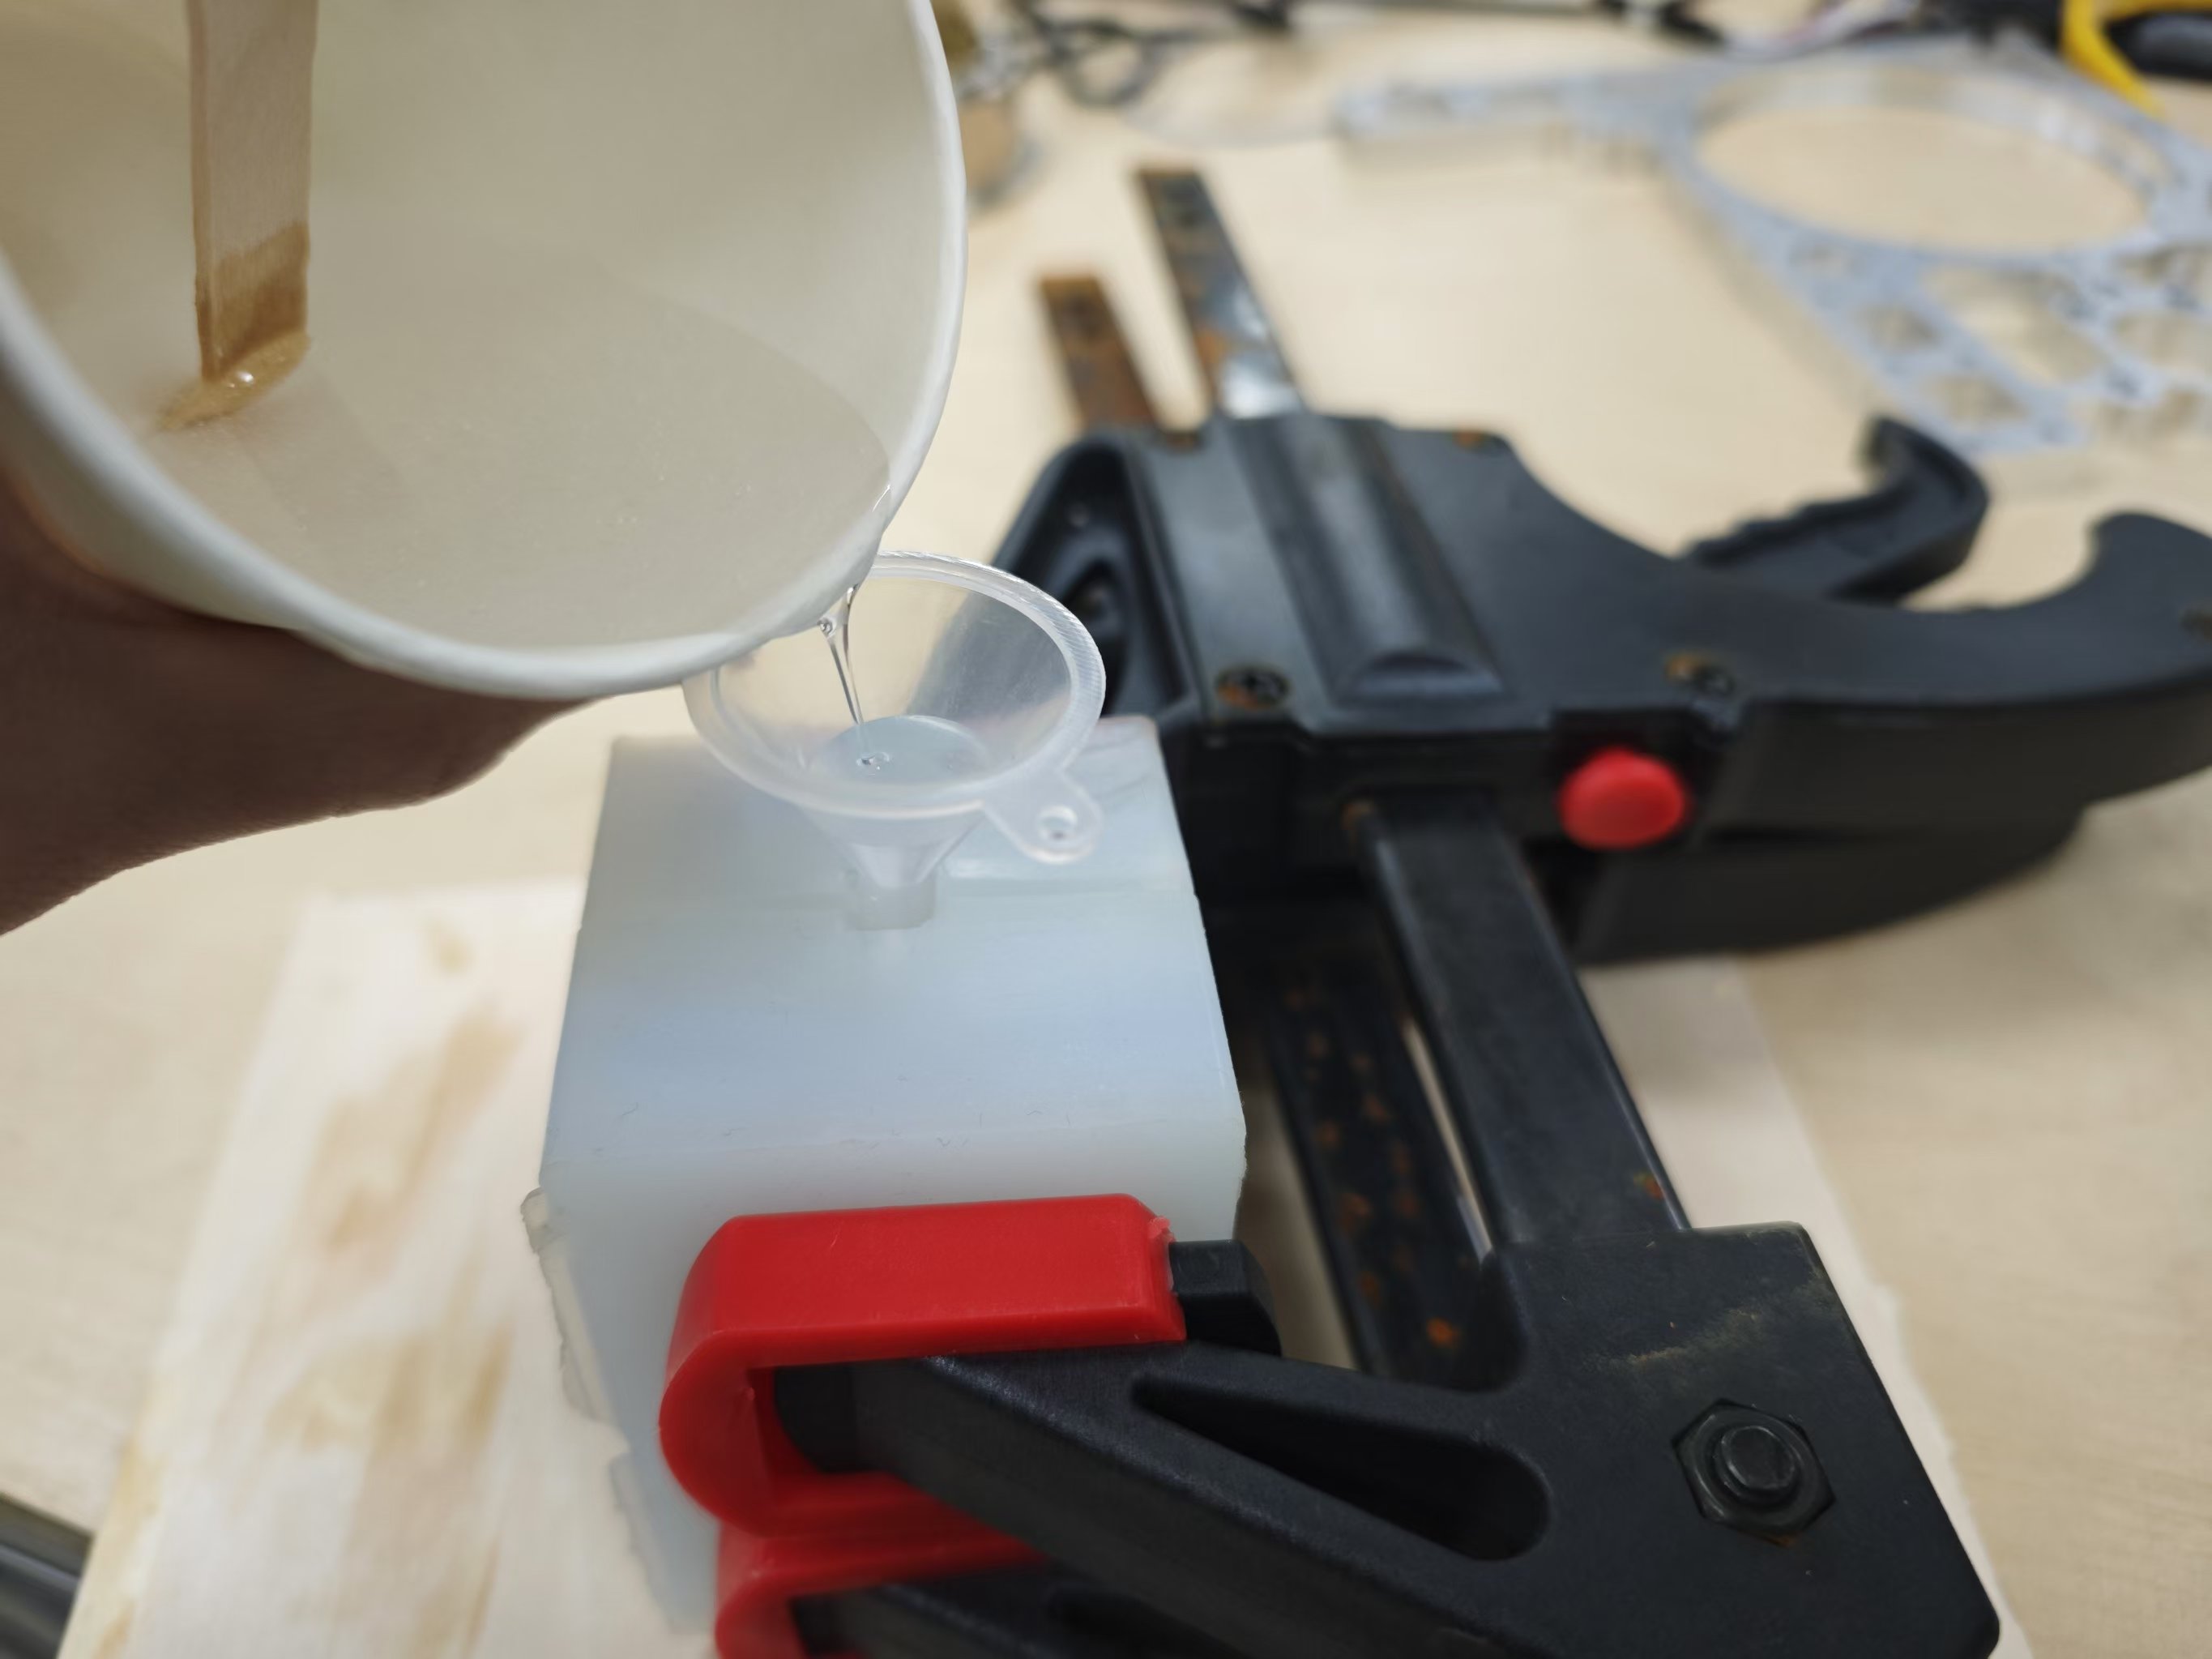
This time the result is pretty good.
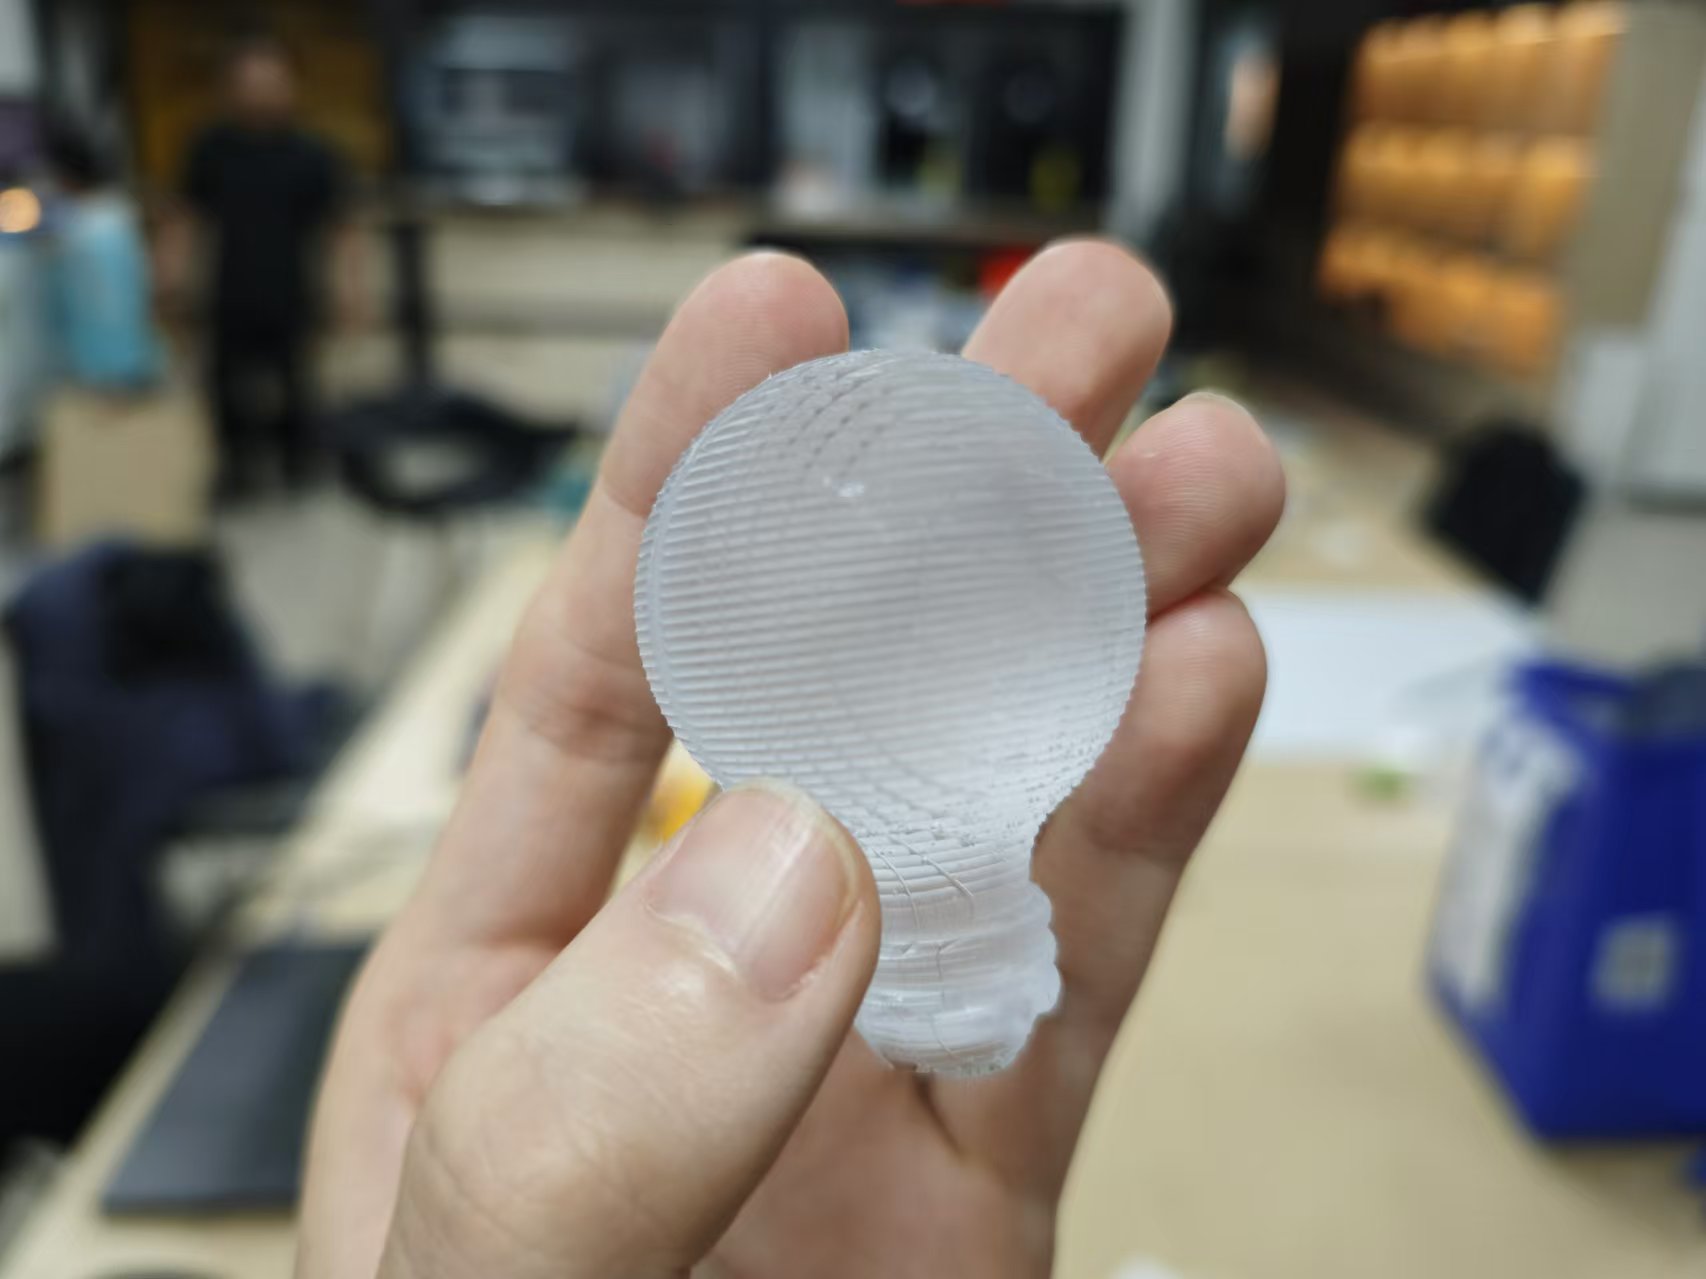
Placing an LED at the bottom, it luminates!
Project files
- FreeCAD project file: light-bulb.FCStd
- Toolpath:
- 3D pocket 4mm: light-bulb-4mm-pocket3d.nc
- Profile outline 4mm: light-bulb-4mm-profile-outline.nc
- Pocket bottom 4mm: light-bulb-4mm-pocket-bottom.nc
- 3D surface 2mm: light-bulb-2mm-surface3d.nc