Assignments
This week I worked on fully redesigning my Fab Academy Website (details of which are displayed in Week 1 documentation), Tested multiple CAD software, Tested 2D/3D software, Batched Compressed my image for upload and worked on a parametric design.
____________
My Plan for Week 2
- Download Autodesk & Solidworks and test out Autodesk, Onshape, Blender & Rhino.
- Test & Document 2D Raster/Vector software.
- Make a parametric design.
- Compress images using GIMP / BIMP and explain the progress.
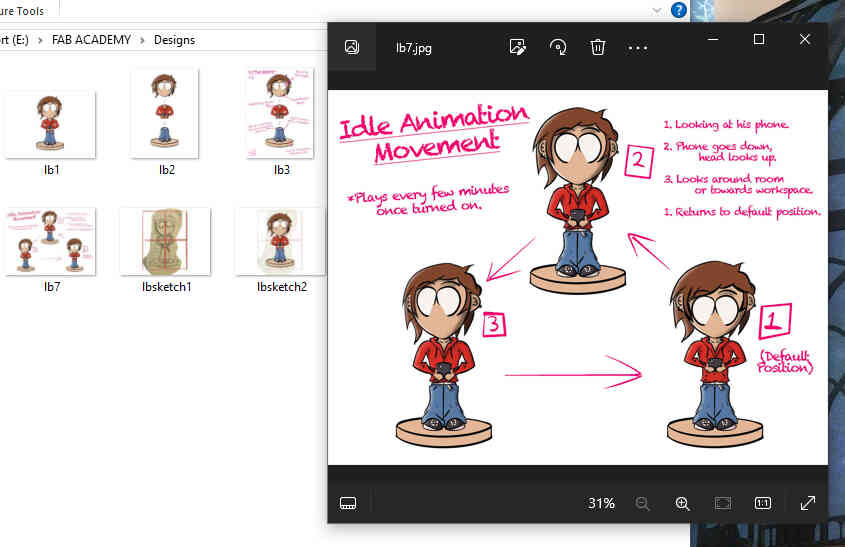
- Build ‘Little Buddy’ in Blender and Animate his movements.
- Document & Upload results.
- Explain the decision to not use AI.
____________
Decision to Use / Not Use AI:
Use for AI: I have never used AI before, especially not for assignment / documentation purposes. I'm still not comfortable with the idea of using it but I thought I could experiment with Time Management by using ChatGPT to give a short description of each software before I personally go further in-depth. Reason being that I would have looked online for a textbook description anyway.
Not use AI: I won't be using AI to create and images, designs or illustrations. Simply because that's my line of work and I don't want my designs or illustrations to be confused with AI art - for better or worse.
____________
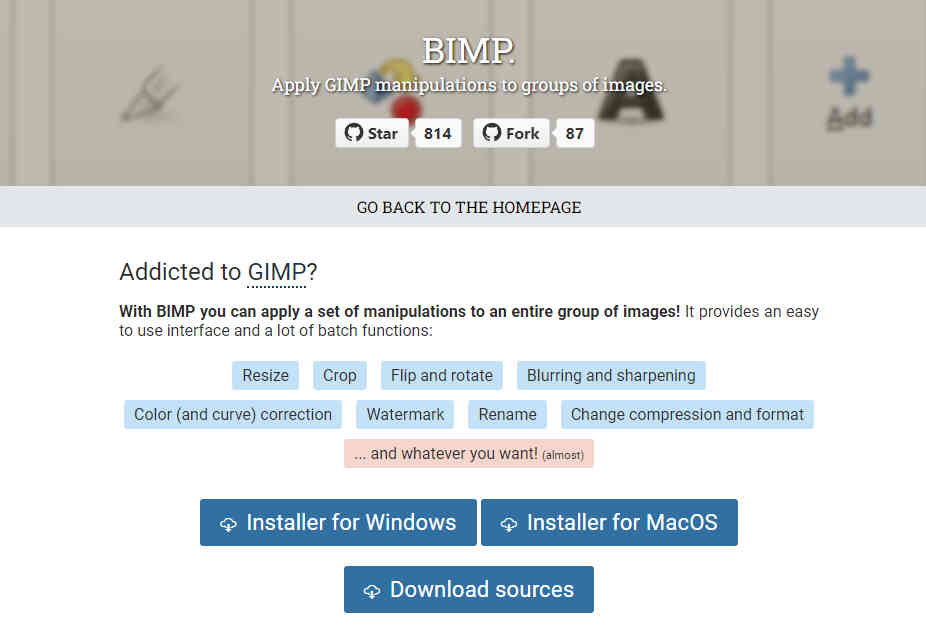
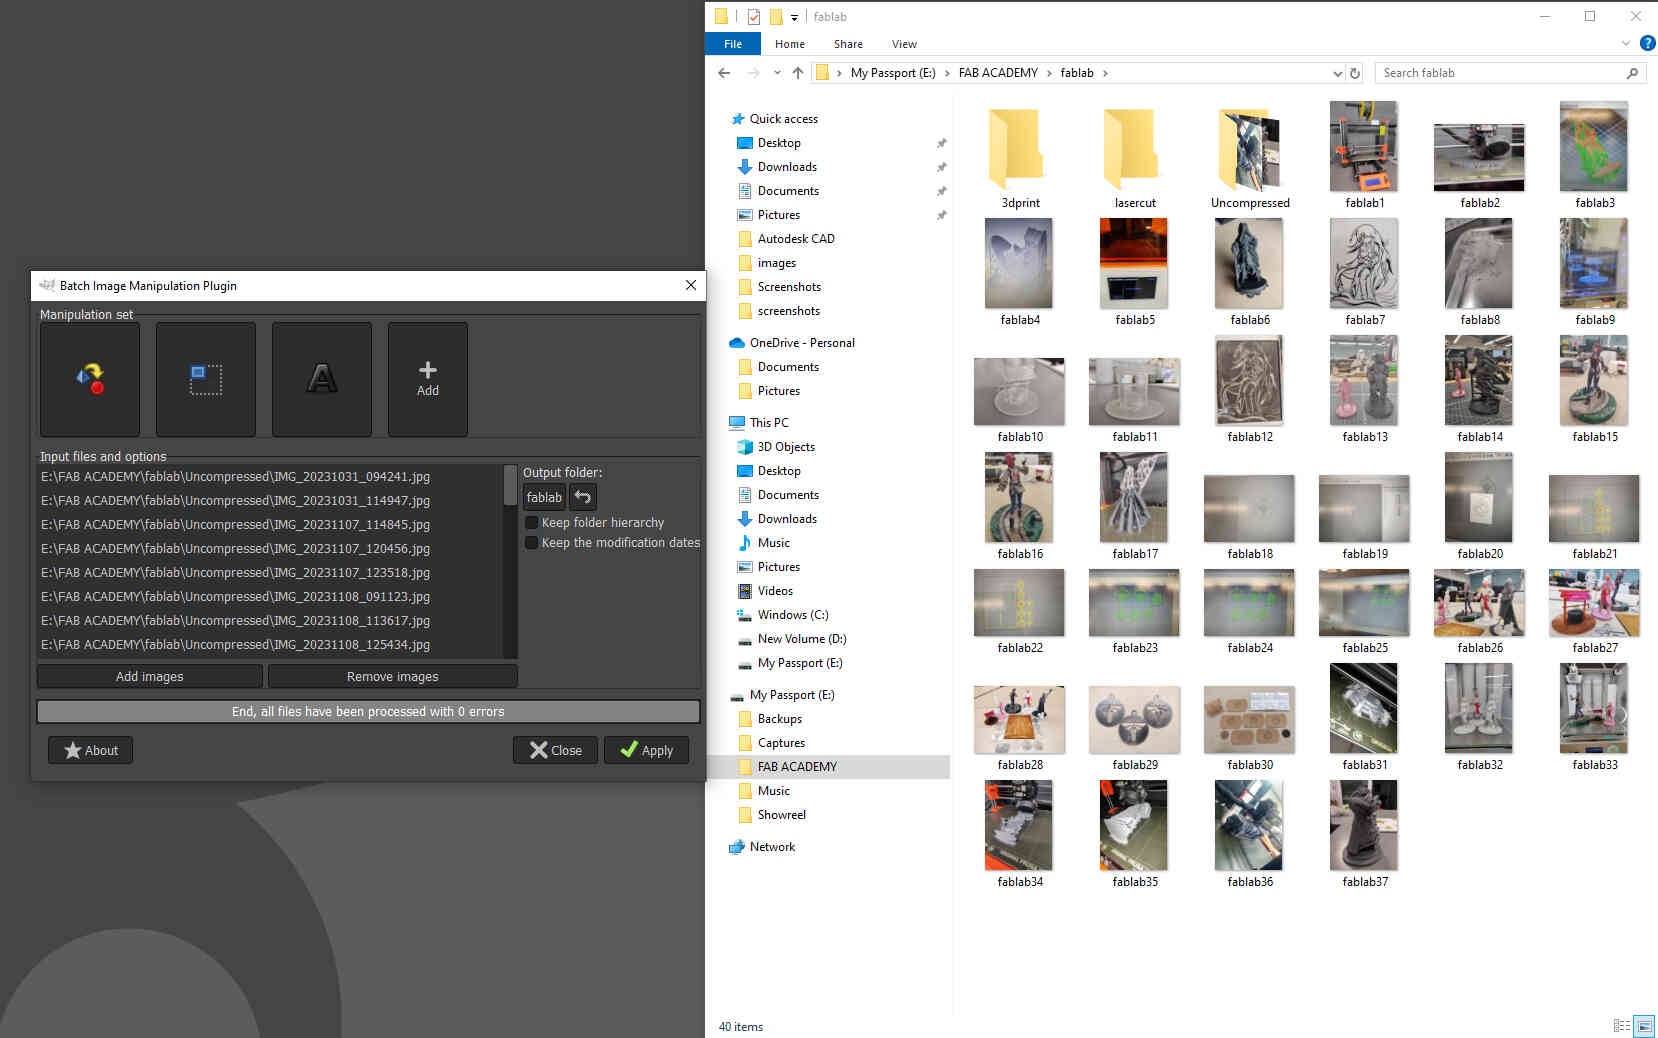
Image Compression using GIMP / BIMP
GIMP, which stands for GNU Image Manipulation Program, is a free and open-source raster graphics editor. It provides a comprehensive set of tools for tasks such as photo retouching, image editing, and graphic design. GIMP supports various file formats and offers features comparable to commercial software like Adobe Photoshop. With capabilities like layering, masks, filters, and customizable brushes, GIMP is a powerful option for users seeking a versatile and cost-effective solution for digital image manipulation. - (Written by ChatGPT v.3.5, 2024)
Anytime I compress images or files, it's either through a zip file or by individually resizing images through software like Krita, Photshop or Procreate.
Having already installed GIMP and highly interested in batch compressing, I decided to compress images using the BIMP addon. I had already moved on from GIMP as an illustration tool a while ago as I didn't find it's user experience all that remarkable, (Now using Krita & Procreate for illustrations).
But after installing the BIMP addon, I was delighted to see how easy it was to use and how quick and organized the result was. Being able to Resize, Rename, Compress, etc, a batch of images at once is a game changer for my personal projects. I had to stop myself from compressing & relabelling everything on my computer. I'll definitely be using this compression method for all my images in the foreseeable future.
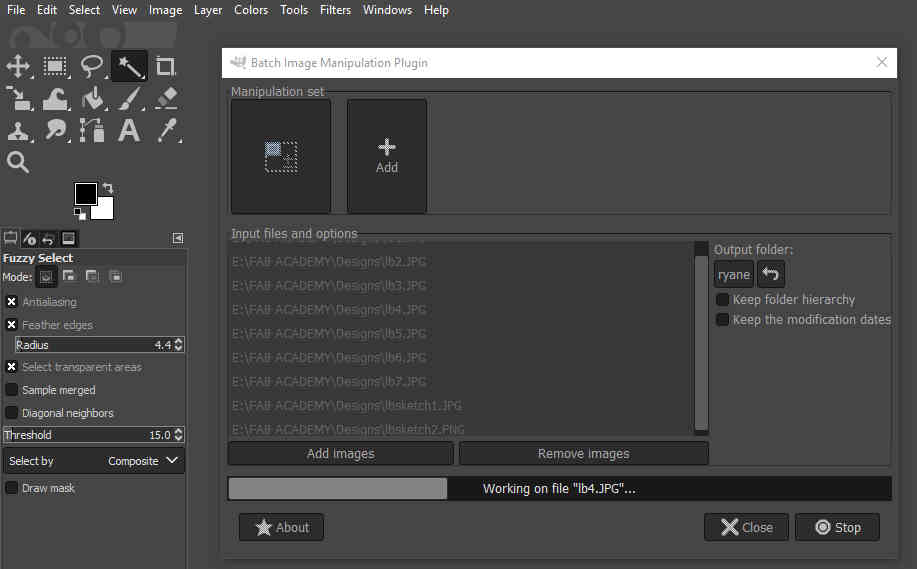
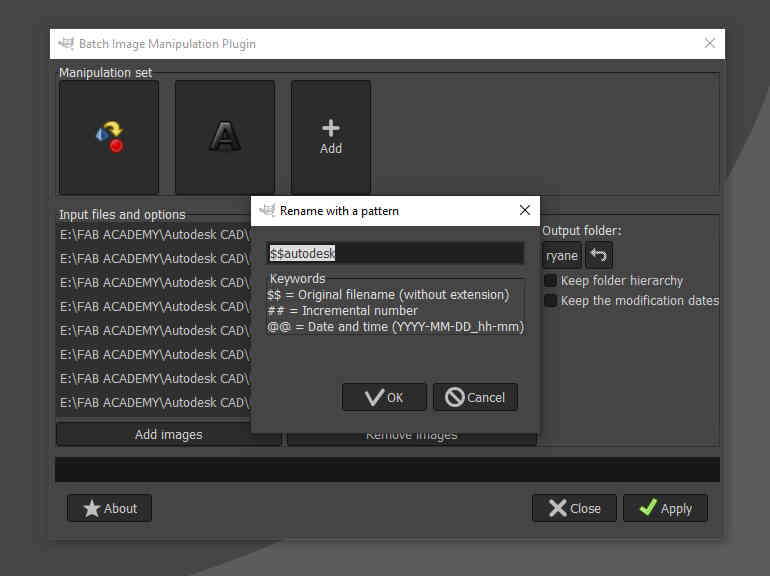
How to use BIMP Compression
BIMP is remarkably easy to use. This is all you need to do:
Open GIMP -> File -> Batch Image Manipulation
Add images that you want to compress, hit the '+' symbol to add manipulations such as Resize, Rename, Compress and File Format, etc. Then hit Export and you're done!
____________
Testing 2D Raster / Vector Software
I chose to test Procreate & Inkscape due to their affordability, quality and accessibility.
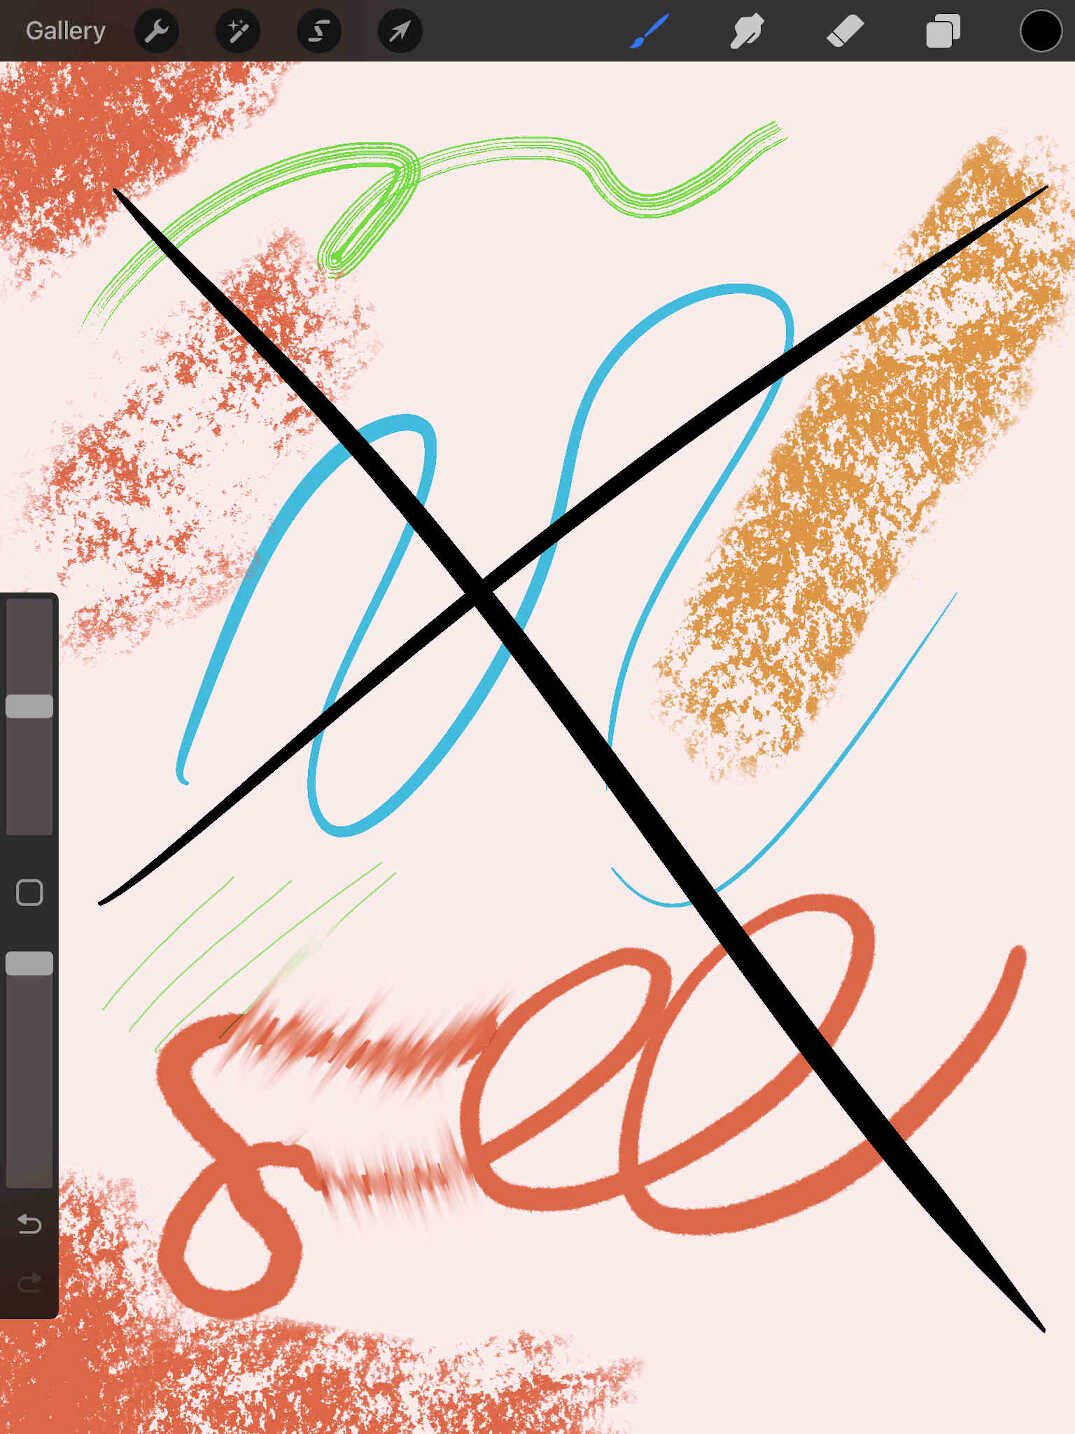
Procreate (2D Raster)

Procreate is a popular digital painting app for iOS devices, known for its powerful and intuitive features. It offers a wide range of brushes, advanced layer capabilities, and high-resolution canvases & at a low cost, making it a preferred choice for artists and illustrators to create digital art. Raster images are composed of pixels arranged in a grid. Each pixel holds information about color, and when combined, they form a complete picture. Common raster image formats include JPEG, PNG, and GIF. The resolution of a raster image is crucial, as enlarging it may result in a loss of quality, known as pixelation. Unlike vector graphics, raster images are resolution-dependent and may not scale well without compromising clarity. - (Written by ChatGPT v.3.5, 2024)
I have been drawing on tablets for over a decade now, often using Wacom Bamboo & Intuos brands. However, once I got my hands on an iPad and installed Procreate, I never looked back. It's incredibly smooth, responsive and satisfying. It does essentially everything I need for sketching and illustration, with it's only drawback being that it doesn't do/export vector art.
The newly released 'Procreate Dreams' has everything you're accustomed to in Procreate, but as a full (and affordable) animation suite.
The illustrations and concept designs made for my Final Project (Found on the 'Final Project' page) were all made and exported through Procreate.
Method:
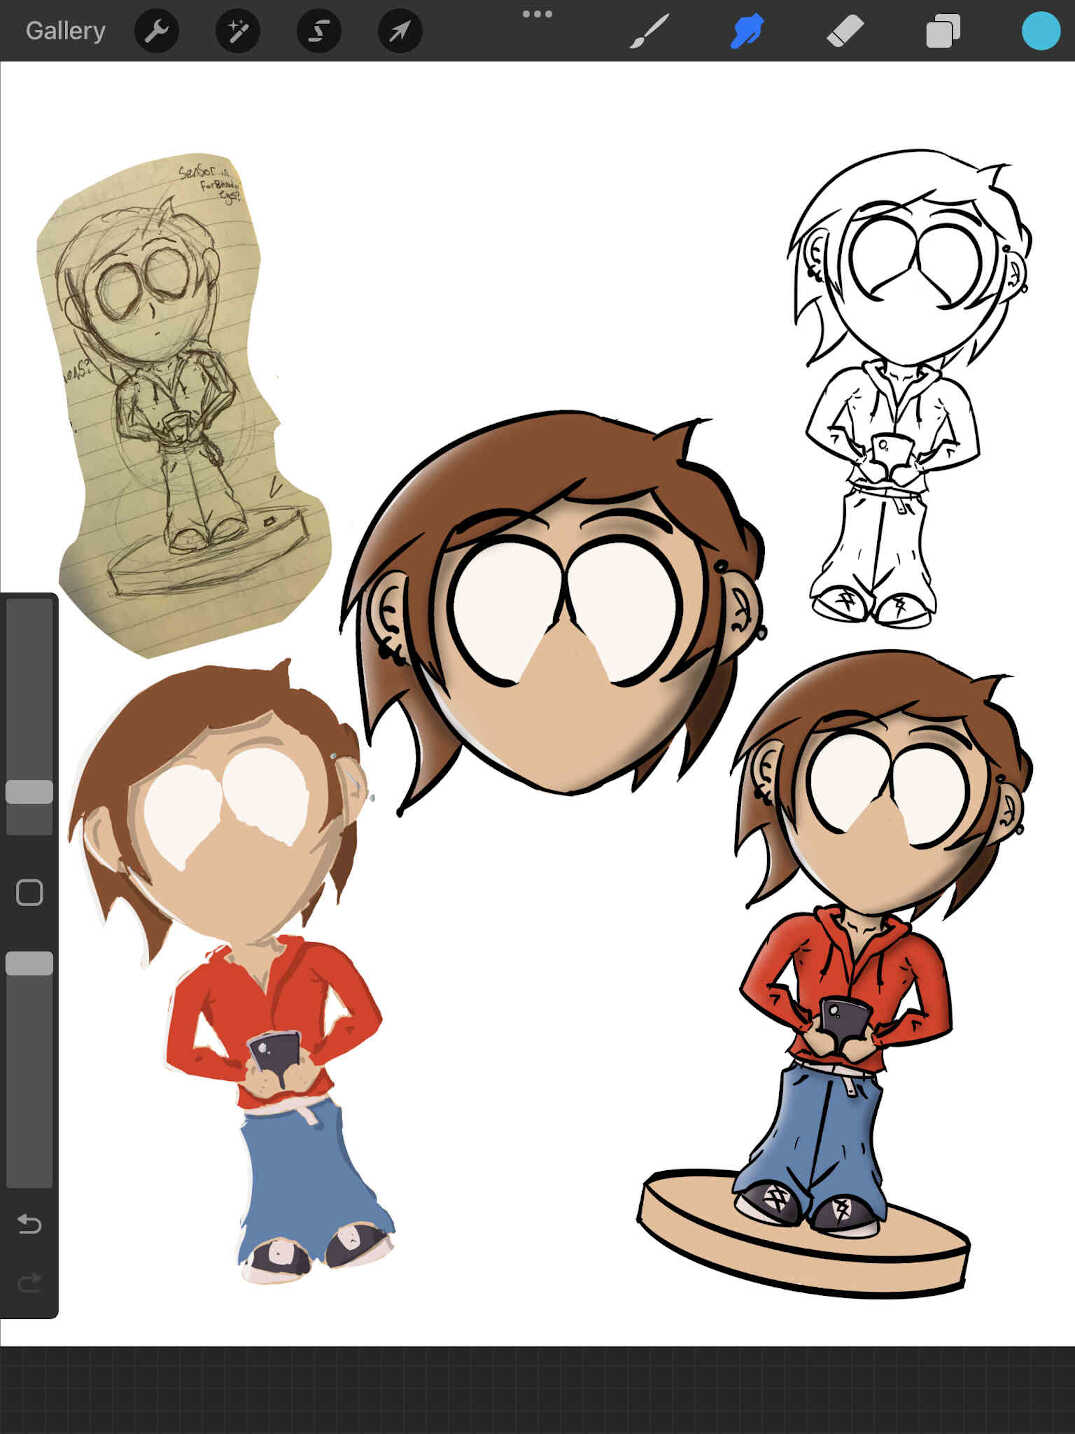
I start the sketch process in an empty layer using a bright colour to make the outline process more distinguishable. Beforehand it's good practice to draw lines using different pencil/pen types to find the flow and style you're looking for.
Once the sketch is complete, reduce the layer's opacity to 40% and start your outline on a new layer. I often use the 'syrup' inking tool for a more manga inspired design with bold black lines.
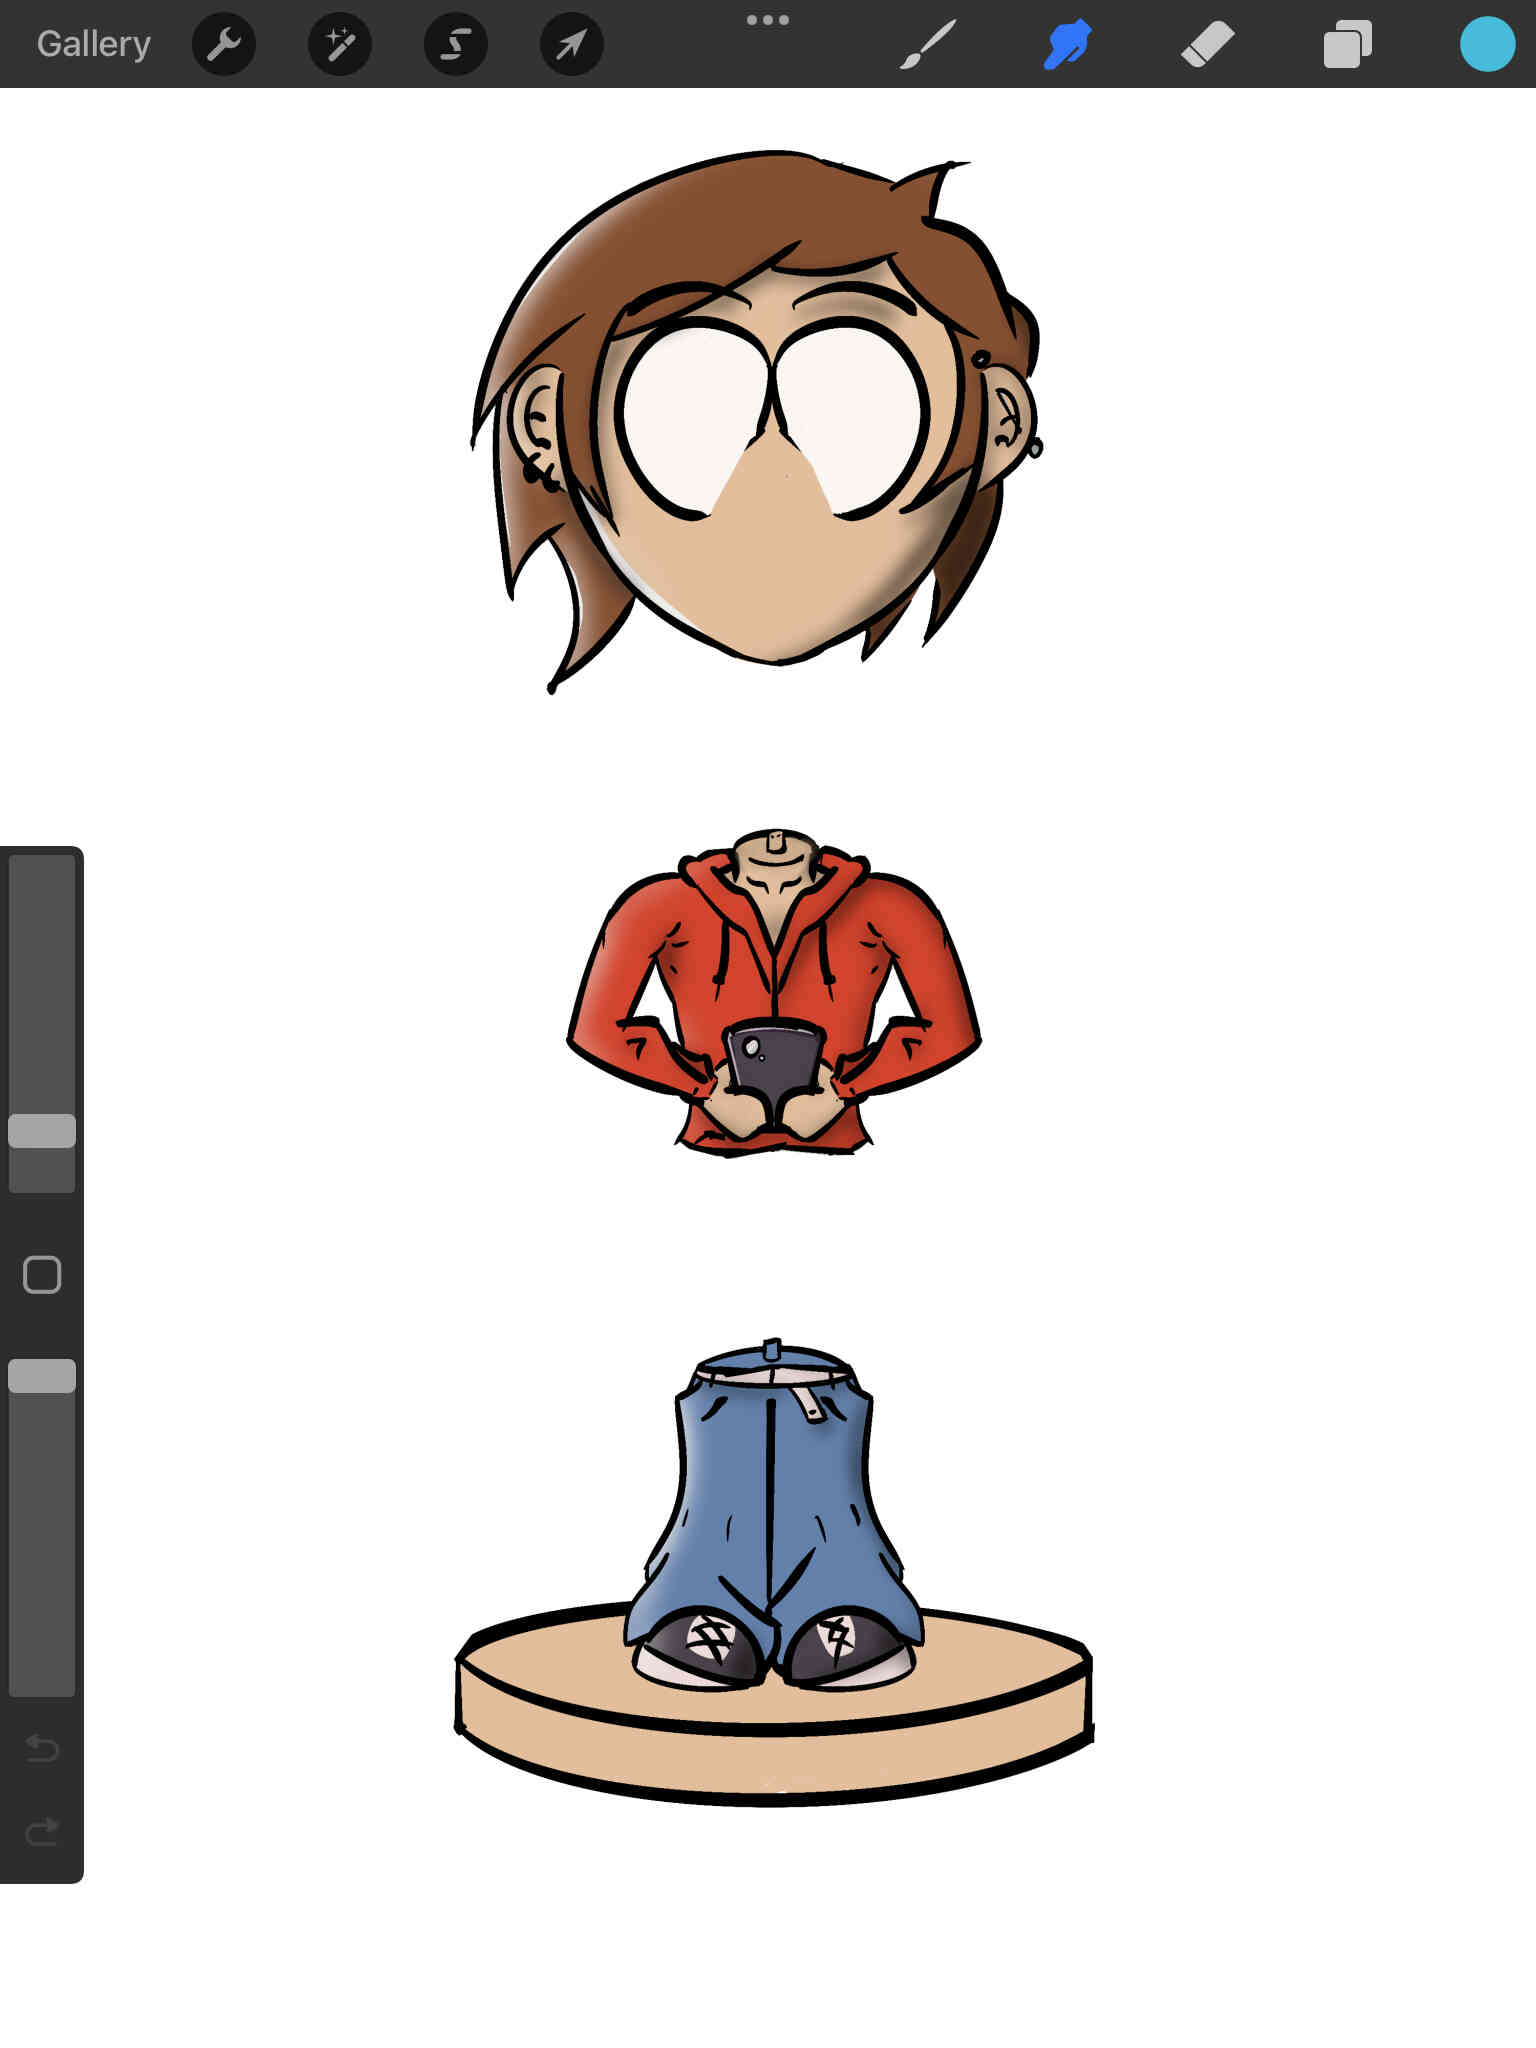
Once the outline layer is finished, create a new layer and place underneath the outline layer. I filled the entire characer design with a single skin colour to prepare the 'mask'. Adding a new layer on top of that, I change it to a 'clipping mask' which allows me to colour in the character design without worrying about going outside the skin layer. After colouring in the design, I add two more clipping masks on top of that for highlights and shadows.
Once the colour design is complete, I duplicate all layers and merge them into one - with the original design layers locked & hidden underneath. This allows me to return to the core files whenever I want in case I need to edit them more or use them as a new template.
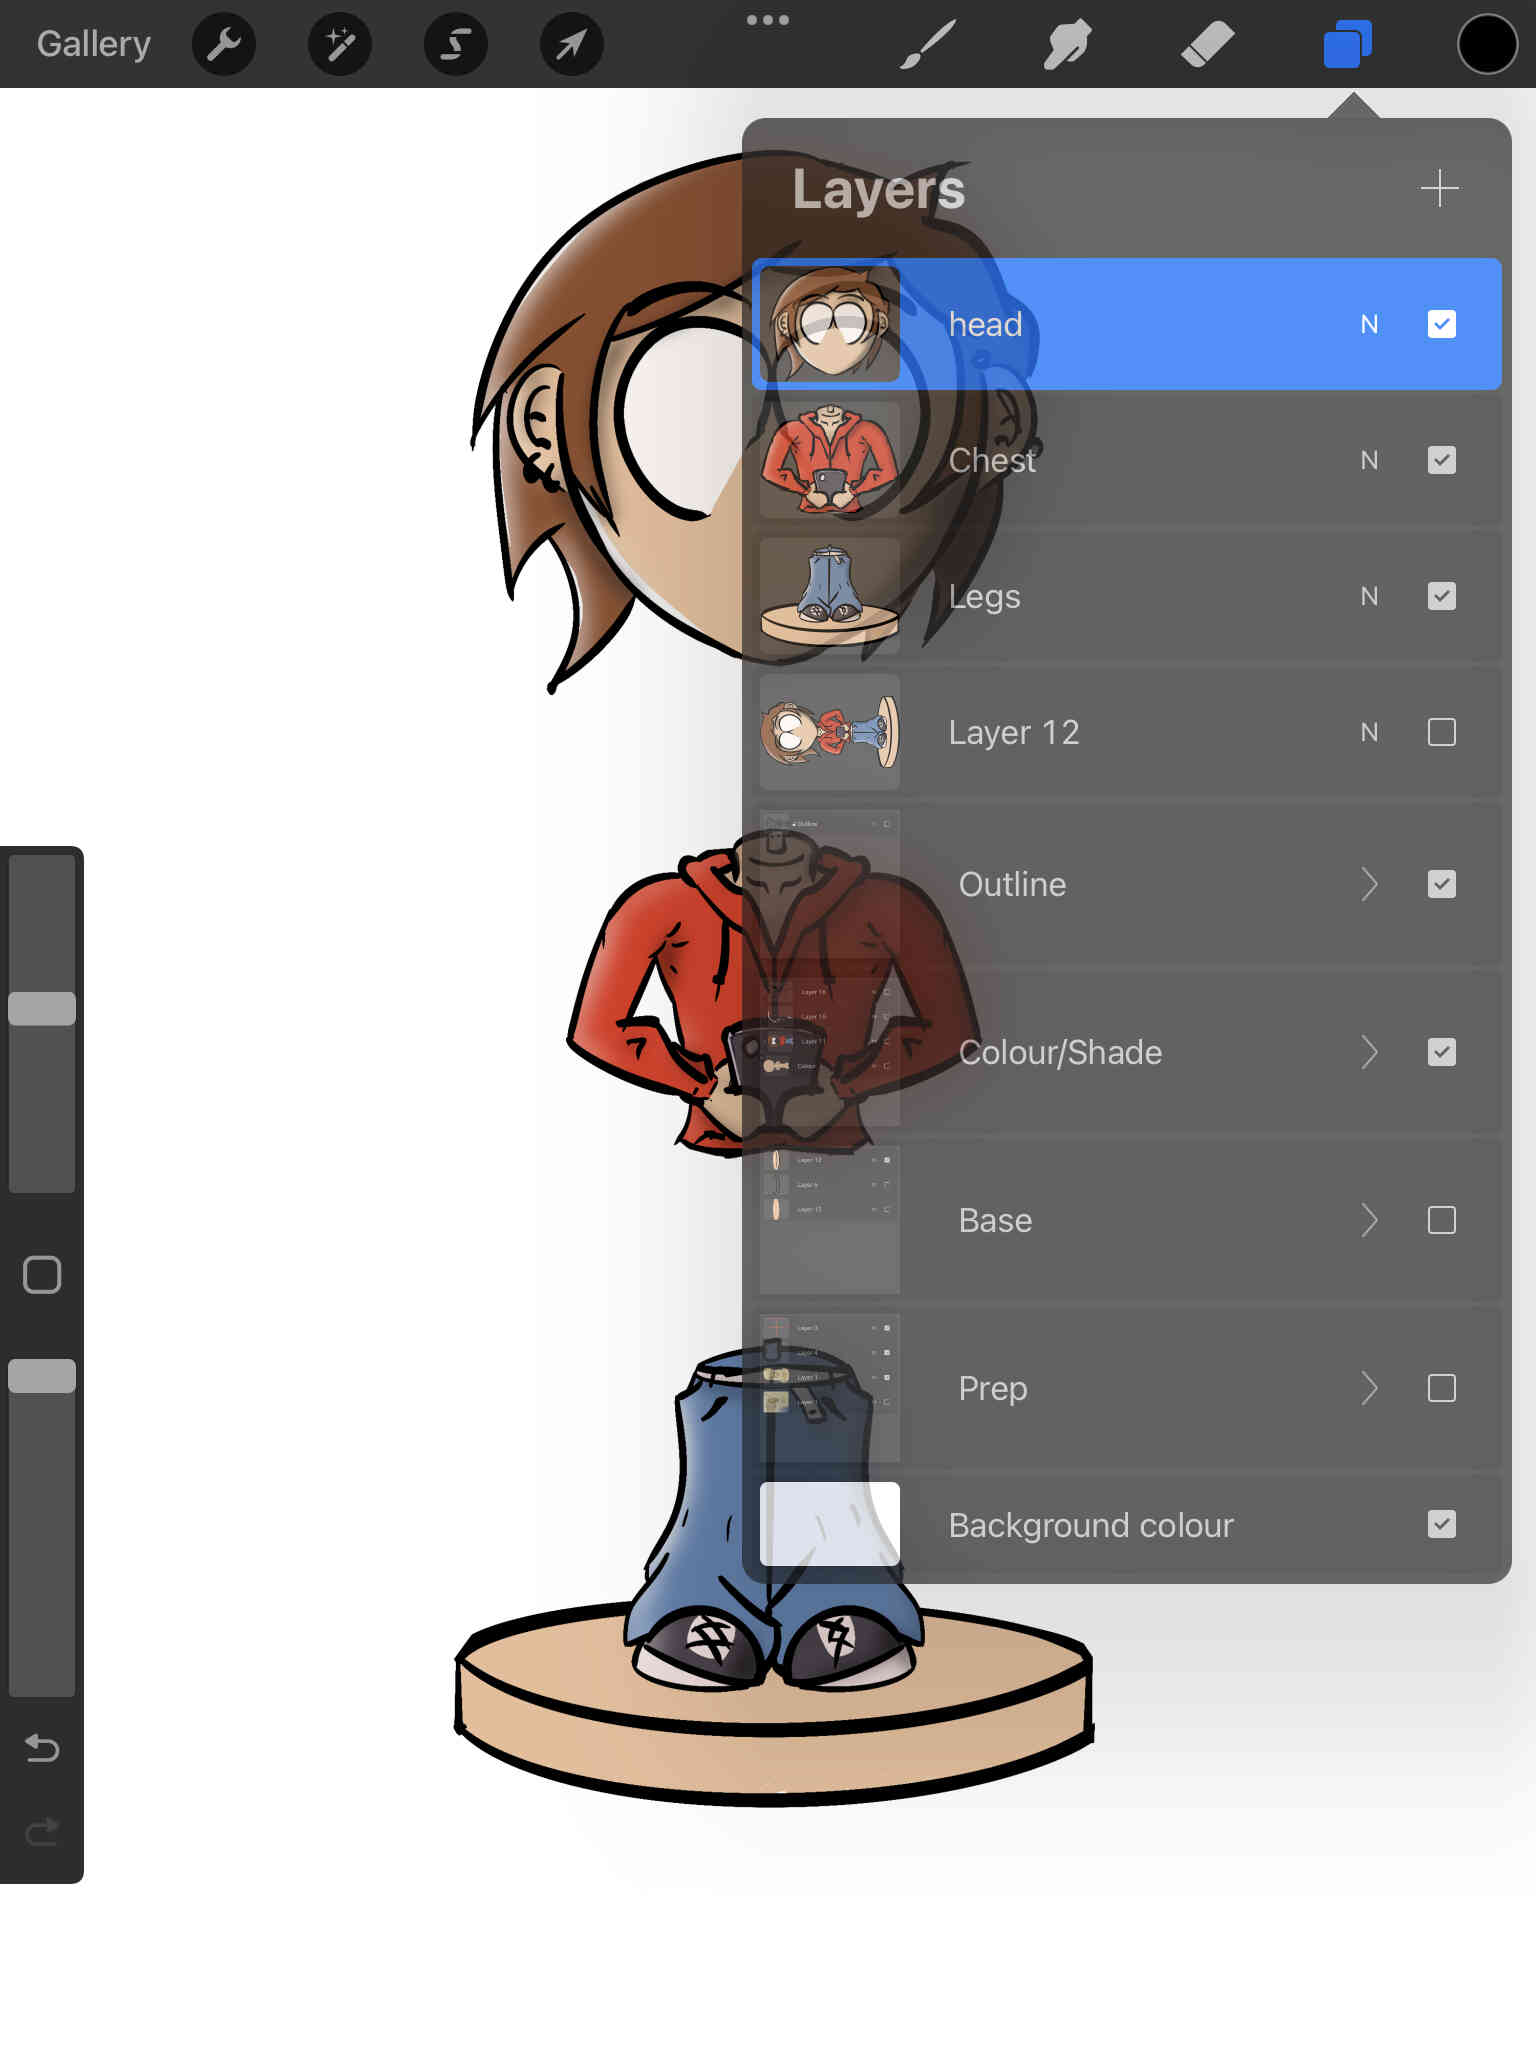
Finally, I duplicate the merged layer into 3 different copies and used the eraser tool to edit out parts of the body. In the end, I'm left with 3 different layers for 'Base & Legs', 'Chest' & 'Head'. I do this for further manipulation and animation needs. With all this done, you're free to export the design into a PSD, JPG, PNG, TIFF, etc.

Inkscape (2D Vector)
Inkscape is a powerful and free vector graphics editor. It's widely used for creating scalable vector illustrations, logos, diagrams, and other graphic design projects. With features similar to professional tools, Inkscape supports a variety of file formats and is popular among users seeking an open-source alternative for graphic design.
Vector images use mathematical equations to represent shapes, lines, and colors, allowing for scalability without loss of quality. Instead of pixels, vectors are based on points connected by paths. Popular vector formats include SVG, AI, and EPS. This scalability makes vector graphics ideal for logos, illustrations, and designs where precision and flexibility are crucial. Unlike raster images, vectors can be resized indefinitely and maintain crisp edges, making them well-suited for tasks requiring high-resolution and detailed graphics. - (Written by ChatGPT v.3.5, 2024)
So far I've only played with the tools on Inkscape's canvas, the most notable of which was the perspective tool. I may have had too much fun with that one...
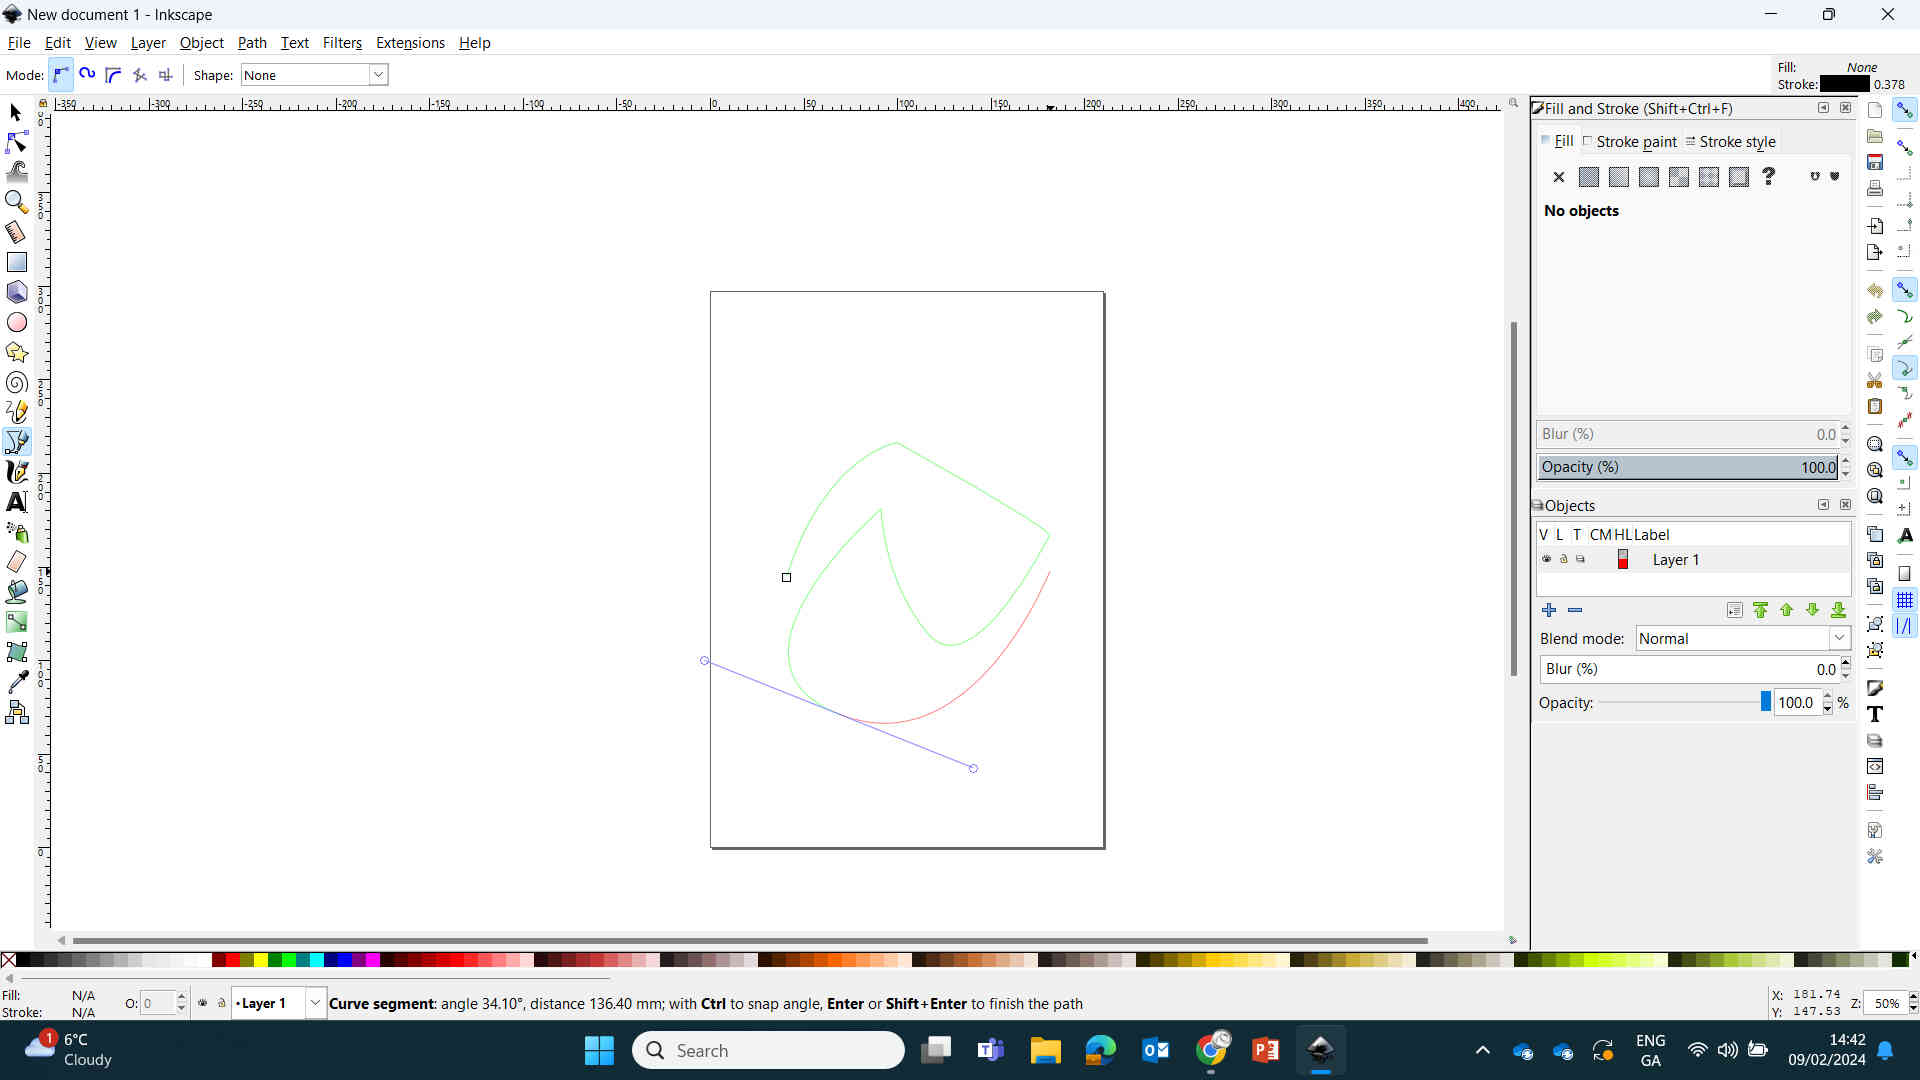
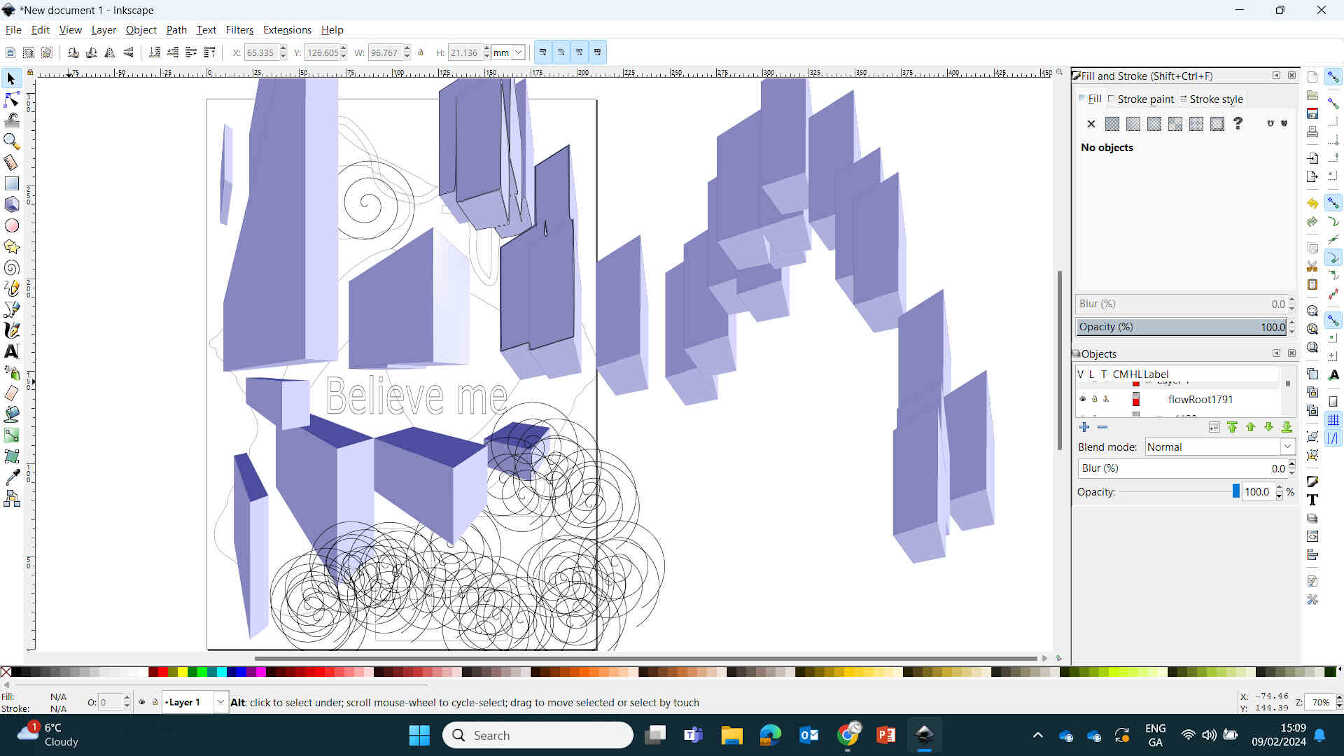
I messed around with all the tools available and was confident enough that I could use this software for projects down the line. During Week 3 I used Inkscape to create a logo design to be cut out using the Vinyl Cutter.
____________
Testing 3D / CAD Software
I chose to test Autodesk, Blender, FreeCAD, OnShape & Solidworks
Unity
Unity is a popular and versatile game development platform used to create 2D, 3D, augmented reality (AR), and virtual reality (VR) applications. It offers a user-friendly interface, a powerful game engine, and a wide range of tools for developers. Unity supports multiple platforms, including Windows, macOS, Linux, Android, iOS, and more. Developers can use Unity to design interactive and immersive experiences, and its asset store provides a marketplace for various game assets and plugins. Unity has gained widespread adoption in the game development industry due to its accessibility and flexibility.- (Written by ChatGPT v.3.5, 2024)
I always wanted to learn Unity to create my own games but it was never a part of my curriculum. It was only after my introduction into game development with Black Shamrock and Virtuos Studios that I set time aside and put the effort in to create my own game.
I strongly leaned towards the animation tools 'Unity Timeline' and 'Cinemachine'. These allowed me to create cinematic scenes, using character models and animations from Mixamo, and allowed me to focus on creative captivating scenes with digital actors and environments.
After a few projects using this game engine, I found that most my days were spent fixing gameplay-related bugs rather than telling the stories I wanted to tell. I later moved from Unity to Blender as that allowed me to focus on what I love about gaming - characters, animations & cinematography.
Final Project Model made with Unity:
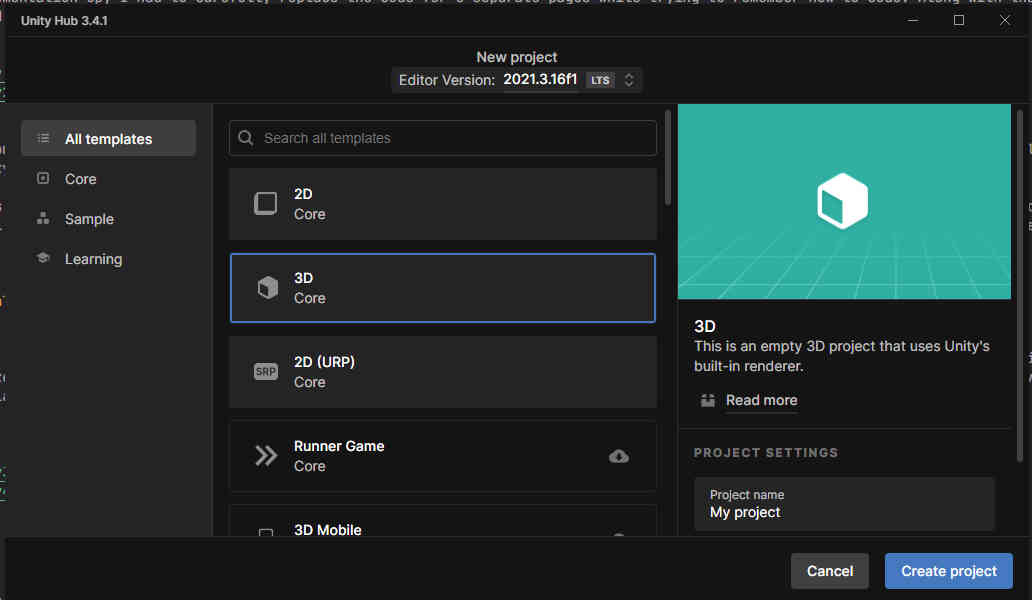
To create this simplistic version of my final project model, I opened Unity and created a blank new scene. Starting with the head, I went to the 'Hierarchy' tab on the top-left side and hit the '+' icon. This offers a variety of options, including what we need - Create 3D Shape.
Starting off with a 'Sphere' for the head, 'Cylinder' for the legs, feet and base, and 'Capsule' for the chest and arms. These shapes can be moved around either through the 'Inspector' transform parameters, or by simply moving the Transform Gizmo on screen. Breaking down the model into these basic shapes gives me a quick look at what the form of the model will be without spending too much time being overly caucious about aesthetic.
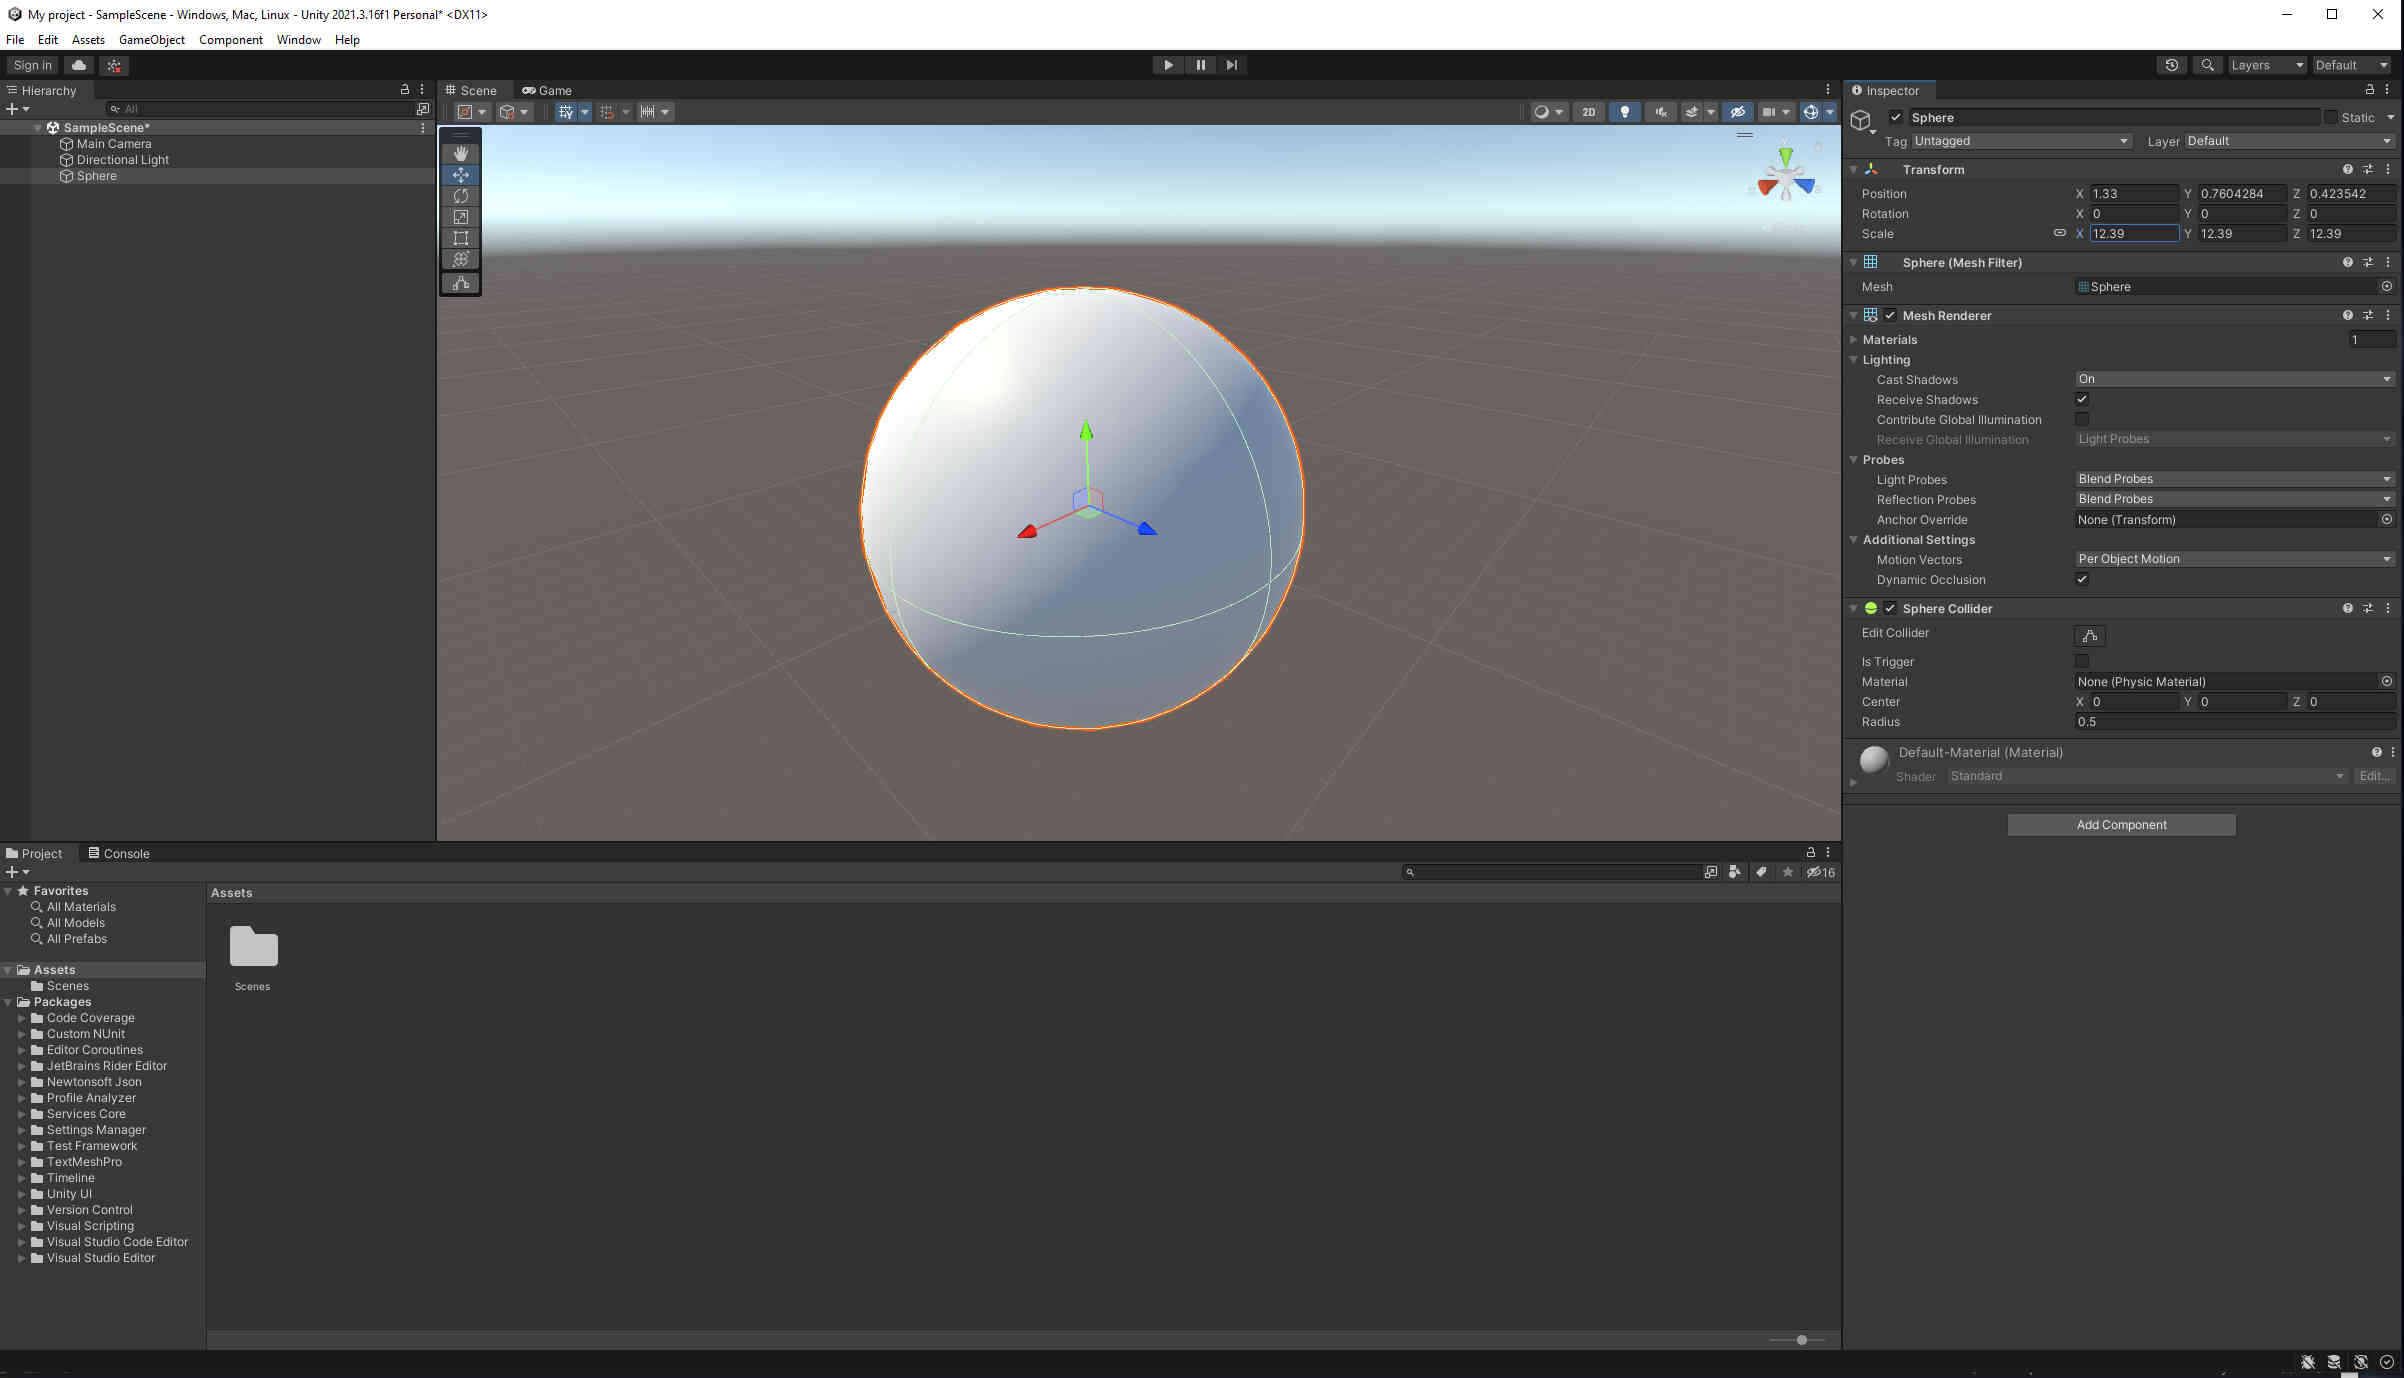
Once the shapes were added, I was able to individually warp the shape of the model by adjusting the X, Y and/or Z Rotation and Scale found in the 'Inspector' menu under 'Transform' - linking and unlinking the scale parameters to form an alternate shape. Once I formed the shapes together, I topped the design off by adding a 'Cube' shape and adjusted it using the same method above to create a phone.

This was just for a bit of fun and research but I fully intend on making the FInal Project Model in Blender, so I left Unity at this point.
____________
Blender

Blender is a powerful open-source 3D creation suite. Containing a vast range of tools used for 3D modeling, sculpting, texturing, animation, rendering, compositing & video editing.
It is widely used for Visual FX in film, animation and modeling in Gaming and Virtual Photography. - (Written by ChatGPT v.3.5, 2024)
Previous experience with Blender:
Blender is my personal favourite software as I use it for modelling, game design, animations and video editing. But most importantly, it's free with a massive online educational community that is always updating and improving.


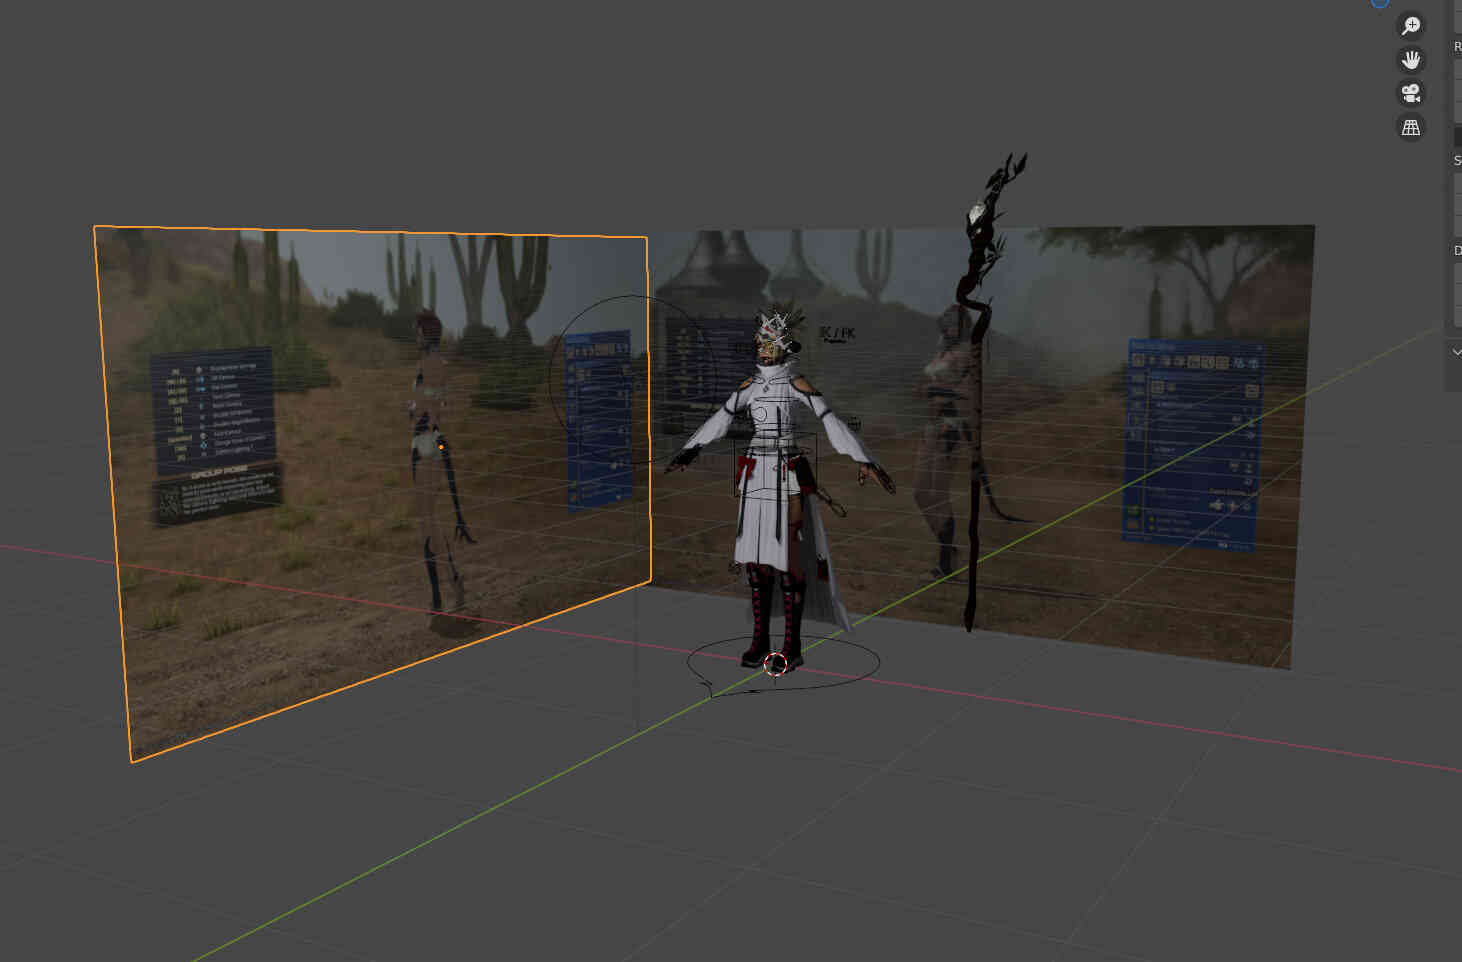
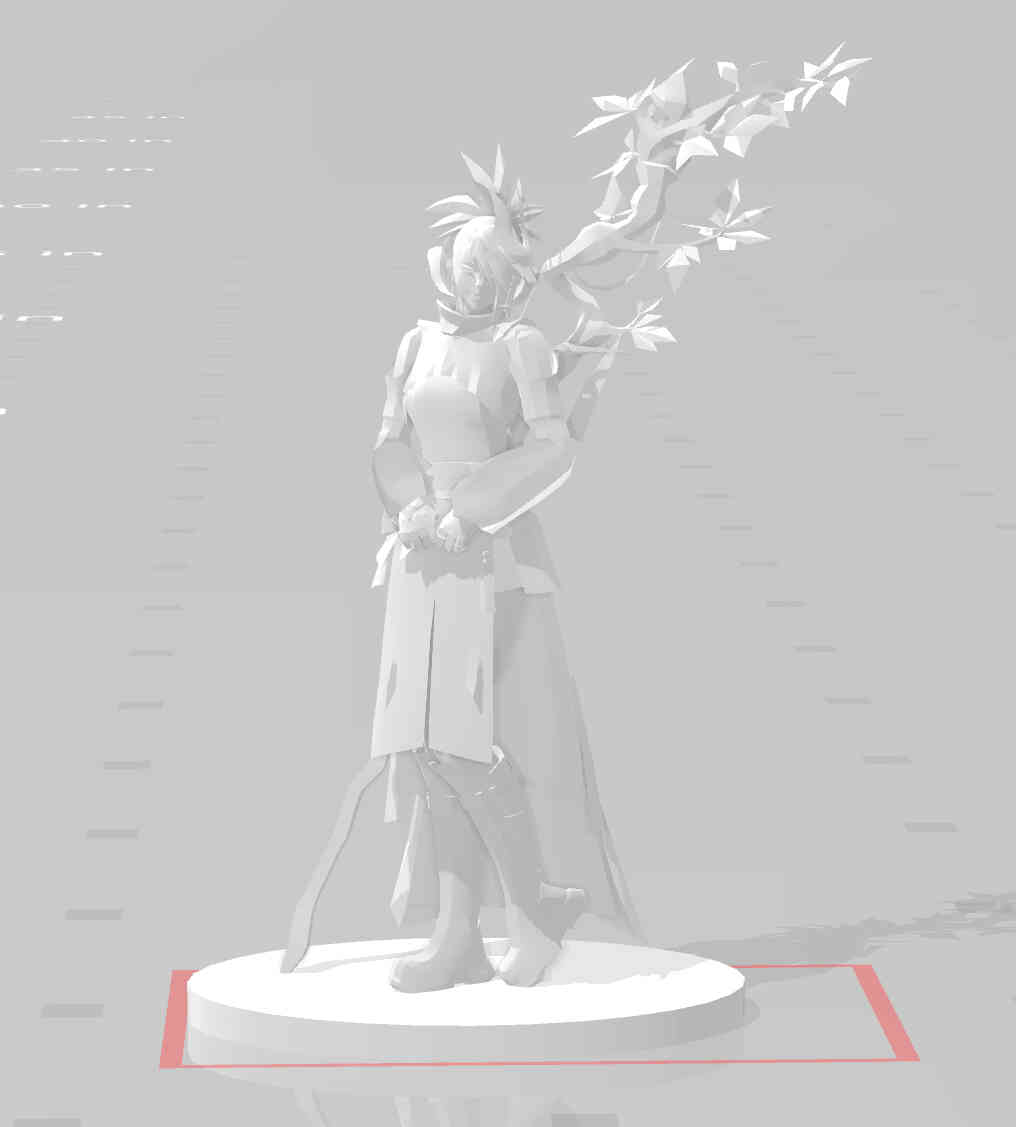
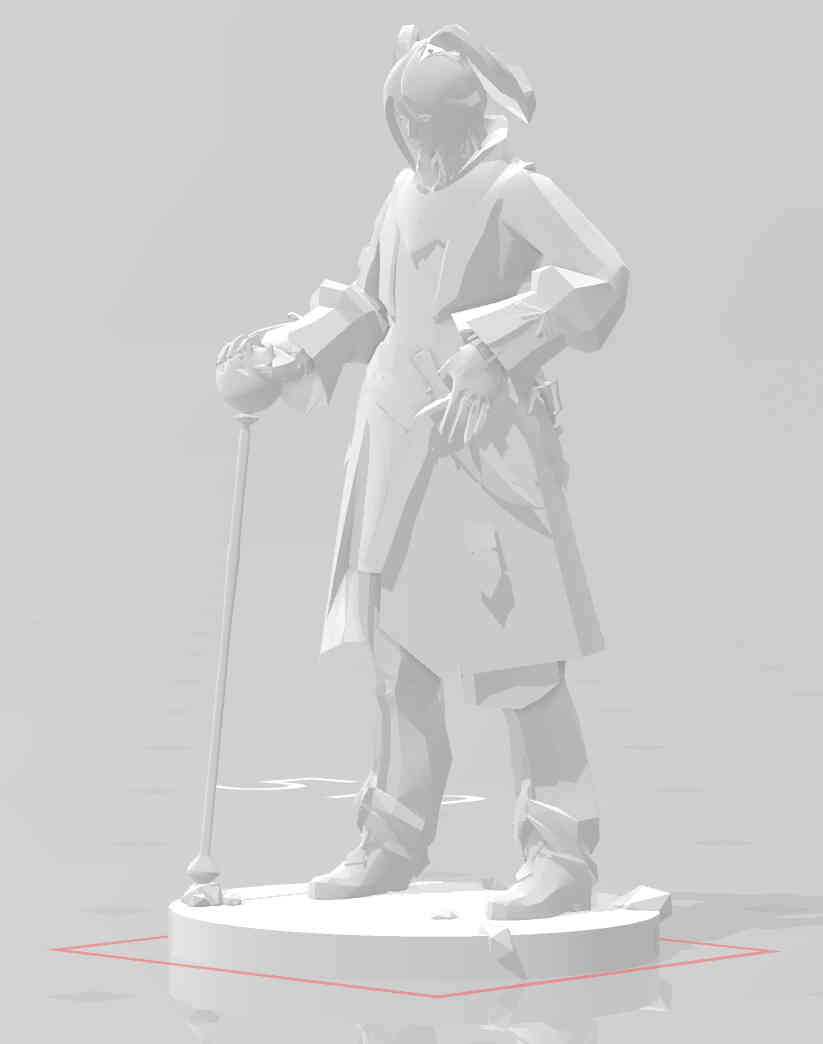
Posing, Animating & Printing FFXIV Races.
Final Project Model Tutorial
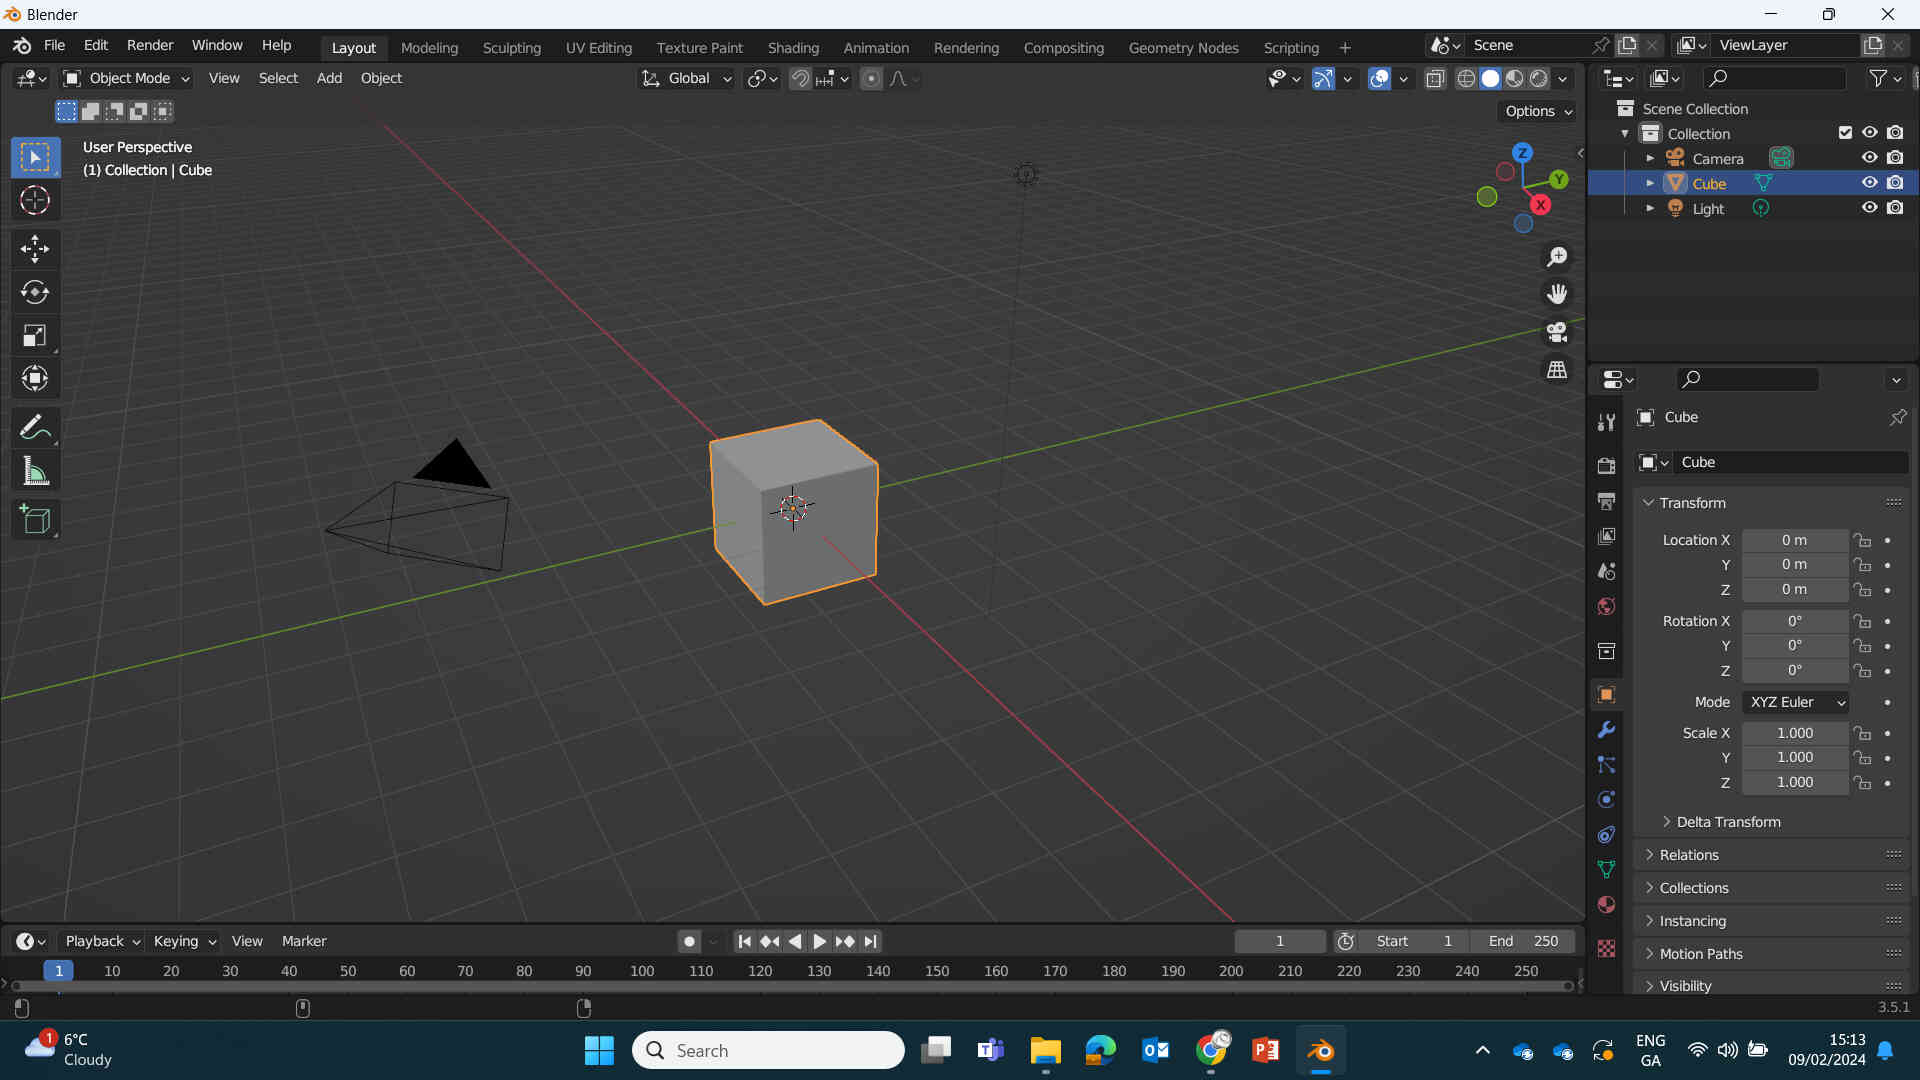
As with ALL great Blender projects, we start with a Cube.
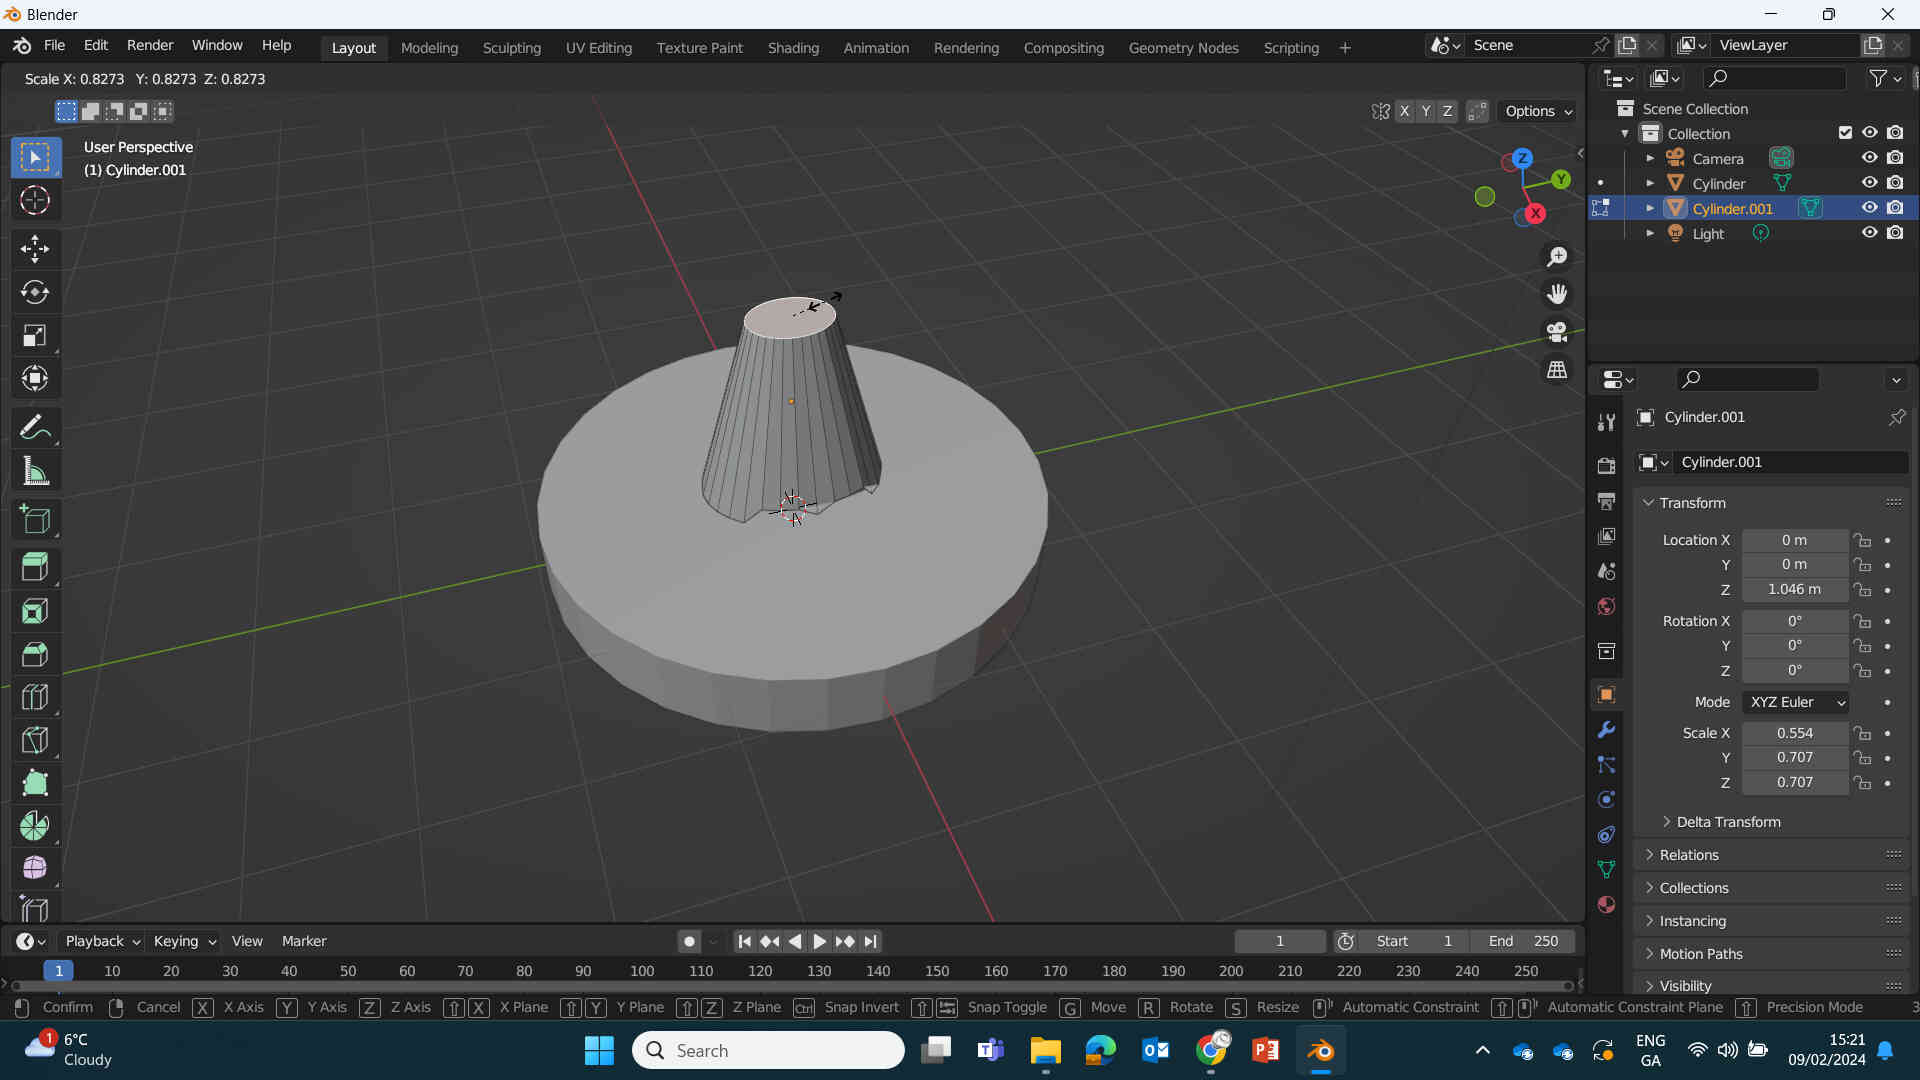
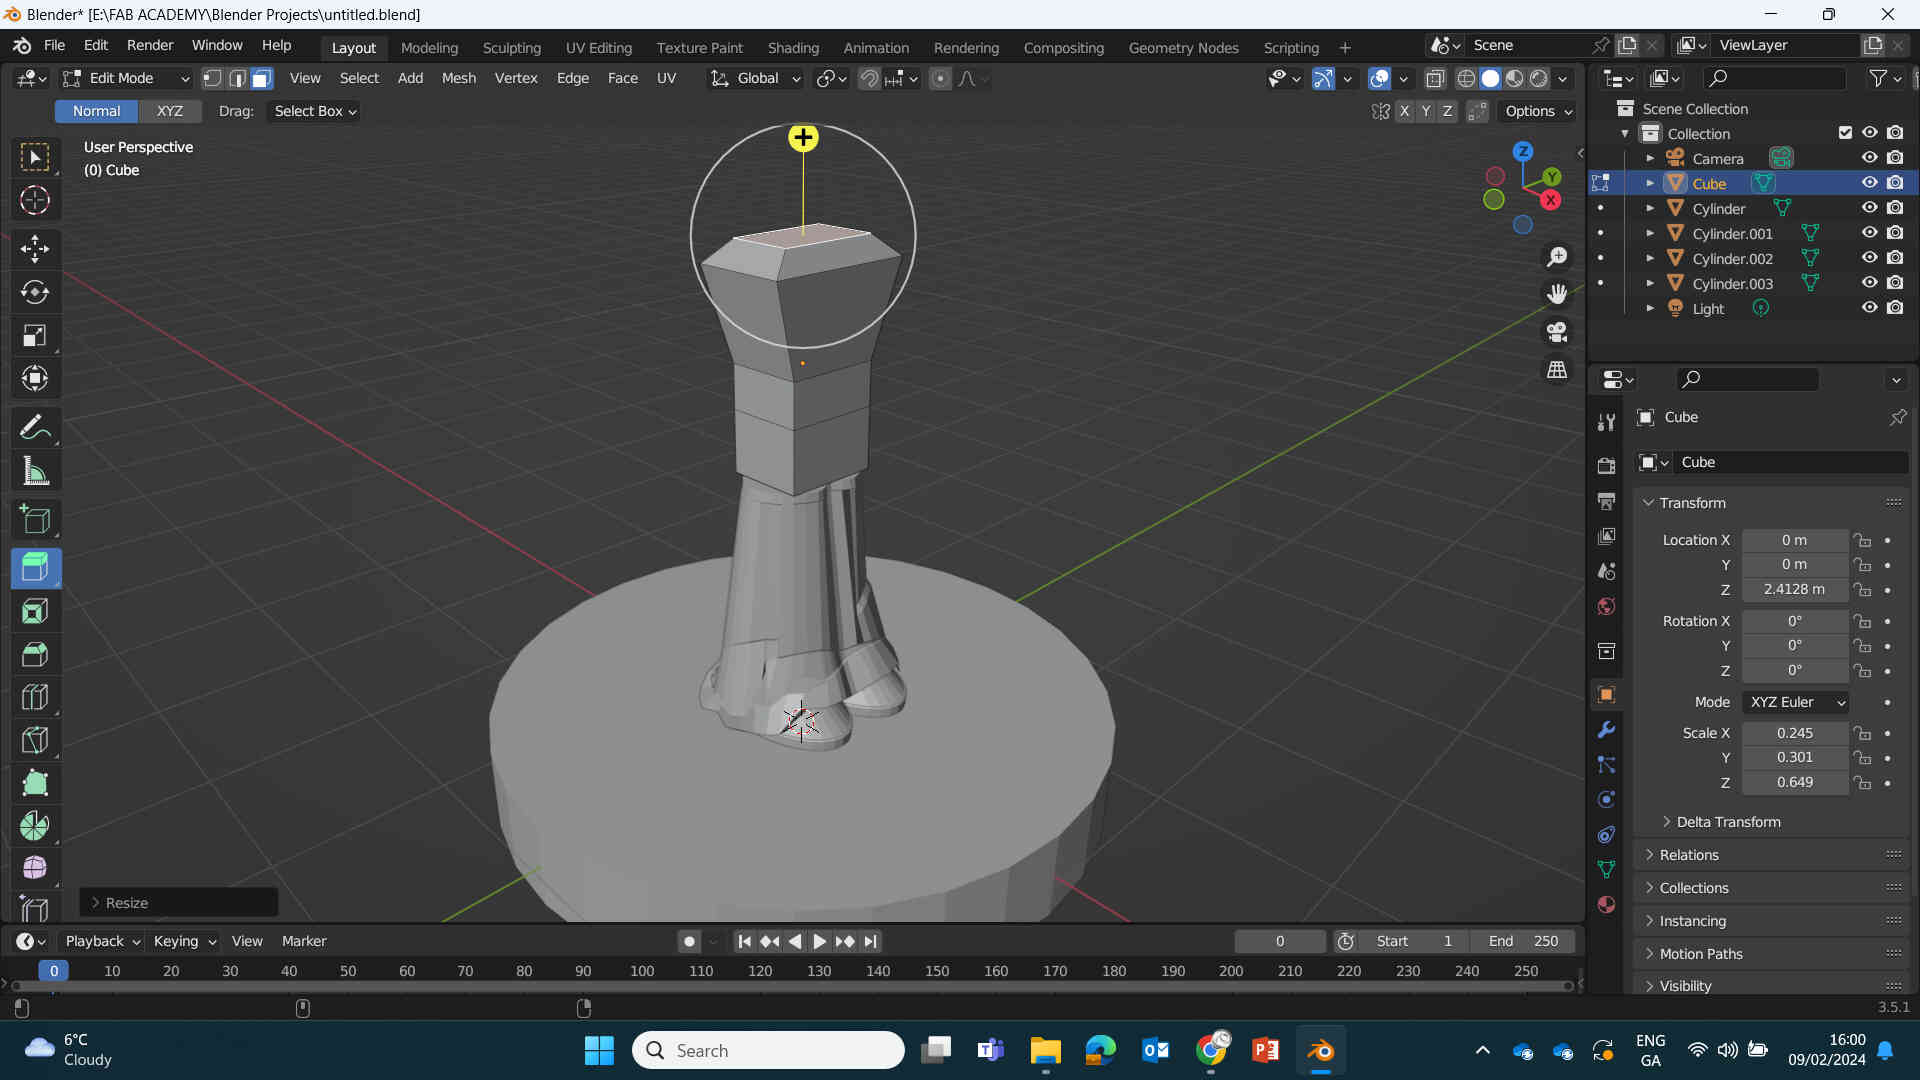
Now delete the Cube and Create a cylinder by going to Add -> Mesh -> Cylinder. Scale it using the 'S' key. You can type 'X,Y or Z' just after pressing 'S' to scale only in that specified dimension. I scaled the cylinder to be bigger and then scaled down on the Z-axis to form a Base.
Afterward, create another cylinder but make it a bit longer and place it on top of the Base to form the Legs. With the new cylinder selected, press 'TAB' or go to click 'Object Mode' on the top left, then click 'Edit Mode'.
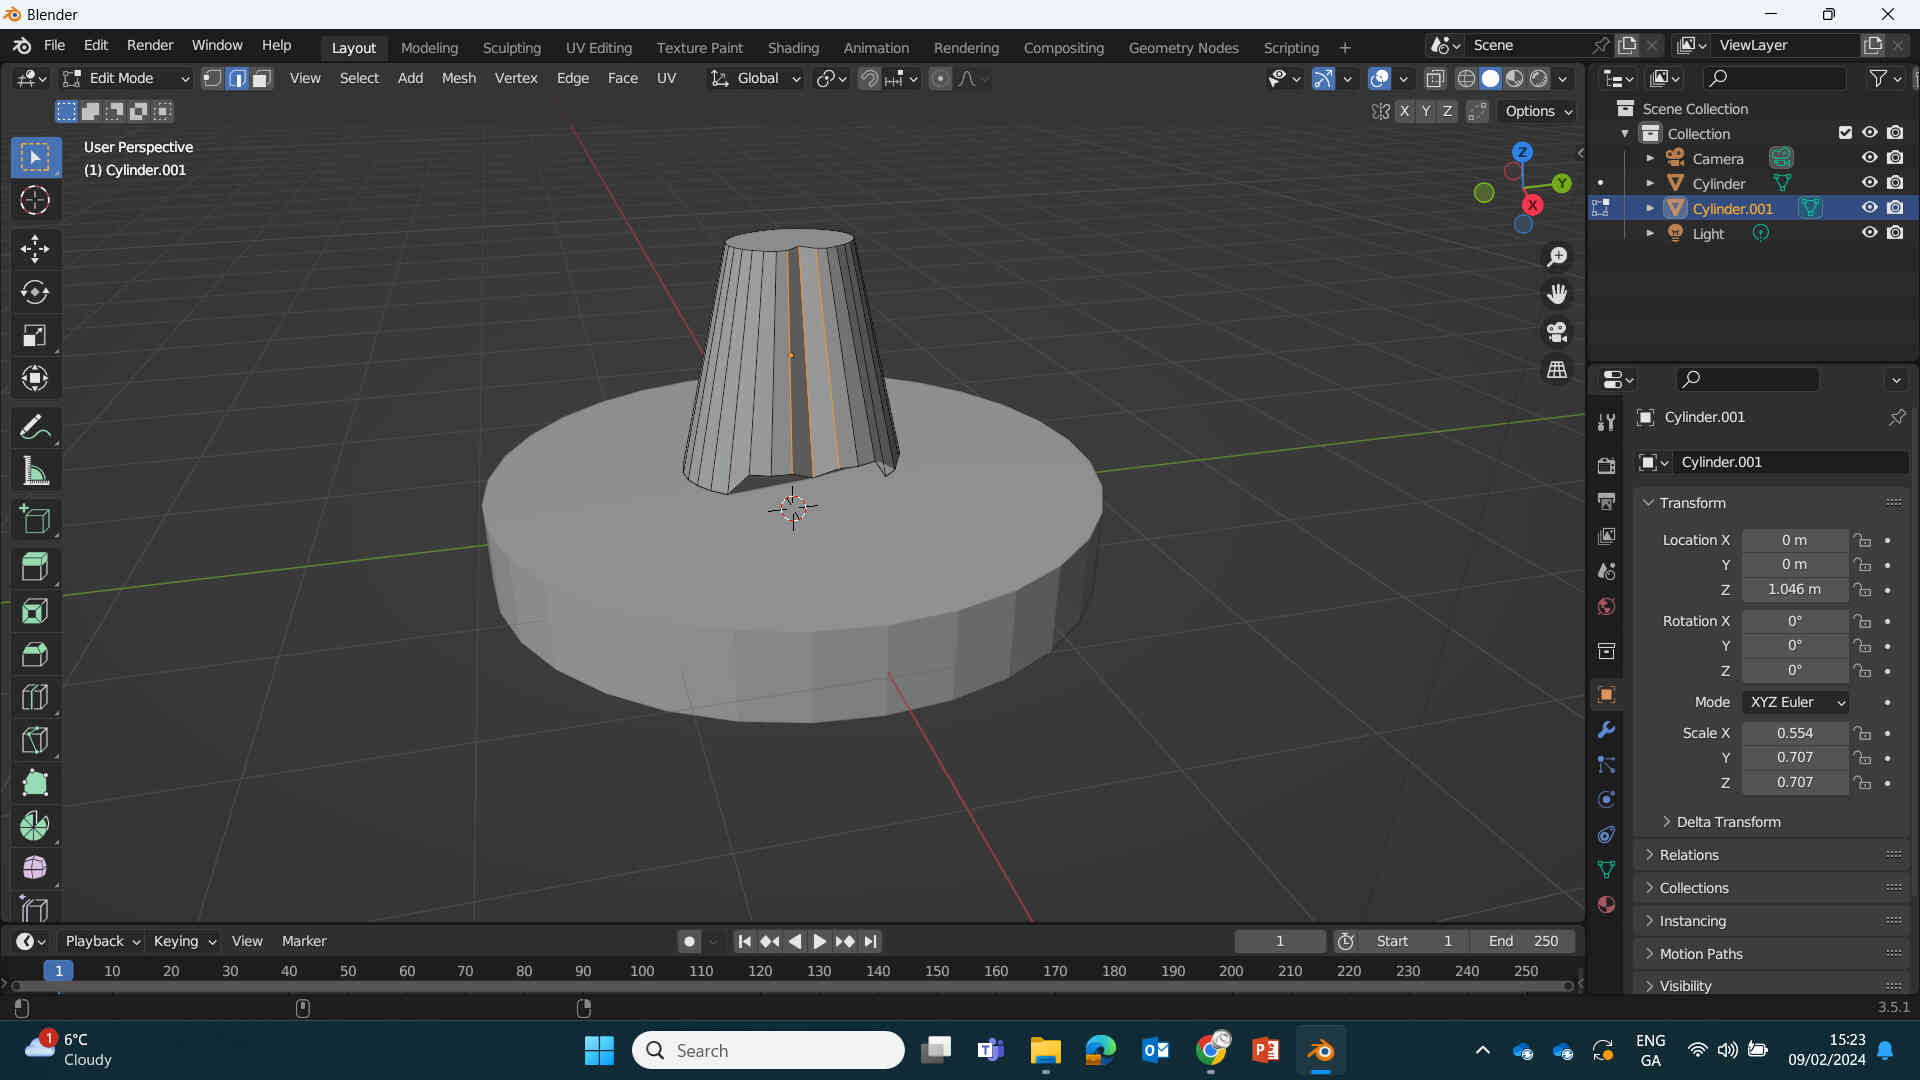
Tick the box that lets you 'Select Faces'. (Found right next to 'Edit Mode'). Now click the top face of the cylinder and press 'S' to scale it down.
This simple action creates the model's waist and baggy jeans. To give a bit of definition in the legs, make sure you're on 'Select Edges' and click the line on the front-side of the Legs.
Press 'G' to Grab/Move the line back. Do the same for the behind. You can also Grab any of the lines on the bottom of the Legs to Morph the trousers/pants to give them a bit of 'crinkle' or overlap as if the fabric is folding.
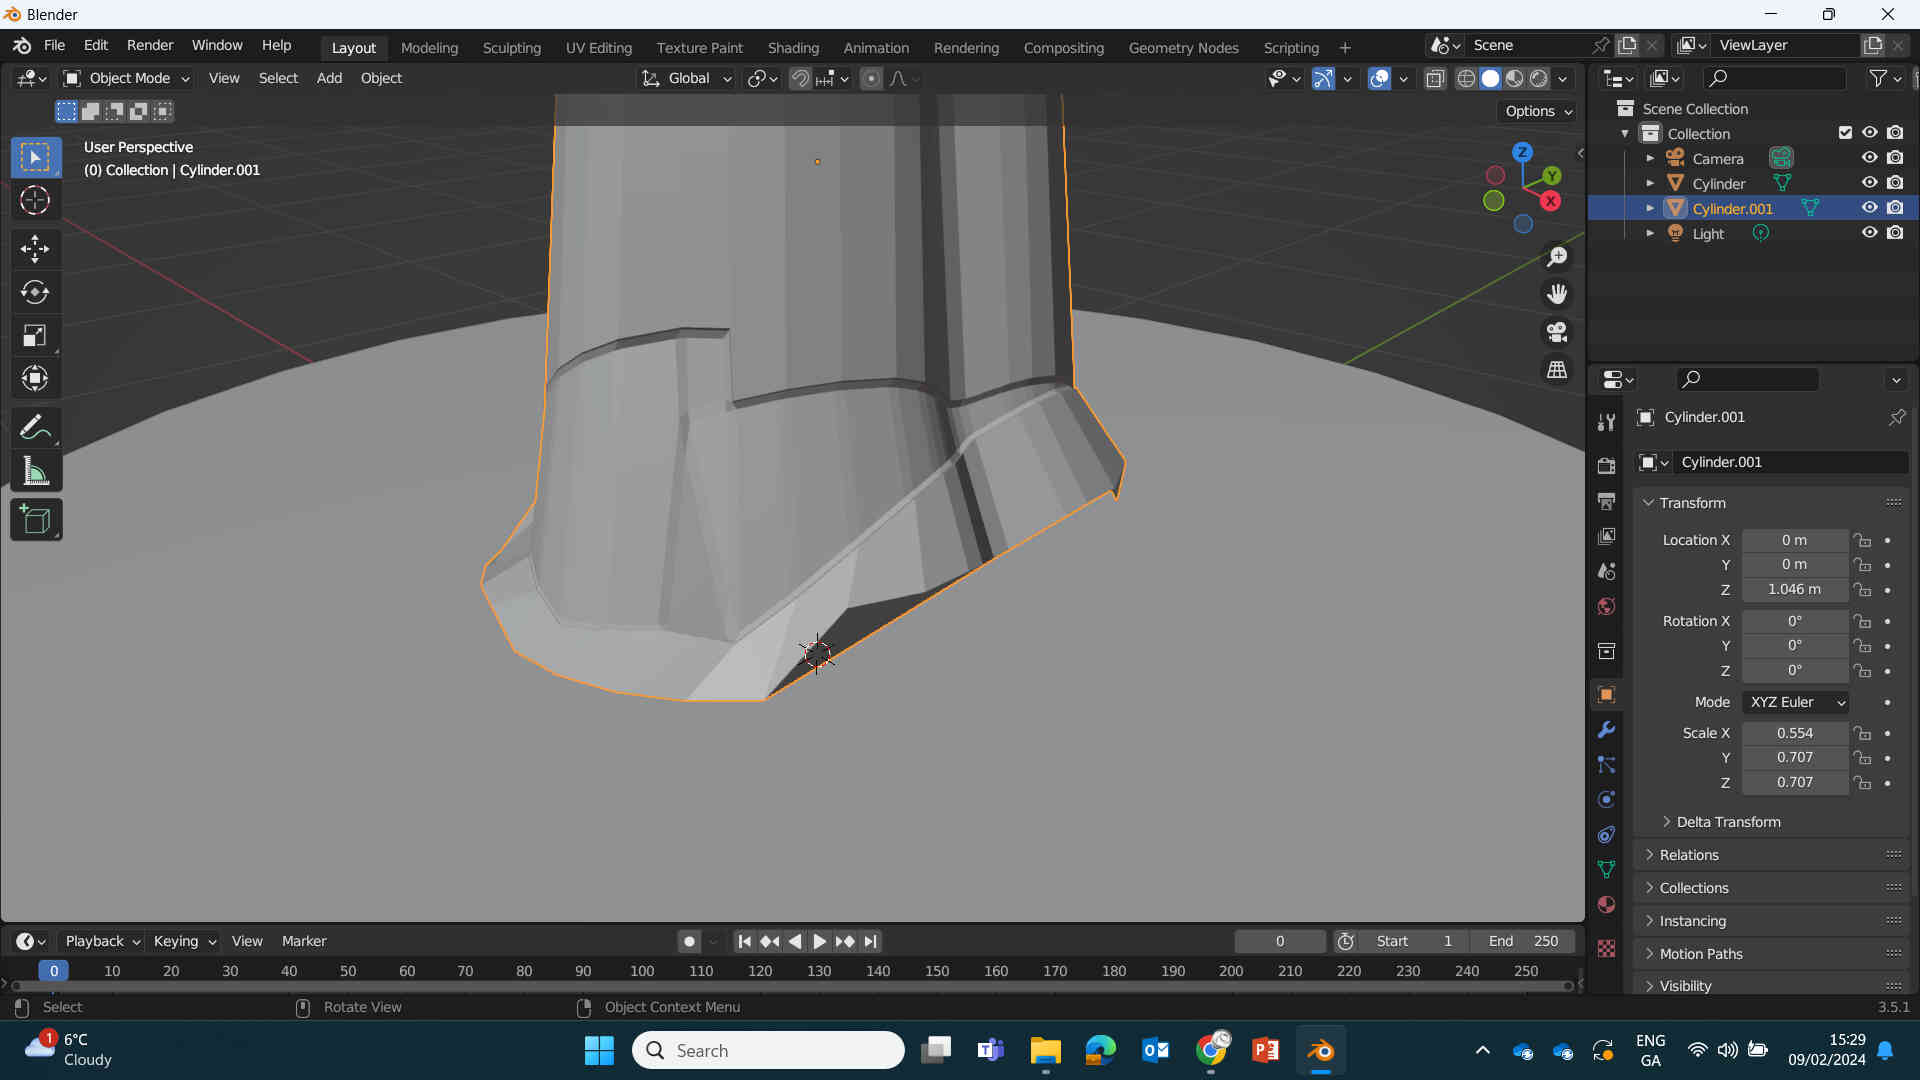
You can use the 'Knife tool' in edit mode to cut / design a line in and around the legs and repeat the Grabbing from the last step to create even more folds around the Legs.
To create our Torso, we need to 'Add' -> 'Mesh' -> 'Cube'. Place the Cube on top of the legs and scale it to the size you want. To form the body, we need to use 'Loop Cuts'. Once you've selected the body and are in Edit Mode, then press 'Ctrl+R' to activate a Loop Cut. You can increase the number of Loop Cuts on an object by scrolling up or down on the mouse wheel. Then by holding the Left Click, you can move the cut up and down on the object. This will take some getting used to but you'll have it in no time!
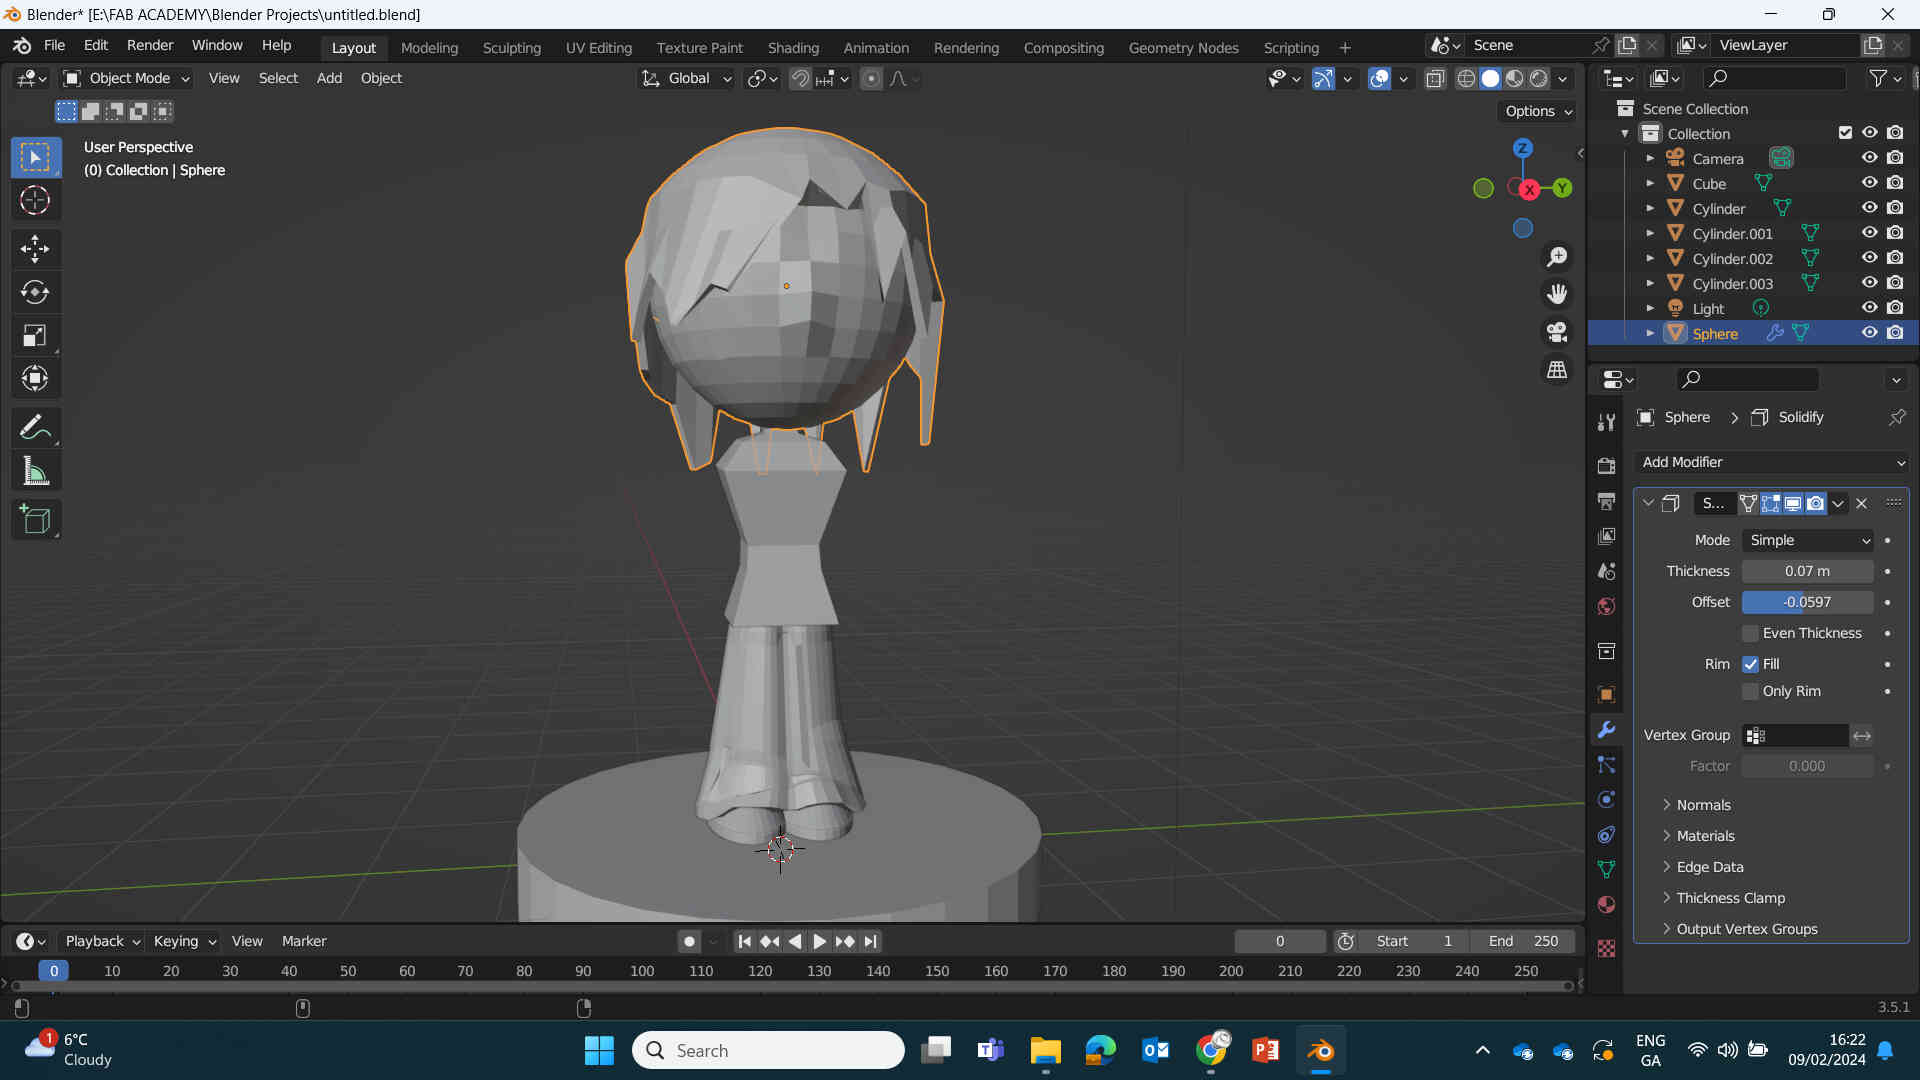
Once you're satisfied with your cuts, we can 'Add' -> 'Mesh' -> 'Sphere' for the model's Head and place it on top of the body. Now, how I made the Hair is commonly used but can cause difficulties when you want the hair separate from the head.
With the Sphere selected, go into Edit Mode and be on 'Select Edges' (or Verticies).
Now drag-select a straight line across the top third of the head and 'S' to scale.
This creates a 'bowl cut' hairstyle, and with this, we can Grab, Rotate and/or Scale the edges of the bowl cut, and pull them down to form the hair shape & style we want!
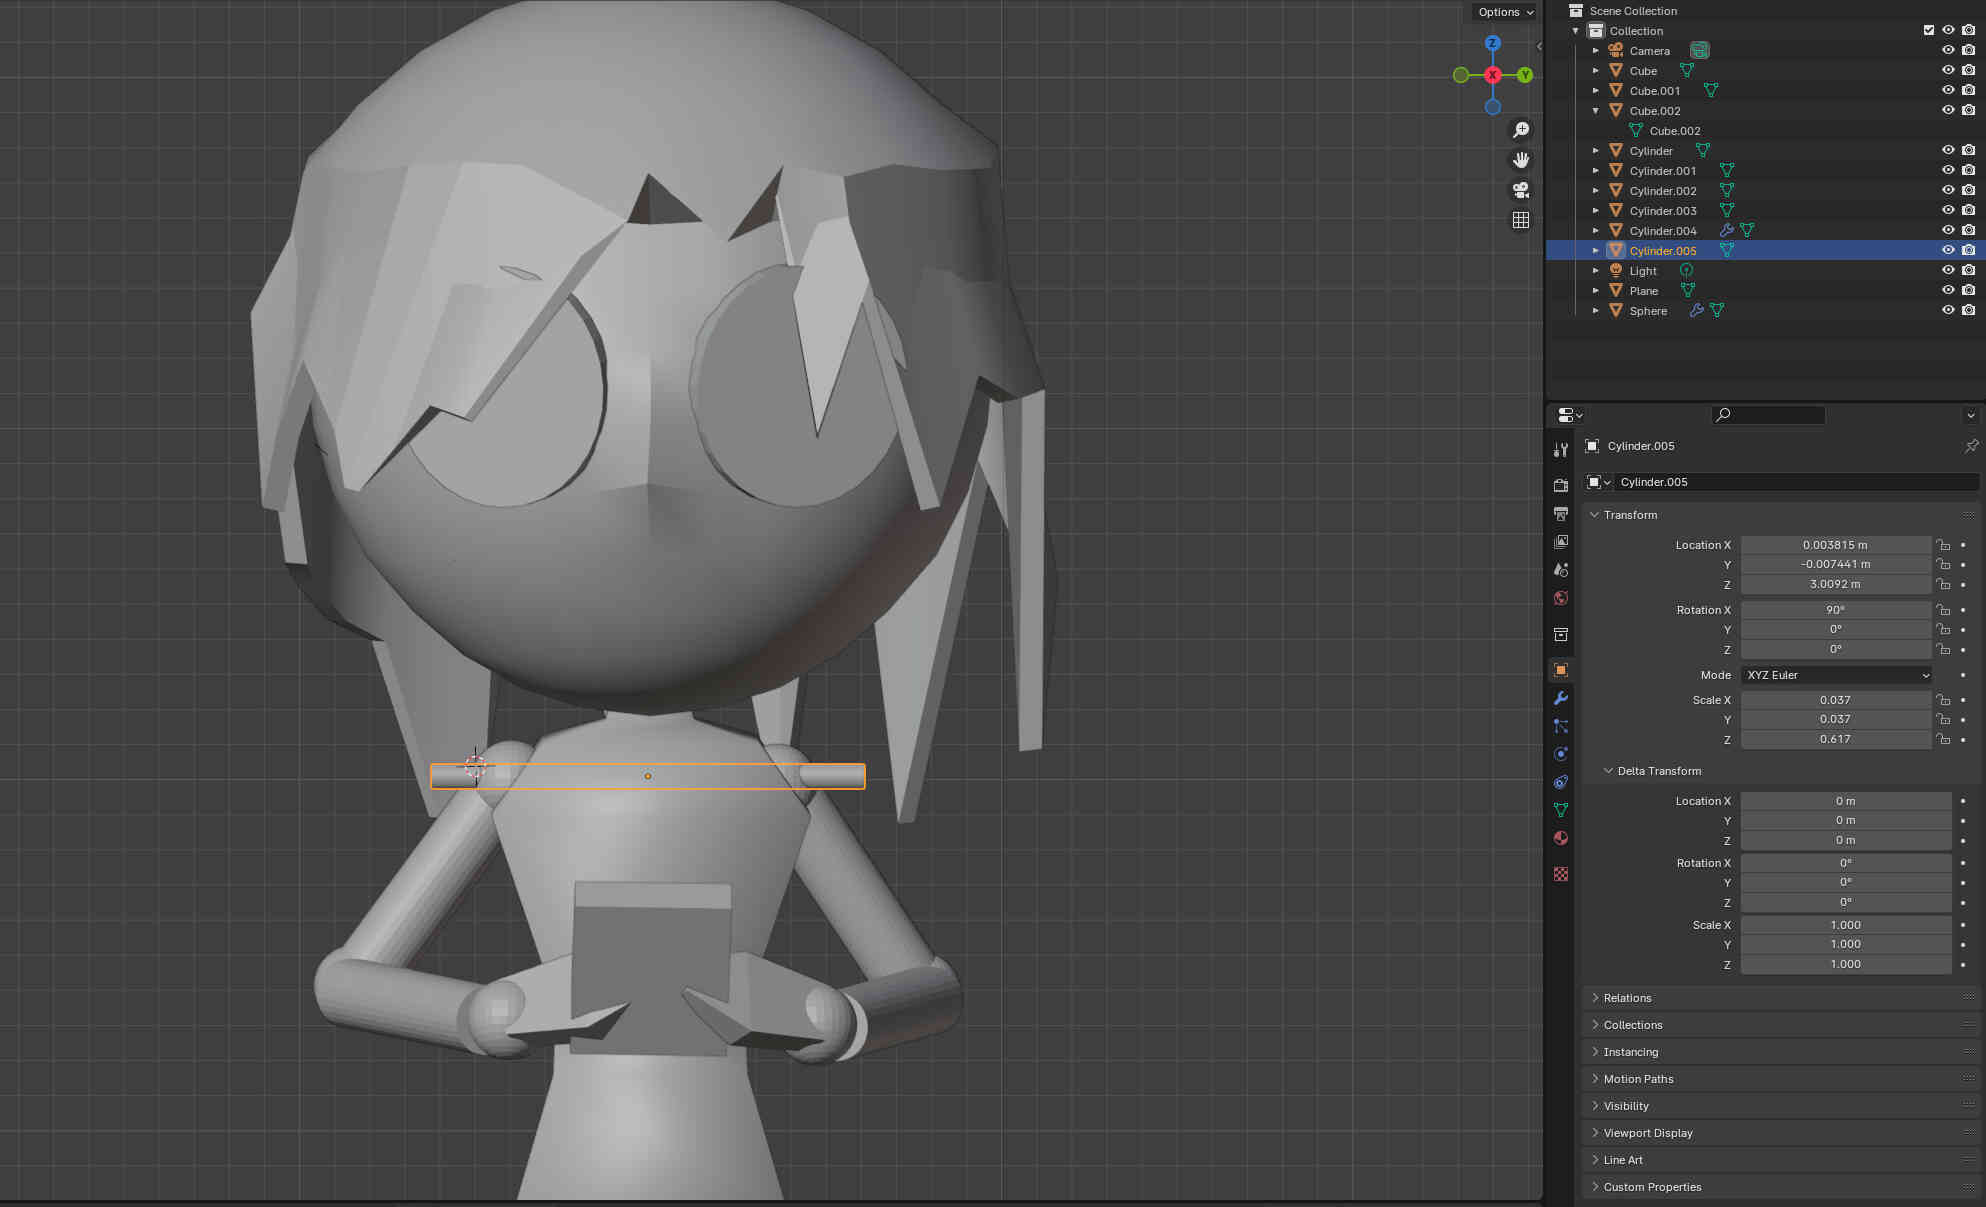
Create and style the arms using the same methods above, using Spheres and Cylinders for joints and arms, with Cubes being shaped to make hands and the phone. To join these objects to form 1 object, 'Shift-Click' the objects you want and 'Ctrl+J' to Join.
I also added a long cylinder to join both arms together. This will act as an axis when performing animations in Blender. Make sure to Set your 'Origin' point to the midpoint of the object as it will help for animation and modelling.
You can change the Origin point of each object by
'Right-Clicking' -> 'Set Origin' -> 'Set Origin to Geometry'.
Or use the 3D Cursor tool to 'Set Origin to 3D Cursor'.
Congrats! Your high quality, photorealistic model is ready! You can give him or her more colour by slecting an object and going into the 'Materials' tab on the right side interface amd changing 'Base Colour'.
Finally you can go to the 'Output' tab above Modifiers and select the file format and location of your render. Once ready, simply go to the top menu tab 'Render' -> 'Render Animation'
____________
Autodesk Fusion 360.
Autodesk Fusion 360 is an extensive computer-aided design (CAD) software that allows users to design, simulate and manufacture products in a single workspace environment. Fusion 360 supports parametric modeling and cloud-based collaboration, with tools used for 3D modelling, rendering, simulation and programming. - (Written by ChatGPT v.3.5, 2024)
I very recently took an Autodesk Fusion 360 workshop where we experimented with CAD software and parametric design. As I couldn't get access to Fusion 360 this week - The following is a description of what we did in that workshop.
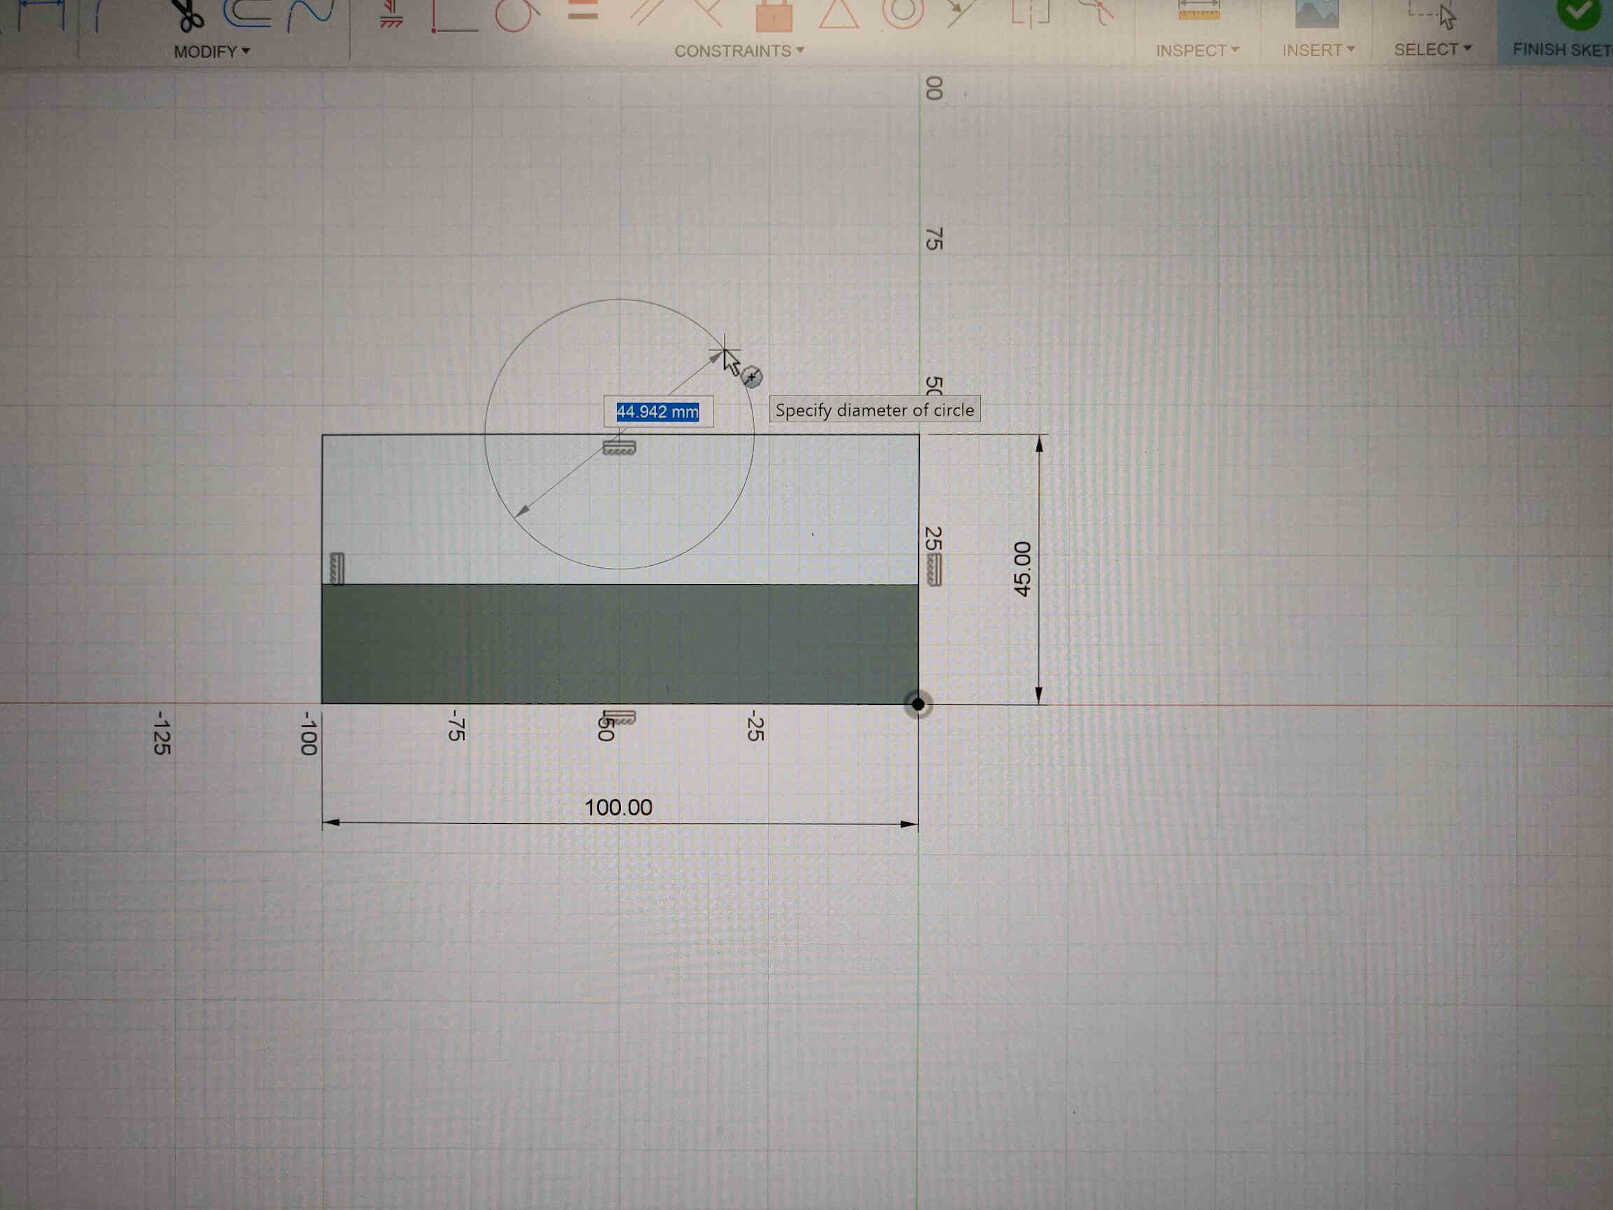
We were initially guided through how to make immediate parametric adjusts from our basic shapes. Once you’ve connected your lines and formed a 2D shape, you can edit the values of each line from a box that appears at the side.
The ‘Dimensions’ button allows you to set constraints and edit the parameters to for the specific shape you need.
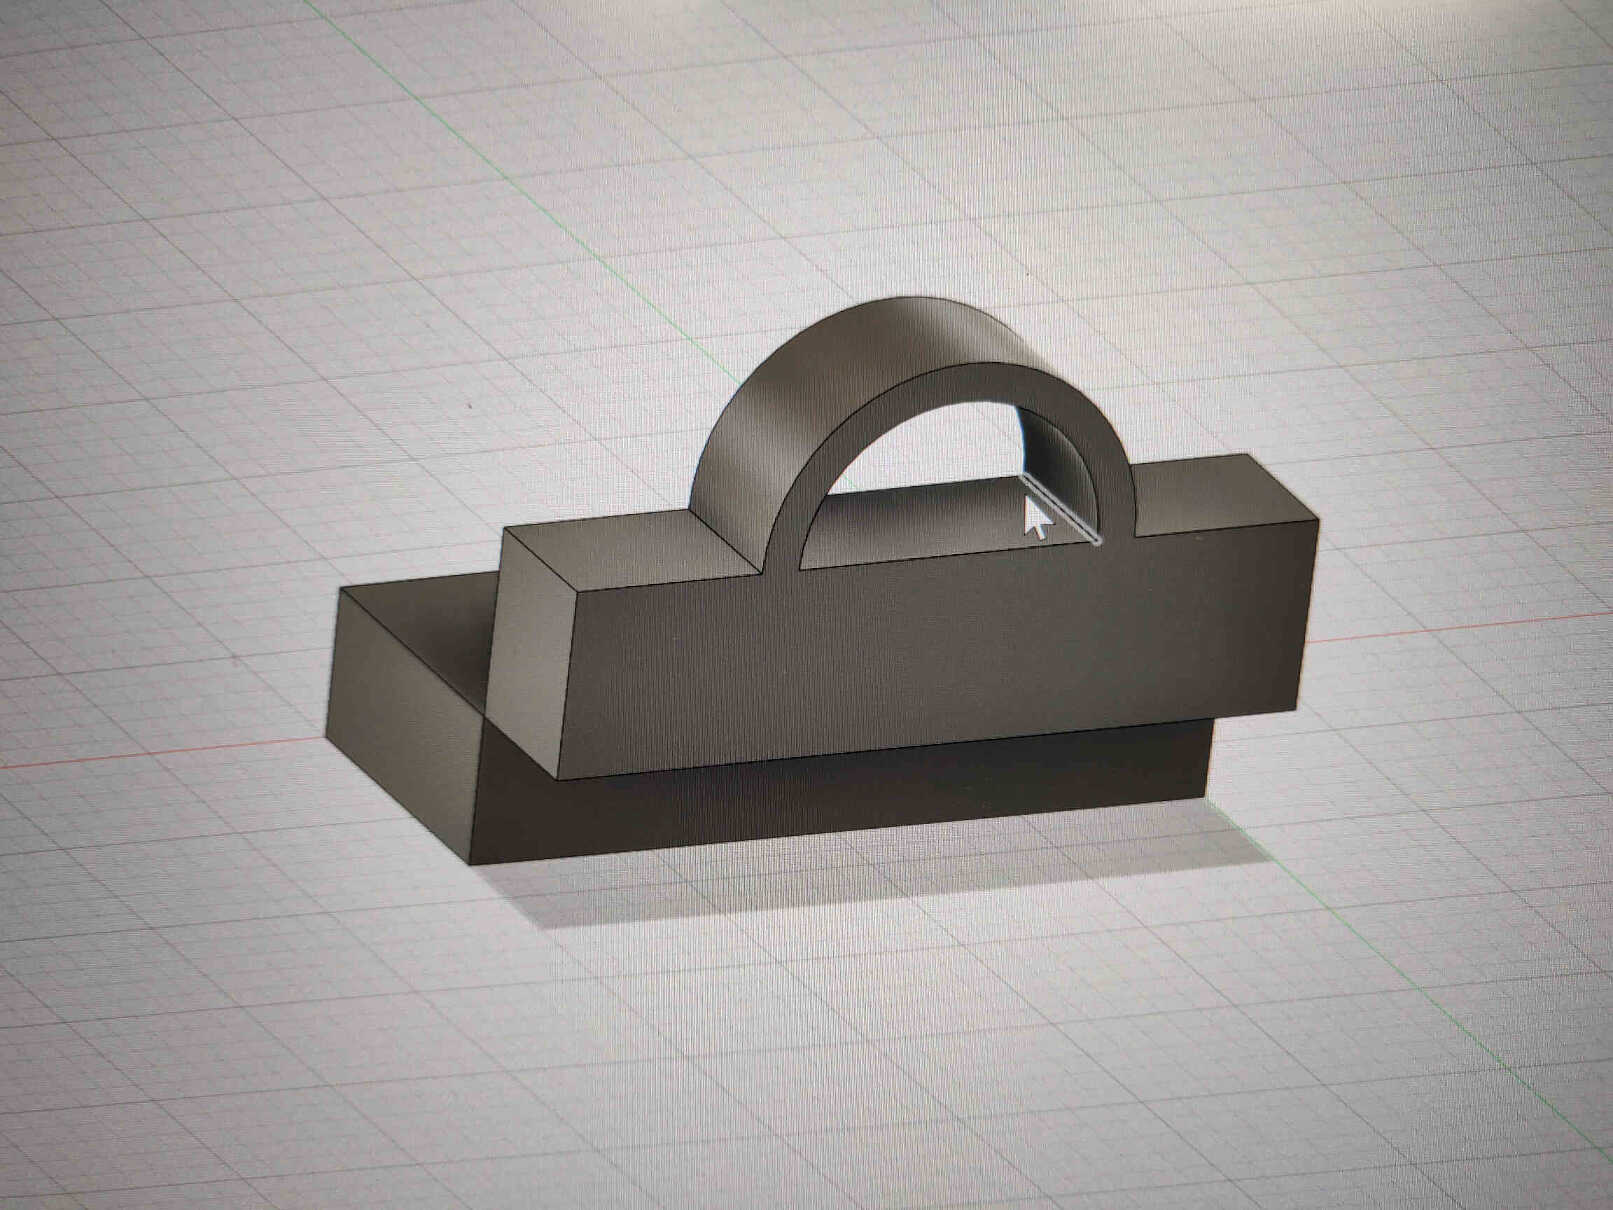
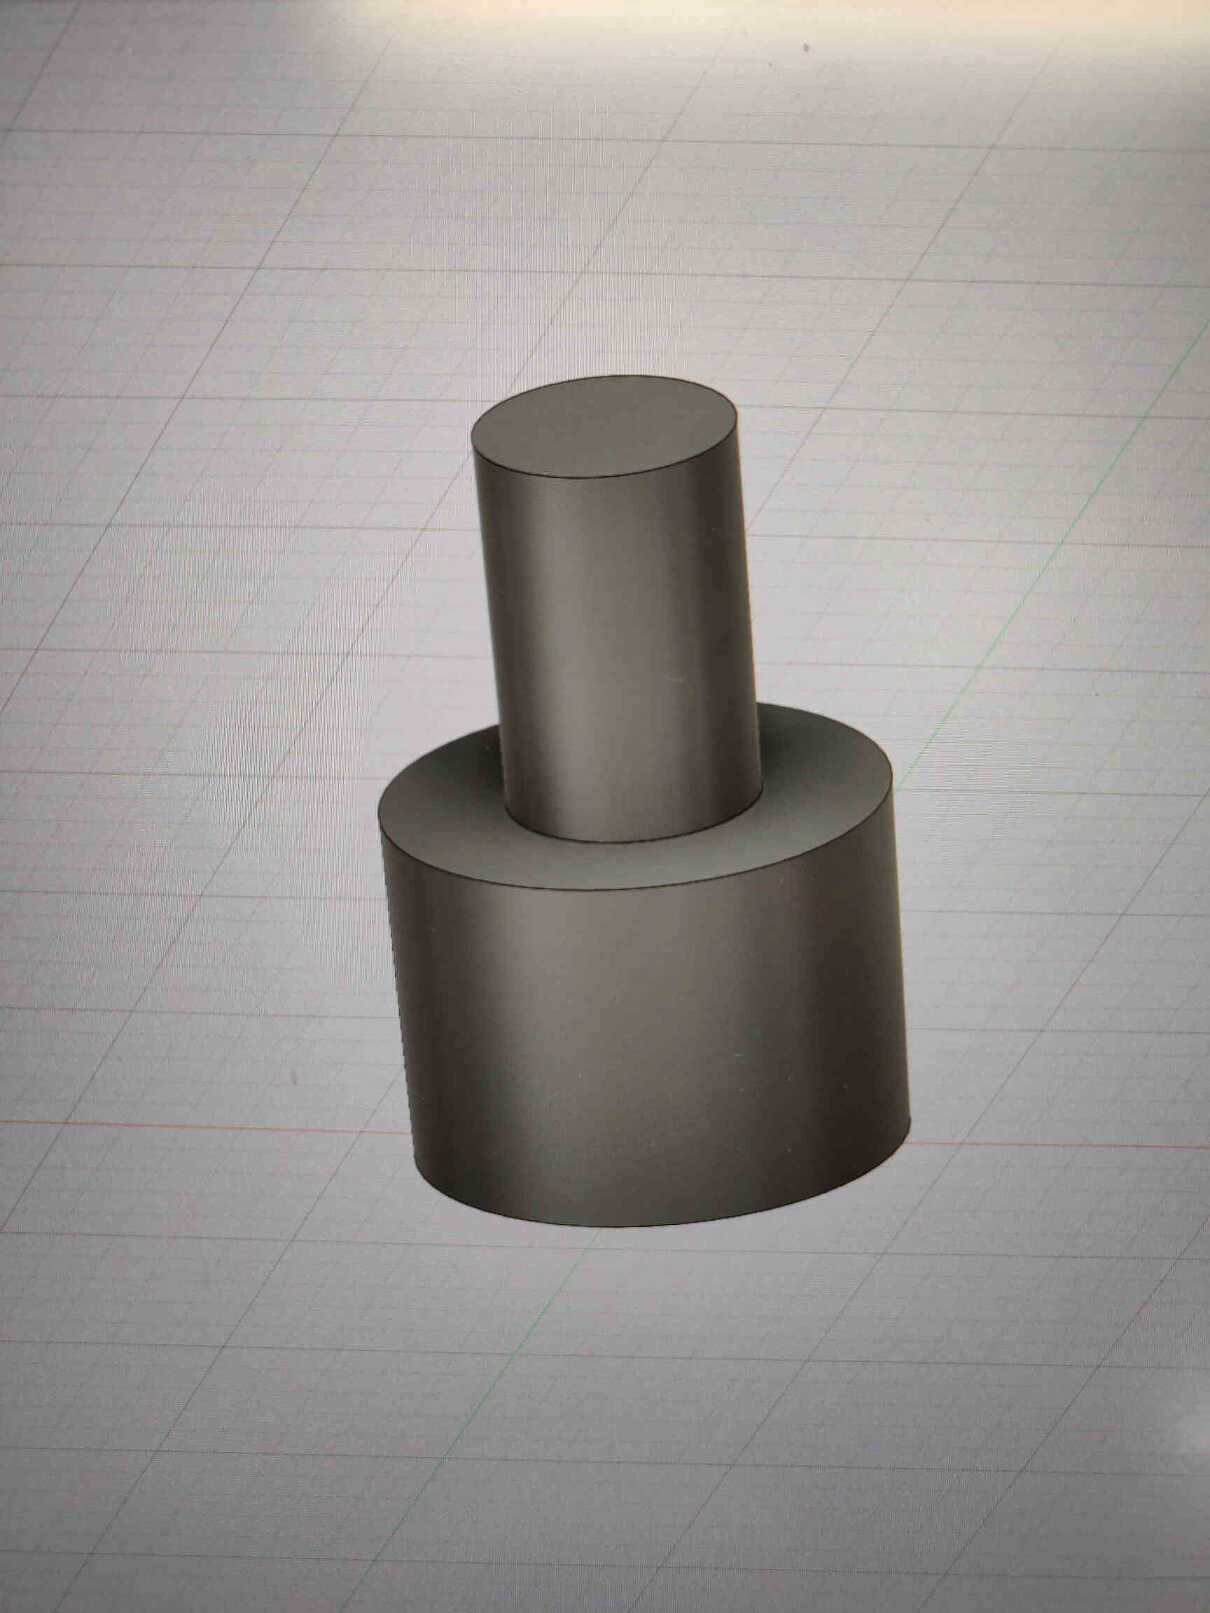

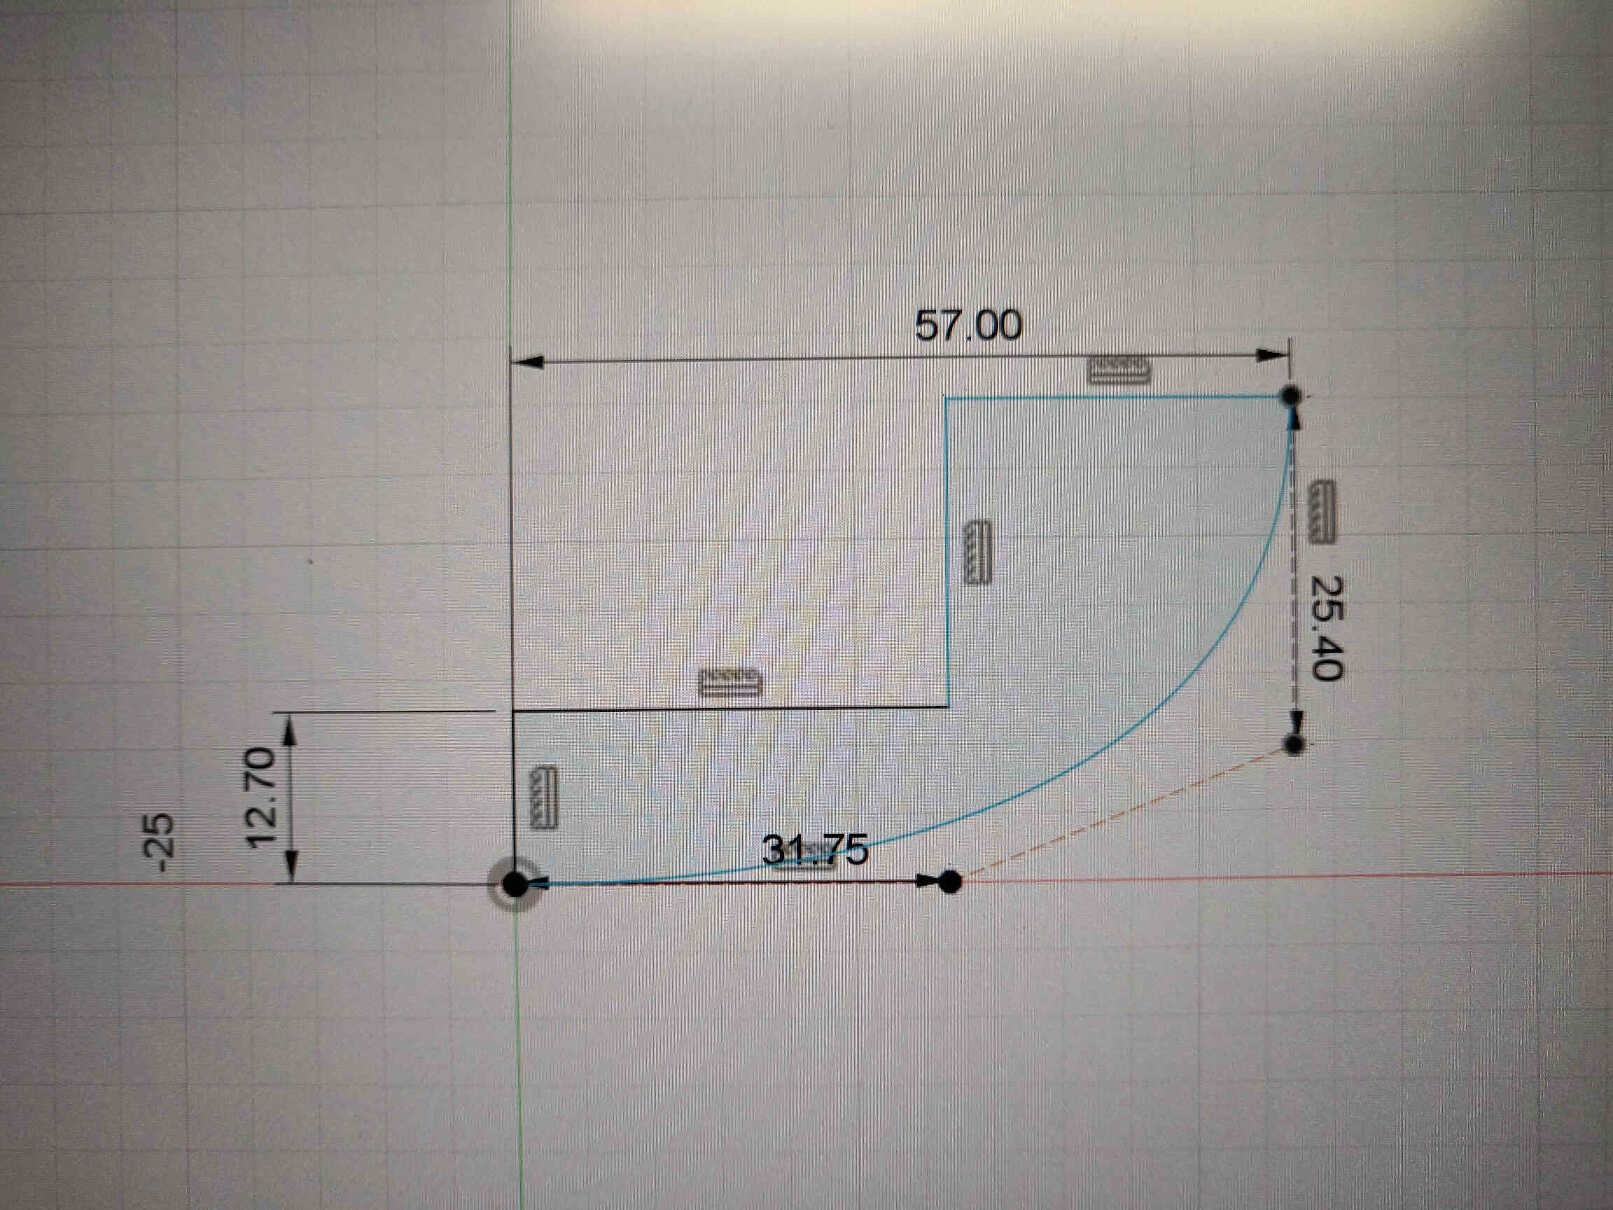
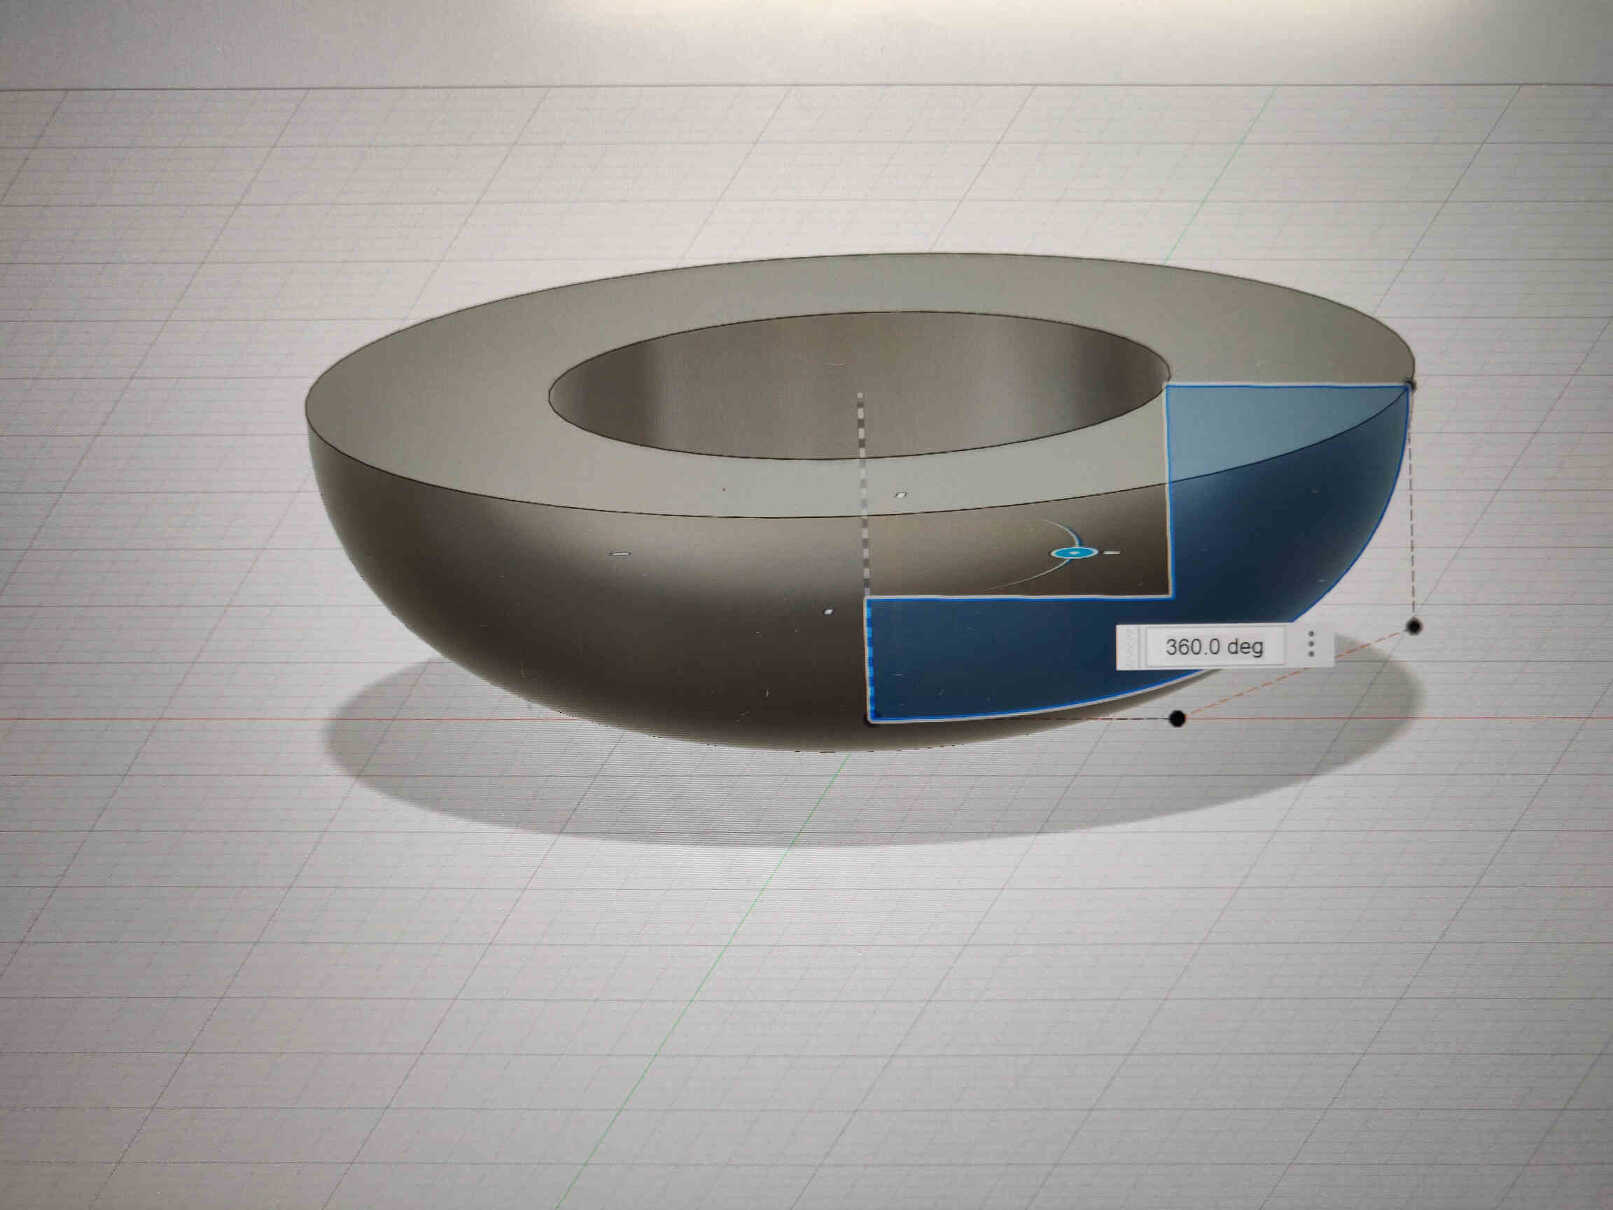
Once the 2D shape & dimensions are made, you can use the ‘Extrude’ tool pull out / extend your design to create a 3D shape. This can be done within the sketch without clicking the extrude button and edit by setting dimensions within the ‘Properties’ menu, where you can edit the Input geometry, Behaviour, distance, direction, etc. Once the 3D shape is made, you can select a face from your shape to start another 2D shape.
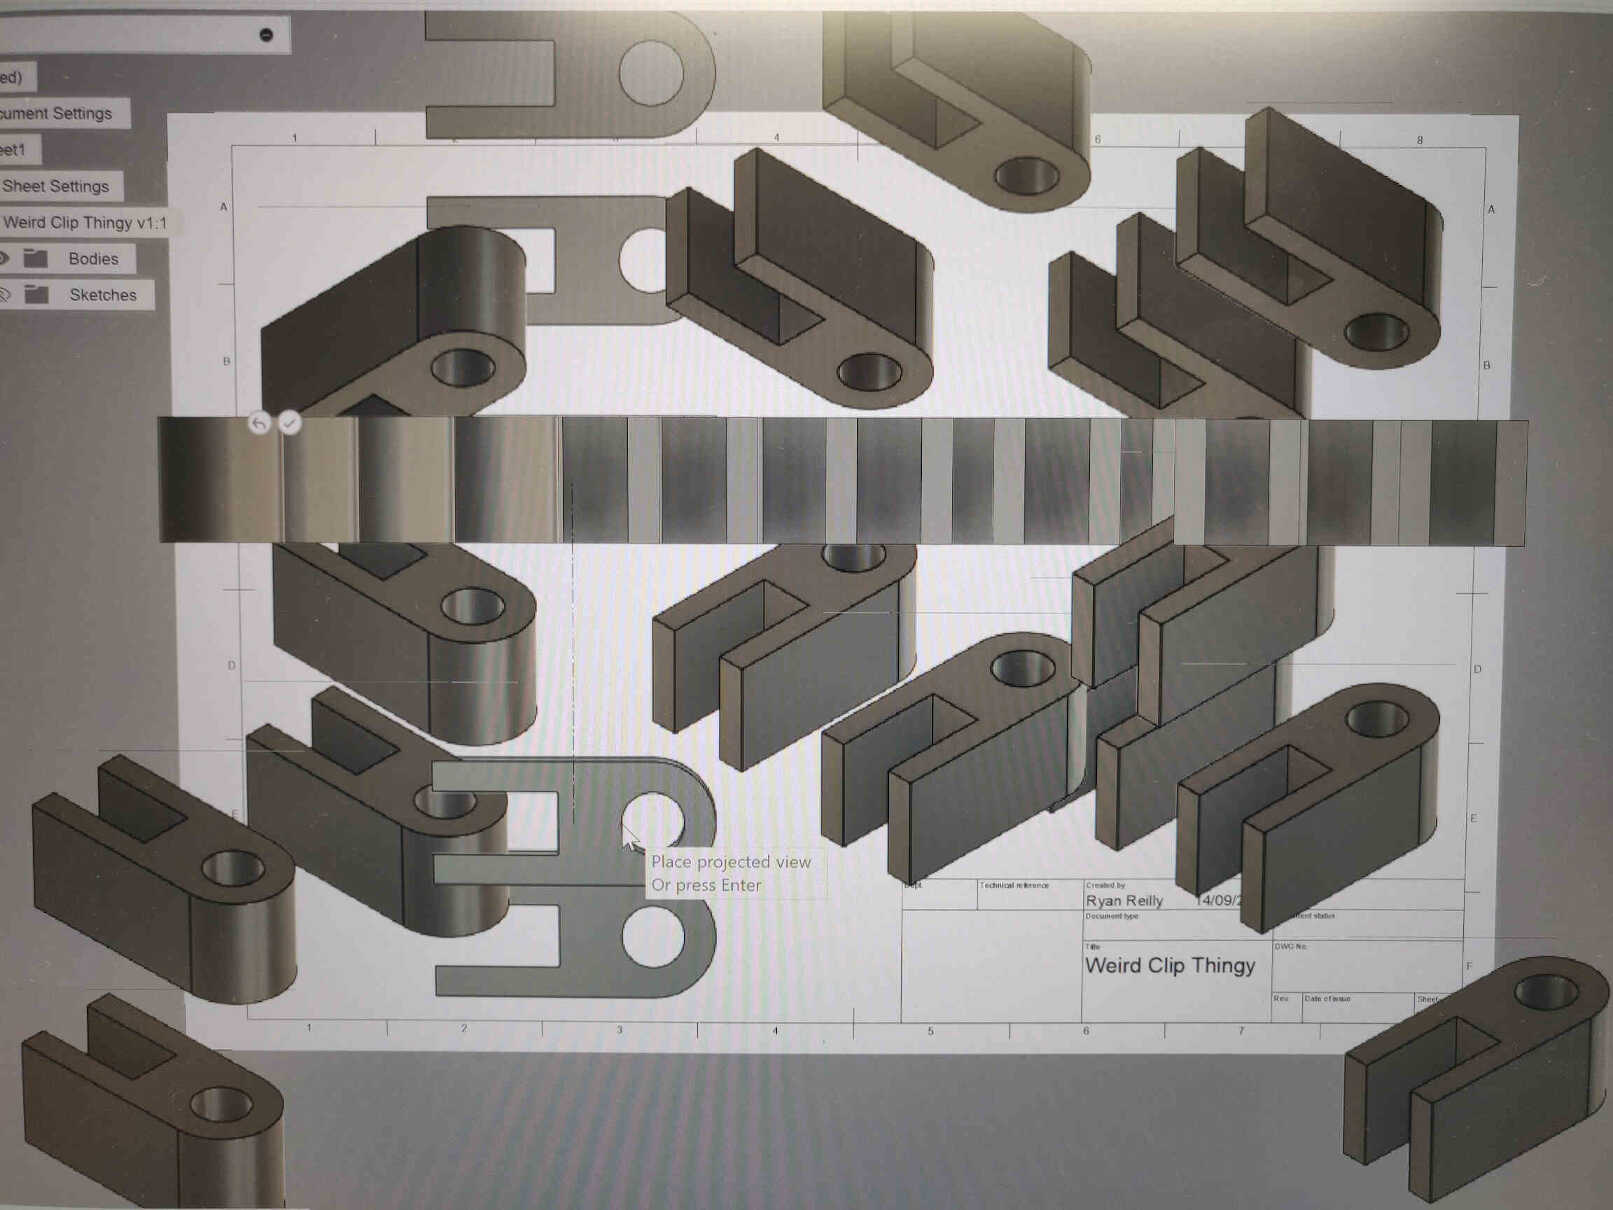
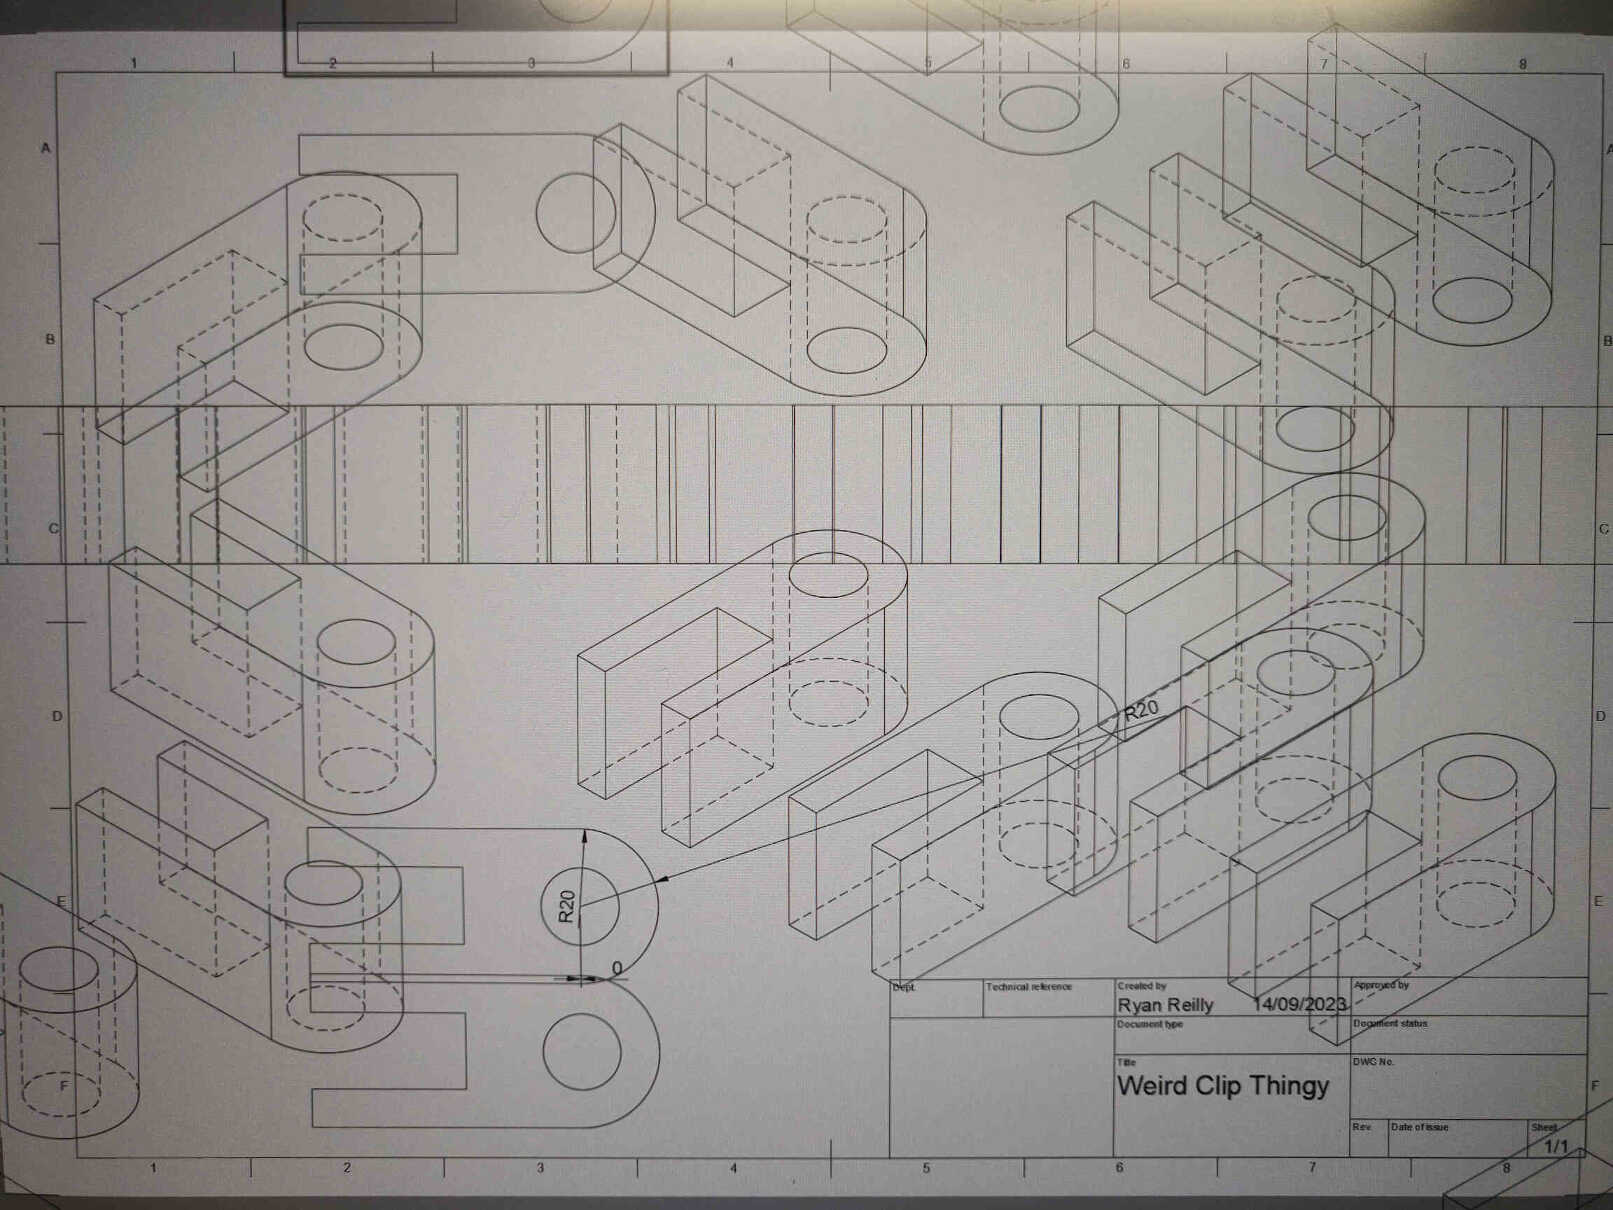
Once all parts of the model were created / acquired, we set about making holes for screws and adjusting the clearance by 0.4mm for the slots. The shape and angle of the screwed hole could be adjusted at anytime leading to high flexibility when it comes to mistakes.
____________
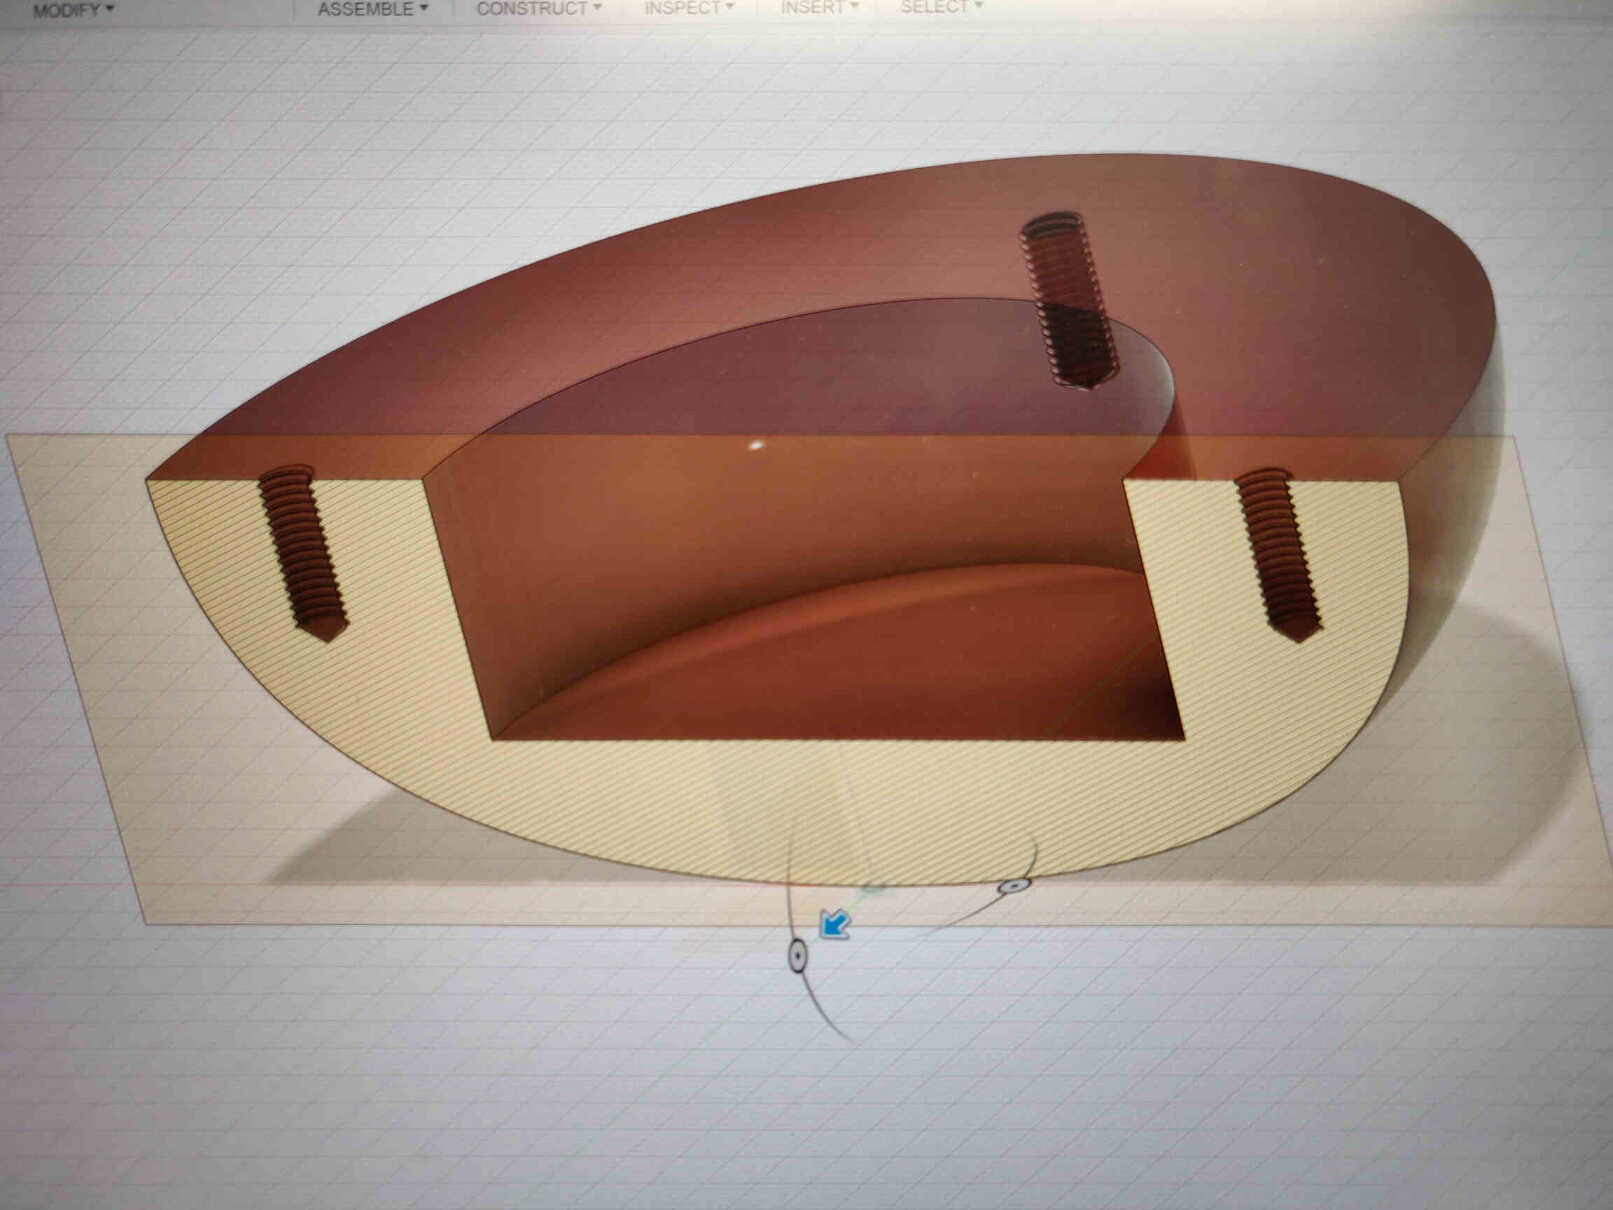
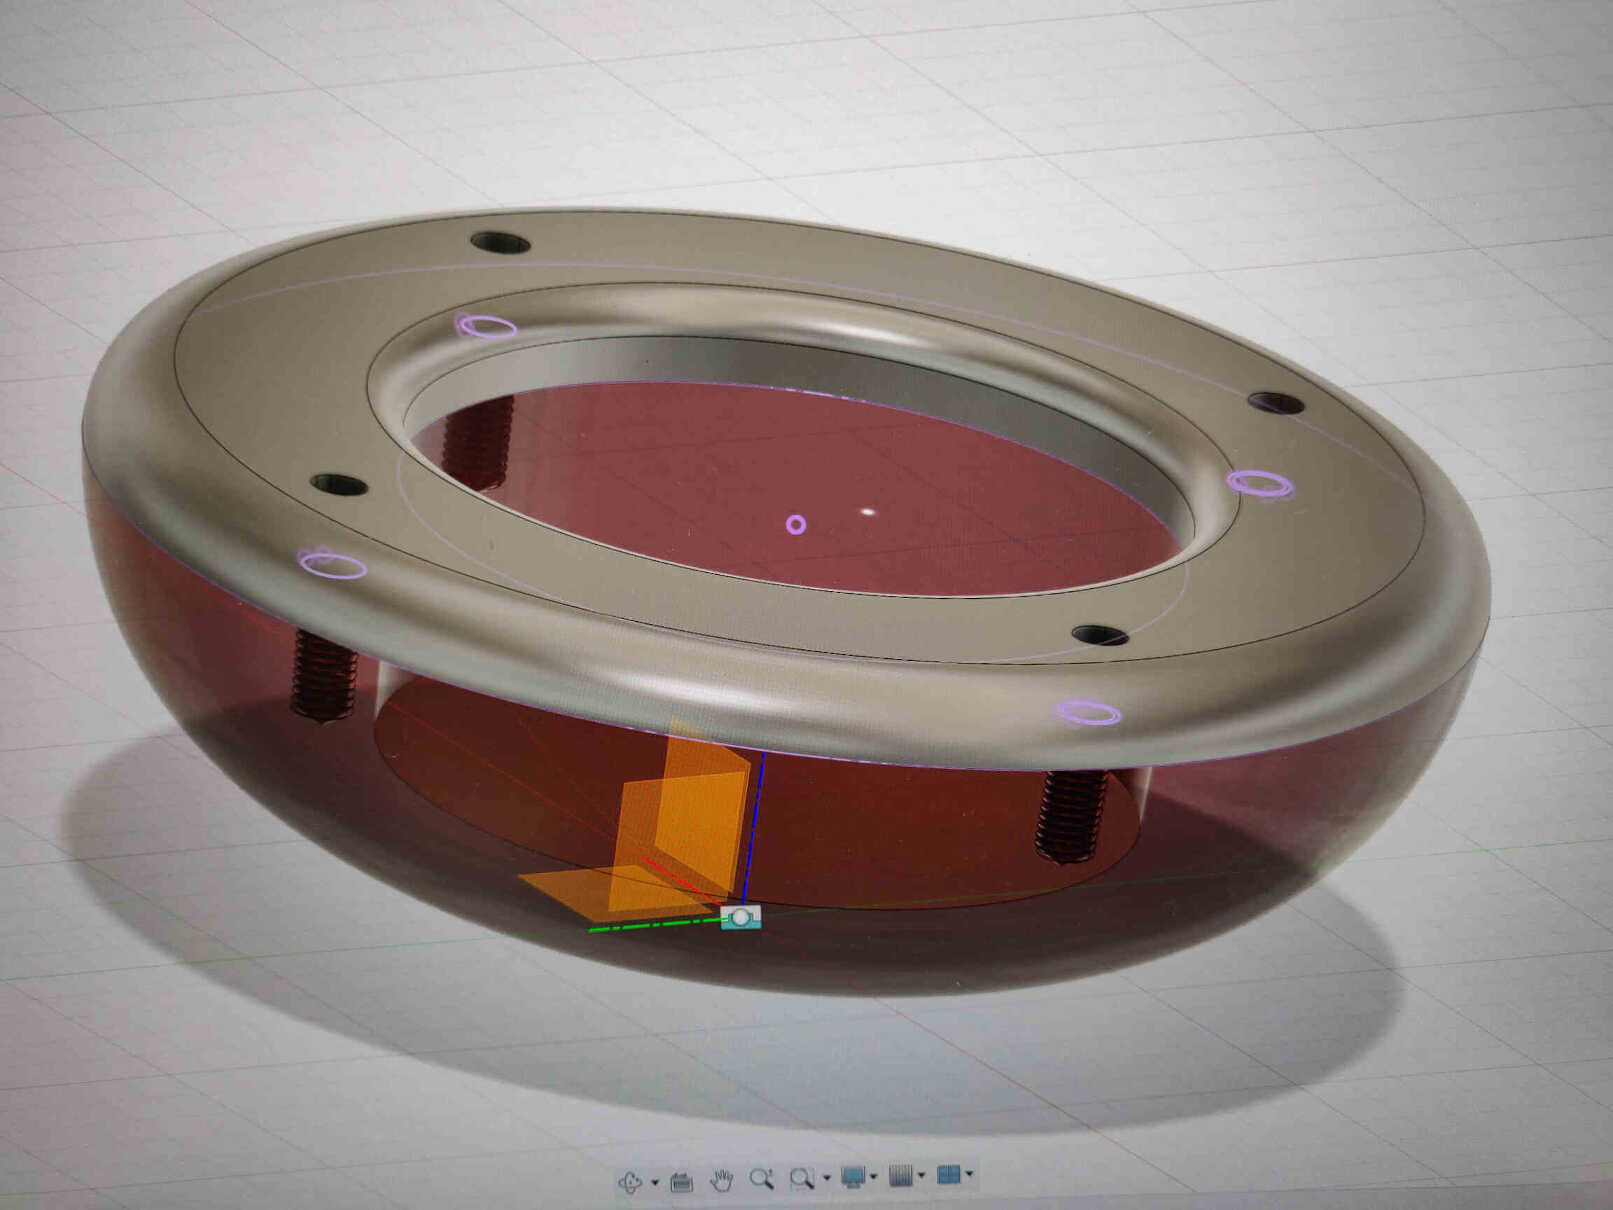
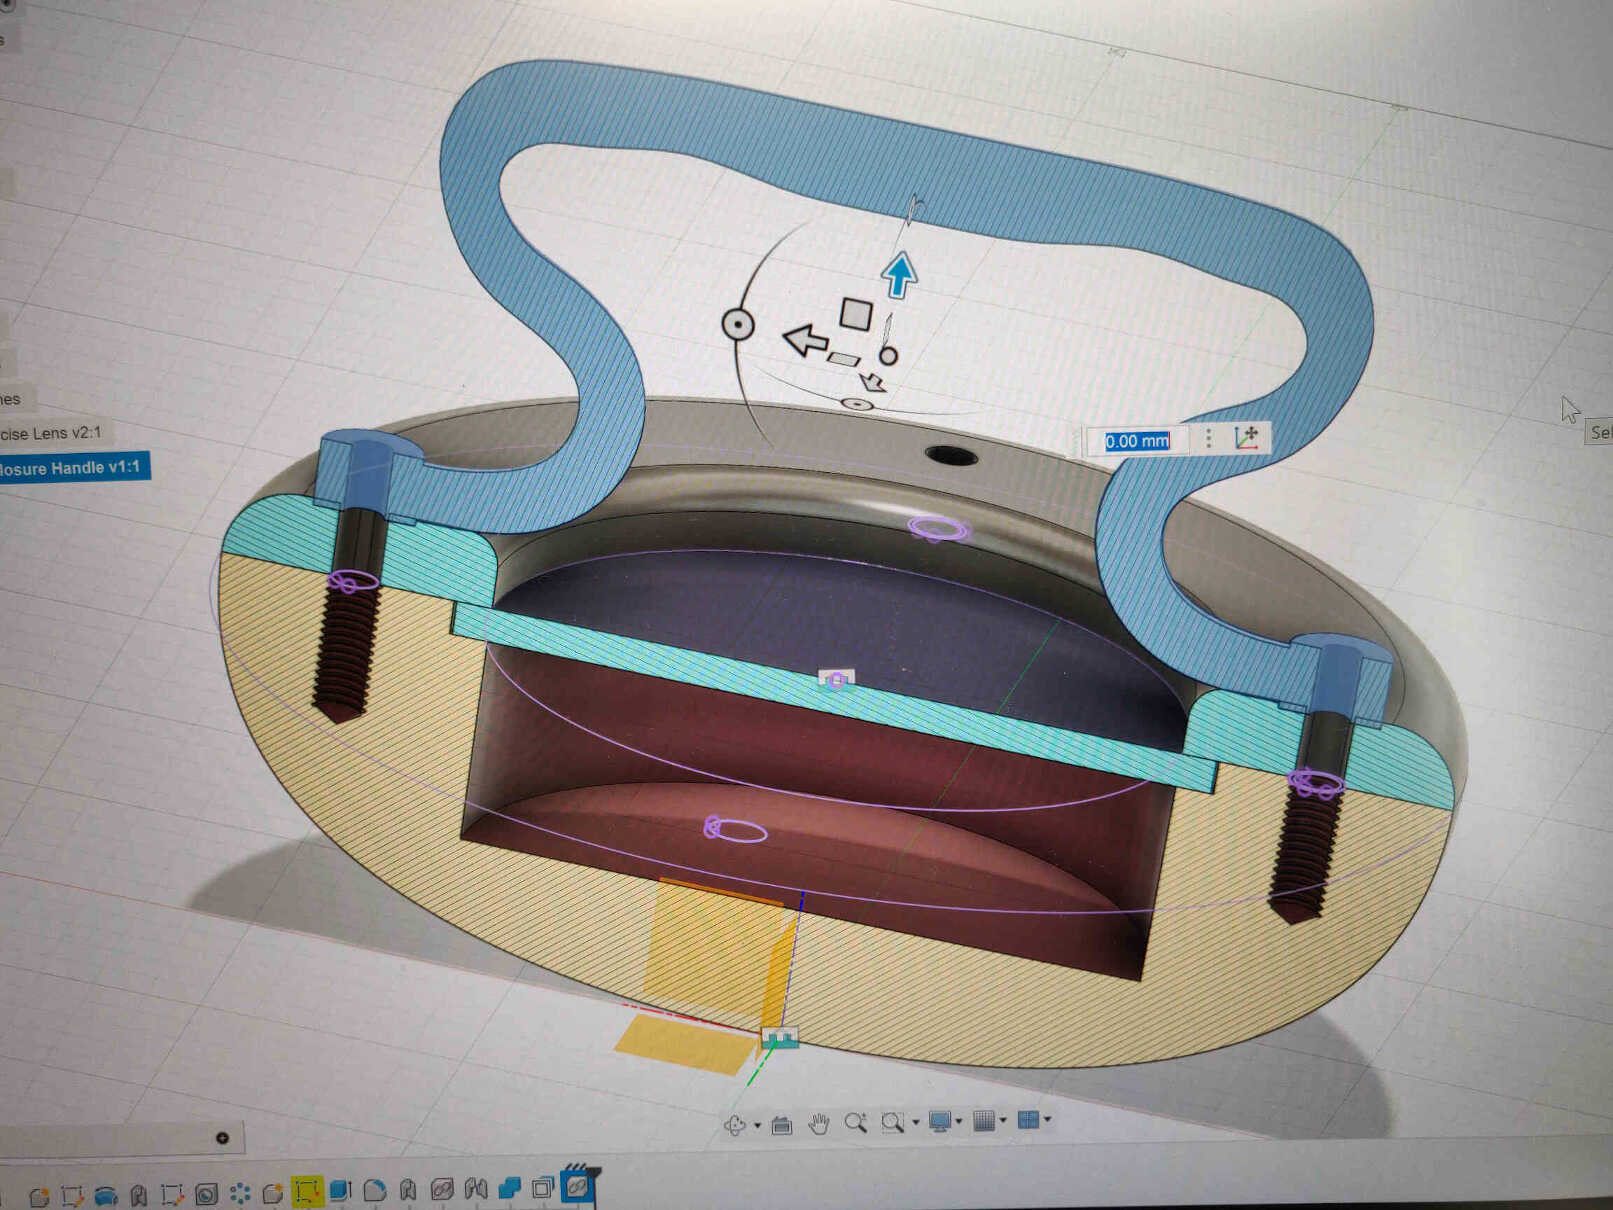
Onshape
Onshape is a cloud-based computer-aided design (CAD) software that allows users to create, edit, and collaborate on 3D models in real-time. Developed by a team of former SolidWorks employees, Onshape is known for its accessibility and collaborative features. As a cloud-based solution, it doesn't require installations or updates and can be accessed from various devices with an internet connection.
Key features of Onshape include parametric modeling, version control, and real-time collaboration, enabling multiple users to work on the same design simultaneously. It supports a wide range of industries, from mechanical engineering to product design. Onshape's cloud-based nature also simplifies data management, as designs are stored centrally and can be accessed and edited from anywhere. - (Written by ChatGPT v.3.5, 2024)
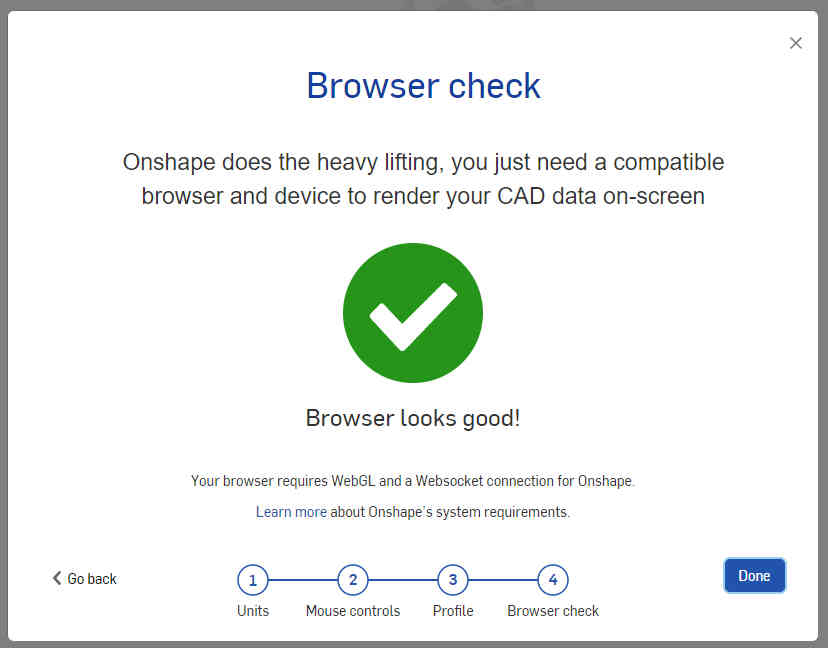
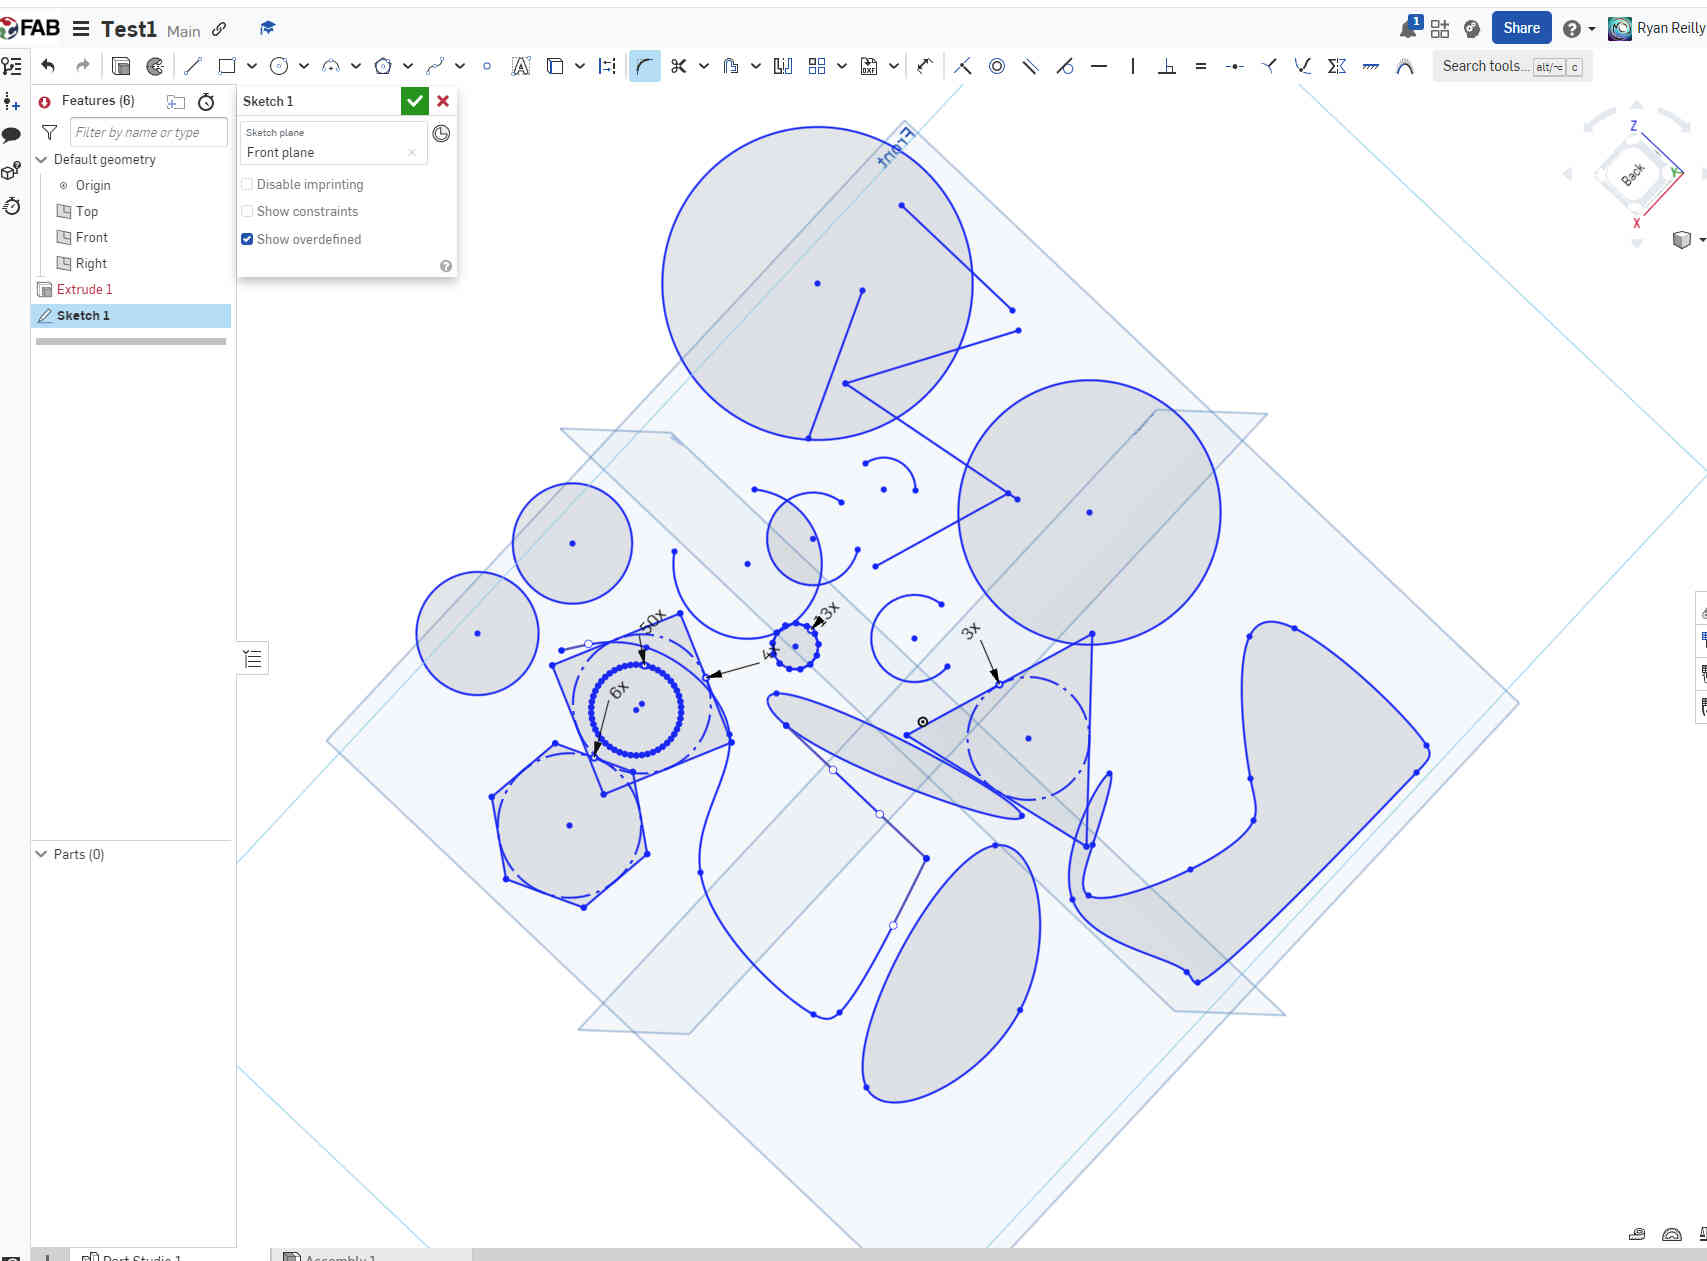
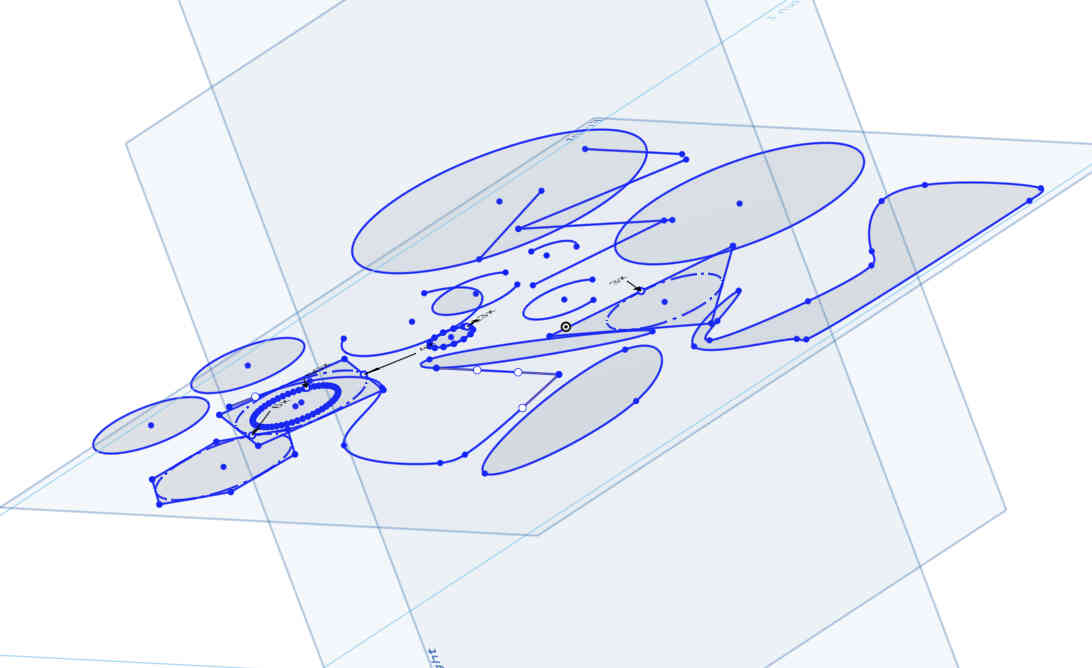
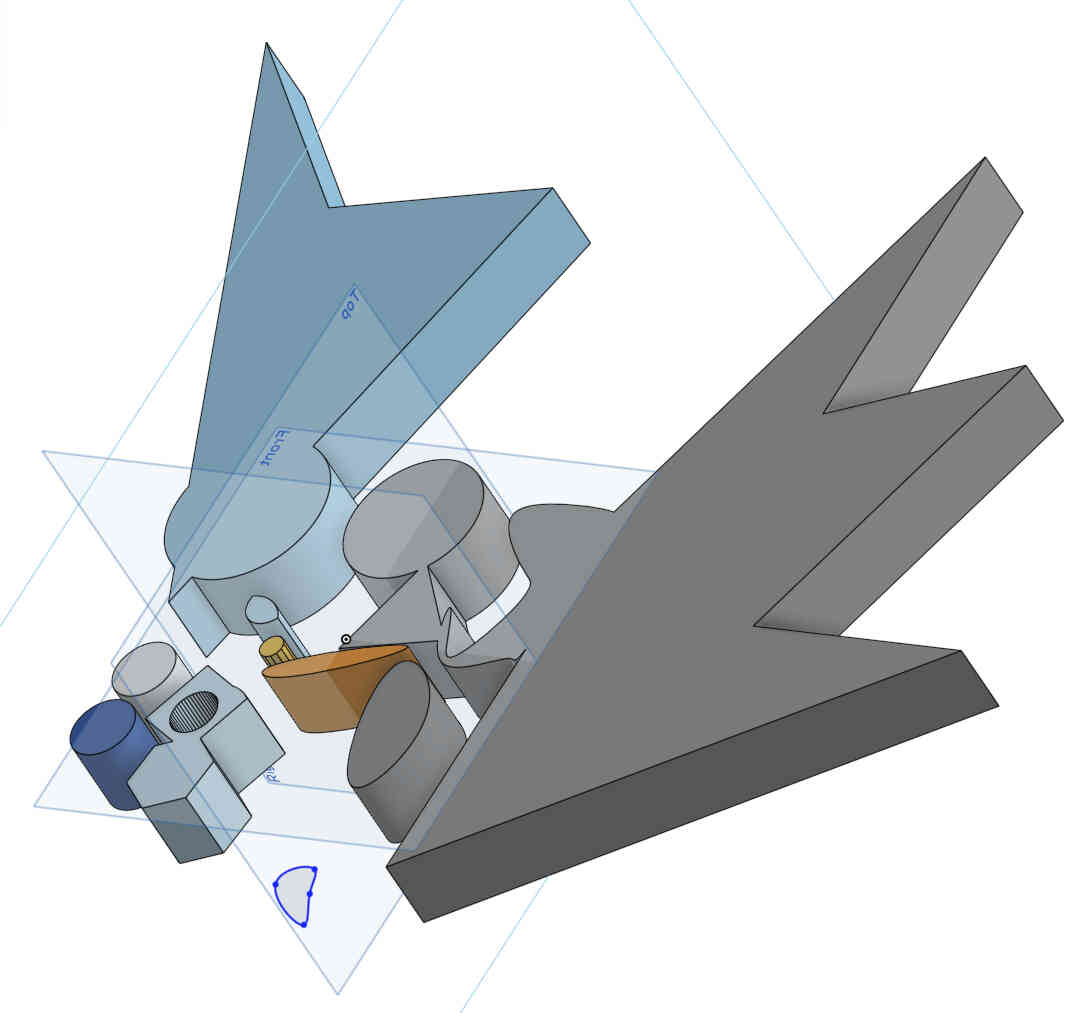
I signed up to OnShape and tested it out. Really enjoyed using OnShape and delighted by how accessible it is! I’m moreso used to building designs in Blender or Unity, but CAD software like Autodesk or OnShape feels very much the same but combined with the technicality of Adobe Illustrator.
____________
Rhino
Rhino, formally known as Rhinoceros, is a 3D computer graphics and computer-aided design (CAD) software. Developed by Robert McNeel & Associates, Rhino is widely used for creating, editing, analyzing, and rendering complex 3D models. It is known for its versatility, supporting various design industries such as architecture, industrial design, automotive design, and more. - (Written by ChatGPT v.3.5, 2024)
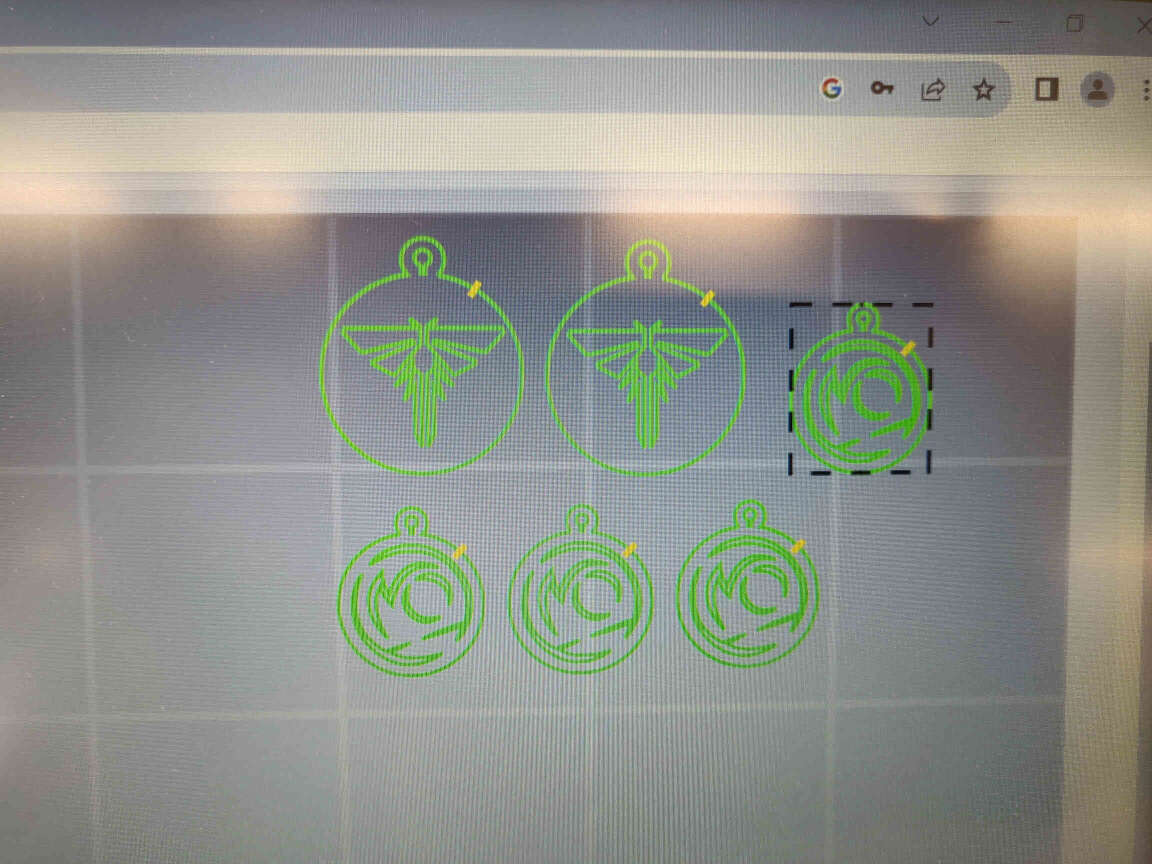
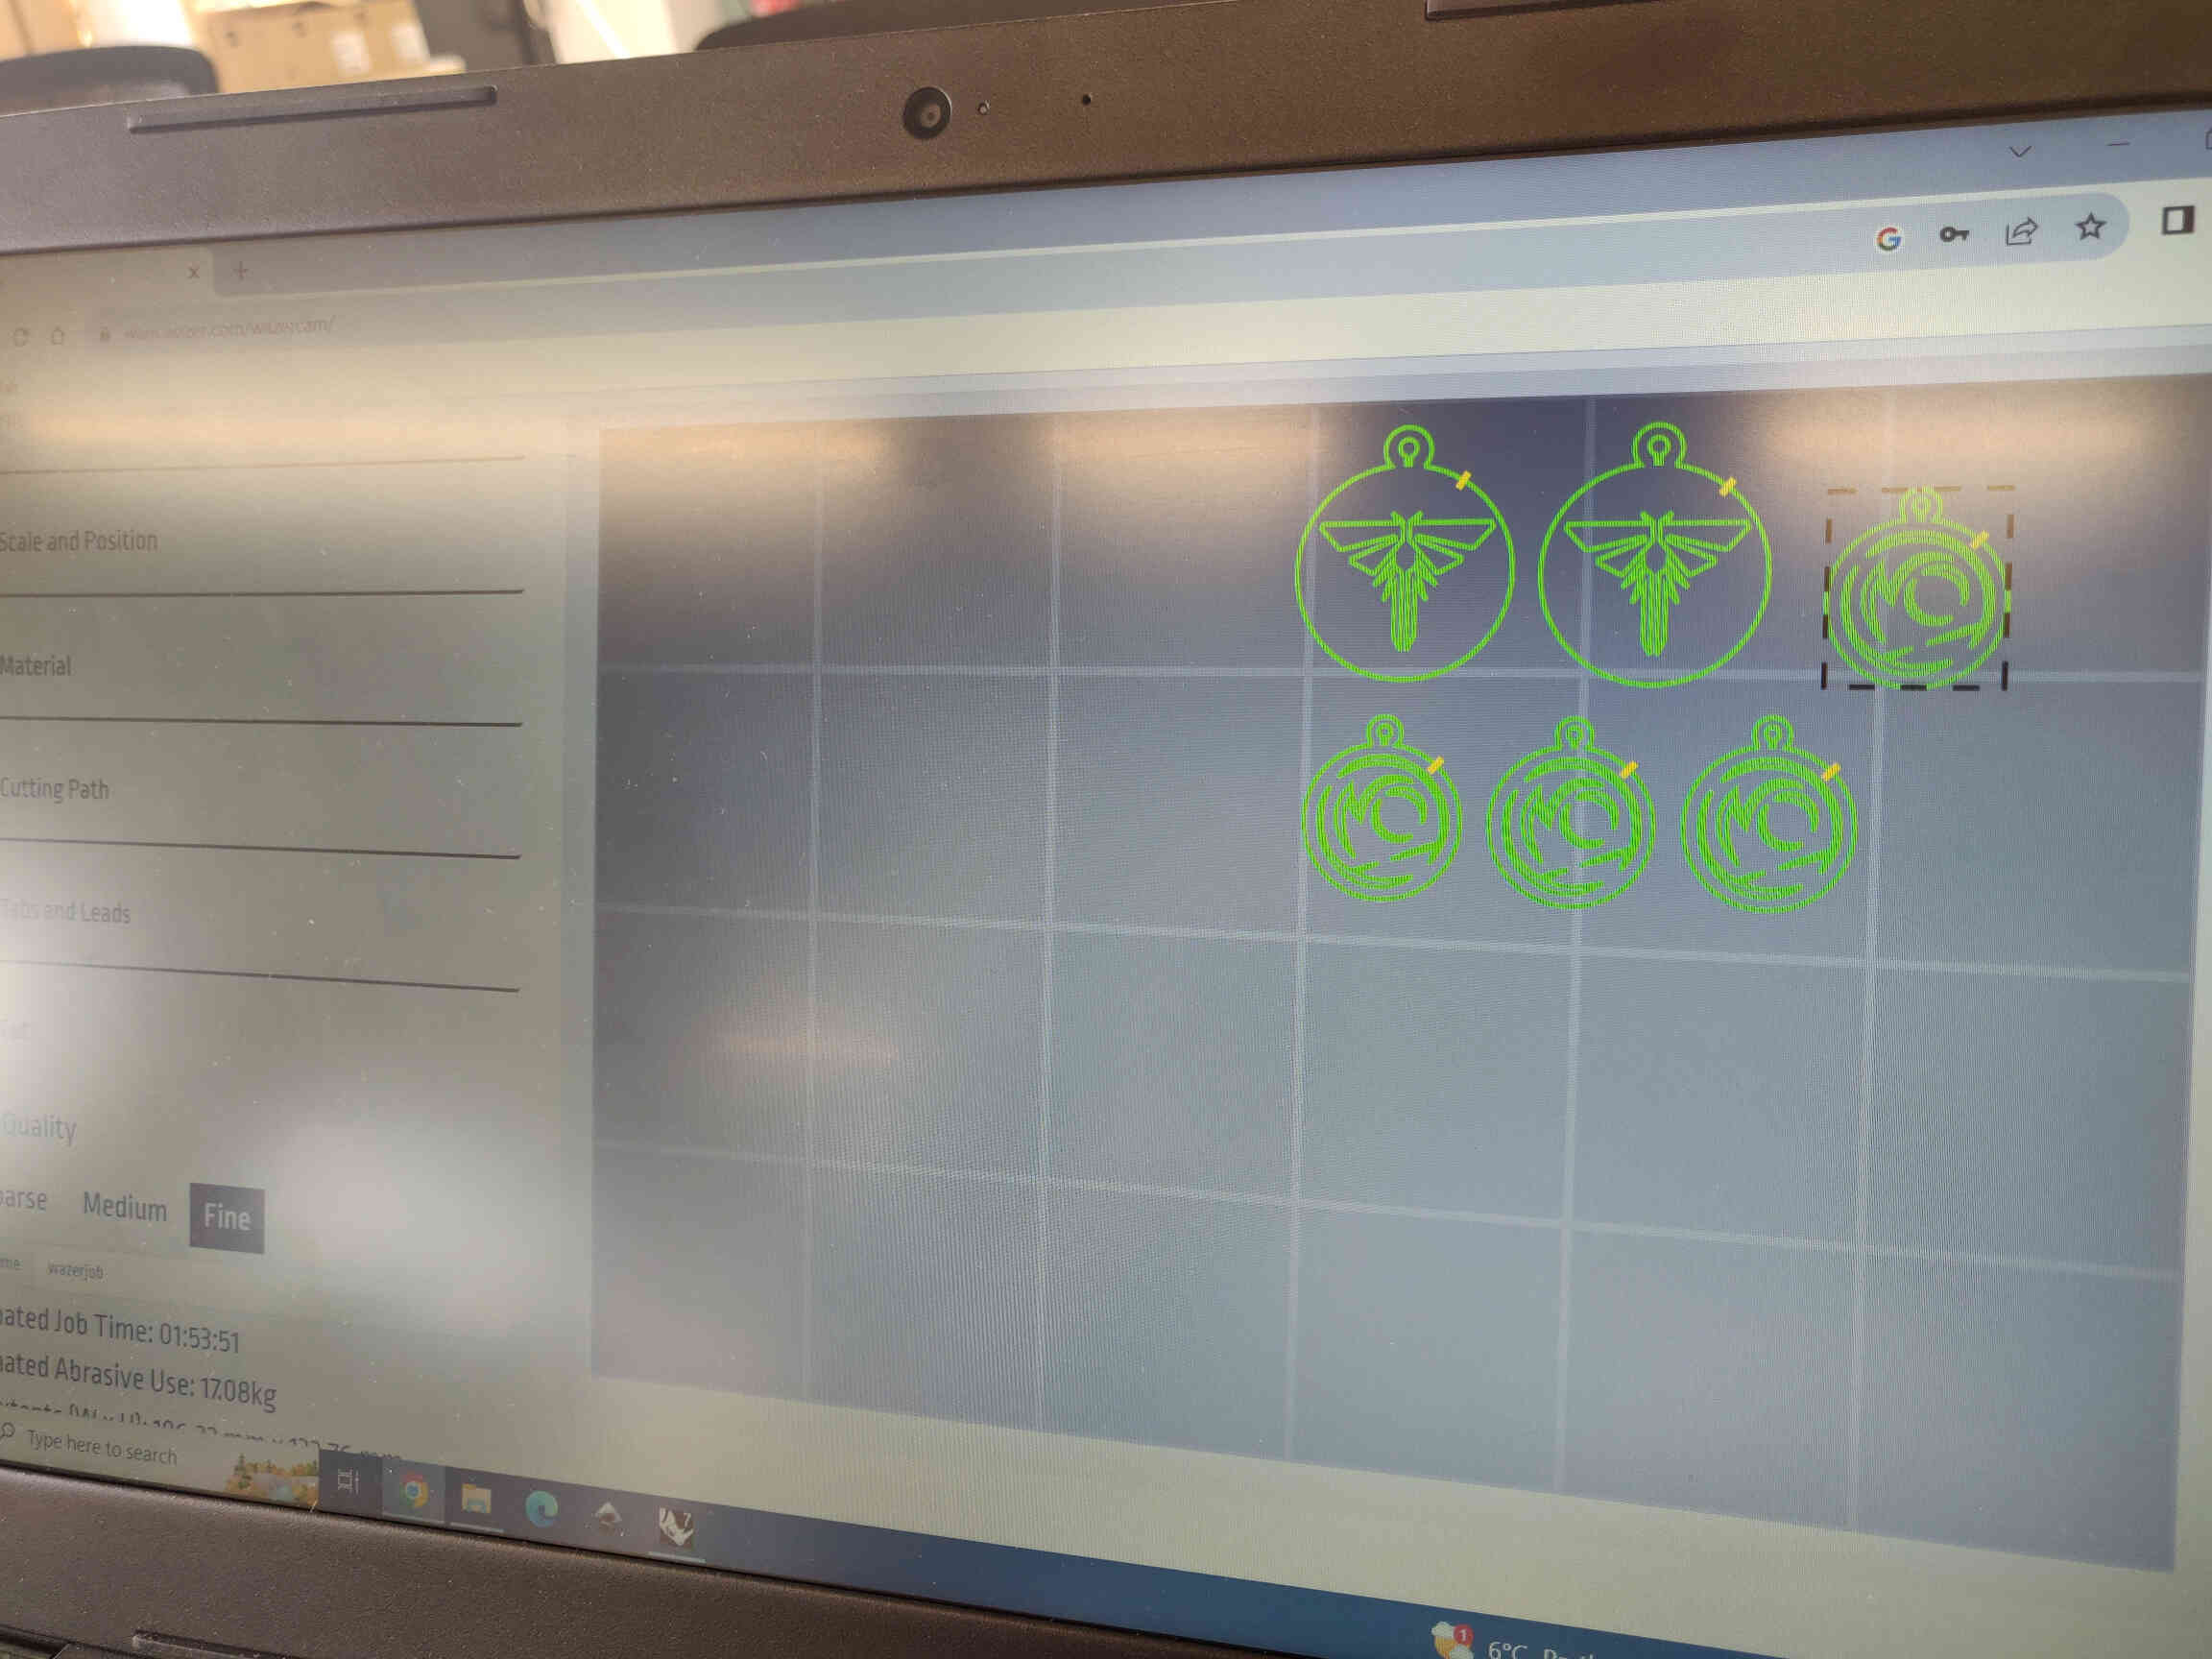
I wanted to create medallions of my logo to send to my supporters as a token of appreciation.
Originally designed in Adobe Illustrator, we noticed by zooming into the image that a lot of the connecting lines weren't actually connected, which could lead to issues with the water jet cutter. We fixed these lines and connections by using Rhino and sending that file to the Cutter.
Later on, I used the same Rhino file to Laser Woodcut a simple stamp of my logo, which I could label onto the envelopes sent out.
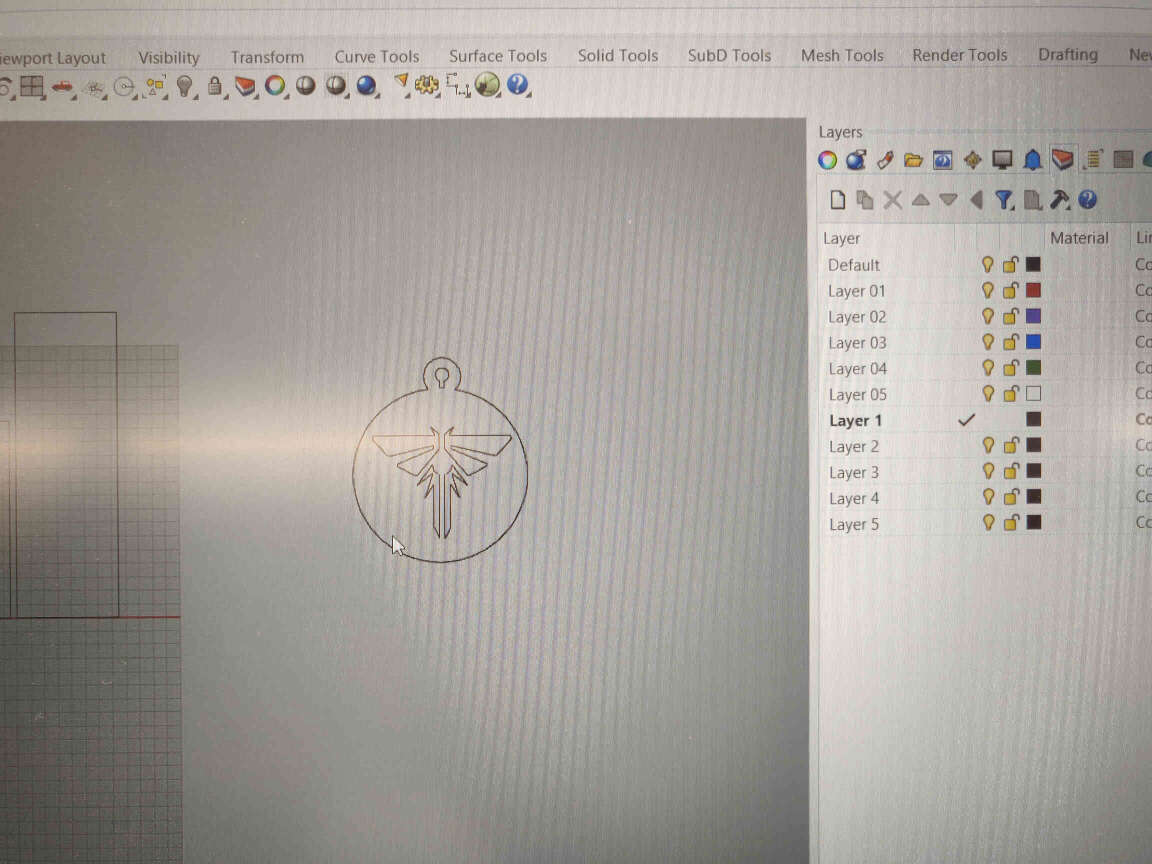
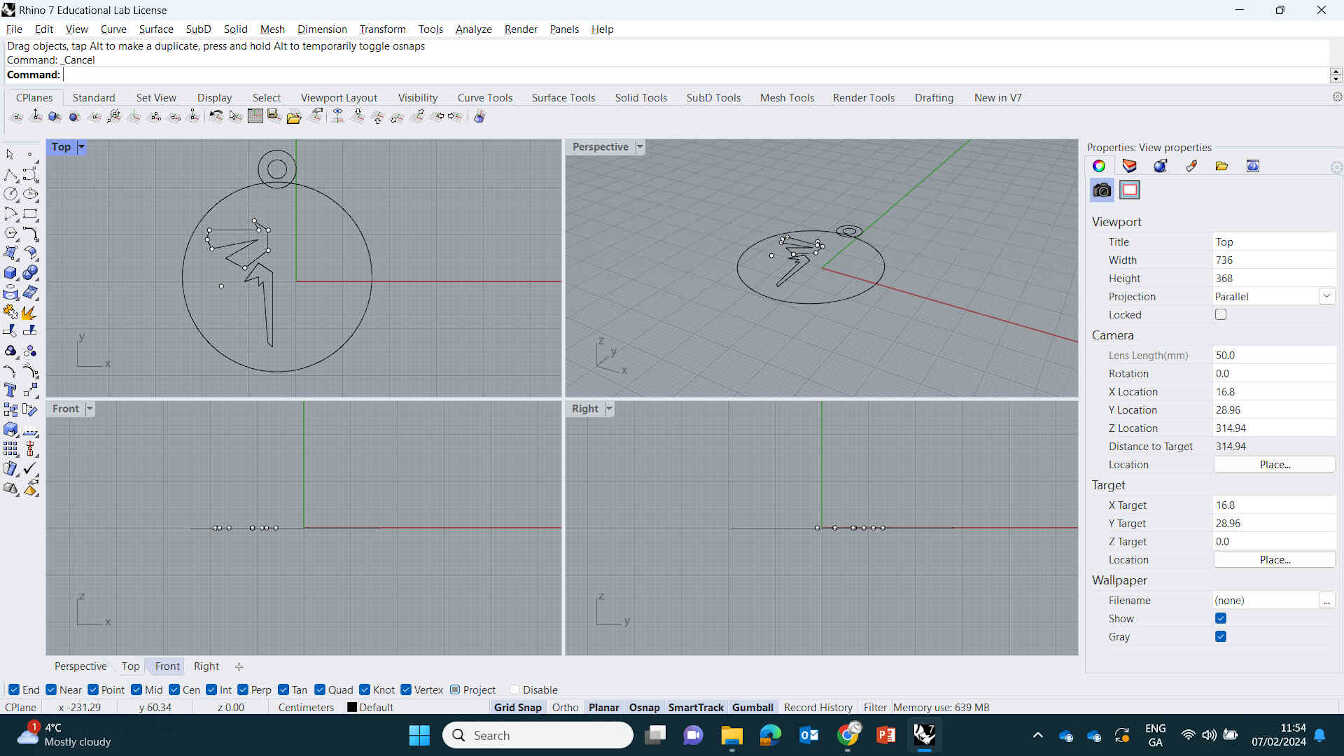
Starting with adding an image of the 'Firefly' logo from 'The Last of Us' (2013) onto an empty layer for reference, I used the 'Ellipse' tool to create a circle that would be the rim of the medallion.
Rhino 'Firefly' Tutorial
Start by creating two circles with the 'circle' tool.
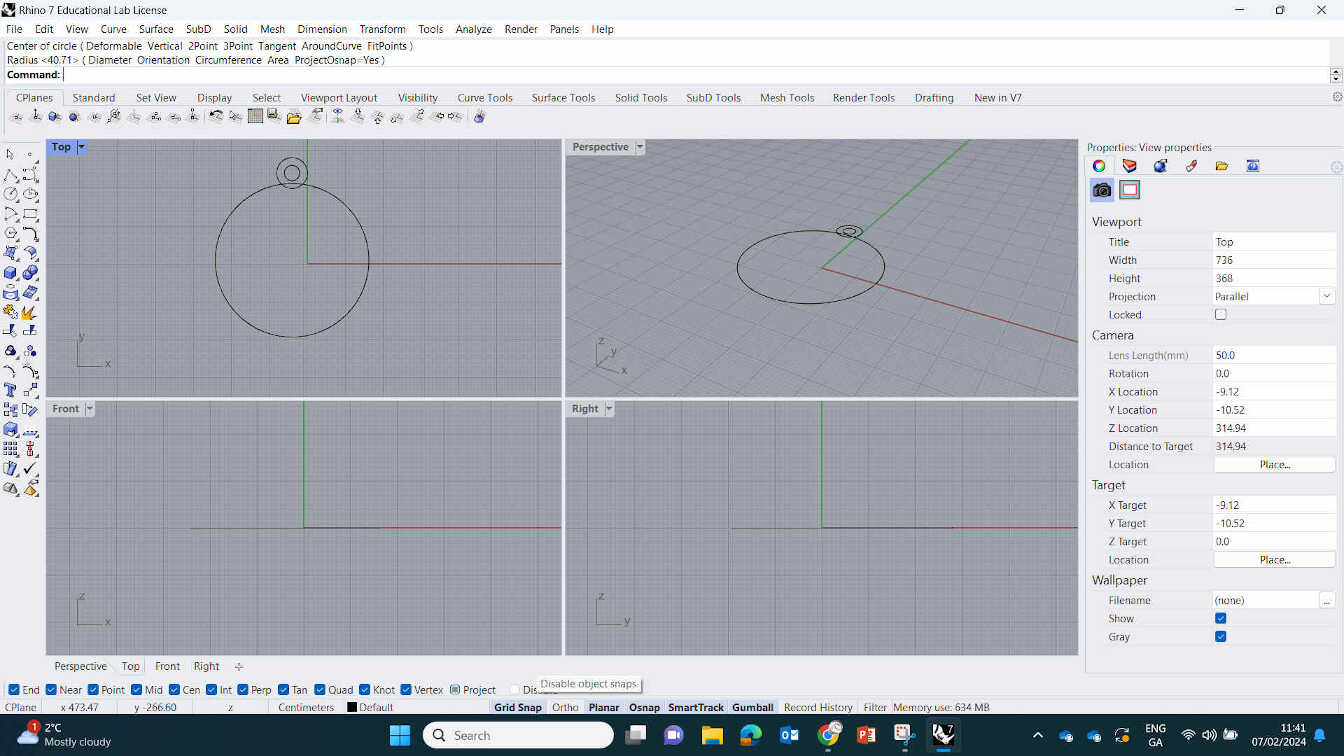
Using another circle to create a hook at the top of the medallion and a third, smaller circle to create a punctured hole that a necklace could fit through. I was able to adjust the shape and size of the ellipse via its 'control points'.
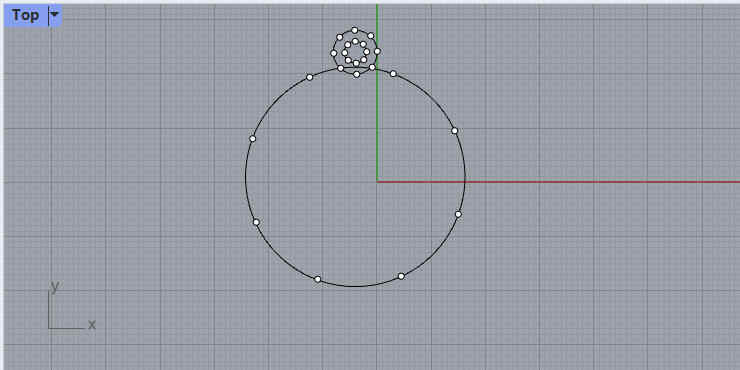
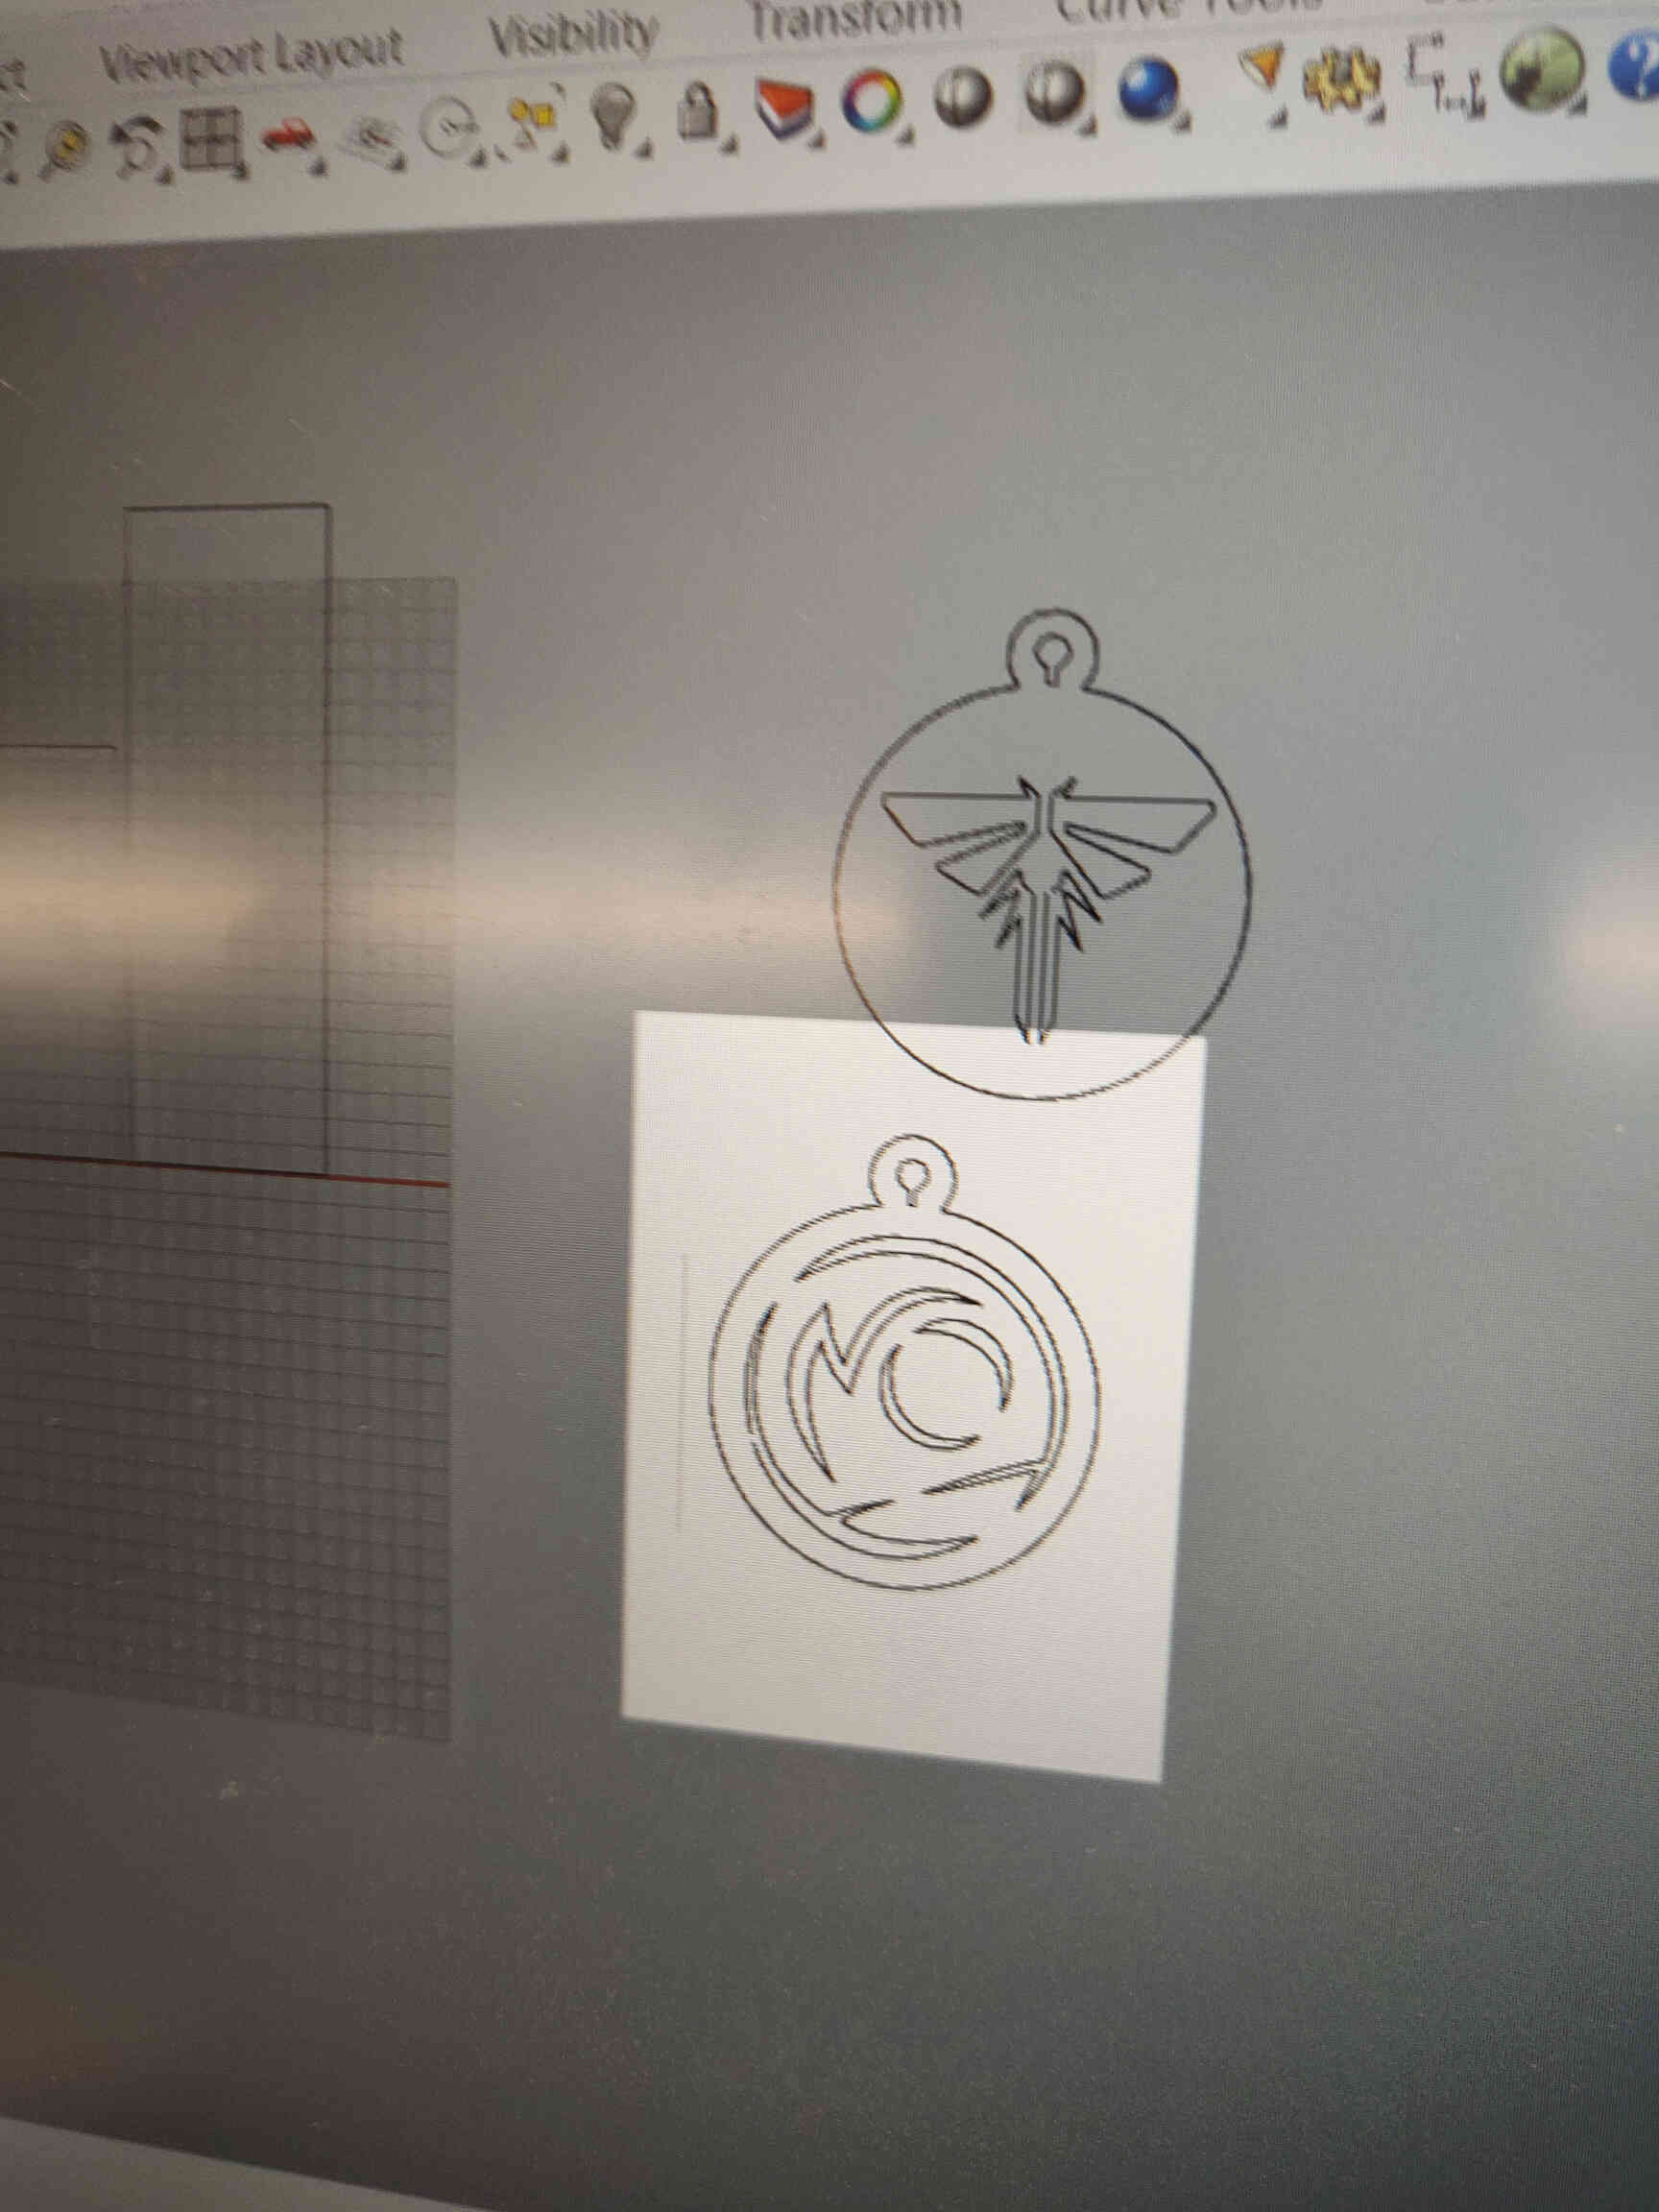
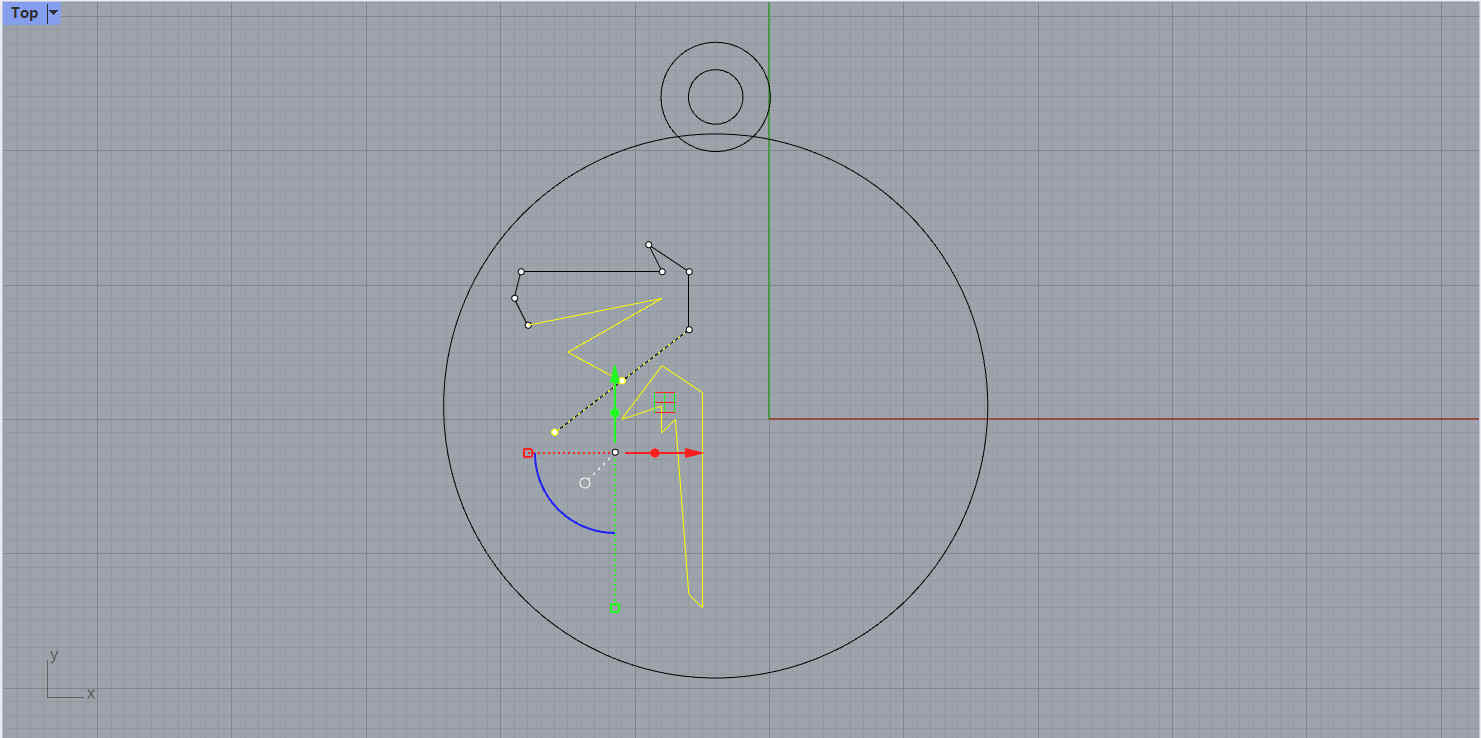
For the middle design, I make sure I'm on the 'CPlanes' tab and use the 'Polyline' tool found on the left-hand side bar. With this tool I was able to cleanly lay out my design, connecting all points, when can be adjusted via control point manipulation.
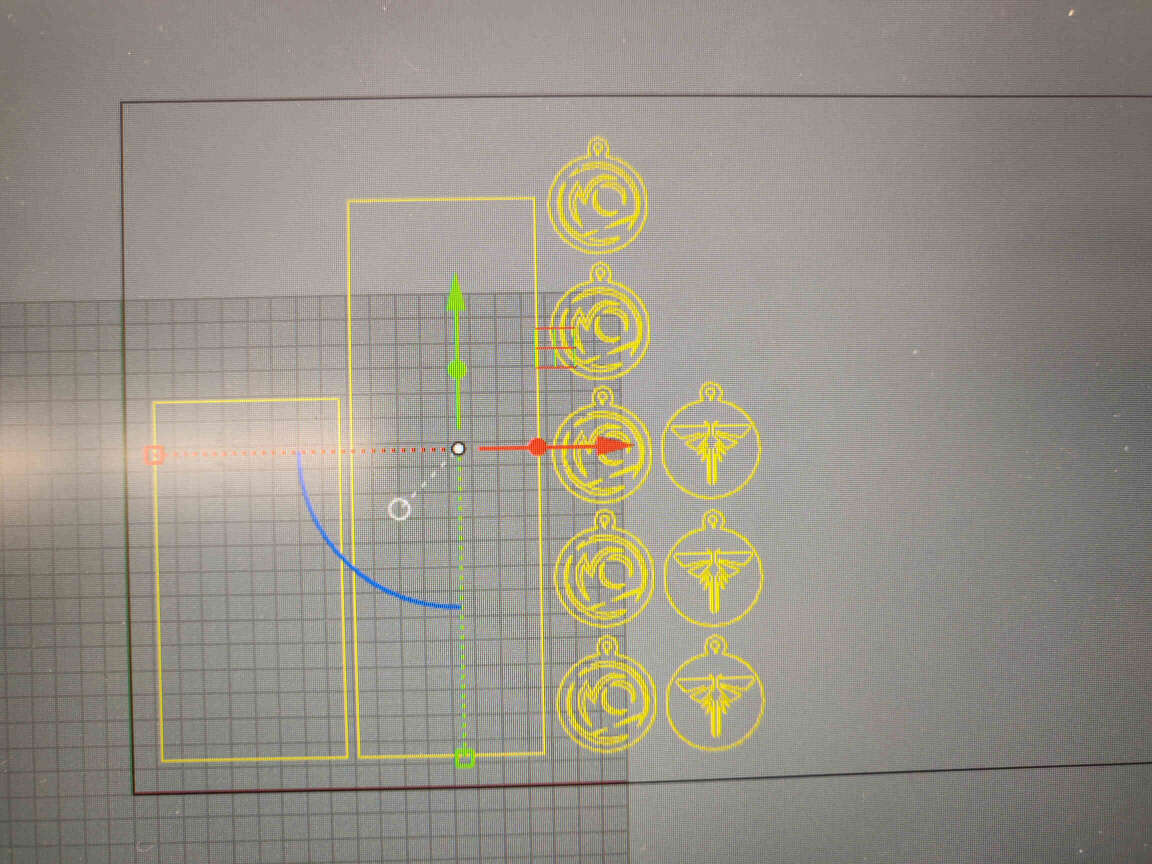
Once I was happy with the left-side design, I created a line directly down the middle of the outer rim for symmetrical reference. By selecting the left-hand design, I can use the mirror tool to flip a duplicate of that design, using the middle polyline to set the point of origin.
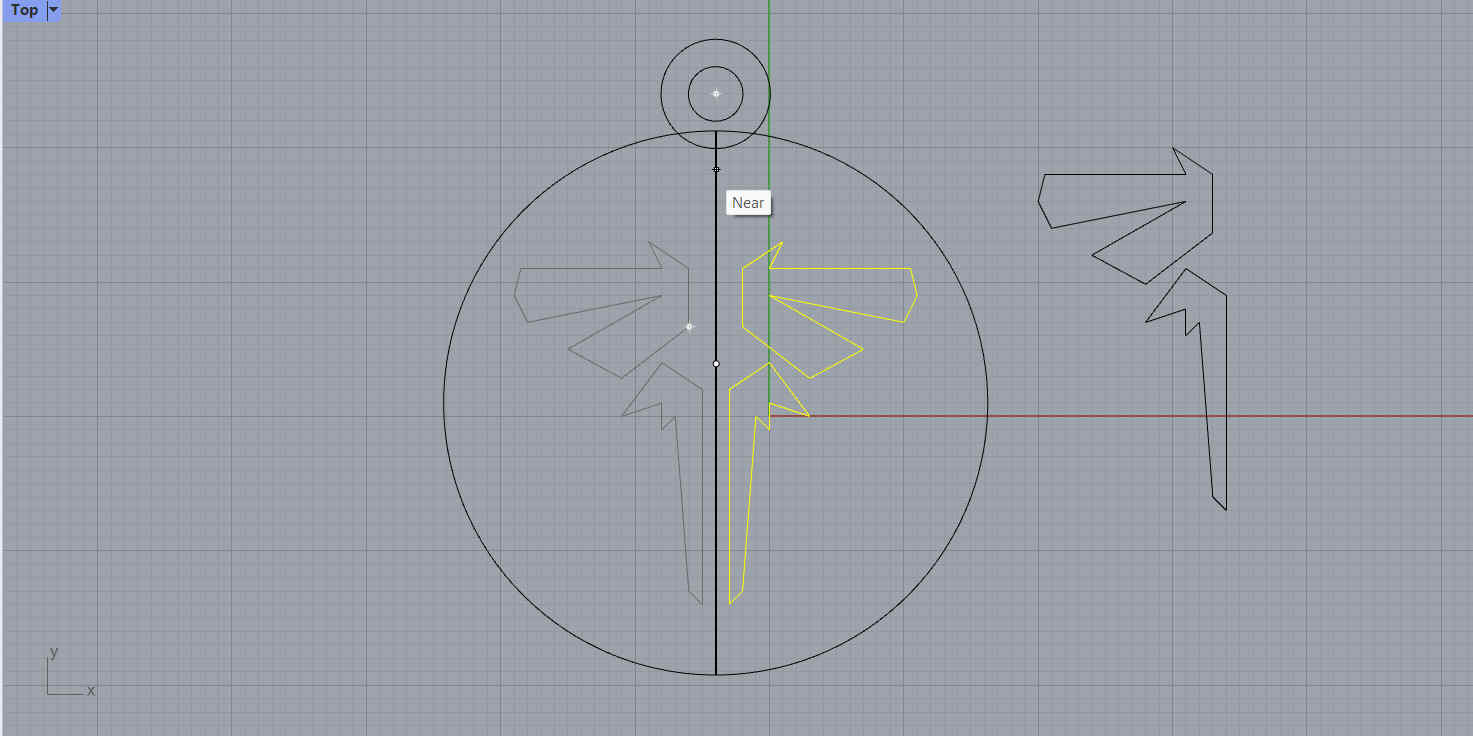
Once the design is flipped, I deleted the middle polyline and the result was a perfectly symmetrical design. I was also able to join both sides of the design by selecting both and typing 'join' in the command line.
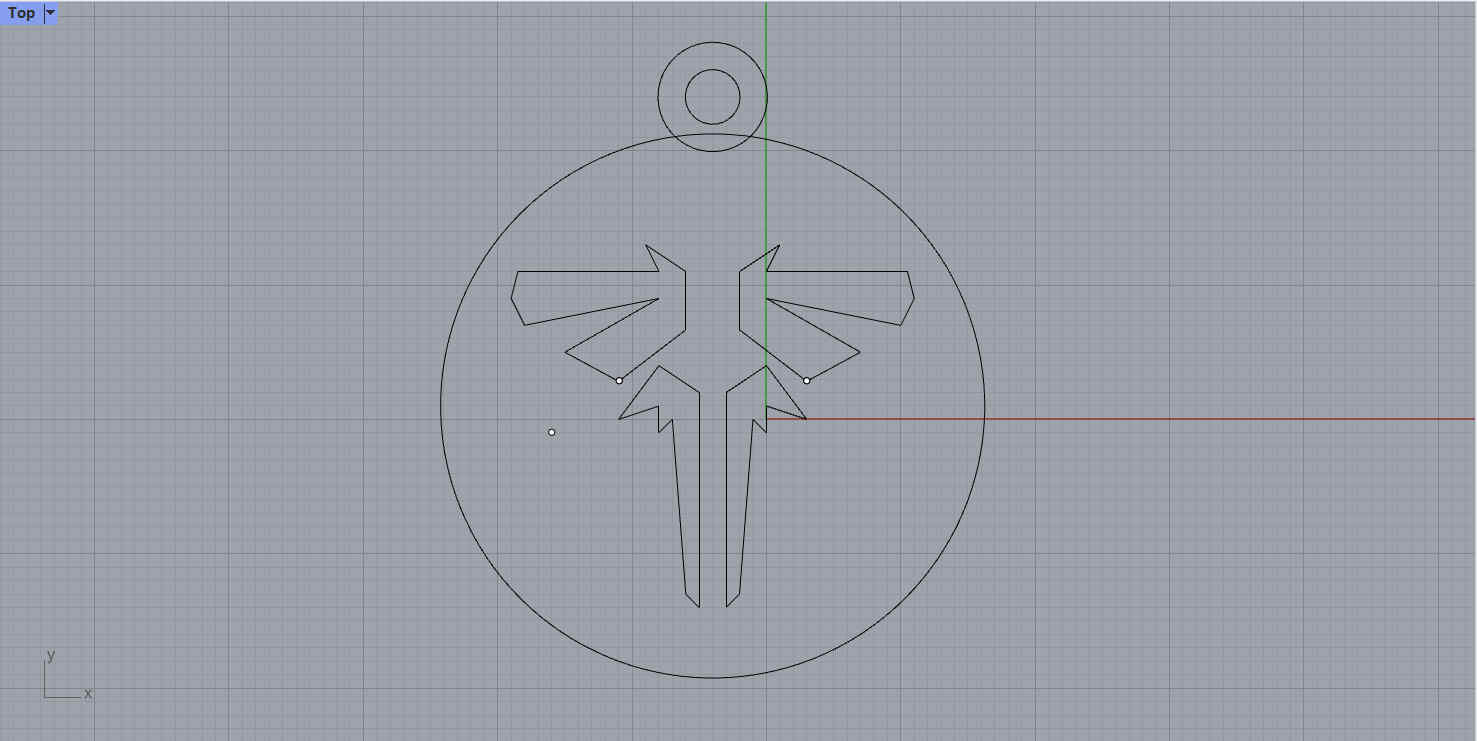
Rhino may seem like it's too technical, but is a remarkably user friendly tool that I've been using for many cutting projects since I was first introduced.
____________
Conclusion / Reflection
This week was all about getting accustomed to Computer Aided Design (CAD) software, as well as exploring 2D Raster/Vector software. I wanted to try out Solidworks as our technician recommended it, but it was weeks before Solidworks came back to me with a license, I had already moved on. I loved testing out Autodesk Fusion as it was the first CAD software I had ever used and my mind was blown by how my past 3D animation experience helped me easily navigate CAD software, which proved true for most 3D software, CAD or otherwise. I had fun using Onshape and was really impressed how easy to use and accessible it was, being a browser app. I had intended to use this on future projects but other opportunities navigated me away from it. Would love to continue exploring OnShape in the future. Though Unity isn’t a CAD software, since I am accustomed to it I thought it would be good to create a bare-bones 3D design of my Final Project as this was something that was asked of us by the Fab Academy instructors. I also documented a Rhino tutorial on how I made my Last of Us Firefly medallions. Since I never documented it originally, I recreated the design to grab screenshots. Rhino will be my main CAD software for 2D designs when I need something manufactured using Laser/Wood/Metal cutting machines.
We also had to research Image Compression software which I needed for my website. GIMP/BIMP was recommended to me and it has easily been the most useful tool I discovered in my whole Fab Academy journey. Certainly a tool I would be using for years to come. Handbrake is the tool I use now for video compression. For my Final Project render I used VLC compression but discarded it later as it was too awkward to use (and boring to look at).
We also had to create a render of our Final Project using 3D software. I designed and animated a super simplistic version of my final project and rendered it using Blender as this was the software I intend on using to design the final product.
I didn’t realise until the week later that I had to also explore types of 2D Raster & Vector software. For 2D Raster software I chose Procreate (iPad) which is my favourite illustration software and documented how I created my ‘Little Buddy’ concept designs. I chose Inkscape for 2D vector work. Inkscape was relatively new to me so I had to do a bit of research and practice before I started using it properly in Week 3. I certainly prefer it over Adobe Illustrator which can be really awkward and expensive.
This was one of the busier weeks for me as I was interested in exploring everything on offer.
____________