Week 13: Molding and Casting
-
Group assignment:
-
Review the safety data sheets for each of your molding and casting materials
-
Make and compare test casts with each of them
-
Compare printing vs milling molds
-
-
Individual assignment:
-
Design a mold around the process you’ll be using, produce it with a smooth surface finish, and use it to cast parts.
-
Navigation:
-
-
Designing
-
Generating gcode
-
Making the wax positive
-
Making the silicone negative
-
Making the resin result
-
-
-
Research different methods
-
Making the 3D prints
-
Using different types of silicones for casting
-
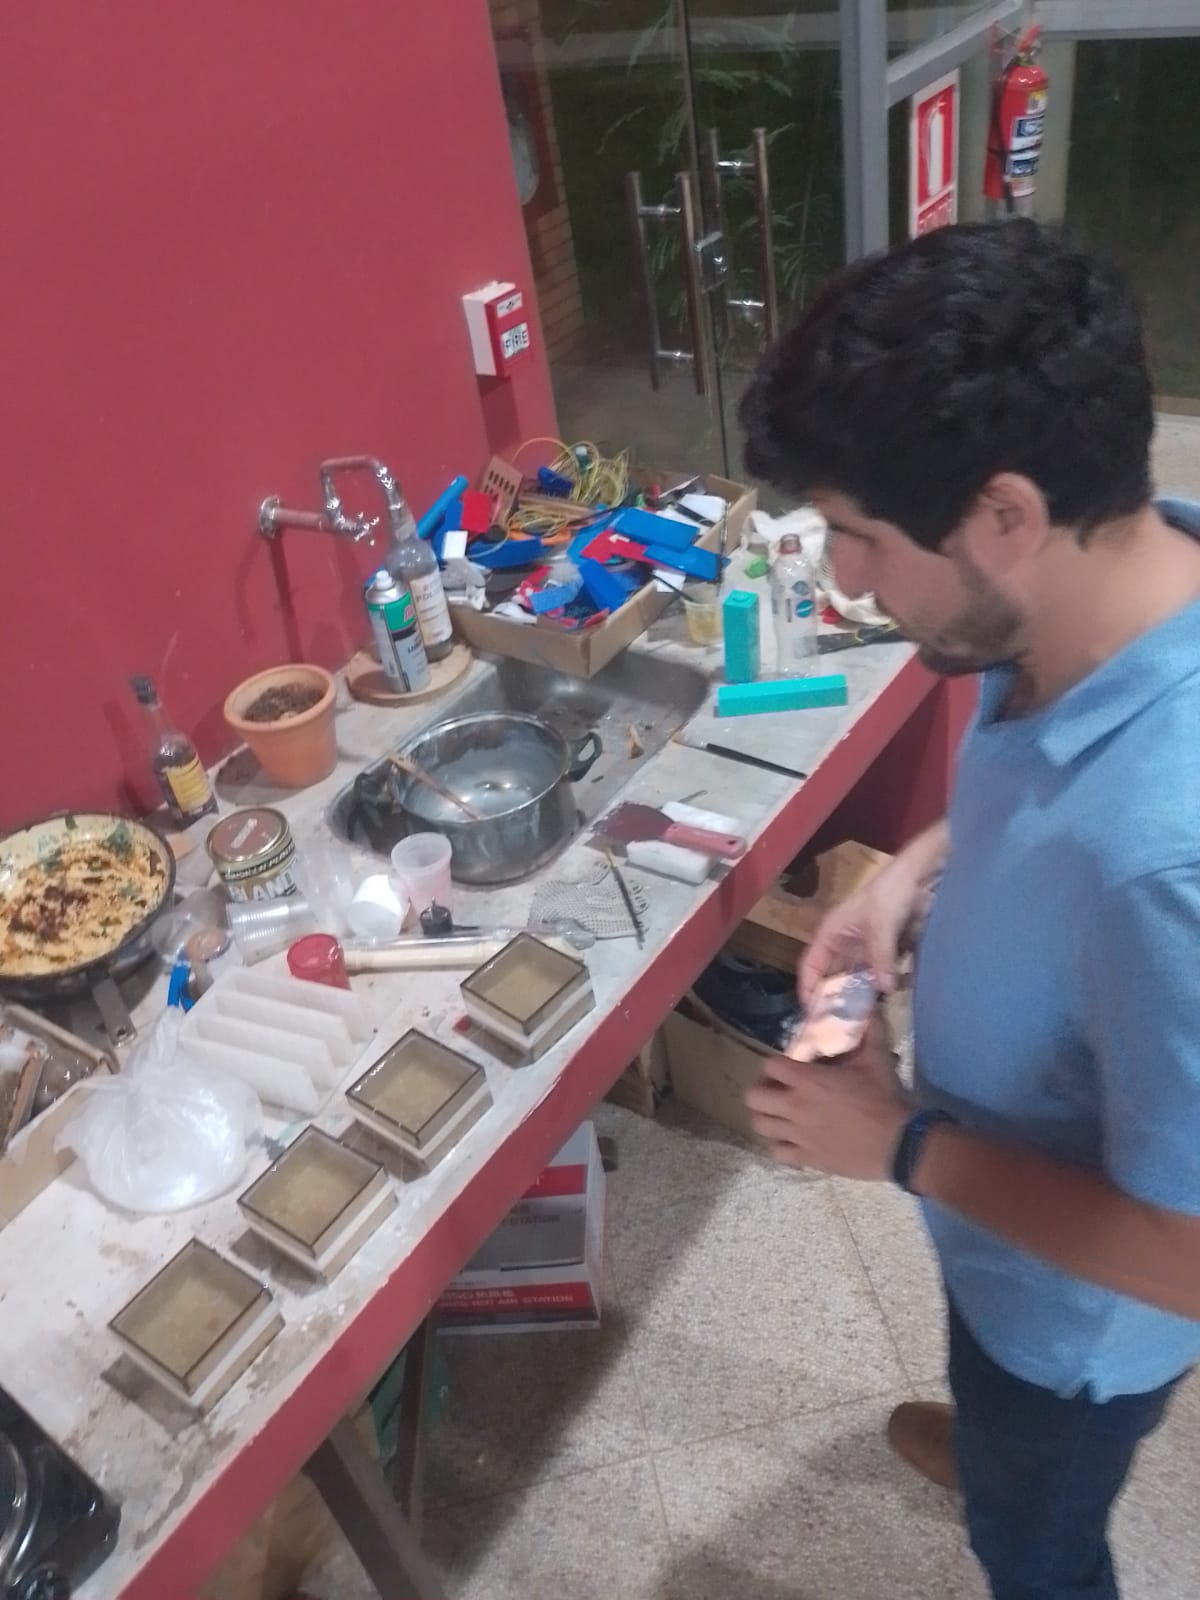
Preparations
How to make machinable wax:
-
50-50 of paraffin with polyethylene
-
First melt the paraffin
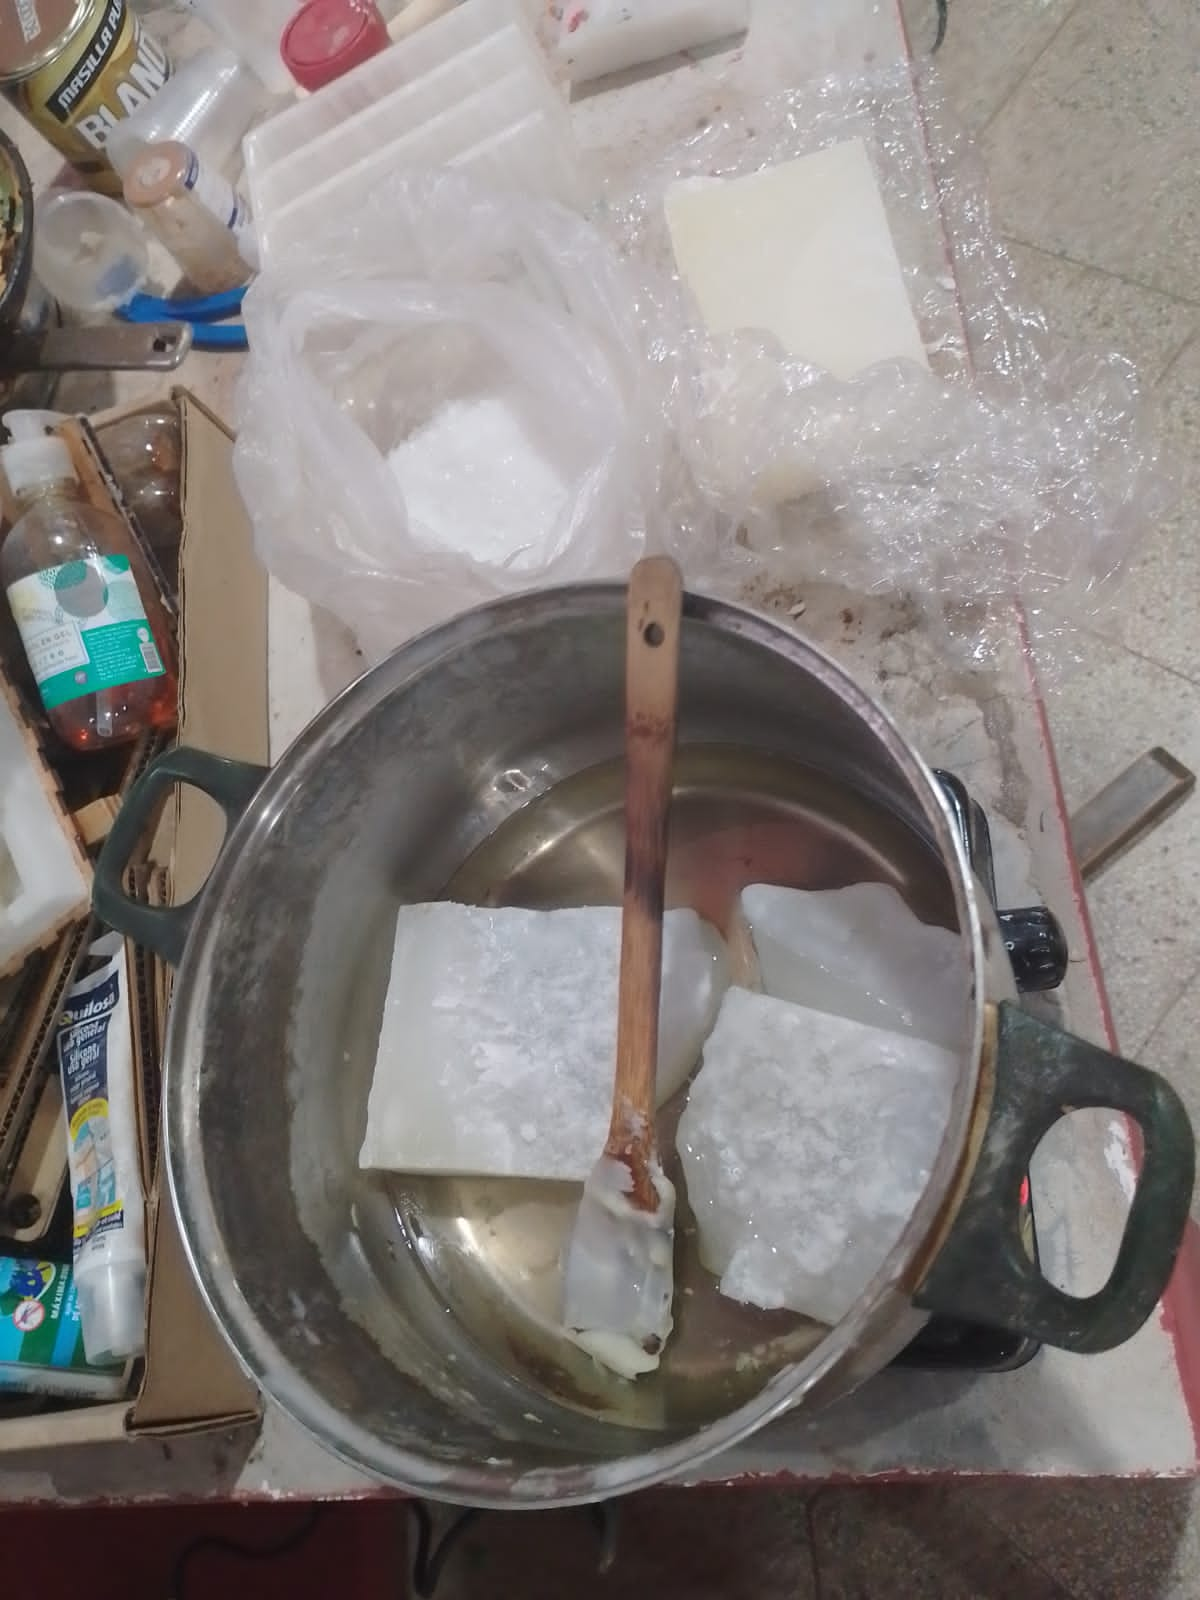
-
Then you mix the polyethylene
-
When it is completely mixed you stop the heat
-
Is not very exact. Sometimes, if there is too much polyethylene your mix will become very dense and white, you want it to be a little transparent so if it becomes too white, add more paraffin.
-
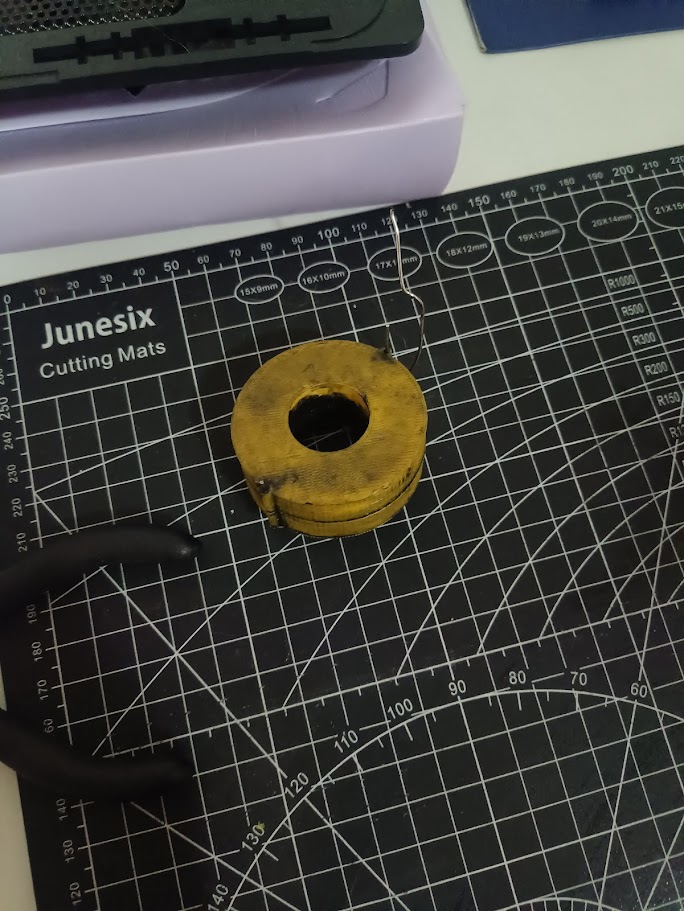
Using a mold of the size you need your wax to be, you are going to pour the mix into it. The mold was designed by one of my classmates and made with laser cutted MDF and we all used it.
-
Leave it resting until it hardens. We left it overnight.
-
When we came back to check on them, we noticed that it wasn’t flat on the top 😣 still, nothing a little machining cannot fix.
Knowing our silicone and resin materials and safety measures
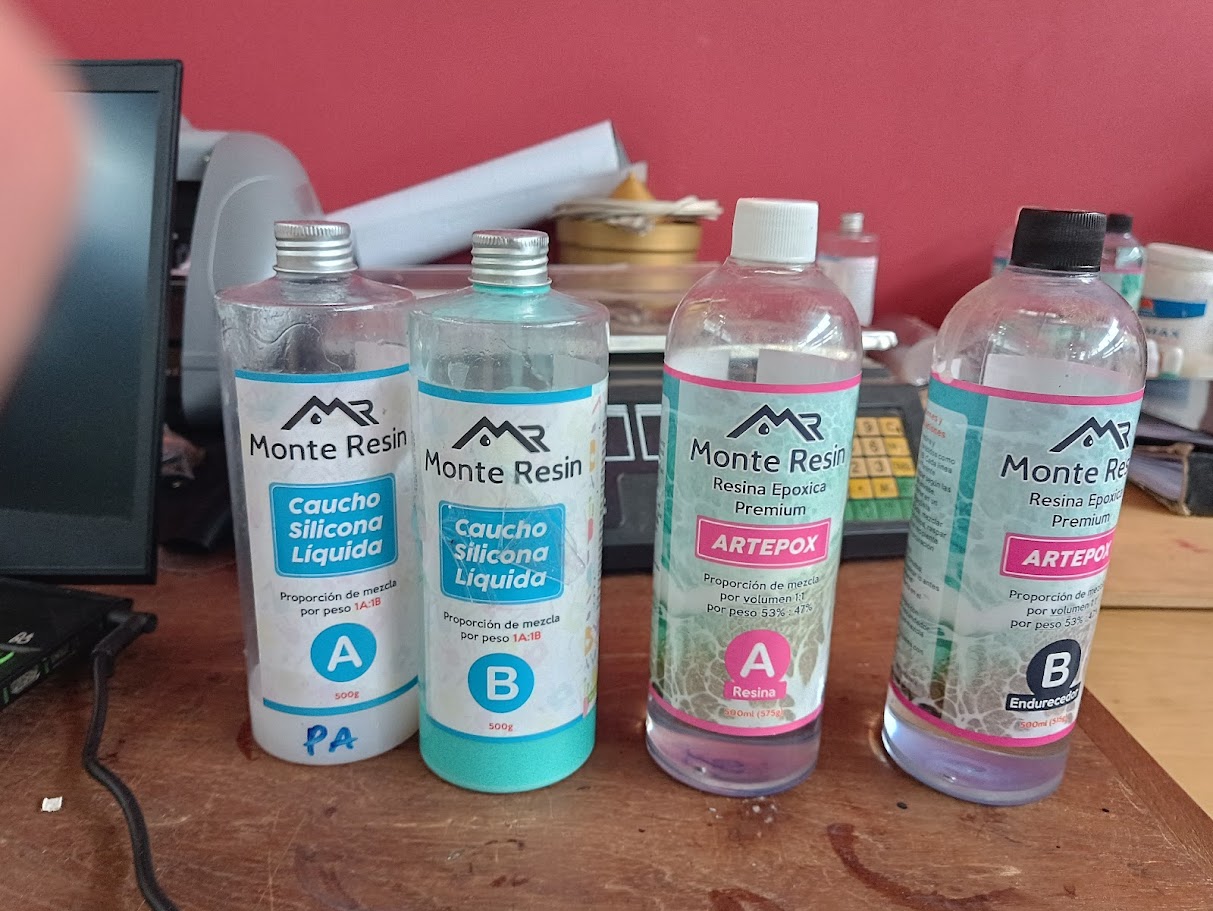
Silicone used
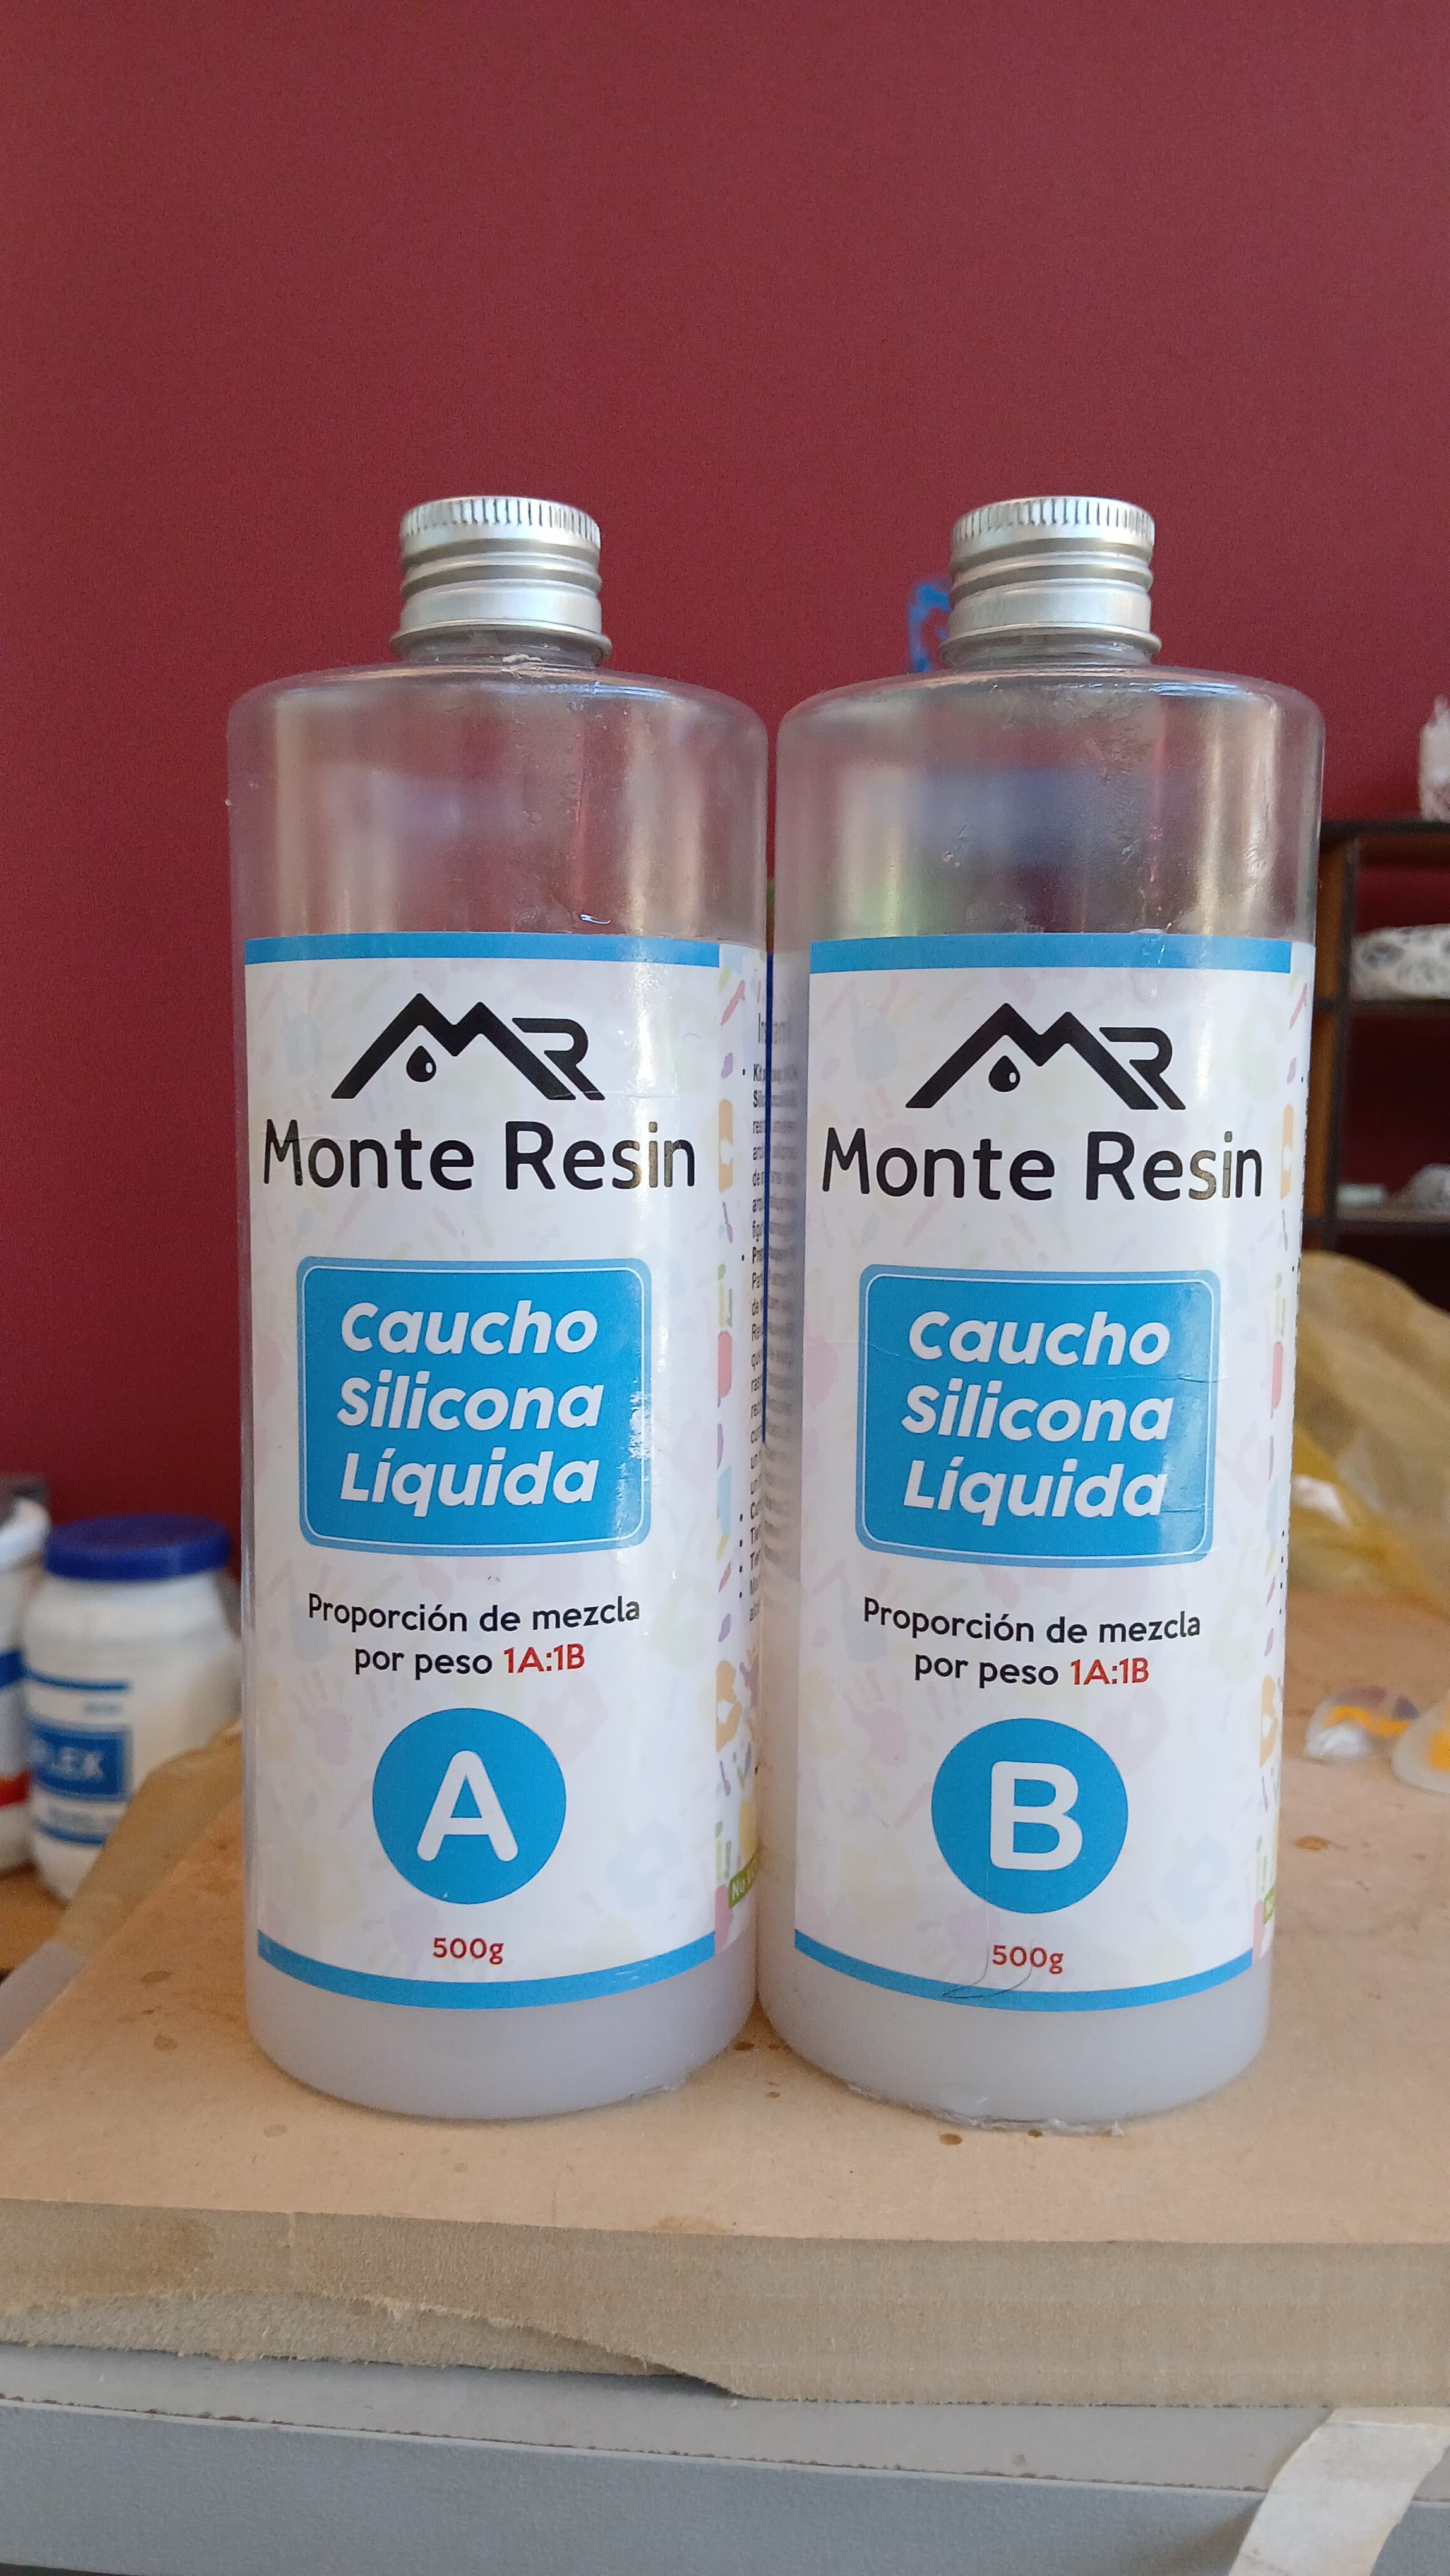
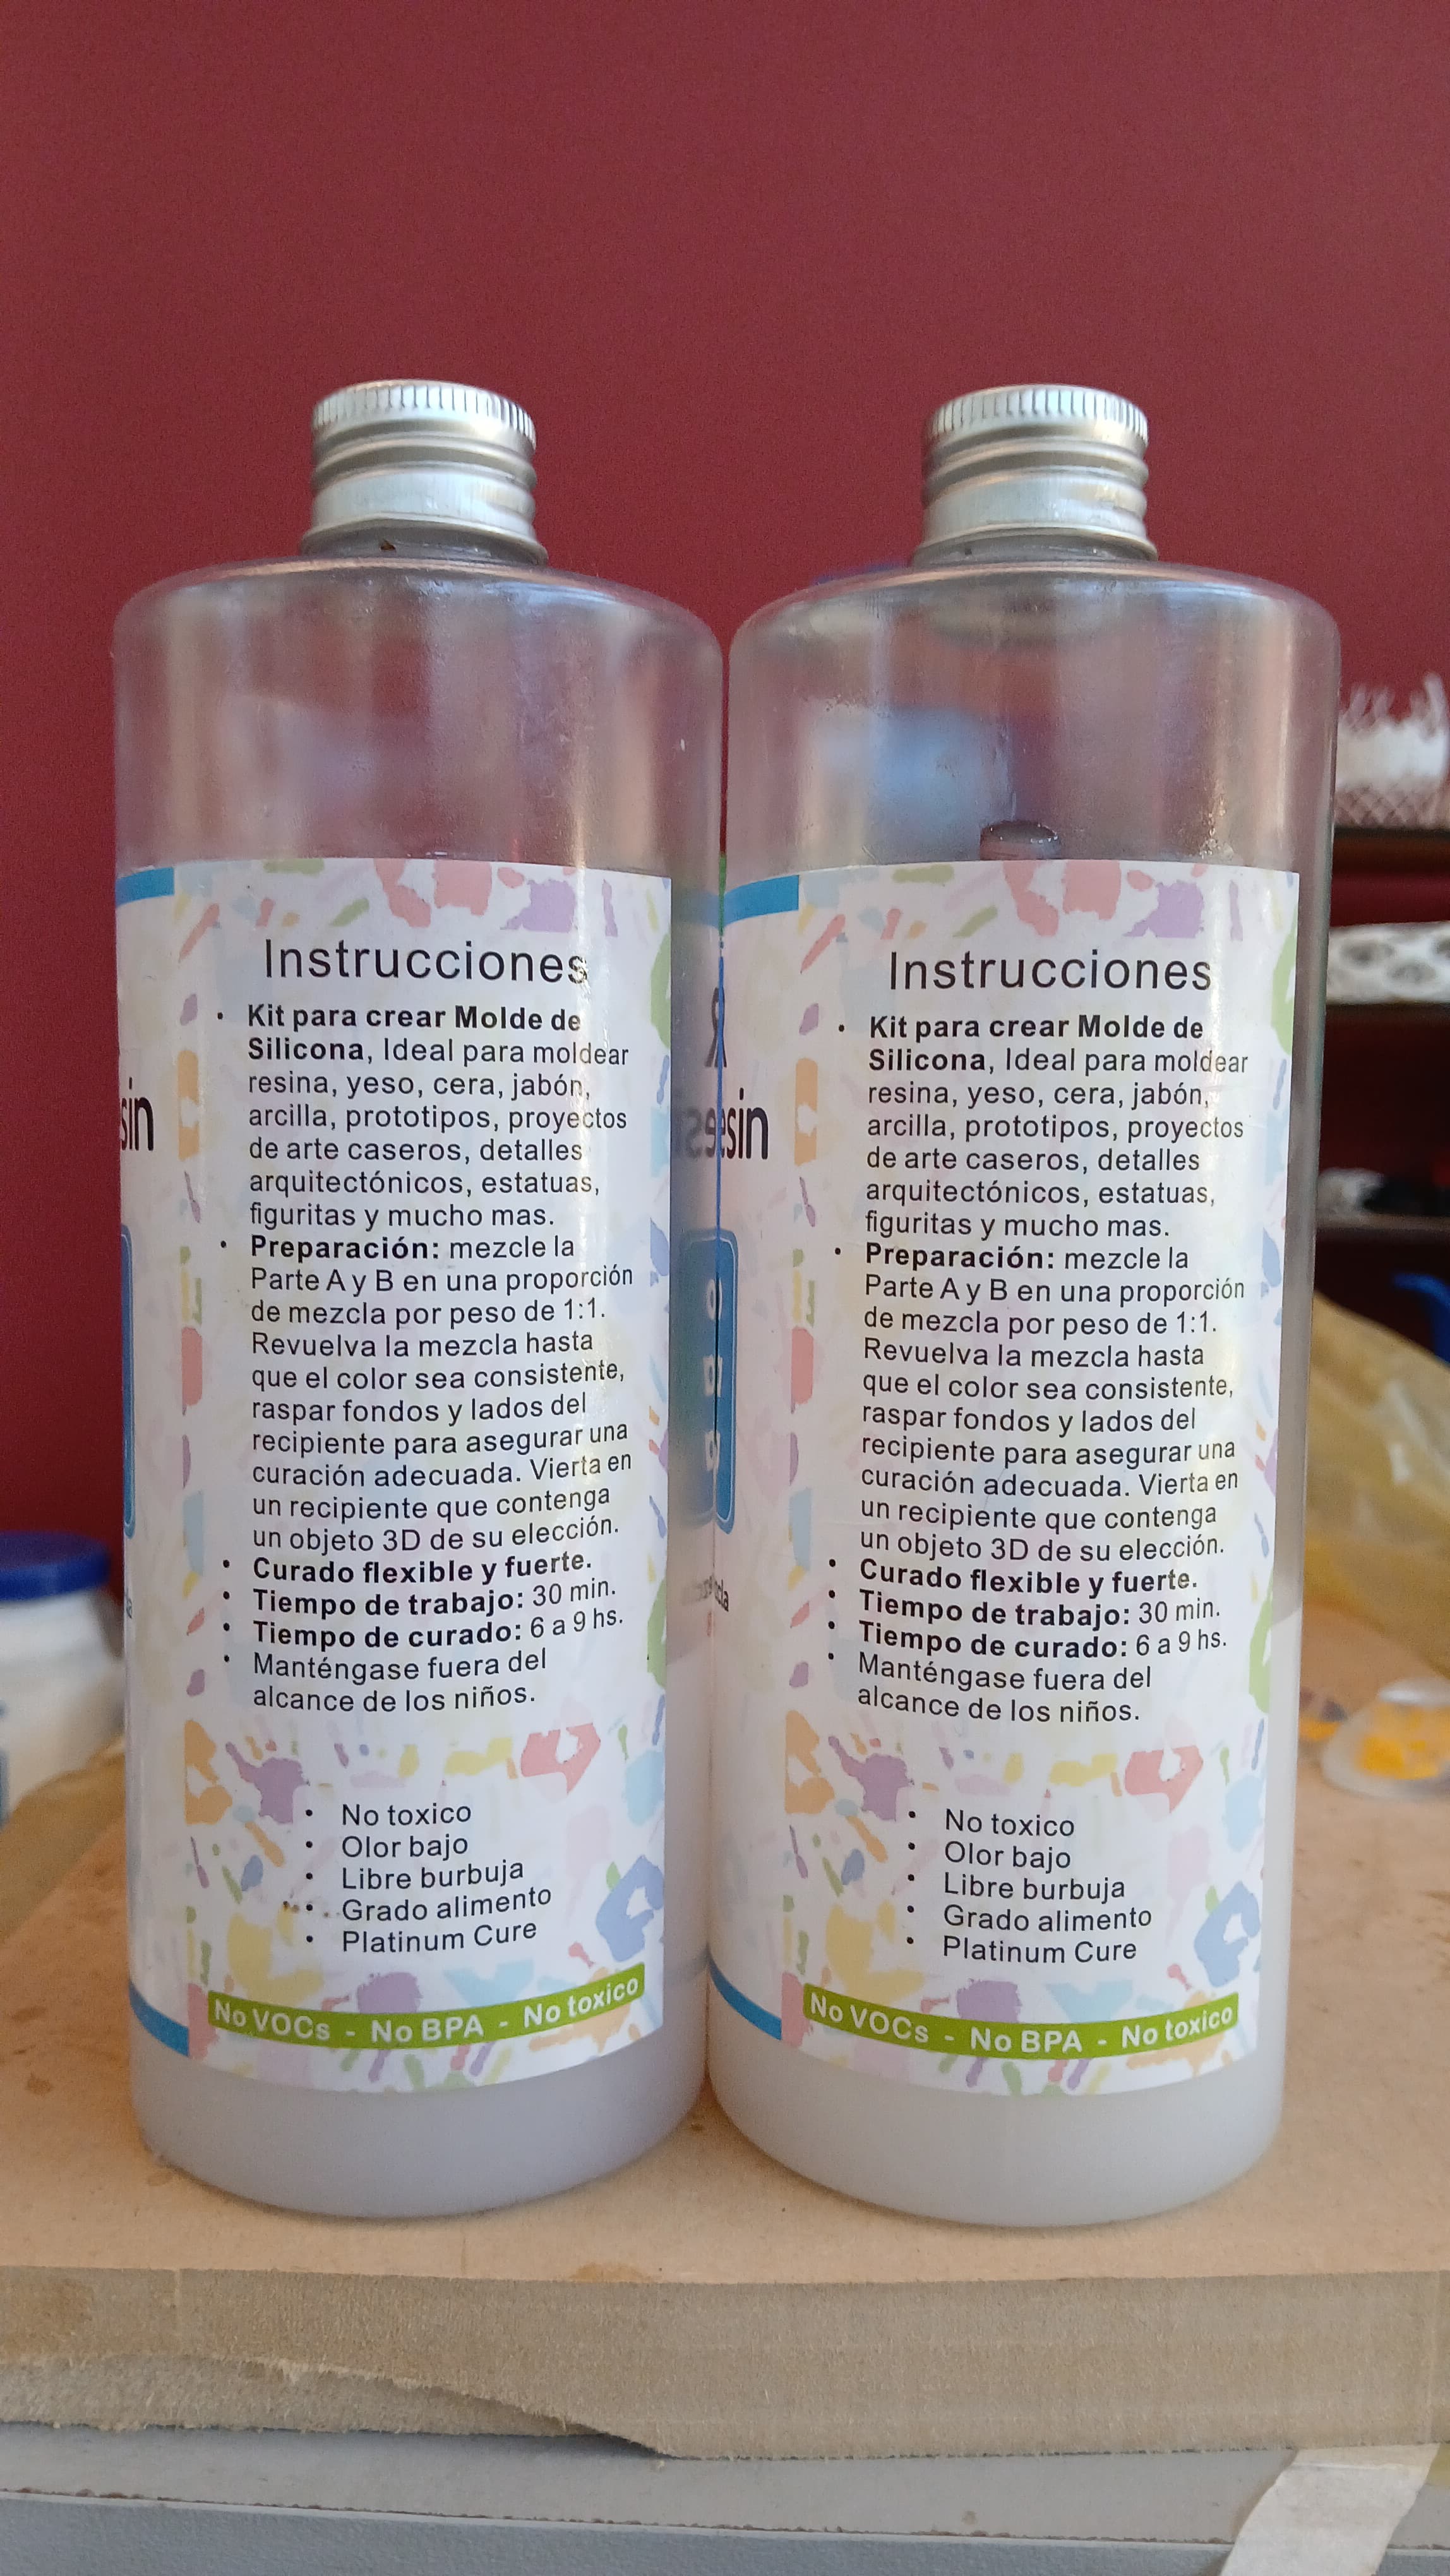
This material basically works with 2 parts, you have 1 that is the A part and the B part that you need to mix 1:1. Meaning same proportions for each.
It is ideal for many applications, like molding resin, wax, soap, plaster, clay, and even has a clearance to use in food molding because it is completely non toxic and also doesn't have any volatile organic compounds.
You prepare it by weighing both parts 1:1 and mixing them together until the color is the same. You gotta make sure you get to the sides and the bottom of the recipient so the mixing is a good one. The work time for the material is of 30 minutes and after you pour it in a mold the curing time is of 6 to 9hs.
It is non toxic, few odors, free of bubbles and it says it is "Platinum Cure". Always is good to still use with gloves to avoid a mess, but at the same time is not strict with this (doesn't say in the instructions). It is still good to mantain outside of reach of children and they should use it under adult supervision.
Resin Used
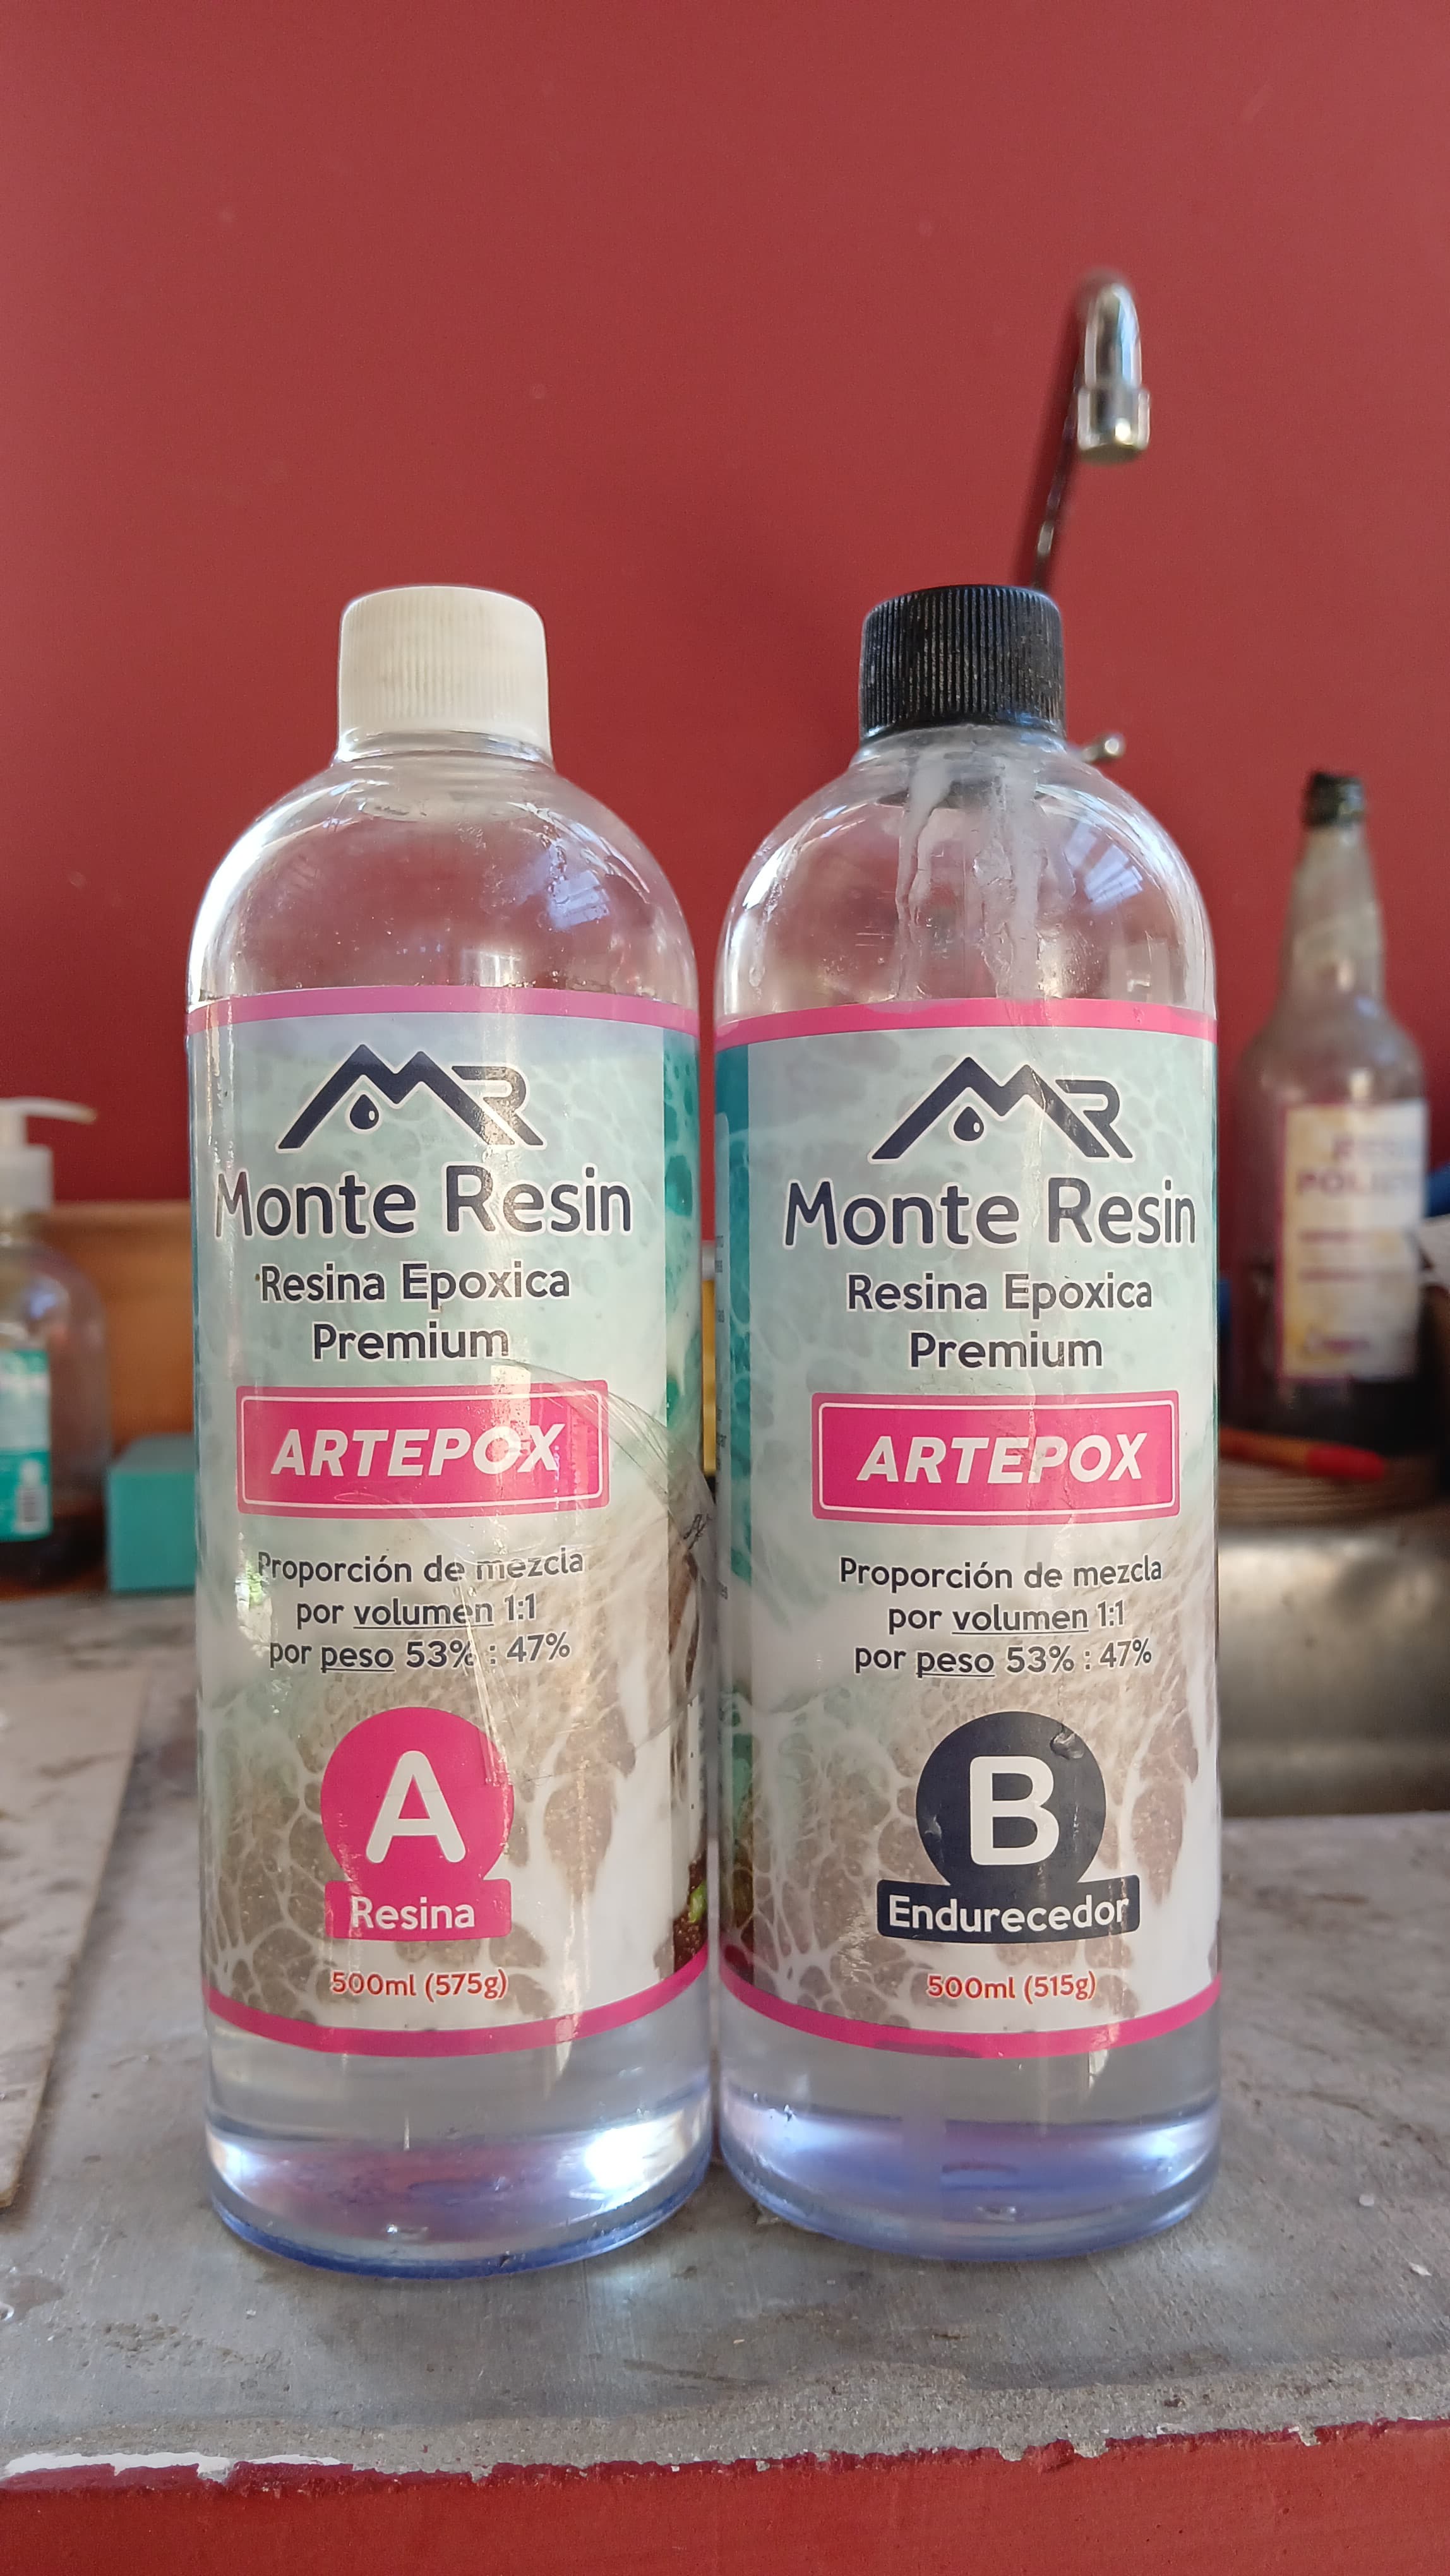
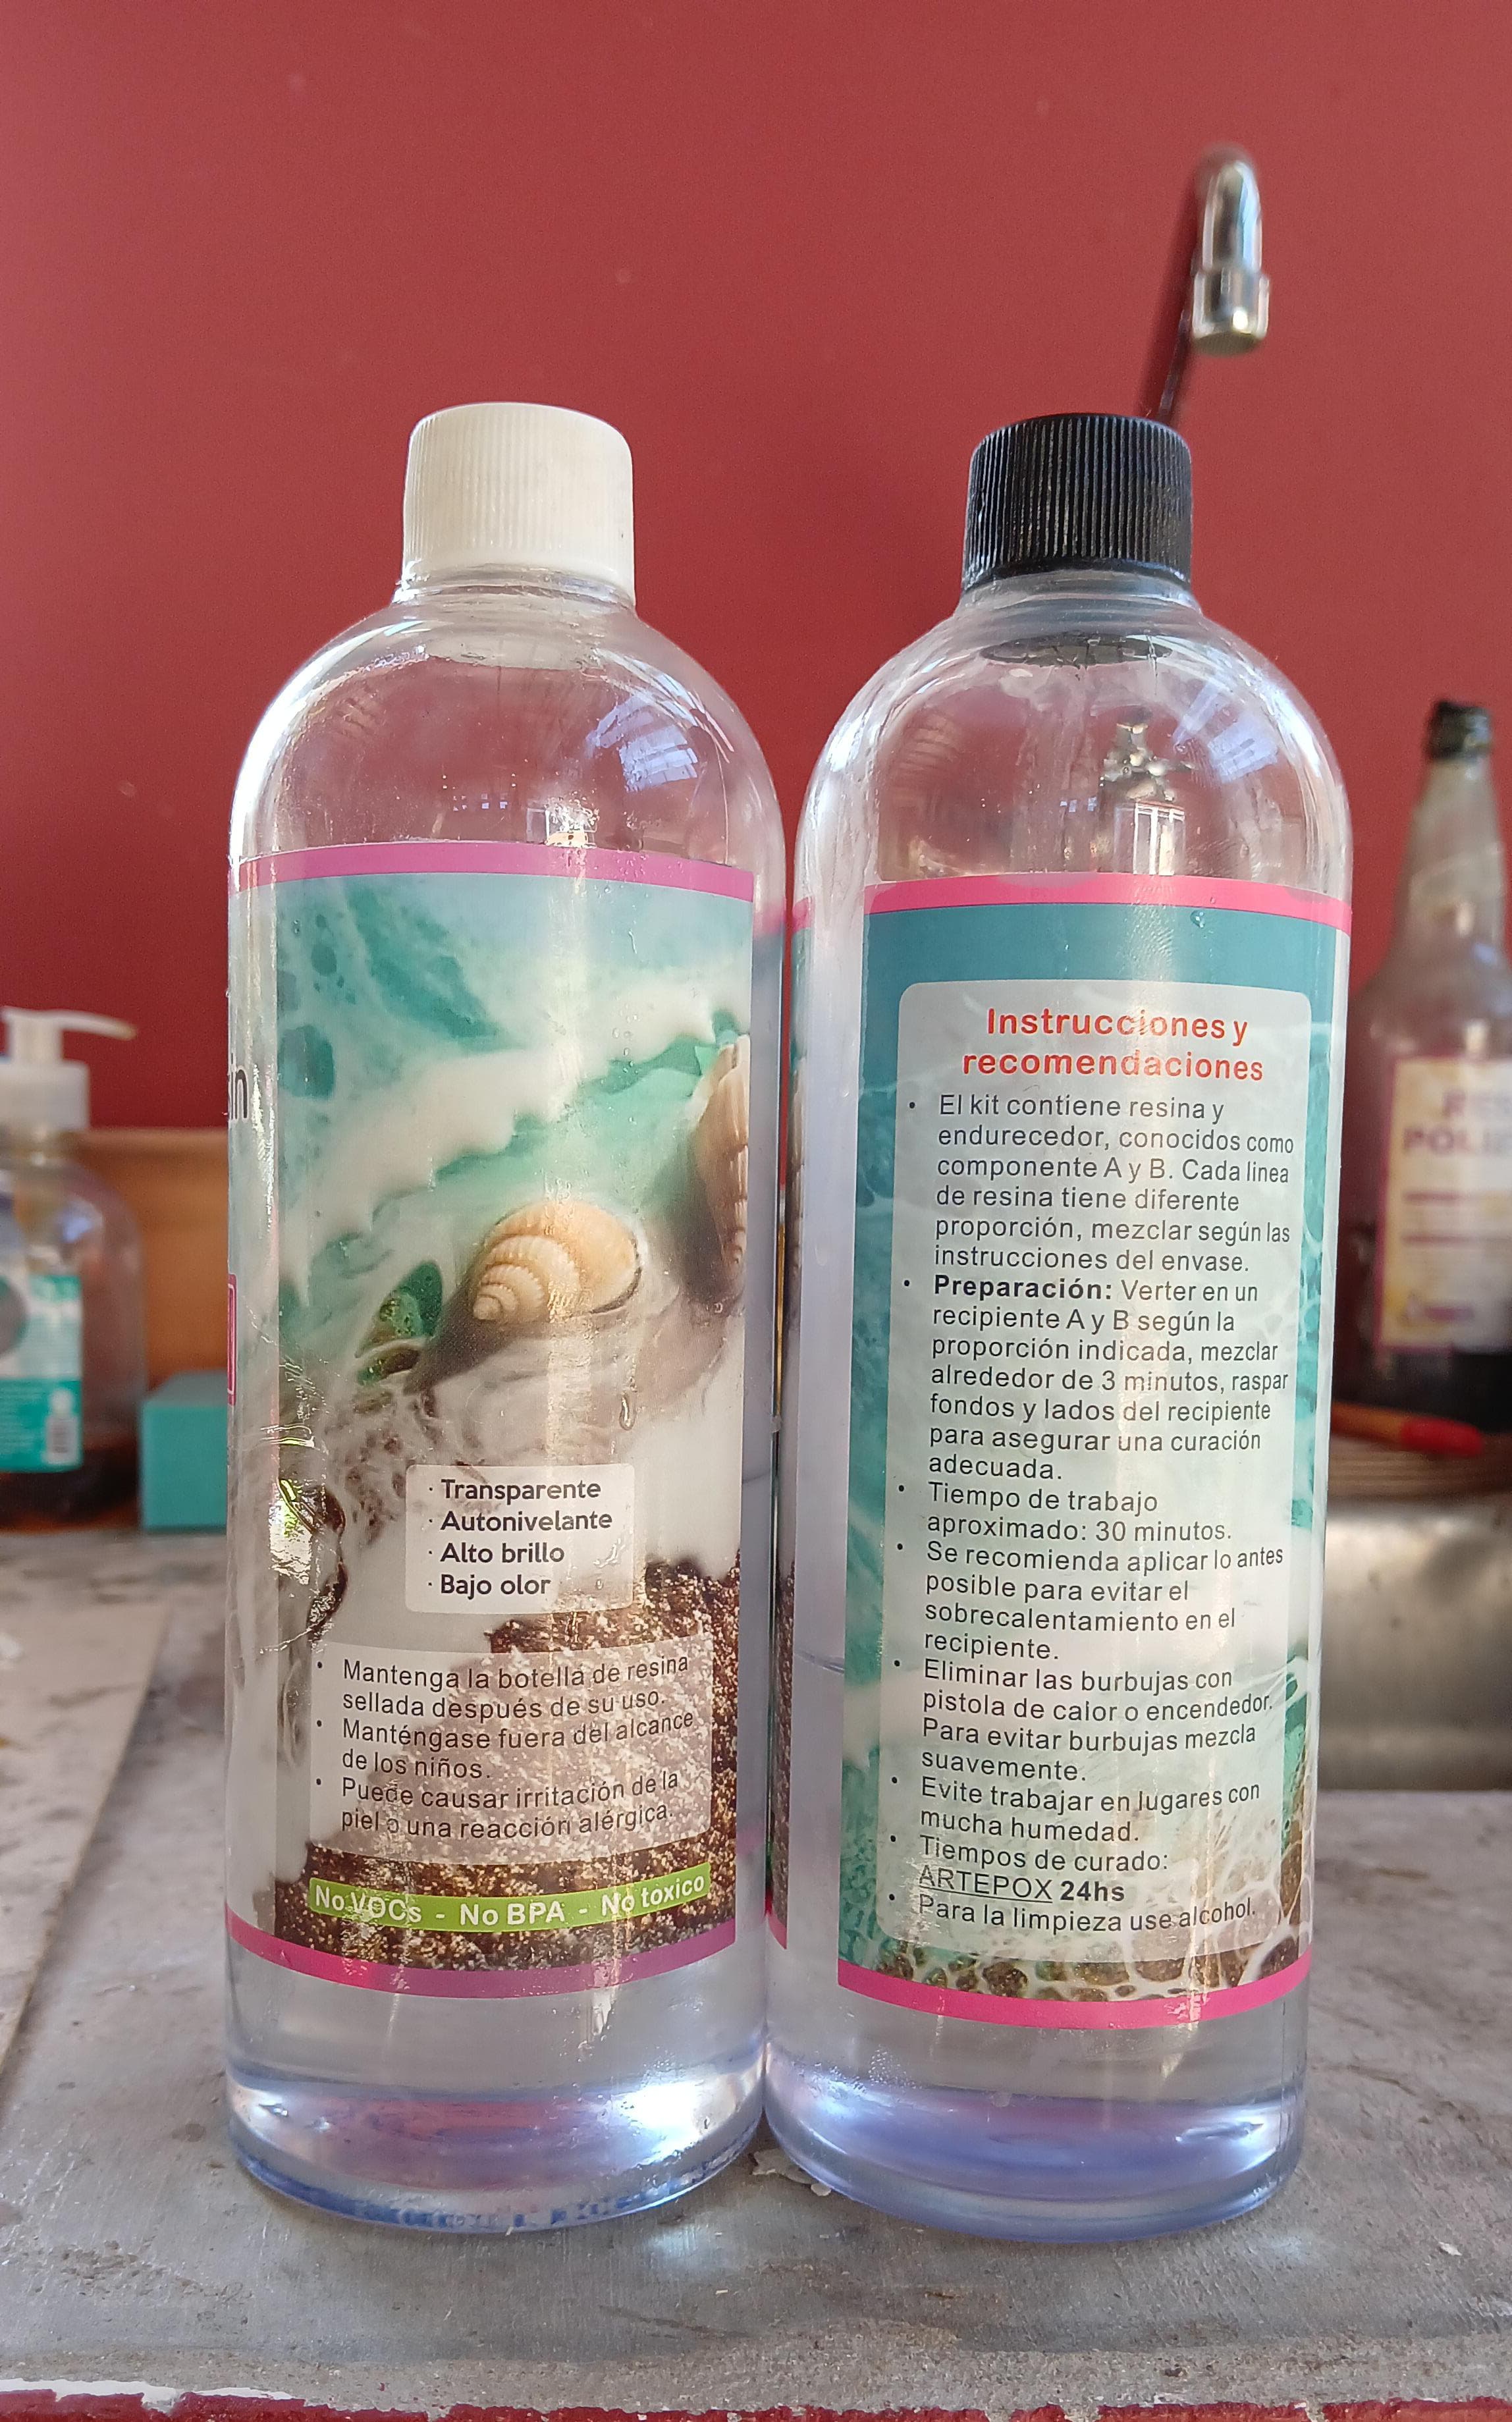
This one also works in 2 parts, A and B, but in this case, one is the Resin and the other one is the Hardener.
The safety rules in the back say to keep the bottle sealed after it is used, it has also a warning to keep out of childrens reach and states that can cause reactions in the skin like allergies (so it recommends the use of gloves to avoid this).
It also is explicit that again, it has no volatile organic compounds, no BPAs and also that is non toxic.
It is recommended to apply as quick as possible to avoid the heating of the recipient that you use to make the mix of the A and B components.
TO avoid bubbles it tells you to use heat like a heat gun and to mix softly.
It asks to avoid humid spaces when working with it. And to clean with alcohol
Working time: 30mins. Curing time: 24hs
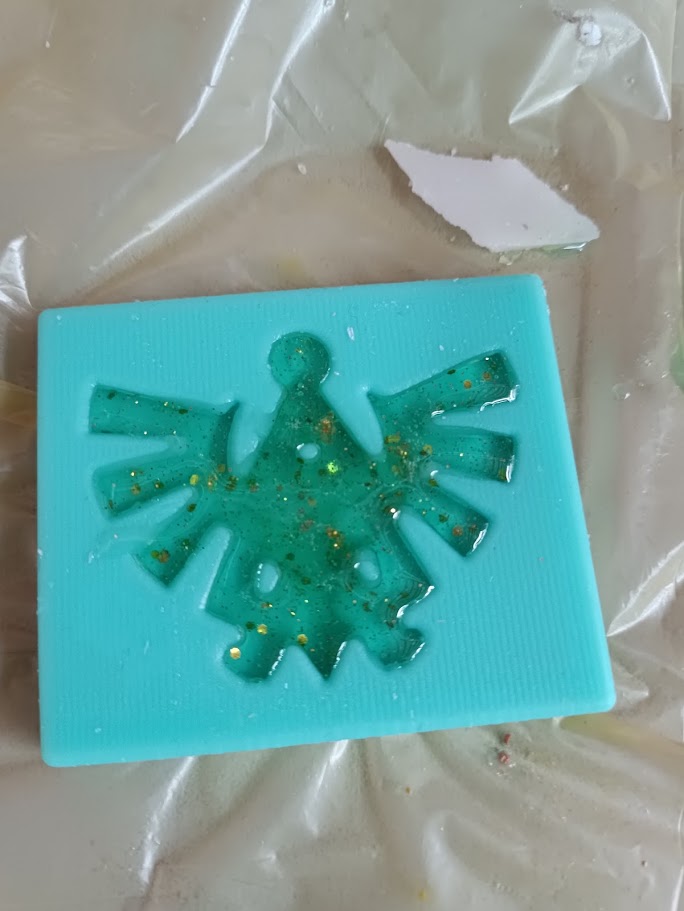
Making a Hyrulean Crest Keychain
-
Designing
Honestly, there wasn’t that much that I designed myself, I was very eager to test the whole process, since each step takes so long. So I kinda just went with an already existing file that I found and liked very much.
Here is the LINK (JEJE) of the OG crest.
-
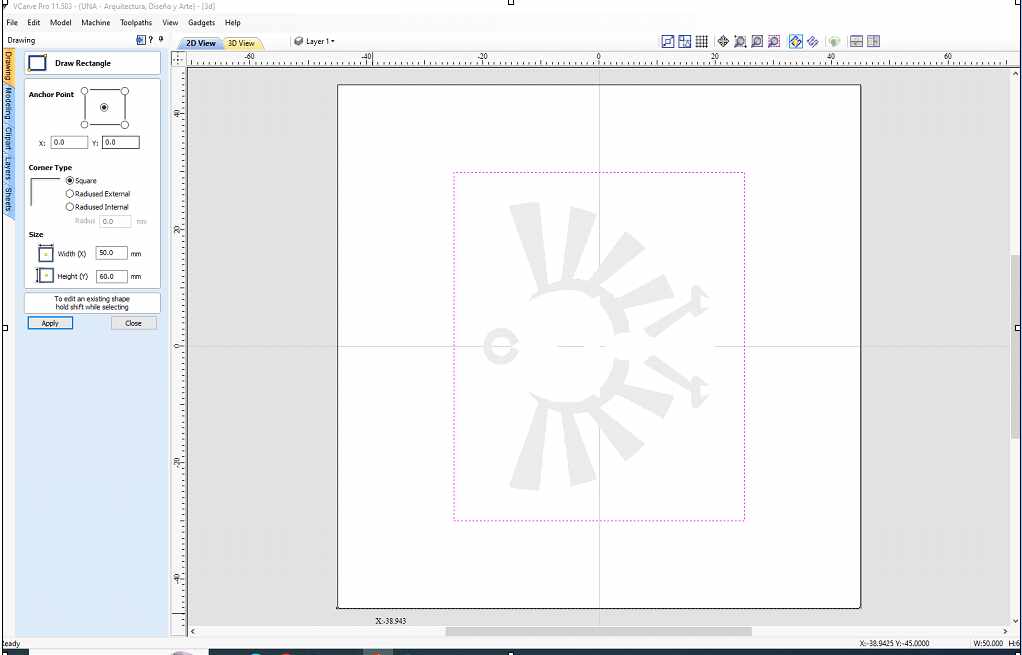
Generating the gcode
This is where it actually became very challenging cause I only used the VCarve once, and it was a simple cutting operation, this thing required many many things from me.
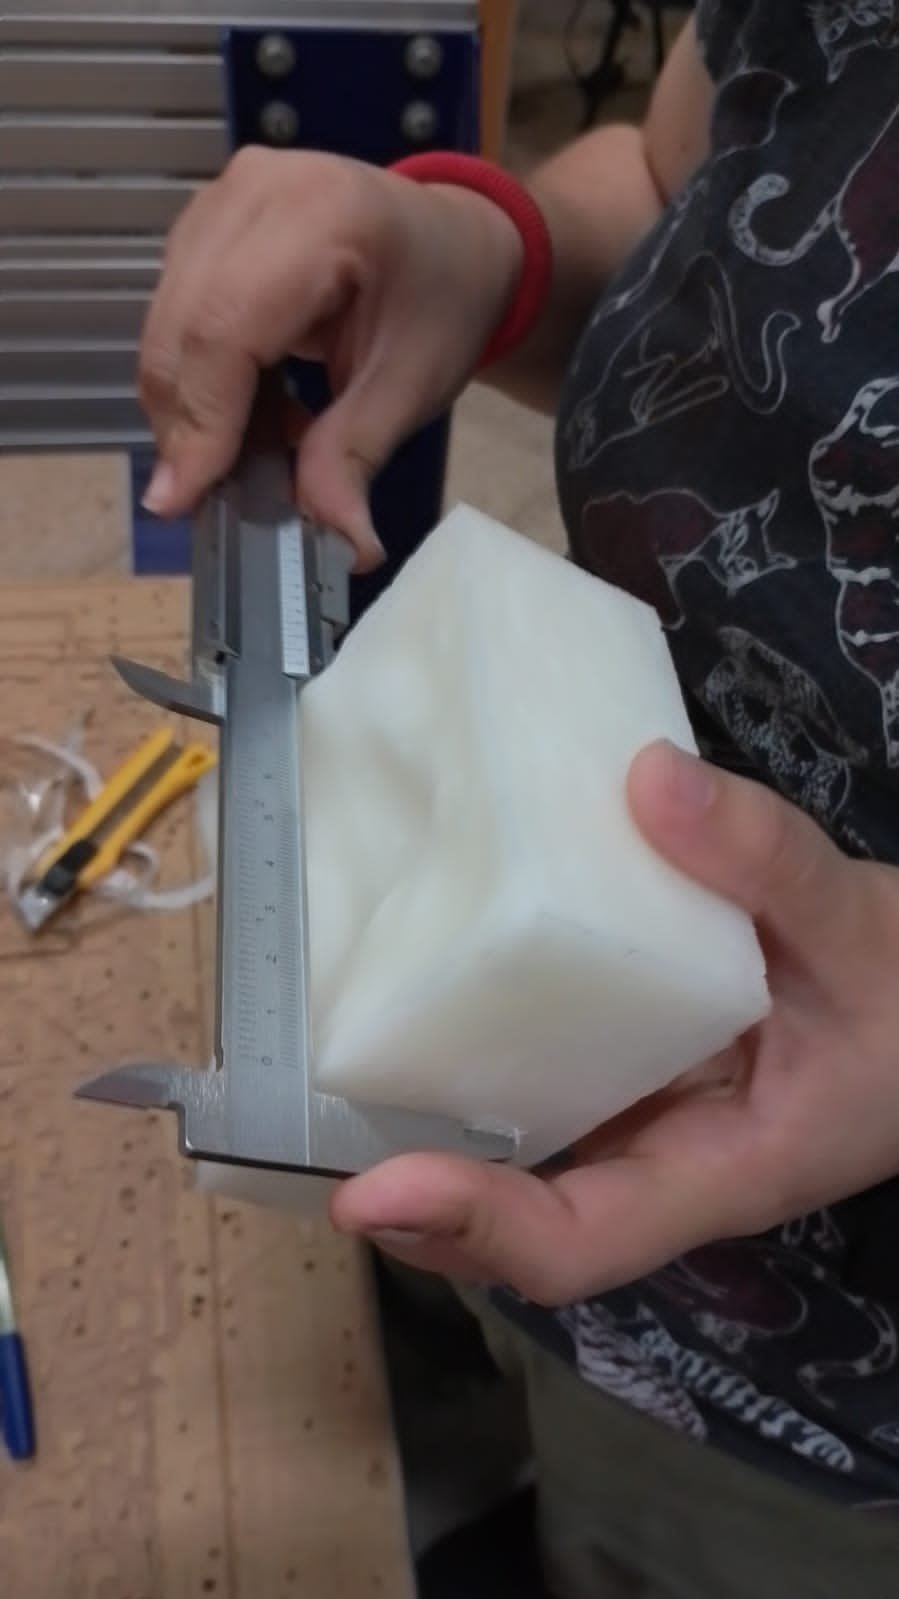
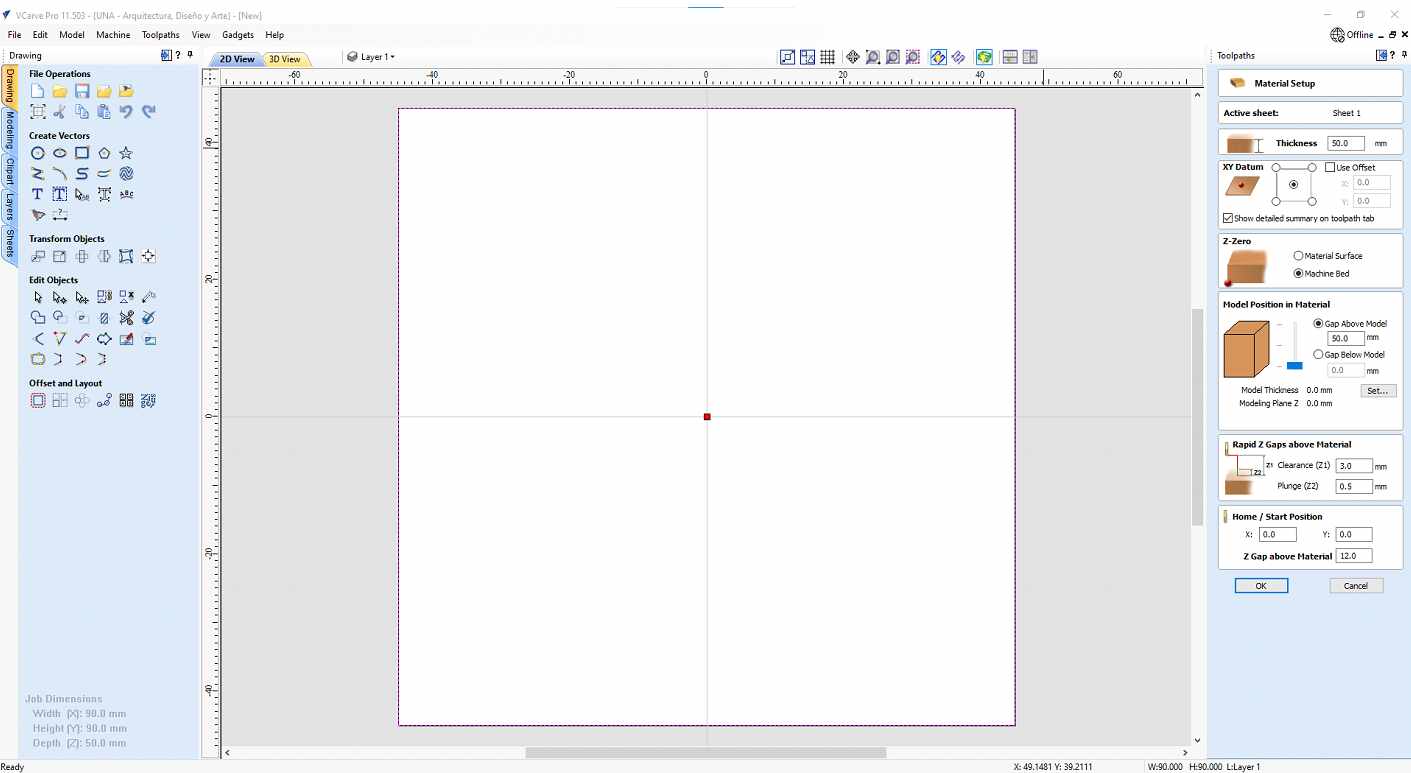
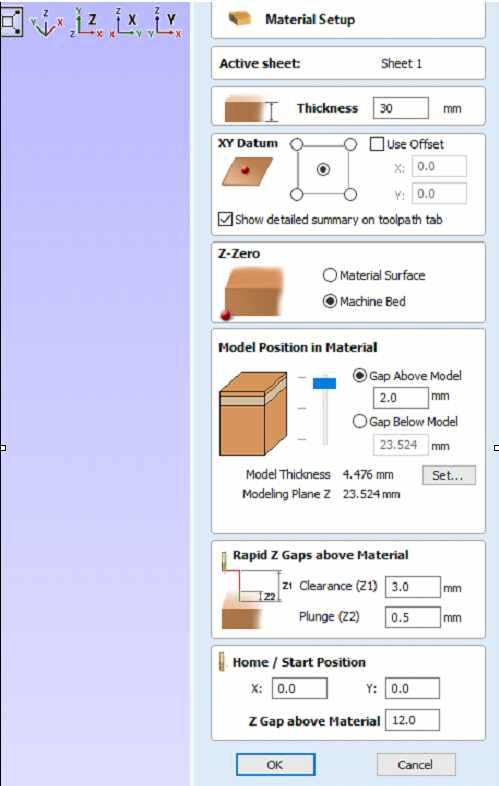
The first thing was making sure how big my machinable wax was. I measured everything to put those things in the setting up of my cnc job.
After having the sizes, I had to do 2 jobs. First off, taking out the part of the wax that was not flat, so the mold could actually be made correctly. So this was a process that we did with the cnc before actually making the positive.
The process in Vcarve is pretty long, I have some pictures to help me explain this a little better.
-
First you gotta measure how big your wax is and put the size of your block of wax as your dimensions in Vcarve. We ended up with 90mmx90mm in xy and 50mm in z.
-
Our design is very small in depth, but we are gonna leave a 20mm depth.
-
The origin of the work will be in the middle and in the base of the bed
-
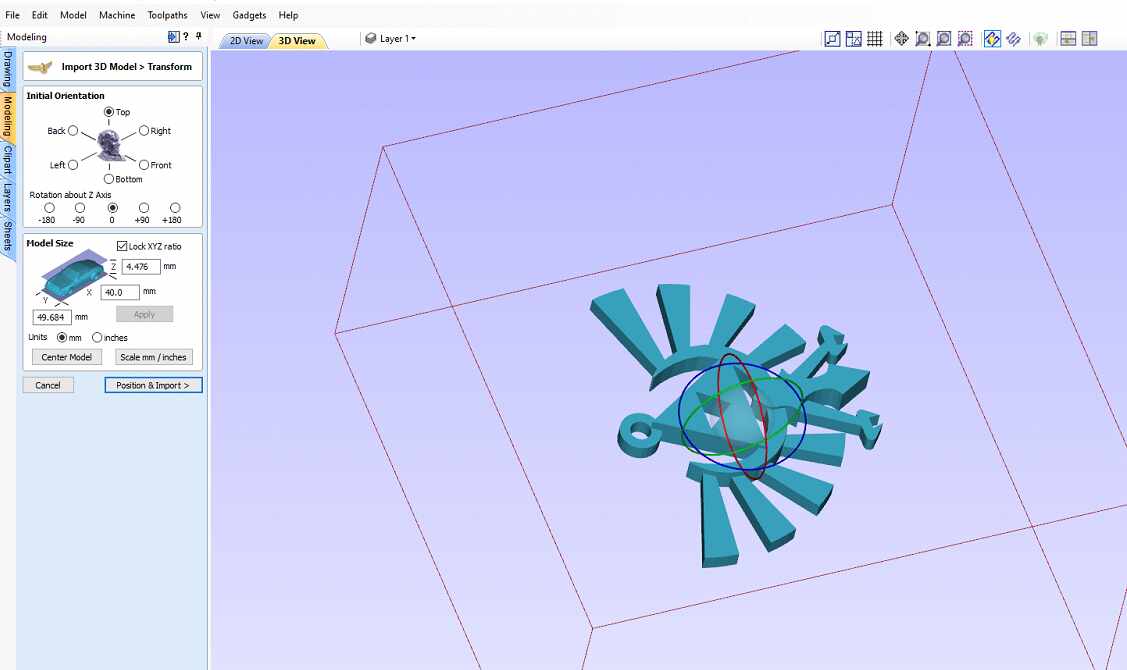
Now before actually doing the design, we are going to mill the space that was not usable in the wax because it had a rough finish on the top.
-
We import the 3D
-
The first job is to do a square that will contain the whole thing for our silicone to have a space to be.
-
You set the values that the material needs to be cut like the pass and the spindle
-
You make a square that will be milled with a vector around the model.
-
You just need a rough machining for this part and the drill is a ⅛”
-
The Z level when you are doing the actual design needs to be put so it is done like a stair, and it will look smooth if your design is mostly straight.
-
If the design is not straight, you use a 3D raster.
-
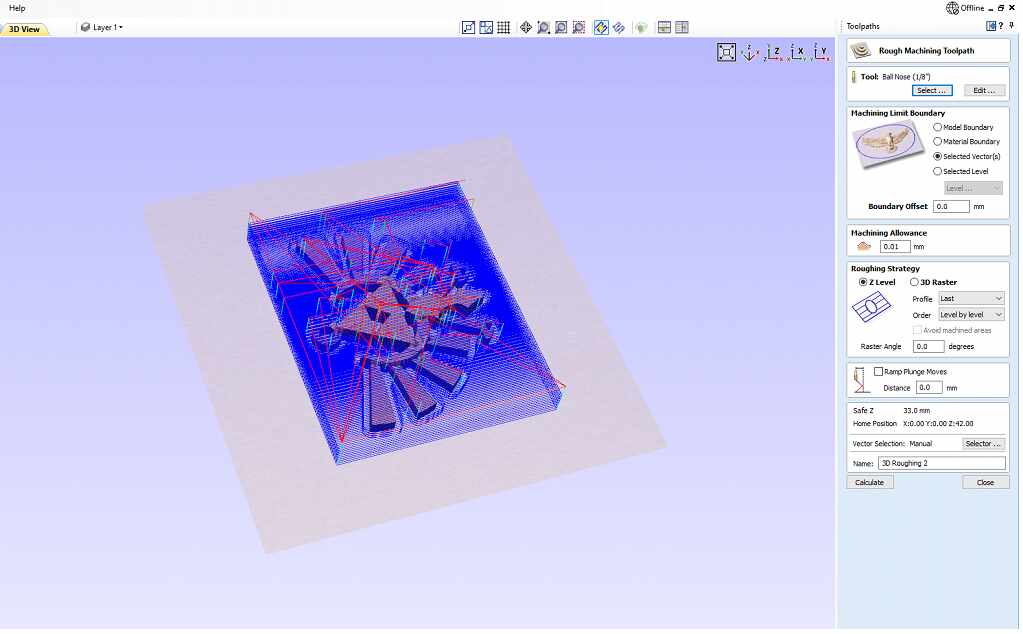
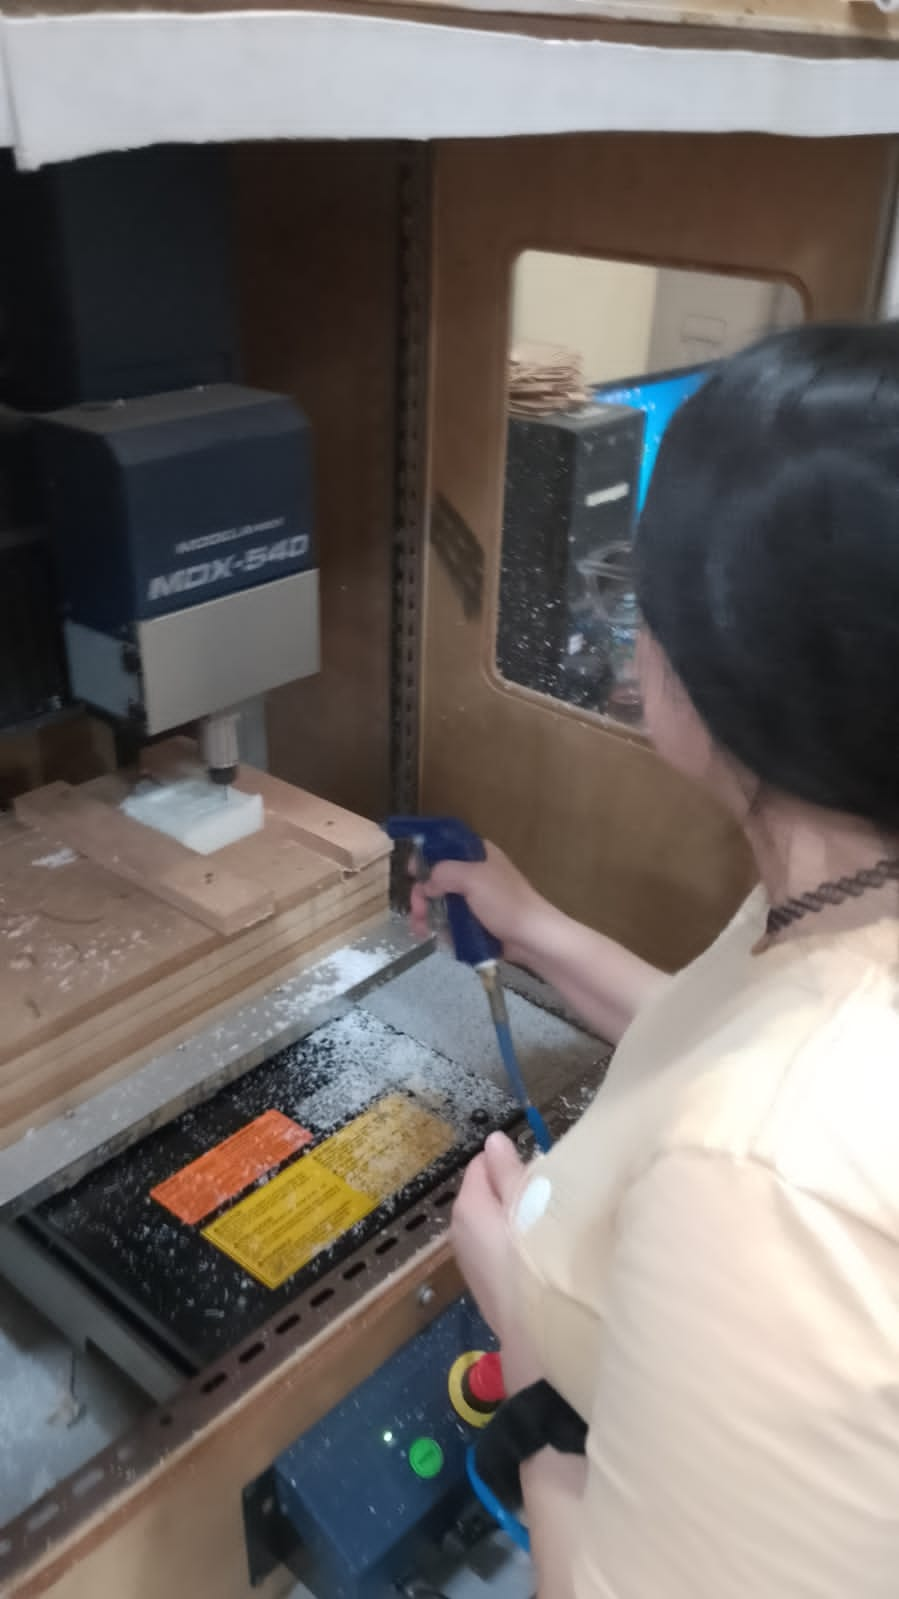
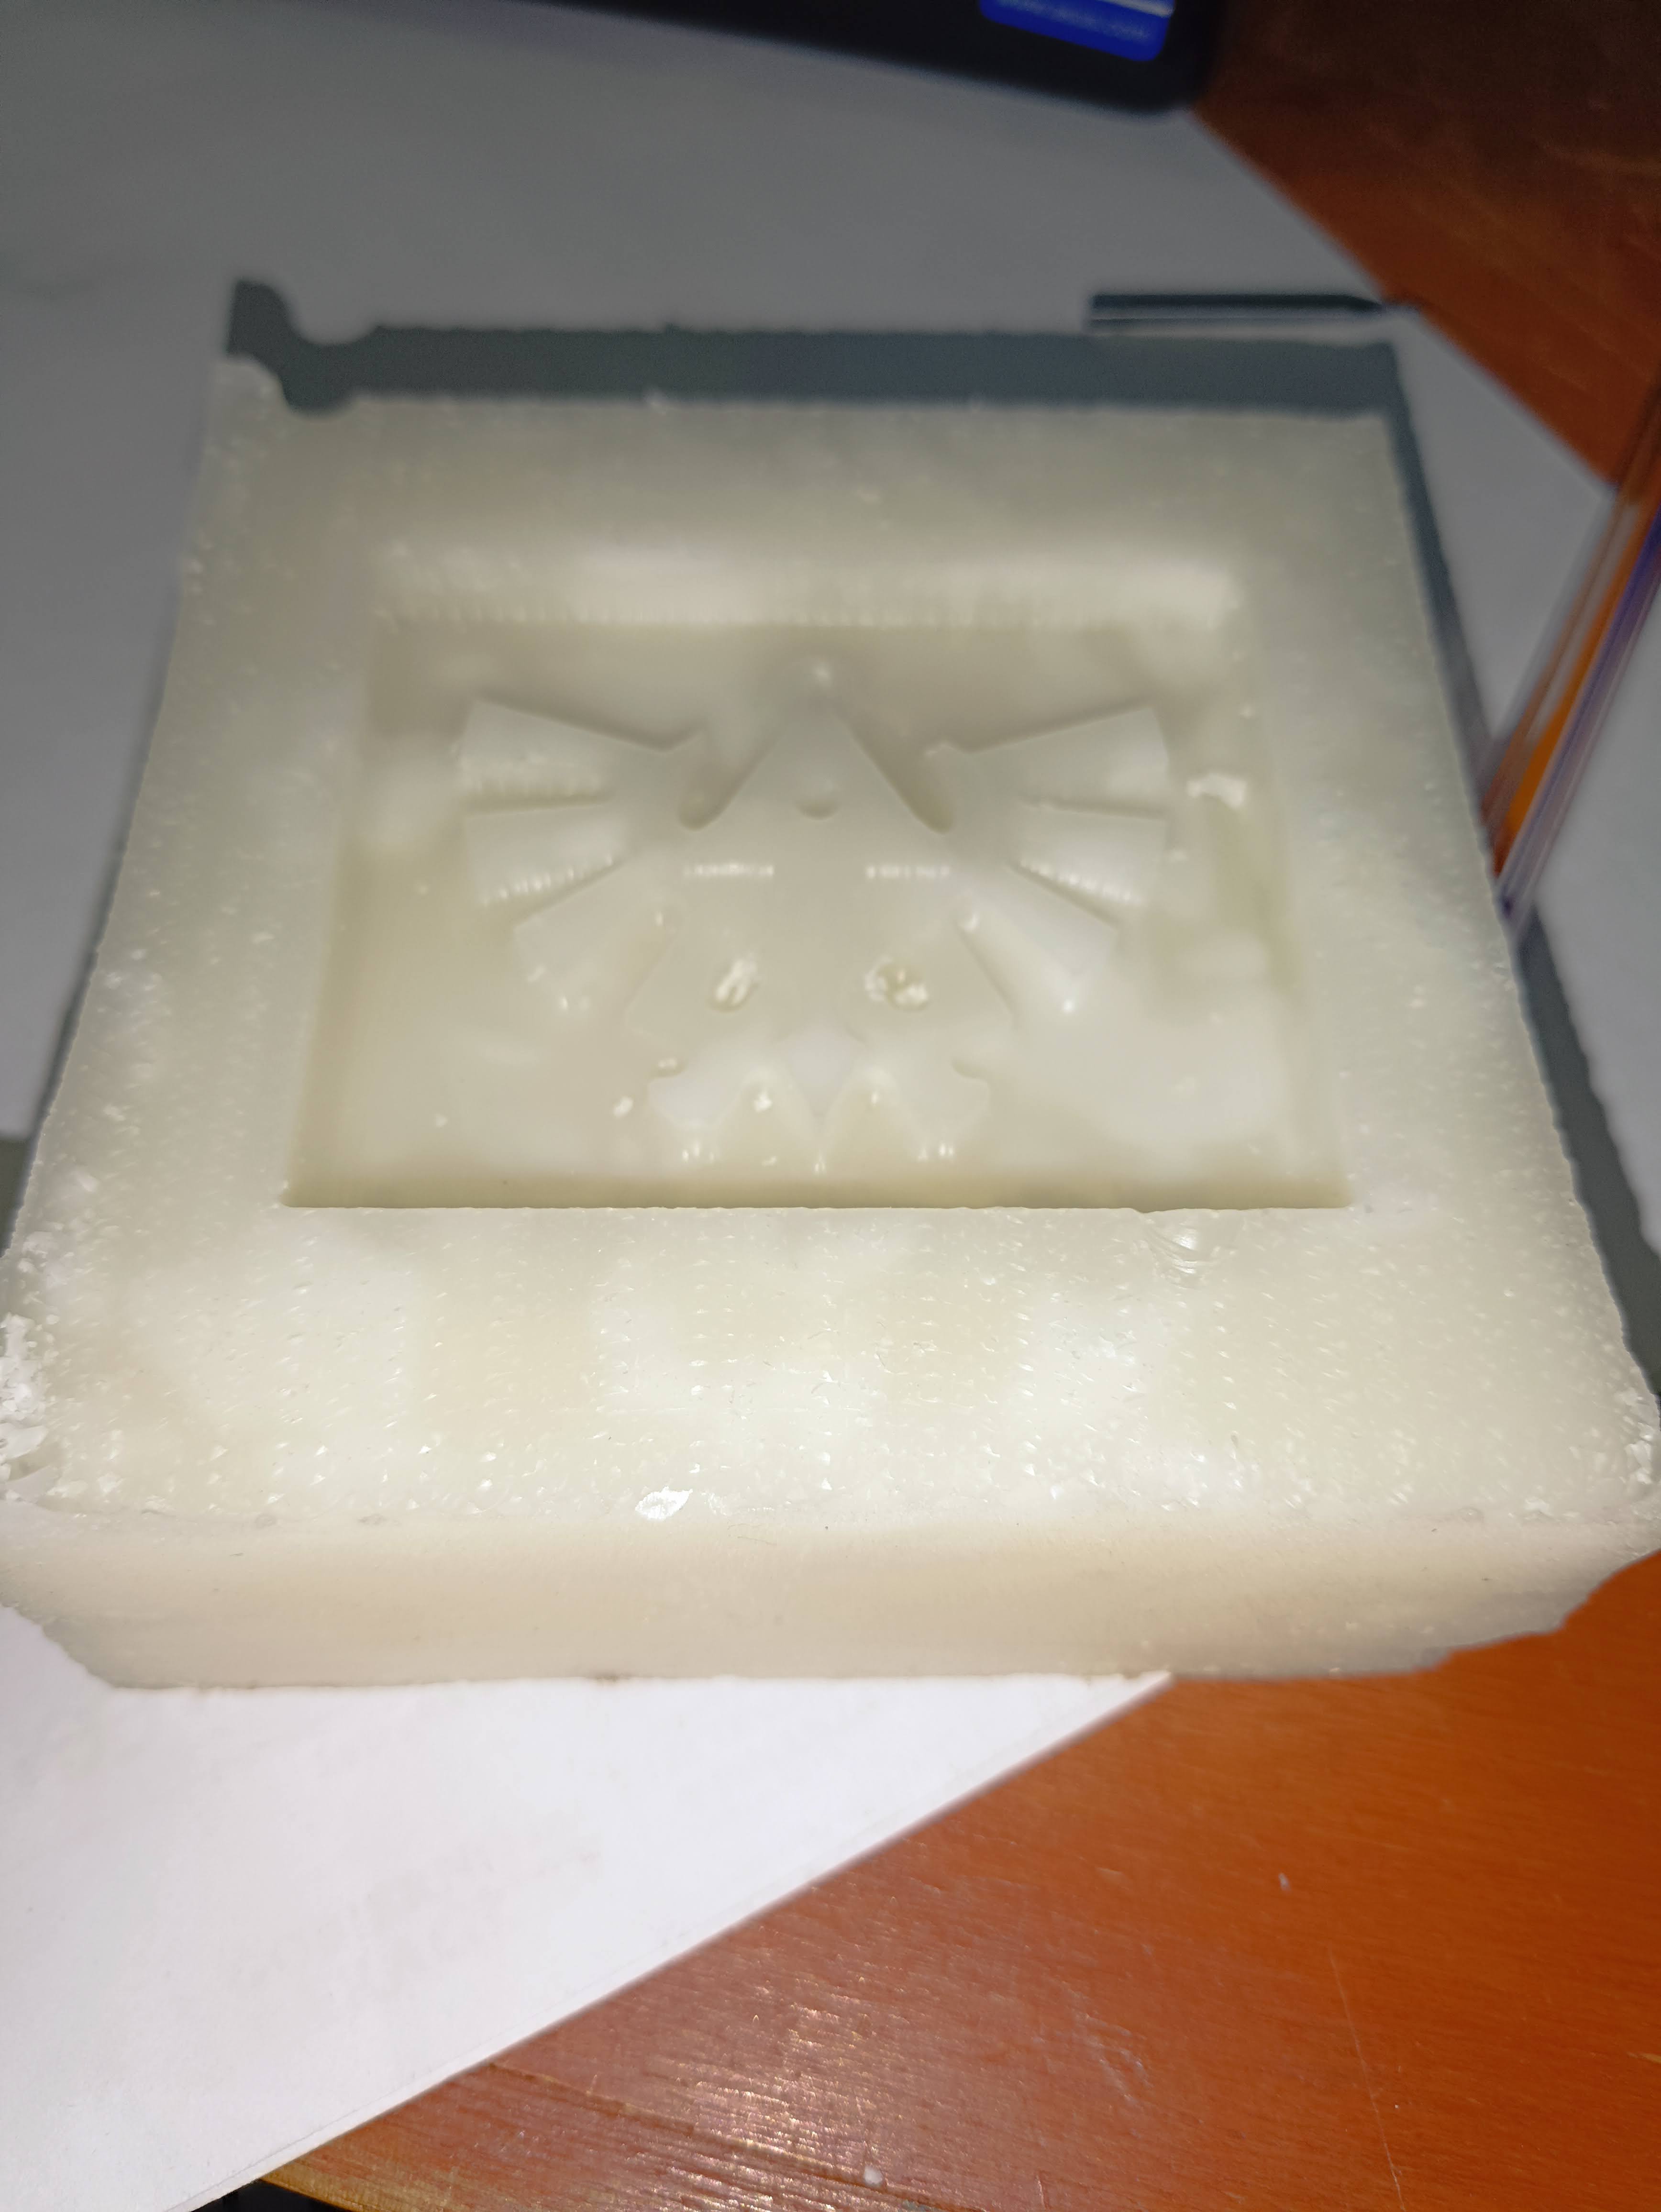
Making the Wax Positive
Then going into the CNC, we used the MODELA to work with the wax, and honestly, it was not smooth. Making a good way to help the wax stay in place was a little complicated. At first I just used the regular double sided tape.
We decided to press it with some wood blocks on both sides so it would stay in place. But there were times where the wax still moved and made the whole process be cut short because the Modela had an emergency stop because the spindle got stuck inside the wax because of the movement. This happened to me 3 times. I guess I’m not great at making a good press with the wood (in other words I'm super weak lol).
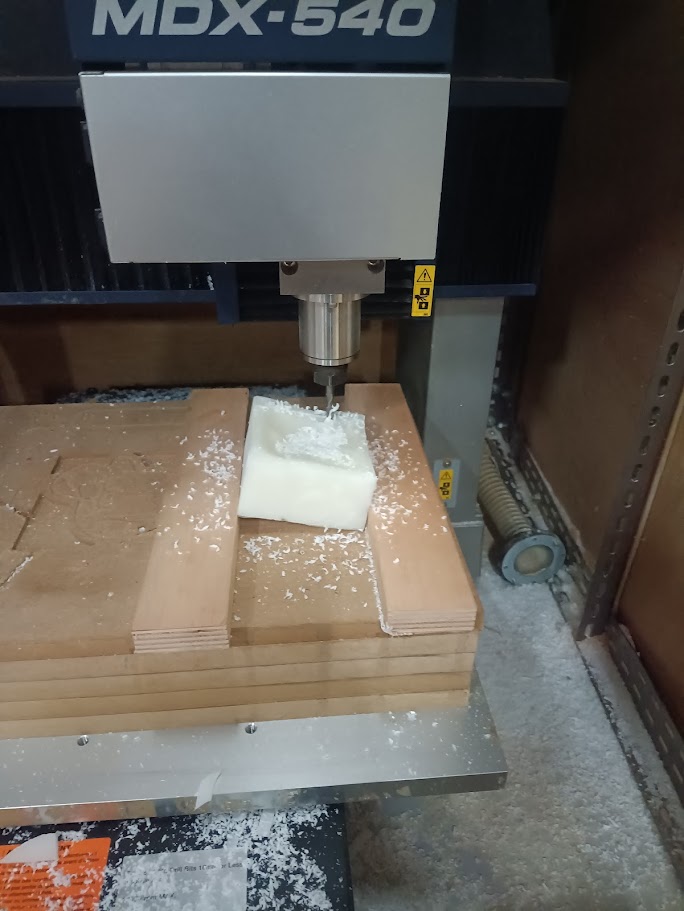
After it finally was properly placed.
The whole process took a little while. Since my model was not too intricate, time wise it wasn’t too bad. Still, it has been brought to my attention that I could have done one more job for the positive to have even less lines of the mill.
Here is how the wax positive looks like.
-
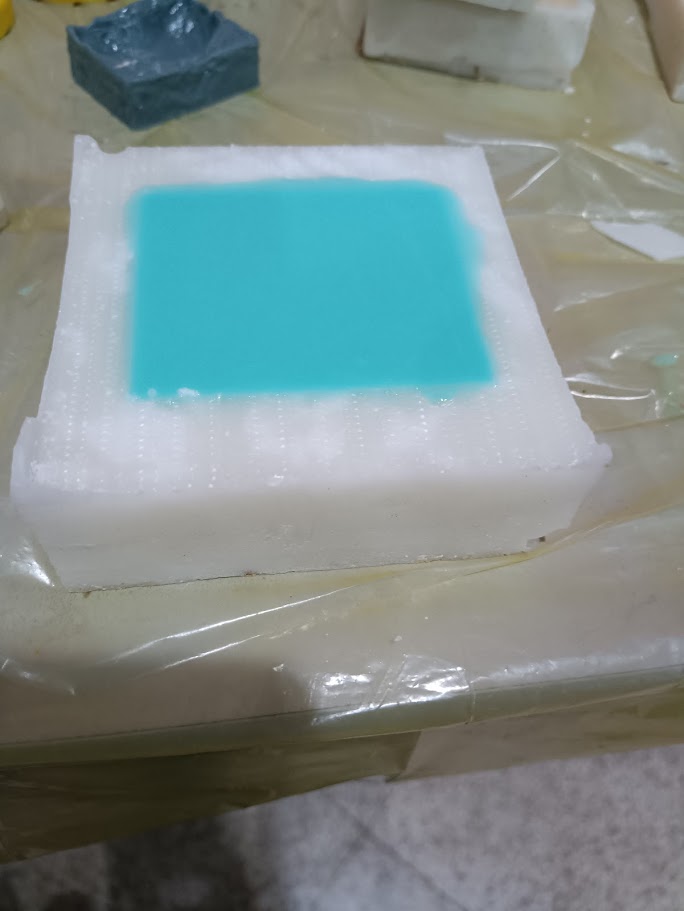
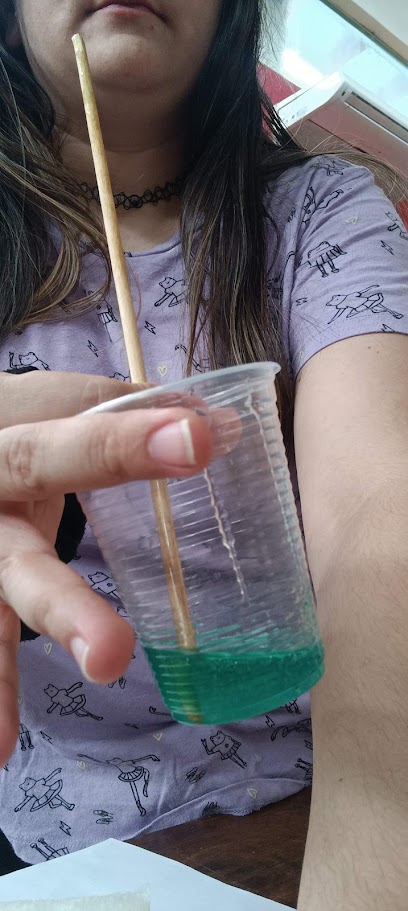
Making the silicone Negative
Working with silicone is pretty easy.
I made a mix of 25g of the A part and 25g of the B part and it seemed like enough, my positive wasn’t too big.
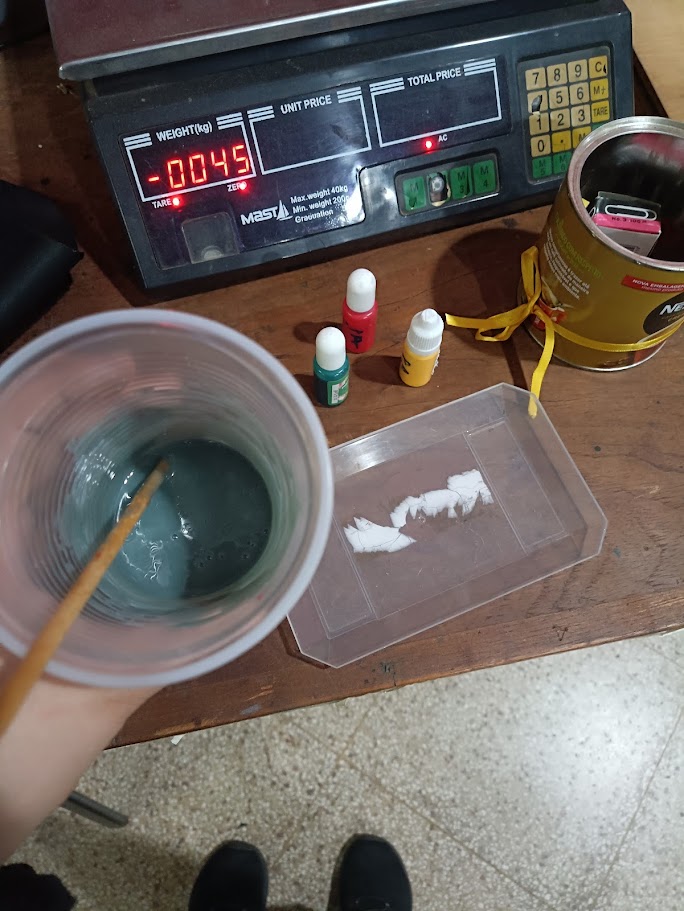
I mixed it together and poured into the wax slowly so it wouldn’t have many bubbles and left it to cure overnight.
-
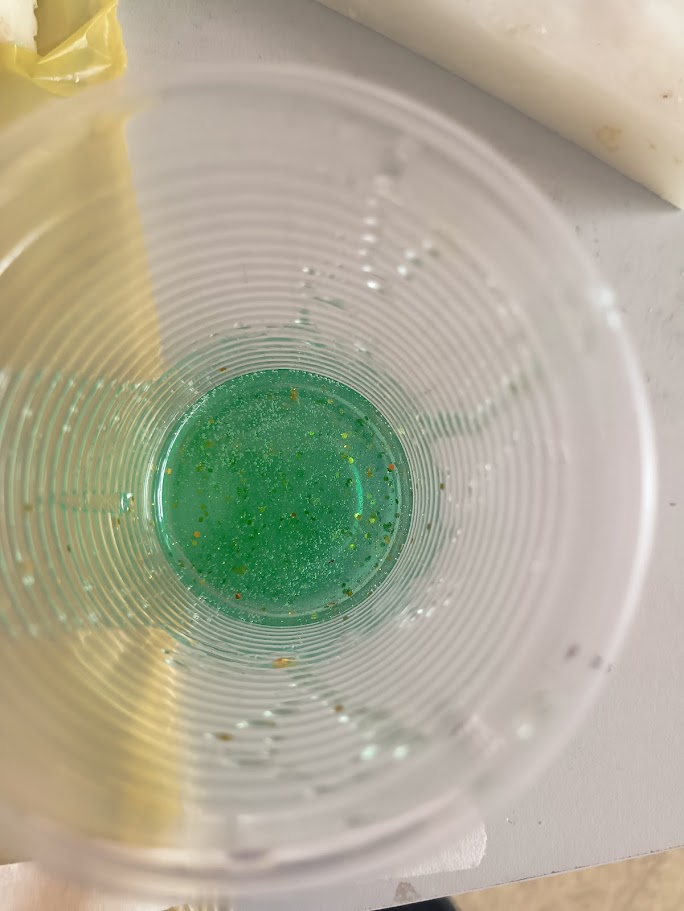
Making the resin result
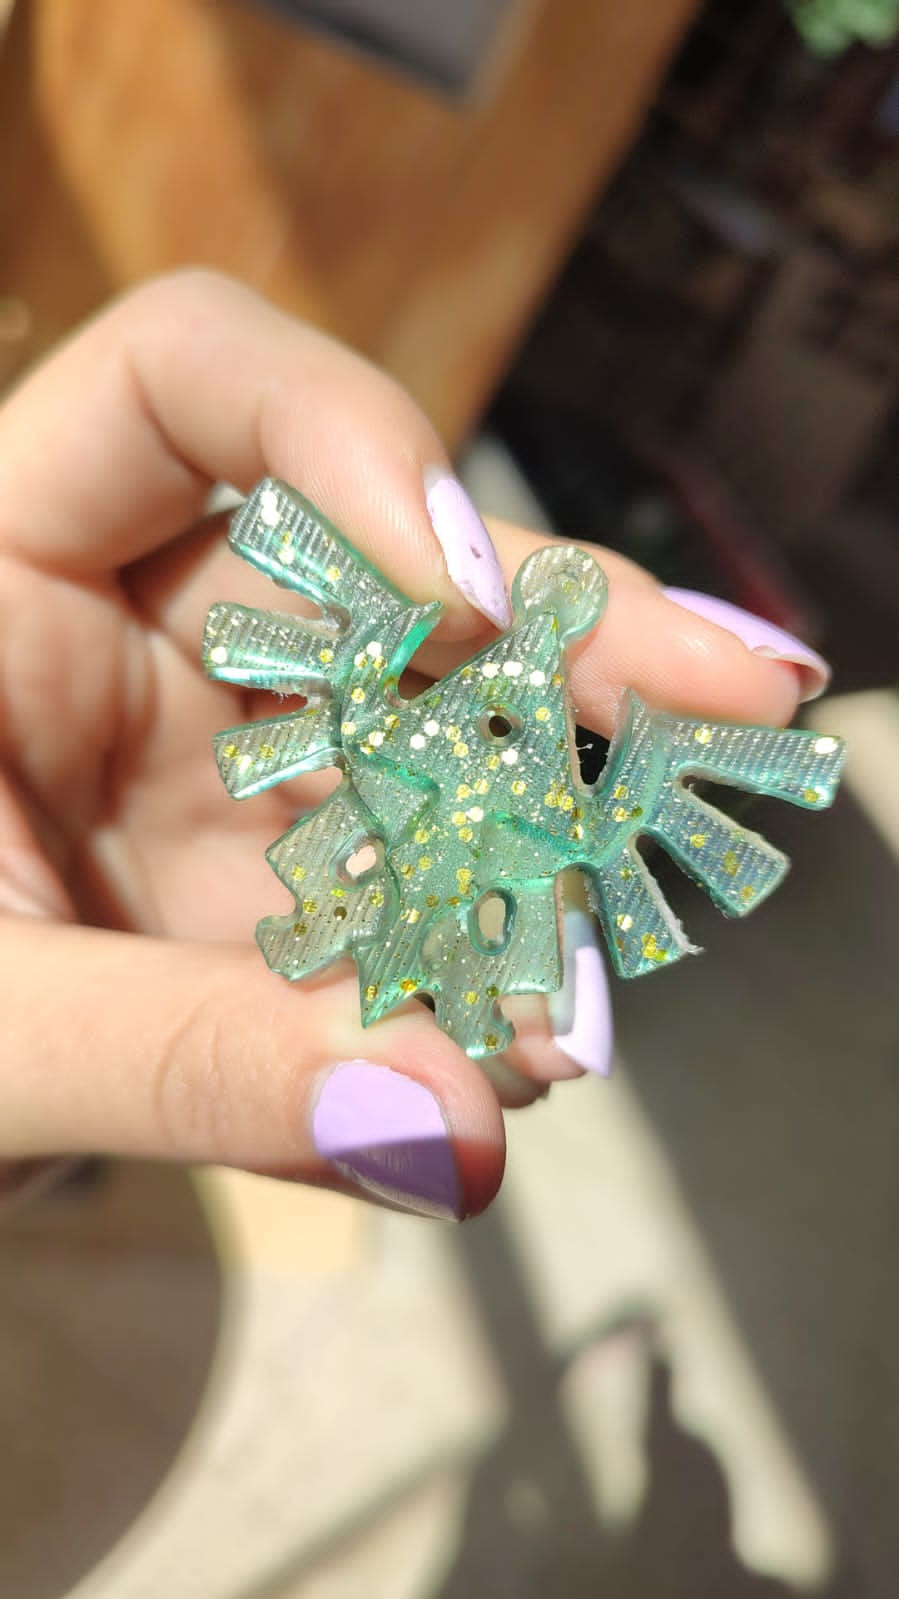
Now after the negative was finally finished. I brought some glitter and used some colors in the resin. Which is the same thing as the silicone, you just need to mix a 1 on 1 of each component to have it.
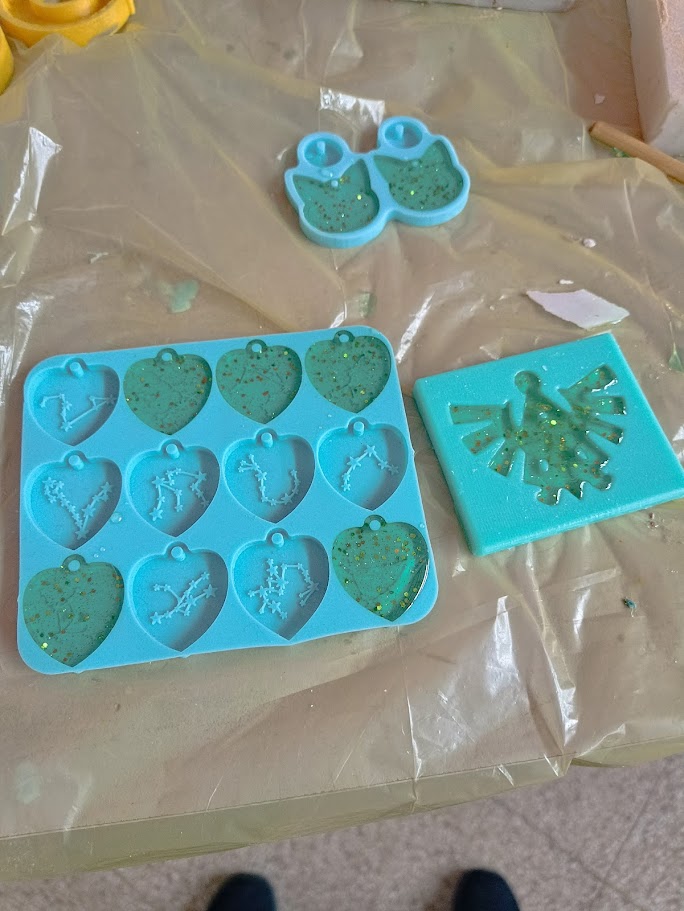
After having the thing ready, I used some glitter to make it more unique. Pour the thing in the mold slowly and voila.
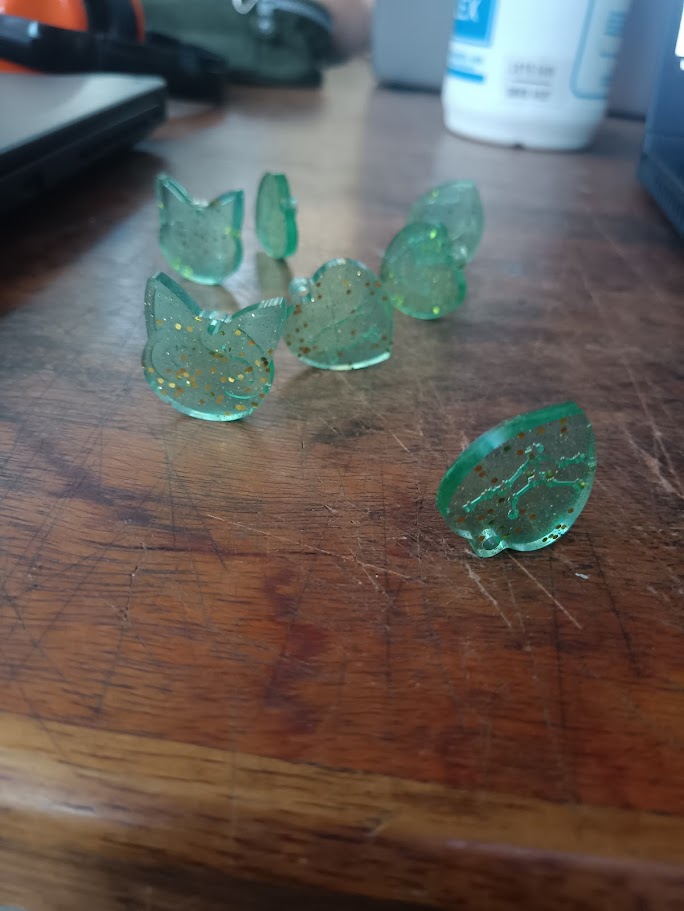
A lot of resin was left, I had some extra molds that I brought from home as well, so I also used the rest on them. They were from constellations so I chose the ones that were from some significant others and also a little mold of the cat of Sailor Moon. Here is the unmolding results.
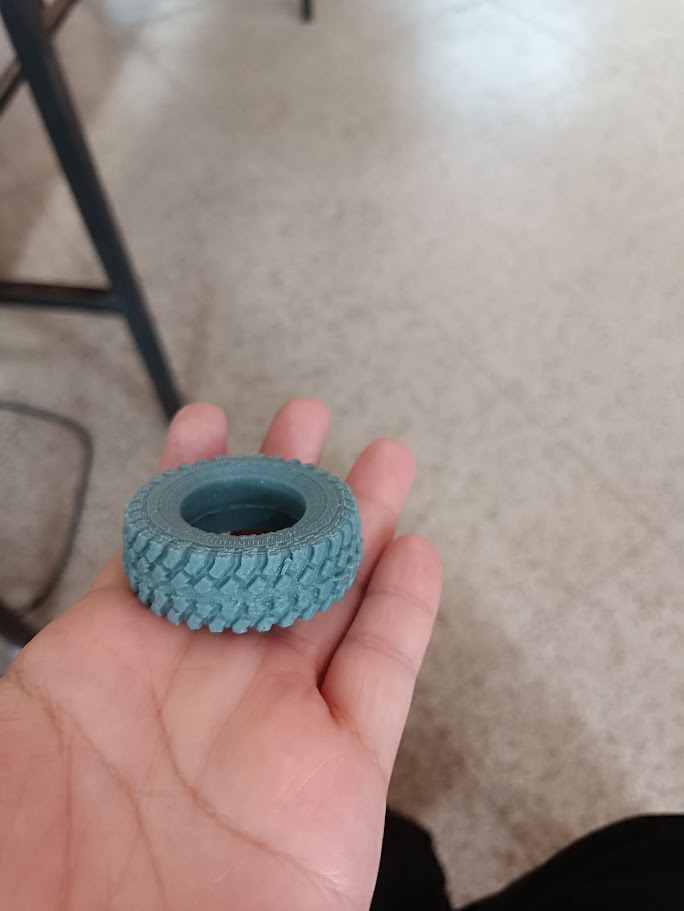
Testing a Tire
Research
I honestly was very eager to make something for my final project. But quite honestly, most of what my project is, can be made very easily with 3D printing. Still, there is something that I wanted to see how to make: tires for my wheels.
I want to be able to make them fully customizable but since I’m still unsure how they will be, I want to test methods so when I finish designing my little car I can make them quickly. So I went ahead and started researching. I saw many videos with very weird mixes, but most of them are some kind of silicone. I asked my instructor if the silicone we will use for the molds can be used for tires because it seemed like the easier way to me, and he said it had to be tested. My problem with using the silicone we have here in the lab is that it is completely liquid, and most of the molds I saw required some kind of gooey material to harden. Here are some of the videos I saw to start with the process.
I had a print that I found that looked simple and I wanted to test but it truly wasn’t gonna be possible to use closed to charge the silicone in a liquid form. I decided to use it openly and then look for a way to join them together. I had a silicone that is usually for construction and sealing things in the kitchen. In the last of the tutorials that I left here they used this kind of product as well, so I thought this was a nice experiment cause I saw the final result they had and it was super nice. So, you will see me testing both methods here.
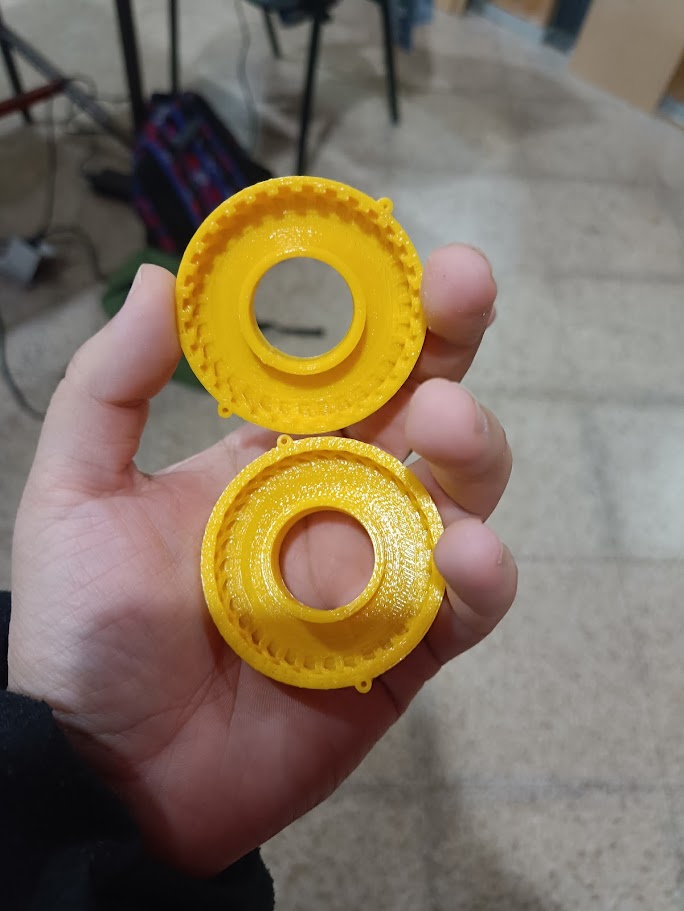
Printing the mold
Like I said, I found a mold that I liked and that was free xDDD for me to test these methods. I downloaded the model from here
I wanted to print it in my house, but since I bought my printer my boyfriend has been making many upgrades to it, and in one of those times, he changed the main board controller, and it still is in the process of finishing updating so I could not use my own printer. I did prepare the print, but all in vain. Oh well.
I went to the lab and tried to print it there with the flashforge. I made the print without supports.
Using different types of silicones for casting
After printing I went ahead and brought print home to test it with the silicone that I have here that is for construction and sealing things. I went ahead and decided to use it without anything else on it, basically just adding the silicone inside the mold and closing it to see what happened.
The main problem that I found was that I didn't have the gun that usually is used for these caulk silicones. Another problem that I found was that the Silicon that I had in my house had already expired not too long ago, but I still decided to use it. Main problem was the smell. It was very vinegary and potent and it really got stuck in your nose.
I still used it by using a little mask and some gloves to interact with it. It was very messy and not pleasant to be honest. Maybe if it wasn't expired it would be a little less pungent and a little more easy to work with? I am not sure cuz I didn't have any non-expired one to test that.
Still, I put as much of the silicone inside of the mold and closed it and left it to cure.
The next day when I went back to the lab in the evening I opened it and to my surprise it wasn't that bad. The smell was still very potent but most of the tire was already formed. Sadly some parts of it weren't completely filled so there were some sections that weren't as nice as others, and it sort of made the thing go broken in the middle. Still, I would say this is a good method if you want to do it with a lot of silicone and is something that you usually have in your house cuz you can use it to repair things that are broken.
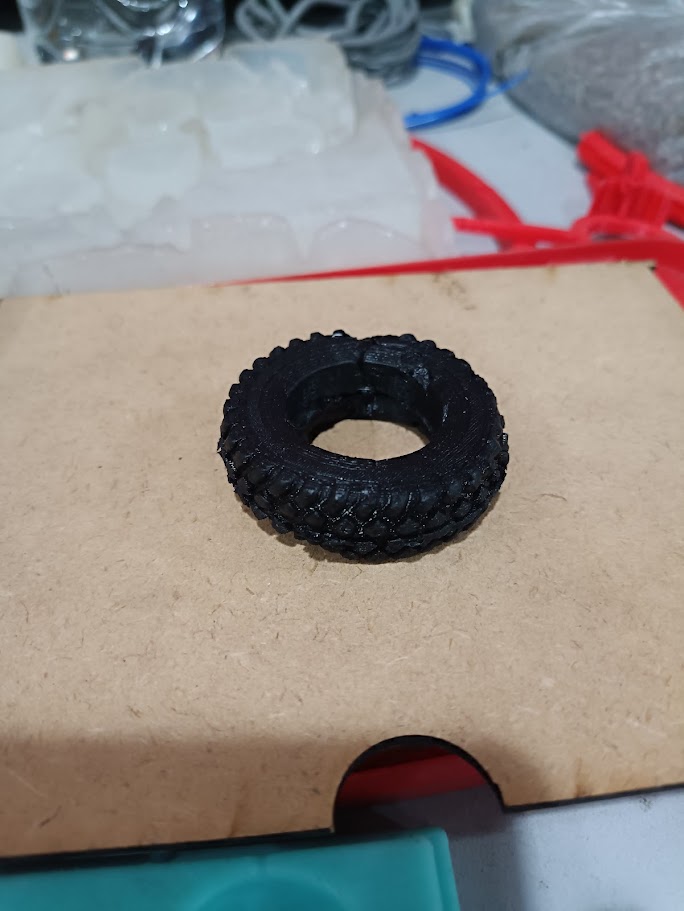

The other method that I tried was with the silicone that is for the negative molds as well. This was way more straightforward because I just had to prepare the mix that is one part silicone, one part hardener, you mix it very well and in my case I used a little bit of colors to make it look more like a tire.
I decided to go for a gray color instead of the green that it already has as a base, and then I poured it in my two parts mold. I didn't close it at the beginning because it was liquid and it wouldn't be really staying put for me to have the time to properly close it, so I went with the harder route which is to connect them together after it's cured for a little bit.
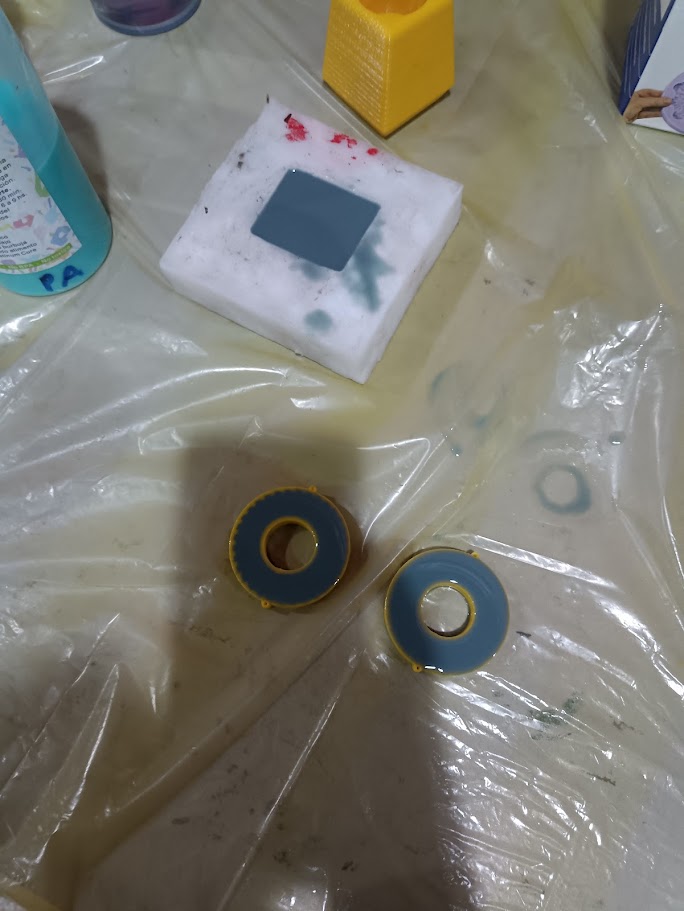
Again the next day, I went ahead and took out the tires from the molds and joined them together because they were still curing and humid, so it still had some capacity to get glued to each other. This is a way easier method than the caulk silicone, but from my understanding the silicone that we use is not really easy to come by in my country, so just because of that, I believe that this is a harder method since the materials are not that readily available as the silicone caulk is in some hardware stores.
here you can see both of the processes in comparison
After some cleaning, here you can see how the silicone tire looks very smooth