WEEK 13 / NETWORKING AND COMMUNICATIONS
Group assignment
TASKS:
Send a message between two projects
Document your work to the group work page and reflect on your individual page what you learned
You can find the group assignment in our group page.
Individual assignment
Design, build and connect wired or wireless node(s) with network or bus addresses and a local interface
For this week's assignment I focused on the type of communication I will be using for my final project. I'll be using bluetooth to connect my pencil with other devices.
The main goal was to transmit the data I was already receiveing through the USB, but now wirelessly. So, to summarize:
+ retrieve acceleration data from the BNO08x sensor
+ read the state of a button
+ transmit this data via Bluetooth to another device (desktop for now)
WIRELESS COMMUNICATION - using Bluetooth
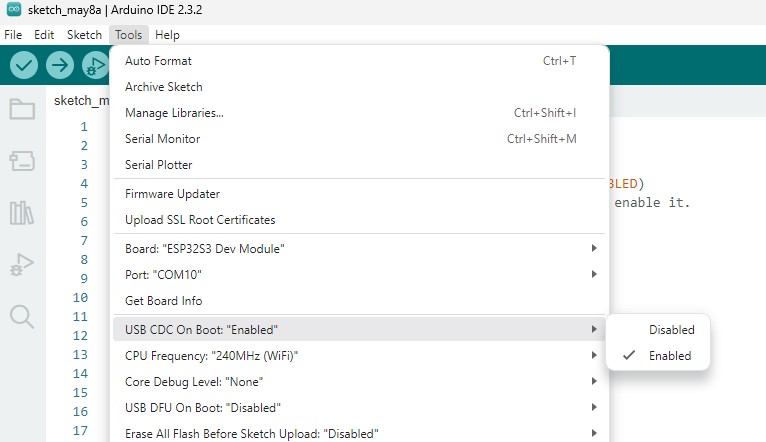
Setting Up Arduino IDE: select the board (in my case "ESP32S3 Dev Module") and port that it is connected to. Make sure the "USB CDC On Boot" is enabled.
Make sure to install the ArduinoBLE library.
I worked on this assignment after working on the interfaces & application week. The data I need to retrieve is basically 4 float numbers: the 3 coordinates, plus a button state to activate/deactivate drawing. So after exploring a bit of Flutter and start to wrap my head around how I'm gonna structure this embedded code, I decided it would be nice to keep each function separate in modules. There would be 4 initial parts:
+ main arduino code
+ "BLE" module, which will control bluetooth connectivity
+ "BUT" module, which will retrieve button state
+ "BNO" module, which will retrieve de accelerometer data
The BNO and BUT code were adapted from what I had worked with in Week 14, using Arduino and Processing. The difference is that now I'm separating the accelerometer data from the button, so that in the future I can refine both functions.
All codes were generated with the help with ChatGPT. However, after a lot of back and forth to get it to respond and be structured in the way I wanted.
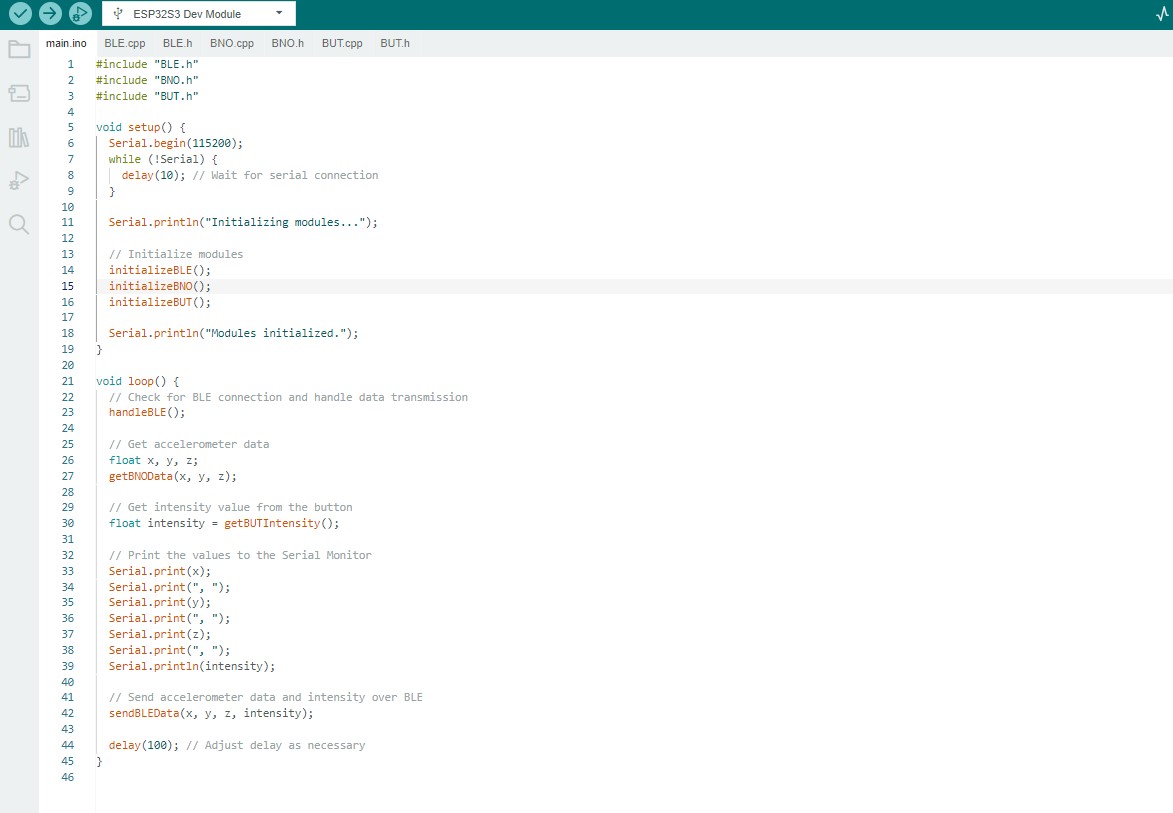
So in the main file:
+ we are first including the modules
+ we are begining serial and initializing the modules
+ after we retrieve the information from the sensor using the BLE connection, we provide the output in the desired structure
Then, on the BLE code:
+ include the header and the ArnuinoBLE library
+ we need to create UUIDs for the service and for the characteristics. The service will represent the peripheral device, and the characteristics are created for each "function". I created one characteristic for the accelerometer data and another for the button. I won't get into the specifics of UUID, but the ArduinoBLE documentation explains a bit further.
+ initialize
+ set up the name you want the device to appear as. Mine is "inkvisiBLE", which is the name I came up for my digital pen project
+ then we have a function to connect and another to send the accelerometer data
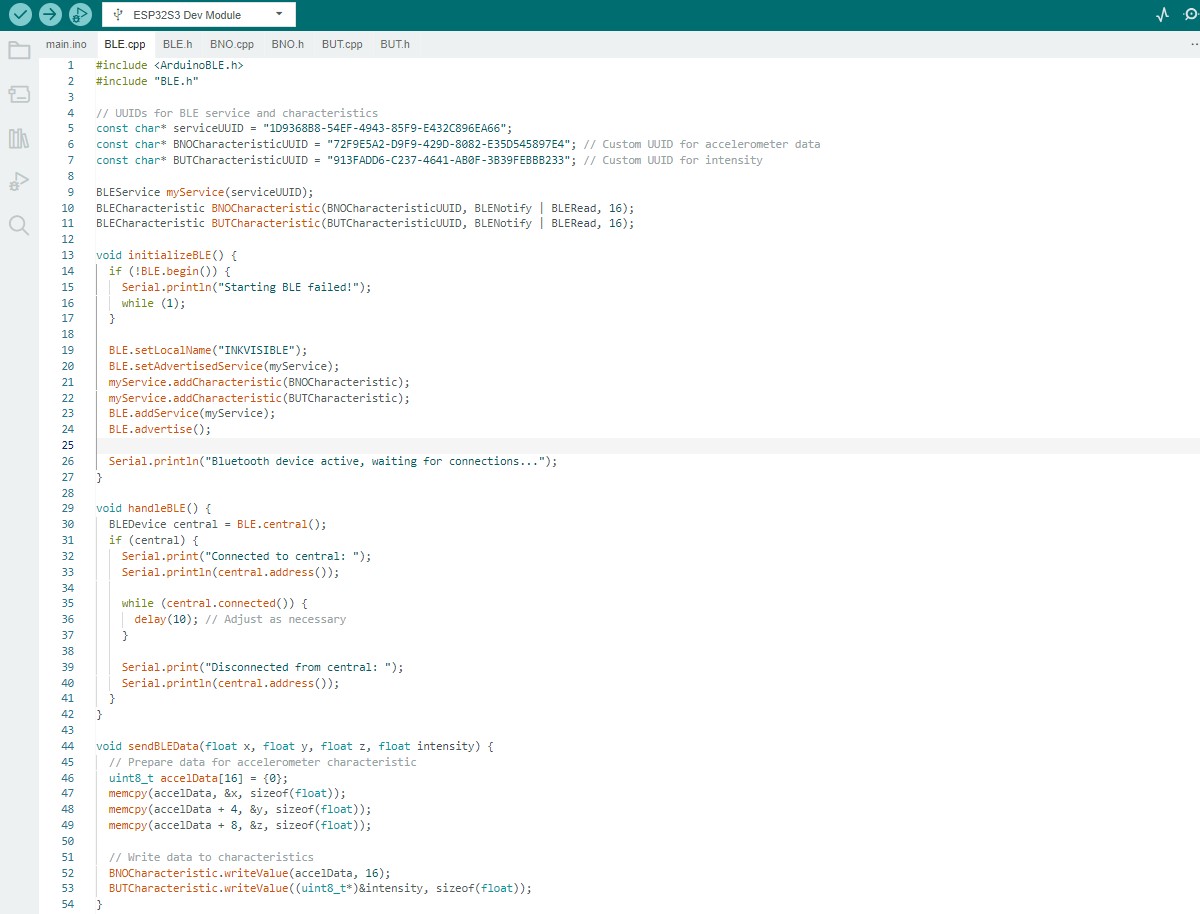
After a few iterations to make the code compile and run - it seemed like it was supposed to be working. However, I spent a long time trying to figure out why my device wasn't showing up on the "devices to pair" settings on my computer and phone. Then I found out that BLE bluetooth is different and can't easily be found like normal bluetooth. To find the BLE device, I installed the app nRF Connect on my phone.
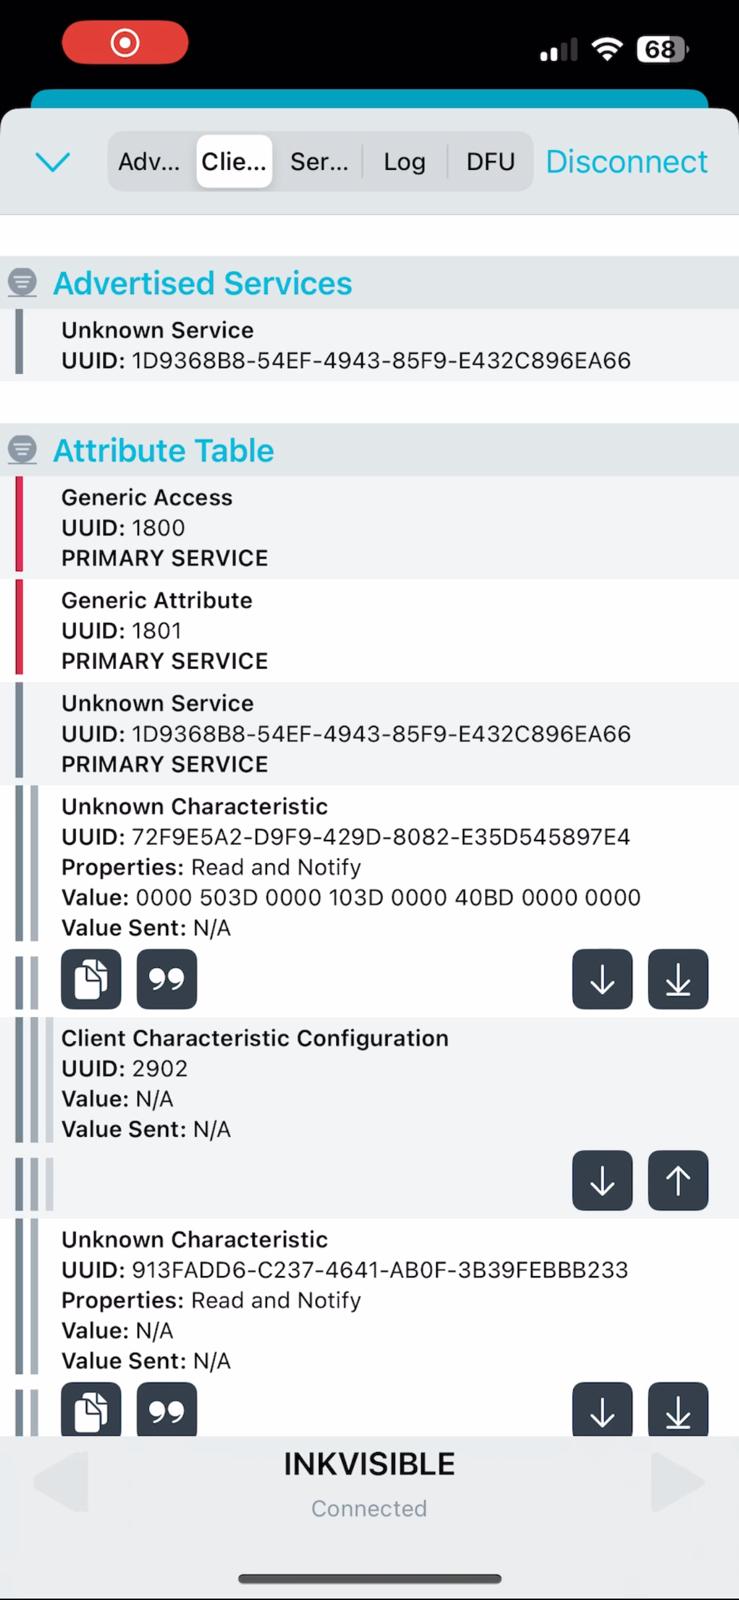
The image on the right shows the characteristics I created for my accelerometer and button.
And in the serial output, I was receiveing the coordinates + button report, then when connected to my phone, received this message:

Additionally, I used I2C to communicate between my microcontroller and the Adafruit BNO08X for my final project.
For the wiring:
board's 3V to BNO085 Vin (red wire)
board's GND to BNO085 GND (black wire)
board's IO8 to BNO085 SDA (light blue wire)
board's IO9 to BNO085 SCL (dark blue wire)


To test the connectivity with the sensor, I used ChatGPT to generate a code to find the I2C buses. Then, generated a code to actually extract data from the sensor, as seen below:

+ BLE CODE