2. Individual assignment: Propose a final project masterpiece that integrates the range of units covered.
Below you find the project development and answers to the these questions:
What will it do?
Who's done what beforehand?
What will you design?
What materials and components will be used?
Where will they come from?
How much will they cost?
What parts and systems will be made?
What processes will be used?
What questions need to be answered?
How will it be evaluated?
,
What will it do?
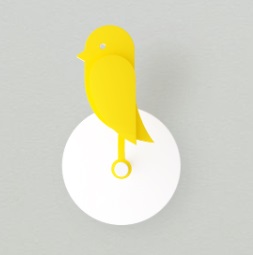
The fish displays the temperature and the relative humidity of the room. It changes color based on the
temperature in the room. It starts moving when the relative humidity is above 60%.
It sends the reading of the temperature and the humidity to an online spreadsheet
Who's done what beforehand?
My research has shown that there already are solutions that come quite close to the project that I have been working on ( I didn´t know that when I started) :
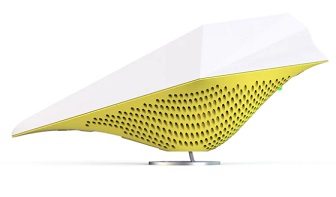
Birdie® ━ Award winning danish Design.
From the website of the company: When the indoor climate becomes unhealthy, Birdie® falls down and reminds you to ventilate. When the indoor climate is good again, Birdie revives automatically.”LINK
AirBird® - For a healthier indoor climate
From the website of the company: AirBird is a fantastic solution for improving your indoor climate. It combines bird sounds and soft light to create a soothing atmosphere that promotes healthy ventilation habits.LINK
PROJECT DESCRIPTION
Planning my time
Here you find a diagram for the project with a list of tasks to be done and a schedule for doing them:
LINK:Time planner
What have I designed? What materials and components have I used? What parts and systems have I made?
What processes have I used?
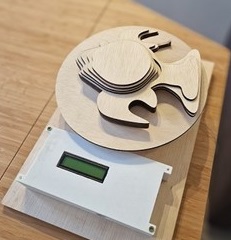
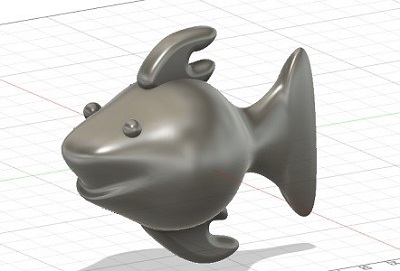
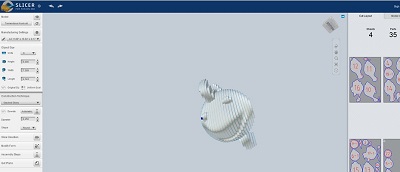
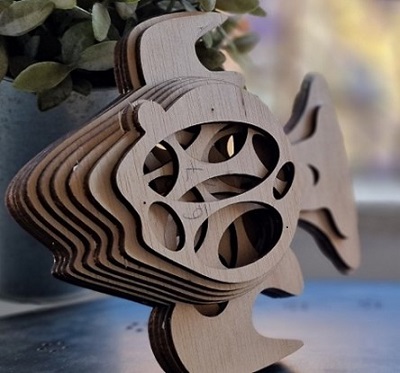
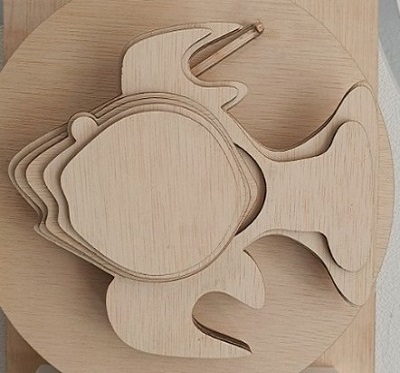
Here I used the construction technique called “stacked slices” and I now could download the plans for the model as *dxf files.
LINK: The original *dxf is here
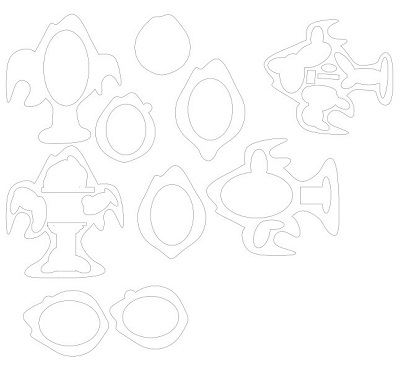
Then I prepared the files for lasercutting in plywood. I was a bit worried about the weight of the fish, so I ended up modifying the plans in Inkscape by removing as much unnecessary fill/weight as possible.
Then I lasercut the model using the learnings about lasercutting from Week 3
and glued it together
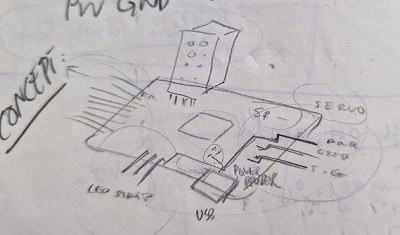
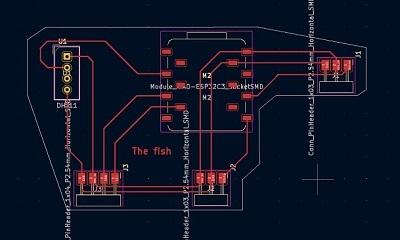
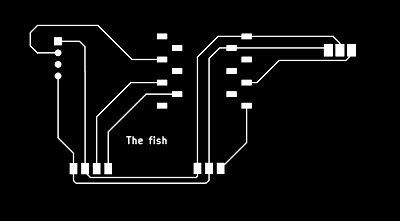
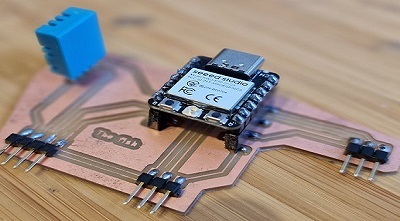
2. I designed a PCB with sensors, actuators and a code to control it.
In Week 9 - output devices and Week 11 - input devices I had programmed the servo to move in a 90 degree angel.
I combined this with the DHT11 that provided the input. It was also in week 11 that I made the very first prototype of the fish moving.
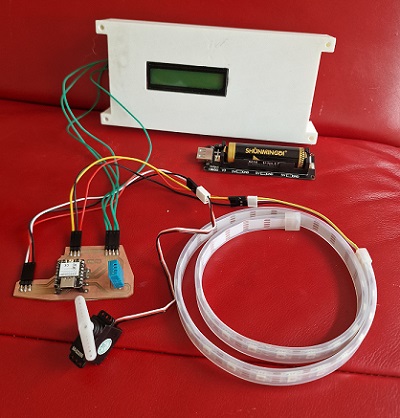
Finally I added the LCD display to the setup and when I wired it all up and layed it out all together it looked light this:
To control everything I worked with my code in Arduino IDE.
I experimented with different solutions both in Week 11 - input devices and in Week 14 - input devices.
In the end I decided to use IFTTT to send the data to an online spreadsheet and add internet communication to the code.
This is how I did that:
Go to www.ifttt.com and create an account and click create a service. Choose webhooks
> receive a webrequest
>connect.
Create an event an event name (temp_moist_read).
Click create trigger.
Then configure the “then that” part.
Click add
google sheet
add row to the spreadsheet
connect
select the account
allow
create the columns
create action
continue
finish
Go back to webhooks (click the icon)
documentaion.
Here you can see your key
Insert eventname etc.
test it
Check the spreadsheet on Google drive
The coding part:
I started out with this code from GIThub:LINK:GitHuband to begin with it worked. I tried to change library from DHT.h to DHT11.h, but that didn´t work. So I went with it knowing it might give me some trouble later. And it did.
But I modified the code, changes things, got help from Josep (instructor) and ended up with this final working code:
Where will the materials and the components come from?
I only used materials and components that were accesible in the Lab
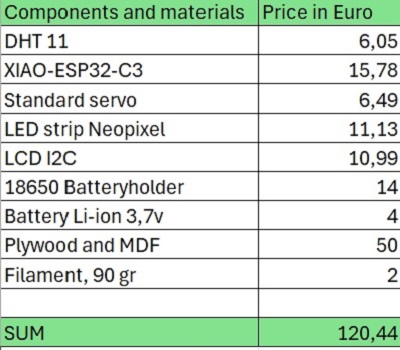
How much did they cost?
Bill of materials
What questions need to be answered? How will it be evaluated?
The question that still needs to be answered is "where does the project go from here?".
As mentioned in the “About me” page we have 10 makerspaces at my University. My main idea was to invent and make a device that helps students and professors at my University to improve the indoor environment fast and efficiently by getting signals from “the fish” followed by an basic action, e.g. opening a window if it is too hot. And that it should be fabricated in the local makerspace.
Another purpose of the device is to be an example of what you can actually make in a fablab/ makerspace. In Denmark we have a pedagogical term called “anskuelighedsundervisning”, meaning something like “Visibility education”. [….teaching method that uses, for example, pictures and concrete things to provide the student with knowledge and understanding of an (abstract) subject or concept.
In this context “the fish” is the concrete thing the provides understanding of the concept of making things in a makerspace/fablab incorporating 2D and 3D design, additive and subtractive fabrication processes, electronics design and production, embedded microcontroller interfacing and programming, system integration and packaging.
At this point in time I have hung one up after I came home from the FabAcedemy 2024 on VIA Campus Aarhus N and more will hopefully follow on the other locations.
Finally the fish can serve as an startingpoint for a “challenge” for students. A working title for now is: Create a device that improves your learningenvironment at the University.
An evaluation of this could take place in about 6 months, - around Christmas 2024 - and then check up on how many of the things mentioned above have acctually happened
My choise of license
The license that I have chosen is BY-NC-SA license. And for now the platform where I publish is this FabAcademy webpage.
This license gives a (re)user the right to do the following :
This license enables reusers to distribute, remix, adapt, and build upon the material in any medium or format for noncommercial purposes only, and only so long as attribution is given to the creator. If you remix, adapt, or build upon the material, you must license the modified material under identical terms. CC BY-NC-SA
 Concept
 Design
 Prepare
 Fabricate