First idea: Desalination machine
There are 2 processes to desalinate seawater: You can boil the water, then catch the steam, leaving behind the salt. Or you can blast the water through filters that catch the salt but let the liquid through.
Boiling the water and catching the steam seams like the most interesting one for me. The byproduct will be the salt so I will have to find a second purpose for this salt.
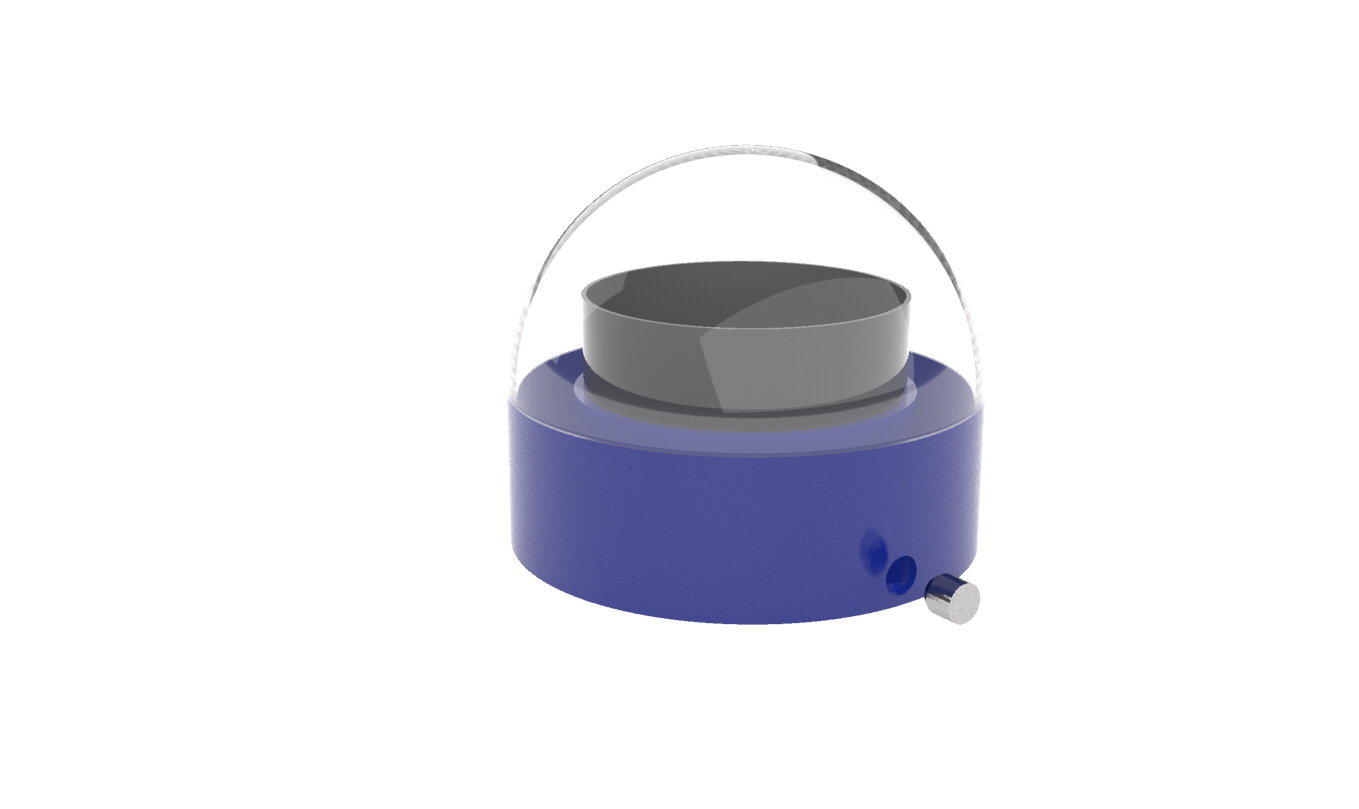
The desalination machine has the shape of a dome. With this shape I can make sure that the steam goes up till the top of the dome and rolls down to the bottom via the side.
The bottompart is the place where all the steam will be collected.
Inside there will be an "open container" where the seawater can be inserted. To boil the water, there will be a heating element that is connected with a solar panel.
This is a first sketch of how I have the machine in mind:
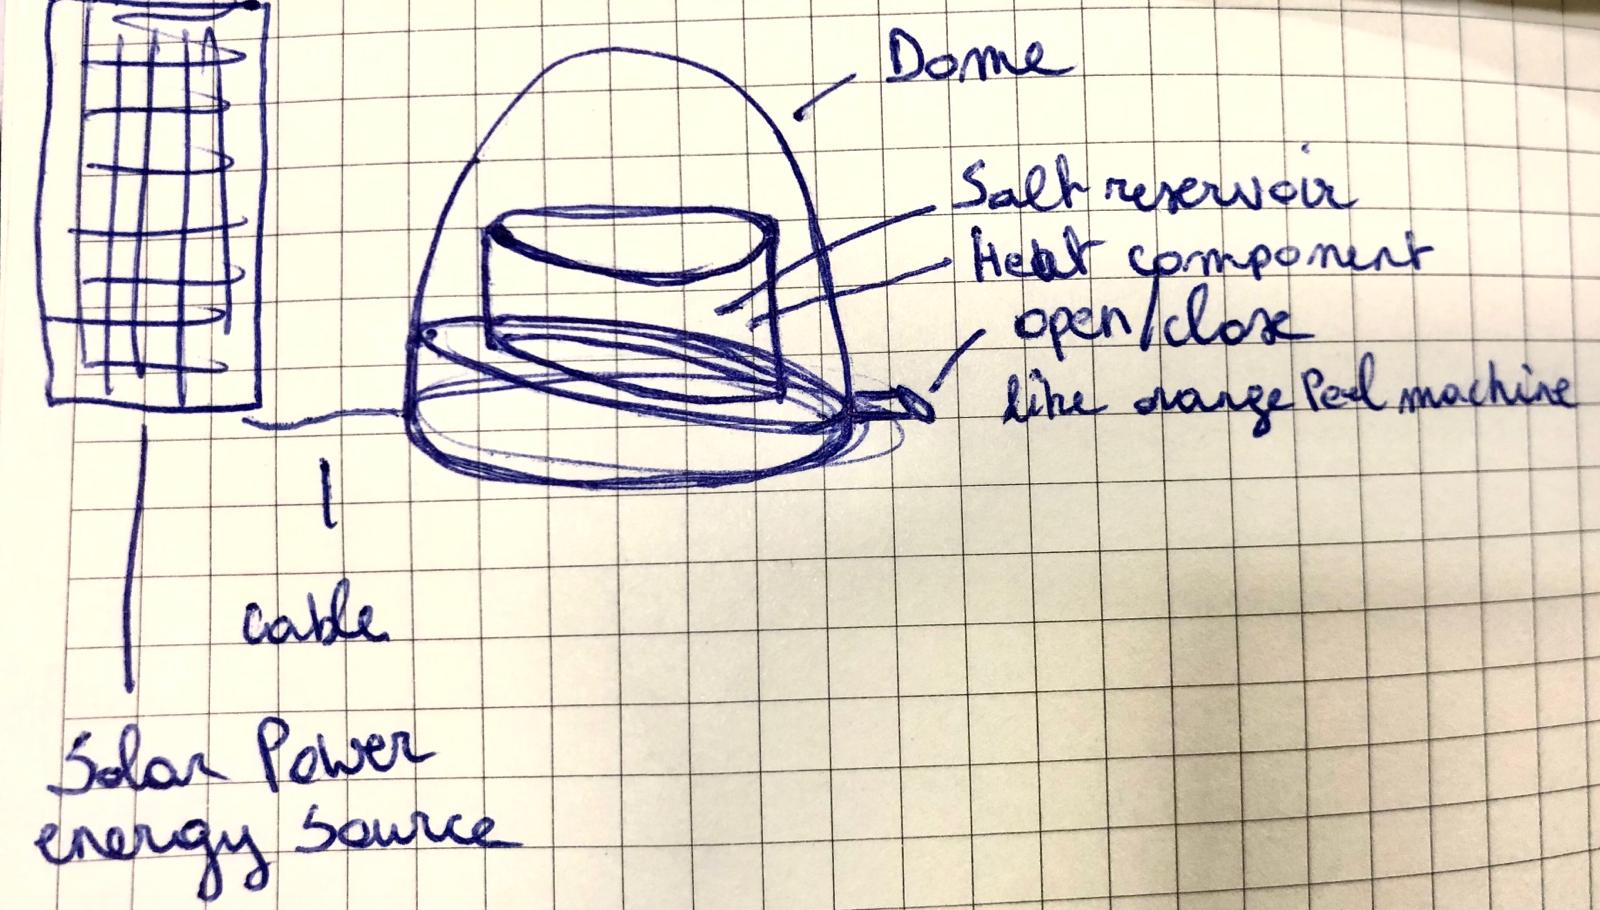
For now the machine exists of 4 parts: the dome, the seawater container with hetaing element on the bottom, the steam container and the opening to take out the steam = water
The bottompart where the water gets collected has an angled surface to direct the water towards the side where the opening is.
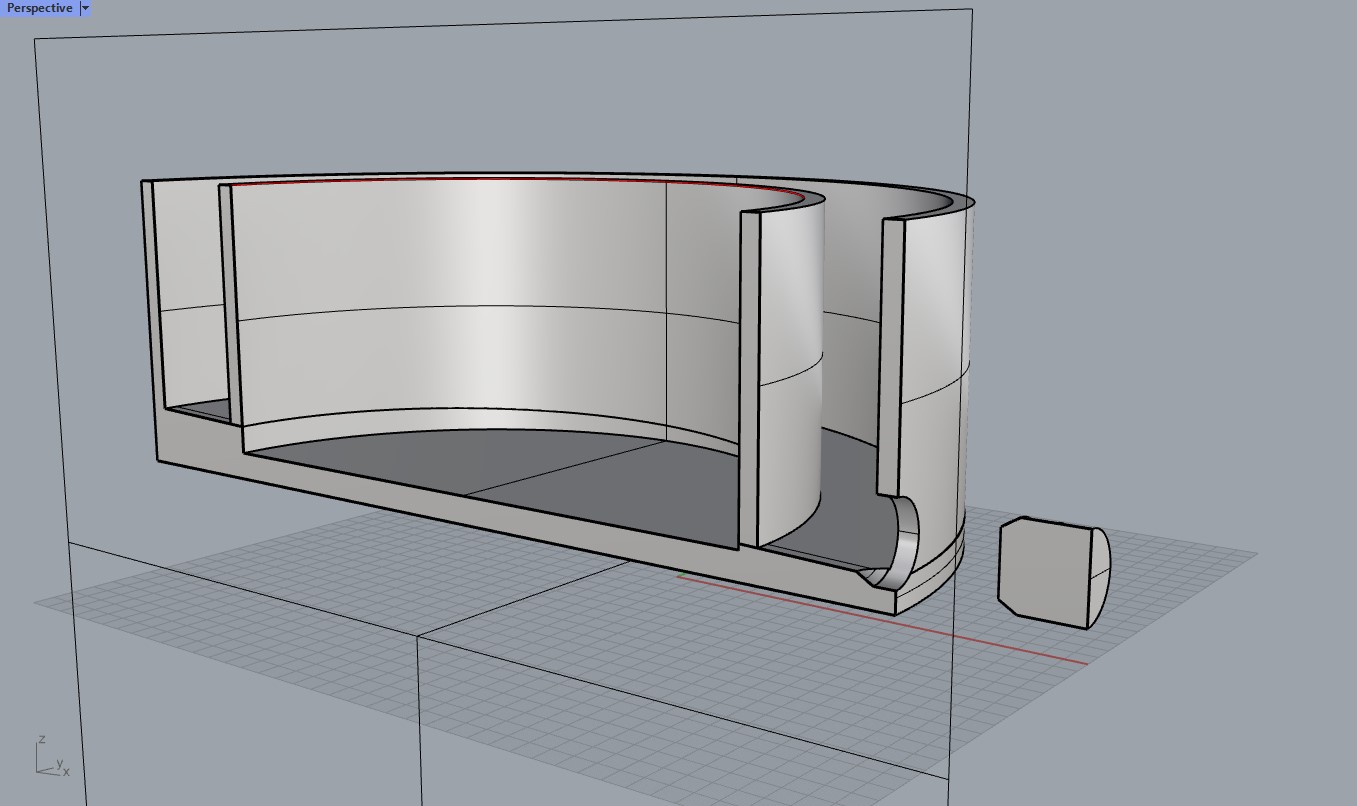 section of the bottompart with angled surface to direct the water towards the opening

Second idea: vacuum tool for carpets
Living with a furry friend demands a good vacuum machine to keep your carpet fur free.
I had the idea of creating a tool or something to clean carpets. Normal vacuum cleaners don't do such a great job when it comes to pet hair.
I have a cordless vacuummachine that I wanted to transform a bit so I could add an extra motor with higher torque an a type of brush to attach to that same motor.
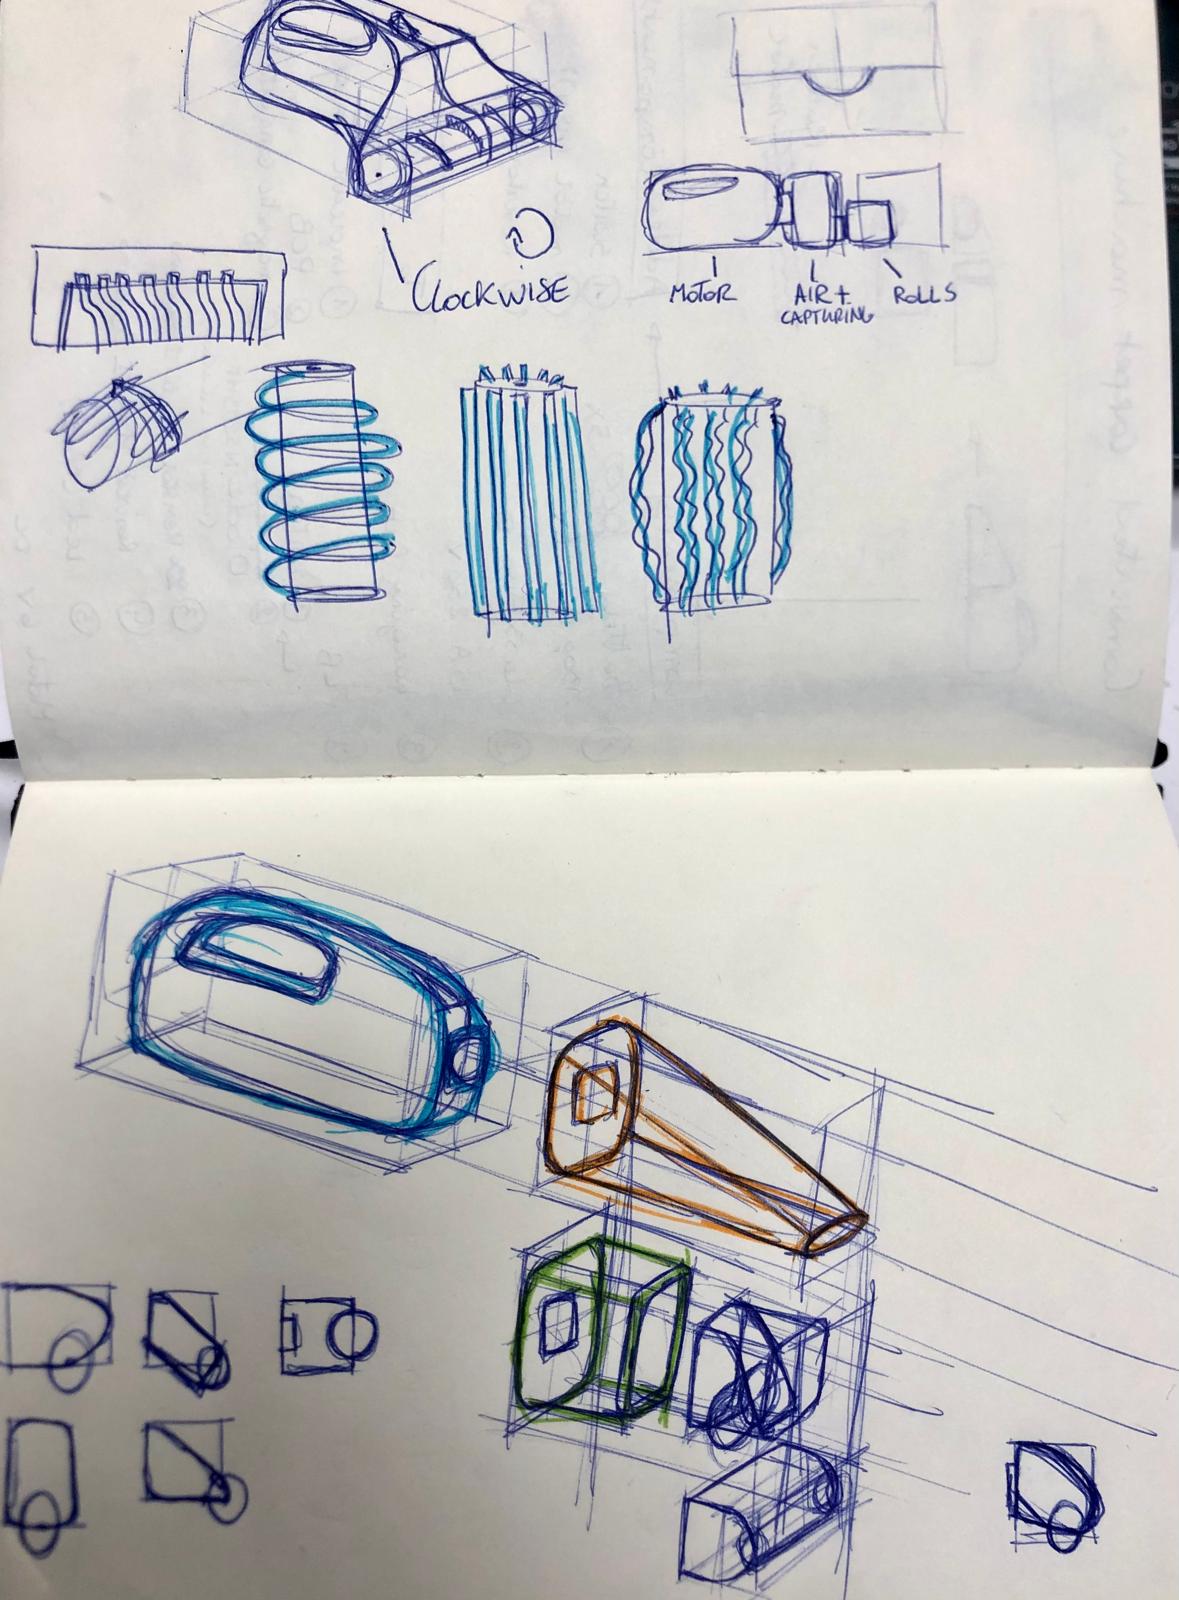 Here are some sketches to visalize the idea.
Third idea: a drone to take care of the oak processionary
This is an idea that I believe will be an interesting one to develop further. And will be my final project!
See my planning Here
Final Project: Spray mechanism for the oak/pine processionary moth

The problem of the oak processionary:
Health Risks: The caterpillars of the oak processionary are covered in tiny, barbed hairs that contain a toxin called thaumetopoein.
Contact with these hairs can cause severe skin irritation, allergic reactions, and respiratory problems in humans and animals.
Eliminating oak processionary caterpillars can help reduce the risk of these health issues.
Ecological Impact: Oak processionary caterpillars can defoliate oak trees, which can weaken them and make them more susceptible to other pests and diseases.
Since oak trees are important components of many ecosystems, protecting them from the damage caused by oak processionary caterpillars is crucial for maintaining biodiversity and ecosystem health.
The nest of the oak processionary is very visible in pine trees these days.
biological treatment
Entomopathogenic nematodes (EPNs) are microscopic roundworms that are naturally found in soil worldwide. They are parasitic to a wide range of insects, including many agricultural and forestry pests like the oak processionary caterpillar.
The idea is to spray these nematodes onto the nest using a drone. Once they are in the nest, they will take care of the rest.
Process of my project and files
You can see the project development and the files on this page here
Summary of the project
In the file section you can find the files you need for:
- Electronics design and production: The Kicad files for the pcb layout and chematic of the remote and the spray. You can find the files in the Kicad folder.
- Design 2D and 3D: The rhino files i created of the packaging and the sticker. You can find the files in the packaging folder.
- Embedded microcontroller interfacing and programming: the arduino code i used to program both of the boards (remote and spray). You can find the files in the Arduino folder.
- Additive and substractive fabrication: the files you need to 3d print the packaging. Note that every printer has different settings!
- System integration: no files needed for this, all parts click&fit without glue. What you need for adding the spray system and servo onto your pressured spray bottle is zipties and rubber bands and something to melt plastic ( i used an old soldering iron)to pull the servo motor through with a metal wire. Check the BOM for the exact parts.
- Packaging: the 3D printed cases/packaging needs to be 3D printed and tested with the battery. These are the same files in the folder of Packaging.
Files
Packaging:files
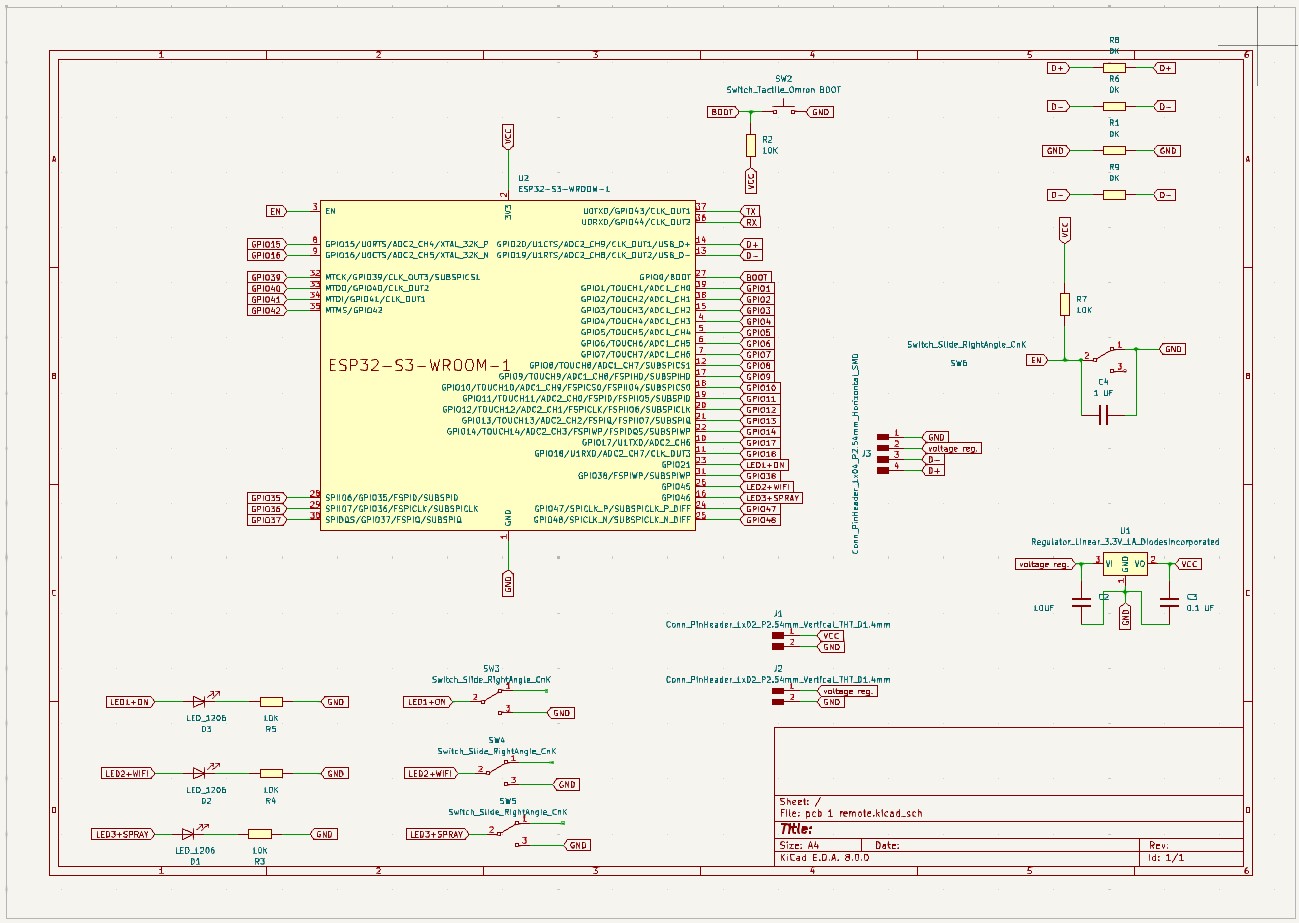
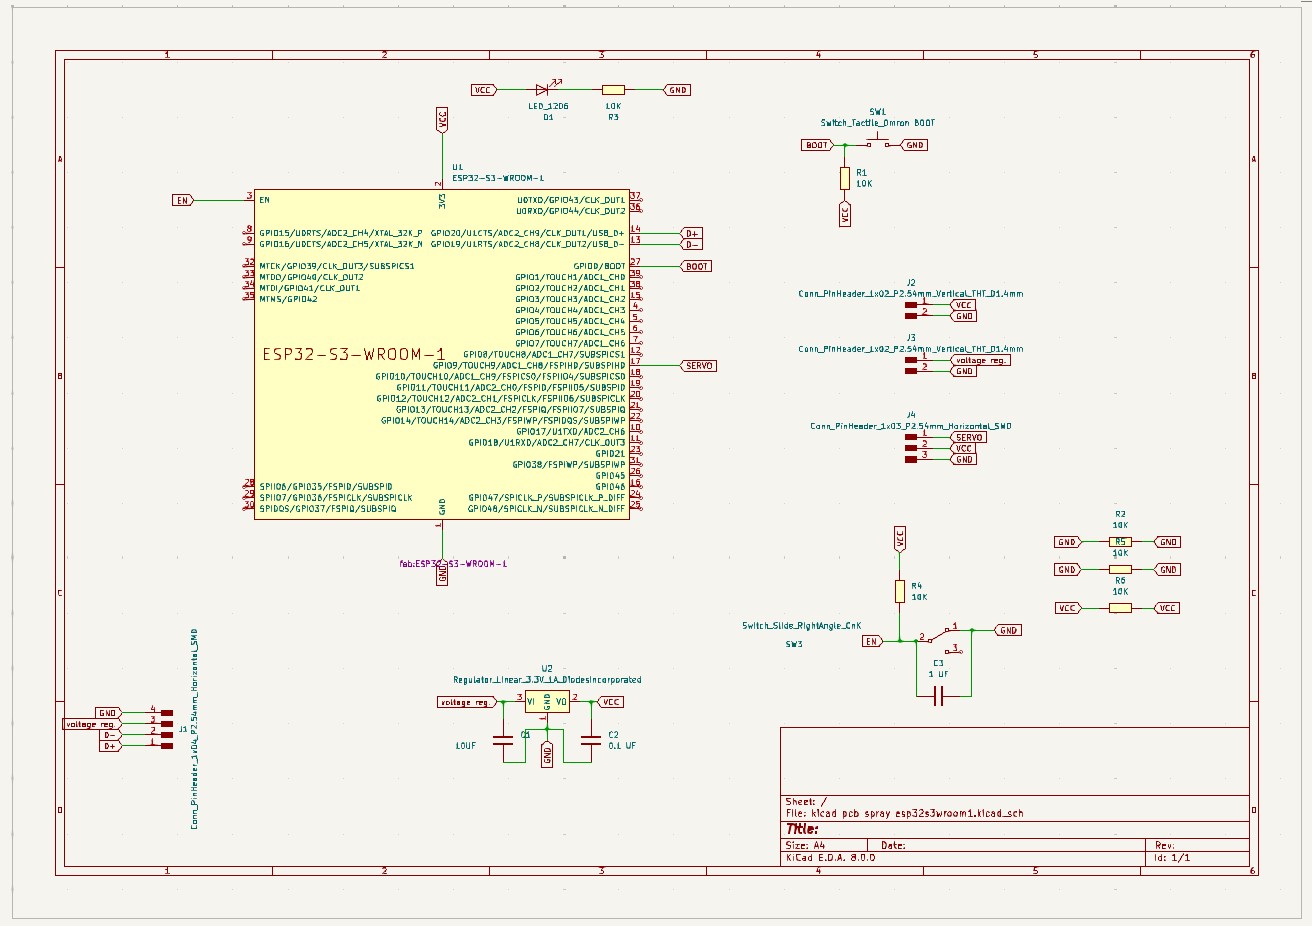
Electronics kicad and production:spray, remote
Vinylsticker: here
Bill Of Materials
This is the BOM of my project:
- 2D and 3D
- Black PLA
- 1x vinyl sticker
- Electronics (remote+spray)
- 2xMicrocontroller: esp32-s3-wroom-1
- 6xResistors 0
- 4xResistors 10k
- 4xResistors 1k
- 3xLED Red
- 1xLED green
- 2xVoltage regulator 3.3v
- 3xCapacitors 1 µf
- 2xButton
- 5xSwitch
- 2xPinheader connection 4
- 1xPinheader connection 3
- wires
- Hardware
- 1xPlastic spray bottle
- Piece of tube: 30cm
- 6xZipties
- 6xRubber bands
- 1xPlastic spray bottle
- 2xBatteries
- 1xServo motor
Bill of Materials (BOM)
| Item Number | Part/Component | Description | Quantity | Unit Price (€) | Total Cost (€) |
|---|---|---|---|---|---|
| 1 | Black PLA | Filament for 3D printing custom parts (85 grams) | 85 grams | 2.11 | 2.11 |
| 2 | Vinyl Sticker | Custom vinyl sticker for labeling | 1 | 5.00 | 5.00 |
| 3 | Microcontroller: ESP32-S3-WROOM-1 | Central control unit for the spraying mechanism | 2 | 3.60 | 7.20 |
| 4 | Resistors 0 Ohm | Basic resistors for circuit connections | 6 | 0.10 | 0.60 |
| 5 | Resistors 10k Ohm | Resistors for electronic circuits | 4 | 0.10 | 0.40 |
| 6 | Resistors 1k Ohm | Resistors for electronic circuits | 4 | 0.10 | 0.40 |
| 7 | LED Red | Red LEDs for indicators | 3 | 0.50 | 1.50 |
| 8 | LED Green | Green LED for indicators | 1 | 0.50 | 0.50 |
| 9 | Voltage Regulator 3.3V | Voltage regulator for power supply | 2 | 1.00 | 2.00 |
| 10 | Capacitors 1 µF | Capacitors for electronic circuits | 3 | 0.20 | 0.60 |
| 11 | Button | Push buttons for user input | 2 | 1.00 | 2.00 |
| 12 | Small Switch | Small switches for controlling power and operations | 5 | 0.50 | 2.50 |
| 13 | Pinheader Connection 4 | 4-pin headers for connections | 2 | 0.50 | 1.00 |
| 14 | Pinheader Connection 3 | 3-pin header for connections | 1 | 0.50 | 0.50 |
| 15 | Wires | Electrical wires for connections | Various | 5.00 | 5.00 |
| 16 | Plastic Spray Bottle | Spray bottle for holding the spraying fluid | 1 | 4.39 | 4.39 |
| 17 | Tubing | 30 cm tube for fluid delivery | 1 piece | 1.00 | 1.00 |
| 18 | Zipties | Zip ties for securing components | 6 | 0.10 | 0.60 |
| 19 | Rubber Bands | Rubber bands for securing components | 6 | 0.10 | 0.60 |
| 20 | Batteries | Power source for the spraying mechanism (2-4€ each) | 2 | 3.00 (avg) | 6.00 |
| 21 | Servo Motor | Motor for controlling the spray nozzle | 1 | 15.00 | 15.00 |
Total Estimated Cost: €67.80
Production
You can see the details of each process in the previously mentioned page: Project Development. You can find the needed files in the files section!
Electronics production
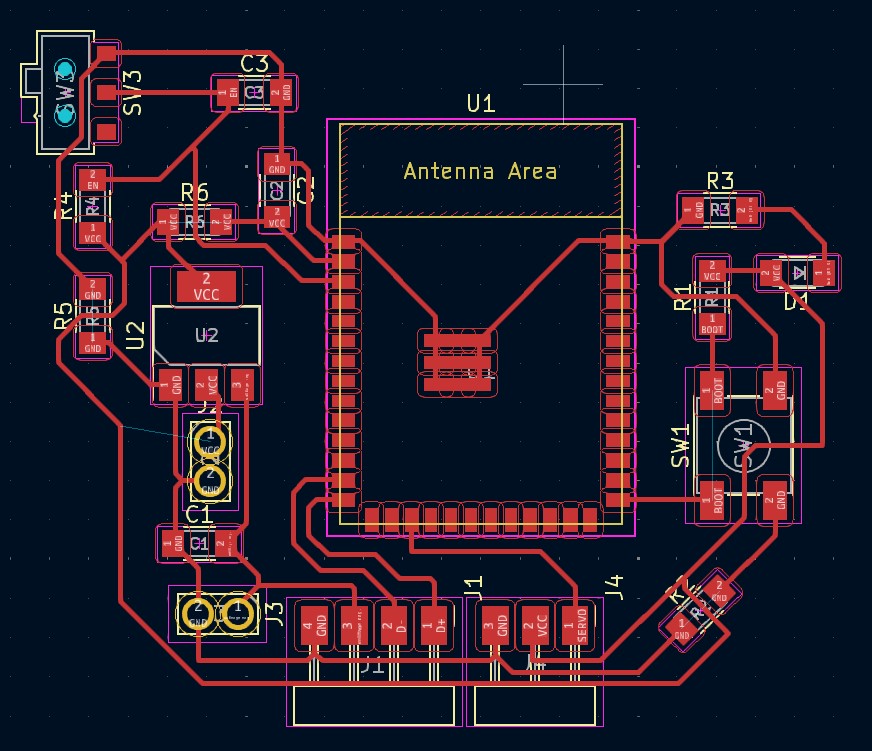
To create the pcb for the remote and spray, you need to create them from scratch. You can find the kicad files and the png's in the files section!
This is the design for the sender=remote in kicad of the pcb schematic and layout.

This is the design for the receiver=spray in kicad of the pcb schematic and layout.
Embedded programming
Once the boards are made and all the components are soldered onto the board, it is time to test it and program it.
The boards communicate with each other. To know if the receiver is connected to the sender, there is a red led that turns on when they are connected and blinks when they are disconnected.
The yellow led on the sender turn on when you flip the switch ON. This shows on the remote when the servo turned and the spray is spraying. When you flip the switch to OFF, the yellow led will also turn off.
I have added a third led. This one is red and currently has no purpose but i thought it could be interesting to have an option when you need a second led or if you want to add second receiver.
Programming the remote = sender
This is the code for the sender:
Download the file of the remote
Programming the spray mechanism = receiver
This is the code for the receiver:
Download the file of the spray

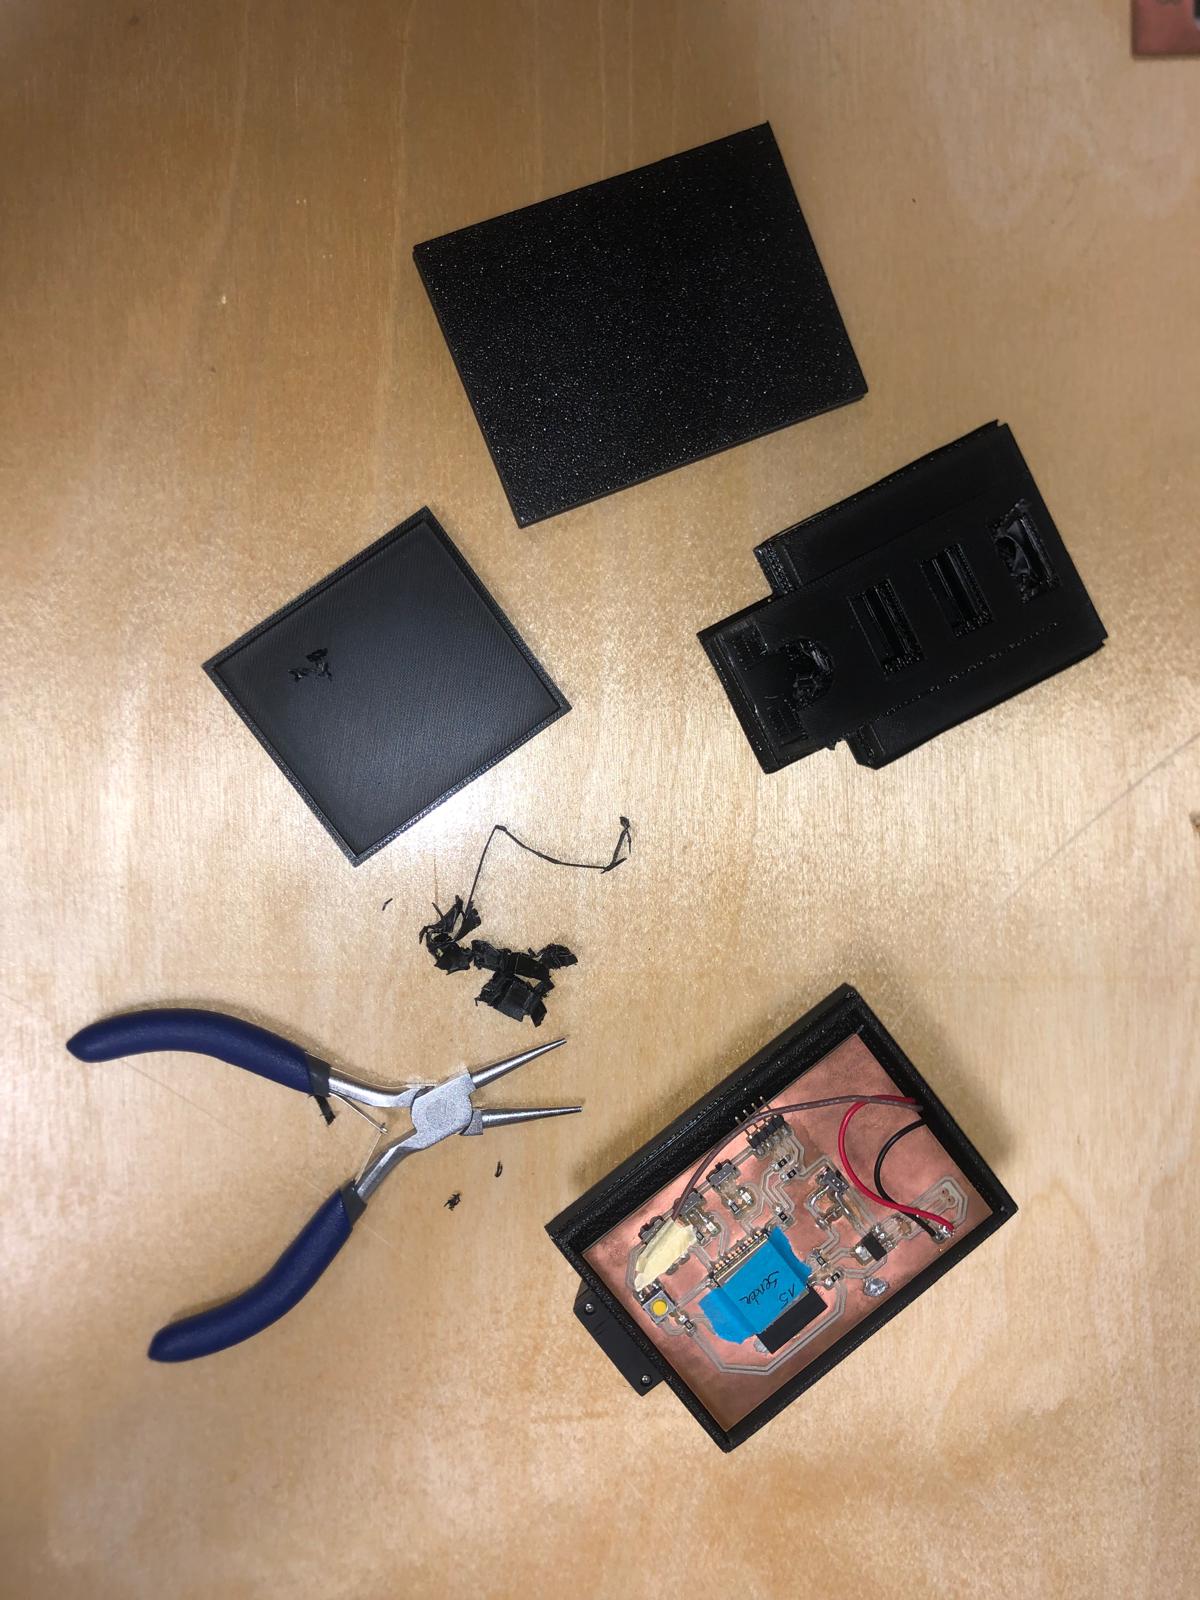
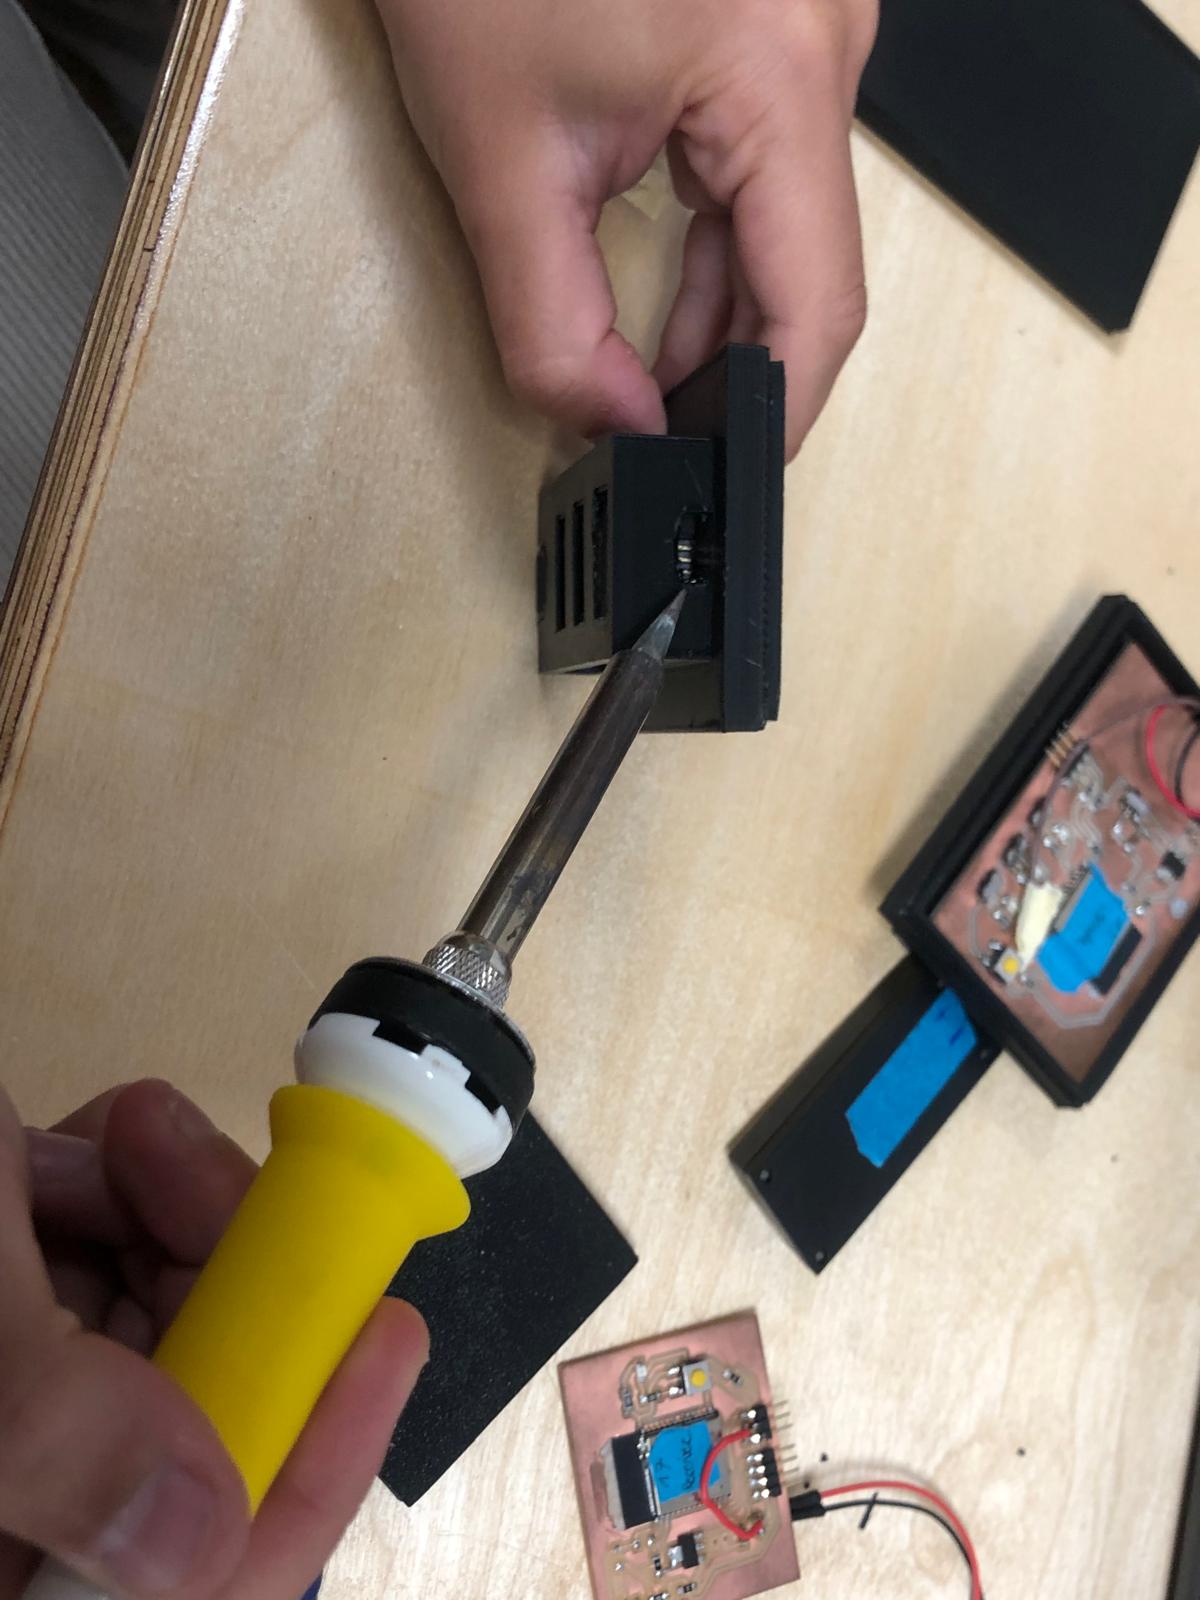
Packaging: Additive manufacturing
Remote and spray case
I modeled the packaging parts in rhino, check the files section to download the parts.
The remote case: the switch, 3 led's and the battery.
The spray case: the battery, 1 led and an opening for the connection of the servo cables.
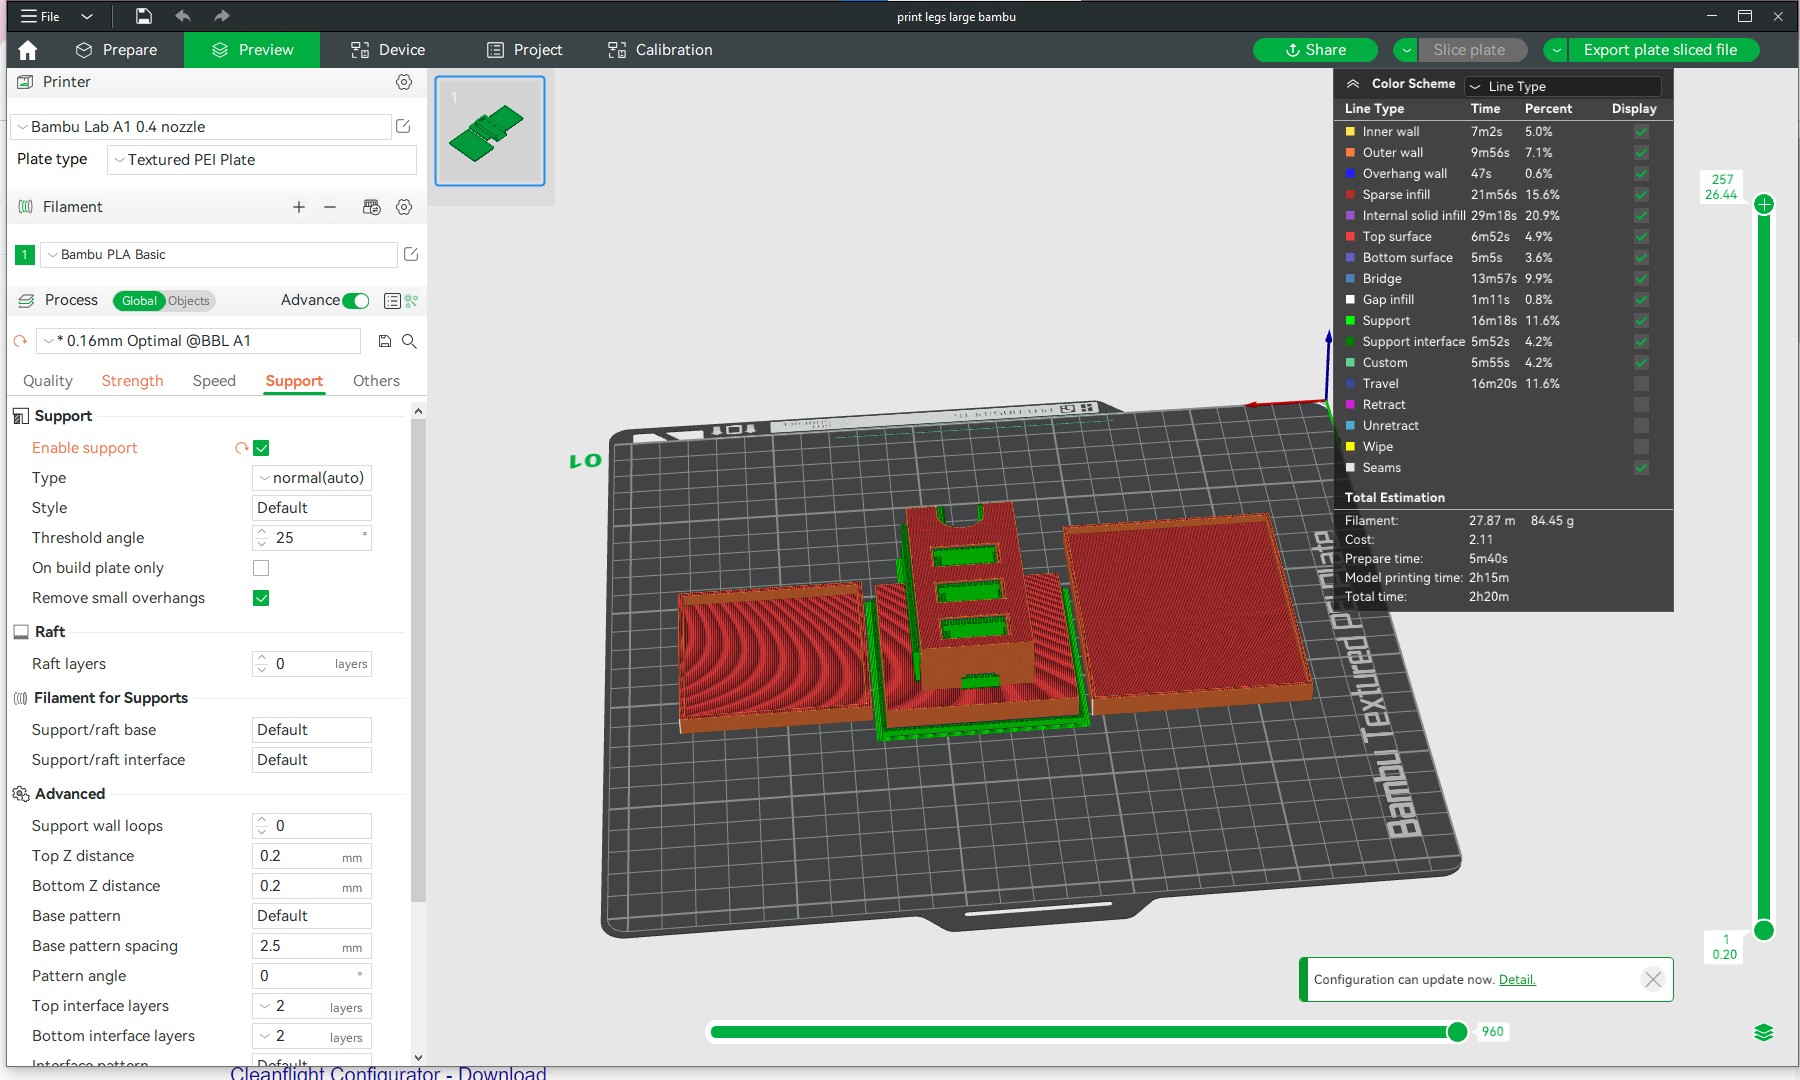
You can see the 3D prints in the picture below and the support that was needed.
In the other pictures you can see how i created the holes in the case where the cables for the battery go through.
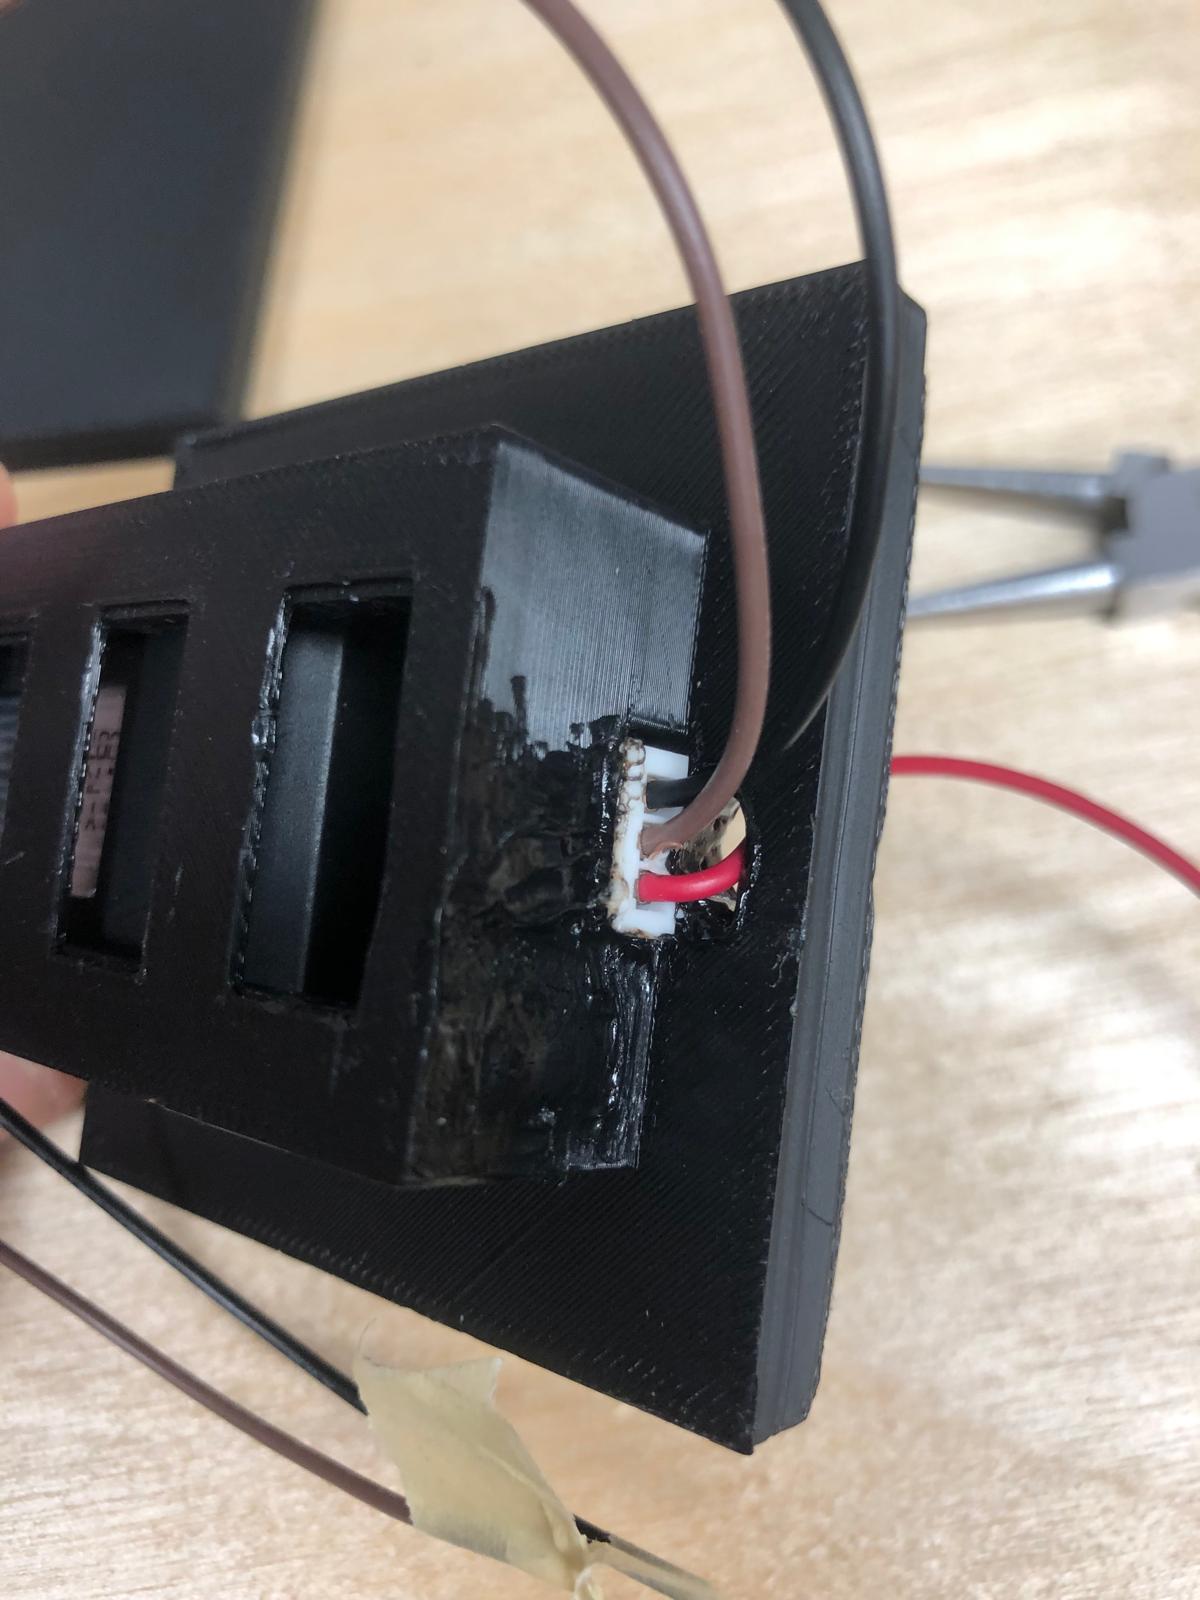
video assembly cases with battery
In the video below you can see how the battery slides into the case and connects to the pcb
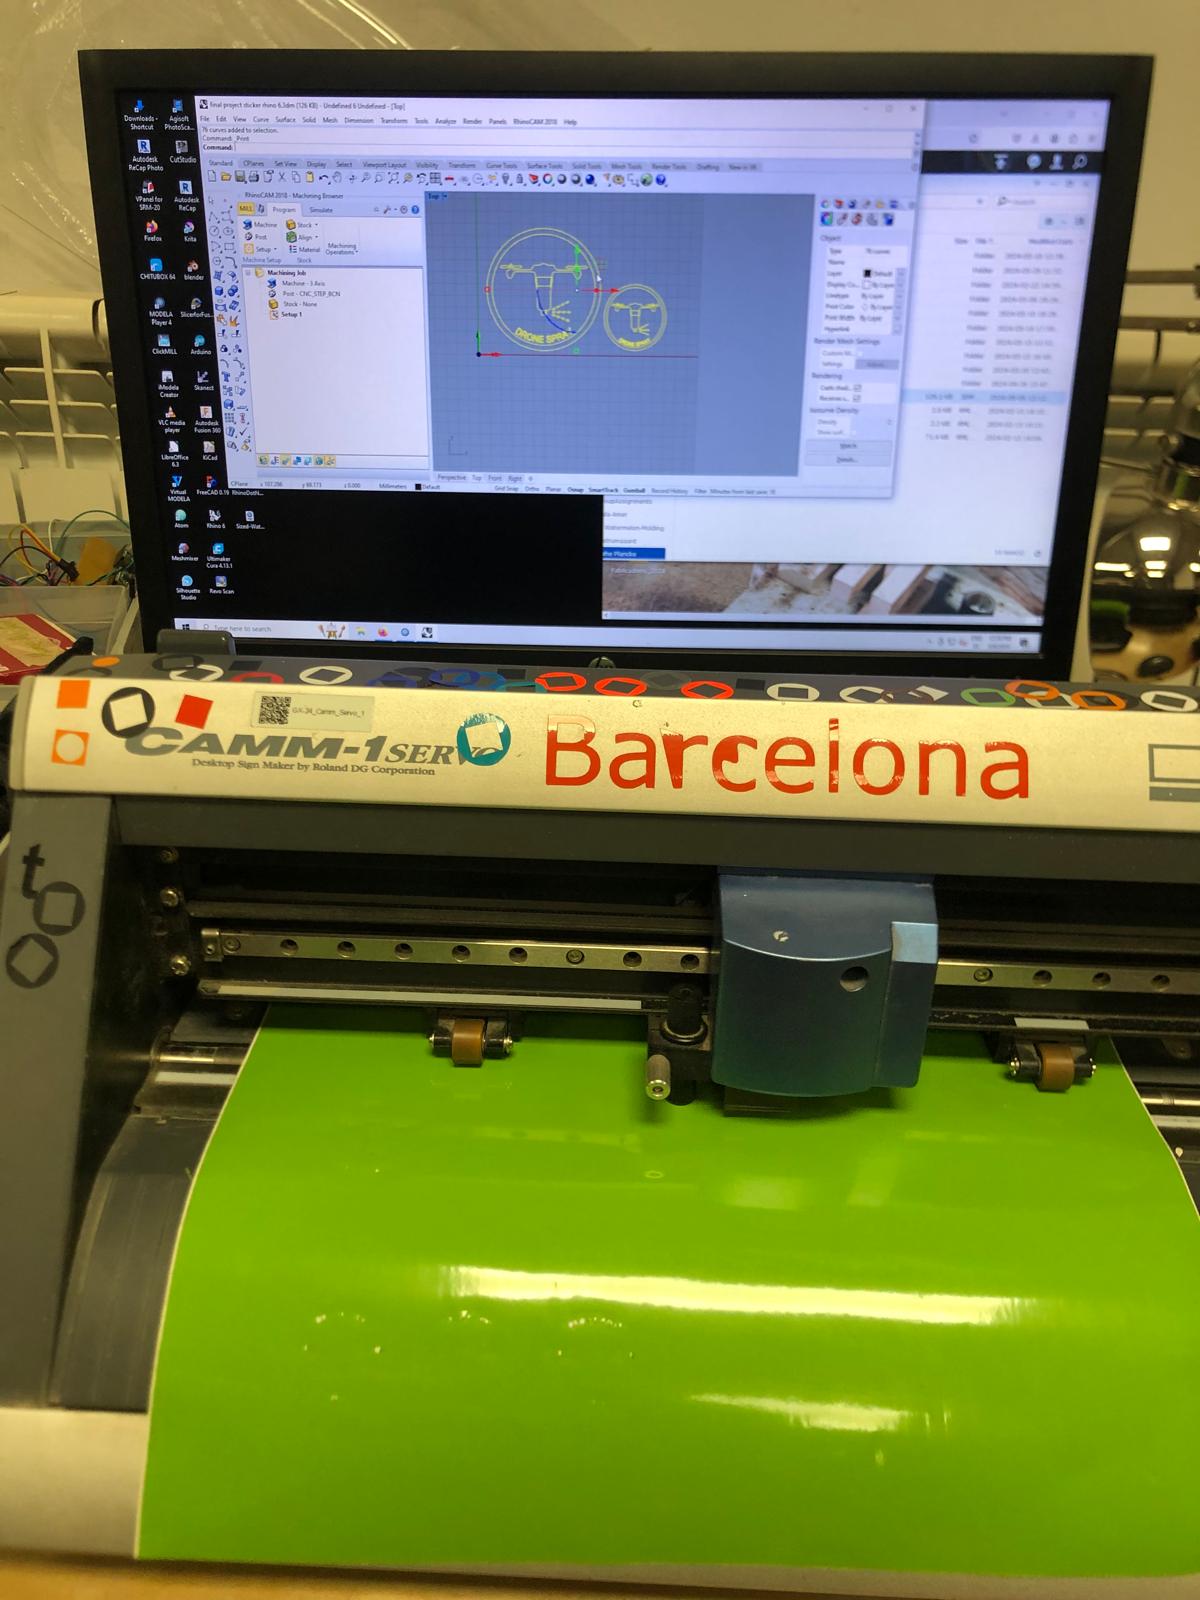
Packaging: Substractive manufacturing
For this production method, I decided to make a sticker to put onto the bottle. Unfortunatly, I made this after shooting the video.
Here you can see the process: create the file in rhino, send it to print, connect and setup the vinylcutter, and ... cut! Once it's cut, I put it onto the bottle!
Fortunatly, there was a bright green vinyl to cut from, just like the color of the bottle :) .
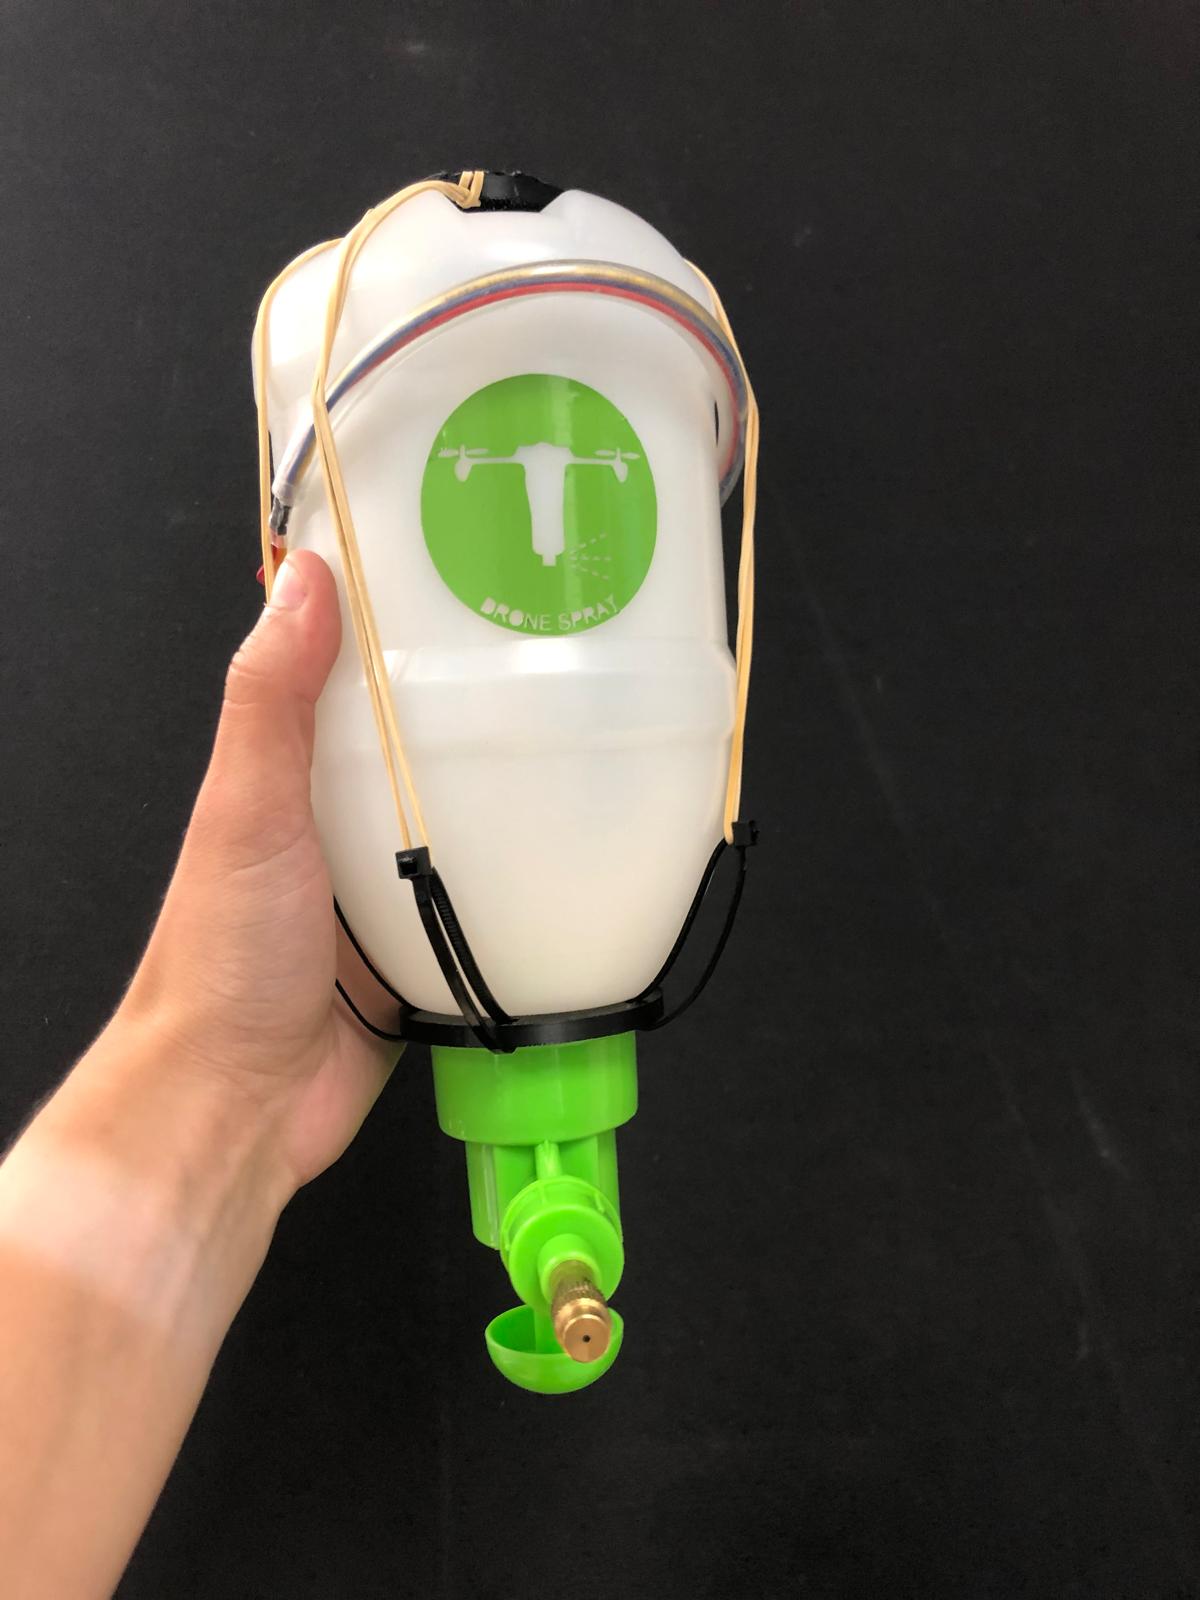
System integration: Click system to attach the spray underneath the drone
I have been using quadlockfor a while and this works with a good slide & click system. I thought that it could be nice to use to attach the bottle onto the drone.
I recreated the quadlock system in rhino and added it to another part that i designed.
In the picture below you can see how everything is assembled. On the neck of the bottle, you add the 3d pinted ring with the 6 openings where you can pull the zipties through. To make sure that the upper part of the bottle fits perfectly, there are also openings foreseen in the 3d printed part where the rubber bands fit through and can be attached with the zipties. It would be ideal to find 6 long zipties so that you do not have to use rubber bands.
Big thanks
Thank you everybody @fablabbcn, who helped me to make this project succeed!