05 3D-Scanning and Printing
This week's assignment is to test the design rules for our 3D printers in the group assignment, design and 3D print an object, that could not be easily made subtractively and 3D scan an object.
Group assignment: Design rules for 3D printers
The documentation for our group assignment from the Barcelona node can be found here.
Lessons Learned
- each printer comes with it's own peculiarities (mini SD card, SD card, different slicer programs,..), it's a matter of getting used to it, but arrive prepared
- choose the printers according to your piece and the purpose - testing, final project,...
- the Anycubic Photon is messy but results in a really good quality - don't forget the last process step and harden the piece
3D Scanning our dark sides
Together with
Get the scanner running
- Connect the Scanner with the USB-C cable and tighten the little screw.
- Plug the scanner into the laptop, before opening the Revopoint software to avoid it not being recognized by the laptop. Once it's connected a little green light appears on the scanner.
- Open the Revopoint software and the scanner will start shooting light beams.
- Hit Scan and check the proposed settings.
@Susanna Brolhani recommended to change to the body settings for a better result.
Start scanning
First we tried to simply move around the scanned person facing the front. While one of us was holding the scanner, another followed her holding the laptop, correcting the scanner's position in order to keep it in the “excellent” section.
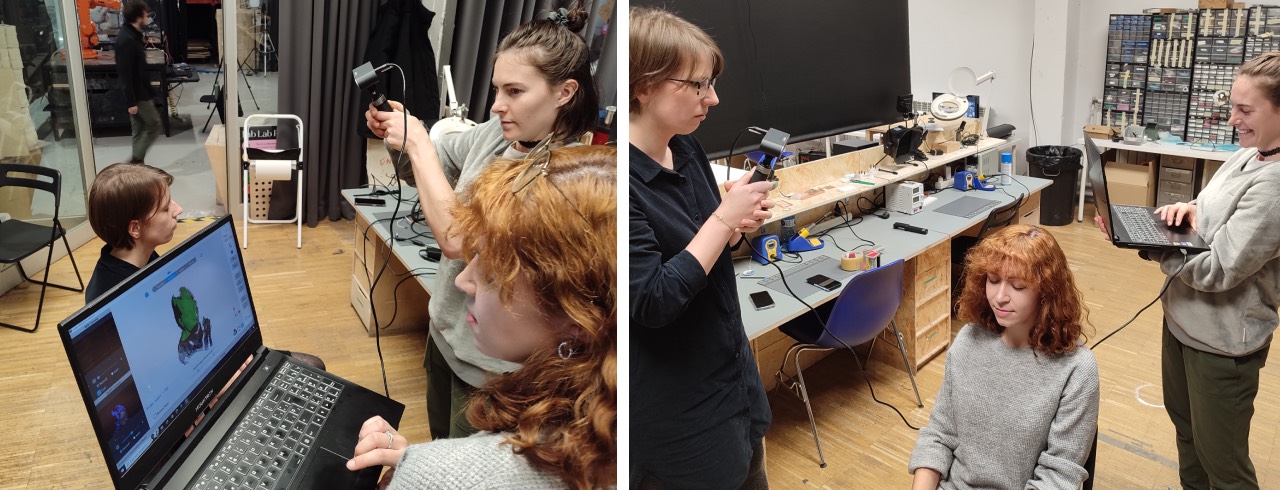
On the first tries we used to scan in one level and attempt to do another turn to cover the top and chin/neck part. Which continued to result in Magdalena medusas several times, because we kept loosing the scanning around the top head part and an offset scan started.
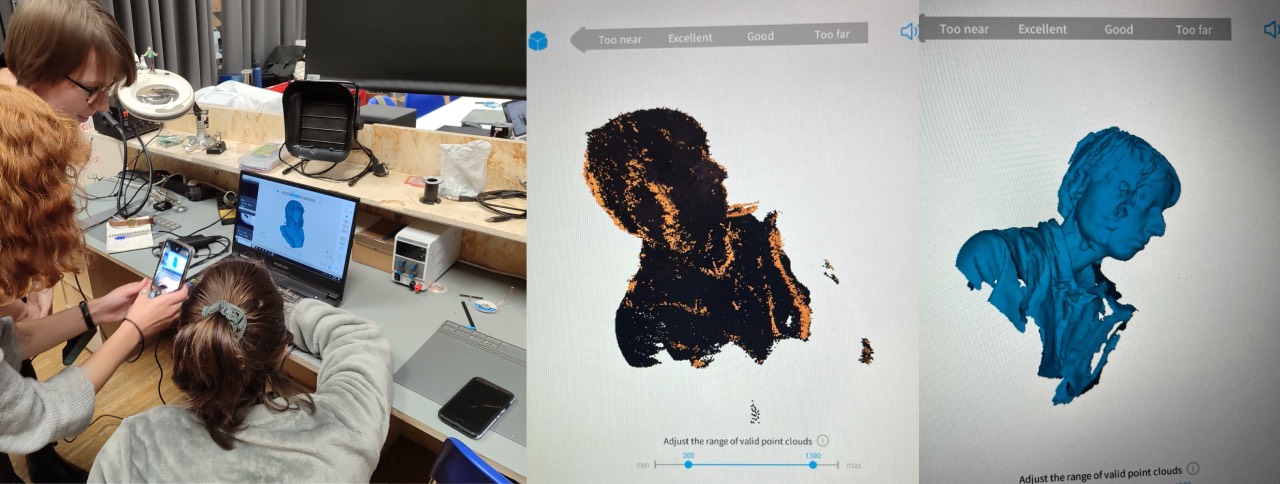
We continued to tweak our workflow along the way:
- By turning off the soldering lights nearby, we managed to reach less reflection on the face.
- We started scanning in a fragmented rotation, covering one angle of the face starting from the eye section, move up to the top of the head and down to the neck before shifting the angle. Covering the face and partial back of the head sections.
- Once we lost the connection, we tried to recover by just holding still, but eventually aborted the scan once an offset scan started to appear.
The real game changer was to change the lighting conditions by rotating the stool itself and eventually we had a good result for all the three of us.
After each scan we checked the point clouds on the Revopoint software by finishing the scan. Initially these were very shady but once we found the RGB settings on the bottom we could quickly check the quality. We discarded the first few medusa scans but meshed and saved our final takes as .srl and s .ply files.

Lessons Learned
- front light on the face is really a gamechanger when scanning a face
- working in three or two is necessary if you are not using a phone
- keep your eyes closed, when scanning your face
- remember to save both .srl and .ply formats
3D printing - Helle's cup
This week was my friend Helle's birthday - since I wanted to use our labs paste printer, I designed a little coffe cup for her. Initially I aimed for an espresso cup, but it turned out to be perfect for a cortado.
Design the cup in Rhino
My initial inspiration for the cup was a mandala, which should represent Helle's danish "trust-the-system" attitude. So the shape plays with convex and concarve shapes as well as alternating round and sharp corners, which could not be achieved by using traditional clay crafting.

Initially I mixed up my measurements and the cup appeared to be only 4 mm high instead of 40. So my first adjustment was to scale the cup. I had simply used loft
to create the shape and offsetthe surface to add thickness
Before starting the print in clay I wanted to test the shape in PLA and familiarize with our lab's printers. Thus I exported the selected surface to an .stl file in Rhino (default export options work fine!) before moving to Cura to slice the file. The file can be found here.
Design the plant pot
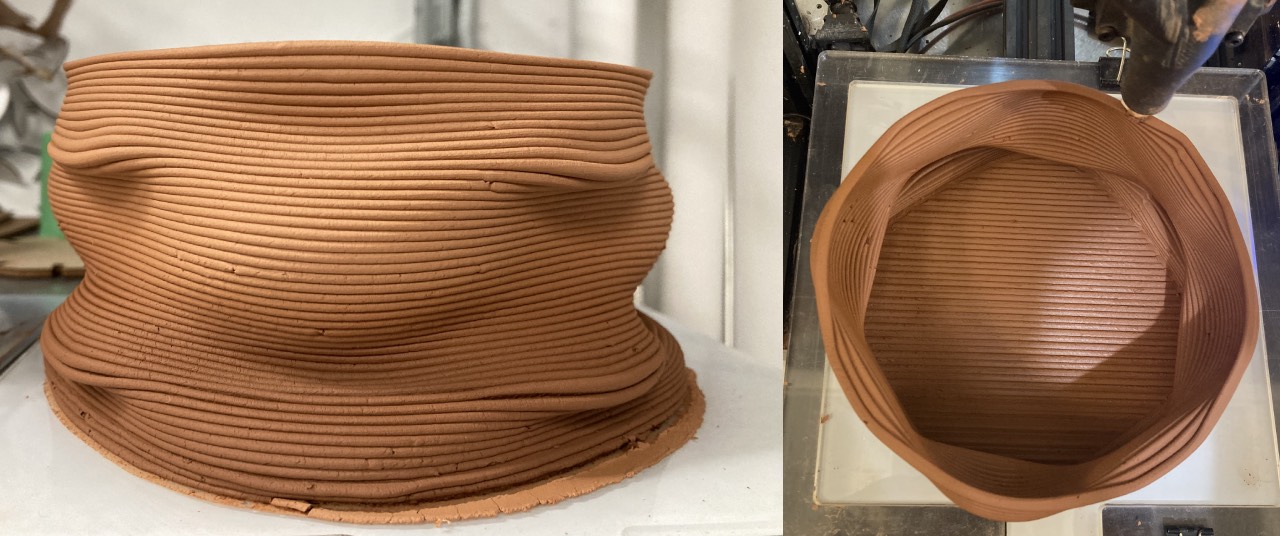
I wanted to try out the limits of paste printing in a second iteration and therefore designed a plant pot that had a diameter of 200 mm and a height of 150 mm to test the printer's limits. To test the possible shapes I followed the isocurve tutorial from Advanced 3D-printing with grasshopper, clay and fdm.
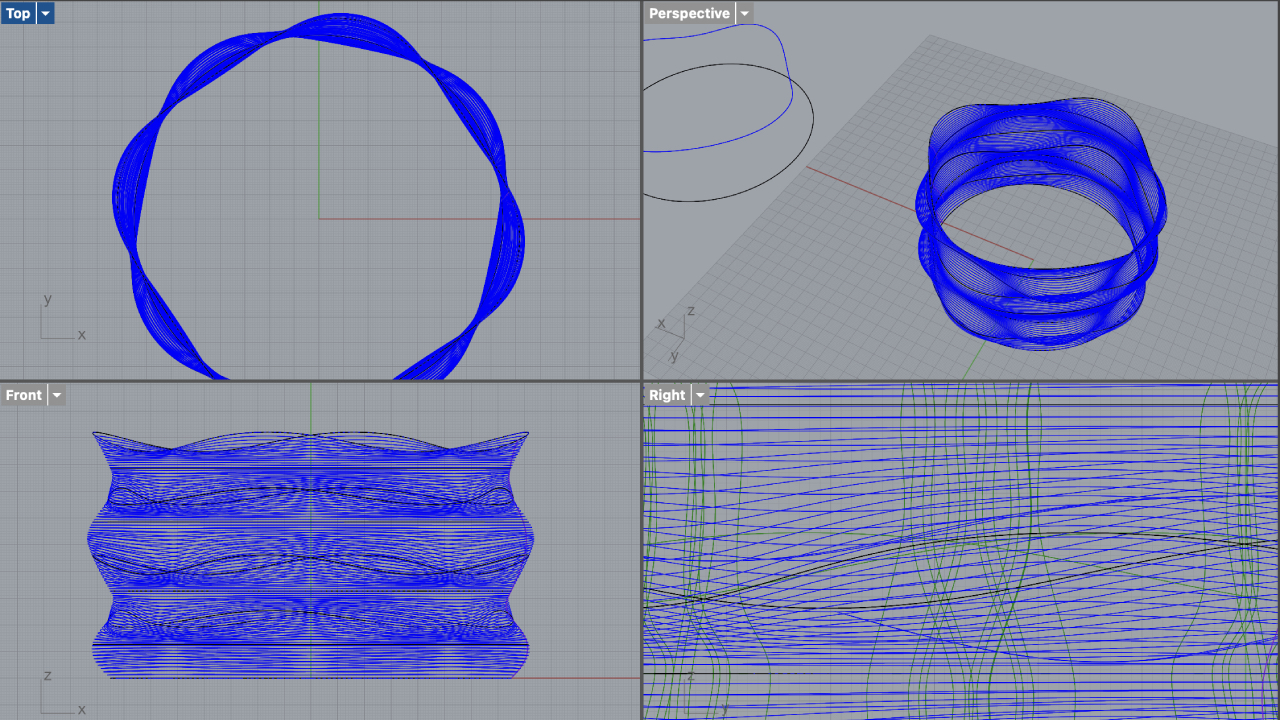
The shape is especially particular for clay printing because it could not be easily substractively - it would be extremely hard to form the calculated symmetrical concentric and concarve shapes with a different process than 3D-printing. I tested different roundings and distances to see, when the shape would collapse.
Print with PLA
Slice with Cura
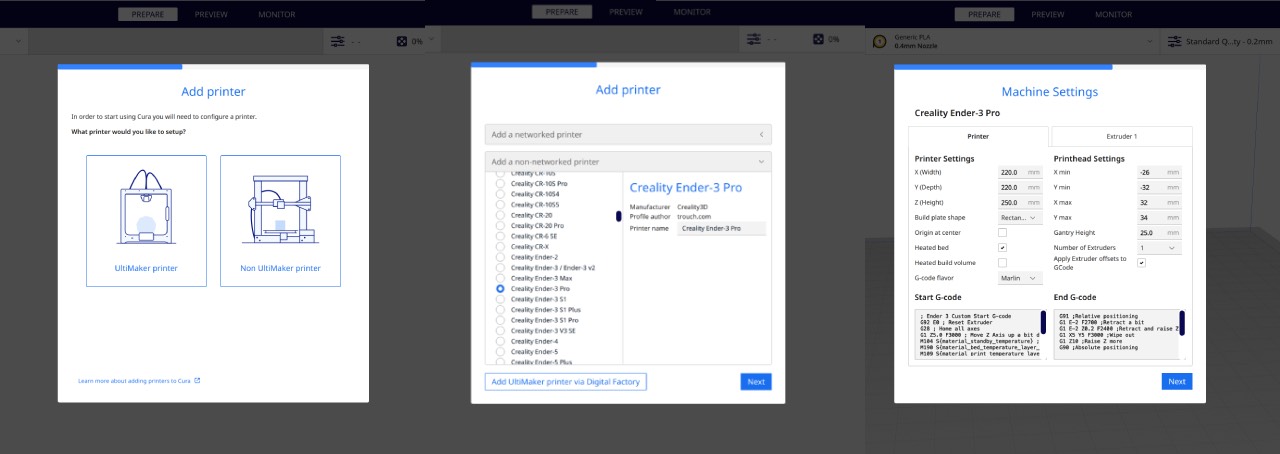
First i had to install Cura and add the lab's printers - I used the Creality Ender-3 Pro, thus added a non-ulitmaker printer. Secondly I changed the nozzle size of the printer to 0.6 mm, which can be done in the machine settings area or in the prepare tab.

I received an instant model error in Cura, because I had not added a top/bottom thickness. Once I had changed this to 2 mm the model was fine. Since I wanted to
simulate a clay print, I asked Spiralize Outer Contour
no extrusion is necessary, but the line width/nozzle size will determine the thickness of the piece.
Once this issue was fixed I had a final sliced model and could preview it's printing time (44 min) and progress. I saved the file to the mini SD card directly from Cura.
Print with the Creality Ender-3 Pro
I entered the SD card in the printer and got the printer ready for the print. First I preheated the PLA by navigating to Temperature/Preheat PLA on the machine's display
and secondly heated the nozzle to 215°. Once the temperature was up I simply selected my file under Print and hit print.

After the machine's test my print started going very smoothly and 44 min later I had a little espresso mug in hand. I was really lucky because the bed was levelled and the nozzle did not get clogged, so I basically did not have to troubleshoot.
Lessons Learned
- spiral printing does not necessarly need thickness on the printed piece
- direct SD adapters to MAC work better than SD to USB to USC-C adapters
- keep in mind the right measurements from the beginning in Rhino
- Take material thickness into account, when designing the cup, I encountered little bubbles on some sharp edges, which did not appear in Rhino
Print with Clay
Printing with clay is a different game on so many levels: it's all about the paste (consistency, material, flowrate,..), which is a fixed and very controlled parameter, when printing with PLA as well as the settings follow a trial and error principle.
Get the paste printer ready
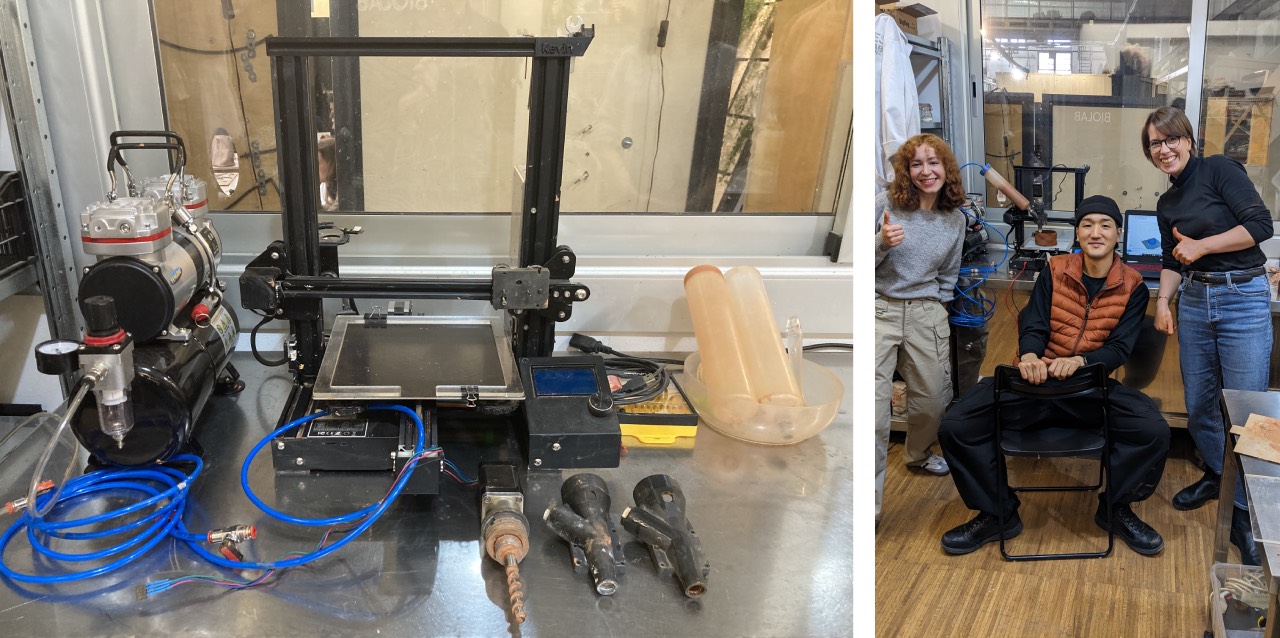
Some of our node wanted to print in clay, so
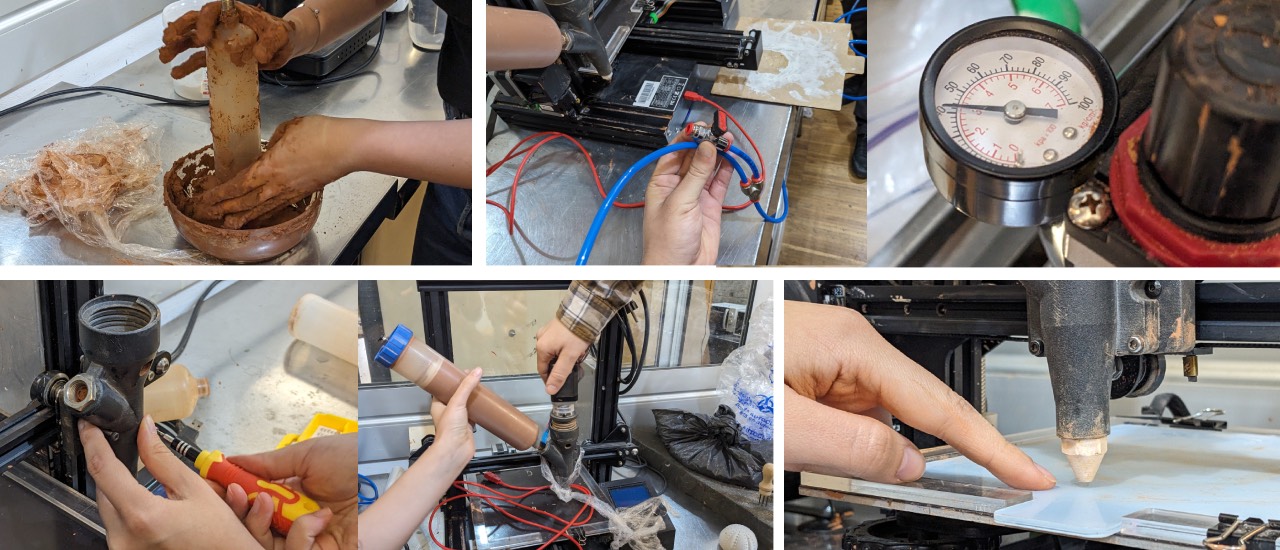
Printing in clay is ideally a team effort, since there are many steps necessary:
- mix the clay with 5-7% water of the clay's weight
- fill the clay into the cartridge, ideally without air bubbles
- plug the air compressor, keep in mind the 4 bar pressure limit
- screw the extruder to the printer and insert the motor (don't keep the cable hanging!)
- load the cartridge into the extruder and connect the air pressure
- autohome X and Y axis and level Z with Repetier Host or directly on the machine
- AND keep adjusting, while printing
Slice the file with Mamba/Grasshopper
To slice the file for the paste printer you can either use Cura or a Grasshopper Plugin called Mamba. Slicing with Mamba is the lab's recommendation for slicing, because the settings can be configured in a more controlled way. So I downloaded Mamba from food4rhino.com and copied the downloaded folder in Grasshopper/File/Special Folders/Components Folders. After restarting Rhino and Grasshopper the plug-in appears and I could work with the example file.

First step was to connect the geometry to the file and insert the printers settings: X(235), Y(235), Z(275). Once these are set a blue preview-frame in Rhino will appear. Initially my shape was not able to be sliced, because I had extruded the polysurface. First lesson learned that again you don't need material thickness, since it will be defined by the nozzle size and line height.

So I had to explode my geometry and delete the unnecessary surfaces. This resulted in some strange printing curves, because I had deleted too many of the tiny
surface. After a little back and forth I eventually lofted the initial geometry again. It should be noted here that I had to close Rhino and Grasshopper for several times for the
the plugin to recognize the changed geometry. The grasshopper file can be found here.
Print attempts
Our lab's paste printer is a Repetier printer, so I downloaded Repetier Host to be able to control the print. Once downloaded you need to connect the printer by USB and change a few settings under Printer/Printer Settings. Set the port, where the printer is connected and select the Baud Rate of 115200.

Before I started to print we had cleaned the extruder to increase flow rate, thus the initial pressure of around 2 bar was too high and a lot of material was pushed. Secondly the clay in the afternoon session turned out to be a little bit more watery, thus the initial setting of the flow rate to 140% in Repetier was too high. Instead on the next session the clay had dried out and with 4 bar and a flowrate of 180 we could not get any paste flowing.
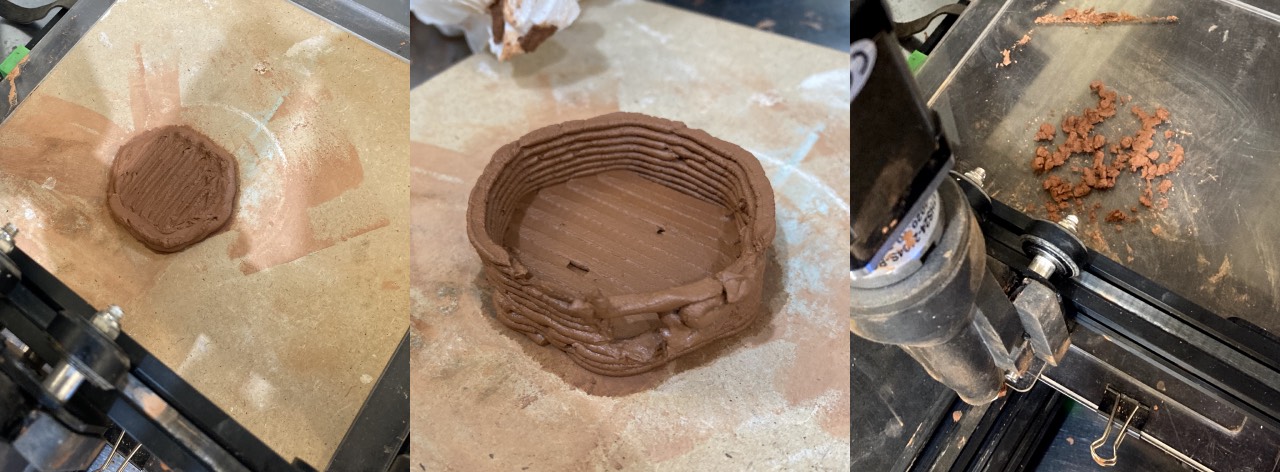
I continued tweaking these two parameters on the second attempt and ended up with the following settings working for my final piece on the third attempt:
- air pressure: around 1,5 bar
- flowrate for base layers: 100%
- flow rate for other layers: 110%

Right after the print I measured the print to see it's shrinkage. Initially it was 7 cm high and .. when fully dried.
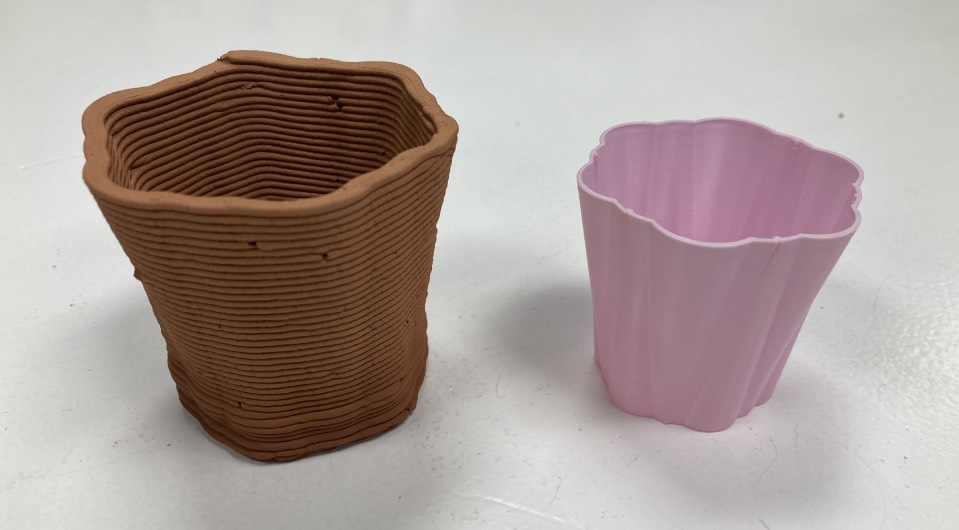
Testing the plant pot and the size and shape turned out to be thrilling. The dimension just fit the printer as well as the isocurve shape almost collapsed, but made it :)
Lessons Learned
- ideally the paste is a little bit more watery in the beginning or it might dry out throughout the day
- paste printing is still a very manual process with a lot of tweaking required
- in the best case paste printing is a team effort!