03 Computer Controlled Cutting
This week's assignment is to get to know our node's laser cutters and familiarize with the process in the group assignment on the one hand. On the other hand to design a press fit kit using parametric design and use the vinyl cutter.
Group assignment: Rayjet R400 & Trotec Speedy 400
The documentation for our group assignment from the Barcelona node can be found here.
Lessons Learned
- Using Tape to fix your material is easier and more hands on than using the clips.
- Always do a square test before getting started with the final design.
- Be prepared if there is no internet connection in the lab.
- The Trotec Speedy 400 is the better machine to engrave in the lab.
- If you forget to turn on the air compression, the material will get burnt.
- Increase either power or speed to change your results.
Lab Safety
The Fablab Barcelona put in place a mandatory lab test to follow their safety standards and regulations. The essence is to use common sense with machines: wear protection, double-check files beforehand with instructors, keep the lab and workspace tidy, don't leave the machines alone and keep an open eye.
Vinyl me, please
Workflow
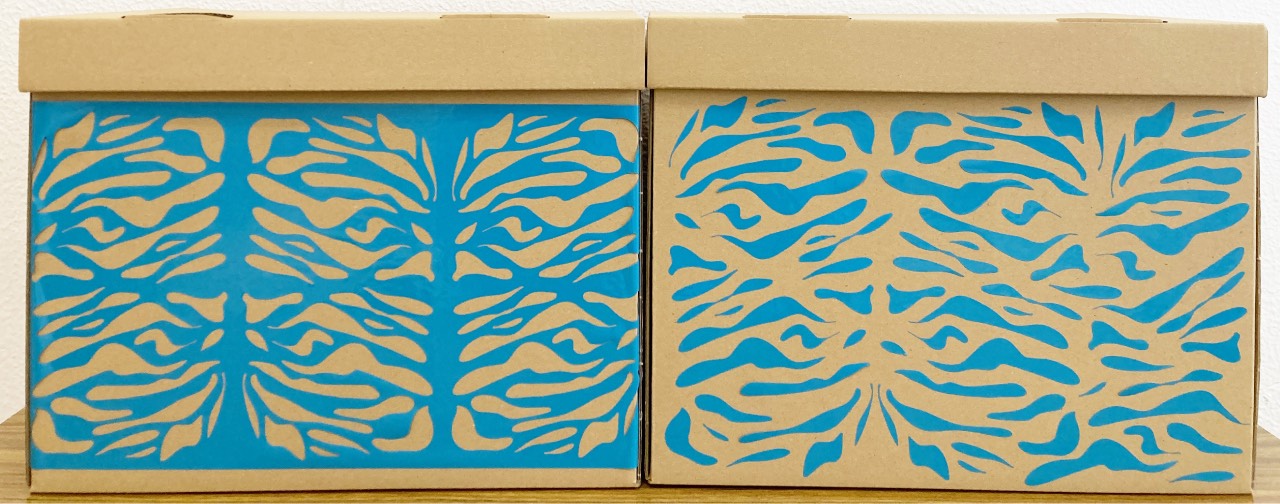
I had just moved to a new apartment in Barcelona and am using Ikea's Pappis Paperboxes for storage. So I decided to print a pattern for one of my boxes:
Initially I drew a pattern on my I pad and than converted the raster to vector in Inkscape and continued to adapt the pattern. Once I opened the .dxf export in Rhino I still had to close some lines with a polyline and add the outer shape. The Rhino file can be found here.
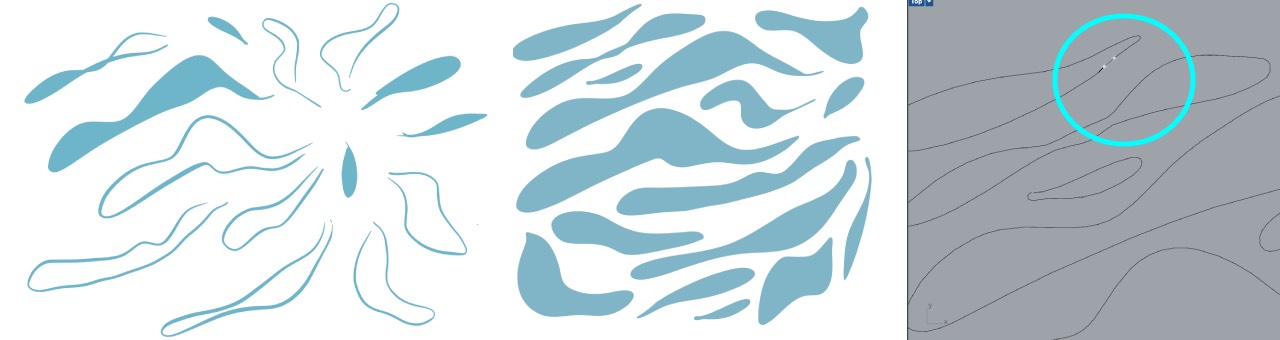
Once I tried the Roland vinylcutter in the lab, it gave me a bad result with the depth of the cut, so i needed to adjust that. Thanks
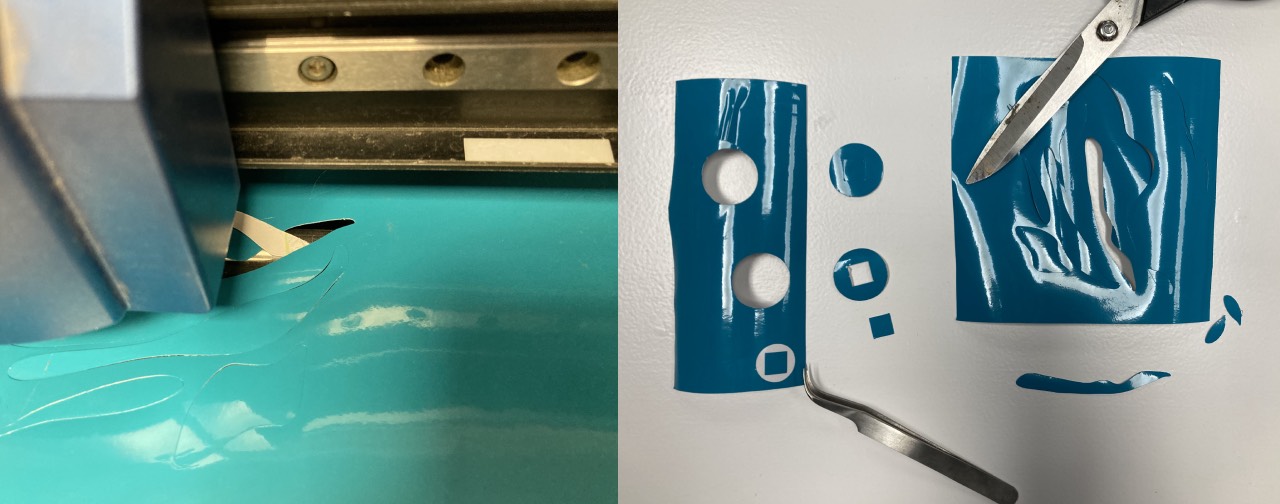
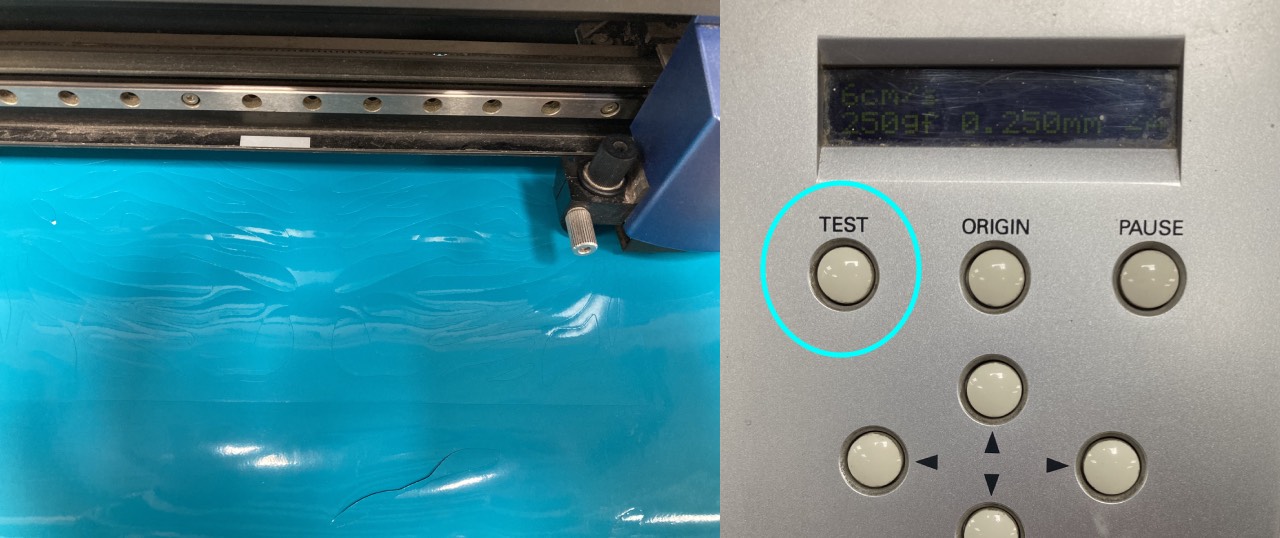
When the depth was set correctly the pattern turned out fine and will be a nice hack for my Ikea box and I think Roland and me will become good friends.
Lessons Learned
- Always safe in Rhino 5 to work on the lab computers.
- Simply use the test button on the machine and don't create your own test.
- Check the back of the material as well, not simply the front.
- Load the material crossing the white line.
A parametric pressfit kit
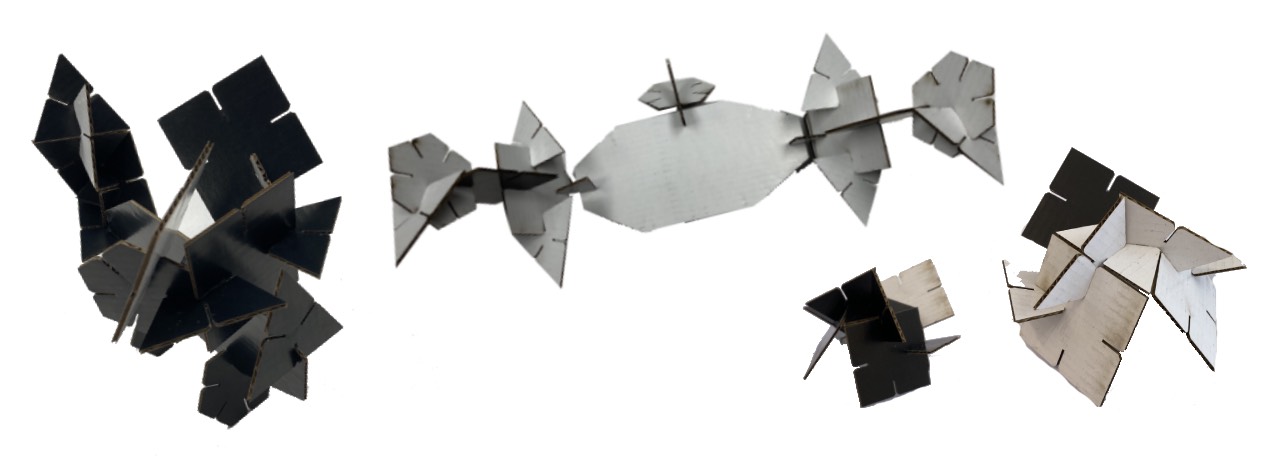
For this assignement I wanted to create a simple kit to play with and boost my inspiration for the final project. Eventually I ended up building little animals from it.
Design
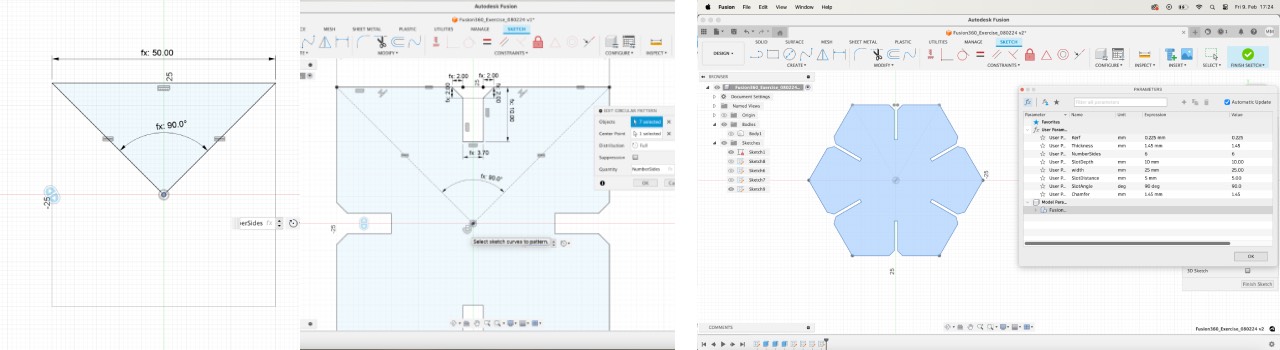
The design of the kit was done in Fusion 360. Not having used parametric design before the interface appeared more user-friendly than Grasshopper. The initial piece was a triangle and with a circular pattern a full square emerged. Than it was easy to change the number of sides to arrive with different shapes for the kit: triangle, square and a hexagon. I added a freeform to advance the possiblities for assemblence. I wanted to use the 1,5 mm black and white cardboard, we tested during the group assignement and put 0,255 as a kerf value. The Fusion 360 file can be found here.
The workflow for our laser cutters in the lab works with Rhino, since the construction lines would appear on the sketch. The recommendation from
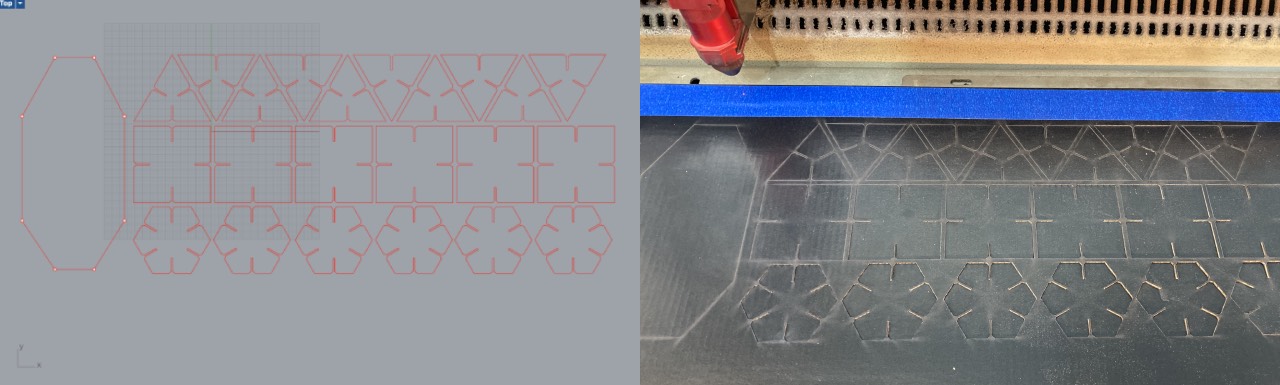
Lasercut on Trotec Speedy 400
After fixing the material, focusing the laser and checking in the file to the local computer I was ready for a quick test of the recommended cutting parameters of our lab (Speed:2 Power:45 Frequency: 1000) Since that worked out fine I continued to lasercut the full set.
Assemble several animals
Lessons Learned
- make a sketch of your parametric design before starting on the computer
- doublecheck lines in Rhino before cutting
- redo kerf-test for the material everytime you use it