Week 13 - Networking and communications
I2C connection through SAMD21
After checking the data sheet on the SAMD21 I decided to use pin 08 and 09 for the SCL and SDA connection.
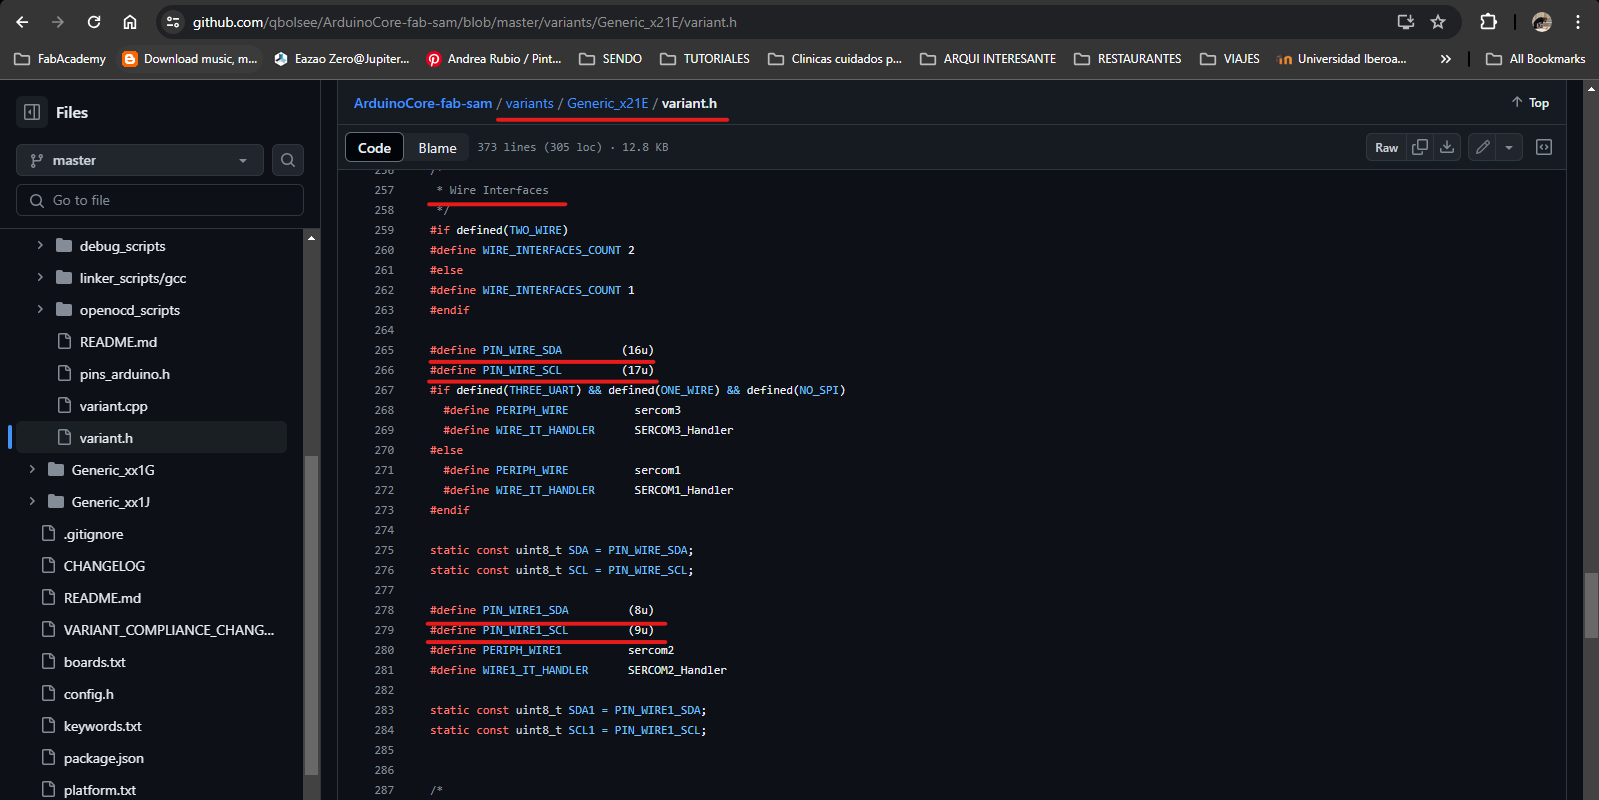
By default the SAMD21 uses pins 15 and 16 for using I2C connection, and in order to verify my instructor suggested to make a fast read on the microcontroller.
#includevoid setup() { // put your setup code here, to run once: Serial.begin(115200); Wire1.begin(); } void loop() { // put your main code here, to run repeatedly: Serial.print("SDA1: "); Serial.println(SDA1); Serial.print("SCL1: "); Serial.println(SCL1); delay(1000); }
IMPORTANT: when you burn the board using bootloader make sure to change the Serial config: ONE_UART_TWO_WIRE_ONE_SPI” . This means that for the connection you are using the second alternative of pins.
Also use Wire1 each time you need to indicate a transmission, a write or a receive. This is defined because I exchanged the default pins, so now we use the Second Wire in order for it to function.
Master and slave
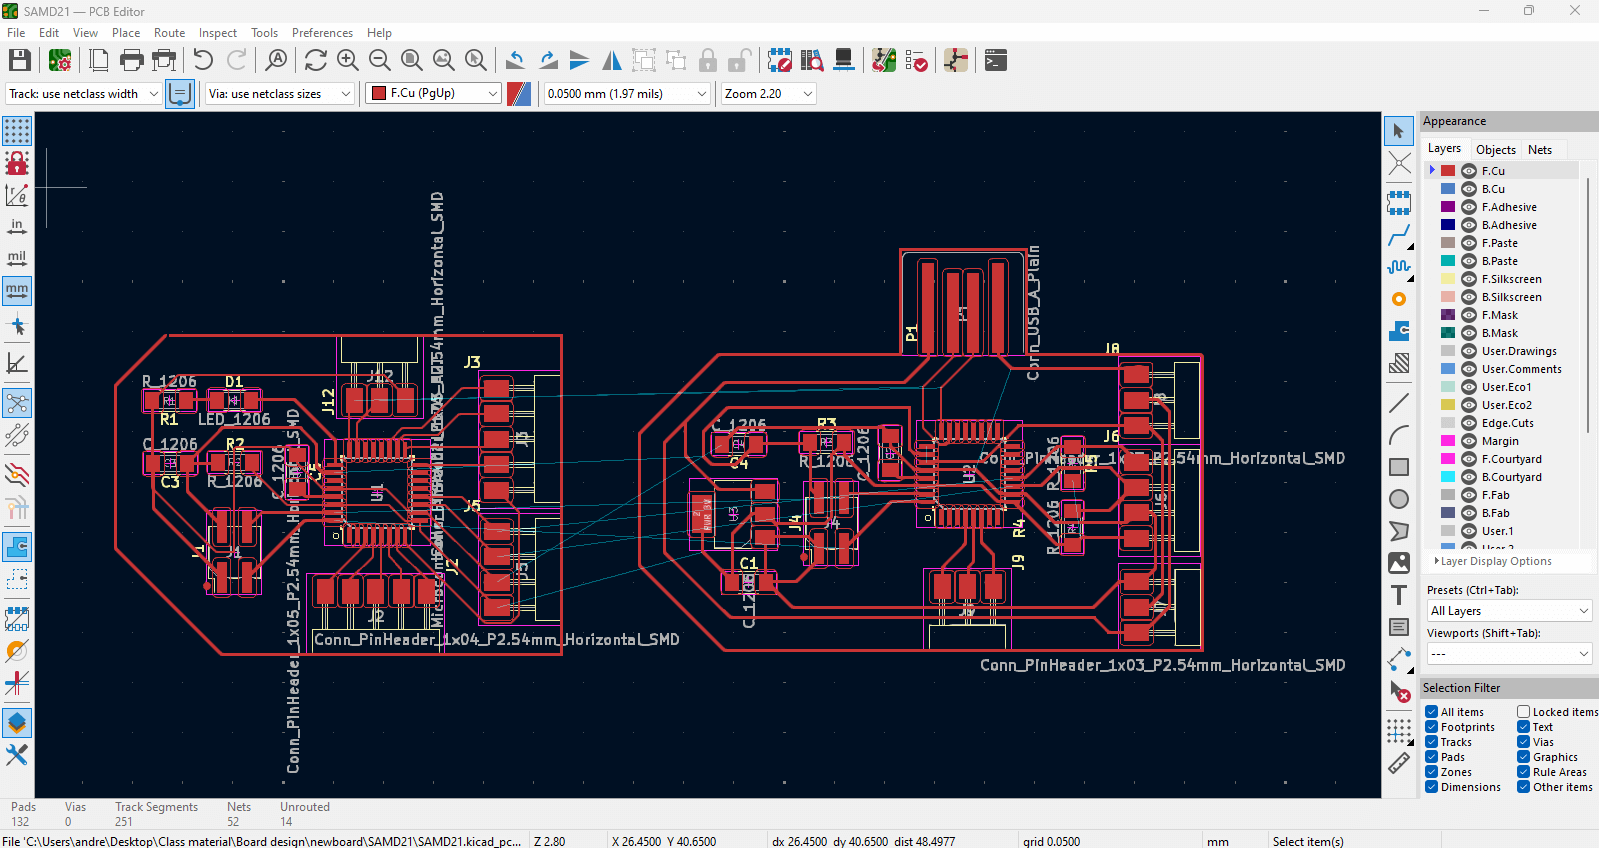
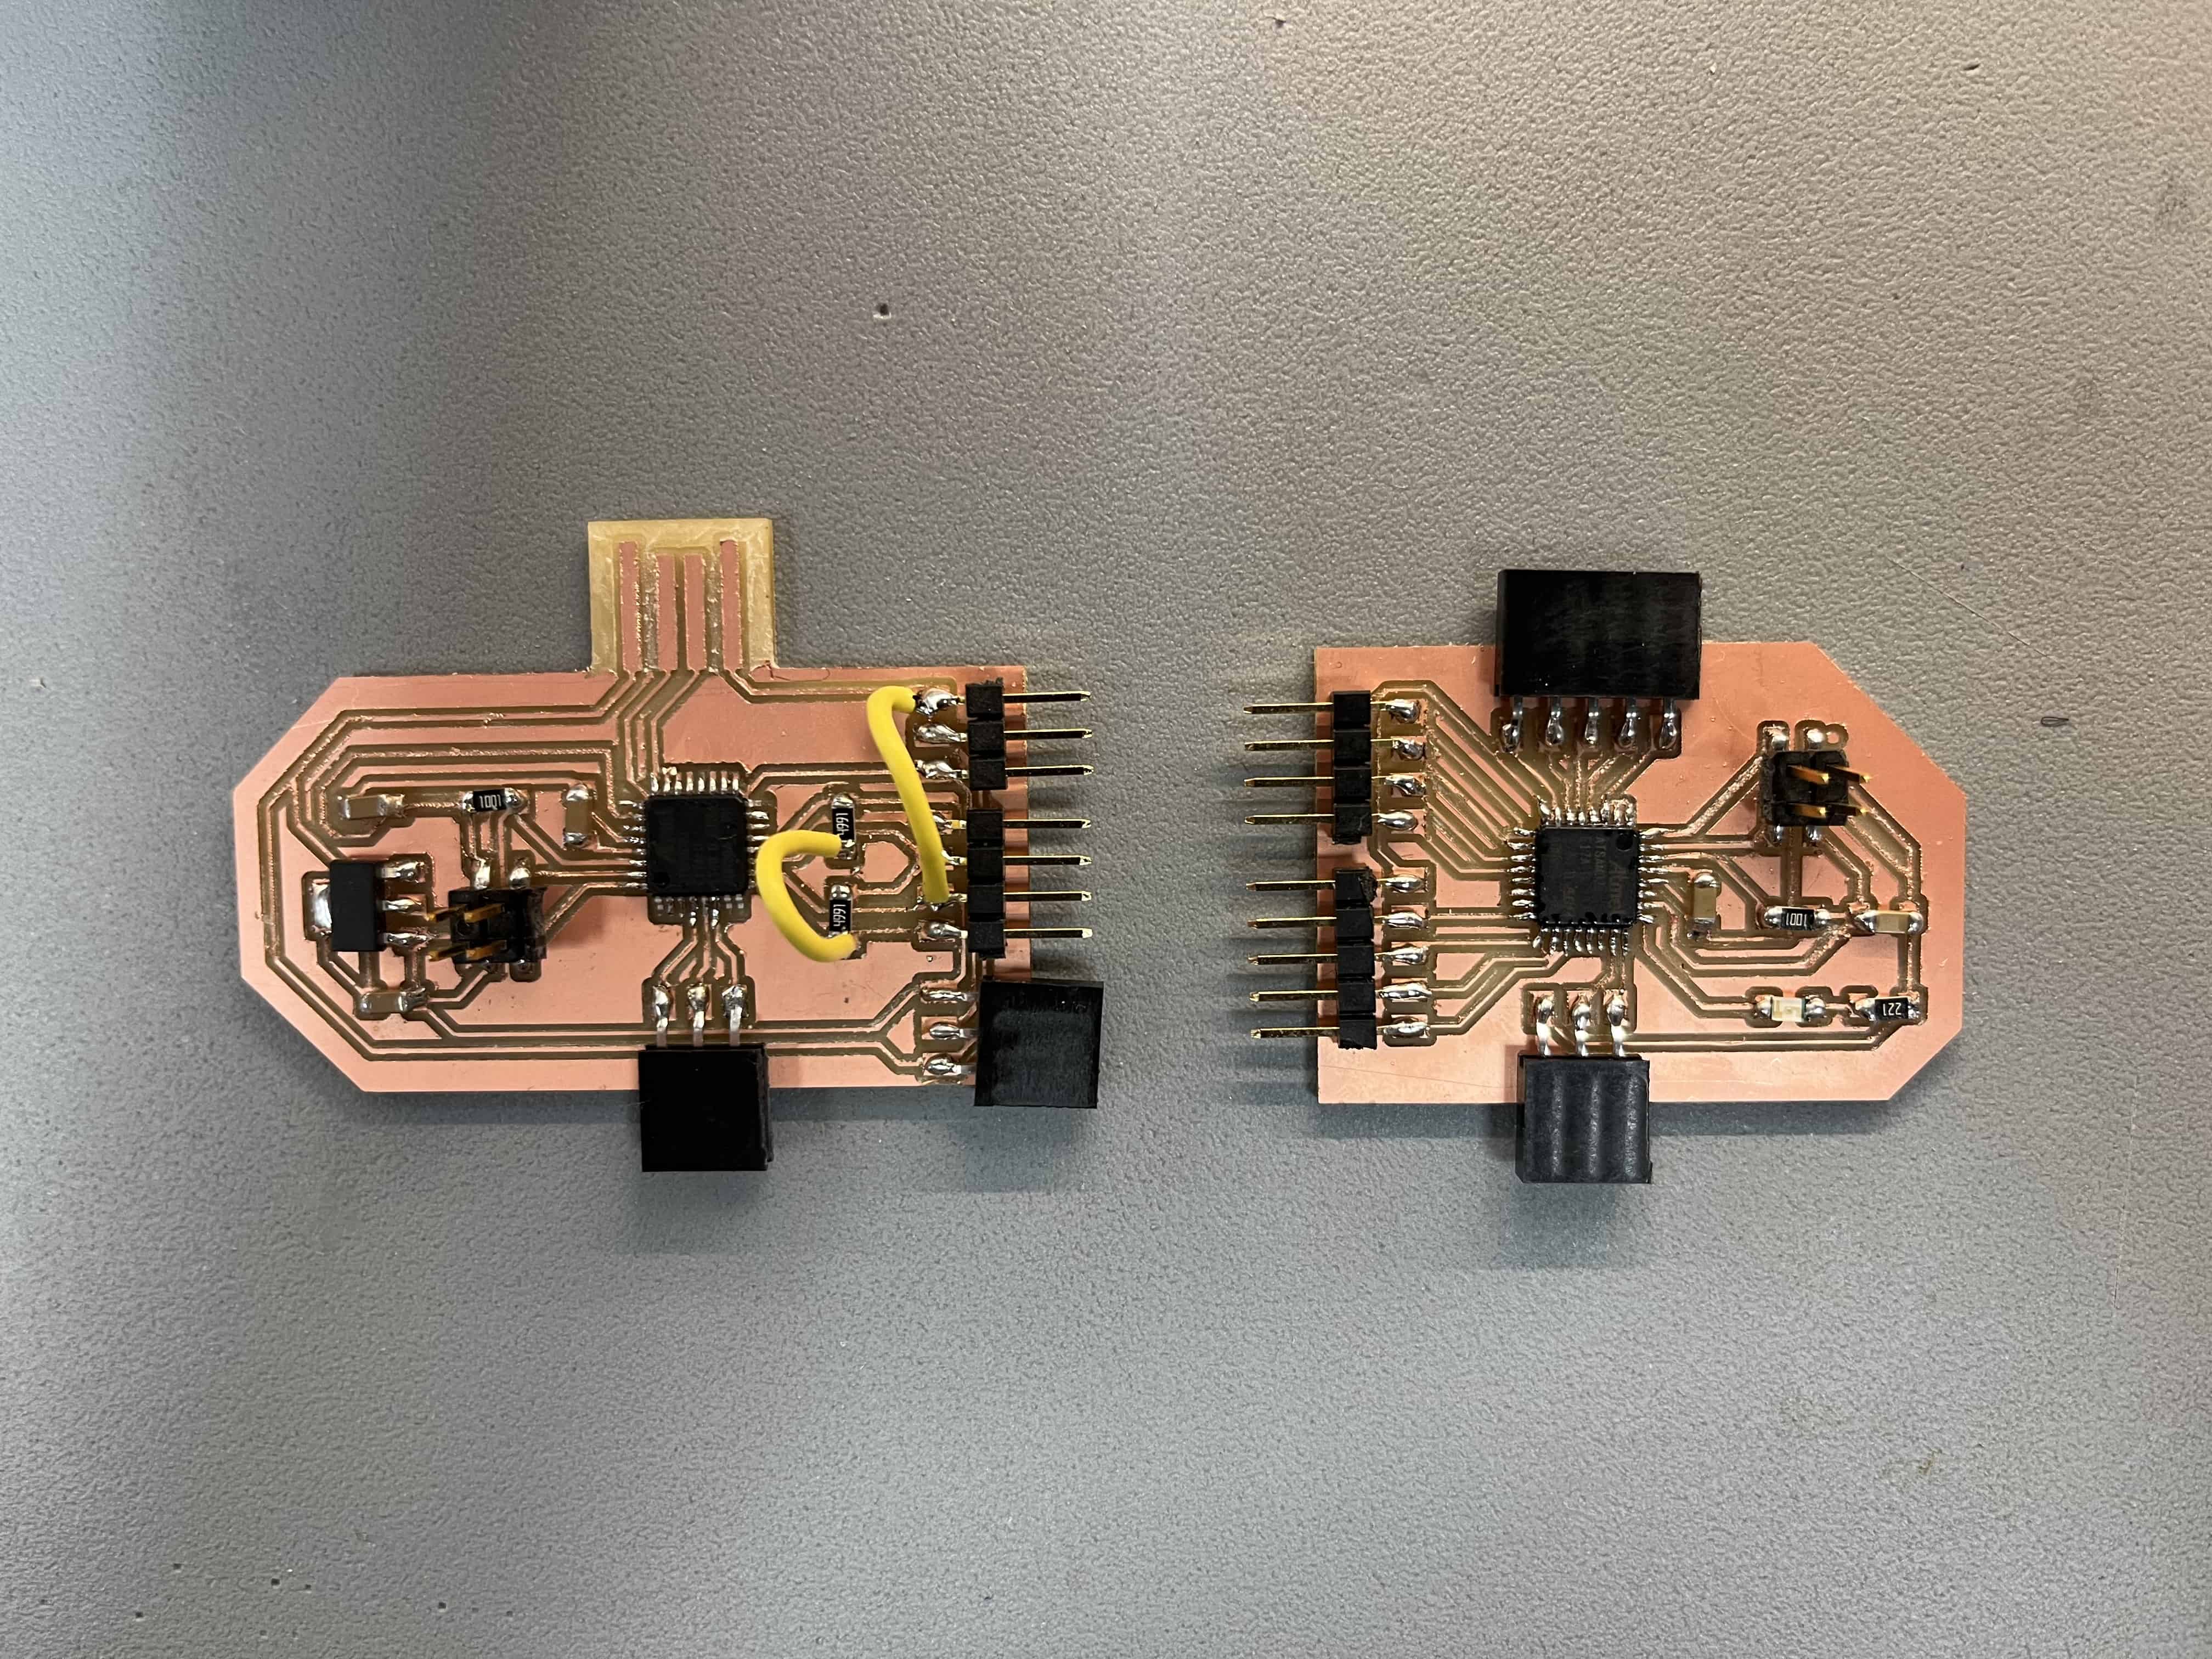
I used the previous PCB board with SAMD21 microcontroller, you can check the full process and documentation from Week 11:Input devices by just clicking on the link.
I defined the first SAMD21 board that contains the Neopixels as the master, and the second board with the capacitive touch pins as the slave. This was a suggestion of my instructor because I need more elements in the first board (5V direct line) and because you only need to receive where the touch is located in order to activate the pixels.
Lessons learned
- - At the beginning it was confusing to understand which code needed to be in each microcontroller, I was assuming that the Master needed to have the “Adafruit_Neopixel” code but actually it only needs the capacitive touch to understand what it needs to do.
- - Verify pins with the data sheet and send a message to your microcontroller just to make sure you can use the alternative ones.
- - Confirm library “Wire.h” because it can be another version and will also not work.
Master code:
#include#include "Adafruit_FreeTouch.h" Adafruit_FreeTouch qt1(3, OVERSAMPLE_4, RESISTOR_50K, FREQ_MODE_NONE); Adafruit_FreeTouch qt2(4, OVERSAMPLE_4, RESISTOR_50K, FREQ_MODE_NONE); Adafruit_FreeTouch qt3(5, OVERSAMPLE_4, RESISTOR_50K, FREQ_MODE_NONE); //Adafruit_FreeTouch qt4(5, OVERSAMPLE_4, RESISTOR_50K, FREQ_MODE_NONE); void setup() { //Wire1.begin(); // join I2C bus as master qt1.begin(); qt2.begin(); qt3.begin(); //qt4.begin(); } void loop() { int qt1_value = qt1.measure(); int qt2_value = qt2.measure(); int qt3_value = qt3.measure(); int qt4_value = qt4.measure(); int max = 500; bool qt1IsTouching = qt1_value > max; bool qt2IsTouching = qt2_value > max; bool qt3IsTouching = qt3_value > max; bool qt4IsTouching = qt4_value > max; int transmit = qt1IsTouching + qt2IsTouching + qt3IsTouching + qt4IsTouching; //Wire1.beginTransmission(1); // transmit to device #8 //Wire1.write(transmit); // sends five bytes //Wire1.endTransmission(); //Serial.println("Transmitting - "); // delay(100); }
Slave code:
#include#include bool ledOn; int sliderRawValue; float sliderValue; float smoothSliderValue; #define PIN 28 #define NUMPIXELS 19 float Pixels[NUMPIXELS]; float PixelsTarget[NUMPIXELS]; Adafruit_NeoPixel pixels(NUMPIXELS, PIN, NEO_GRB + NEO_KHZ800); void setup() { Wire1.begin(1); // join I2C bus with address #8 Wire1.onReceive(receiveEvent); // register event // Wire.onRequest(requestEvent); // register event Serial.begin(115200); // start serial for output Serial.println("hello"); pixels.begin(); pixels.clear(); pixels.show(); } int time; void loop() { // Serial.println("hello"); // smoothSliderValue = smoothSliderValue - ((smoothSliderValue - sliderValue) / (float)10); float step = sign(smoothSliderValue - sliderValue) * -0.01; smoothSliderValue = constrain(smoothSliderValue+step,0,1); int activePixels = smoothSliderValue * NUMPIXELS; String res = ""; for (int i = 0; i < NUMPIXELS; i++) { PixelsTarget[i] = i < activePixels ? 1 : 0; res += (String)Pixels[i] + " "; } RecalculateSmoothPixels(); // Serial.println(res); if(millis() > time){ time = millis()+1000; Serial.println((String)sliderValue + " msg"); } } void RecalculateSmoothPixels() { for (int i = 0; i < NUMPIXELS; i++) { float step = sign(Pixels[i] - PixelsTarget[i]) * -0.01; if (step > 0) { step /= 2; } Pixels[i] = constrain(Pixels[i] + step, 0, 1); // Pixels[i] = Pixels[i] - ((Pixels[i] - PixelsTarget[i]) / (float)20); int intensityR = Pixels[i] * 255; int intensityG = Pixels[i] * 255; int intensityB = Pixels[i] * 255; pixels.setPixelColor(i, pixels.Color(intensityR, intensityG, intensityB)); pixels.show(); } } int sign(float x) { return (x > 0) - (x < 0); } void receiveEvent(int howMany) { sliderRawValue = Wire1.read(); sliderValue = (float)sliderRawValue / (float)4; //4 capacitive touch in the parent // Serial.println(sliderValue); }
Group assignment
On the link below you can find the complete process of this week's group assignment. Click here
Resources
Josep Martí // Fab Lab Barcelona lead instructor
Adai Suri // Fab Lab Barcelona instructor
Files
Download KiCAD ZIP package and Arduino IDE codes here.