Group Assignment
Objective
Design a machine that includes mechanism, actuation, automation, and application. Build the mechanical parts and operate it manually. Document the group project and your individual contribution.
Summary
Project Overview
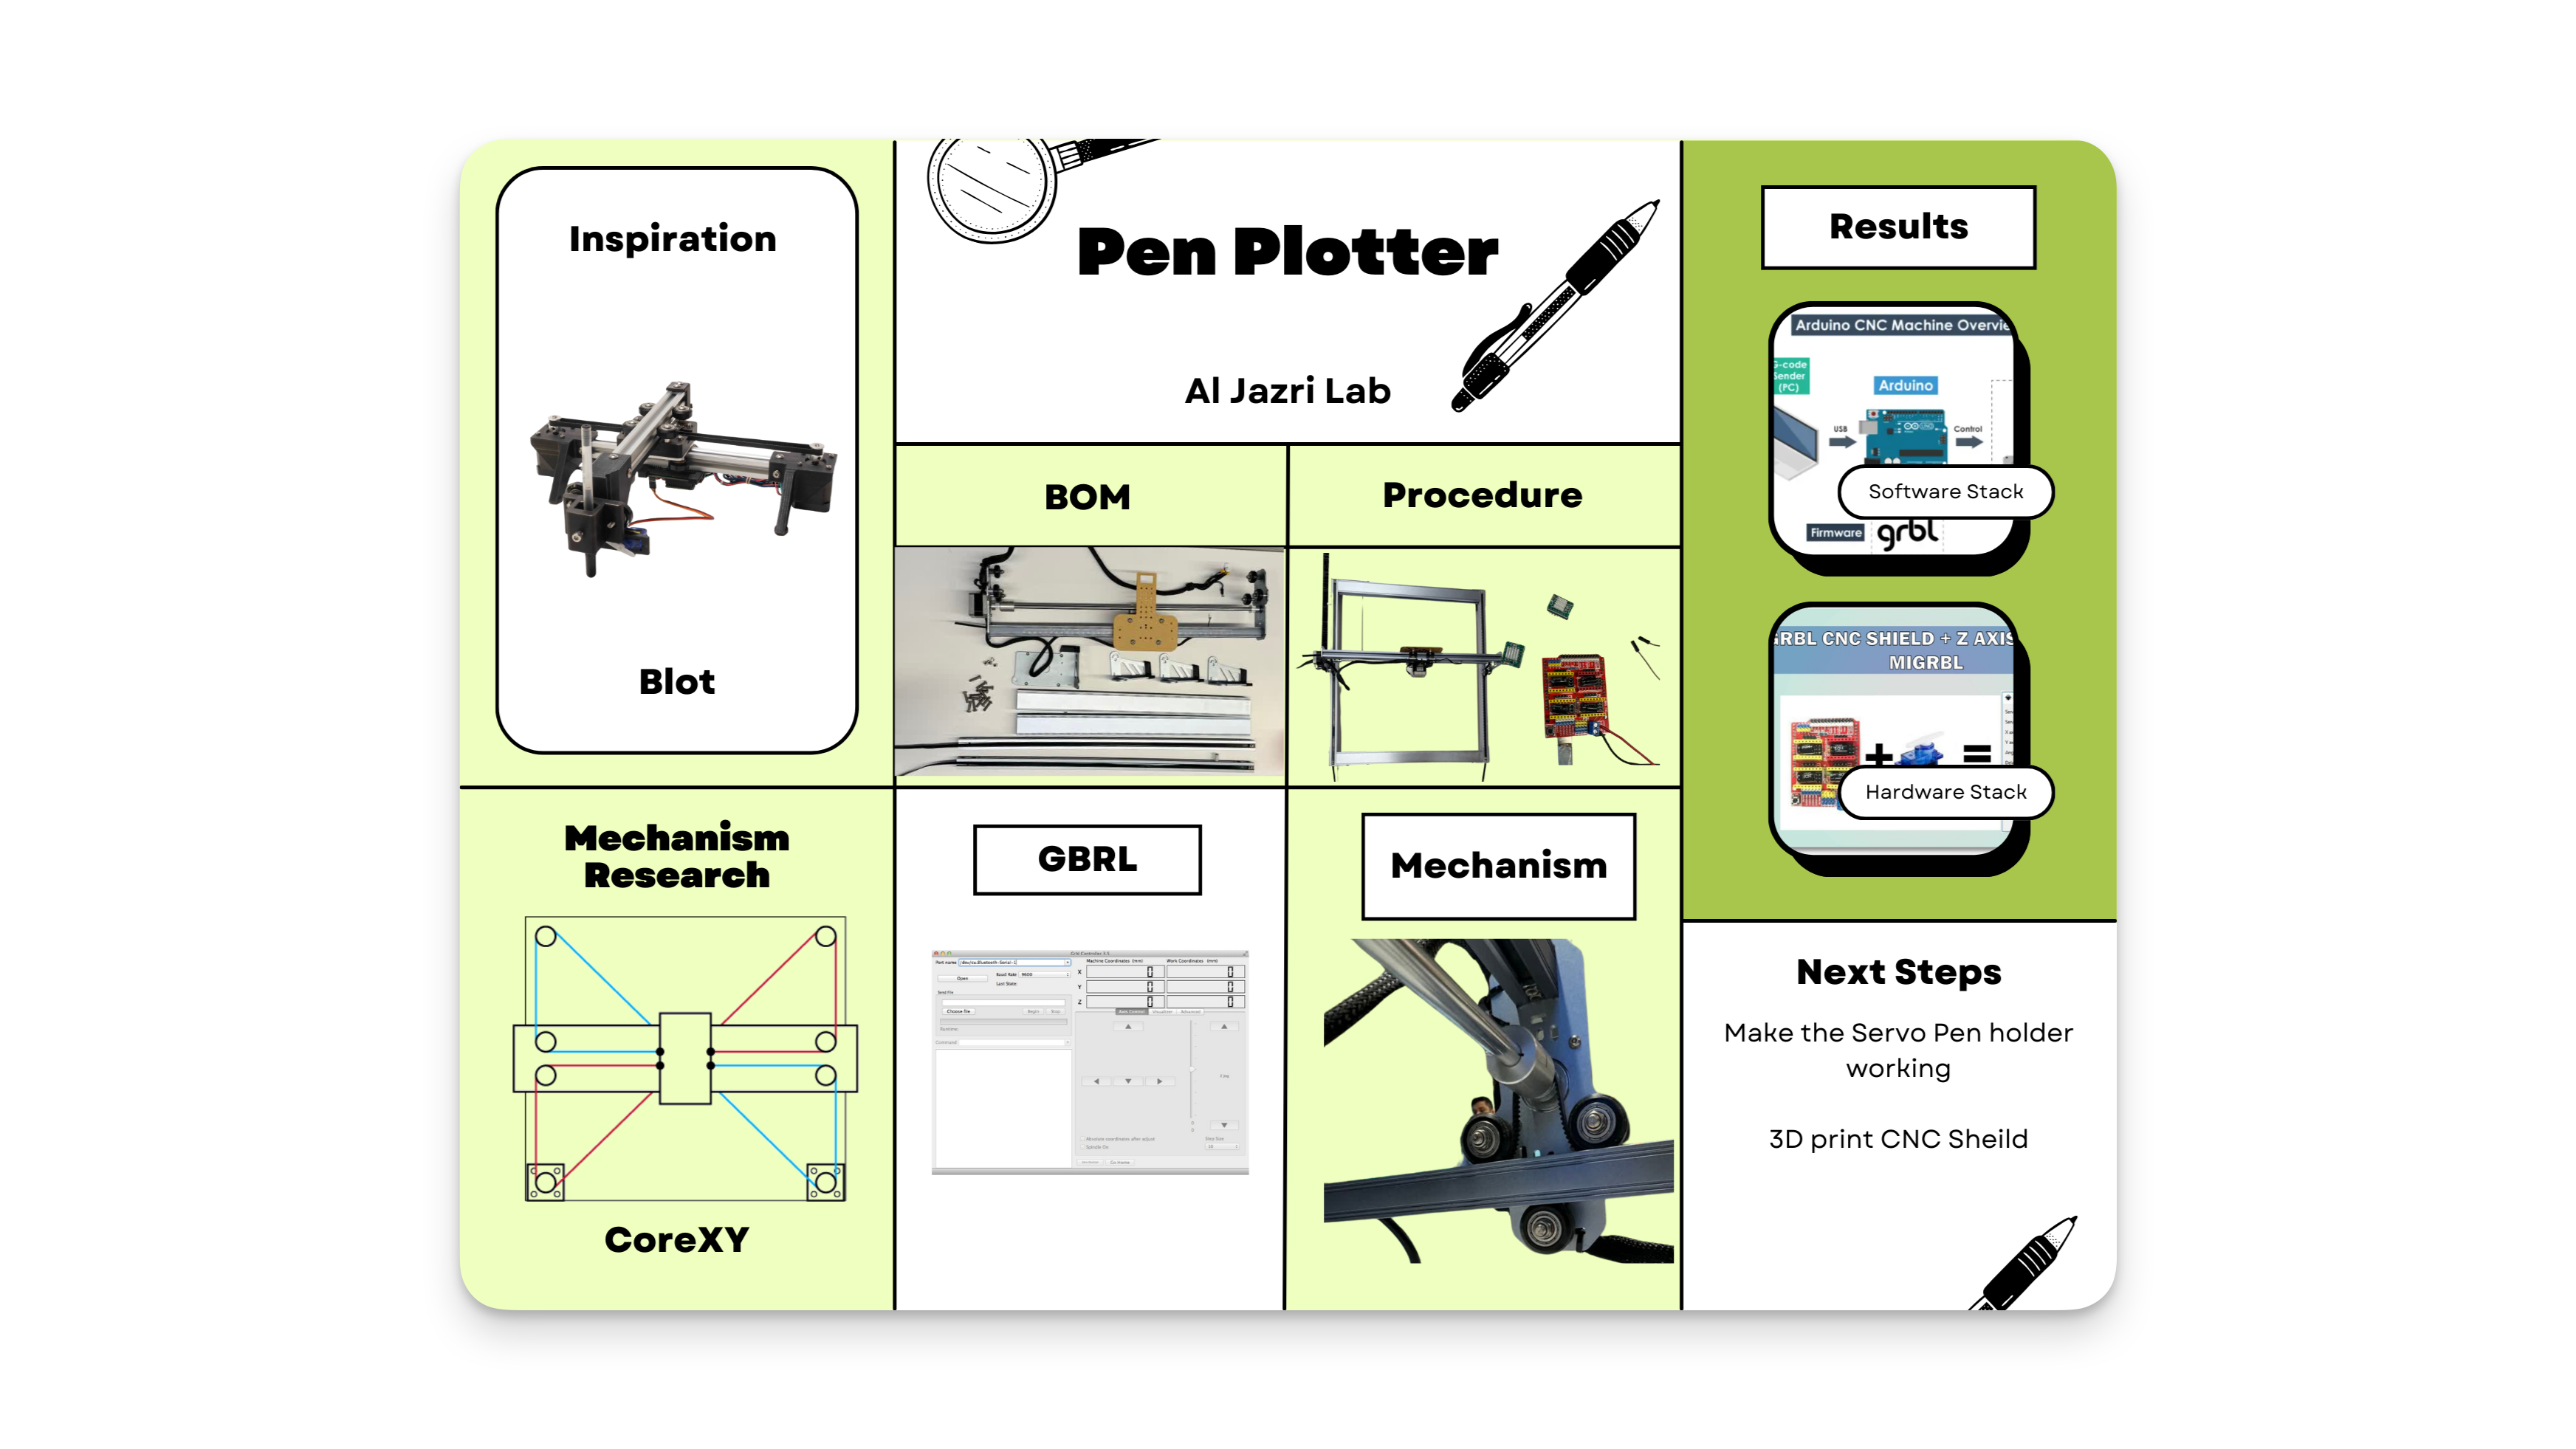
For the Mechanical design, during machine design week, we decided to create an XY Pen Plotter.
Inspitation :
![]()
Team Responsibilities
- Mechanical Design: Murtaza
- Software Section: Athif
- Documentation: Nisha
| Stage | Details |
|---|---|
| Research | - Idea |
| - Topic | |
| - Bill of Materials | |
| 2D/3D Mechanical Design | - Using existing mechanical parts |
| - 2D/3D Designing Pen holder | |
| Prototyping & Assembly | - Laser cut |
| - 3D Print | |
| - Mechanical Assembly | |
| Software | - GRBL |
| - Universal G-Code Sender | |
| - Using Inkscape to generate gcode | |
| - Programming to plot shapes |
Inspiration
Day 1 Activities
The team spent the day researching the concept of building an XY Pen Plotter. We decided to repurpose existing mechanical parts from a broken Creality CR-Laser Falcon Laser Engraver.
Introduction to the Machine
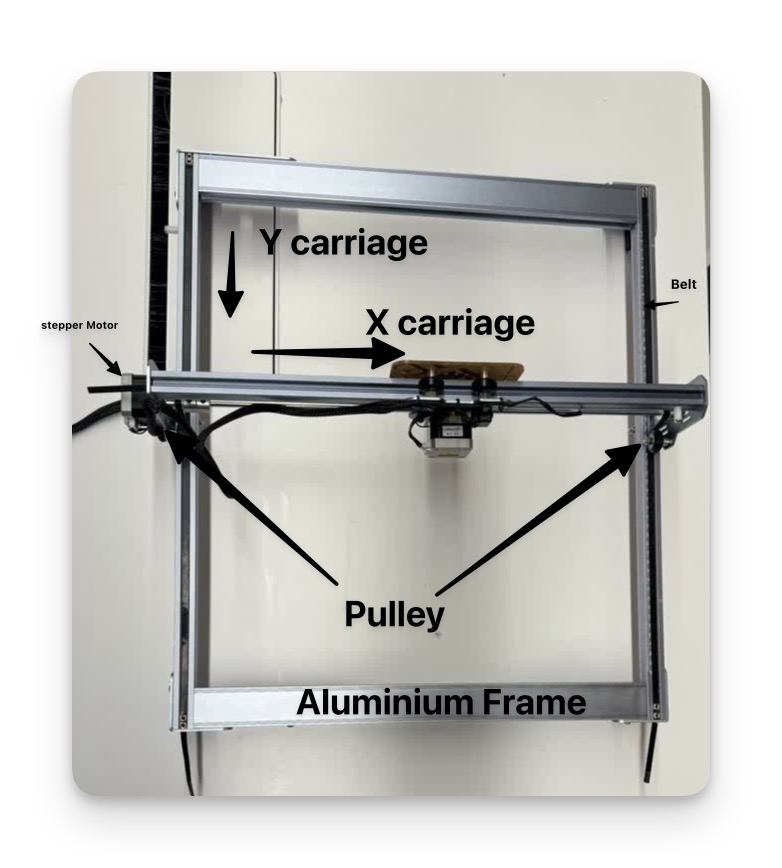
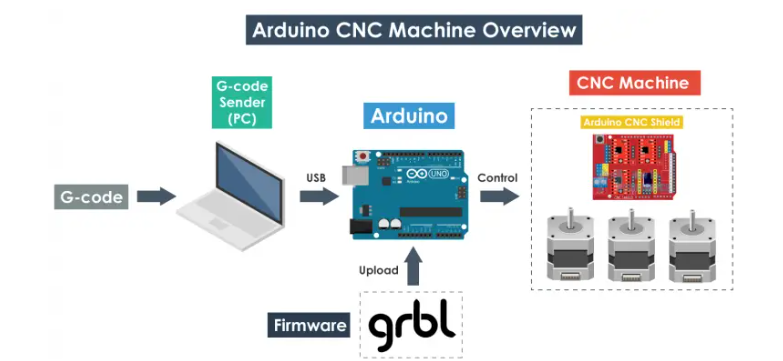
The plotter will feature two-axis control and a mechanism to raise and lower the pen, designed for A4 size operations. Each axis is powered by a stepper motor and belt mechanism. Stepper motors connect to a CNC shield atop an Arduino UNO, requiring a 12V external power supply for electronics and motors. The Arduino, programmed with the GRBL library, reads G-code, which is sent from a computer to the plotter using an open-source G-code sender.
Individual Contributions
Murtaza
- Designed the pen holder to be 3D printed and utilized as an end effector using Fusion 360.
- Designing mechanical components required for the machine.
- Assembly of machine design
Software section:
We experimented with GRBL , LaserGRBL , Open Build
GRBL : GRBL is an open source software or firmware which enables motion control for CNC machines. We can easily install the GRBL firmware to an Arduino and so we instantly get a low cost, high performance CNC controller. The GRBL uses G-code as input, and outputs motion control via the Arduino .
Installing GRBL
- Download the GRBL firmware from github.com (Download it as .ZIP file)
- Open the grbl-master.zip file and extract the files
- Open the Arduino IDE, navigate to Sketch > Include Library > Add .ZIP Library
- Navigate to the extracted folder “grbl-master”, in there select the “grbl” folder and click the open file. Now we have to GRBL as an Arduino Library.
- Uploading the Firmware
- Navigate to File > Examples > grbl > grblUpload. A new sketch will open and we need to upload it to the Arduino board. Select the Arduino board, the COM port and hit that upload button and we are done.
- Now your arduino can understand the G-Code.
G-code Generation:
We used inkscape to generate G-code for the machine.
Here are the steps:
1. Import the image you want to plot
2. If the image is not vector, trace bitmap to create a vector file of the image.
3. Go to the Extensions and select GcodeTool for the G code generate
Theory :
CoreXY is the foundation on which we thought over about the expansion of the fabrication tools in the rectangular cartesian coordinate system. It has two stepper motors which move in a syncronized manner so that the carriage moves from one XY coordinate to another.
BOM
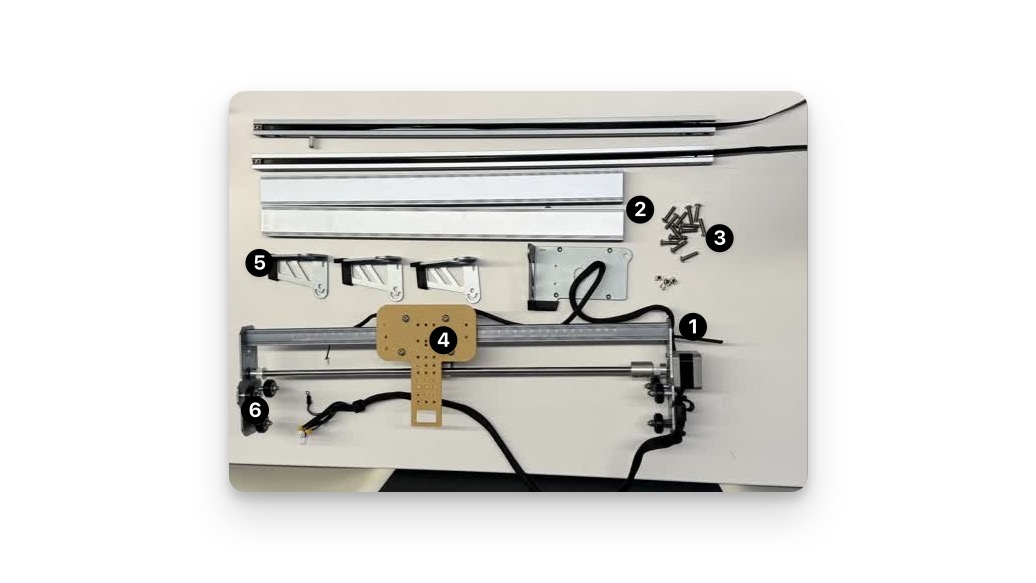
| SN | Item | Details | Qty | Remarks |
|---|---|---|---|---|
| 1 | Linear Rails with Carriage | ex.400mm | 2P | |
| 2 | Aluminum Extrusion | ex.300mm | 4P | |
| 3 | Assorted Screws and Fasteners | M3-M5 | 10P | |
| 4 | Arduino Board | 1P | ||
| 5 | CNC Shield | 1P | ||
| 6 | Laser cut Assembly holder | 1P | 100mm x 100m | |
| 7 | 3D printed Pen Holder | 1P | 150mm x 35mmm | |
| 1P |
PEN PLOTTERs

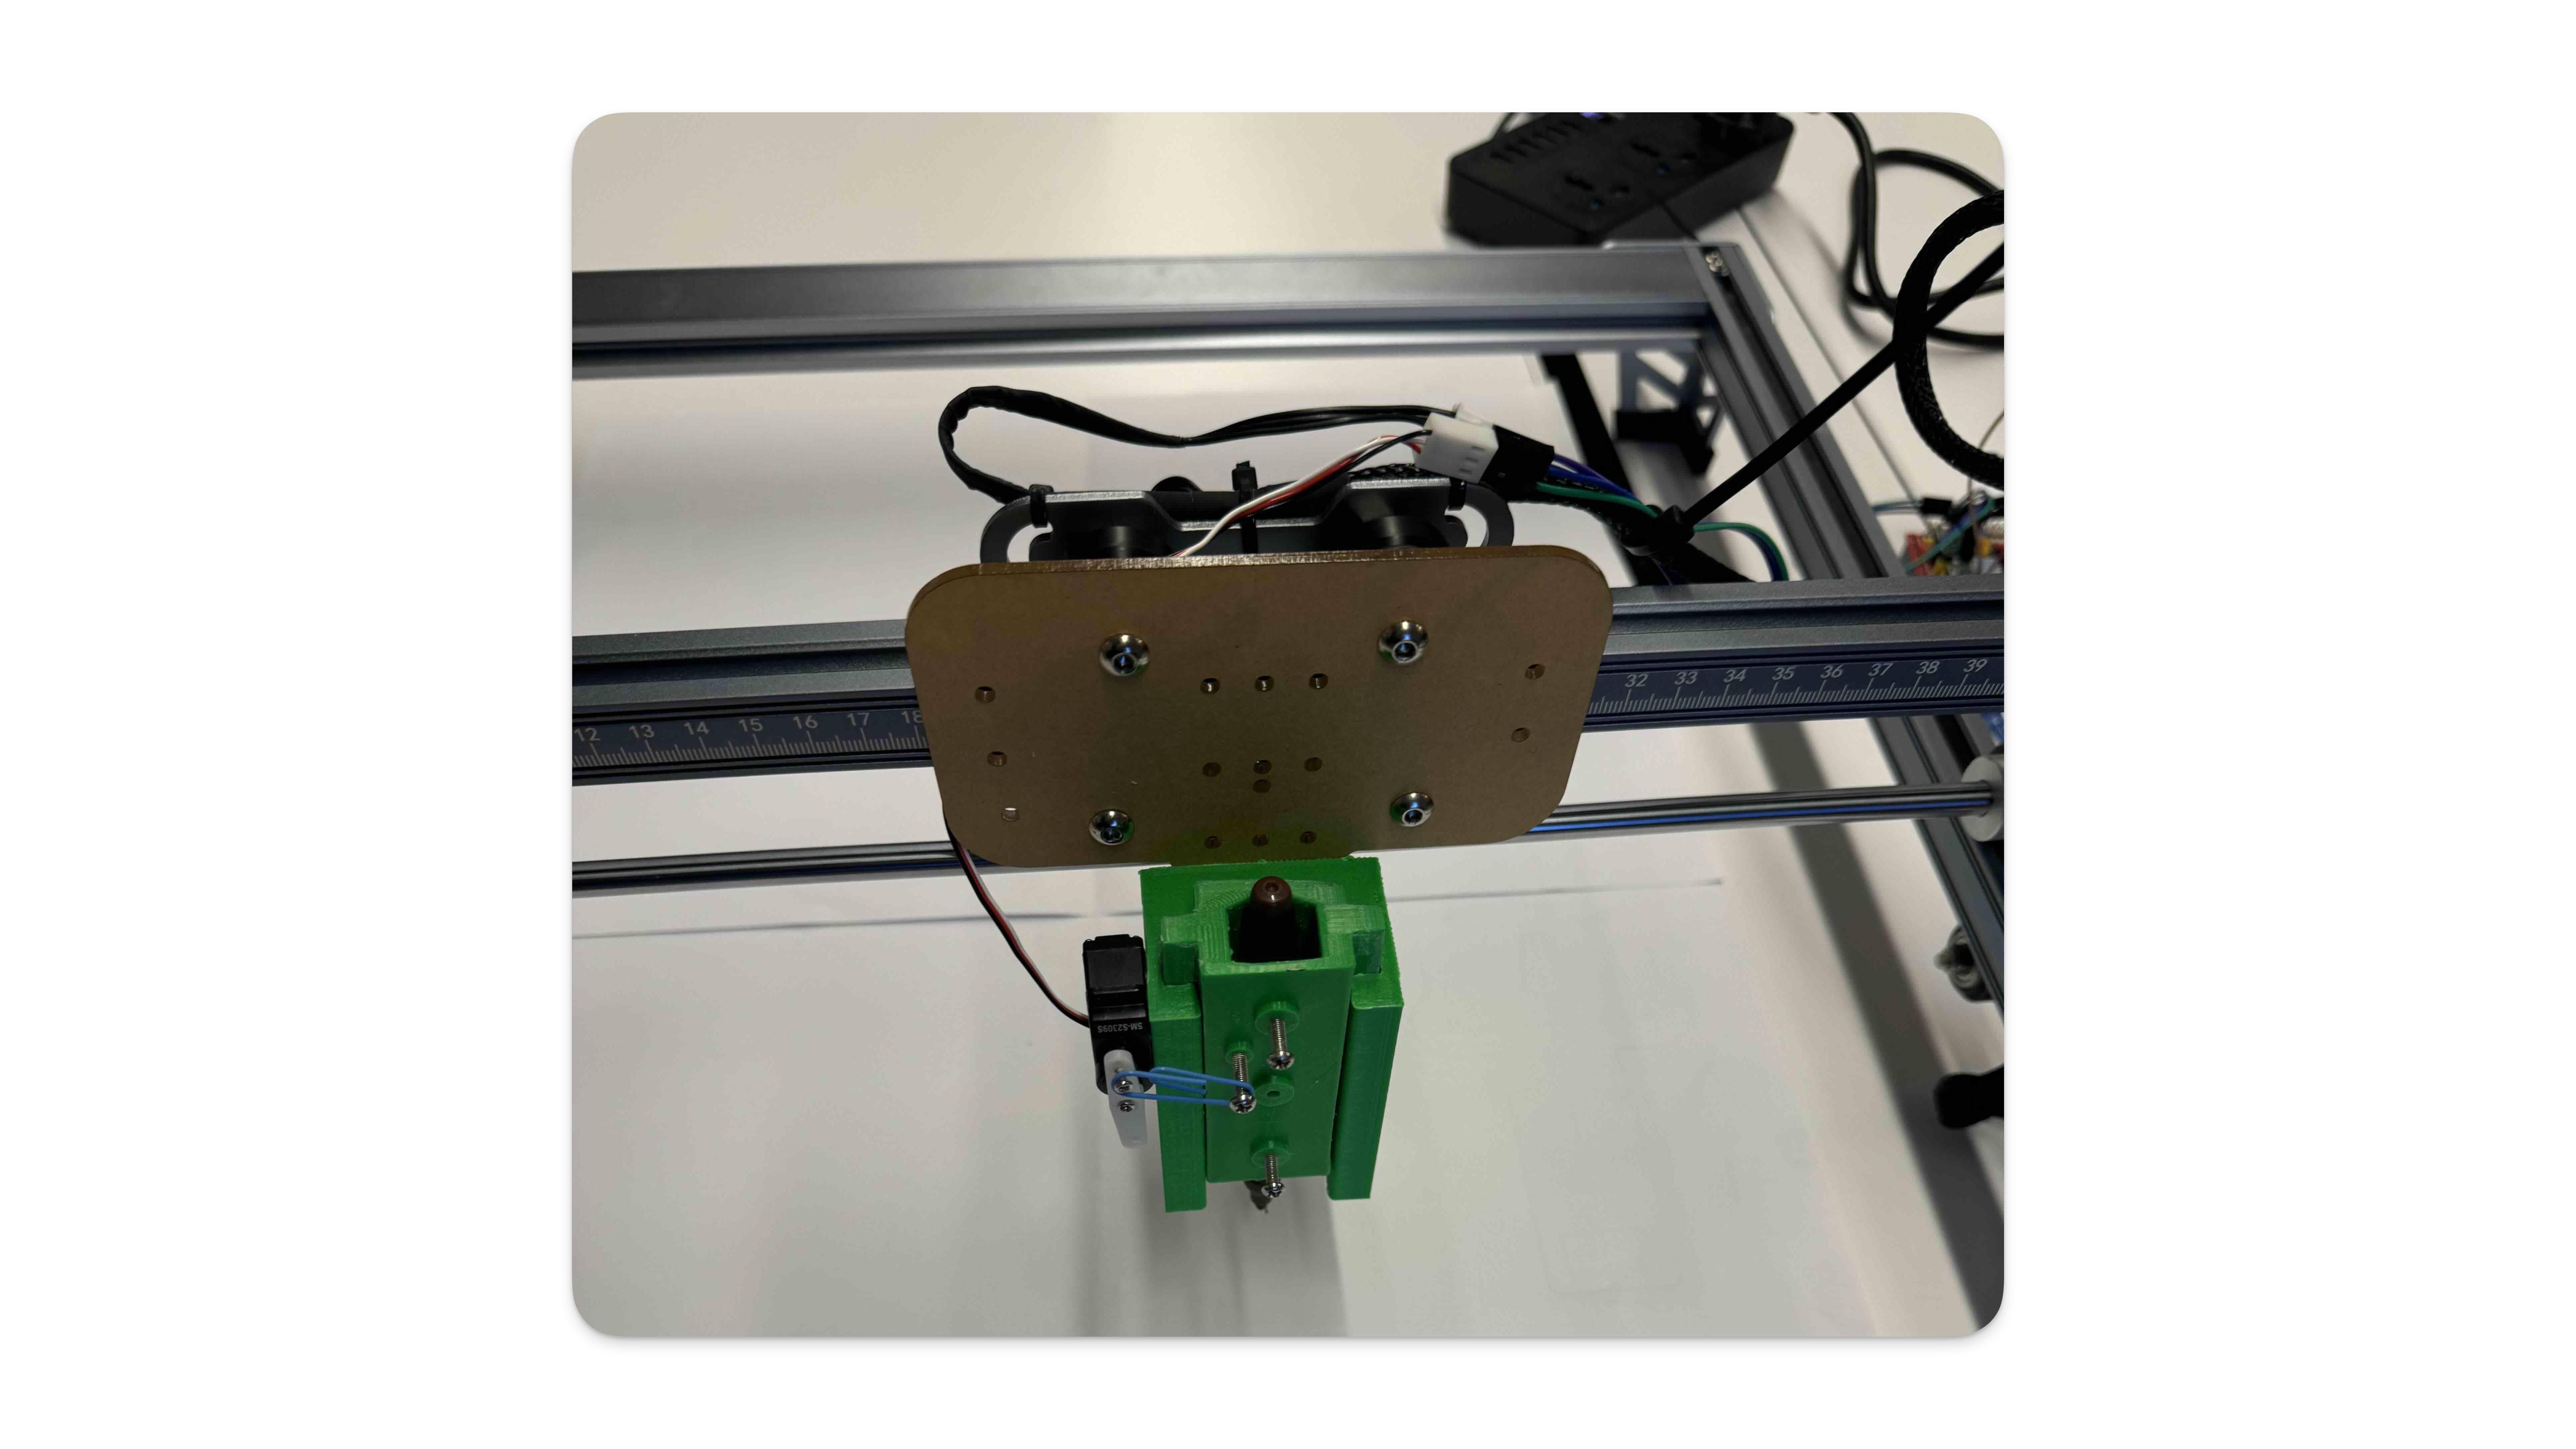
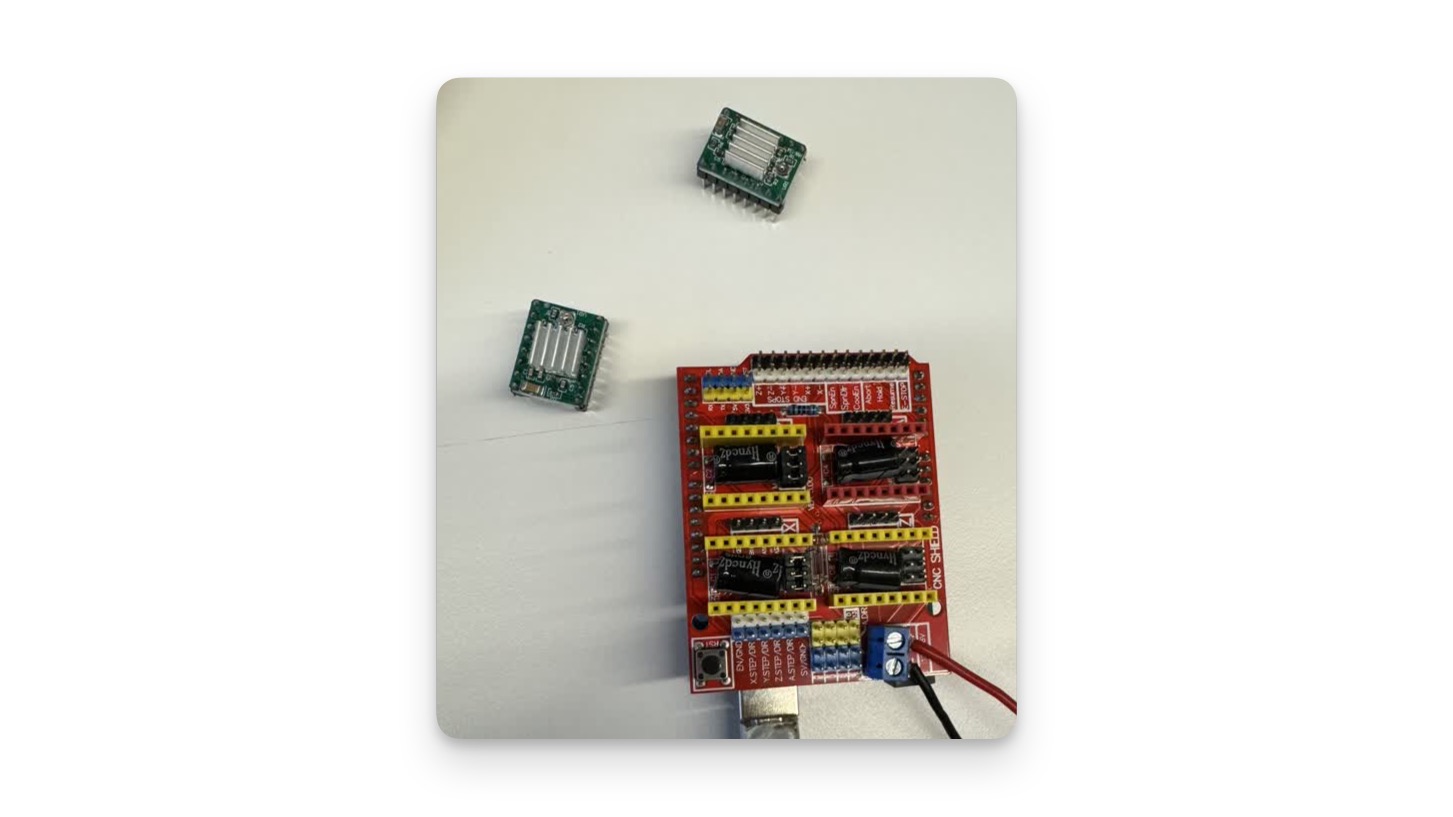
The CNC Shield fits on top of an Arduino board I connected two stepper motors to the shield, one for each direction: X-axis (left and right), Y-axis (up and down), and a servo motor for Z-axis (up and down for the pen). These motors are what move the pen to the right spot on the paper.
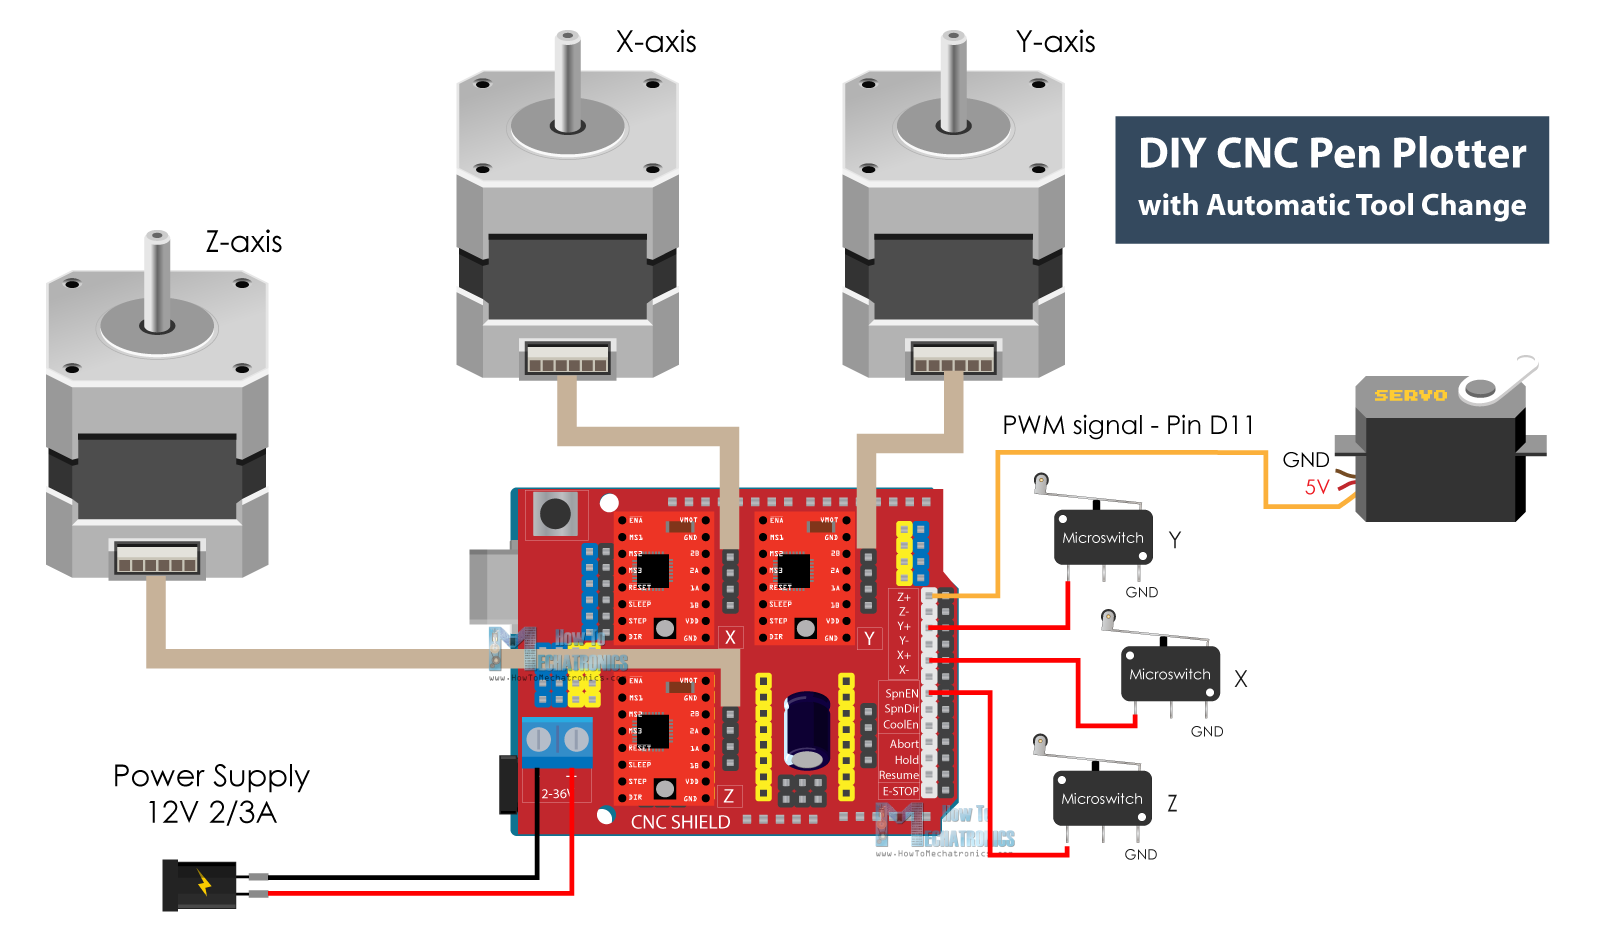
I also tinkered about added limit switches but wasnt successful in completing it. Below is the image of CNC Shield and Digaram for refernece.
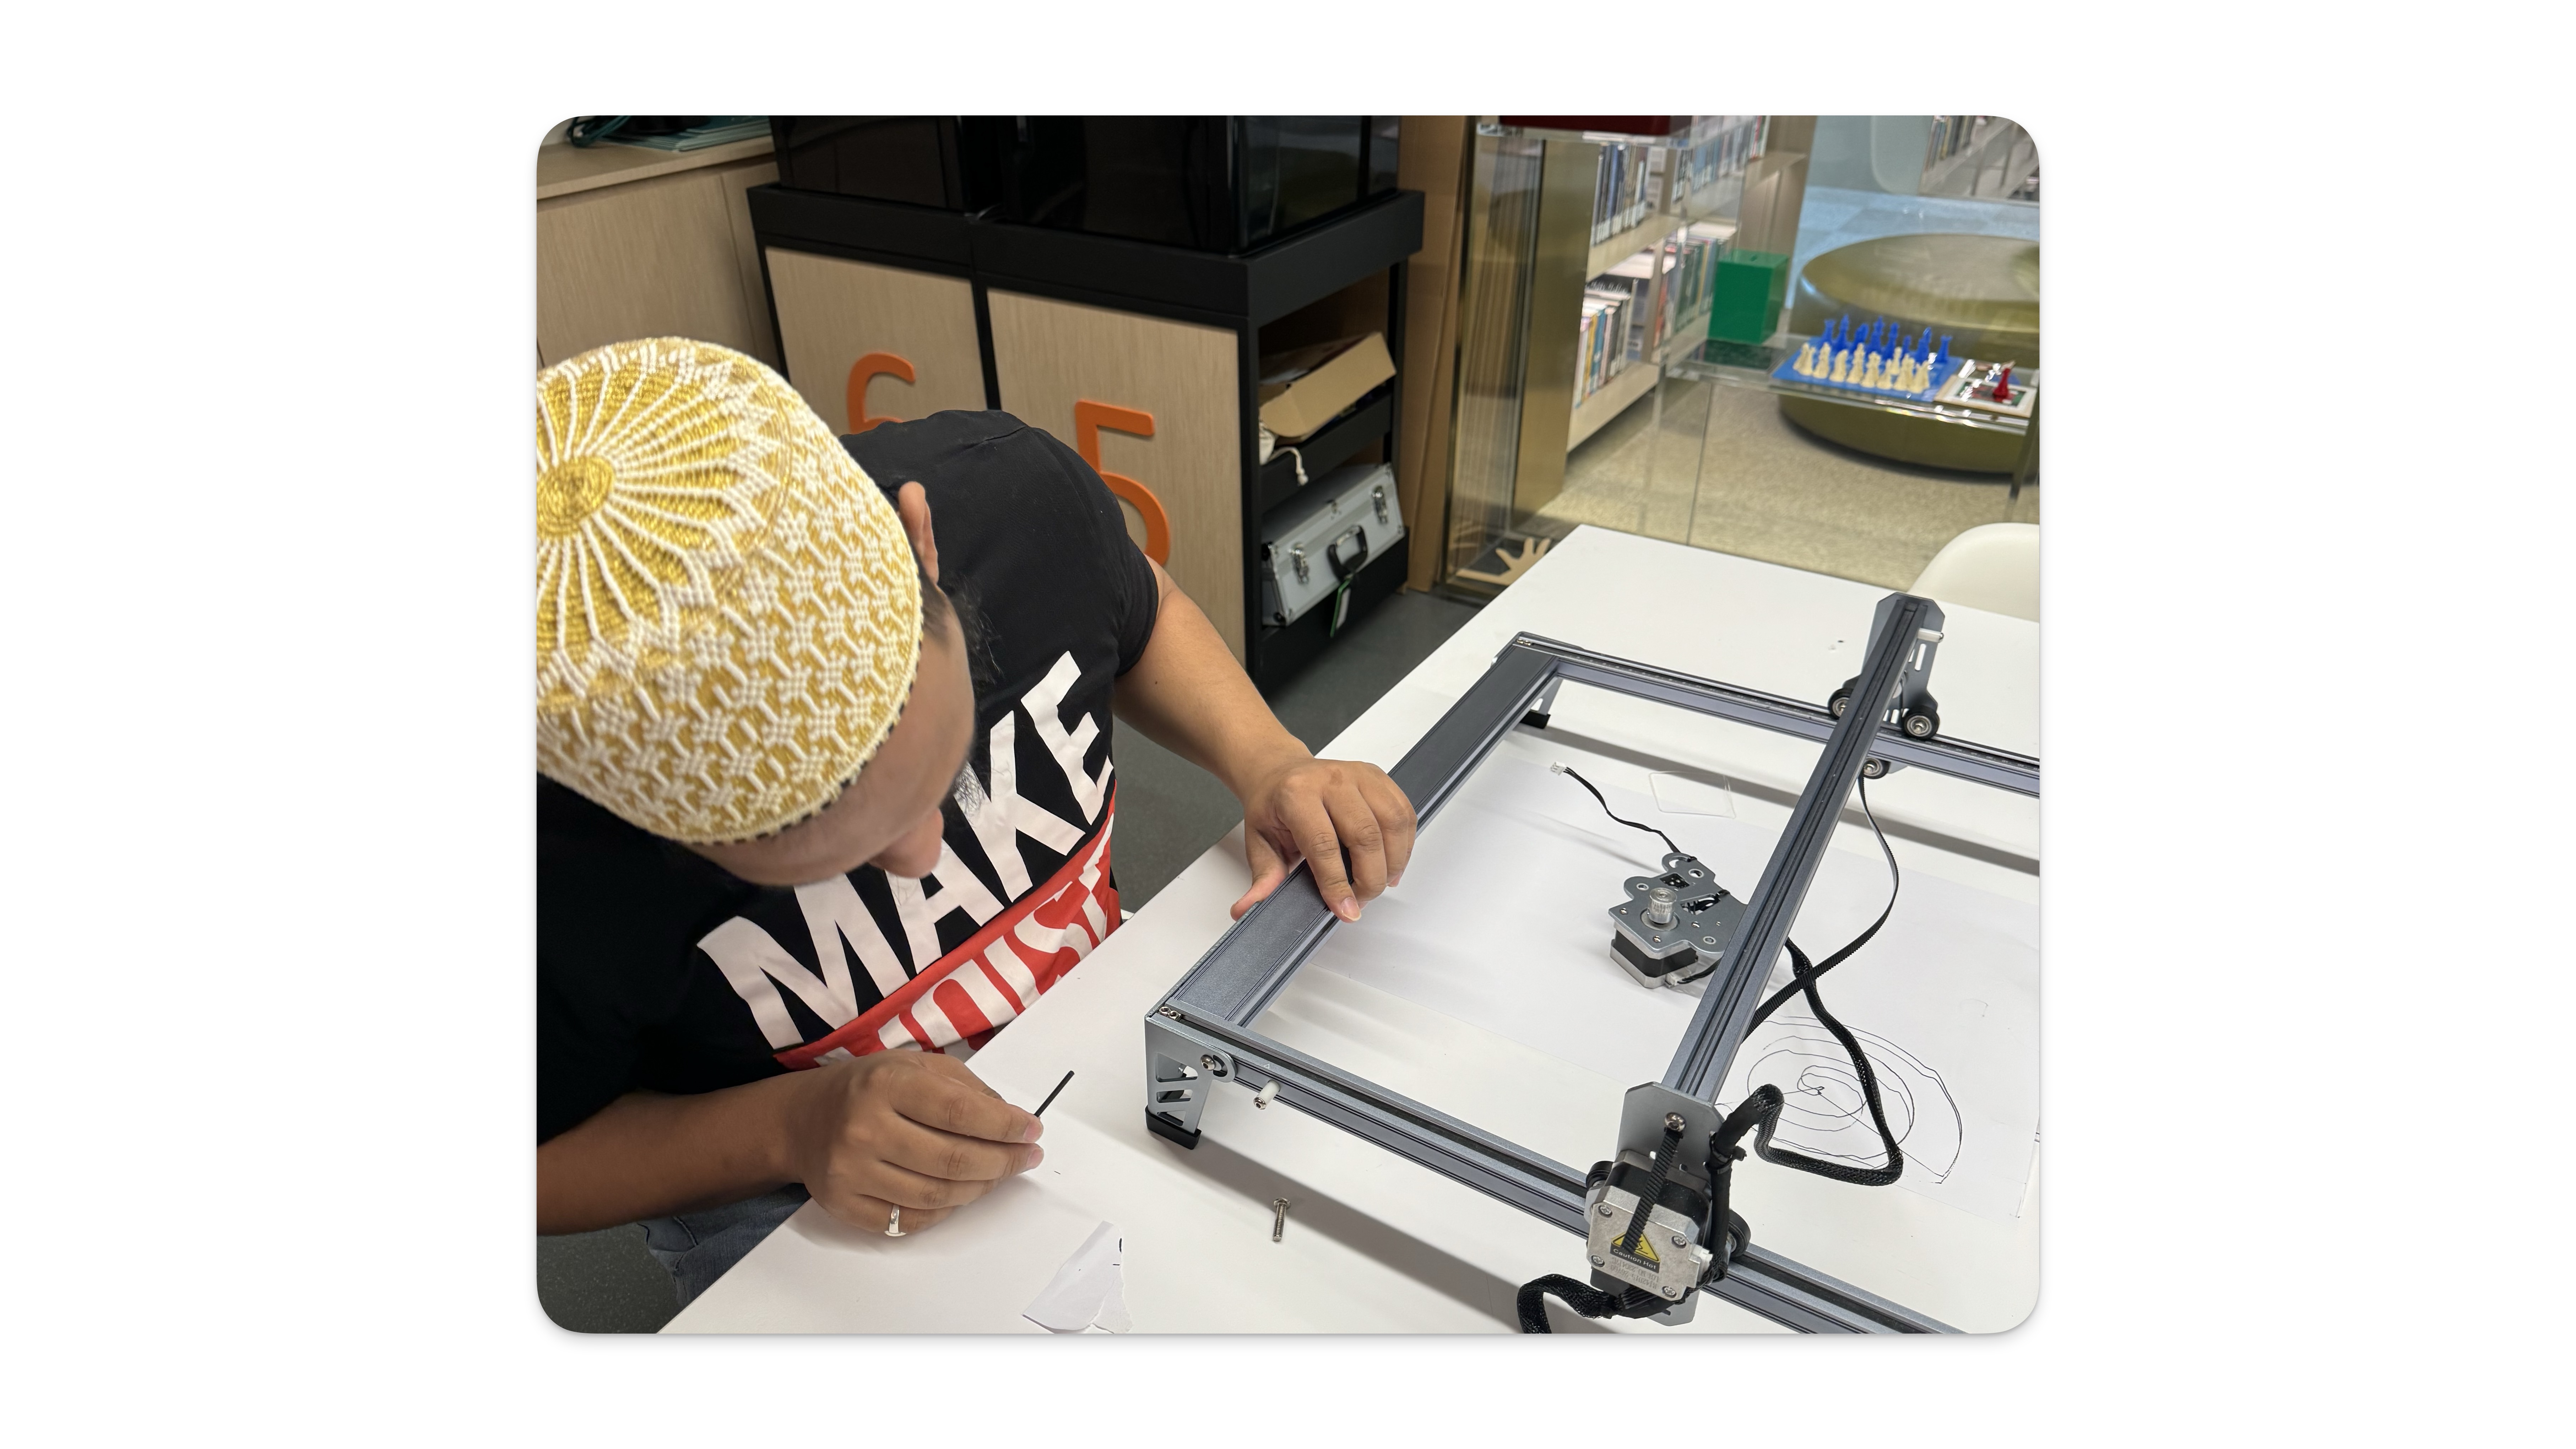
I attached the 3D printed pen holder to the Laser Cut Assembly Holder

Once assembled, This the top view with the pen attached

Design Prep:
- Open Inkscape, and created the design or text to plot.
- Used the G-code extension (plugin installed) to convert your design into G-code. This involves selecting yur design, specify details for a pen plotter like pen down position speed, and other parameters.
3D Print and Laser Cut Files
For assembling the Pen plotter mechanism we Laser cut the base inspired by the Creality based and 3d printed 1st a non servo and later servo enabled pen holder
Challenges
How to tune the stepper motor settings ?
with help from datasheets and ChatGPT we were able to determine the microsteps For Pen Plotter it is crucial for achieving smooth, accurate movements.
Start with GRBL Settings:
Since we are using GRBL (given the Arduino and CNC Shield setup),we 1st identified the Key Parameters:
_The most critical settings for tuning stepper motors are:_
_Step/mm ($100, $101, \(102)_: Determines how many steps the motor needs to take to move one millimeter. This setting is crucial for accuracy. _Maximum Rate (\)110, $111, \(112)_: The maximum speed the motors will move in mm per minute. Acceleration (\)120, $121, $122): How quickly the motors can accelerate to their maximum rate.
Adjusting Steps/mm:
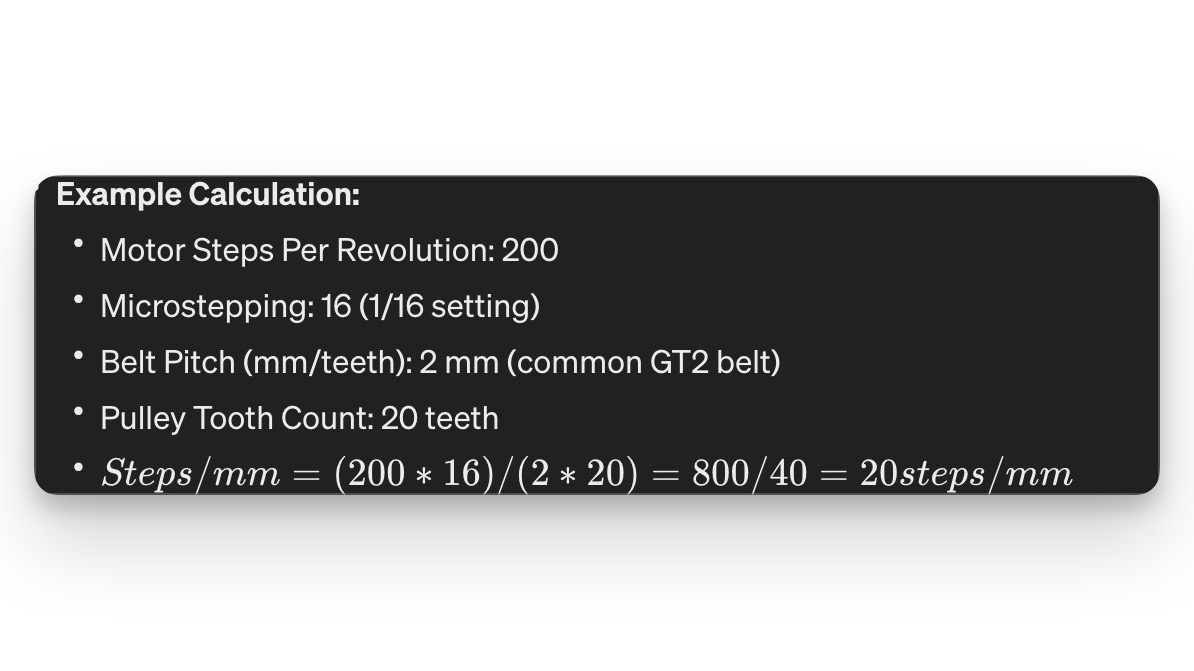
To get precise movements, we ensured the steps/mm settings ($100, $101 for X and Y axes, usually) are accurate.We started by calculating the expected steps/mm based on your stepper motors’ specifications (steps per revolution) and any gearing ratios.
We began with conservative speeds and accln. Too fast, and your stepper motors might lose steps. Increase gradually while ensuring the movements remain smooth and accurate.
Test: After adjusting a setting, we tested by sending a simple command or running a short G-code program to observe the behavior Each stepper motor, CNC shield, and Arduino can behave a bit differently.
Exampale Calculation
Hero Image :