  group assignment
      - design a machine that includes mechanism+actuation+automation+application
      - build the mechanical parts and operate it manually
      - document the group project and your individual contribution
Group work
-->Link to Group Project Page<--
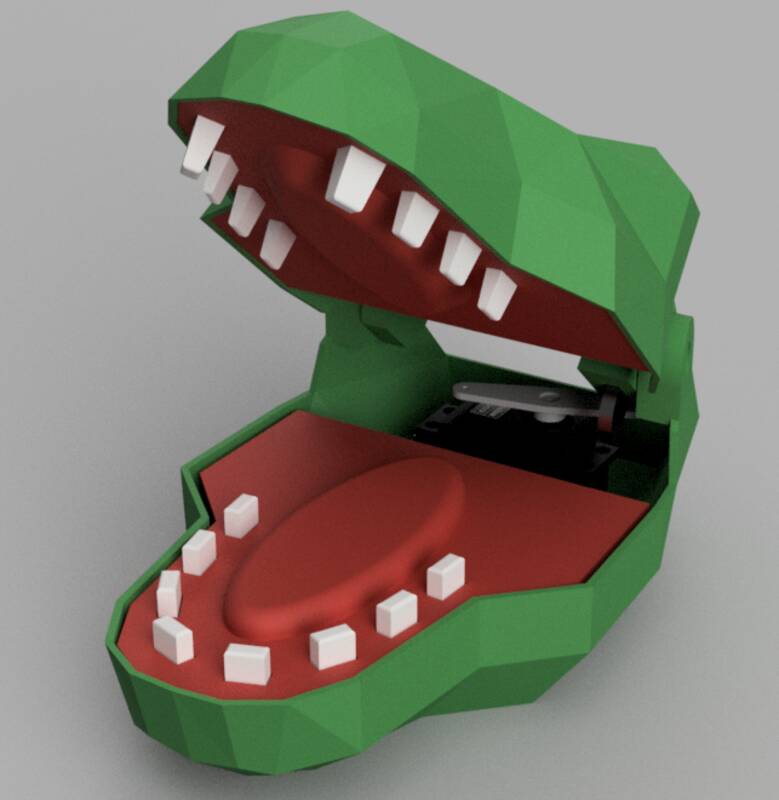
Concept: Dinosaur Dentist Game
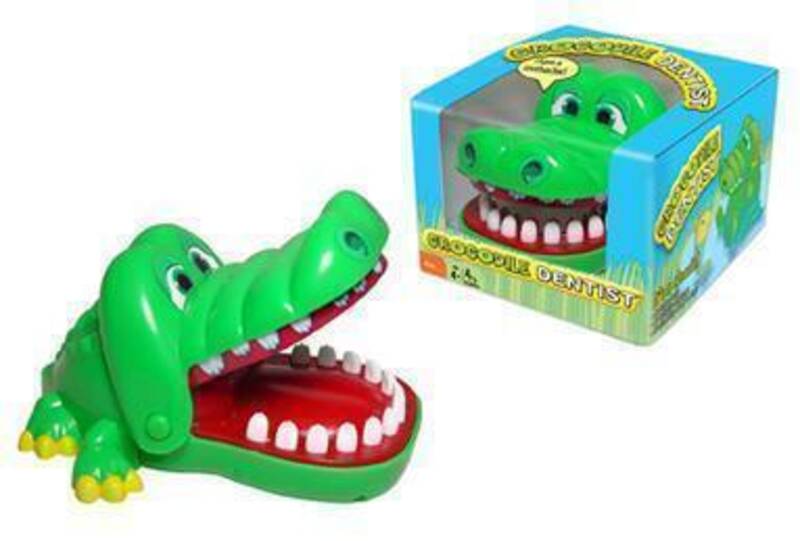
We were kicking around ideas for this week's project, and someone mentioned the "alligator game", and my partners (who are all younger than me) all nodded in understanding, but I was clueless: "What's the alligator game?" Turns out it's called "Crocodile Dentist", and it's a neat mechanical toy where you open the jaws of a toy plastic crocodile and then push on his teeth. One tooth is "sore", though, and will make the crocodile snap his jaws shut on your finger. The cool thing is it's a different tooth every time you reset the jaws.
So we decided to do an electromechanical version of this game. We also decided to do it as a dinosaur head rather than a crocodile. Each tooth will have a momentary contact switch and an LED underneath it. The jaws will be opened by a servo. The game starts with all the teeth glowing, but when you push one, the tooth goes dark, the servo advances and the jaw opens a little more, until the servo goes too far, and the jaw falls down on your finger. If possible, we want to have the LEDs glow with different brightnesses, giving players a general idea of how much that button will open the jaw. Players will take turns pushing buttons, and the one who gets "bitten" loses.
Our project has only one degree of freedom of motion, so it's not as fancy as a stepper-operated gantry robot, but it does satisfy the requirements of machine week: mechanism, actuation, automation, and application.
Our group documentation and video is here (no link yet).
Our tasks were split up as follows:
- Aesthetic design of the head - Me
- Mechanical design of opening mechanism - Zach
- Teeth and lower jaw - Evan
- Upper jaw - Me
- Servo and button programming - Bella
- LED programming - Evan
- 3D printing - Me and Bella
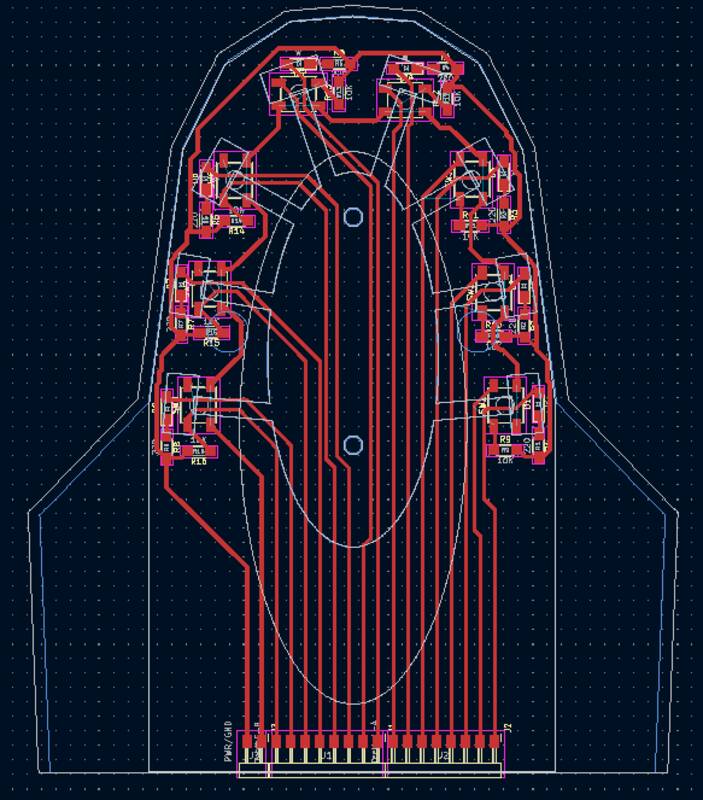
- PCB design - Me
- PCB milling and soldering - Evan
- Overall software design - Bella
- Assembly - Bella, Zach, and I
Individual Work: Blender
I've never worked with Blender before, and I'm a terrible artist, so I signed up to create the overall design of our dinosaur head. I was really relieved when Zach suggested we go for a "low-poly" aesthetic, that sounds a lot easier than realism. This side of the project really needs Blender. Fusion 360 is a terrible tool for working with free-form organic meshes, even low-poly ones.
Blender took some getting used to, but here's my process:
- I found this YouTube Video ("Low Poly Dinosaur Tutorial in Blender 3.2") very helpful. It's actually quite different from what I want to do, despite the title, it's modeling a whole stegosaurus rather than just a T-Rex head, but it taught me a lot about low-poly modelng in Blender.
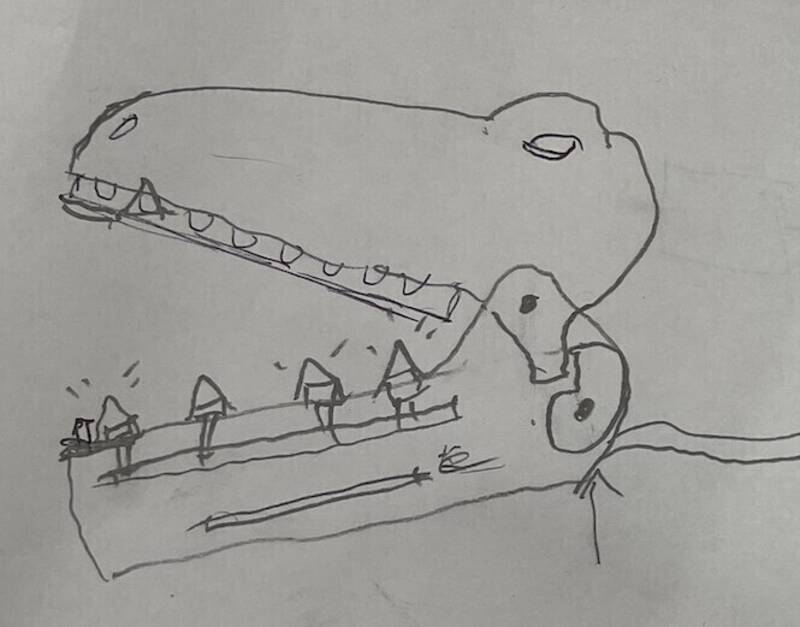
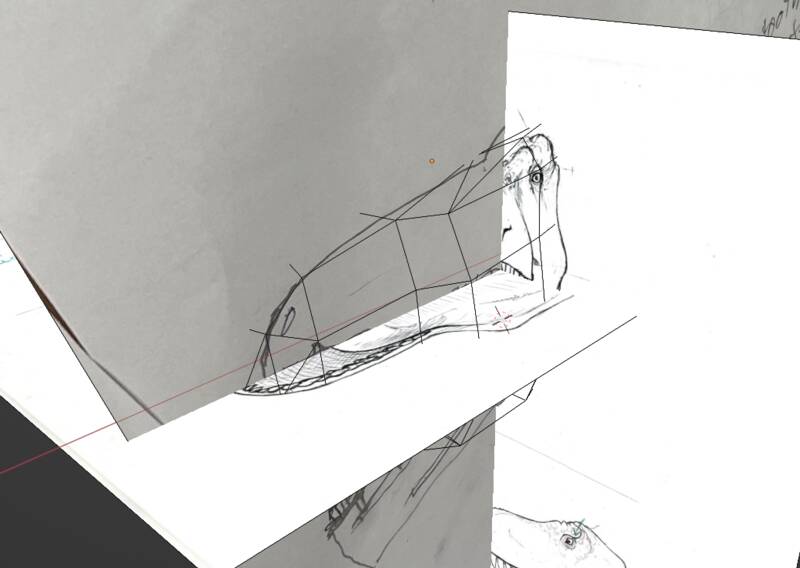
- I made a little pencil sketch of the side view of a dinosaur head that I kind of liked, but I couldn't figure out the front or top views, so I found an image on Deviantart by kronosaurus82 that would be helpful for inspiration.
- I placed these images on the X,Y,Z planes in Blender, making two copies of the kronosaurus82 image for the Z-Y and X-Z planes. I moved and scaled them to line them up.
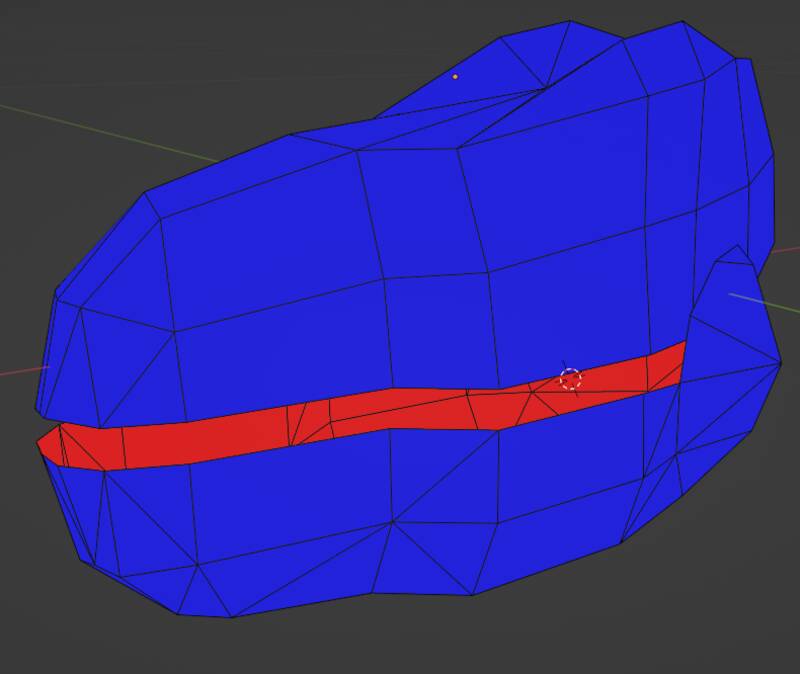
- I created a new Plane object, then switched into Edit mode and added new edges to create an elevation view of the dinosaur's profile.
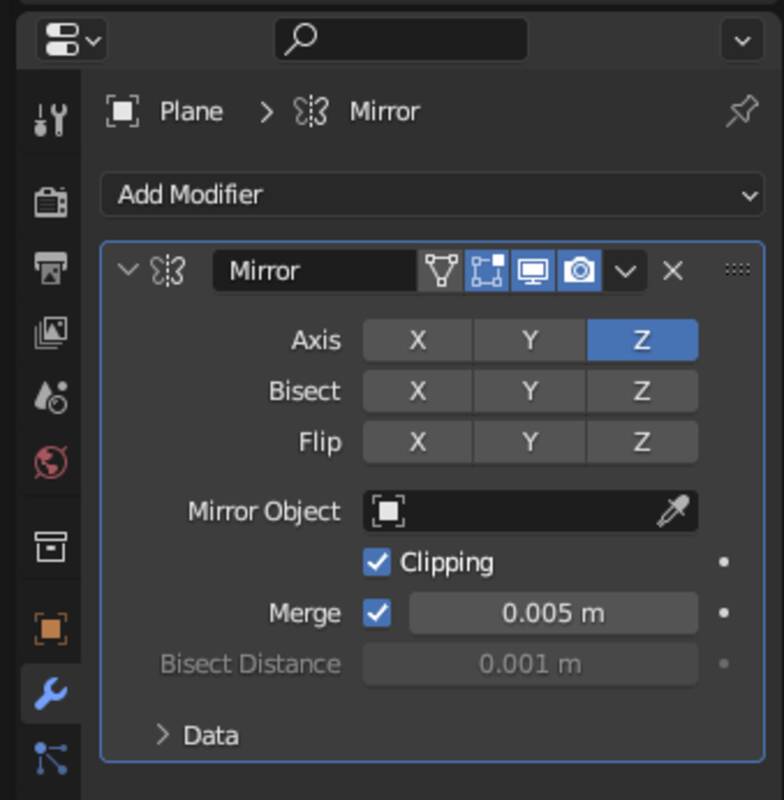
- I added a "Mirror modifier" to make the head symmetric, then extruded it to create the first blocky head design.
- I then split faces to create more edges and points, and moved the vertices around to match the top and front views of the dinosaur, and fill in the 3-d structure. I tried to keep it as coarse as possible to save work and achieve that "low-poly" look.
- Finally, I exported the head pieces from Blender as STL files.

My goal wih the Blender stage was just to create a skin surface. I deliberately didn't make the design a 3-dimensional watertight solid ready for the printer: there's a lot more work to be done, and it's easiest to do that in Fusion 360. I found it very difficult to make Blender care about whether the design was physically possible.
Individual Work: Fusion 360
I worked in Fusion 360's mesh environment briefly to import the Blender file. I used "Insert Mesh" to bring the STL files into Fusion, and "Convert Mesh" to change them into a Fusion "surface body". In my experience this totally doesn't work if you've got a complicated mesh with thousands of faces, but for a low-poly model like this it works great. I then thickened the surface to create a hollow shell.
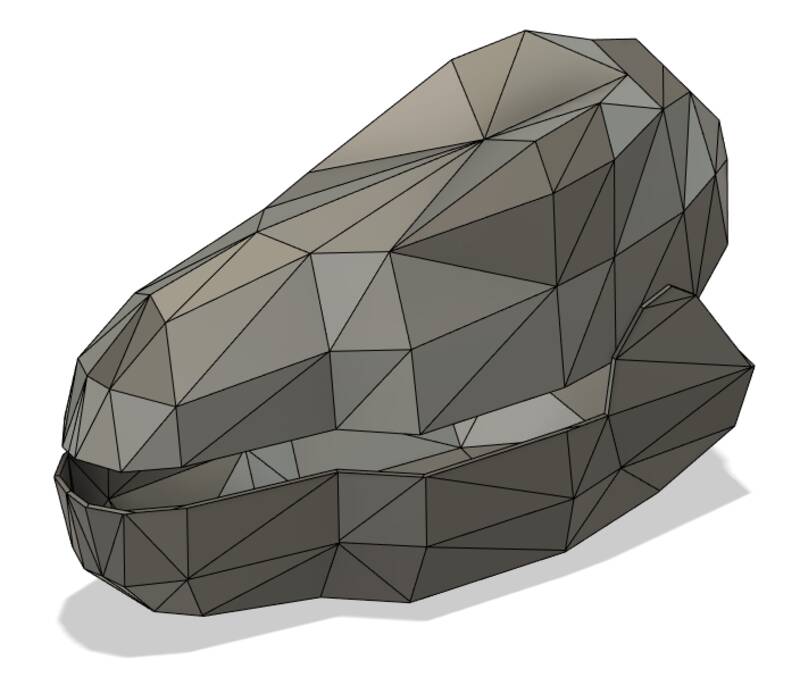
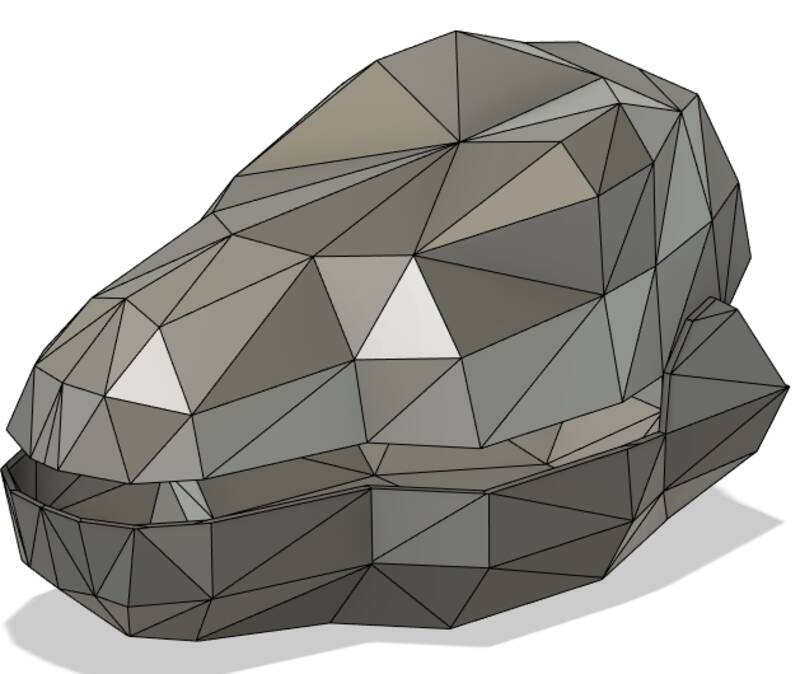
Once I was done, I decided the head looked a little too scary, and was also too slim to fit our servo in. So I made a "chubby" version just by scaling the whole head width-wise.
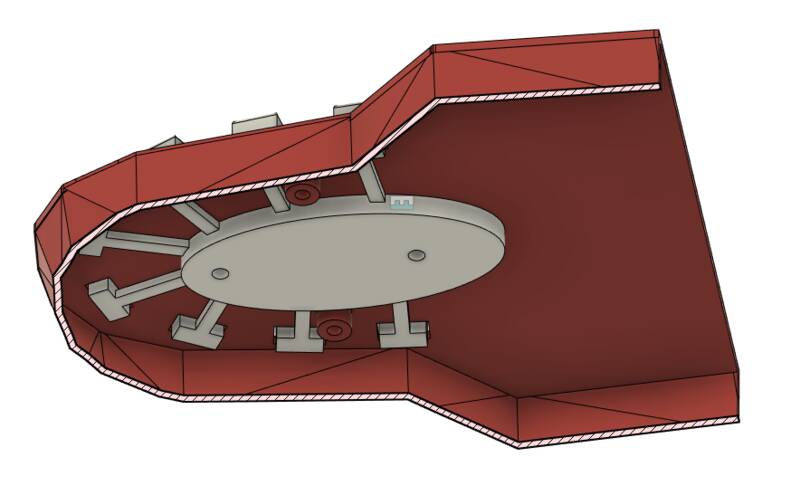
Finally, I shared these designs with the rest of my group using the project sharing tools in Fusion 360. Zach added a hinge to allow the head to swing open, plus a clever pawl system to allow the servo to re-set the head for another round of play after the jaw has closed. Evan designed some teeth and a tongue-and-gums part that fits into the outer shell of the head. I then followed Evan's design process to add an upper palate and gums, with more teeth.
Somewhere along the way, I bought the original "Crocodile Dentist" game so I could take it apart and learn from it. In particular, how does a purely mechanical device generate random numbers? It's a really clever design, internally it's a bit like a roulette wheel crossed with a mousetrap. Anyway, one of the ideas we got from taking it apart was to make the teeth one single connected part rather than individual tooth pieces. The teeth are part of a spider-shaped part: the central body attaches to the rest of the dinosaurs, and the arms hold the teeth in position with enough flex to allow the teeth to be pushed down. This is crucial for the lower teeth that have buttons, but we also did this for the upper jaw, so the teeth have some springiness and will hurt less if they bite you. I printed the teeth out of translucent white PETG, which is more flexible than PLA and should allow the lights to show through nicely.
I also added colors, which was totally unnecessary, and added joints so you can articulate the jaw and servo on the computer screen, which I thought would be useless but highlighted some minor design problems with the servo action. Anyway, here's a rendering of what it will hopefully look like when it's done:
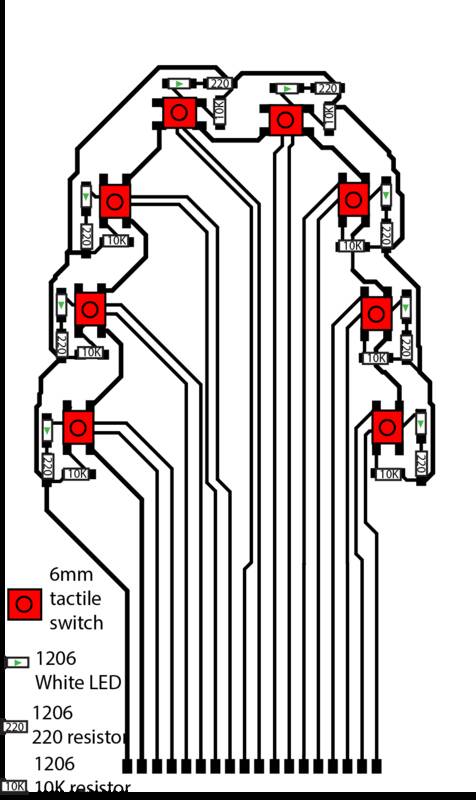
Individual Work: PCB Design
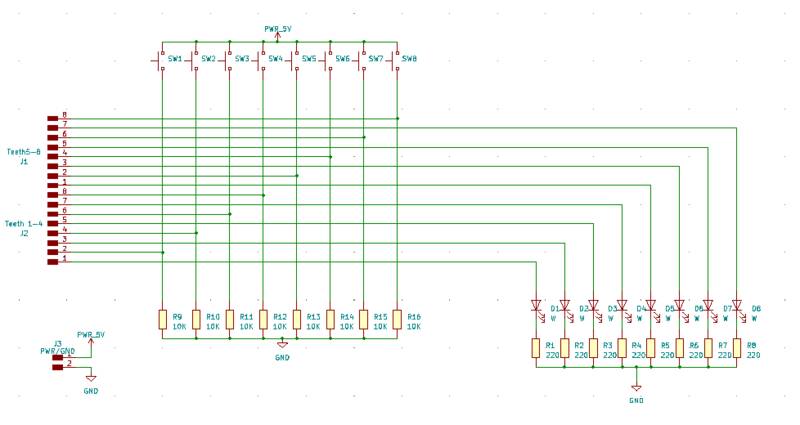
I took responsibility for designing the circuit board that would hold the buttons and lights beneath the teeth. Originally, the plan was to mount a Xiao module in this circuit board, but we quickly realized that we needed far too many inputs and outputs for the Xiao, which has 11 GPIO pins. We need 8 pins for button inputs, 8 for LED outputs, plus 1 to control the servo.
I imported a DXF from Fusion showing the shape of the head and the position of the teeth, so I could design the board to fit in the head, with buttons and lights under the teeth.
My first design tried to use a shift register to control the LEDs. This is a sound idea in principle, but I ran into three problems. First, there are still not enough pins on the Xiao: I need 8 for the buttons, 3 to control the shift register, plus one for the servo, which is one too many. Second, I thought the difficulty of controlling a shift register would put an unfair burden on the group members responsible for the Arduino programming. Finally, our goal was to use PWM to control the brightness of each individual LED. If it's possible to do PWM through a shift register, it's certainly beyond my skillset.

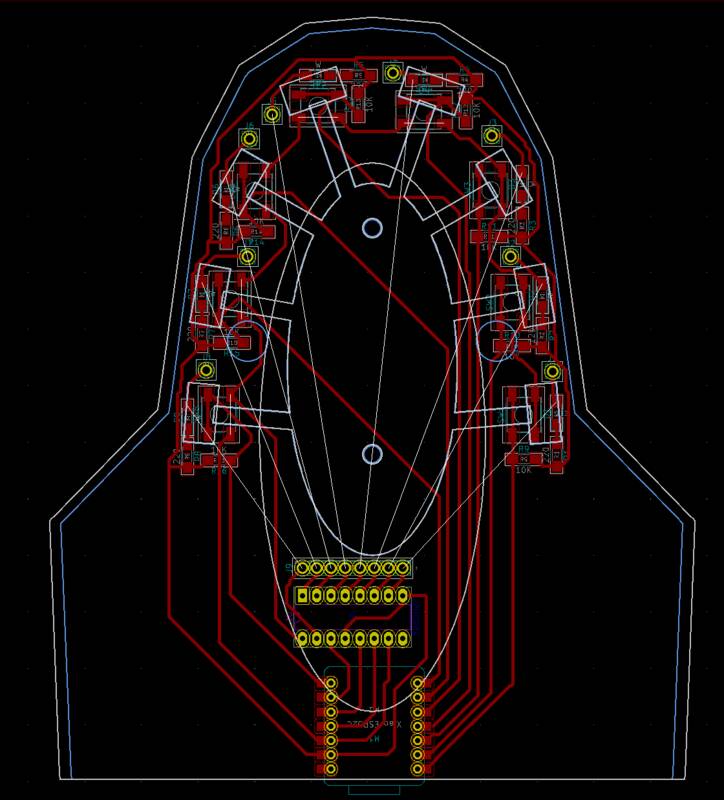
So I started over from scratch, with a design based on an Arduino Uno. The Uno has more than 17 GPIO pins, so the shift register was no longer necessary. The only limitation is that it only has six PWM-capable pins, so some of the teeth will have to be on full brightness.
Individual Work: Printing
I printed the jaw and teeth pieces on my Prusa Mini at home, freeing up time on the lab printers for other group members to print the other parts.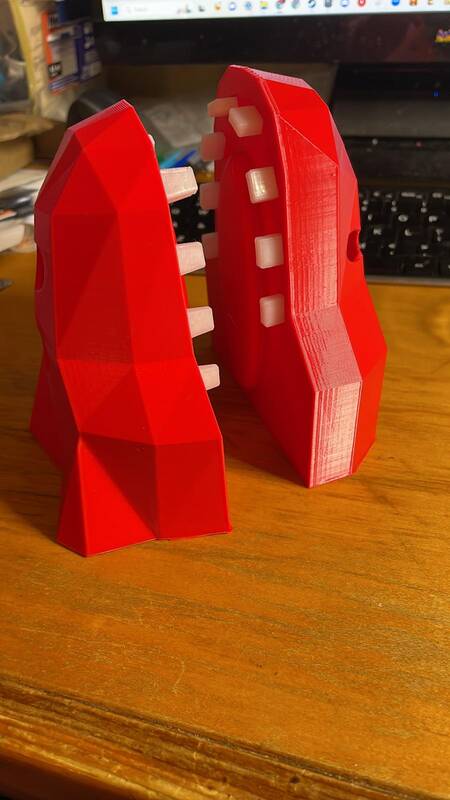
Individual Work: Reinforcement Panels
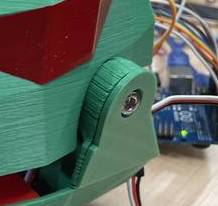
As we printed the model, it became clear that we had both design and printer problems. The "cheek panels" of the lower jaw were to thin and weak to support the head hinge properly. In addition, the printer we used was under-extruding badly for some reason, so this area was extra-flimsy. We also had trouble with the servo mount being too weak. I solved this problem by creating some reinforcement pieces that we hot-glued to the inside and outside of the cheeks to reinforce them. There's also a plastic rod that the jaw screws thread into, that runs across the width of the head.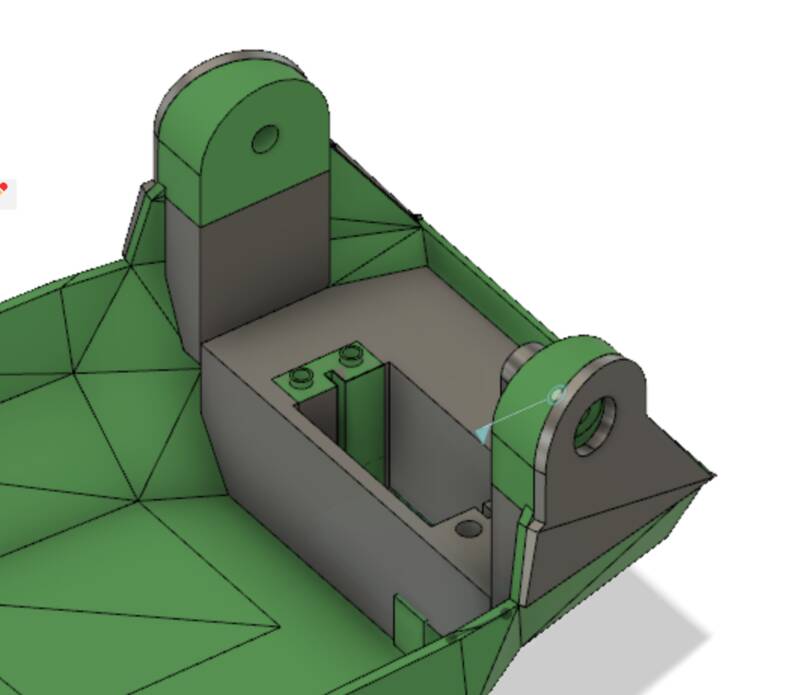
Individual Work: Other Tasks
I also helped my group members with several other tasks. We worked together to assemble and test the design, and I gave advice and encouragement for the programming work, which was mainly done by Bella.Design Files
- Fusion 360 design file (at Autodesk360.com, joint effort)
- Design STEP file (Joint effort)
- KiCAD board design files
- Board manufacturing files and soldering guide
- Arduino code (Written by Bella)