group assignment:
      - test the design rules for your 3D printer(s)
   individual assignment:
      - design and 3D print an object (small, few cm3, limited by printer time)
         that could not be made subtractively
      - 3D scan an object (and optionally print it)
My plan for this week is to try to make something that can't be be made subtractively for subtle reasons, rather than obvious ones like having one part entirely enclosed in another. My core concept is "curved holes". On the 3D scanning side, I'm not very familiar with the latest phone apps that make use of the iPhone's Face ID LIDAR system, so I'm going to try a bunch of them to see which will work best when I teach this class in the future.
Major tasks for this week:
- Group Lab work: test the design rules for our 3D printers
- Try various apps for doing 3d scanning using an iPhone
- Design a spherical puzzle box that uses bearing balls as a locking mechanism
- Print and test the ball-lock ball.
Group Work
My group's work for this week is documented here. We found that our 3d printer creates holes about 0.15 mm smaller than the design calls for, and can't print features smaller than about 0.5 mm across and 0.15 mm thick: I'll take that into account when designing my individual project.3D Scanning
- Free to install. If it ain't free students won't use it.
- Free to download scan files. This is how they get you.
- Produces high-quality detailed scans.
- Easy to use.
| App name | Free install? | Free scan files | Scan quality | Ease of use | Notes |
|---|---|---|---|---|---|
| 3d Scanner App | Yes | Yes | Mediocre | Annoying | LIDAR |
| Scandy Pro | Yes | Not sure | Not sure | Poor | Didn't work |
| WIDAR | Yes | No | Good | Good | LIDAR |
| Polycam | Yes | No | Mediocre | Good | Photogrammetry |
| Kiri Engine | Yes | 3/week | Excellent | Good | Photogrammetry |
Being able to download the data files for free is a hard requirement for me, so I focused only on 3DScanner and Kiri Engine.
3DScanner does all the work on the phone, so there's nothing to download, you just share the file with another device, and it's all free. One annoyance is that if you close the app, it cancels the image processing. Kiri Engine makes you create an online account, which is annoying, but it does the processing in the cloud, so it works in the background. You get three free downloads, which isn't great, but it's enough for many purposes. Another annoying thing about 3D Scanner is that since the LIDAR is on the screen side of the phone, you have to face the screen away from you while using it, so you can't see what you're aiming at.
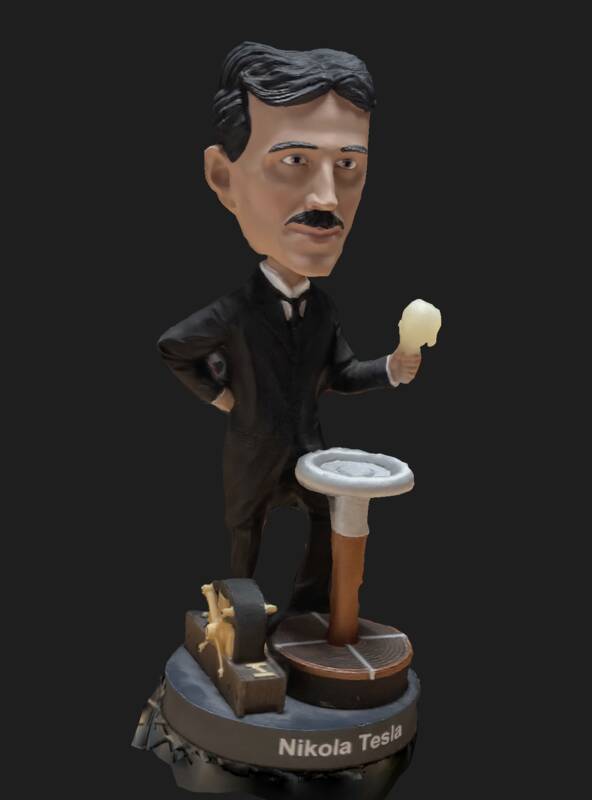
The Kiri Engine uses photogrammetry, while 3DScanner takes advantage of the phone's LIDAR sensor. I was shocked to see that Kiri Engine actually produces much better, high-quality meshes than 3DScanner! 3DScanner's meshes are very low polygon count, poor accuracy (they don't separate Nikola's Tesla coil from his waistband, for instance), and they even have holes in them! Kiri Engine's scans are much better: they still look like they're carved out of tapioca, but that's pretty normal for 3d scanning apps I guess.

3D Printing: Locking Ball Puzzle
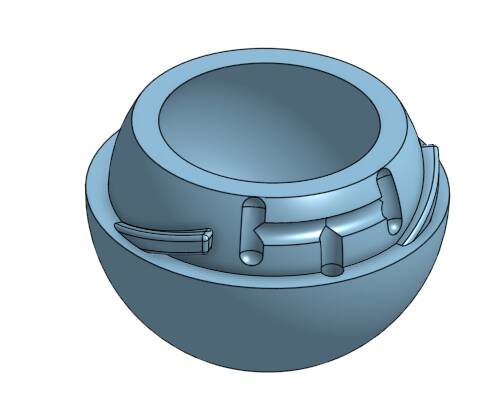
My starting concept was "curved holes", which are difficult or impossible to make subtractively. I started thinking about ball bearings riding around inside the holes, and then thought about ball-bearing locking mechanisms, in which a wedge forces a ball into the gap between two mating parts, locking them together. This design is seen in air compressor hoses, padlocks, and some firearms. I settled on the idea of a puzzle box in the shape of a sphere, which can only be unscrewed if the hidden ball bearings are in the right position in their slots..jpg)
An Abandoned Idea
My first idea was to have a "marble maze" built into the ball. You would have to reorient the ball to move the ball bearing into a position where it would no longer obstruct the lid from turning. In the end, I decided this was too complicated and fiddly, and holding the lid with just one ball bearing probably wouldn't be strong enough to stop a frustrated person. I gave up on this concept.
First Draft
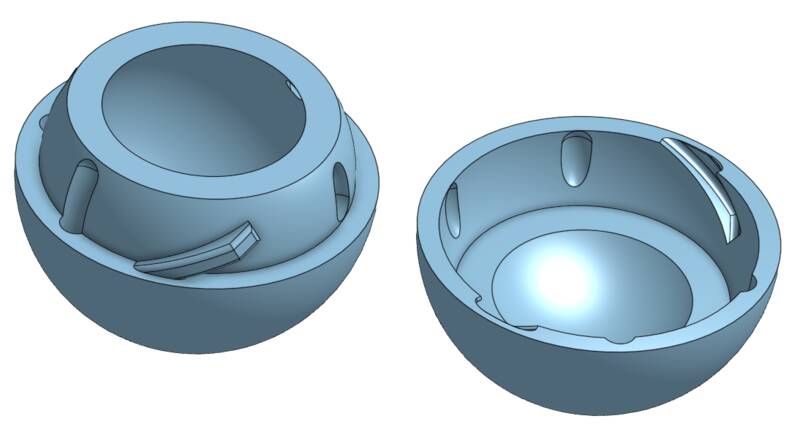
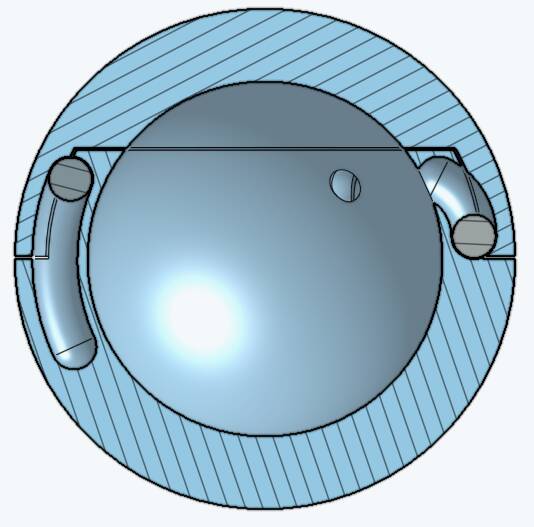
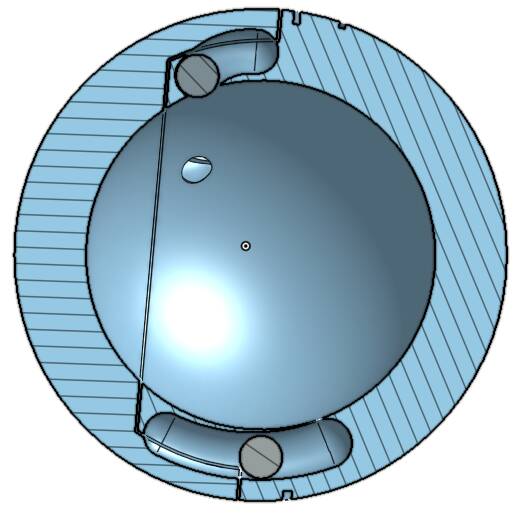
This version kept the overall shape and screw threads from the marble maze idea, but had four balls that ride in vertical slots. One pair of balls locks into the lid when they're in their uppermost position, the other pair locks when they're in their lowermost position. So whether the ball is right side up or upside down, it's locked. It only unlocks if you tilt it sideways in the right orientation, so both pairs of balls roll into their unlocked position.All my prints were executed on my home Prusa Mini. This doesn't have quite the same design rules as the Prusa Mk3S we did group work on in the lab, but it's pretty close.
This was a good concept but a bad execution. It didn't have enough clearance anywhere. Screw threads didn't mate, balls didn't fit all the way into slots, and I printed it in the wrong orientation and had trouble removing supports. This version was also 80mm across, which took about 9 hours to print.
Second Draft
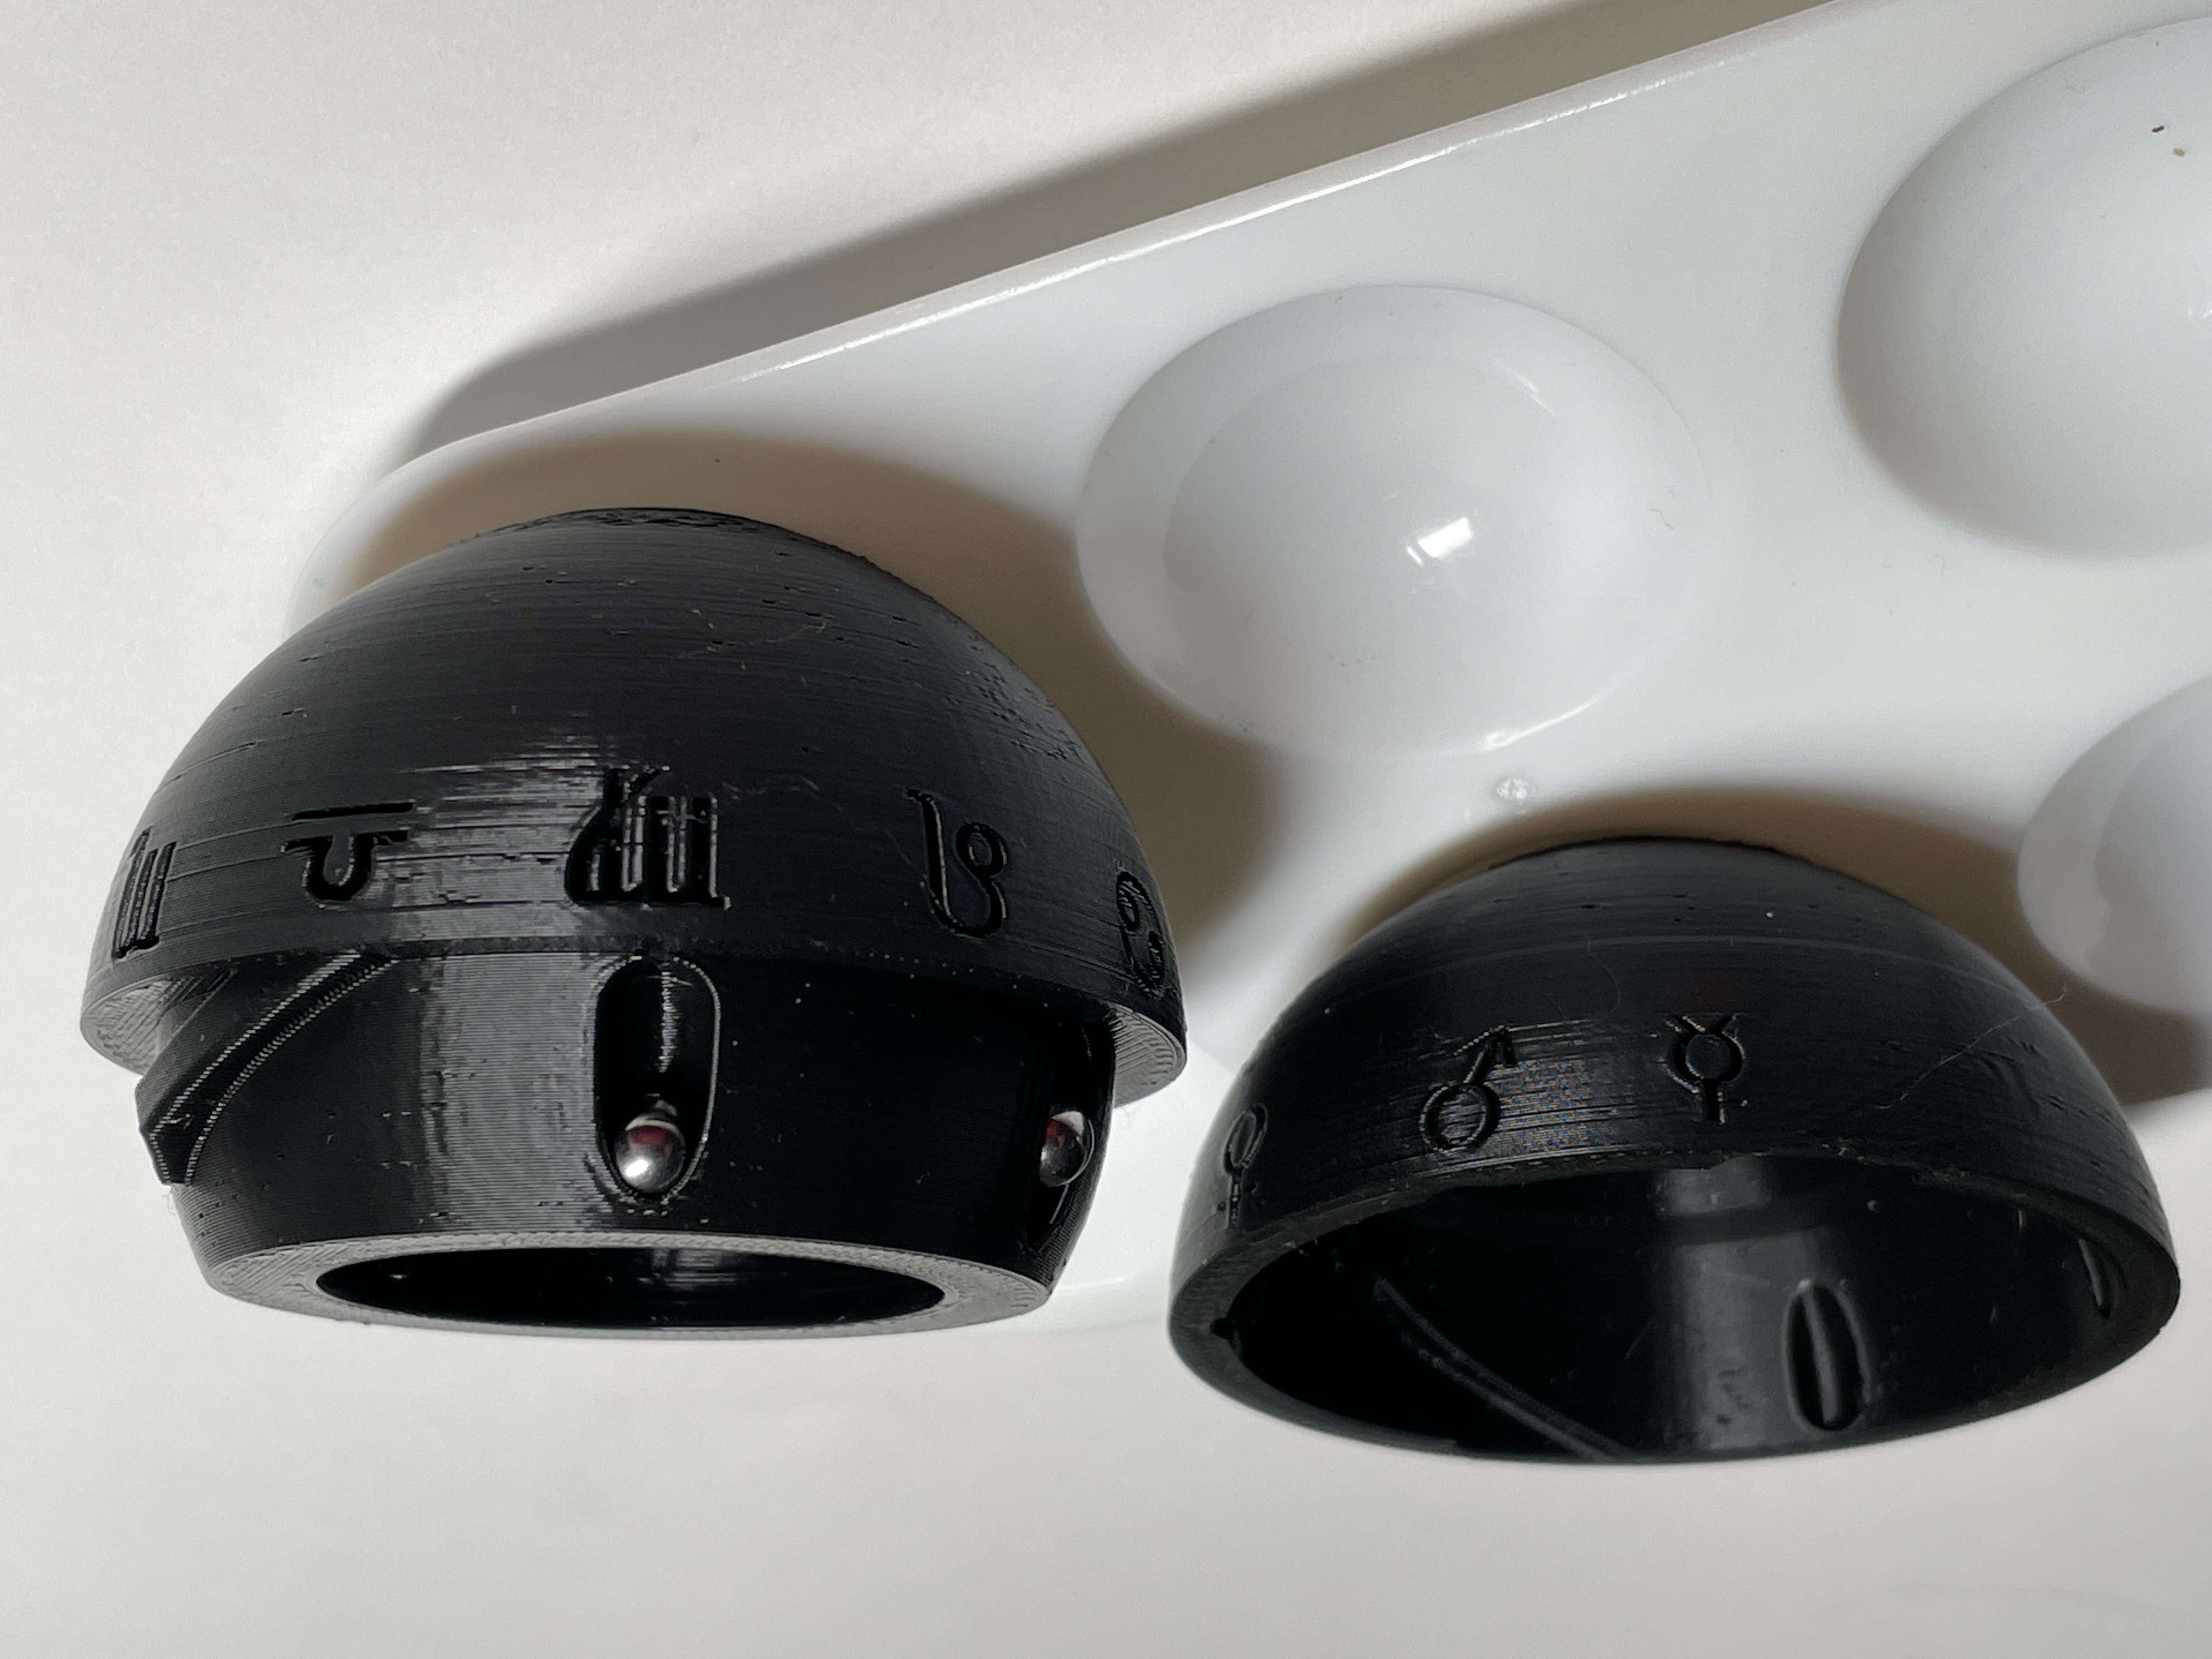
In this version, I reduced the overall diameter to 55mm, used smaller 3/16" ball bearings, and added more clearance everywhere. It works! ... sorta. The balls that fit into the deeper slots get a little stuck down there, and the balls that go in the shallower angled slots get a little wedged at the top. But if you tap it they pop into alignment. It's kind of appealing, you have to "crack the egg" by tapping it on a countertop to open it. Also the balls fall out, I want them to be retained inside the slotsFinal Version
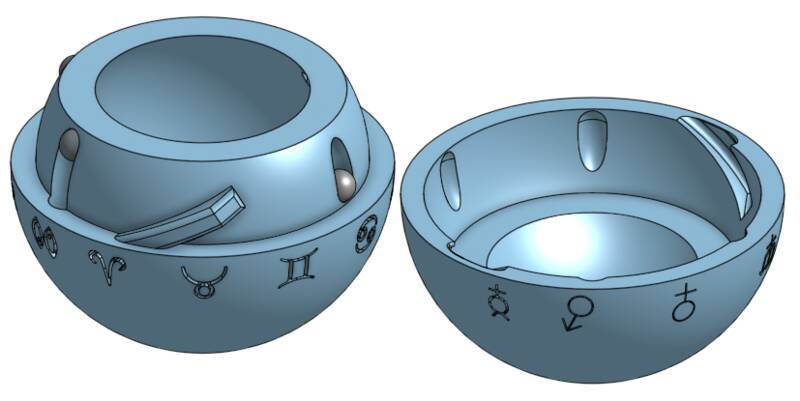
In this version, I modified the diameter and depth of the slots to help the bearings roll smoothly inside them without falling out. I also added some cryptic symbols to the outside of the ball. They're not just for looks! They represent the Zodiac position of the planets on March 5, 1979, which is the date that the Voyager I spacecraft flew past Jupiter. To open the sphere, you need to tip it so that the Jupiter symbol is facing upward.The astronomical symbols were created in Inkscape from Unicode symbols, then transferred to OnShape as a DXF file and then wrapped around the sphere using the "Wrap" tool. Annoyingly you can only do a cylindrical wrap, not a full spherical one: I would have liked to make a globe, but I had to settle for something restricted to the sphere's equator.
Conclusions
This project taught me a lot about achieving very fine tolerances with 3D printing. The difference between the tolerances being too loose (so the balls fall out of the slots) and too tight (so the balls don't lock effectively) is about 0.1 mm, right on the edge of being reliably printable. If I had more time, I'd go back up to a larger sphere diameter with 1/4" locking balls, so the tolerances wouldn't need to be as precise. Also, heavier balls would move under gravity as they're supposed to, and wouldn't get hung up in the slots so much.I also couldn't have done this project without parametric design. Being able to rebuild the whole ball at a smaller size with looser tolerances in an instant was a godsend.
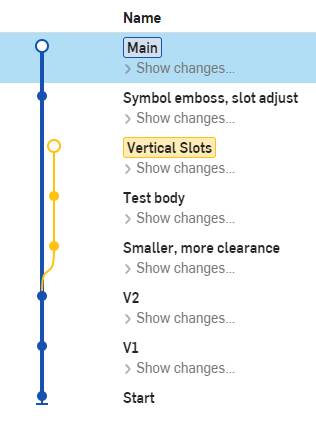
Version Control in OnShape
One last note about something I learned about OnShape for this project: it has git-style version control built in. I was able to make a branch from my original "marble maze" design concept to explore the vertical slot design, evolve that design, and merge it back onto the main line easily. Here are some screenshots of that: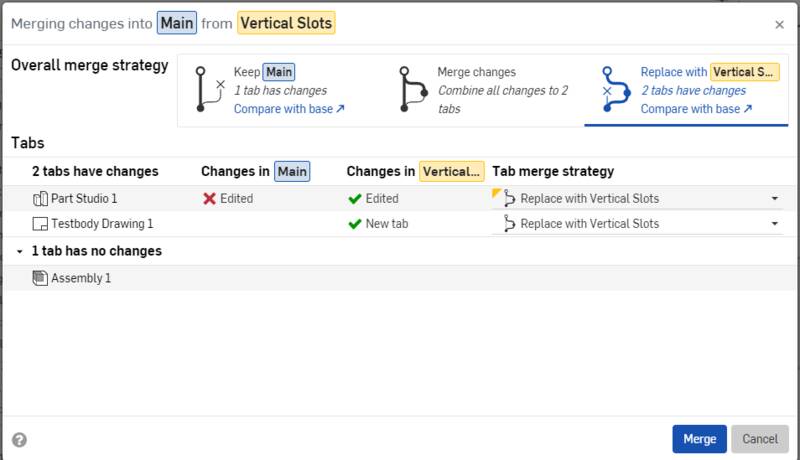
Design Files
- Tesla_bobblehead_3dscanner.zip (Google Drive link)
- tesla-boblehead-kiri.zip (Google Drive link)
- locking-sphere.zip (Zipped STEP file)
- Locking Sphere (OnShape share)
- zodiac-1979-03-05.svg (SVG of astronomical symbols)