Week 5: 3D Scanning and Printing
Group Assignment(s) for this week
- Test the design rules for your 3D printer(s)
- Document your work on the group work page and reflect on your individual page what you learned about characteristics of your printer(s)
Getting Started
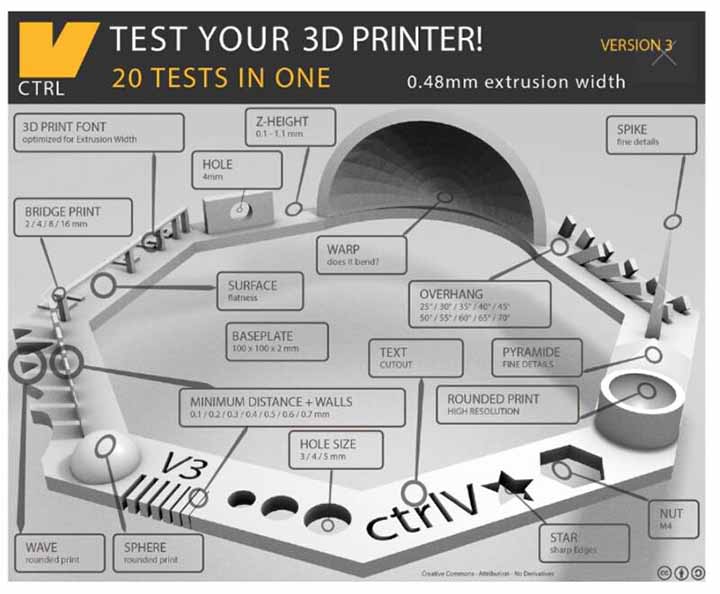
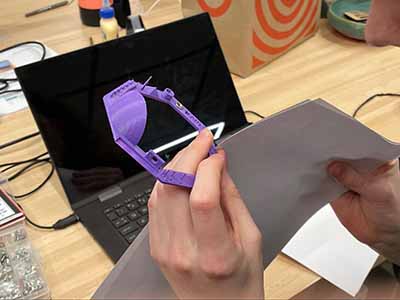
For our group work, we printed and measured a3D print from Thingiverse that includes a bunch of different tests for various design rules for the printer. The object looks like this:
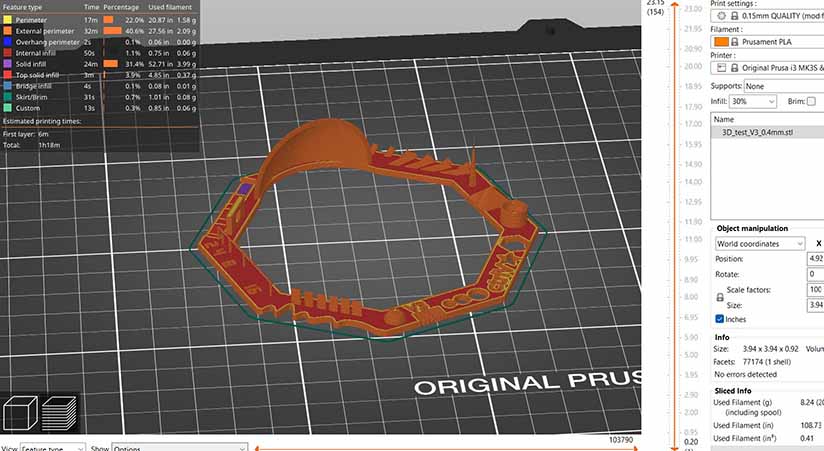
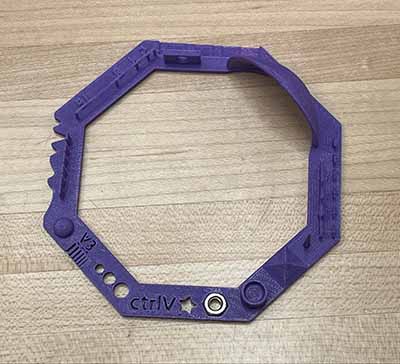
We printed the object out on a Prusa Mk3S at 0.15 mm layer thickness, Quality mode, 30% infill.
We did the following tests:
- Nut test: a 4mm nut should fit perfectly in the hex hole.
Result: just a little tight but almost perfect - Hole size: we measured the diameter of the test piece's holes using digital calipers, and double-checked by passing metric bolts through them.
Results:Design size (mm) Actual size (mm) notes 5 mm 4.85 mm 4 mm 3.73 mm an M4 bolt doesn't fit 3 mm 2.86 mm an M3 bolt really doesn't fit 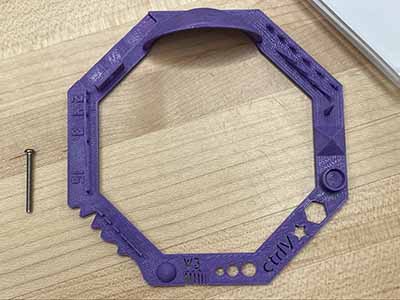
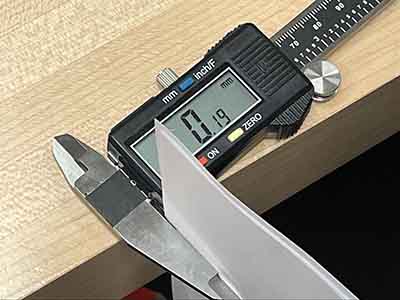
- Slit size: the model includes narrow slots from 0.1-0.7 mm width.
Results: the 0.1 mm slot is completely closed up. The "0.2 mm" slot fits 1.5-2 sheets of paper. Measuring the thickness of the paper, we conclude that the 0.2 mm slot is just a bit less than 0.19 mm wide. - Z-height: the model includes thin vertical steps ranging from 0.1 to 1.1 mm in thickness.
Results: we measured the thinnest step to have a thickness of 0.24 mm, more than twice as thick as designed. The second step was 0.38 mm thick, and the third was 0.6. However, because our layer thickness was 0.15 mm, some of the steps didn't print at all: the third step we measured is probably the fifth step in the design. Our printer probably also has some slight first-layer calibration problems that make the first layer a bit thicker than it should be. - Bridge test: the model includes thin "bridges" up to 16 mm long, supported at both ends.
Results: our Prusa was able to print these just fine with no problems. - Overhang angle: the model includes tilted blocks at increasingly steep angles.
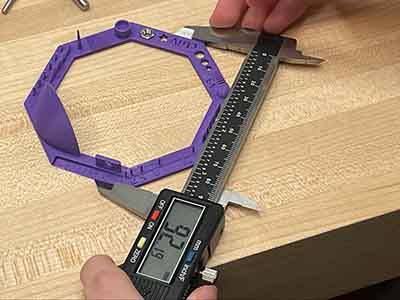
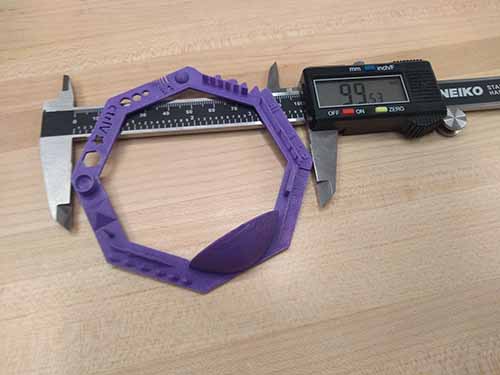
Results: We had no problems printing a 60° overhang angle, but the 65° overhang had some problems. Weirdly the 70° overhang looked okay, probably because the overhang distance was shorter. - Overall size of the model should be 100mm x 100mm.
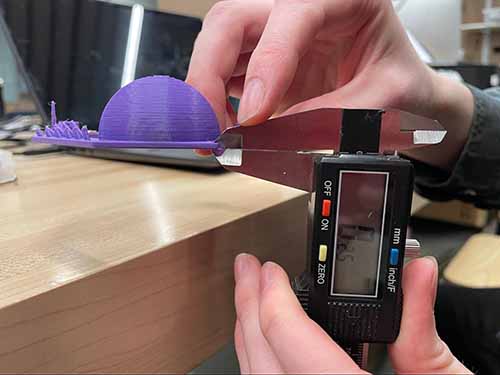
Results: for our first measurement, we were shocked to find the actual size of the hexagon was 92.2 mm across from edge to edge. But the Thingiverse documentation was misleading: 100 mm is actually the corner-to-corner distance. We re-measured from corner to corner and got 99.5 - Spike test: The model includes a vertical spike that should be 21mm tall.
Result: the spike is actually only 12.8 mm. (The top of the spike is too thin and doesn’t get printed.) - Thinnest vertical walls: these are designed to be 0.1, 0.2, 0.3, …. 0.7 mm.
Result: actually all of these structures are 0.37 mm thick, except for the last one which is 0.7 mm. This is because our printer's nozzle is 0.4 mm thick, so the walls end up one strand of plastic wide, or two.
Conclusions
- After measuring the bolts with the calipers my group found out the holes come out slightly too small for the bolts.
-
After we measured the model by its overhang angle, we found that it can't reliably overhang more than 60 degrees because of how we encountered a problem with the angle of 65 degrees.
-
We can't print structures thinner than layer thickness (0.15 in this test) or narrower than width of nozzle (0.4 mm for us) because of how some of the steps weren't fully printed on the model.
- The very thin structures were generally unreliable because of how difficult it was to measure.