7. Computer-Controlled Machining
The assignment this week is to, as a group, go throught he milling machine safety training, test runout, alignment, fixturing, speeds, feeds, materials, and toolpaths for our machine. On our own we had to make (design+mill+assemble) something big (~meter-scale).
3D Cut Design
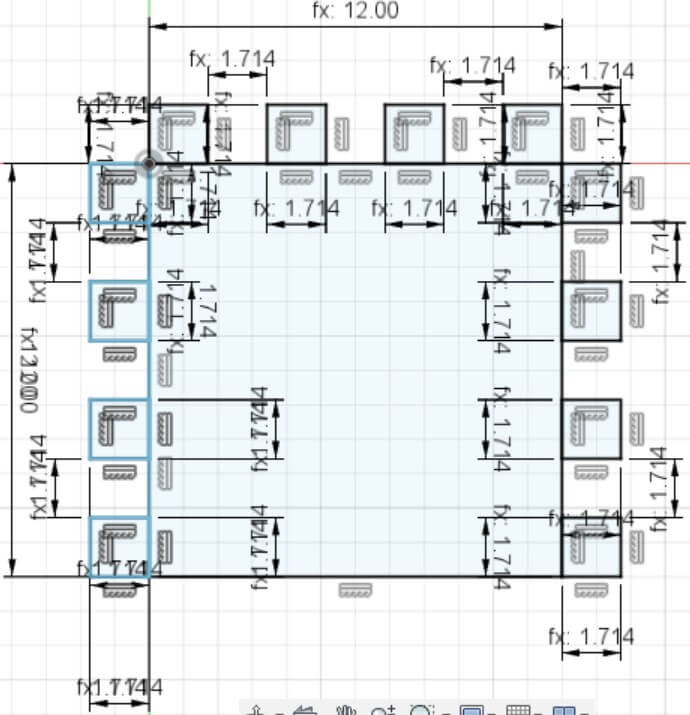
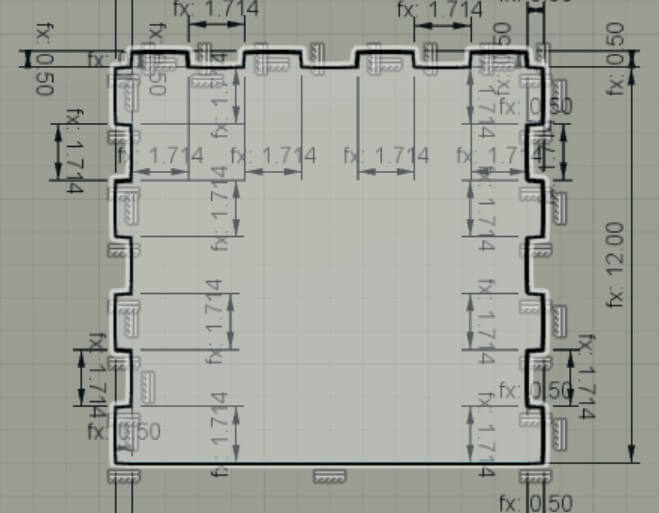
This week I didn't really have anything in mind at first but I've been wanting a place to display some of my past projects so I settled on making a shelf. My idea to make it more than just a basic shelf was to add hexagonal cubbies(enclosed shelves) in the center. I first started designing and making the perameters for how the sides of the shelf would fit together. I went with a square slot and notch design so that I could push the peices together easily and keep them that way.
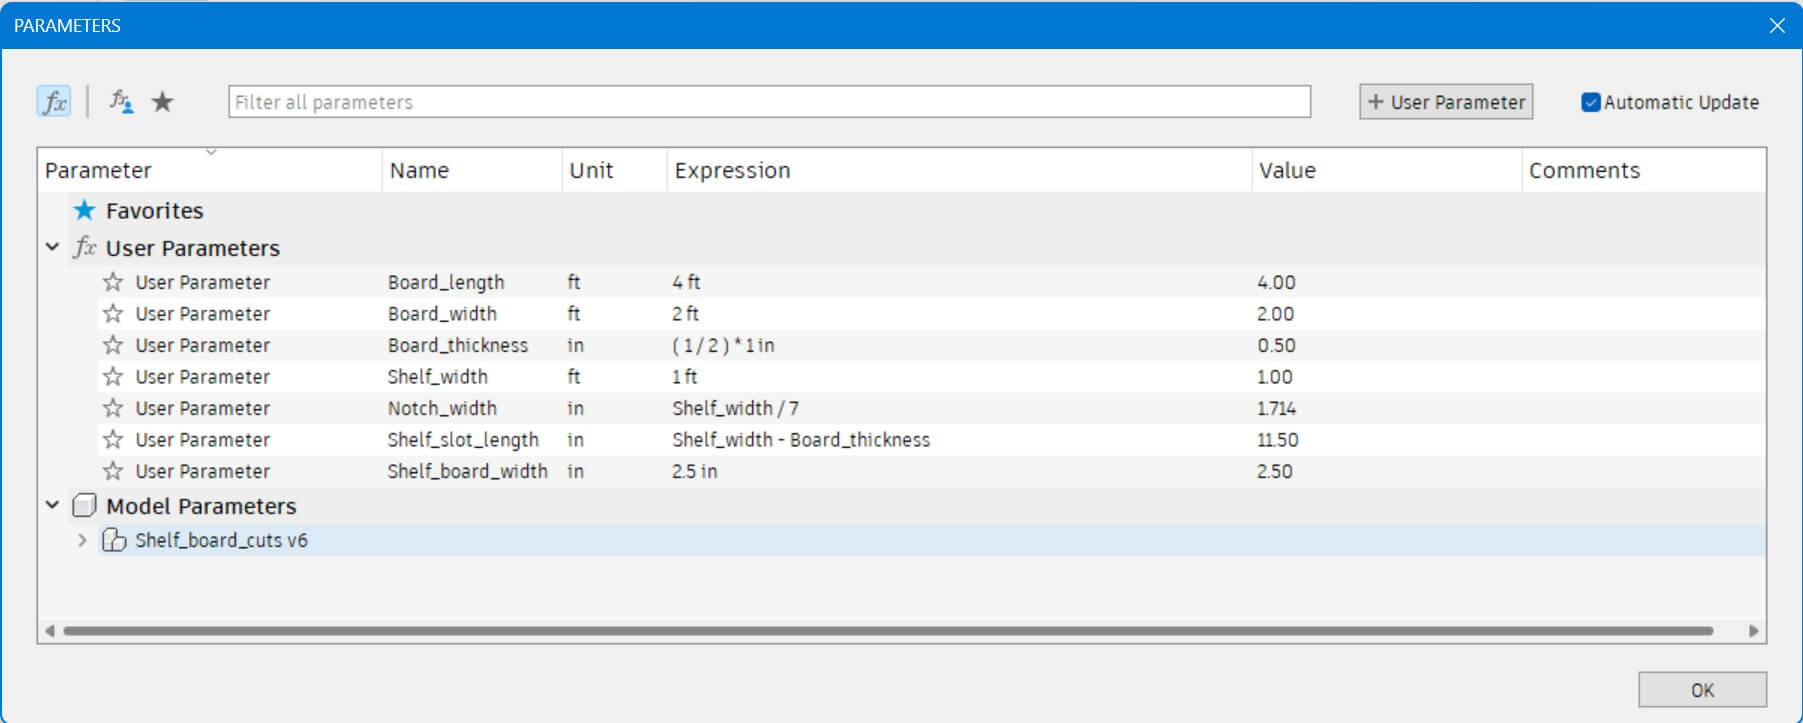
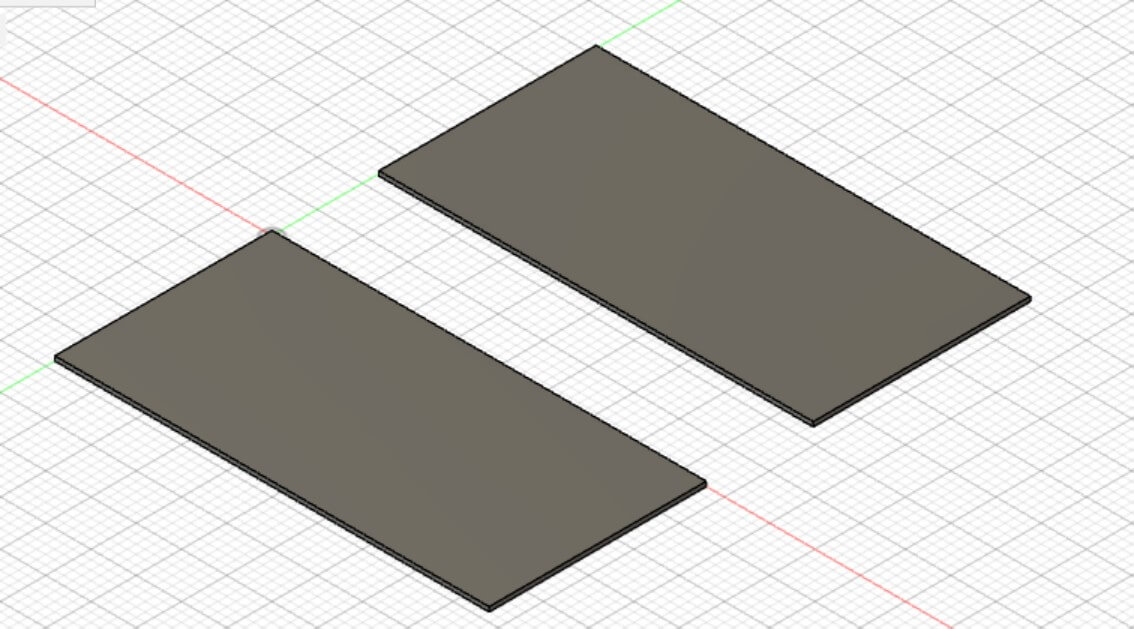
Then I made a 3D model of our allotted materials(two 2x4 boards or wood) so I could use the thickness of the wood for the notch height and so I could use the face of the board like a canvus for my shelf sketches.
Next, I remade the shelf base and made sides and a back to match and connect to the base.

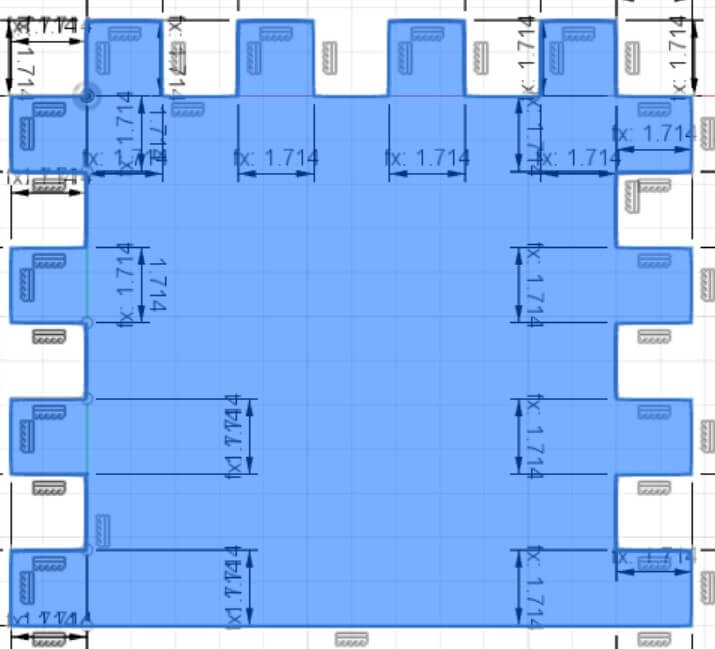
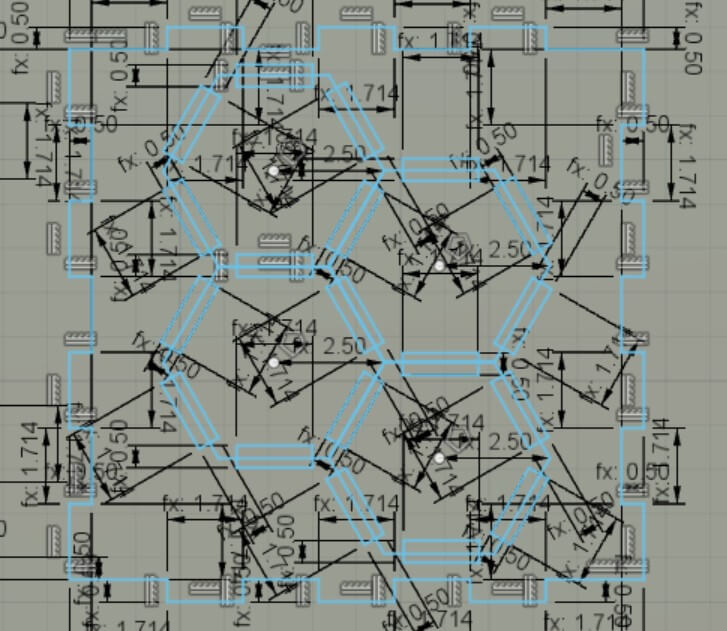
Once the back pannel of the shelf was made I started adding hexagons to it. It was really difficult to find my desired cubby size and make sure I had a decent ammout of hexagonal cubbies. I was able to settle on a design of four in the center of the shelf. This left some open and unused space but it will still be able to comeplete the job it was designed for.
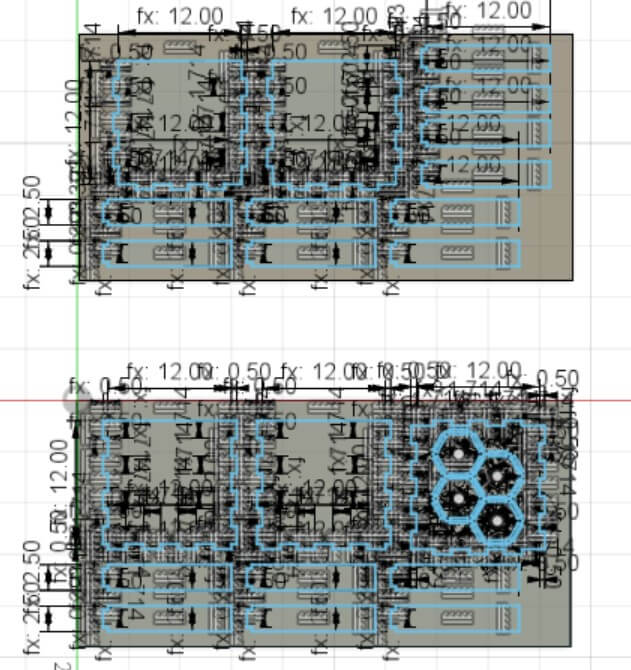
Then I made the planks that would make up the cubbies which were a foot long and two and a helf inches wide with a central notch at the end.

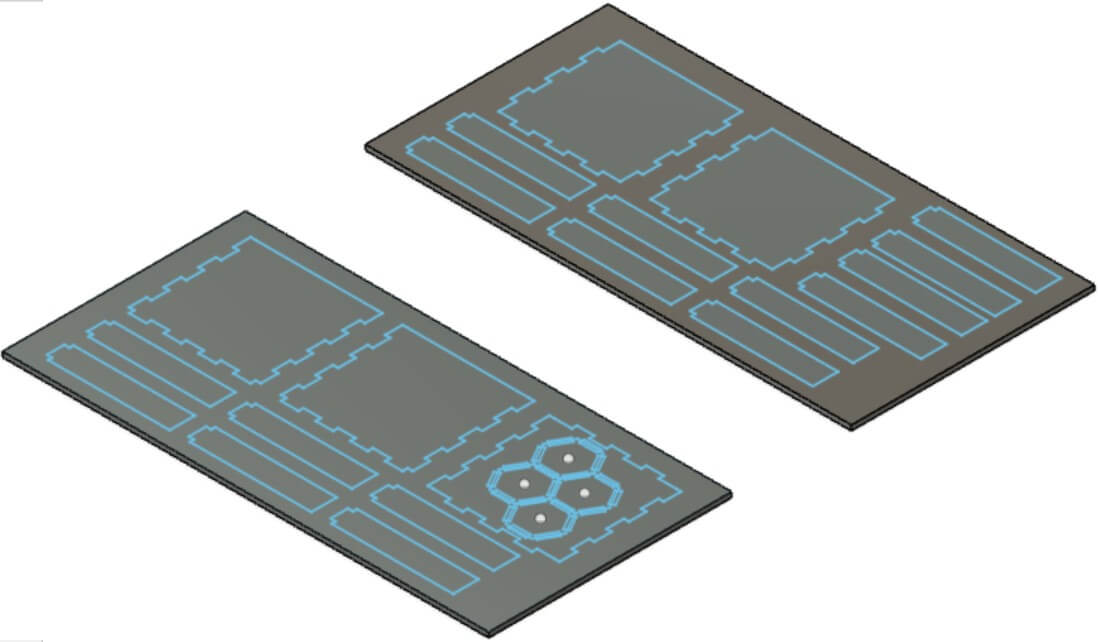
Finally I fit all the pieces I'll be using on the boards so that I had a plan of where they'll be when it's time to cut them out.
Group Page:
Useful links
None for this week.