Week 4: Embedded programming
This week I programmed an arduino, looked through the arduino datasheet, and worked in a group to compare the arduino to the ESP32-C3.
Important notes from the Arduino datasheet:
6 PWM channels. Pulse width modulation is useful for any project that needs a continuous range of voltage. This means that the arduino has 6 different PWM output pins you can program.
Support for several common types of communication, including USART, I2C and SPI.
Takes 2.7-5.5V of power.
Rated for -40 C to 85 C temperature range. Will probably work a bit outside of this range, but the EEPROM, voltageregulator, and crystal oscillator might have some issues.
The arduino has two processors; the ATMega328P, and the ATMega16U2. The CPU goes up to 16 MHz. The two processors have 2Kb and 512B SRAM respectively
Overall the arduino board has a large variety of features and compatibility.
Group work
Group work documentation page
Prior to this week I had some experience programming with arduino Uno, so the main thing I took away from the group work was how to connect with other boards. This will undoubtedly be useful when programming my microcontroller for the final project, as it may be significantly different from the arduino architecture.
Arduino coded
Arduino code (download)
I knew that an Arduino would be easy to interface with an LCD, which is what I wanted to do this week, so I used an Elegoo Uno R3. I skimmed through the datasheet for the board I was using, and though very little of it informed the code that I wrote, I found the documentation interesting to see how everything was connected. I suspect the board that I will need to create for my final project may involve many of the same components.
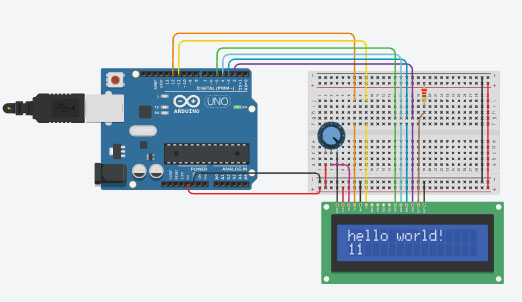
Example found on tinkercad
To start off, I opened up Tinkercad and created a circuit simulation. I then went into components > Arduino, and then found an example of interfacing an Arduino with an LCD. This example had wiring, and a hello world script pre-programmed, so it was an excellent starting point to see how it worked.
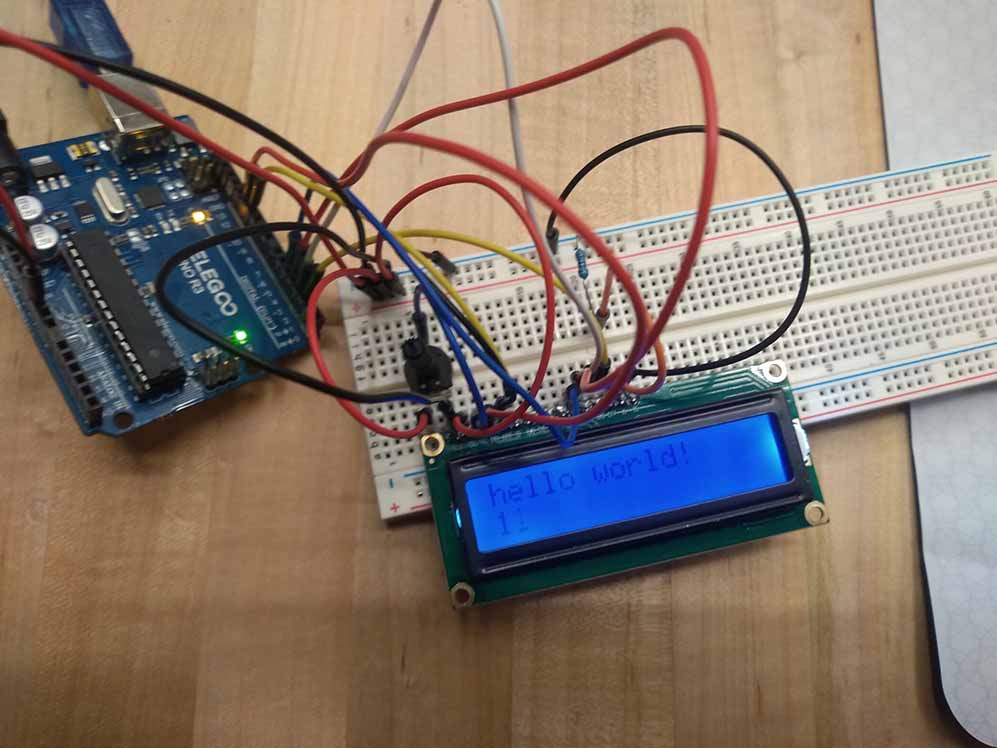
Theory to practice
I took the example wiring from tinkercad and made a physical version of it. It ran the code fine, though bumping the wires could sometimes cause random characters to show up, so something was wrong with the connection.
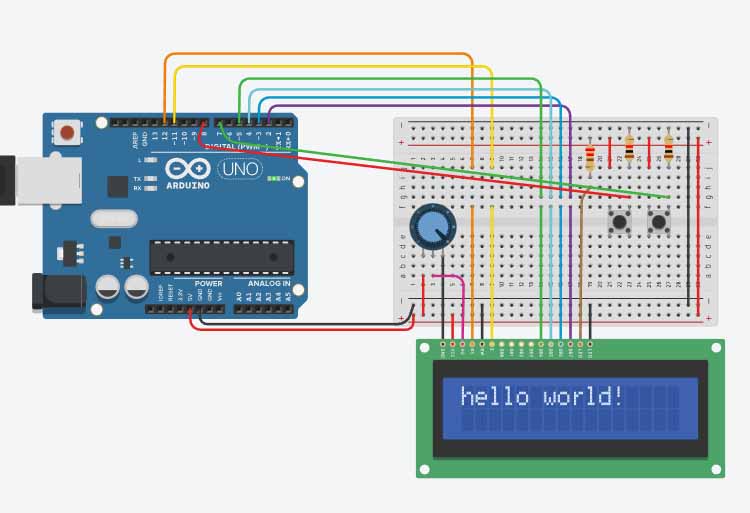
Input elements
I then went on to make my own edits. I wanted to make a scrolling menu using two buttons to scroll up or down in a list. I added the buttons in tinkercad to make sure the wiring could work, and then added them to the physical version.
With the wiring layout done, I wrote the code for the scrolling list. It uses a list of characters and a variable to store the position on the list. I used the serial monitor to debug my code, but it is also an example of how the arduino can talk back to the computer.
        #include &#ltLiquidCrystal.h&#gt

        char *list[6] = {"Item1", "Item2", "Item3", "Item4", "Item5", "Item6"};

        int element = 0;
        bool button[2] = {0,0};

        LiquidCrystal lcd_1(12, 11, 5, 4, 3, 2);

        void setup()
        {
          Serial.begin(9600); // open the serial port at 9600 bps:
          lcd_1.begin(16, 2); // Set up the number of columns and rows on the LCD.
          pinMode(7,INPUT);
          pinMode(8,INPUT);

          // Print a message to the LCD.
          lcd_1.print("hello world!");
        }

        void loop()
        {
          lcd_1.setCursor(0, 1);
          if(digitalRead(7)== HIGH){ // if button is pushed
            if(button[0]==0){ //then if that button wasn't already pushed
              Serial.print("button1\n");
              if(element > 0){ //if it's not at the bottom of the list
                element--;
                lcd_1.print(list[element]);
                Serial.print(element);
              }
              button[0]=1;
            }
          }else{
            button[0]=0;
          }
          if(digitalRead(8)== HIGH){ // if button is pushed
            if(button[1]==0){ //then if that button wasn't already pushed
              Serial.print("button2\n");
              if(element < sizeof(list)){
                element++;
                lcd_1.print(list[element]);
                Serial.print(element);
              }
              button[1]=1;
            }
          }else{
            button[1]=0;
          }
          delay(5);
        }
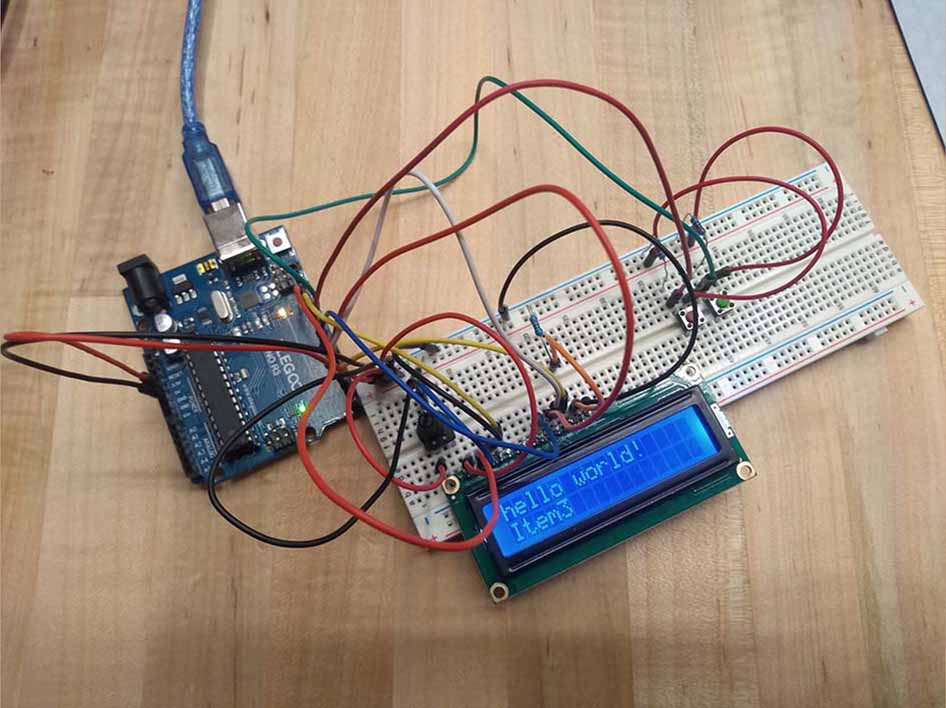
Final product
Finally I ran my program on the arduino and achieved the basic functionality I set out to achieve. Pressing one button scrolls down on the list and the other button scrolls up. It still says hello world on the first line without being overwritten, so I still have more to learn about the LCD interface to get it working perfectly.