- Assignments
- Chain mail module
- Mold design
- Making the mold
- Material research
- Results
- Group assignment
- Files
- Saco’s lecture notes
- Lecture notes
Molding and Casting
Assignments
| Progress | Task |
|---|---|
| Done | Group assignment: Reviewed the safety data sheets for each of your molding and casting materials, then made and compared test casts with each of them |
| Done | Documented how you designed your 3D mold and created your rough and finish toolpaths for machining, including machine settings |
| Done | Shown how you made your mold and cast the parts |
| Done | Described problems and how you fixed them |
| Done | Included your design files and ‘hero shot’ of the mold and the final object |
Chain mail module
For this week, I wanted to make a module that I could use to make a modular ‘fabric’. I started out with researching 3D printable modules and looking into chain mail. Chain mail is a type of armor that consists of metal rings linked together in a pattern to form a mesh, but there are infinite ways to link these modules together. I decided to use this ring as my base shape, since all of the cool examples consisted of just this base shape.
Research
- http://www.cottesdemailles.com/mailles/universelle/index.php?quoi=6in1
- https://www.mailleartisans.org/weaves/weavelist.php?Beginner=on&advanced=true
- https://nl.pinterest.com/michellevossen_/chainmail/_tools/more-ideas/?ideas_referrer=23 3D printed chain mail:
- https://www.thingiverse.com/thing:45203
- https://www.thingiverse.com/thing:3096598
- https://www.thingiverse.com/thing:2437081
- https://www.thingiverse.com/thing:442571
- https://www.thingiverse.com/thing:3619166
- https://www.thingiverse.com/thing:3213294
- https://www.thingiverse.com/thing:3369555
- https://www.printables.com/model/288-chainmail-20-modular-3d-printable-fabric modular
- https://www.printables.com/model/177143-chainmail-3d-printed-fabric-snap-together-too modular snap
- https://cults3d.com/en/3d-model/various/hexagonal-chain-mail-interlocking-patterns
- https://www.thingiverse.com/thing:2990070 > this one might be possible to adapt
- https://www.thingiverse.com/thing:3649089 knit with scales
- https://www.thingiverse.com/thing:119729 > something like this but with an opening
Mold design
I started out with a positive mold design based on a loop in a knit. I made it by drawing a fit point spline, then drawing a circle perpendicular to the start of the curve and sweeping that along the curve.

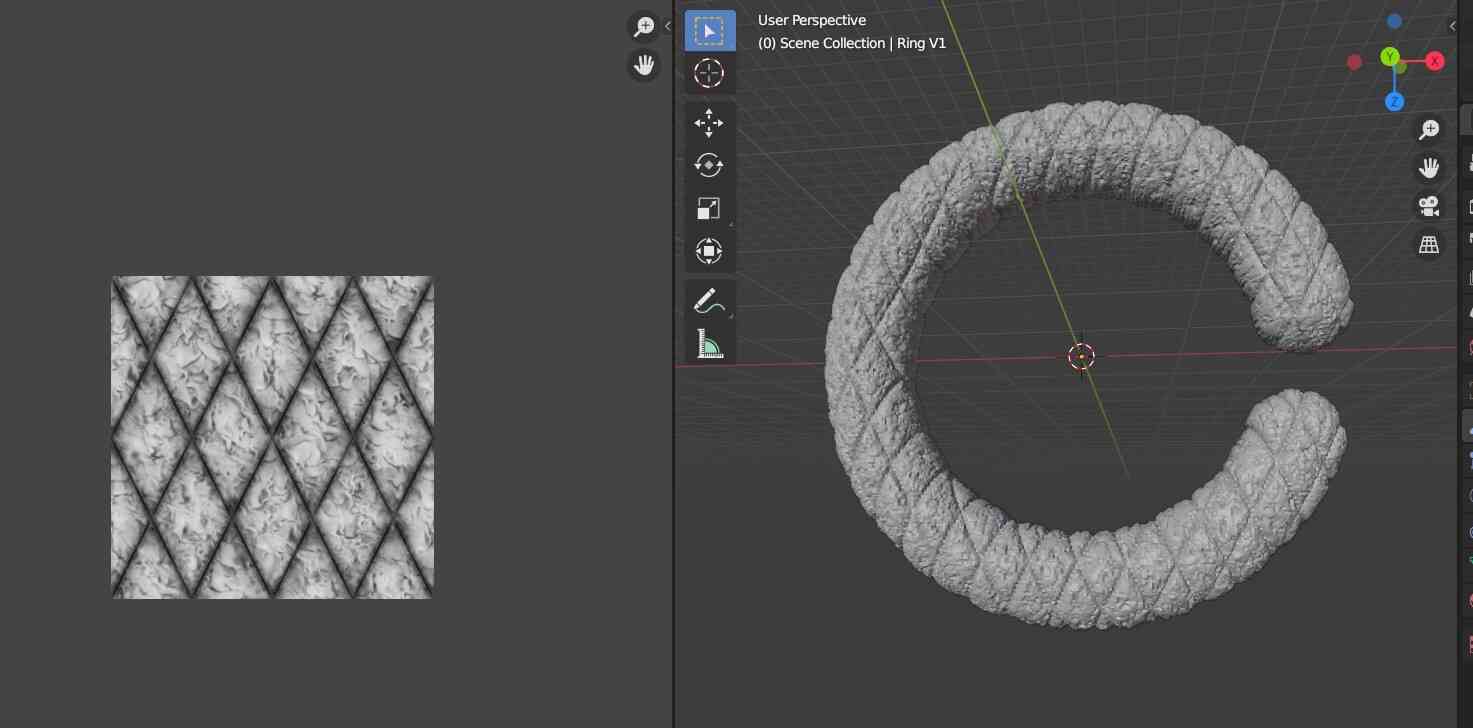
Blender
Then I exported my Fusion design as an STL and imported it into Blender to do some displacement mapping, something that Fusion can’t do. I’ve documented my workflow for this before here. My workflow for this is as follows:
- Remesh if needed (more on that below)
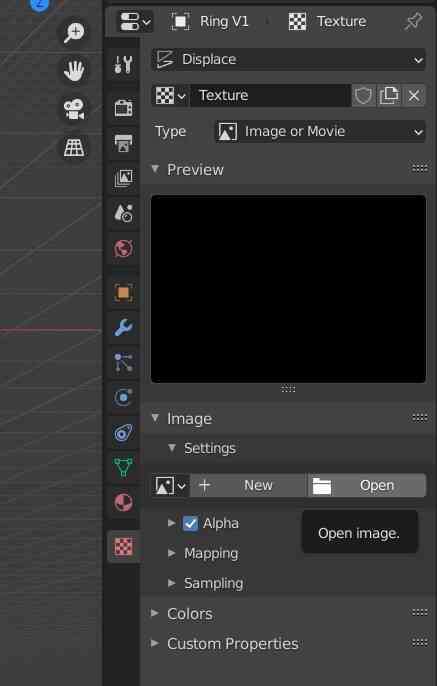
- Add Displace modifier
- Click on New Texture
- Set coordinates to UV
- Go to texture properties on the right side and open the displacement map
- Go to UV Editing tab at the top and select the displacement map
- In edit mode, go to the correct orthogonal view if needed, click ‘face select’ and press U for UV mapping options
- Scale and position the projected map as needed (for me it’s usually extremely stretched)
- Add subdivision surface to get the needed detail and place it above the Displace modifier
In the past I had issues with meshes exported from Fusion. I know now that you have to export them with a smaller maximum edge length, but I still don’t like this triangular mesh for displacement mapping so I’m remeshing it in Blender with the remesh modifier set to smooth.


Displacement maps
Following the steps above, I played around with various greyscale and black and white images I had made before.
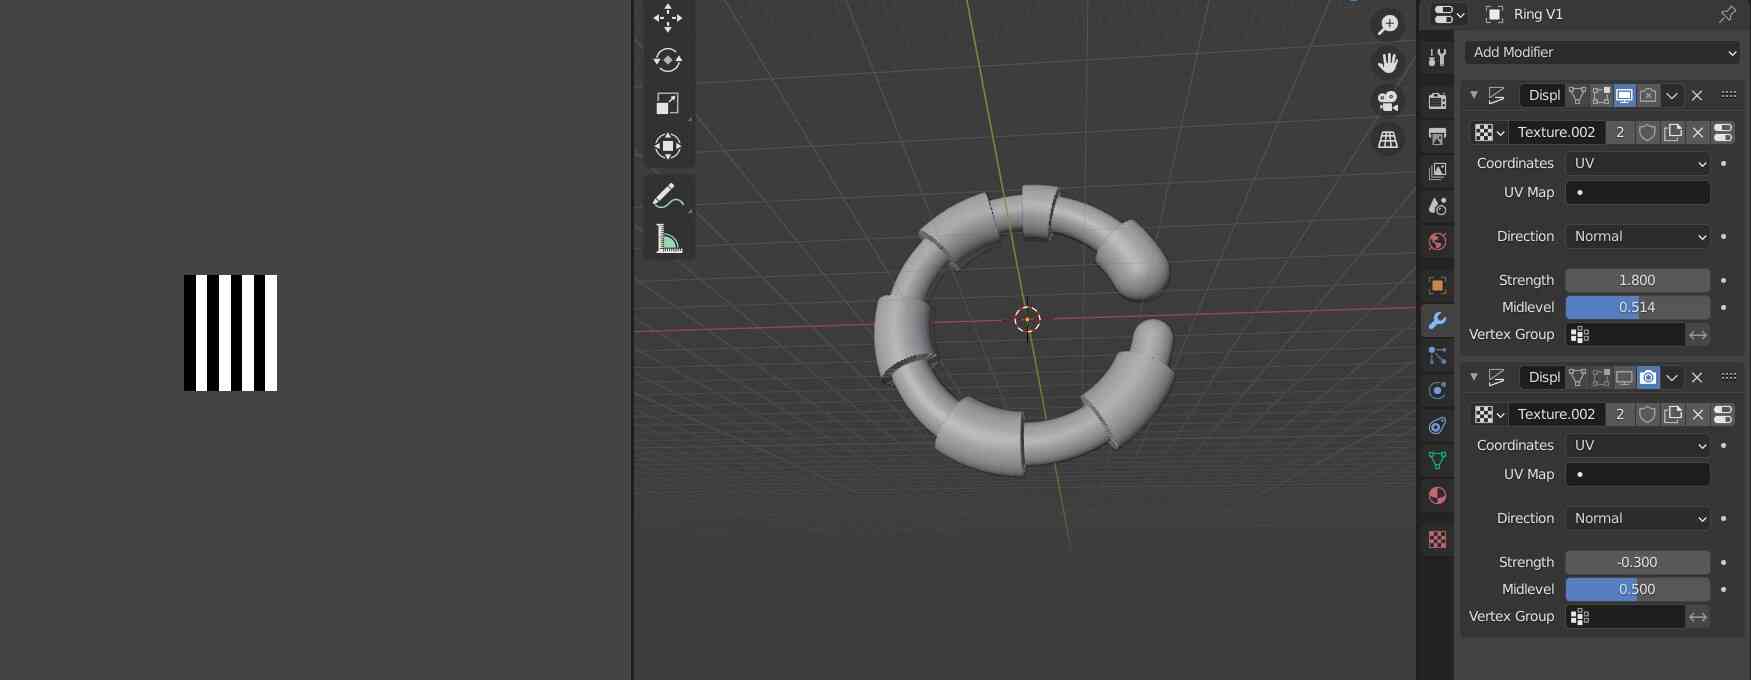
Regular stripes look a bit like a worm, so I don’t like it too much.
This is a wobbly stripe with a cylinder UV projection:
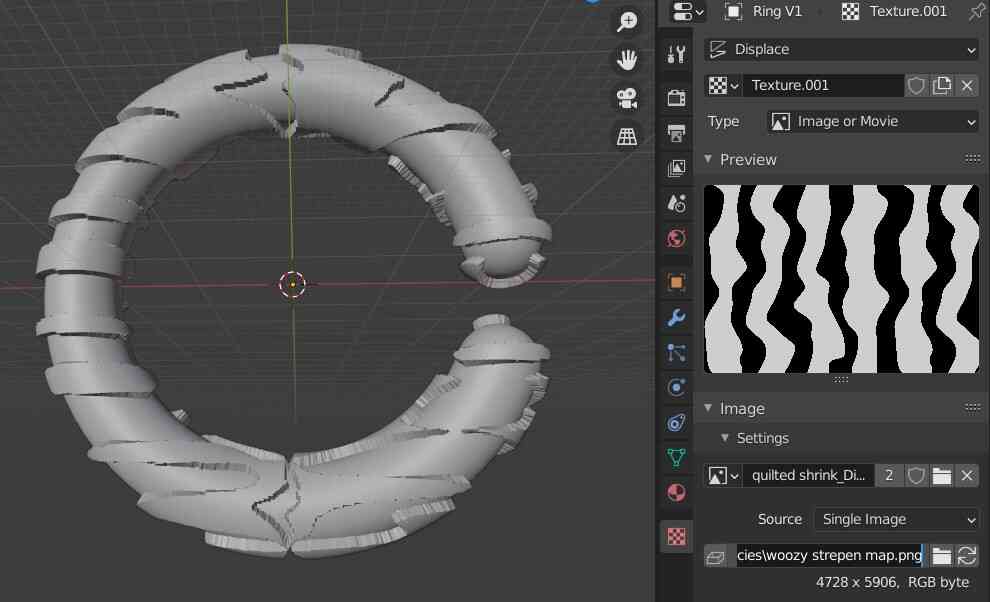
I thought there was a bit too much contrast so I used a gaussian blur on the image in Photoshop:

This is what that looks like; I don’t hate it, but I feel like machining something that looks like an abstract blob doesn’t really make sense if I can make a super quick abstract blob out of any malleable material, so I continued my search for a nice texture.


Here are some nice but impossible options:

Layering stripes is also fun; however this as well is not really millable.

At some point I kept changing back and forth between ideas and I didn’t like anything anymore, but I had to make something because I only had Friday to mill if I wanted to get anything done. My goal for this week is to play around with materials, not to nitpick a design for 6 hours.
In the end I settled on a spiked ring, because it represented how I felt. I made the displacement map in Illustrator by making a circular pattern of black-to-white gradients. You can see that the map has a slight issue with the edges of the spikes, but since the milling bit cannot go down in a crevice that small, I’m not worried about it.

I then imported the rings back into Fusion, and built a quick mold around it like this; I mirrored one side to the other side. I’m not very proud of my timeline here but I was in a hurry.

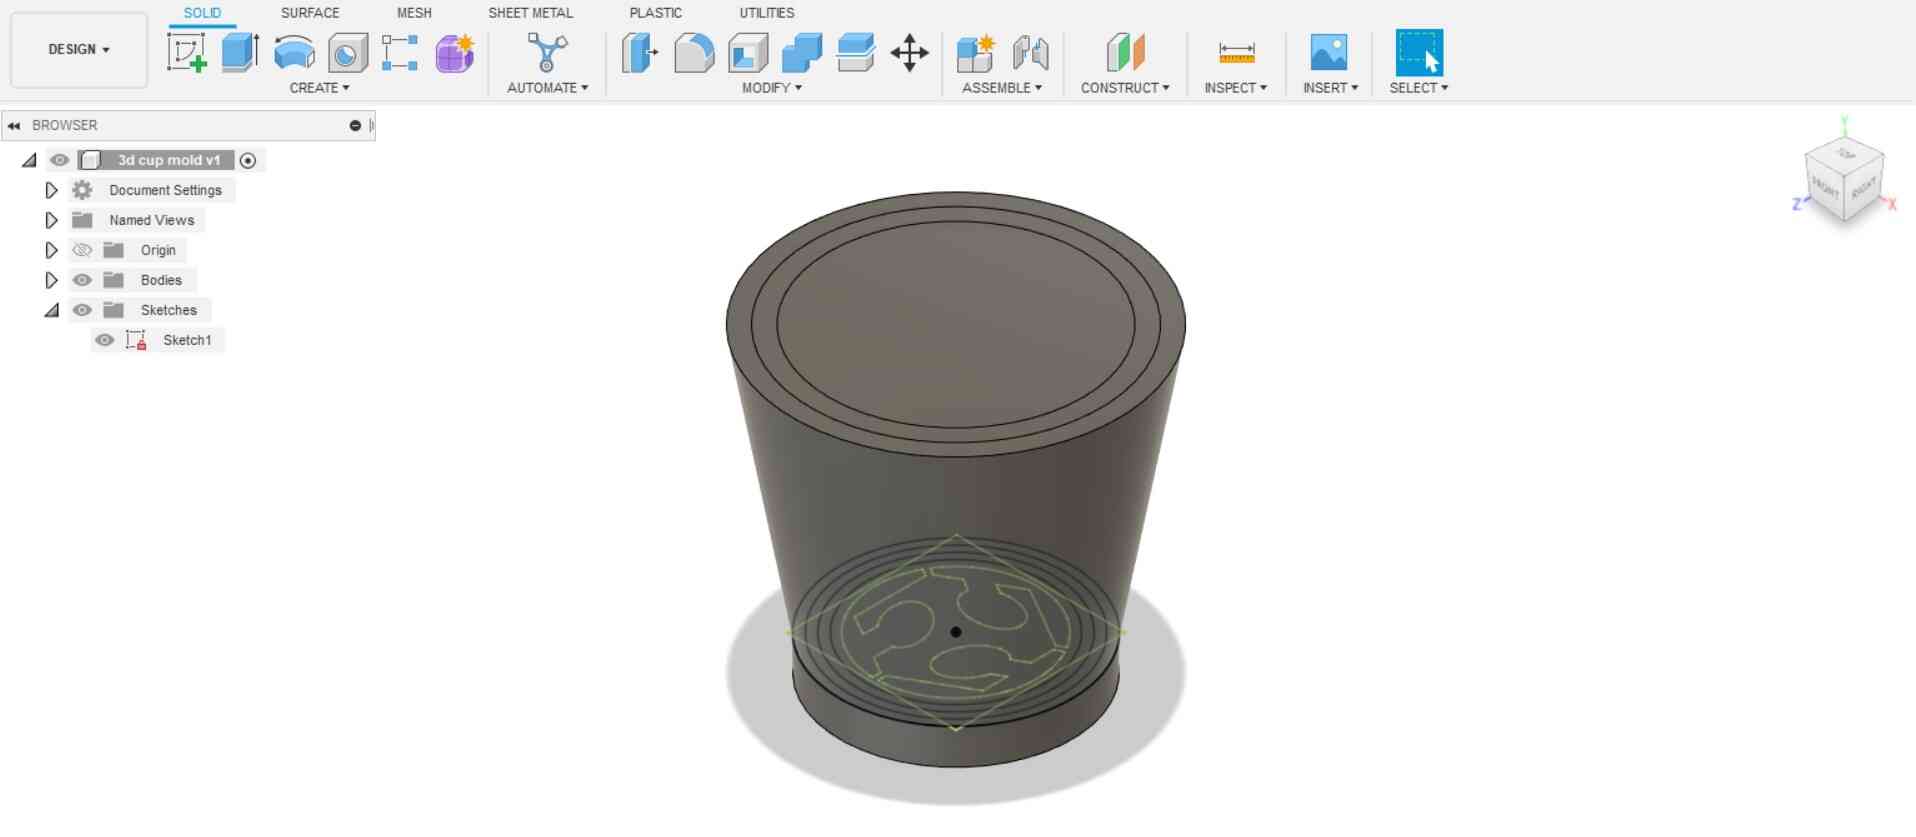
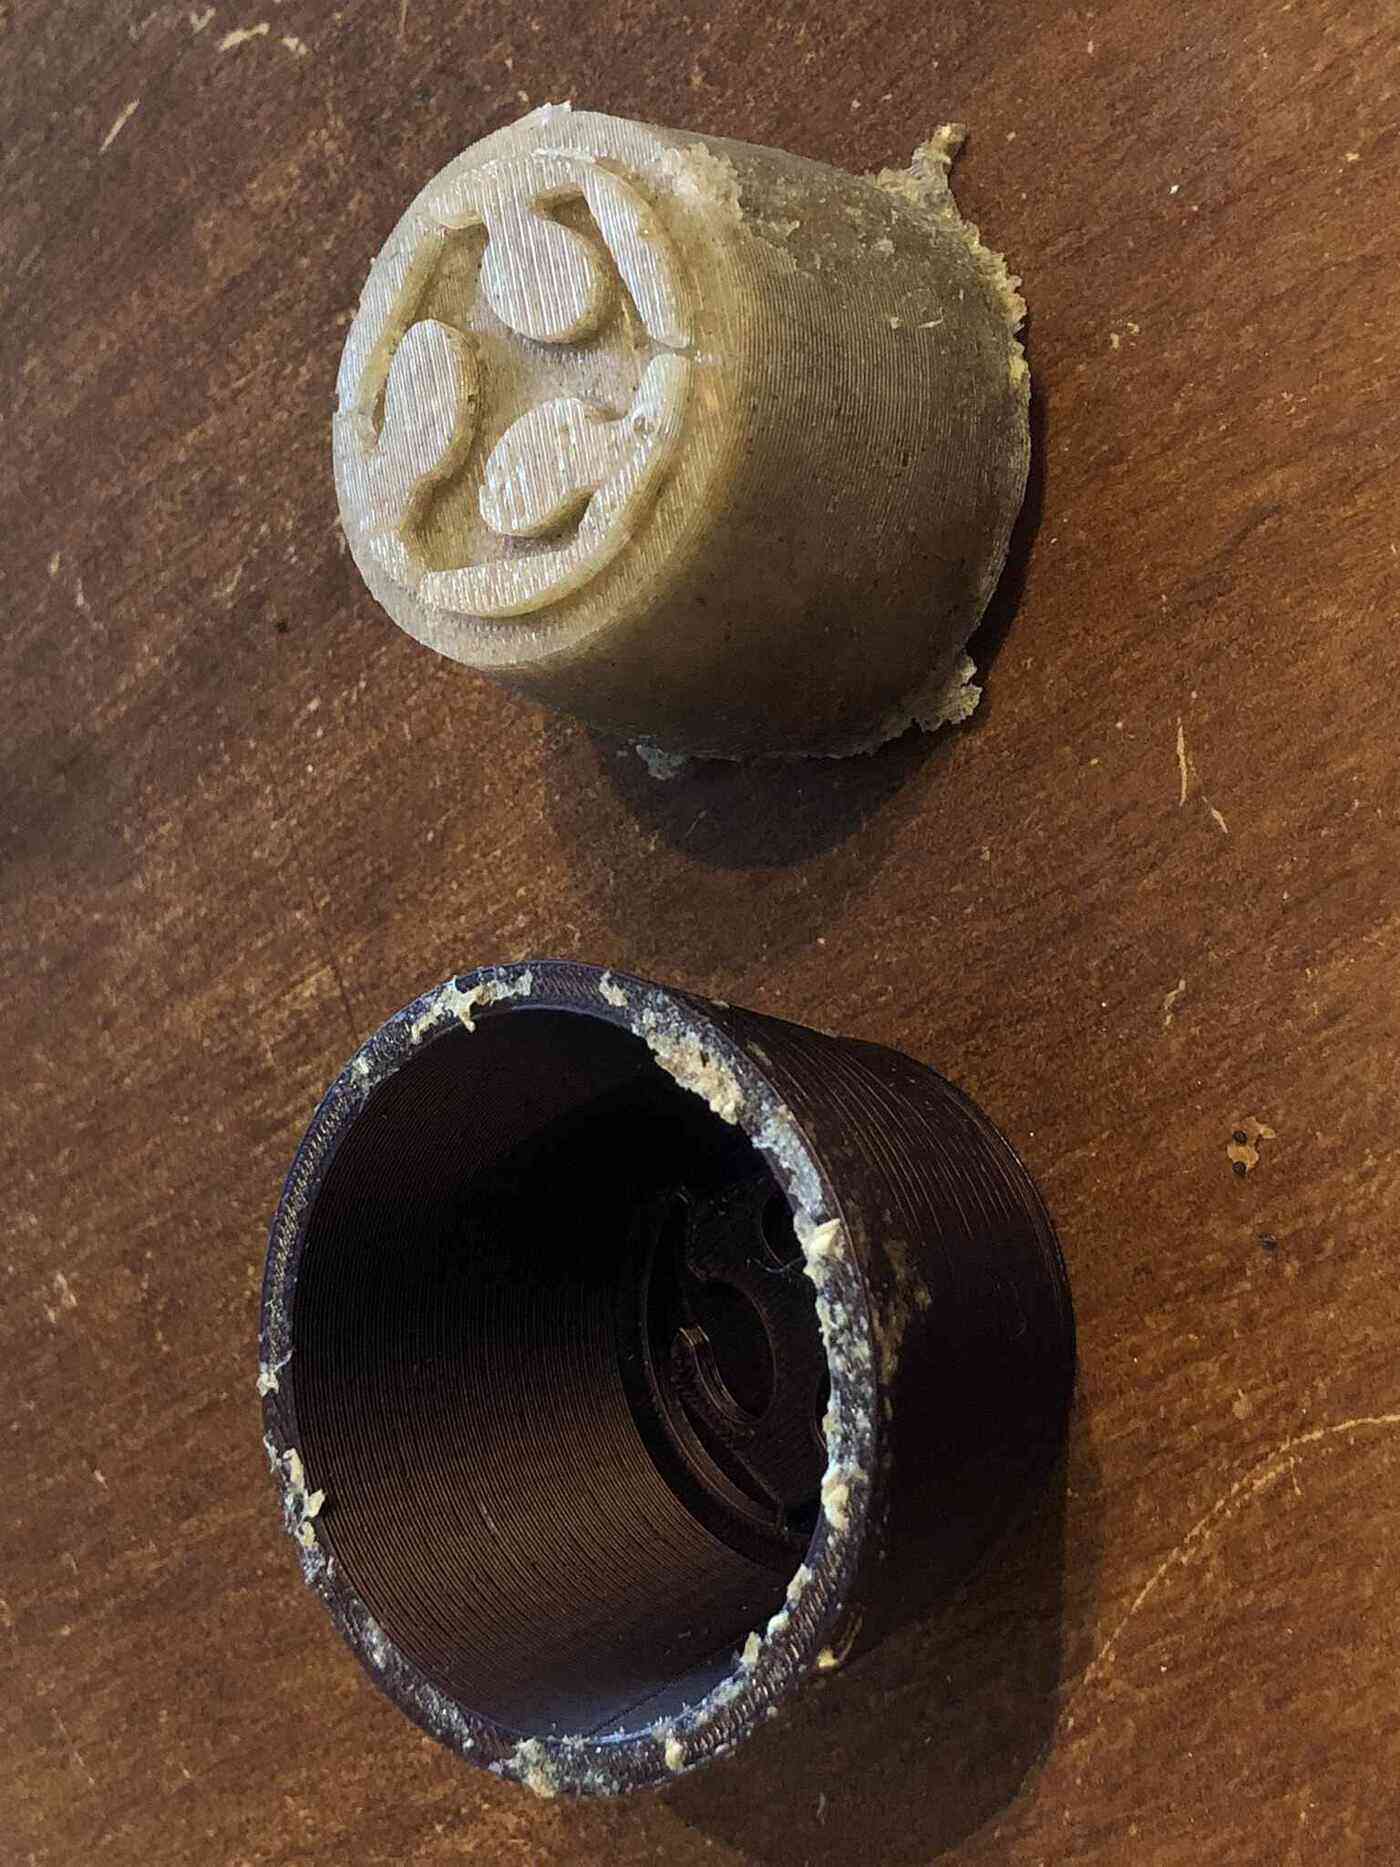
3D printed mold: Fabacademy cup
I also wanted to make something a little more 3D so I designed and printed this Fabacademy cup. It’s made by extruding two circles with the same taper angle. The outer cup has the logo in the bottom, so it will actually be the foot of the cup. One thing to not forget is that it still has to be mirrored, which I did directly in PrusaSlicer.


Making the mold
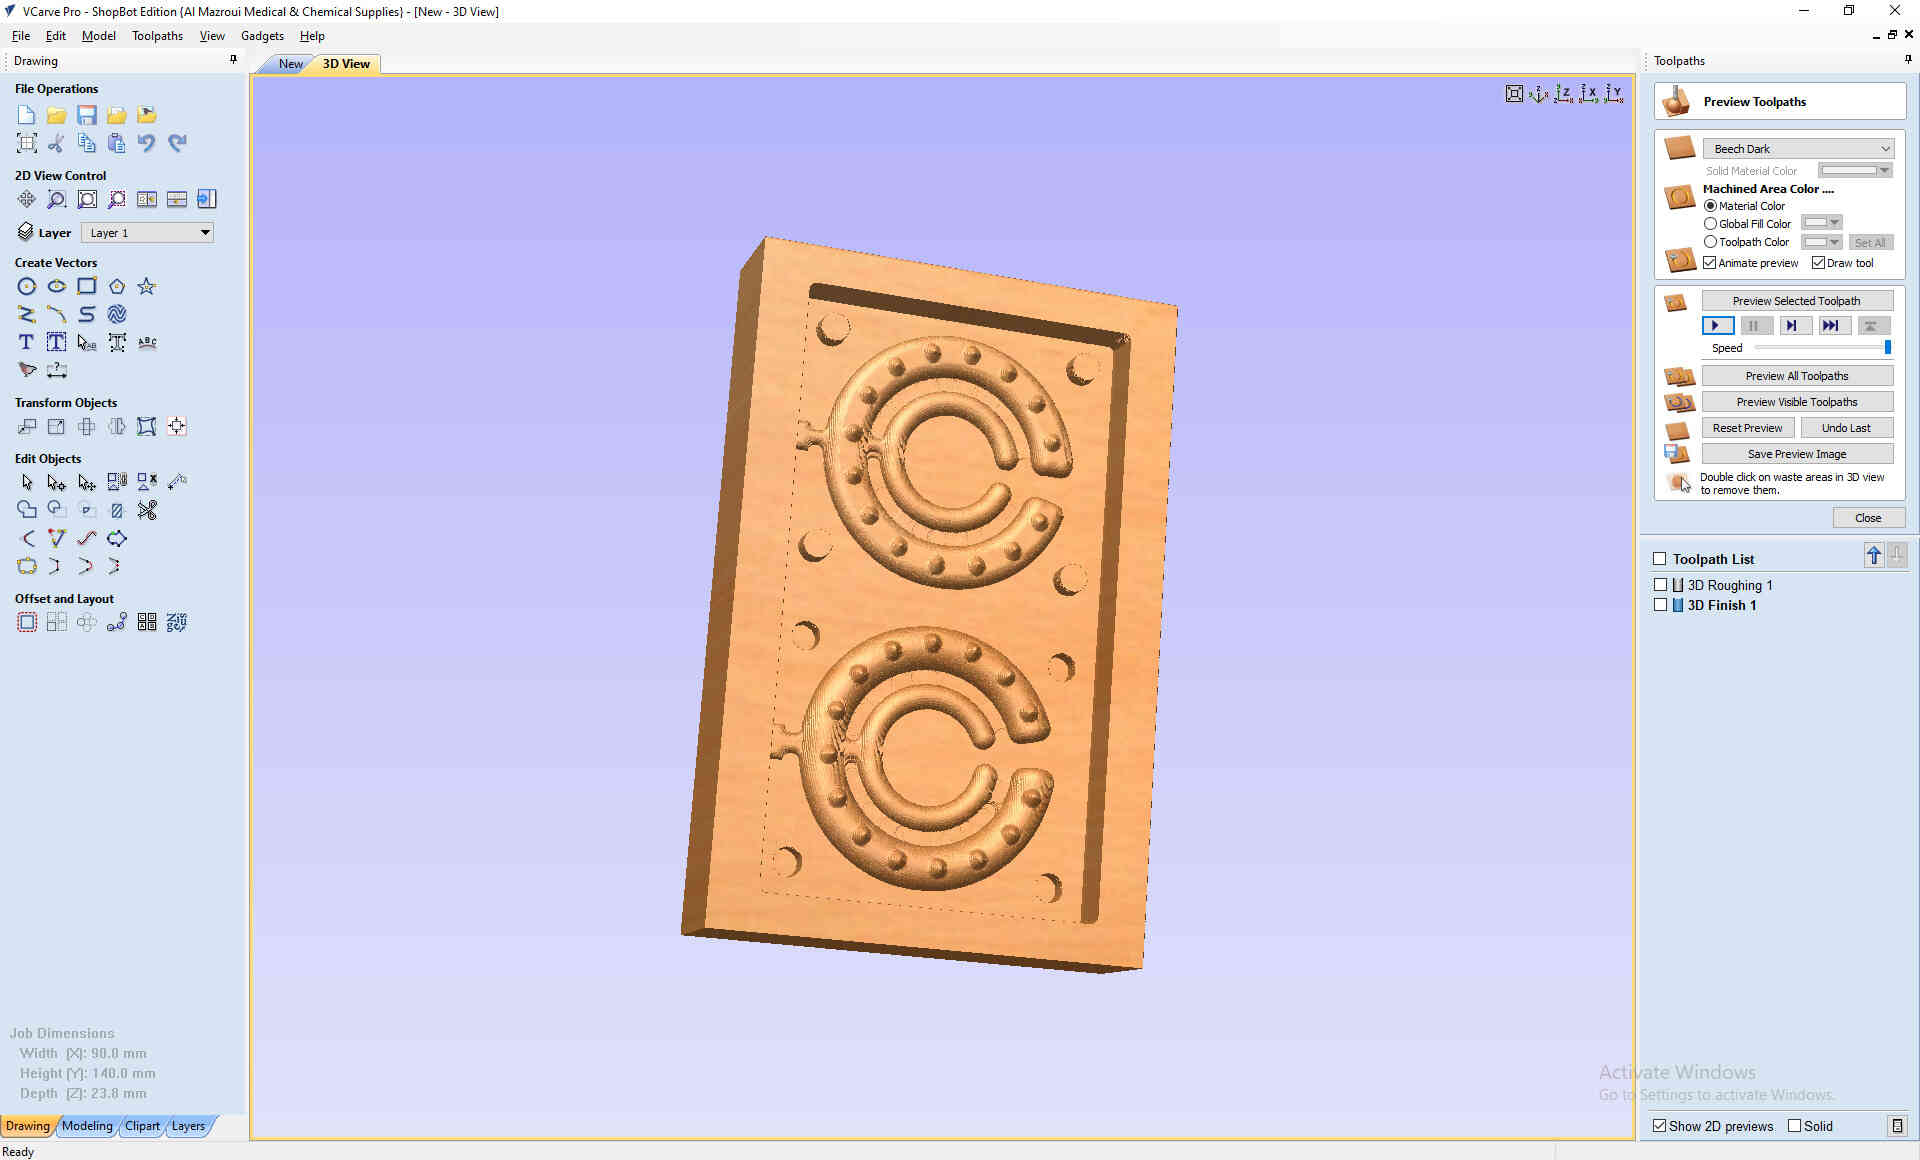
VCarve Pro
I used a 3mm end mill for both roughing and finishing toolpath, because the distance between my rings was 3mm. For the roughing toolpath I used a Z level raster X strategy. For the finishing toolpath I used a 90 degrees raster strategy, so it would be perpendicular to the roughing toolpath.
Settings
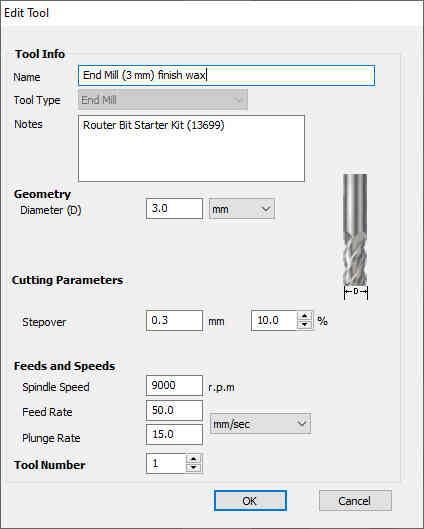

Roughing toolpath:

Finishing toolpath:

Preview:
Milling
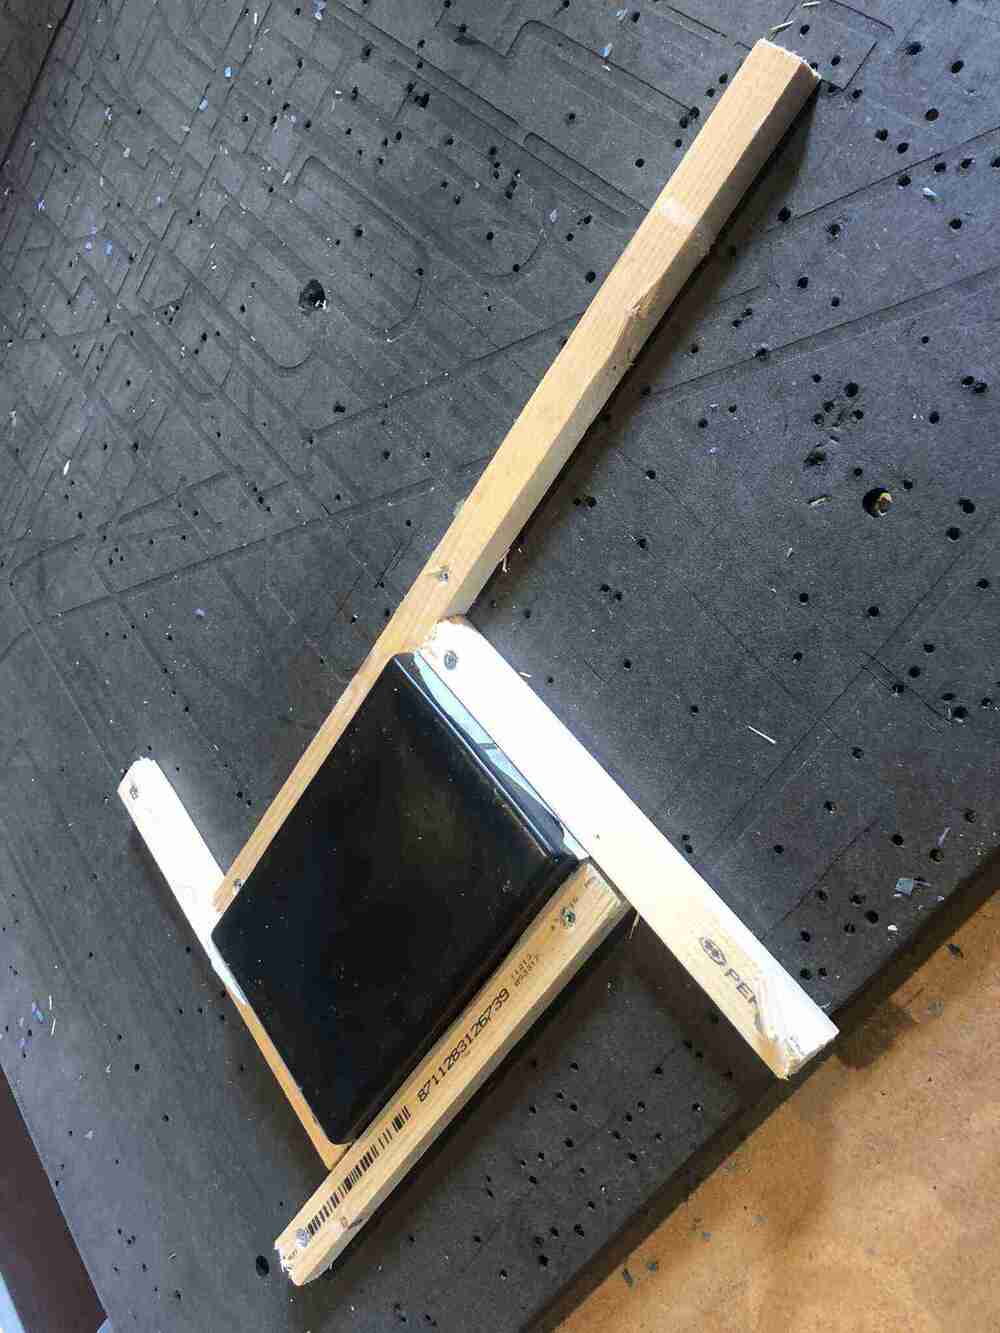
You can’t screw the wax block to the sacrificial layer so we stick it to the table with double sided tape and add four wooden bars to the sides to counter the shear forces on the material. Pre-drill the holes in the bars so the bars don’t rise when mounting them to the sacrificial layer. You can surface the top of the wax if it’s very irregular, or grate the bottom of the block if it’s not flat enough to stick to the sacrificial layer.
The tape I used didn’t stick super well but after attaching all four bars it wasn’t going anywhere. I zeroed the Z axis on the sacrificial layer, and the X and Y axes in the bottom left corner of the block of wax.

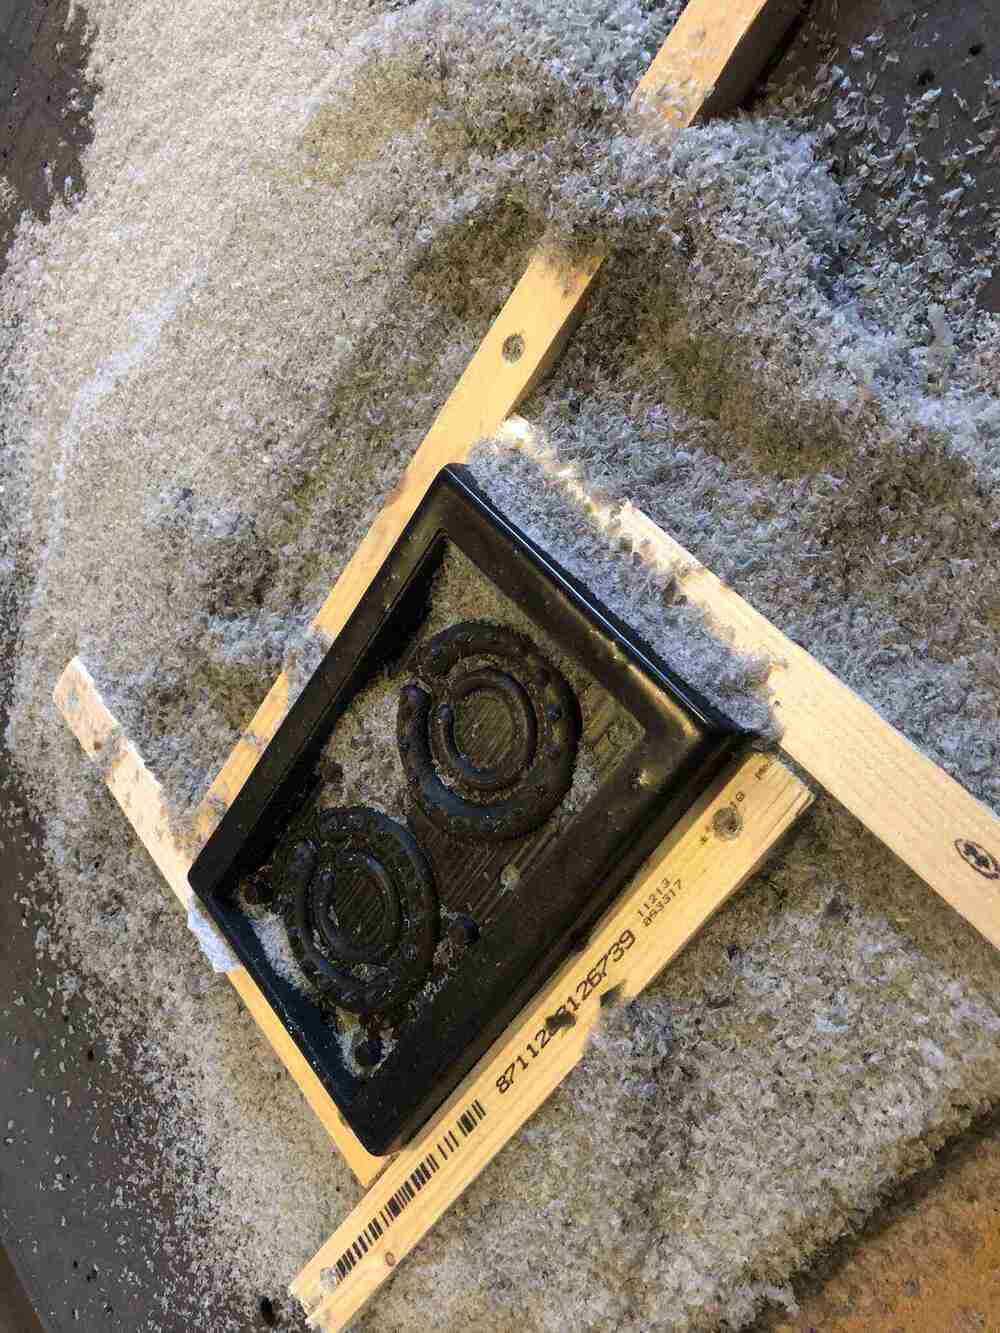
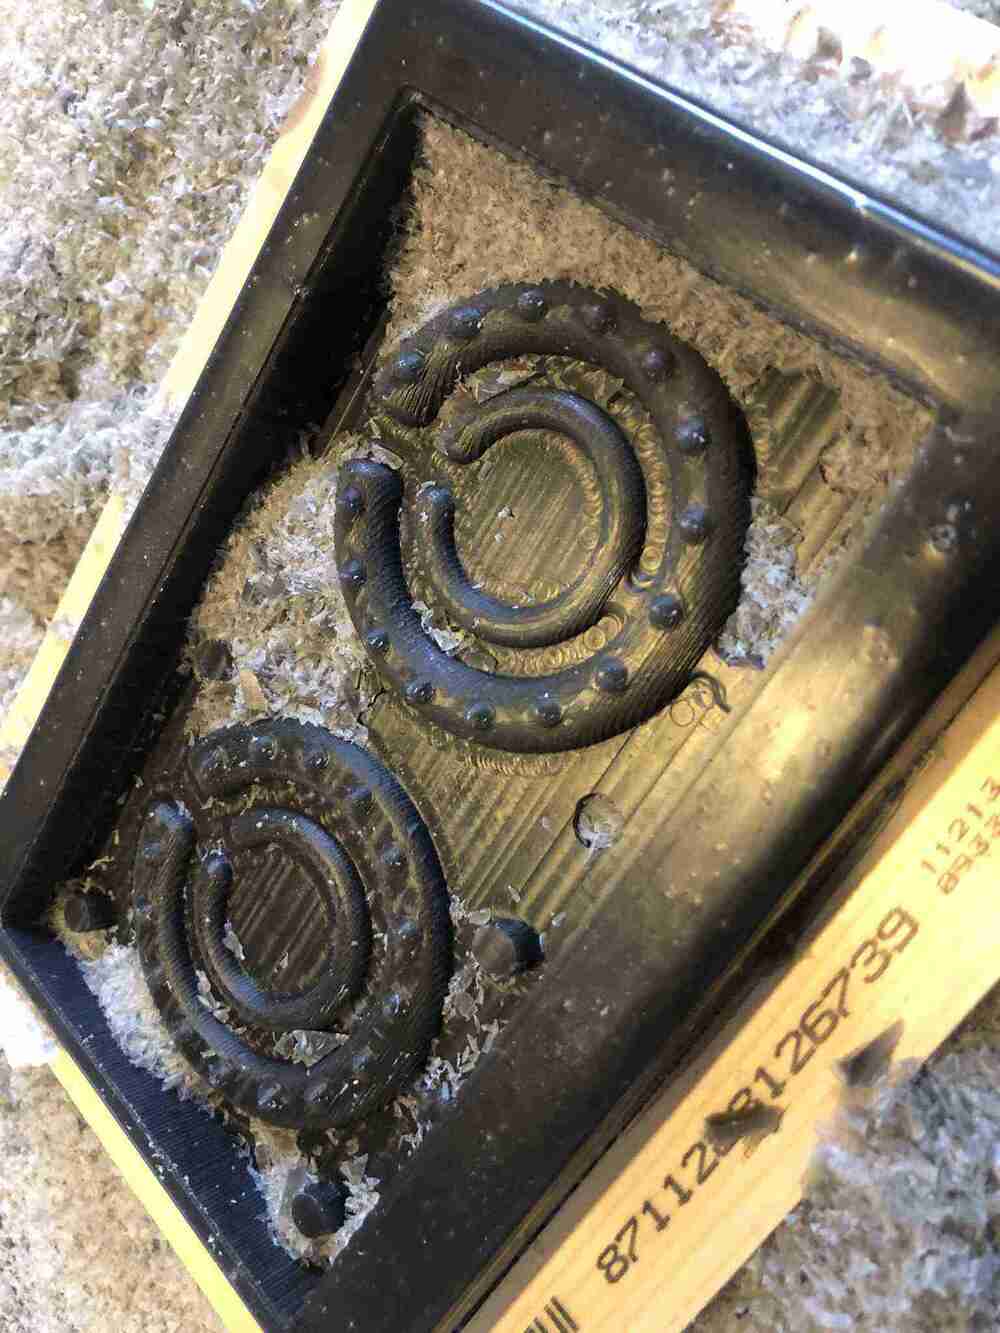
The milling process went fine; just messy as expected. It took 50 minutes to mill the roughing and finishing toolpath with the 3mm end mill. You can see that the gap between the two rings is about the same size as the milling bit, which makes the stepover kind of round in between. It’s not super smooth but it’s fine because it’s mostly on the areas that are squeezed against each other.

Making the negative mold
To measure the approximate volume needed, I filled the mold with water like Henk suggested.

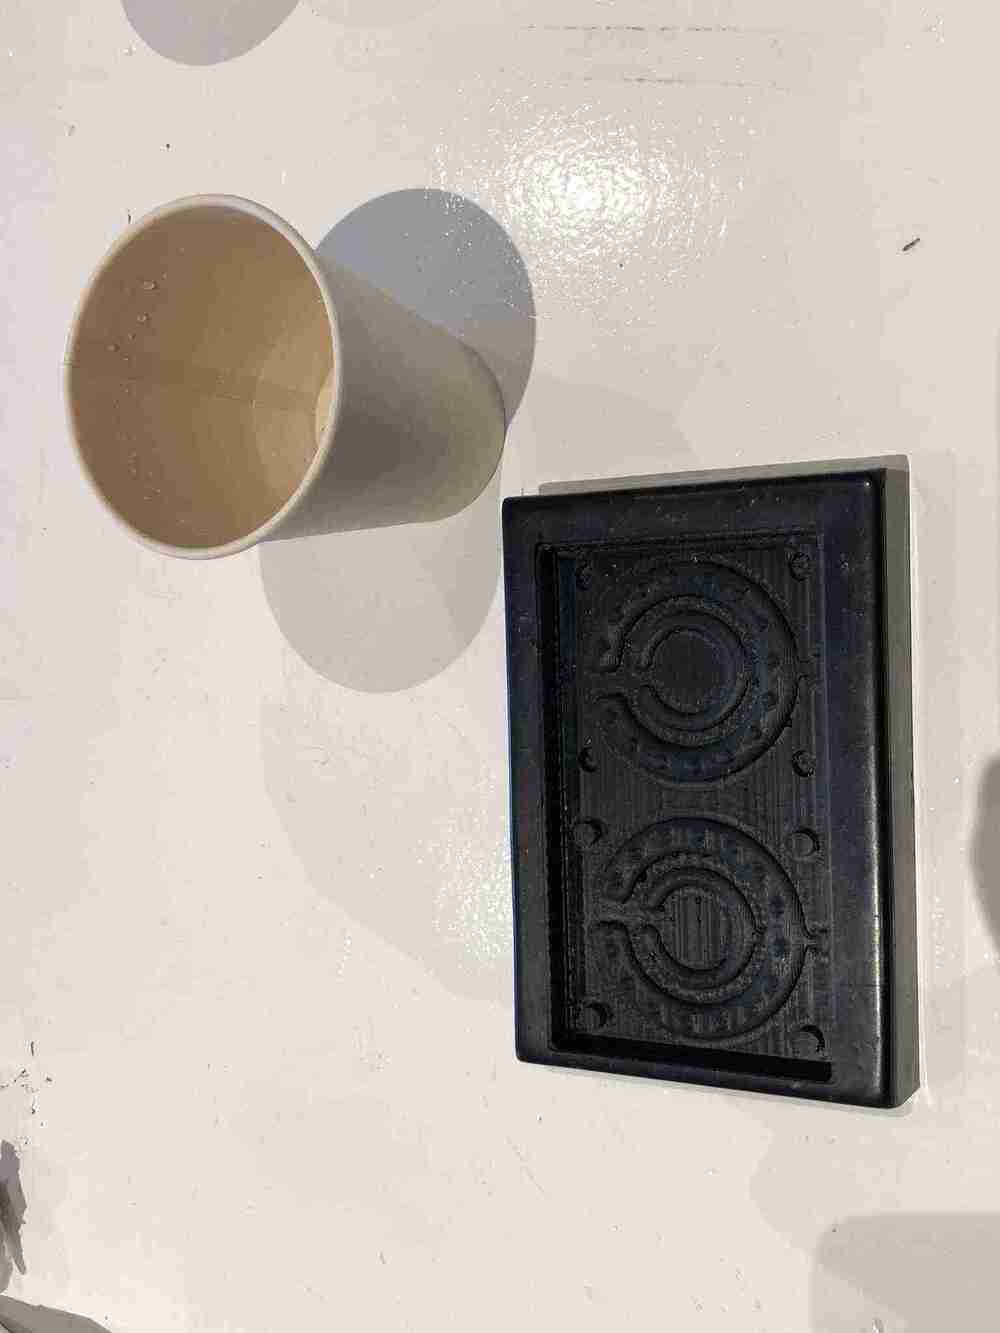
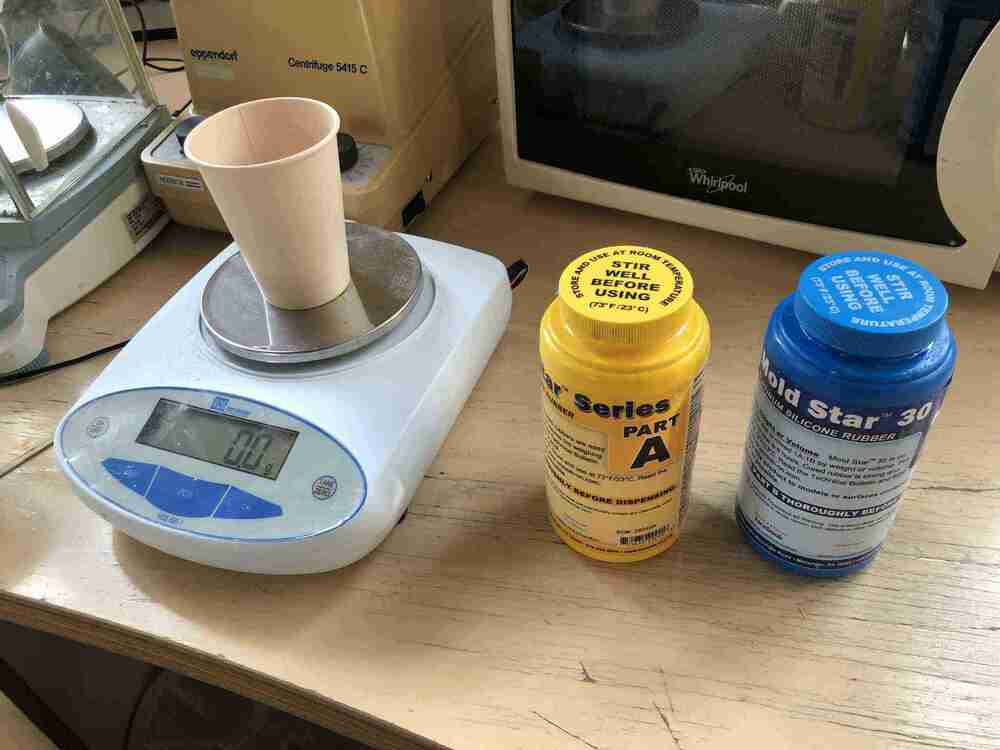
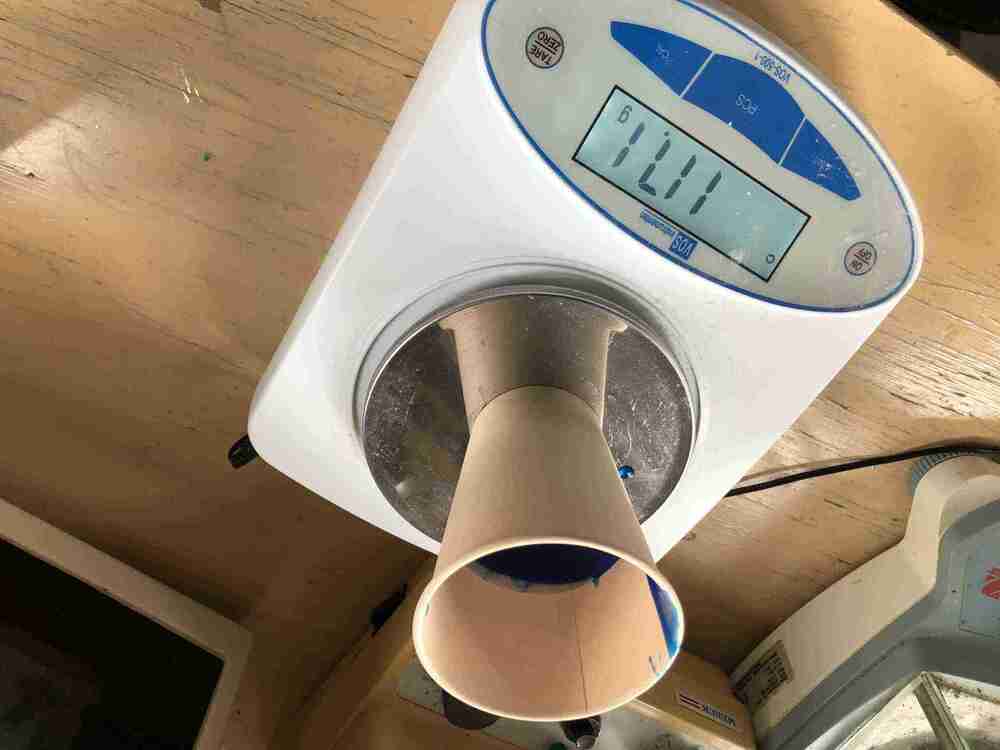
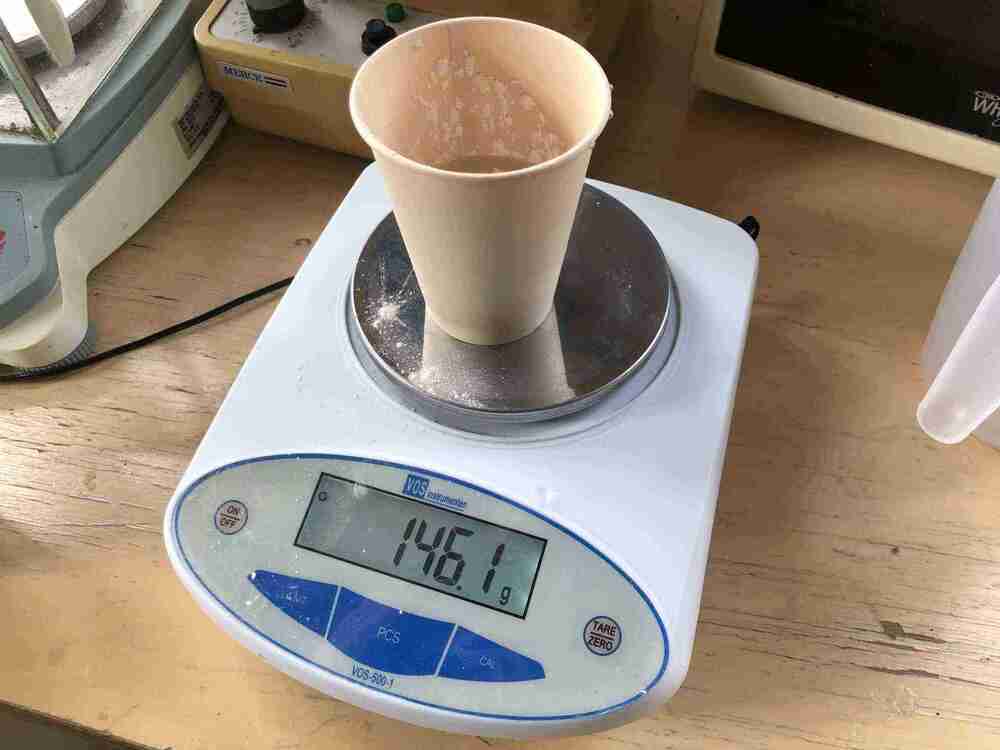
I’m using the Mold Star 30 that we tested on Thursday. I measured by weight, not by volume, because it’s more accurate than eyeballing it. The ratio is 1:0,96 (A:B) by weight. Then I mixed it in the ventilation box.

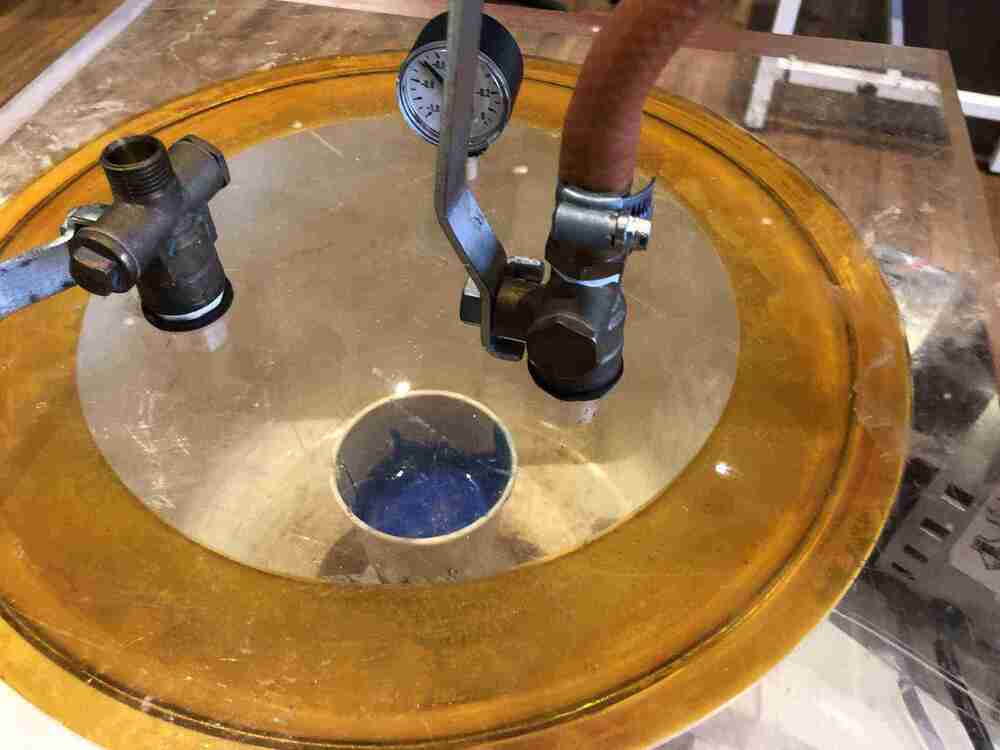
Since we saw how many bubbles came out of the Mold Star 30 mixture in the vacuum pot, I put it in there again for about 15 minutes; a lot of bubbles moved up and popped.

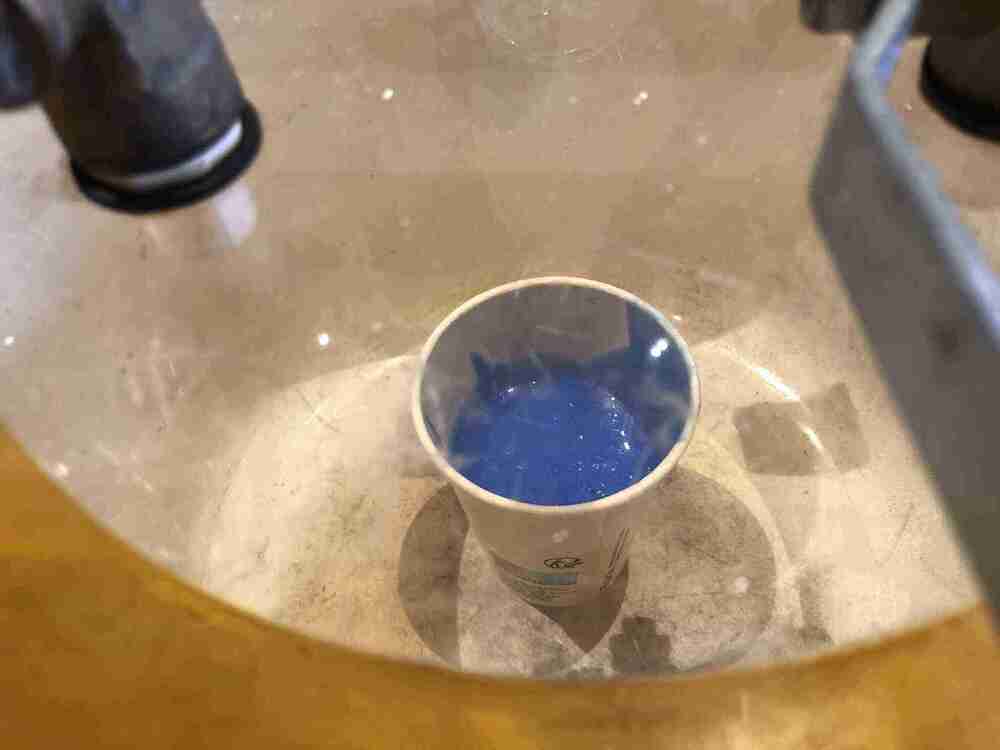
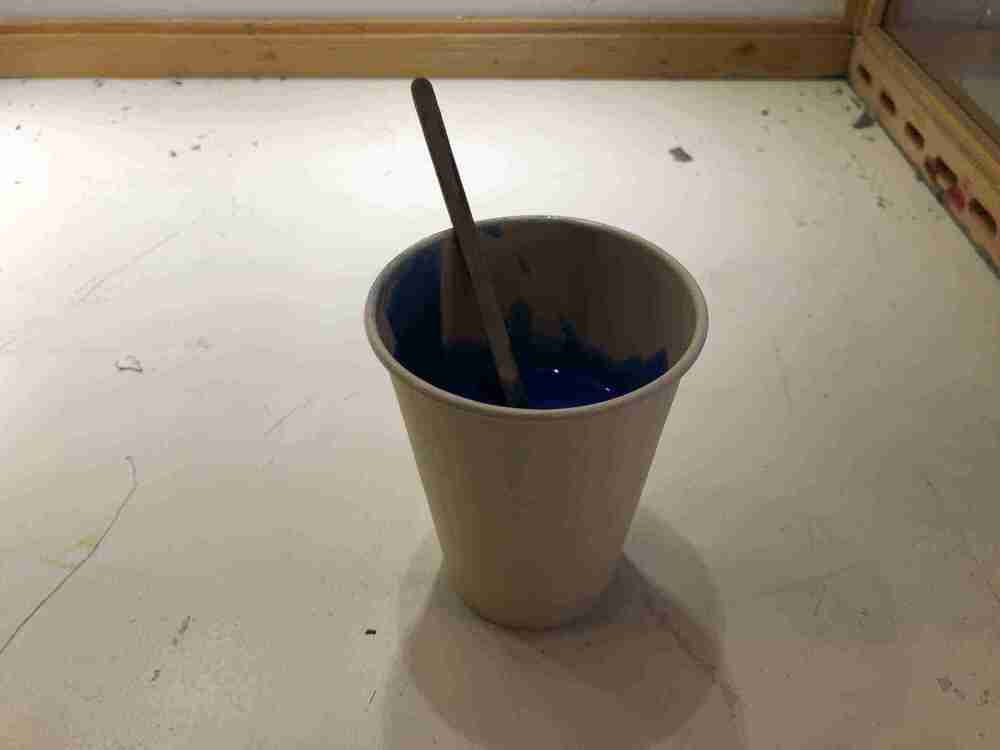
Then I poured it in the mold. The table was not completely level so I used a stirring stick to level it.


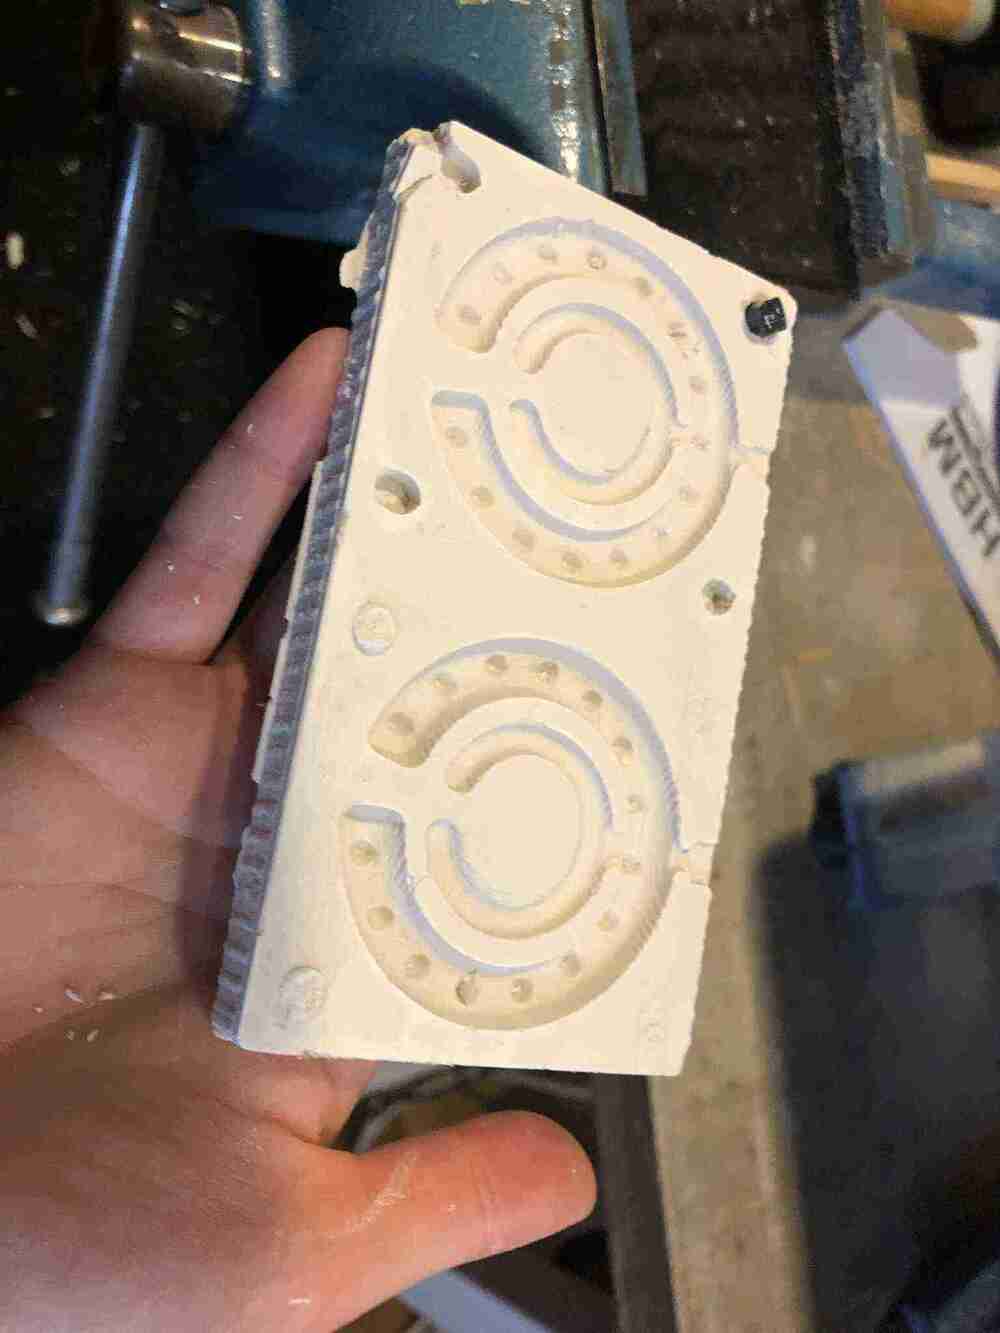
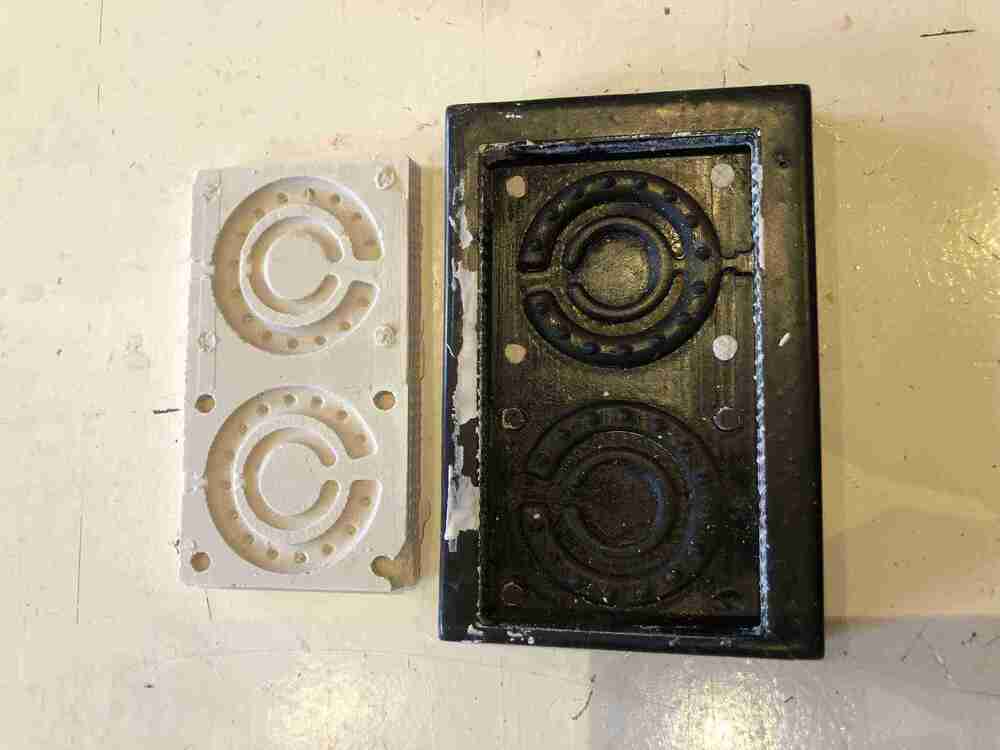
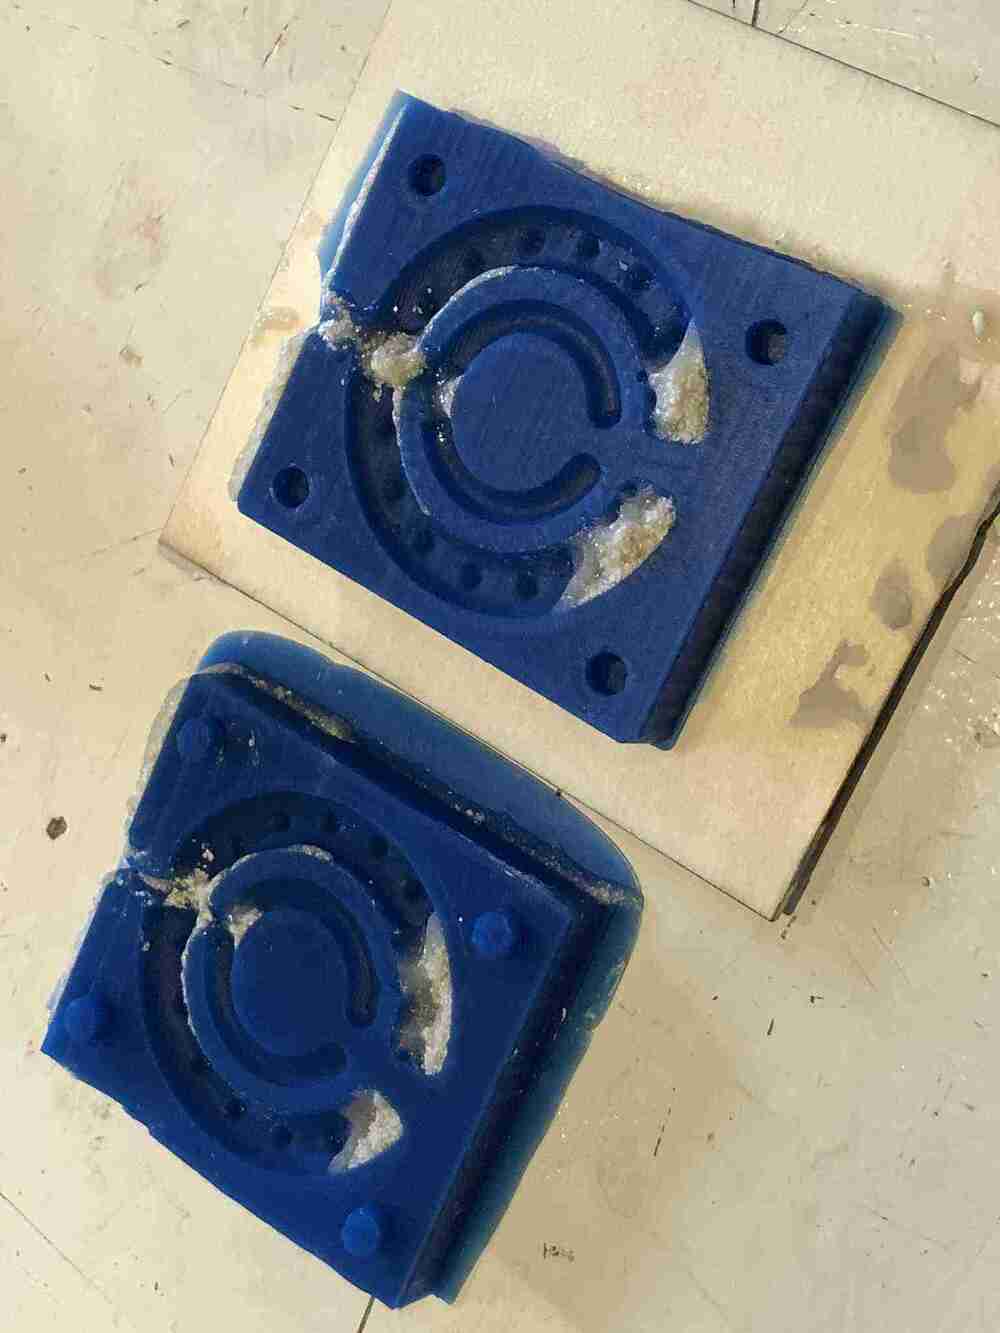
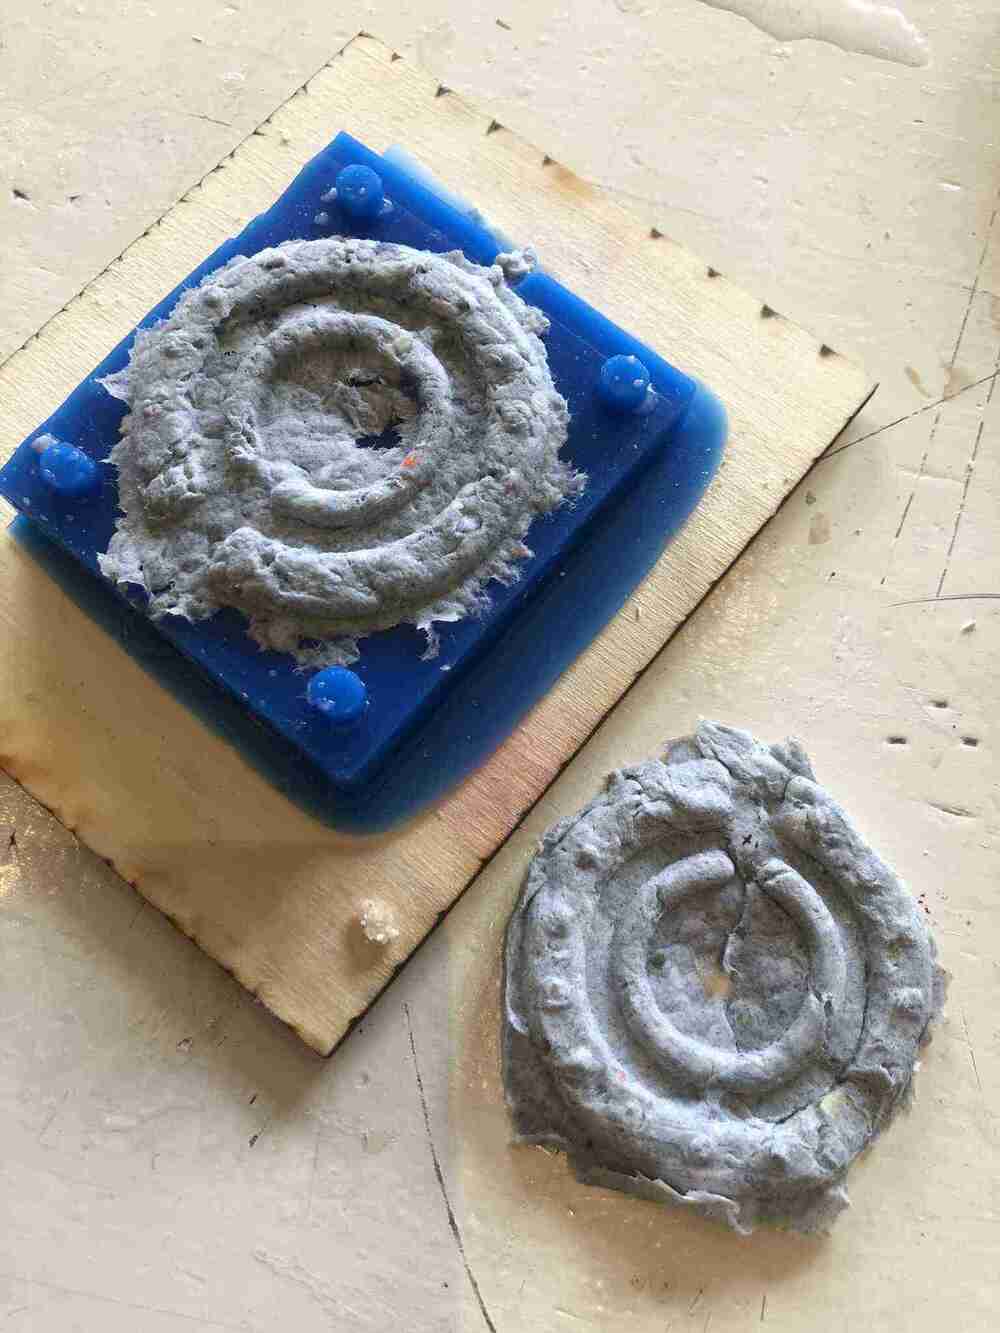
The next day, it demolded easily. I cut it in half carefully and tried it out.


I also made a mold out of gypsum so I could use it for more flexible materials, iterate faster and it’s way cheaper than Smooth-on resins. I used the recommended 1:1,5 ratio of water to gypsum in weight.


I put a bit of vaseline on the mold so it would be easier to release.


After 2,5h I demolded it using a big hammer. By carefully banging the mold, the plaster mold came out in one piece.

Material research
I really do not like that this week the standard is to use all kinds of materials that are very bad for the environment, especially if it’s for products that are made only for this week and not used afterwards. Neil only talked about it very briefly and didn’t say anything about the environmental consequences of all of these
Another big problem of these products is their shelf life: we had to throw out 20 Smooth-on boxes (retailing for about 40-60 euros each) of half to barely used materials. It’s a waste of material that’s already unsustainable by itself, and by not using it it’s even more wasteful. And in addition to that, it’s a big waste of money.
For this week I’m not making a part that needs to have very specific features like temperature resistance or extreme durability, so I have room for experimentation. I’m focusing on biomaterials instead. I’m also working with paper and gypsum since they’re sustainable materials too.
Gypsum
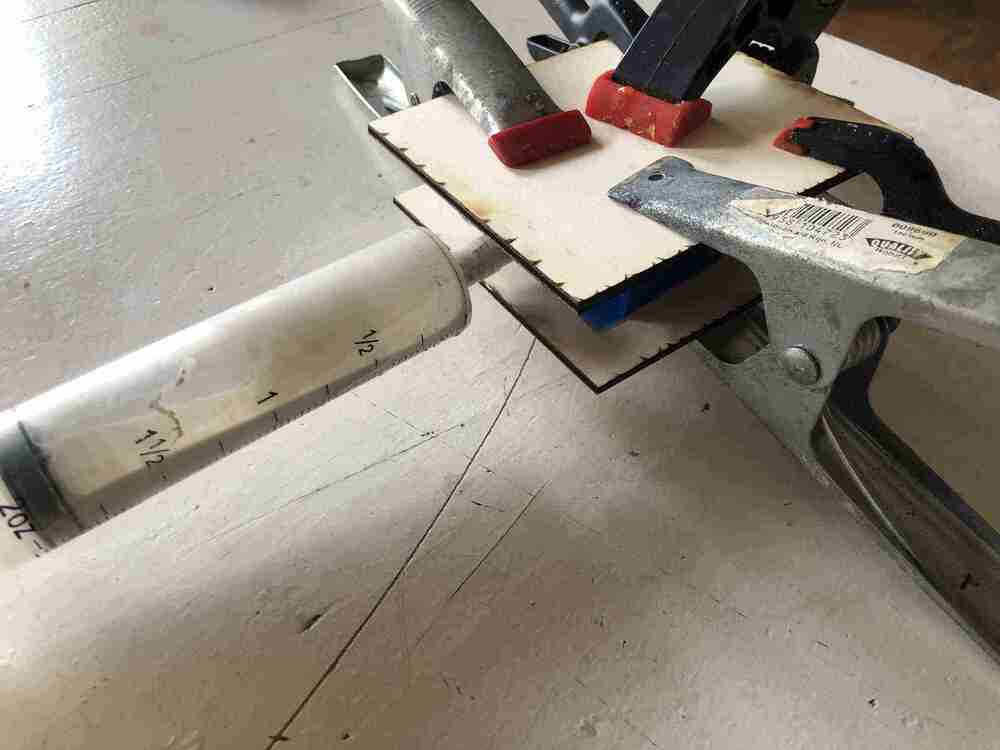
As a first test of the mold, I mixed some gypsum and water (1,5:1 in weight) again and put in in a syringe. I clamped the mold between two pieces of plywood with a couple of glue clamps, and inserted the syringe in the gap for pouring the material. The gap was smaller than I aimed but the mold is flexible so I could push the syringe in, but it didn’t feel very convincing. The first try didn’t really work out.

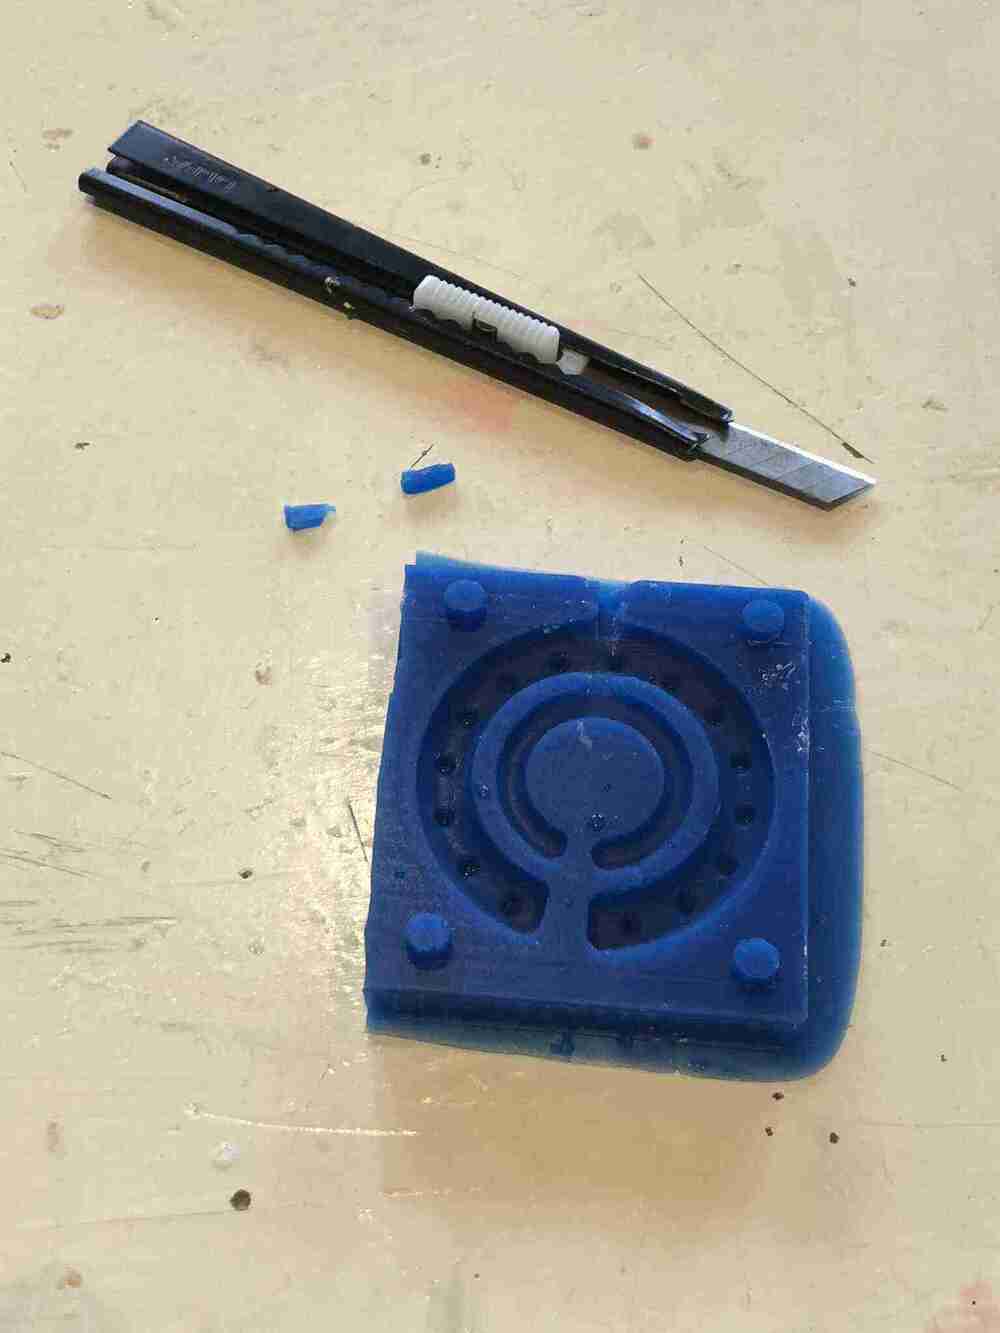
I tried again but the result was even worse, so I cut away some of the silicone at the entrance.
Here are some nice but impossible options:
The plaster was also very fragile which makes it not very suitable for the purpose of making a bioplastic chainmail, so I continued with the biomaterials.
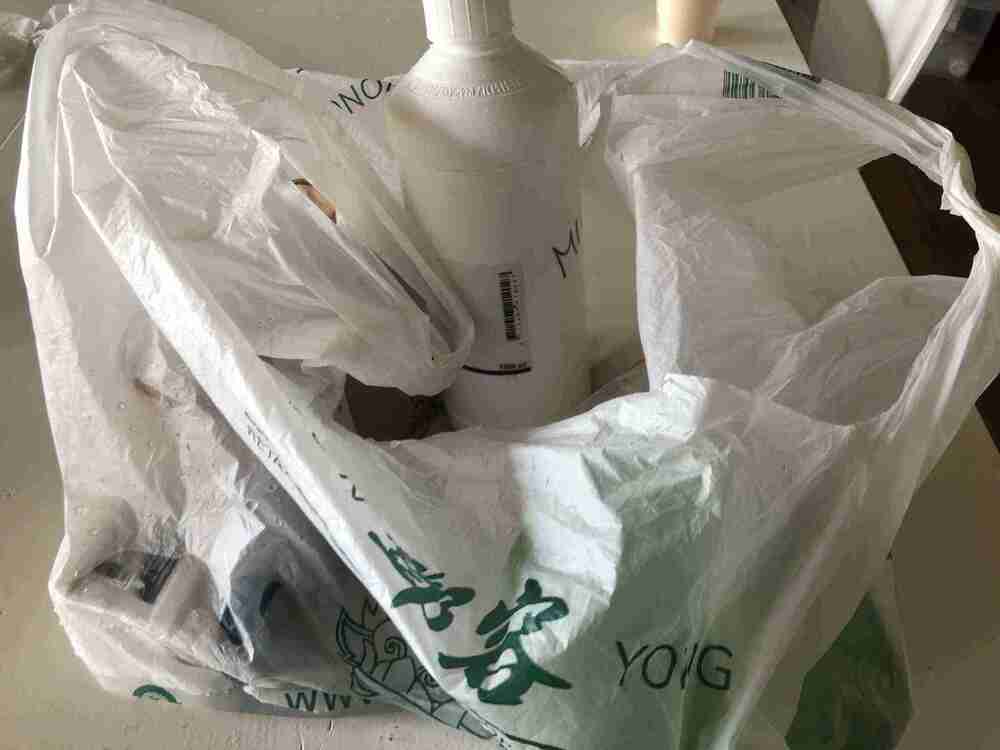
The day before I started with my material experiments, I brought a bag with a couple of ingredients to make biomaterials. One of these was a bottle of glycerin which I had apparently not closed properly so everything was very sticky. Luckily everything was salvageable and most of the glycerin in the bag could be saved.
I’m using Materiom recipes as a starting point. I’m converting everything that is written in milliliters to grams, so I can do the ratio of everything in weight.
Eggshell
I’ve been collecting and crushing my eggshells for a couple of months now for the purpose of making biomaterials, so I started out with that. I weighed one of the bags which came to about 300 grams. I began with cooking the crushed eggshells to kill the bacteria. I scooped out the foam and continued until no more foam appeared at the top of the water. It smelled really bad. Then I put the eggshells in the dehydrating oven (at 75 degrees Celsius) in the wetlab for about 2 hours.


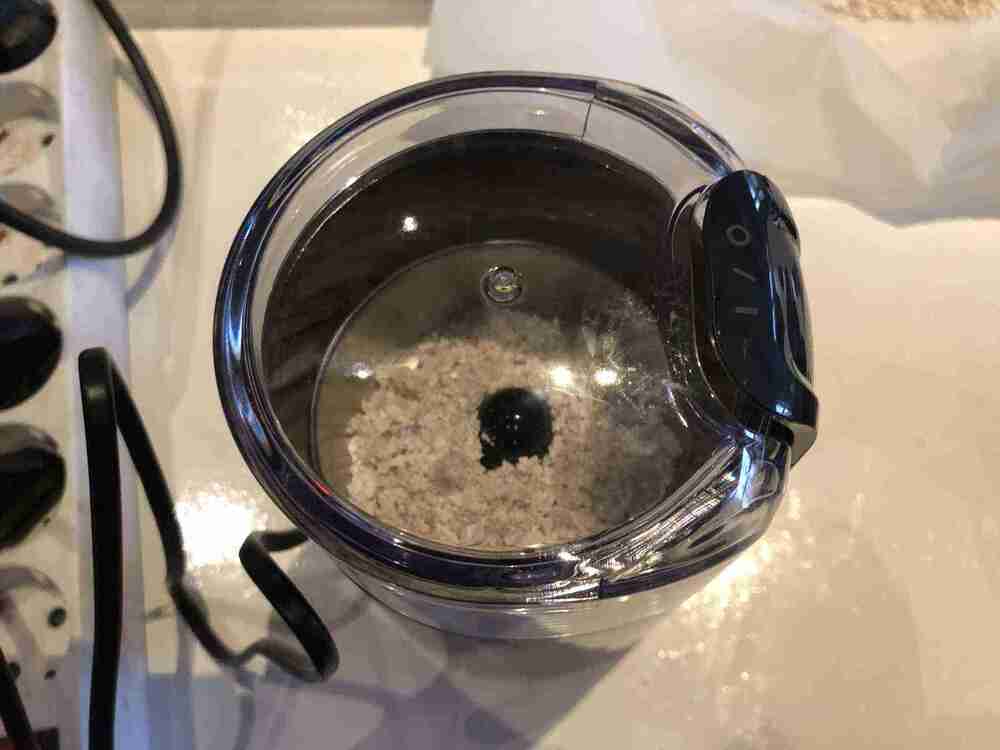
Then I put the dried eggshells into a coffee grinder to pulverize it into a powder.

Gelatin
| Ingredient: | Water | Glycerin | Salt | Eggshell | Gelatin |
| Ratio (by weight, in grams): | 235 | 5,6 | 5 | 30 (+ 12,5) | 30 (+ 1 tablespoon) |
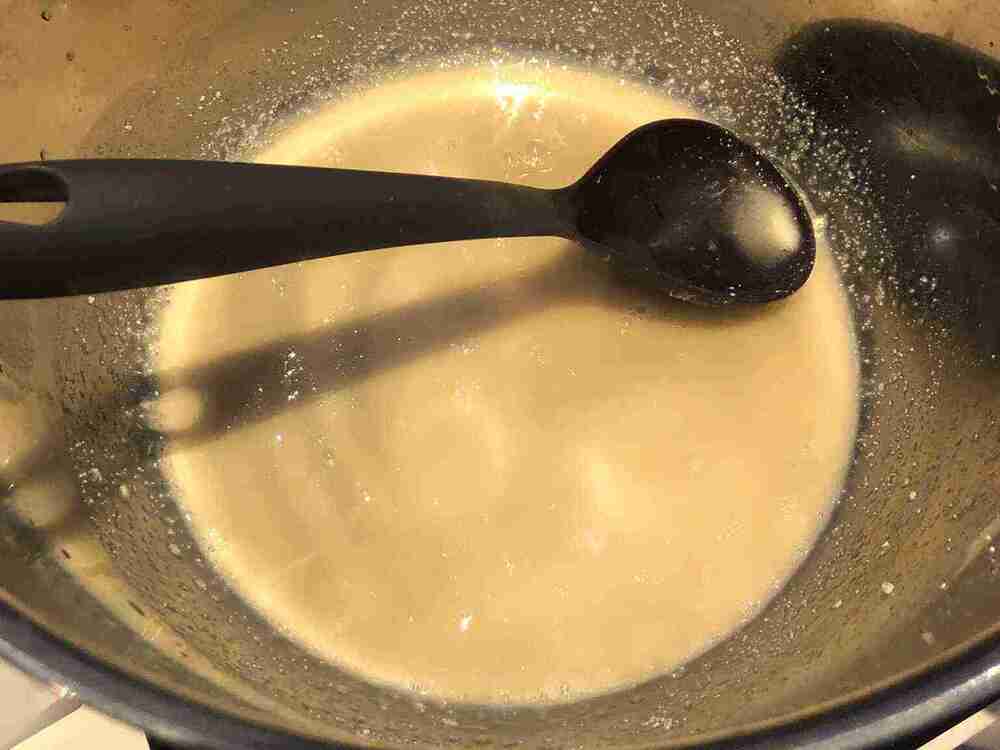
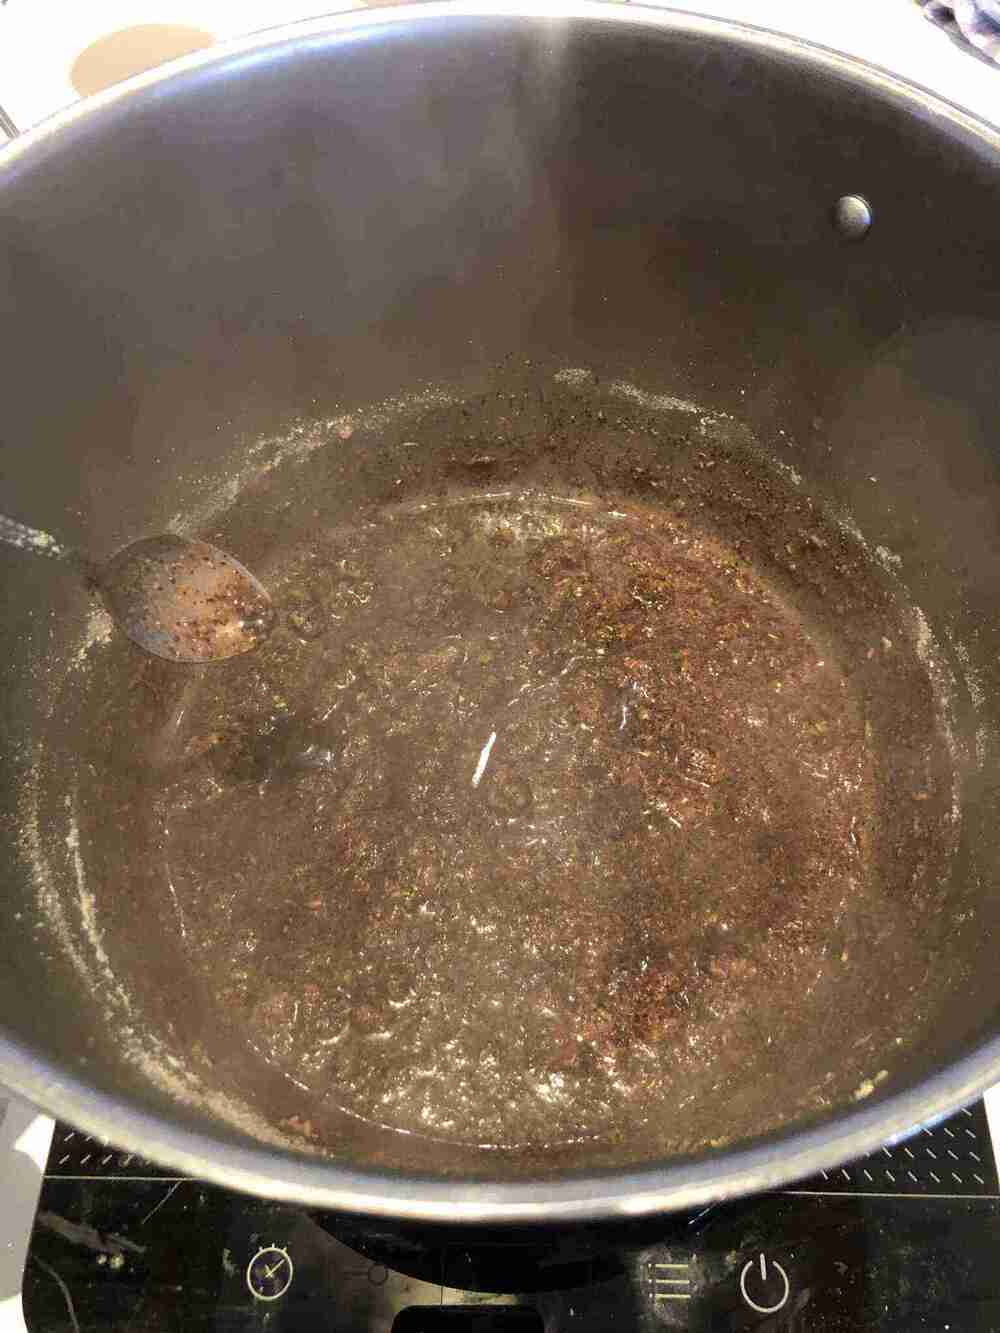
I mixed the water, glycerin, salt and gelatin in the pot on low heat. It was very runny, so I added 1 tablespoon of gelatin (didn’t weight it because I was in a hurry) and 12,5 grams of eggshells to the recipe because the eggshells were just falling to the bottom of the pot. I also let it simmer (60-80 degrees Celsius) for way longer; about 20-30 minutes, so some of the water could evaporate.
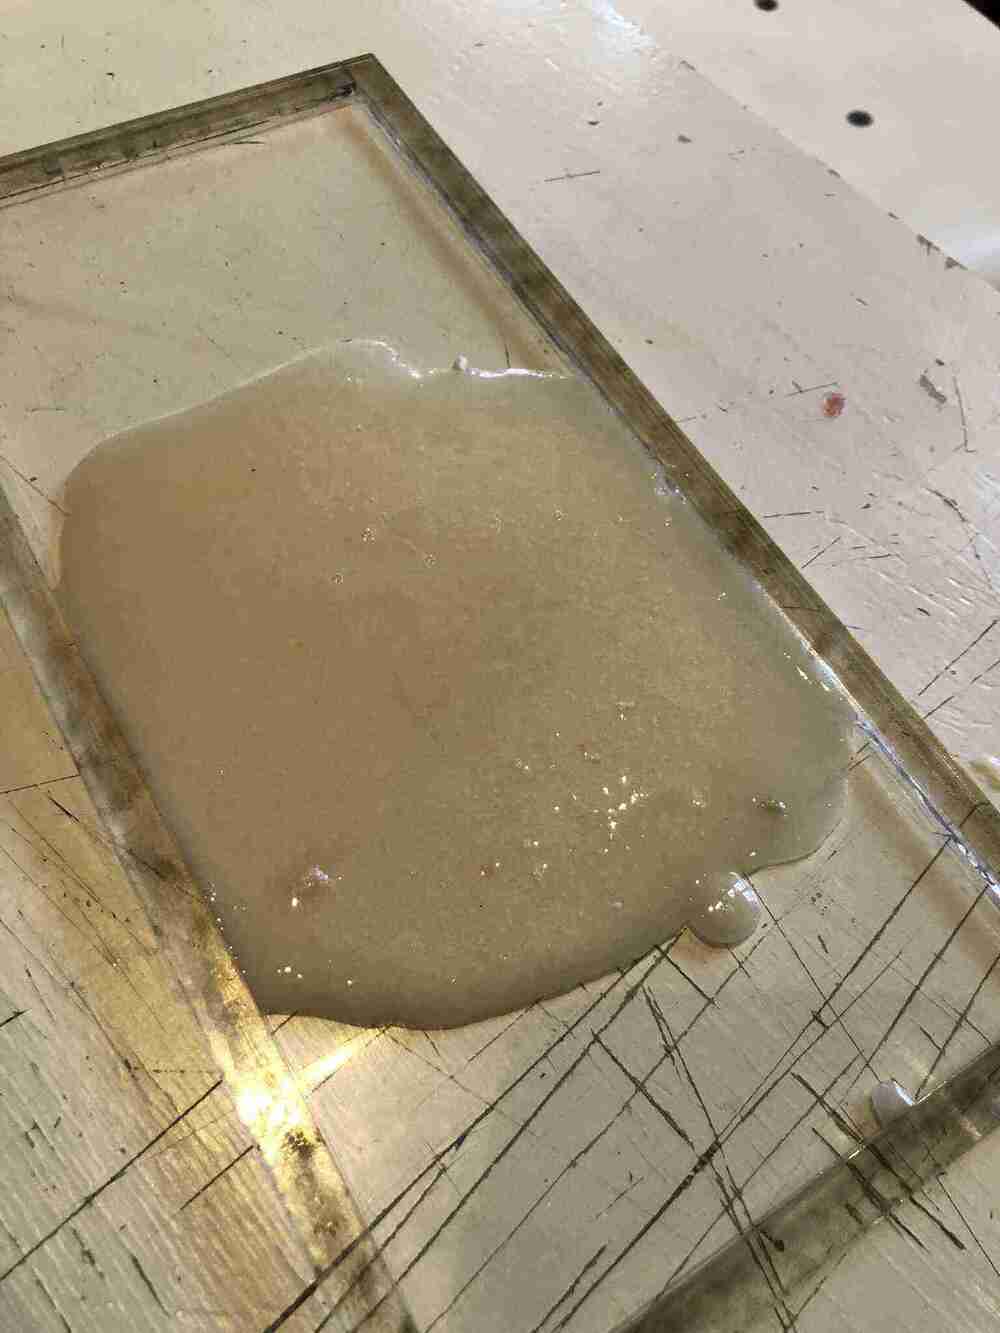
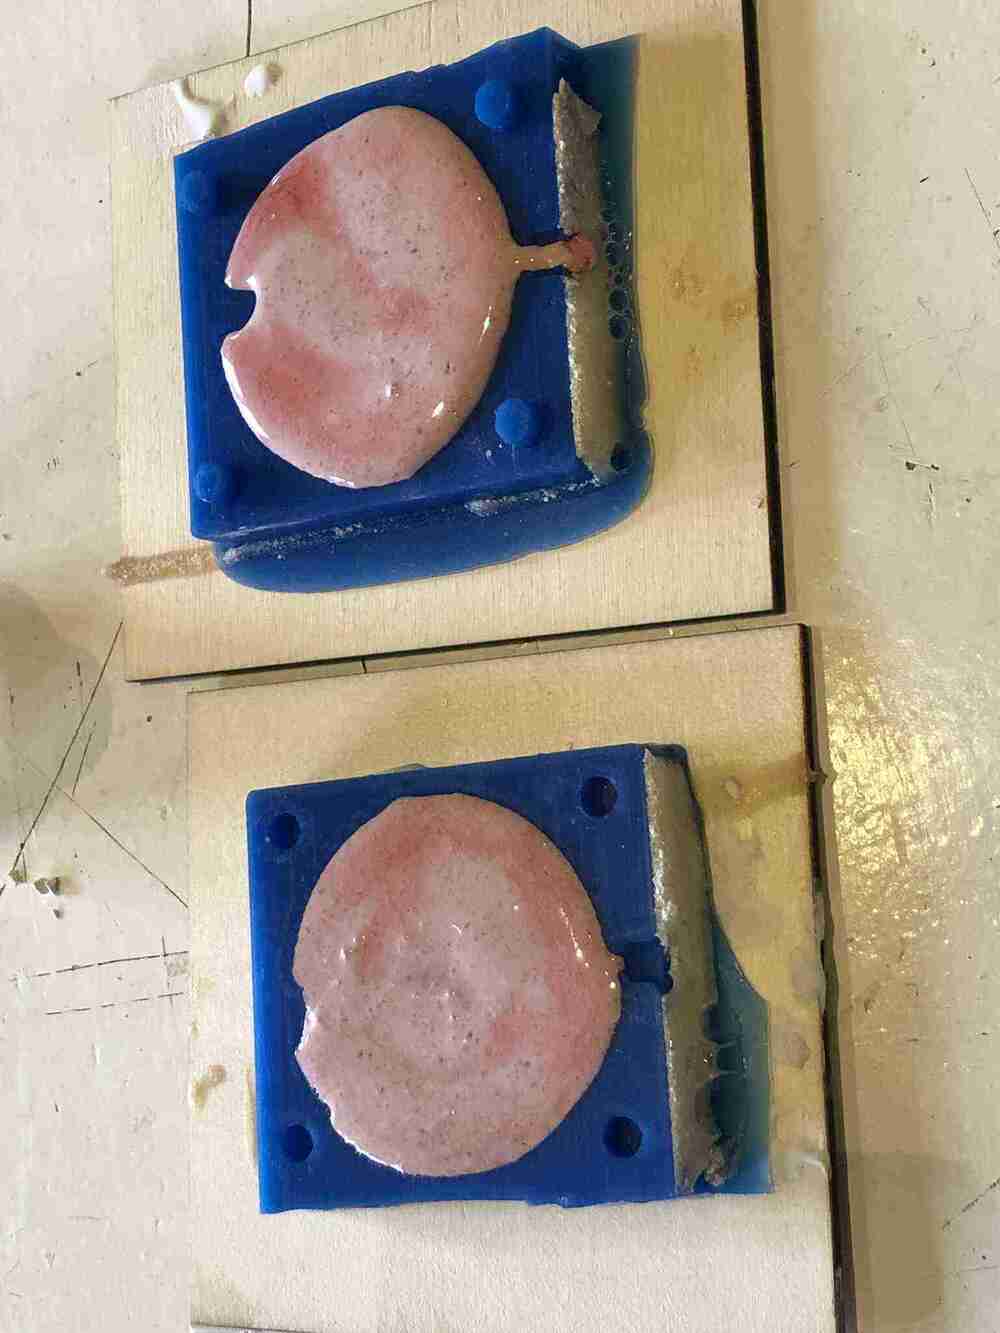
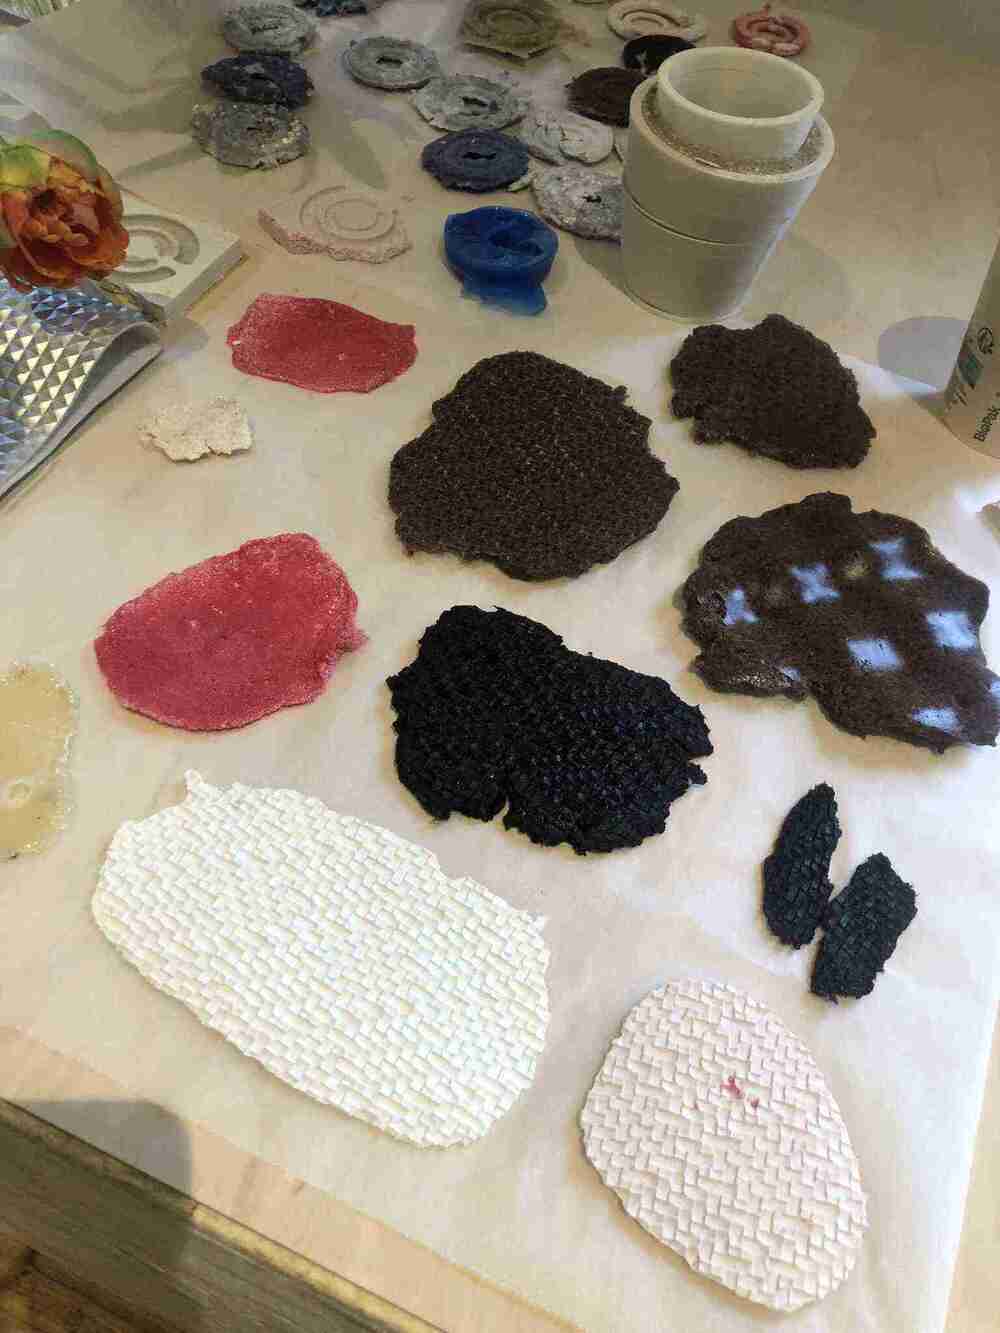
I had grabbed some textured fabric and an acrylic mold from the textilelab to make material samples next to casting in the mold, since there is usually some material left over that has to be cast right away before it solidifies in the pan while the material in the mold is drying.
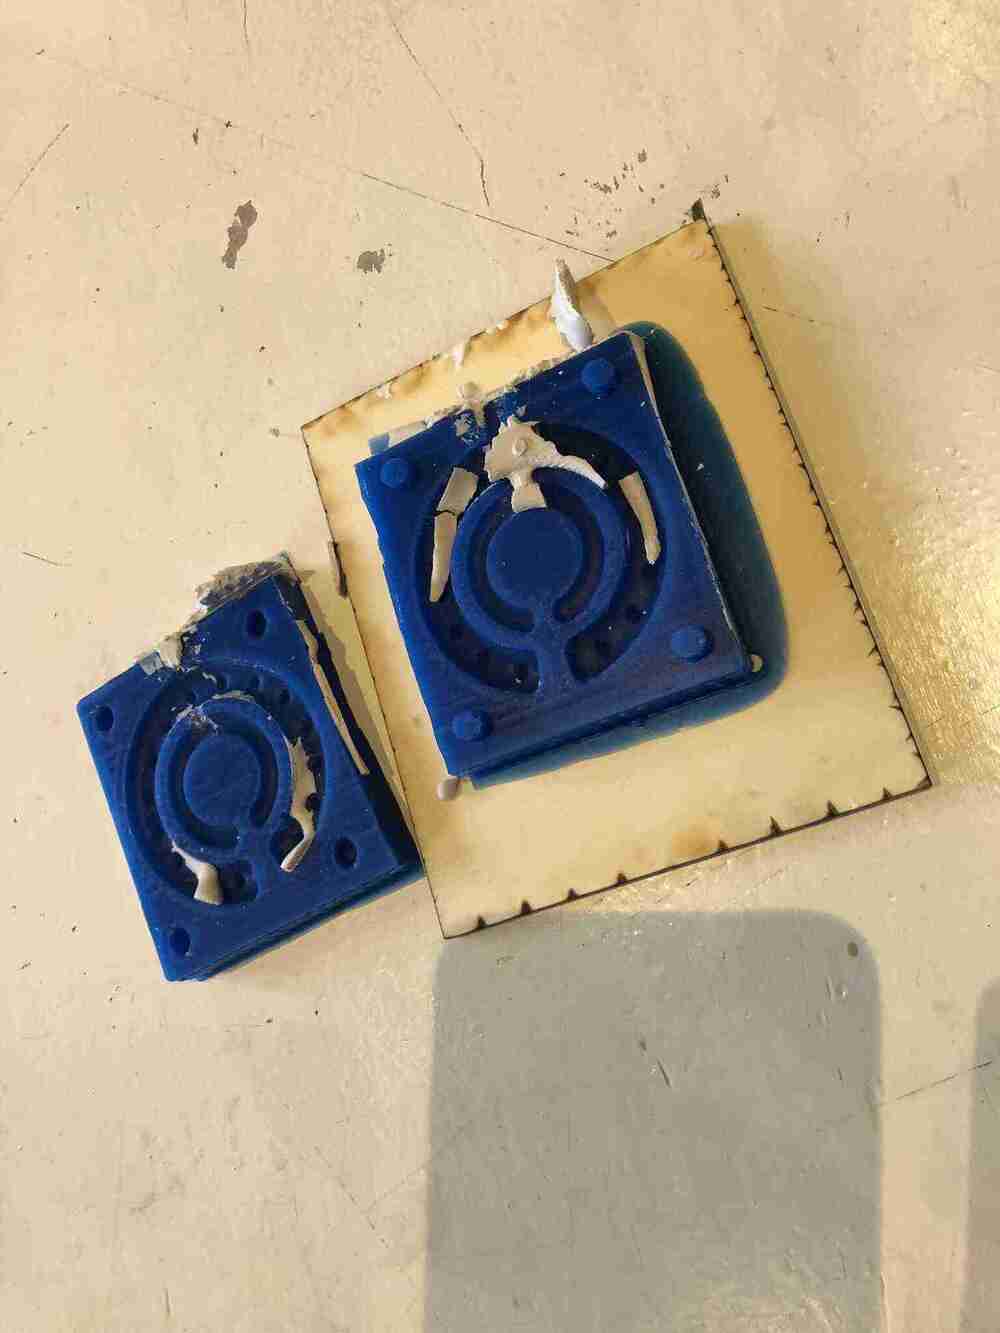
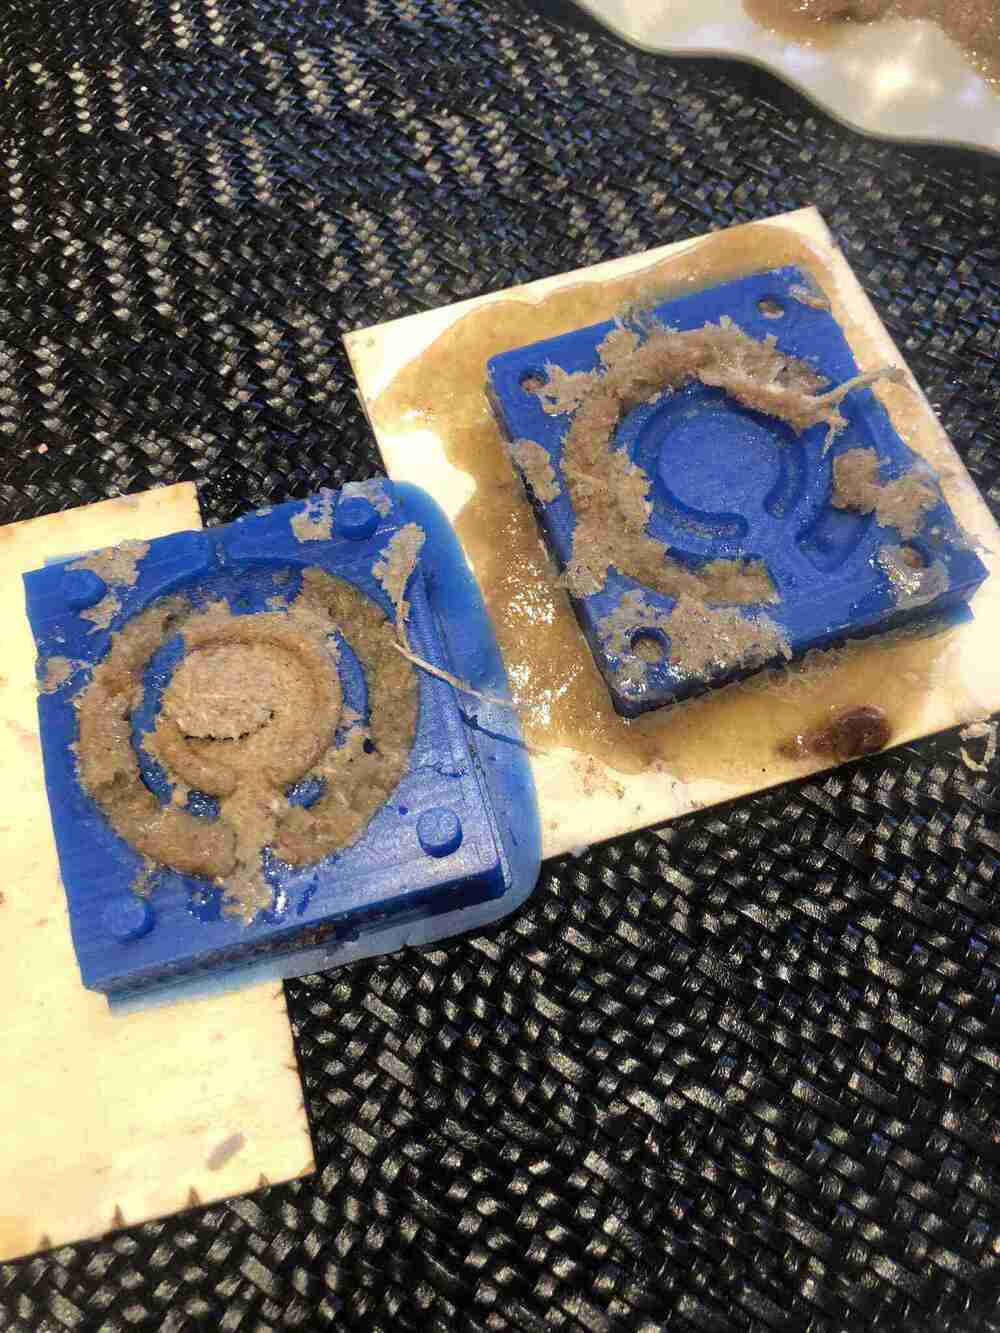
Sadly when I opened the mold, this was the result. I think the channel to insert the material is too narrow and the angles the material needs to move don’t really work.
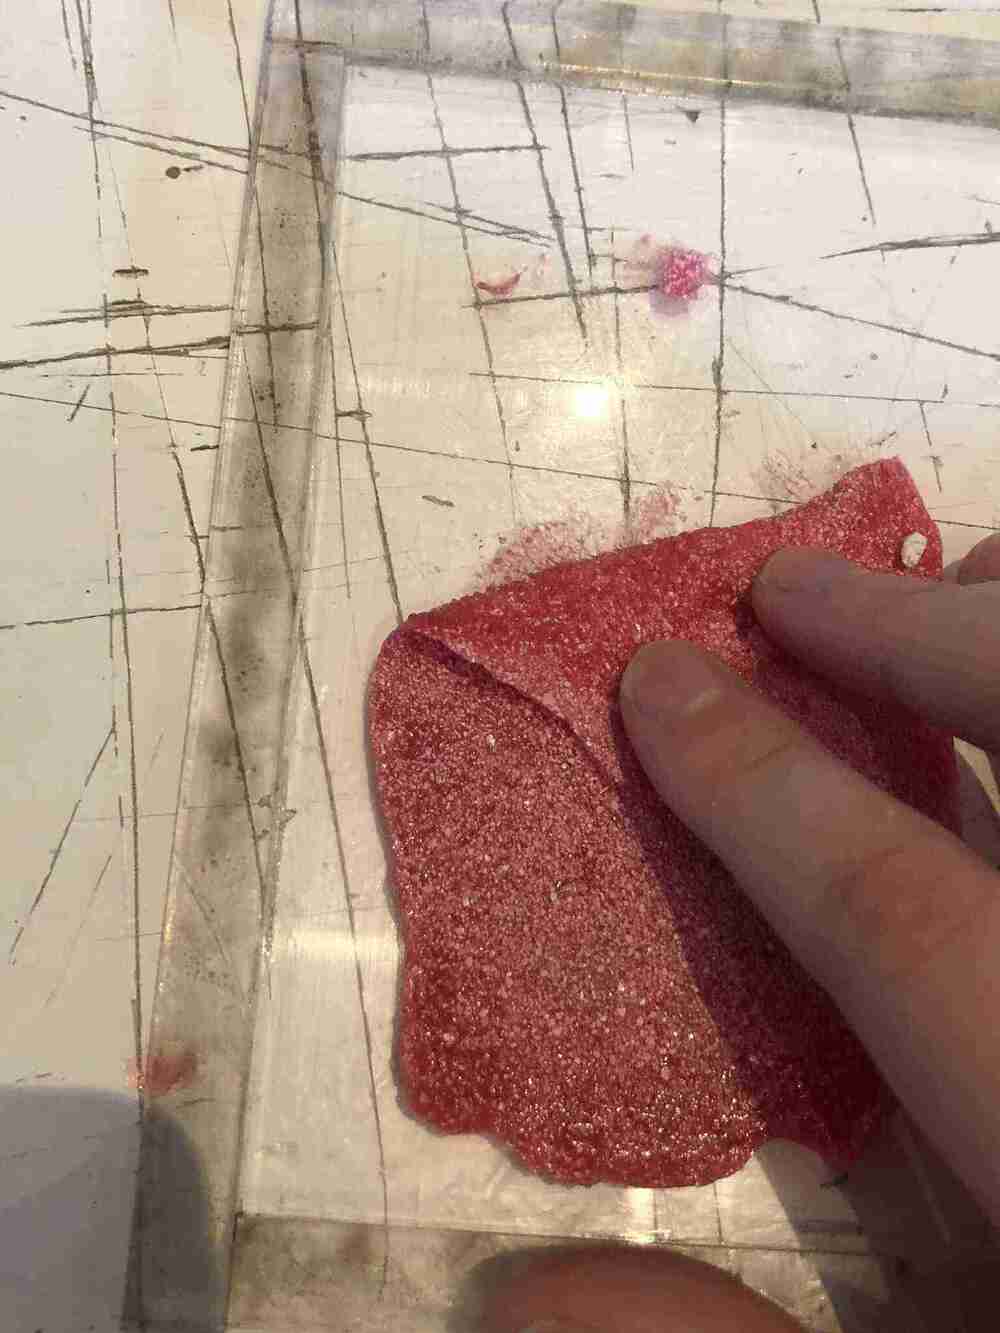
So I changed my technique: instead of using the syringe, I tried casting on both sides of the mold, let it rest for a minute (not for too long or the parts won’t stick together), then press them together with the usual clamping method. After about 30 minutes I carefully separated the mold parts, and a pretty decently shaped pair of rings revealed itself. As you can see I added some drops of red food dye. What you can also see is that I broke the plaster mold when trying to separate the two halves.


The rings look fun but they’re way too flexible. Even this tiny amount of glycerin was too much I think. After 24 hours they’re super sticky and not very usable; maybe because I added more gelatin. The ‘fabric’ cast is slimy and sticky, but I’ll give it a couple more days.


Gypsum
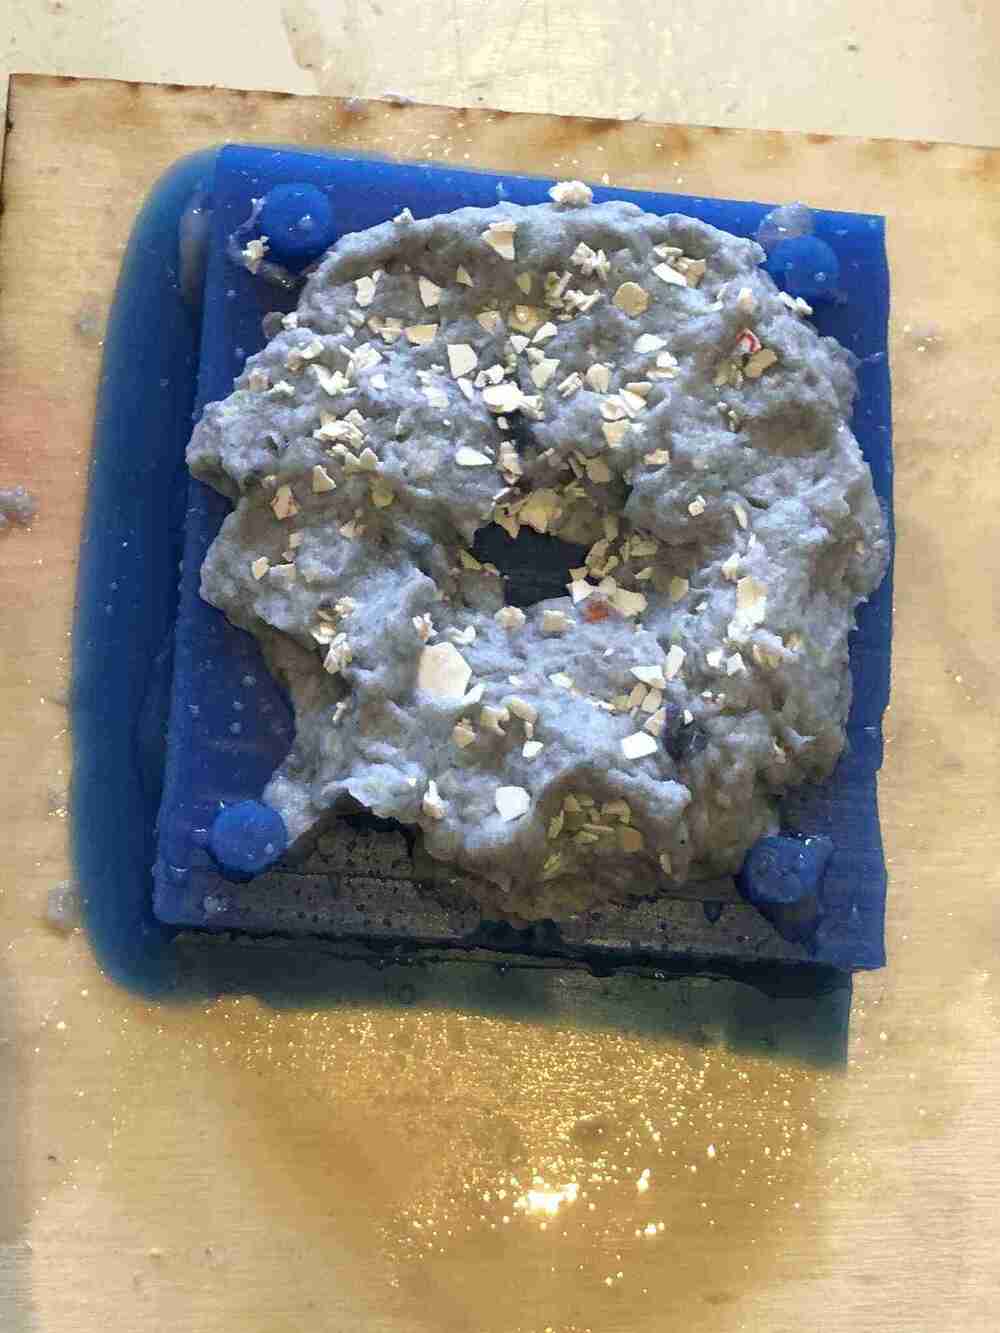
I also tried to mix gypsum with eggshells and a tiny bit of food dye.
| Ingredient: | Water | Gypsum | Crushed eggshells |
| Ratio (by weight): | 1 | 1,25 | 0,5 |
It looked cute but it was even more brittle than the regular plaster. Since I had broken the plaster mold, I tried to make another one with this mixture but as you can guess it didn’t work at all.

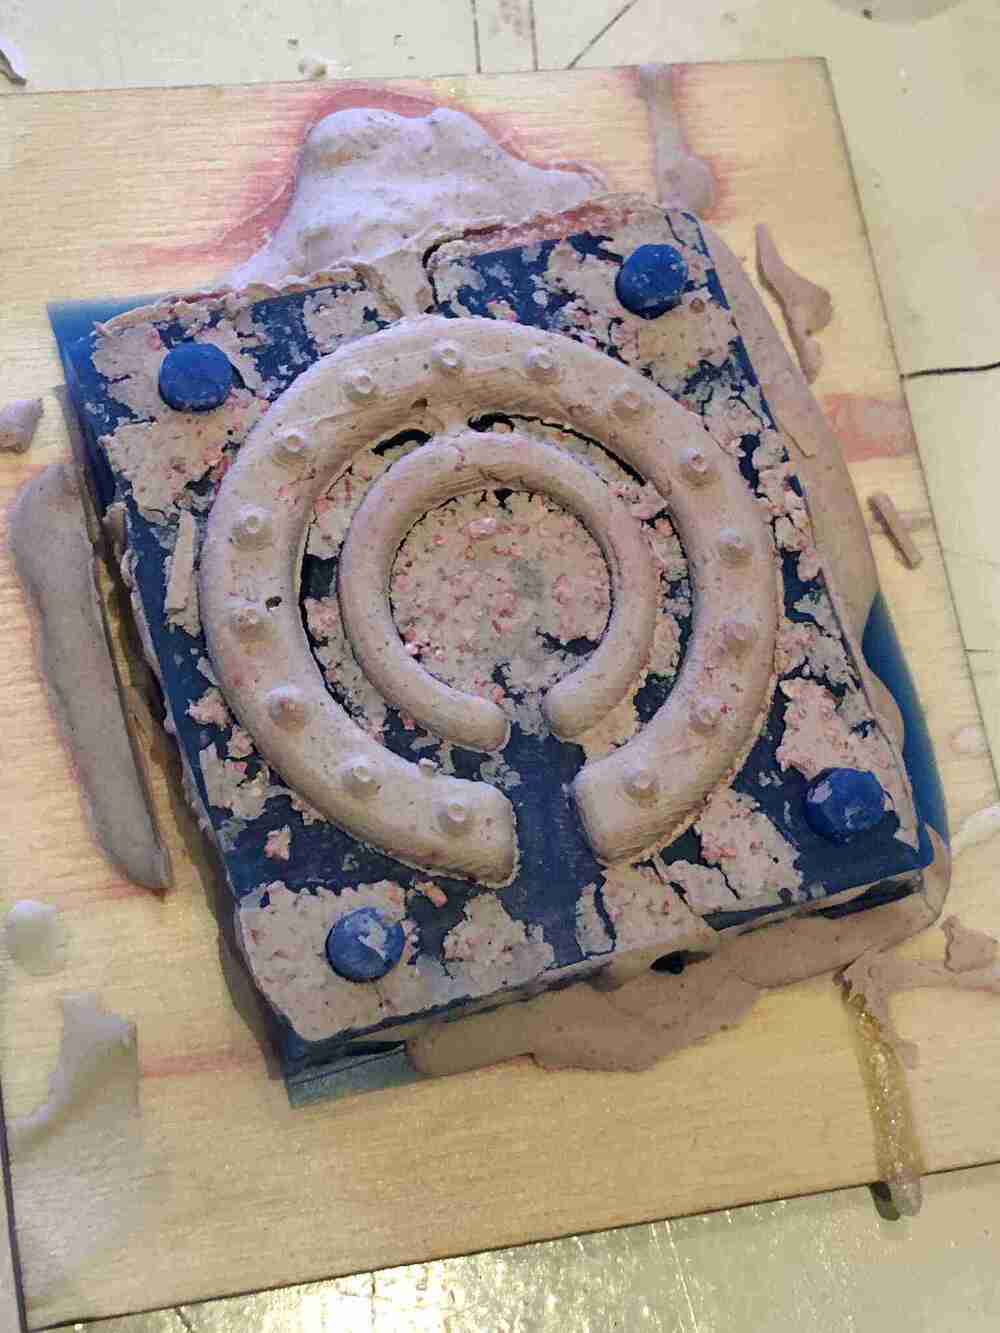
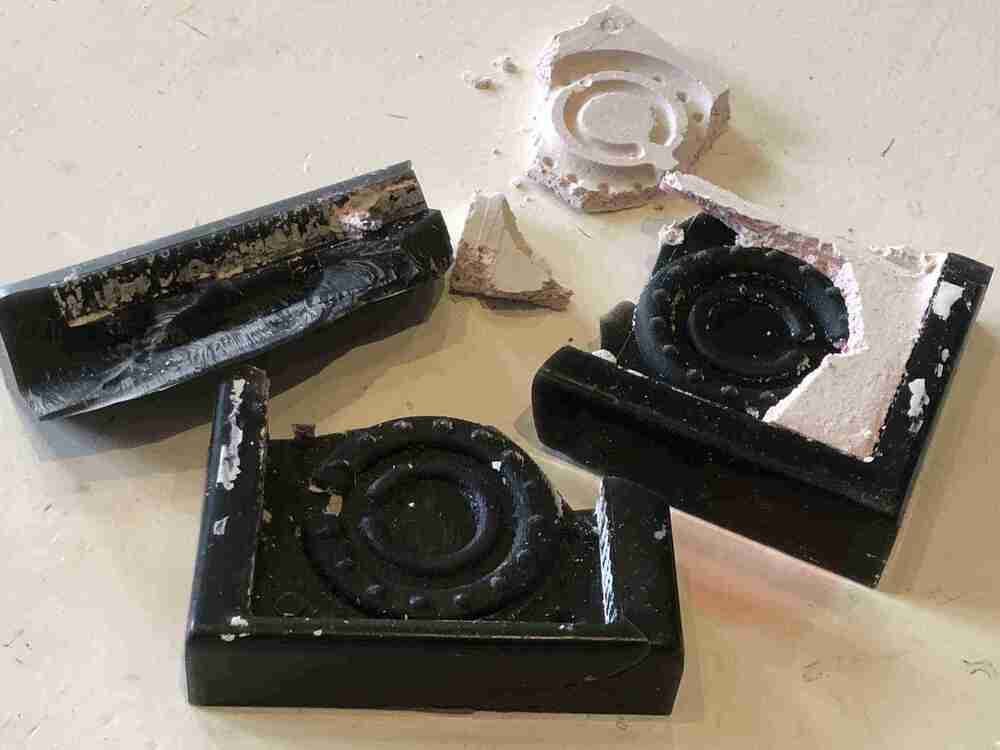
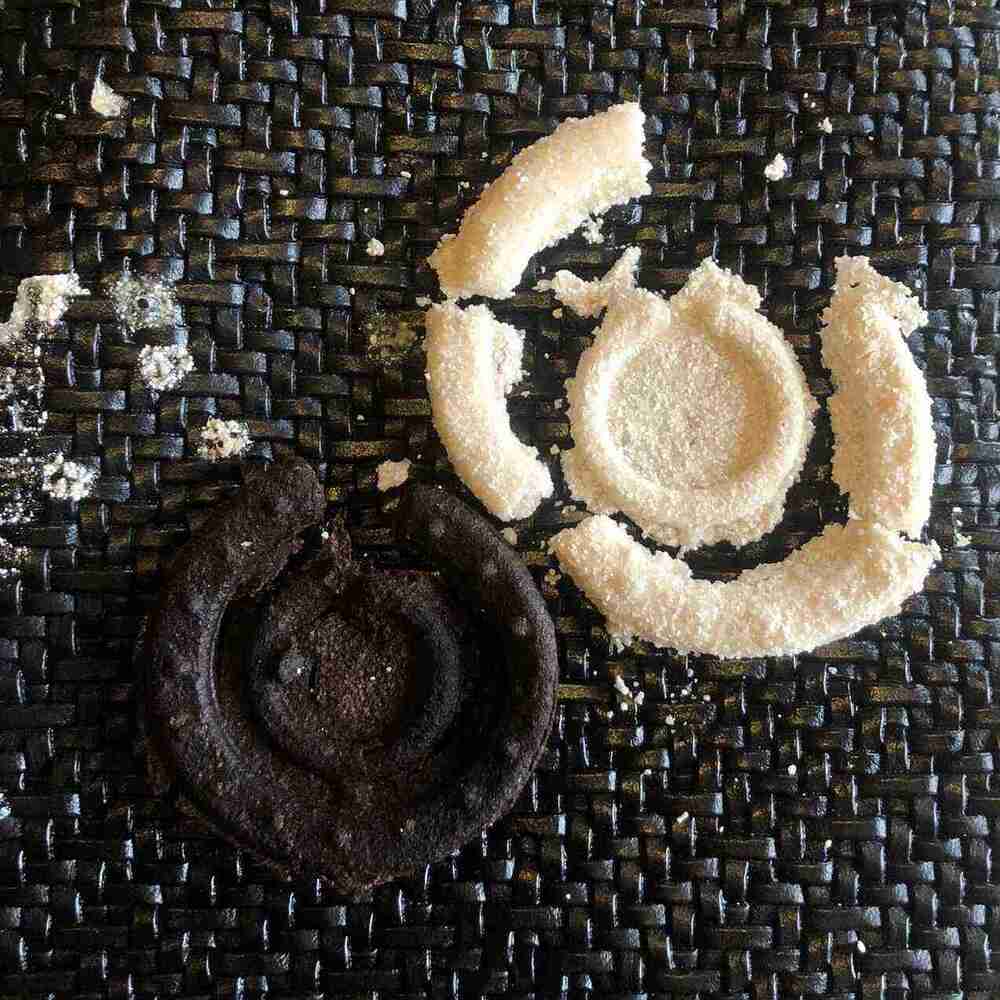
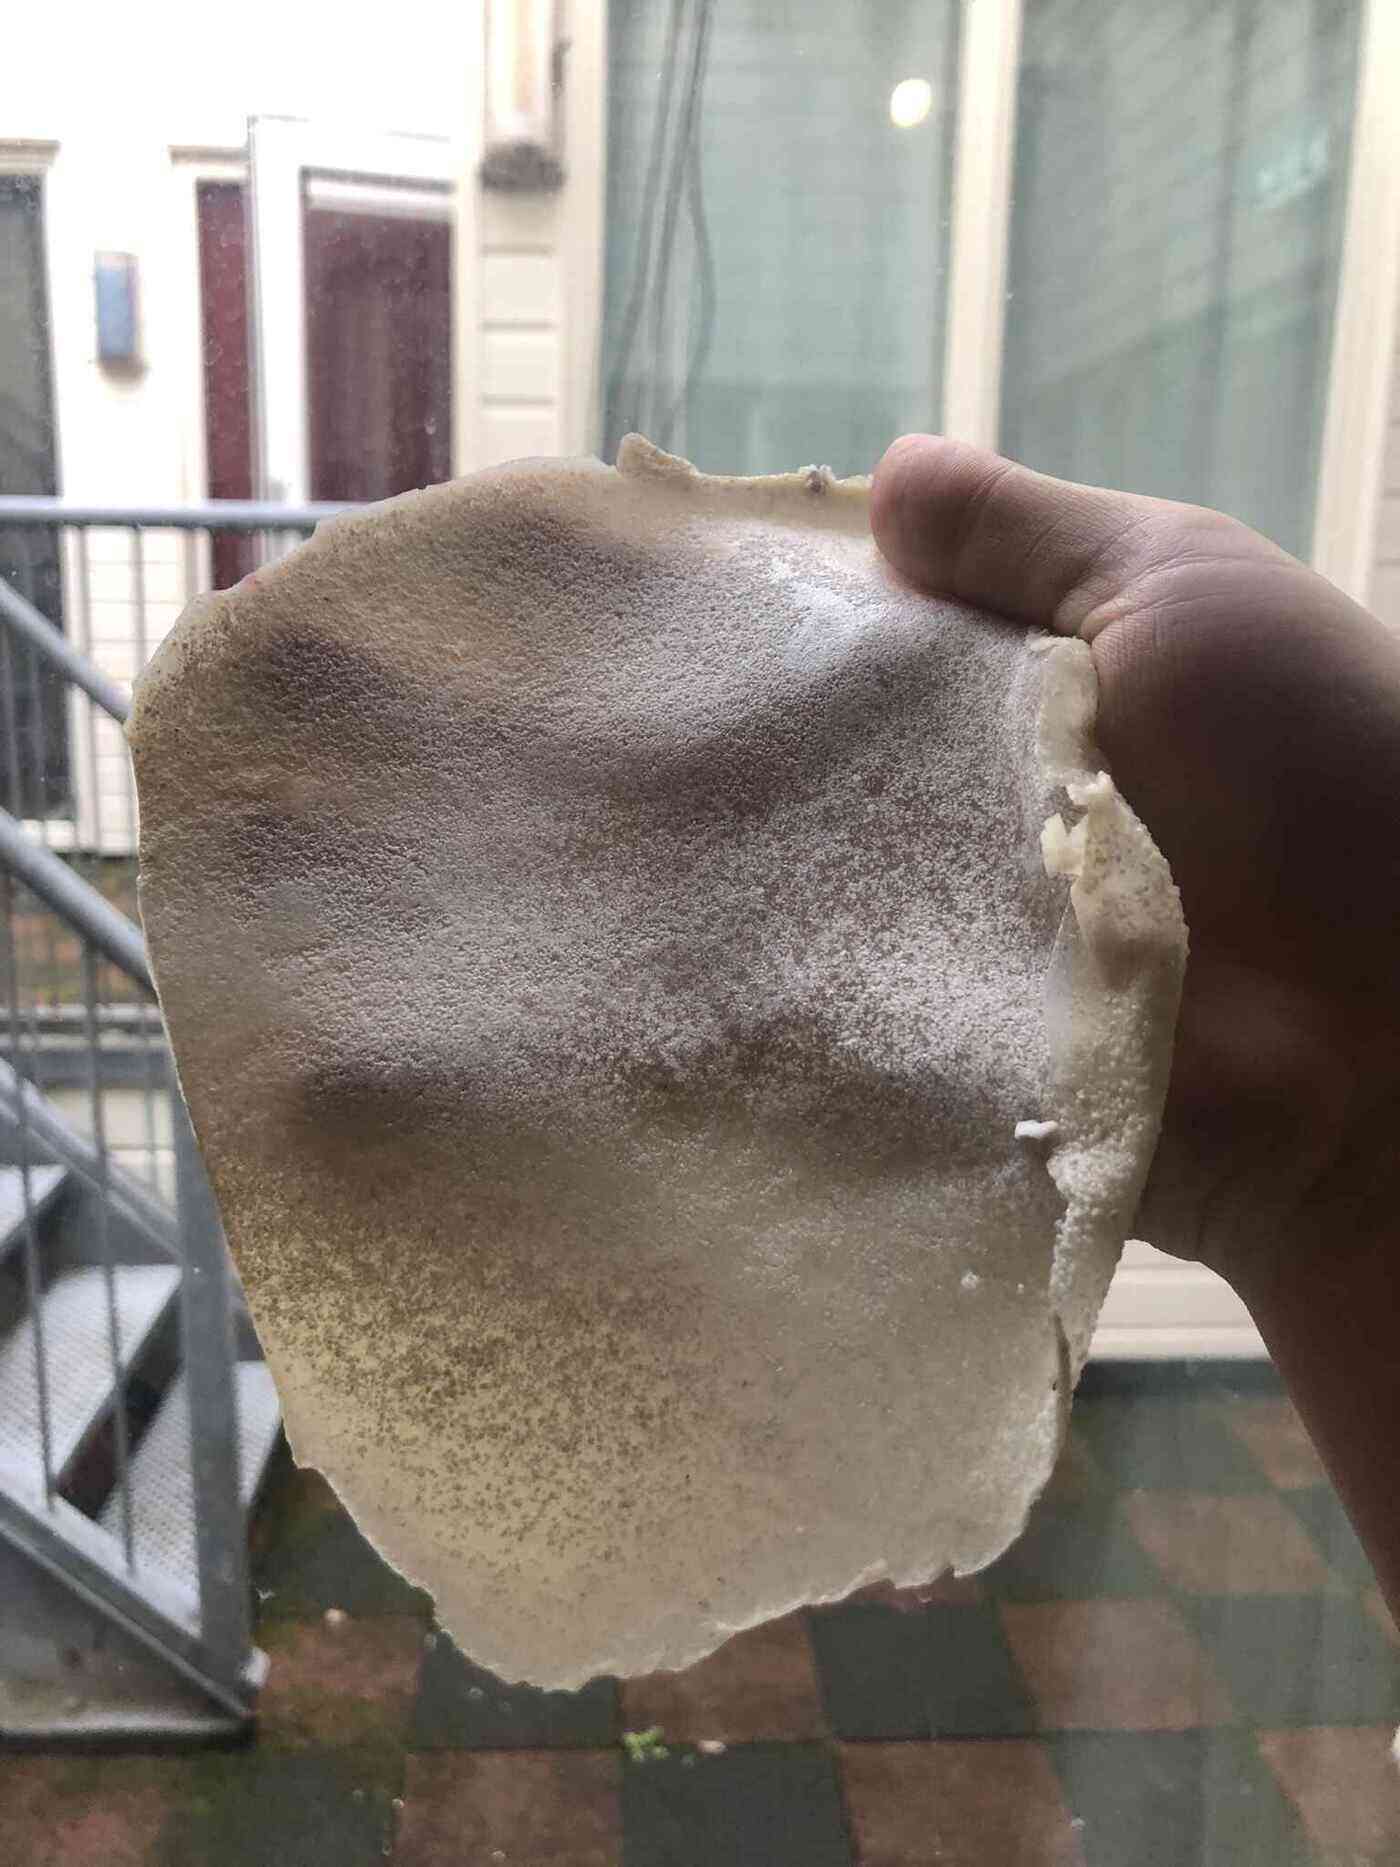
The plaster cast on the fabric looked pretty nice (regular plaster and eggshell plaster here), but as you can see it breaks pretty easily.

When trying to hammer the weak plaster mold out, I broke the entire wax mold instead.
Agar
| Ingredient: | Water | Glycerin | Agar agar | Crushed eggshells |
| Ratio (by weight): | 40 | 3 | 2 | 12,5 |
I didn’t have bilberry powder so I used 12,5 grams of eggshells instead. It’s a super quick recipe, but you shouldn’t forget to bring the two mold parts together because it stops being sticky in a few minutes.
After 24 hours it’s not sticky, but not very stable; it falls apart easily. Here you can see it on the right, next to the coffee waste and agar one from the next experiment.
Coffee waste
| Ingredient: | Water | Glycerin | Agar agar | Coffee waste |
| Ratio (by weight): | 40 | 3 | 2 | 12,5 |
I grabbed some coffee waste from the espresso machine we have in the lab and put it in the dehydrating oven until it was dry. This recipe solidifies quickly and it feels pleasant to the skin and smells really nice (in stark contrast to the eggshells).


Sawdust
Agar
| Ingredient: | Water | Glycerin | Agar agar | Sawdust |
| Ratio (by weight): | 250 | 5,6 | 15 | 50 |
To make this recipe I took some sawdust from the CNC dust extraction bag. As you can see the sawdust absorbs all of the water, making it very dry. For the second iteration I added a tiny bit of glycerin, some water and added a handful of coffee. I kept it on the induction stove at about 120 degrees Celsius until all of the chunks from before were broken down and I got a consistent mass.

They dried nicely (I did get a little lazy with filling the mold).


Gelatin
| Ingredient: | Water | Glycerin | Gelatin | Sawdust |
| Ratio (by weight): | 480 | 16 | 96 | 300 |
The second time I took a bioresin recipe from Fabricademy that I made during my internship and added sawdust to that. I kept stirring and boiling for about 20 minutes until I had a viscous consistency. I made way too much and I tried to release the mold quickly so I could make more, but that didn’t work with this recipe. I put some in the mold and left it for a bit longer and that did work.


Paper pulp
I had some paper pulp left at home so I tried that out too, first without any additives but that seemed very fragile. Next I tried it with some crafting glue for kids since I’ve heard that it works well for making paper 3D. I also added some eggshells as a texturizer.

Since paper is a bit more heat resistant than some biomaterials, I put them in the dehydrator which really helped. With some of them I was rushing too much and I hurt the shape a little bit.
The intermediate result of the weekend:


Results
Post processing
Since my casting method was a bit improvised, I had some post processing to do. I had to trim the excess material. For the biomaterial it was pretty easy since it was quite soft, but the paper pulp ones were a different story. I didn’t have a suitable pair of scissors so when trimming them I broke most of them so I glued them back together. Next time I’m not doing a two part mold with excess material on the inside (outside was ok).
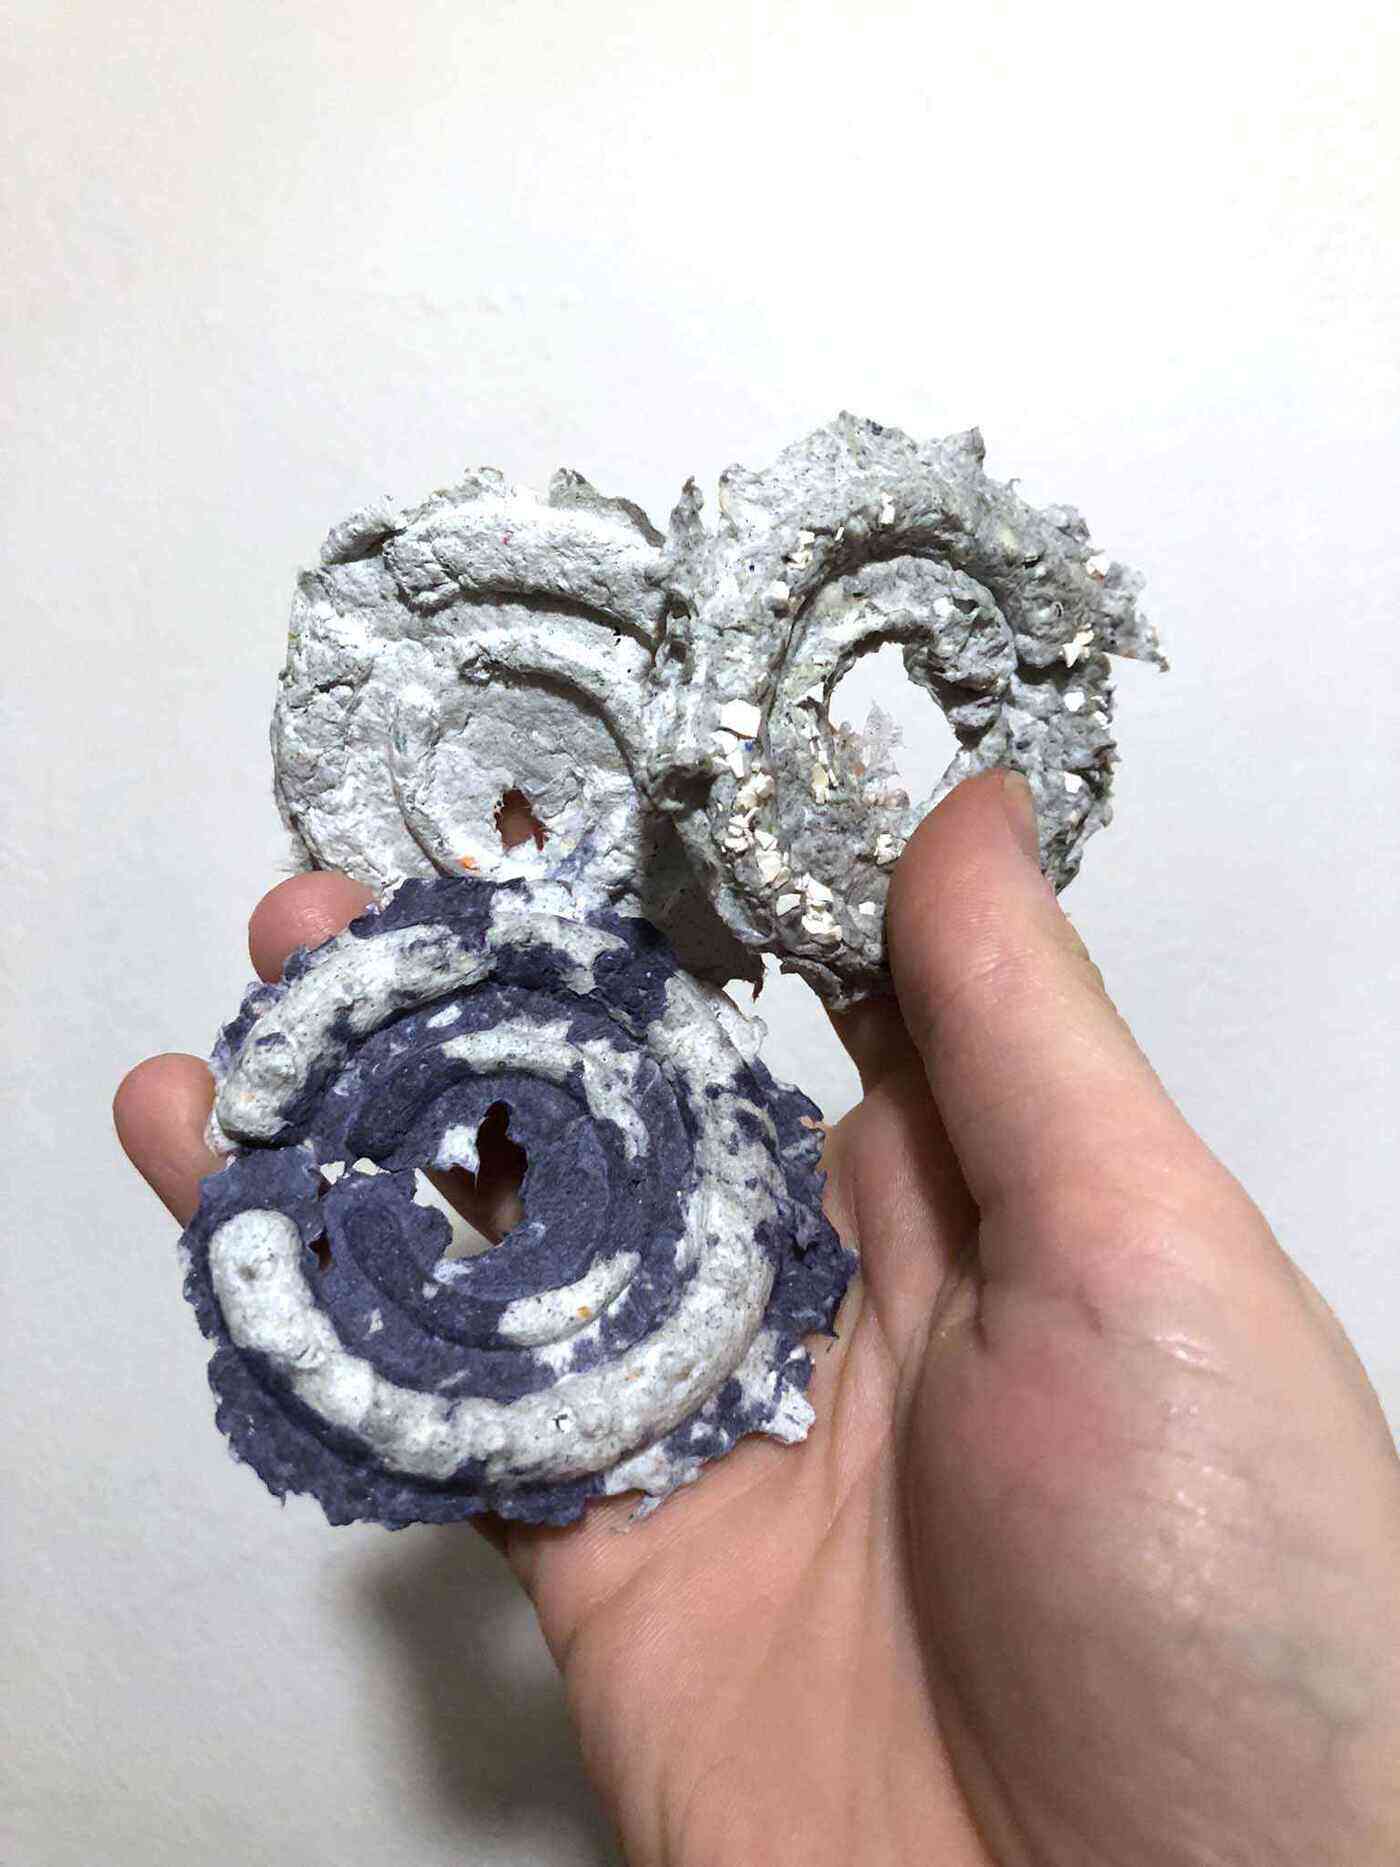

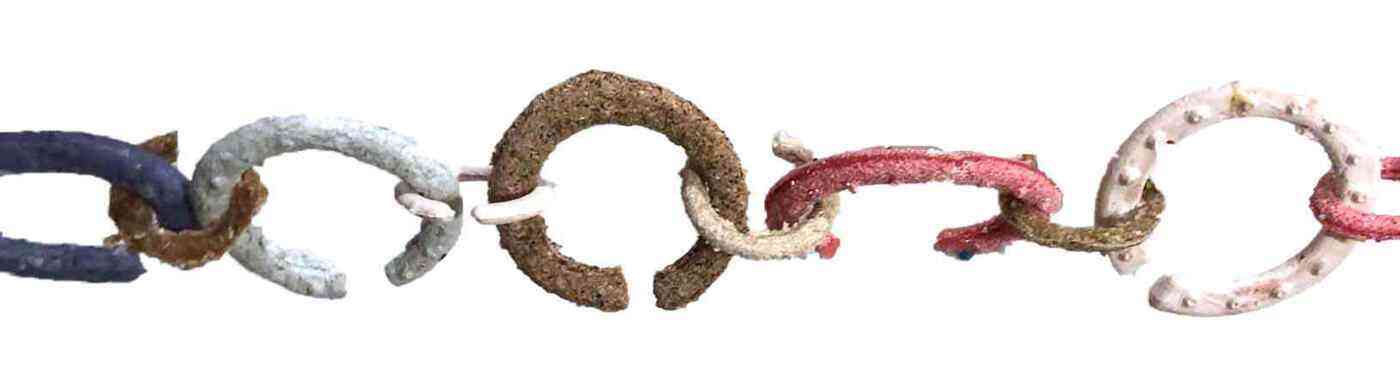
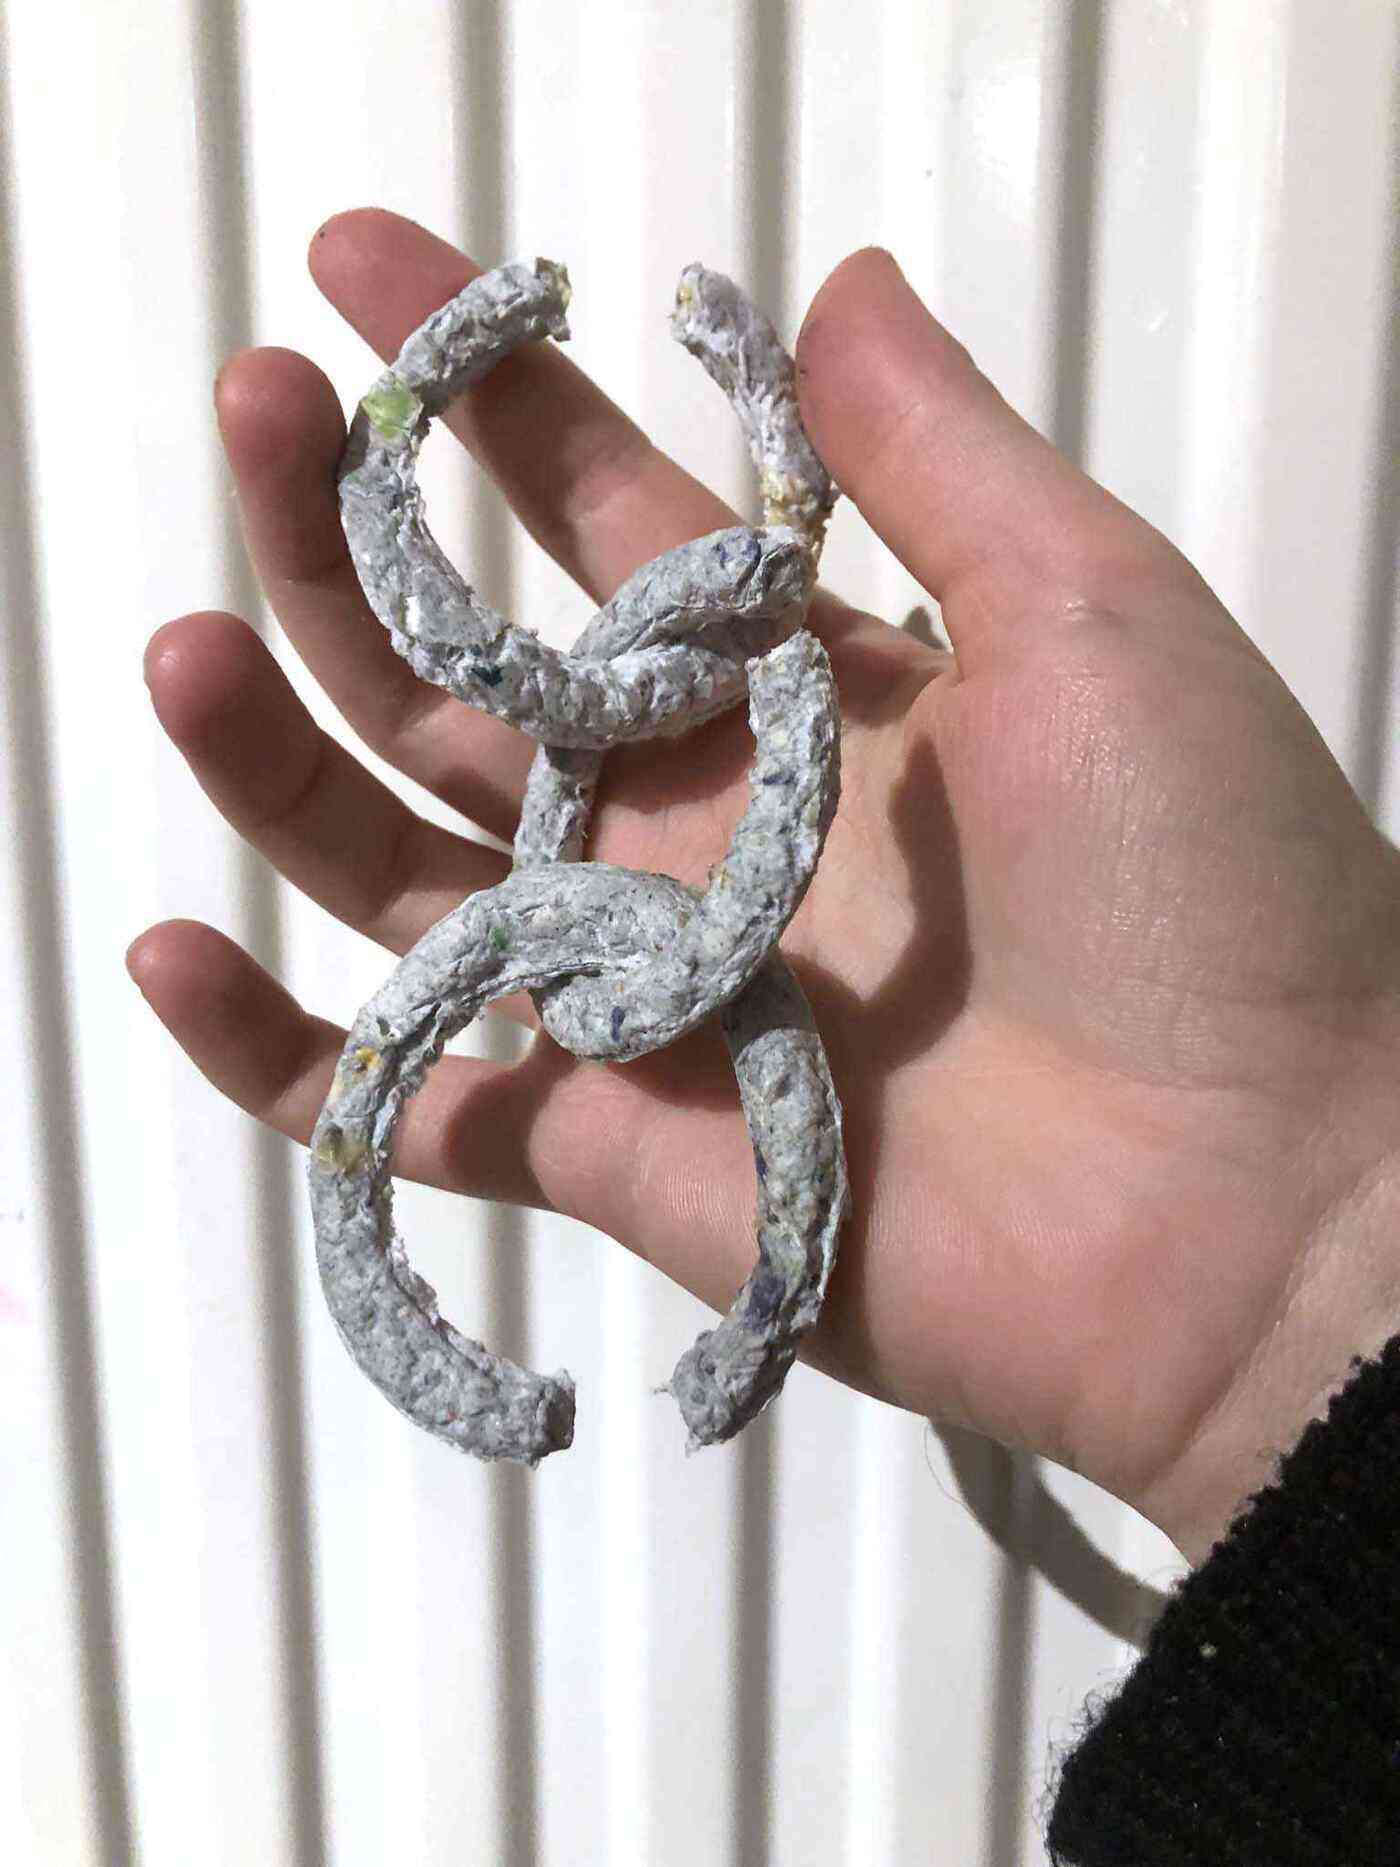
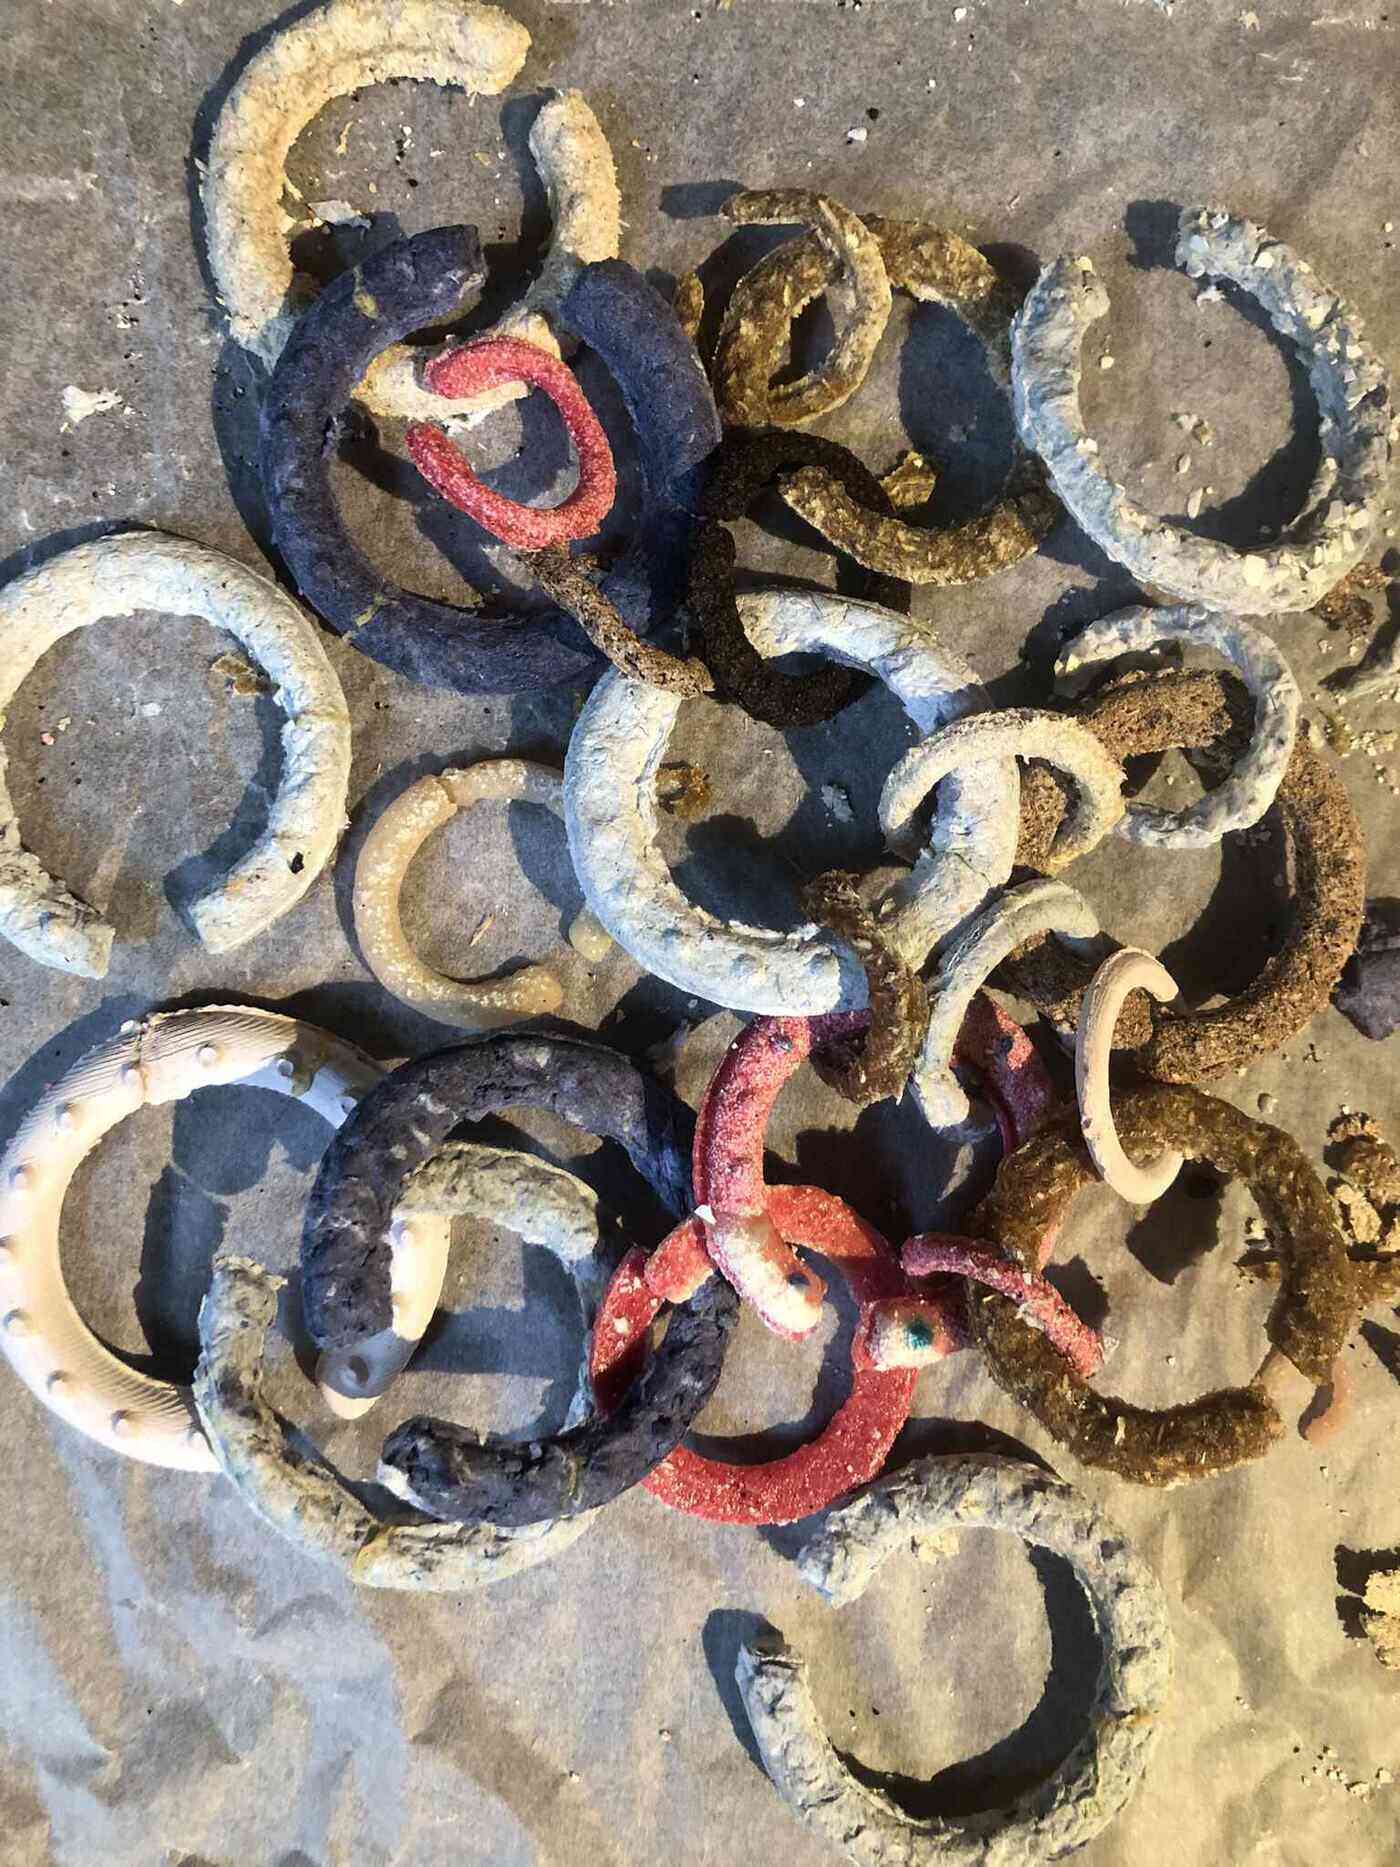
The biomaterials aren’t fully dried yet after a couple of days, but you can see a lot of shrinking happening. I am happy to see that the shrinking is happening pretty uniformly. Especially the coffee one at the top shrunk a lot compared to the ones around it that came from the same mold.

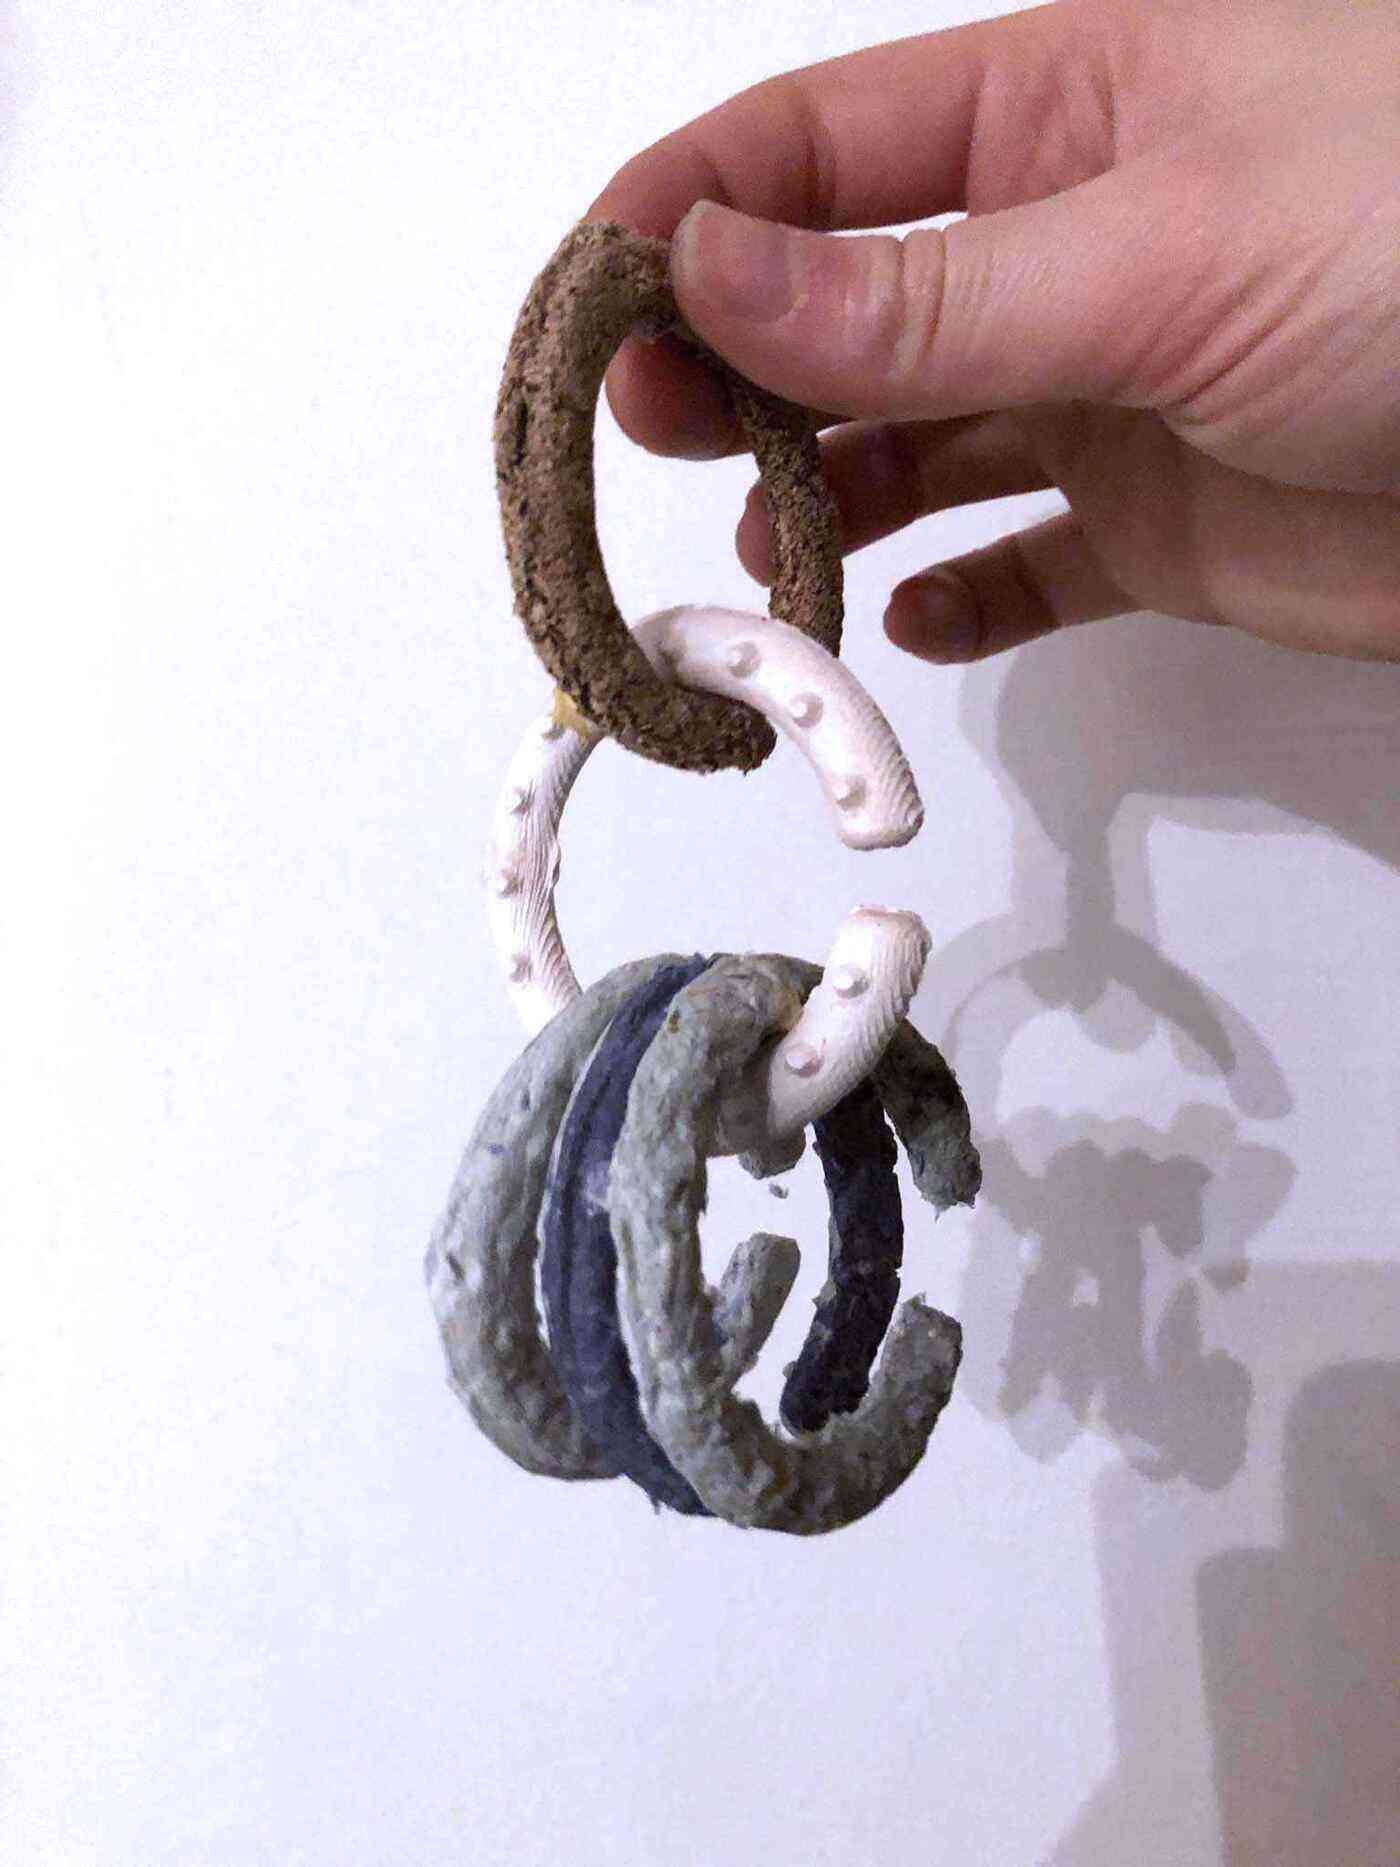
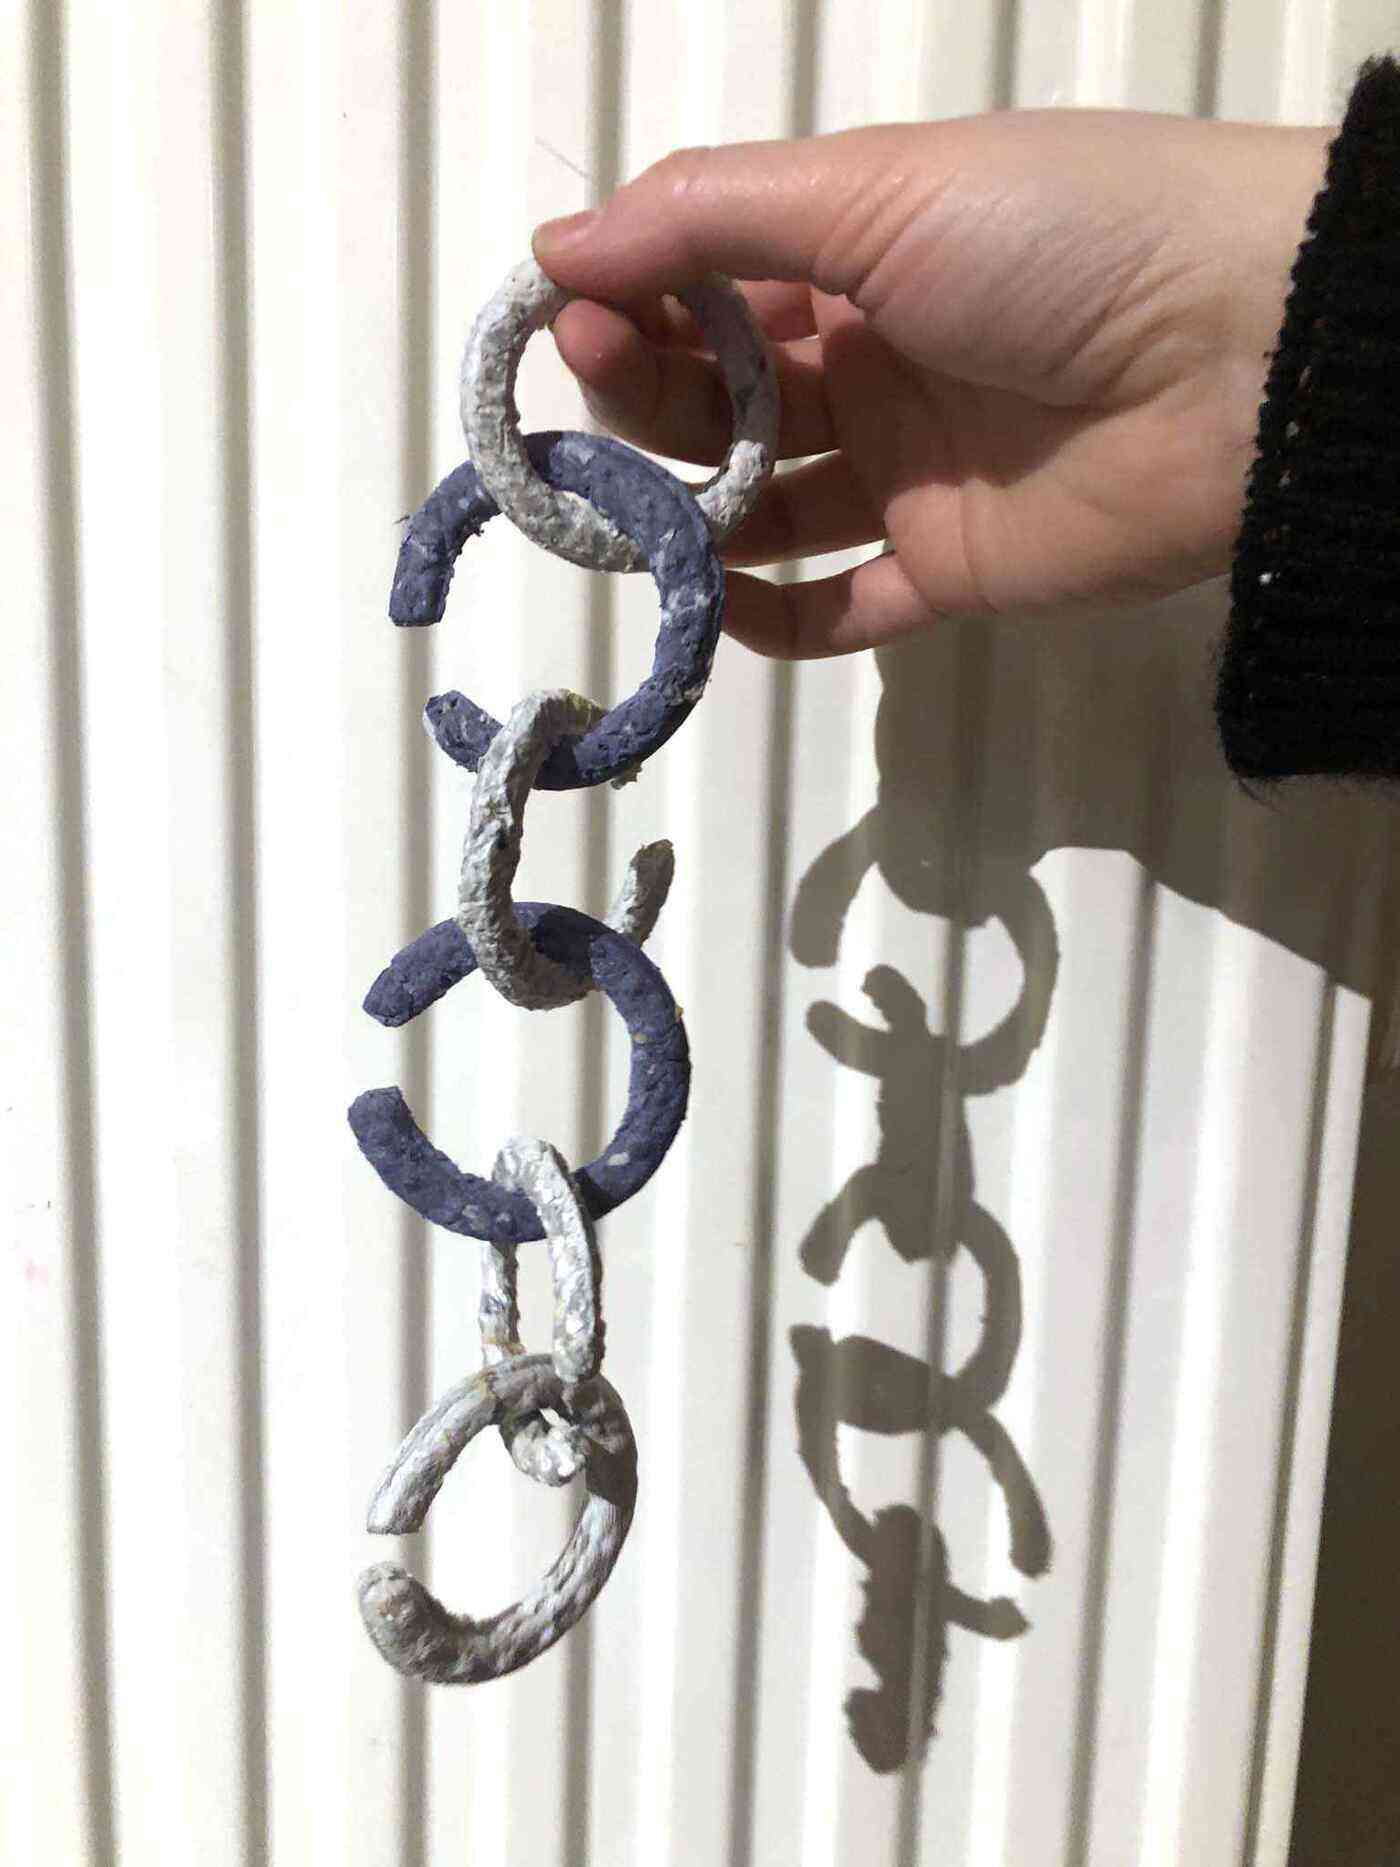
Shrunk rings as rings:

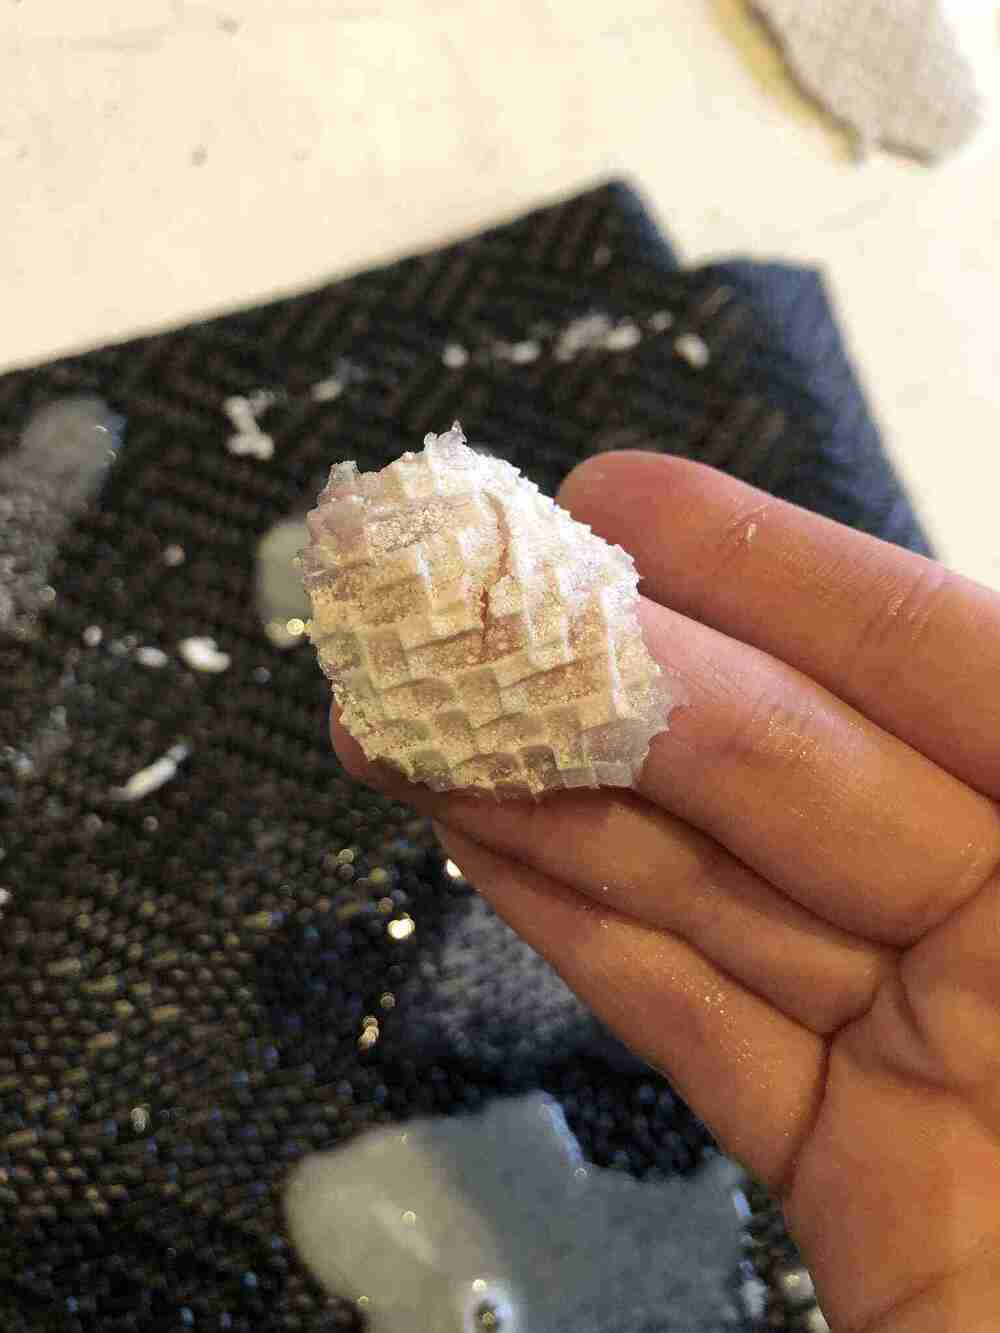
I don’t really have enough rings to make chain mail now, but I did play around with connecting them in various combinations. The pieces that I cast on fabric are still drying, but I was finally able to get the super sticky gelatin one with eggshells released from the acrylic mold. It has a really nice translucency.
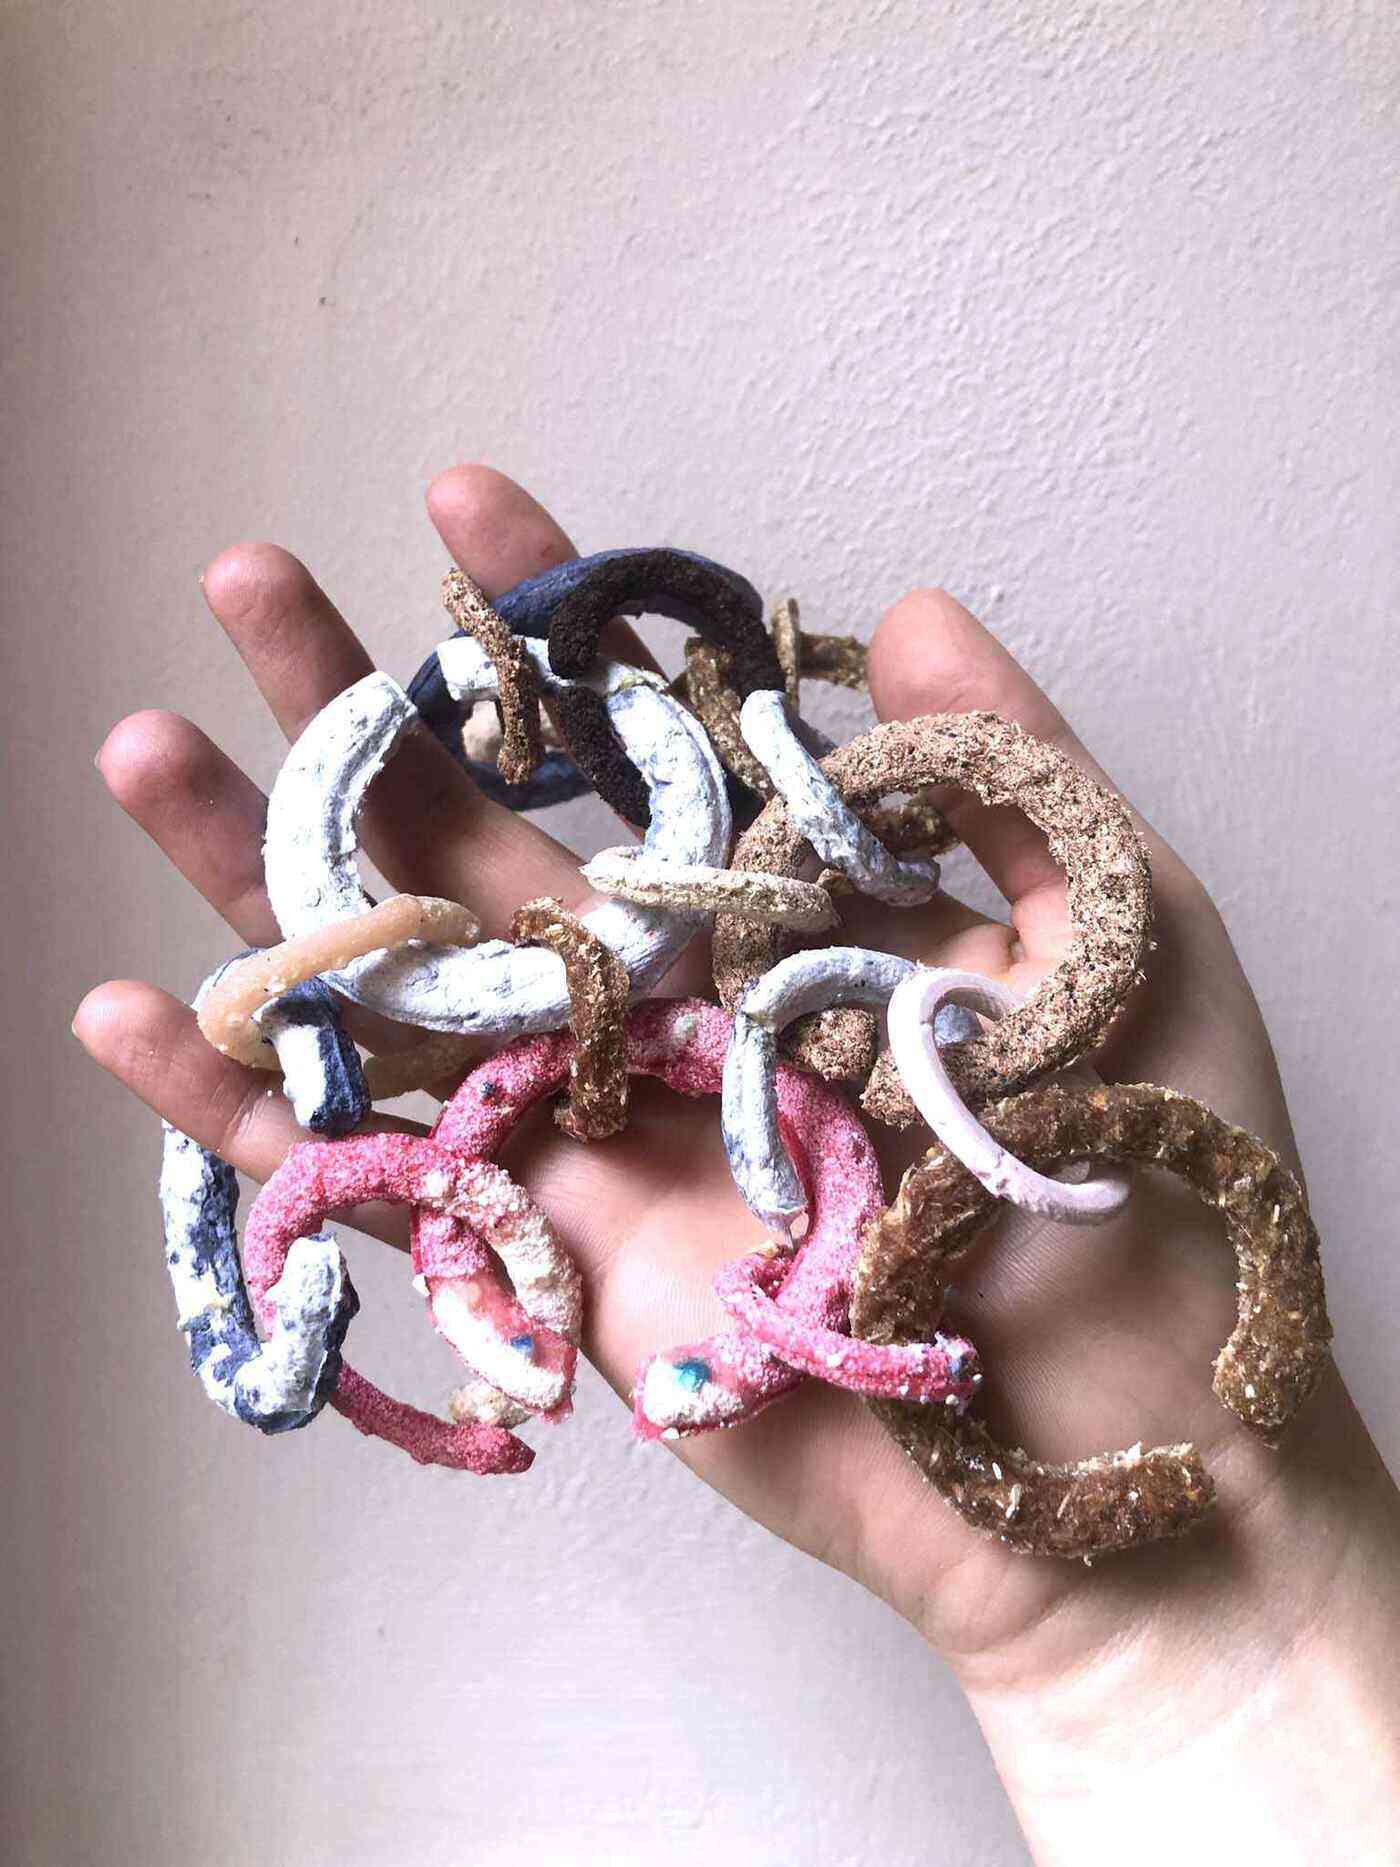

A messy overview:

CNC sawdust fabacademy cup
Since I rushed the print settings, I completely destroyed the 3d printed mold which is pretty wasteful. I should’ve just printed it solid so it’s actually a reusable mold. You can also see the lines of the extruder that broke when I was casting it, making the cup wobbly.


The smaller printed solid cup did survive.
Group assignment
Safety Data Sheets
Since most of the materials that we had in the lab were unusable, we only had 3 types of Smooth-on products to try out. We have the Smooth-Cast 300 urethane resin for rigid molds, and the Mold Star 30 platinum silicone rubber and Ecoflex 00-30 to make flexible molds. Pieter had a look at the SDS for the Smooth-Cast 300 while I looked at the other two. The SDS for both flexible ones is the same.
Features (same for part A and B):
- Not hazardous
- Degassing not necessary
- Silicone rubber
- Mix ratio 1:1 by volume
- Respiratory protection is not normally required when using this product in open environments with adequate ventilation
- Wear any liquid-tight gloves such as butyl rubber, neoprene or PVC.
- Stable at room temperature in closed containers under normal storage and handling conditions.
- Incompatible materials: Strong bases and acids
For the Krone-gips gypsum the website didn’t work so I couldn’t read the SDS. For the FormX Exa Duro I wasn’t able to find the product nor SDS online.
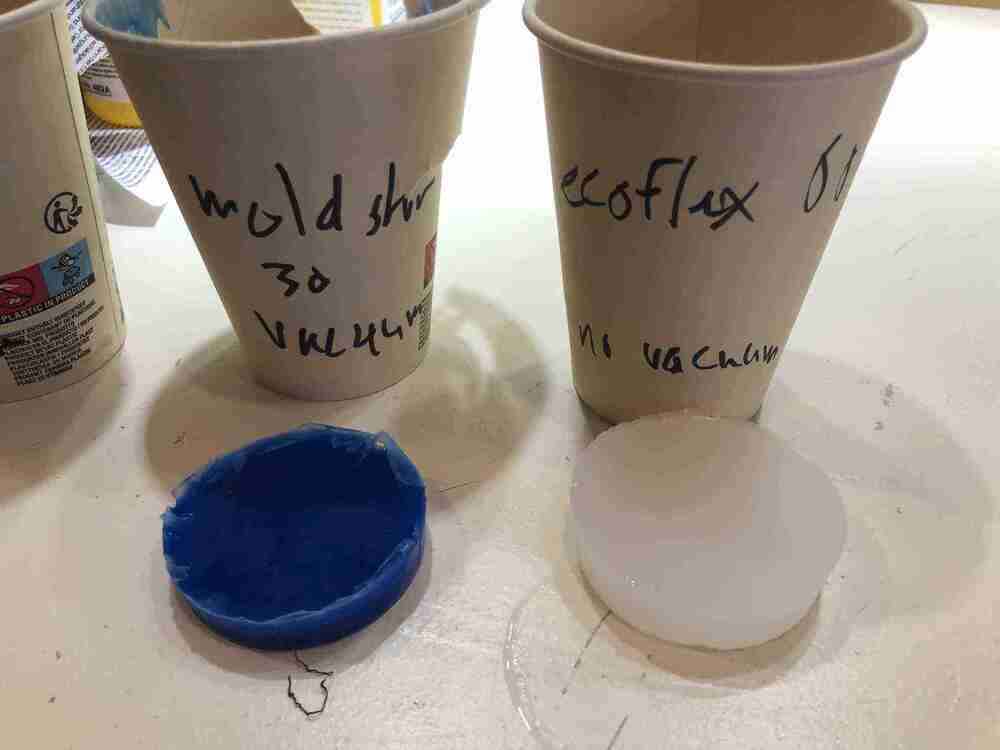
Testing materials
We cast the materials on Thursday at the end of the day. The next day, the Mold Star 30 and the Ecoflex 00-30 were cured and dry. The Smooth Cast however was a different story. There was a layer of liquid on top that I accidentally touched with my bare hand, and it looked kind of bad. So this one also didn’t survive it seems; the box said it was opened in 2018 so it’s not a very big surprise.

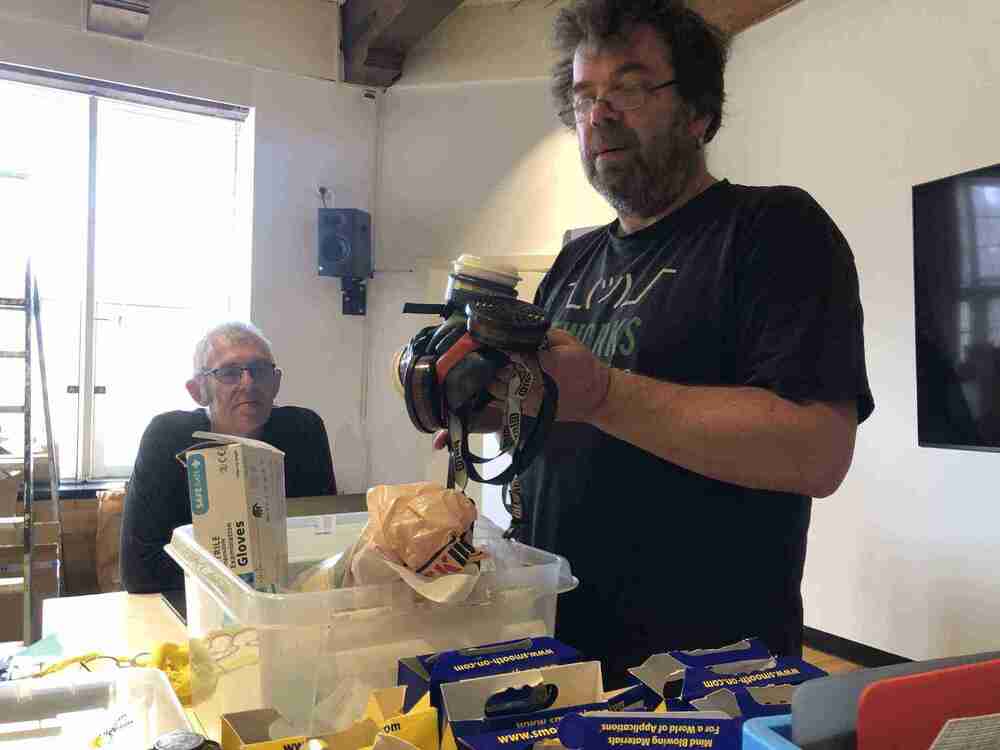
Safety
FTPE-2 masks have to be worn for some of the really nasty materials like the urethanes. For silicones it’s usually not necessary if you’re working in a well ventilated room. You always need to read the Safety Data Sheet before proceeding. We have a bunch of samples from Smooth-On materials.

The vacuum pot system can remove up to 0.8 bar. This process is called degassing: getting bubbles out of the liquid poured. You have to do this before putting the liquid material in the mold; this means you don’t always have time to degas material before it solidifies. If you’re using the vacuum system, make sure you don’t fill material to the brim because it expands when the bubbles move to the top.
The higher the viscosity, the harder the bubbles are to get out in the vacuum chamber: they just expand into mini bubbles sometimes.


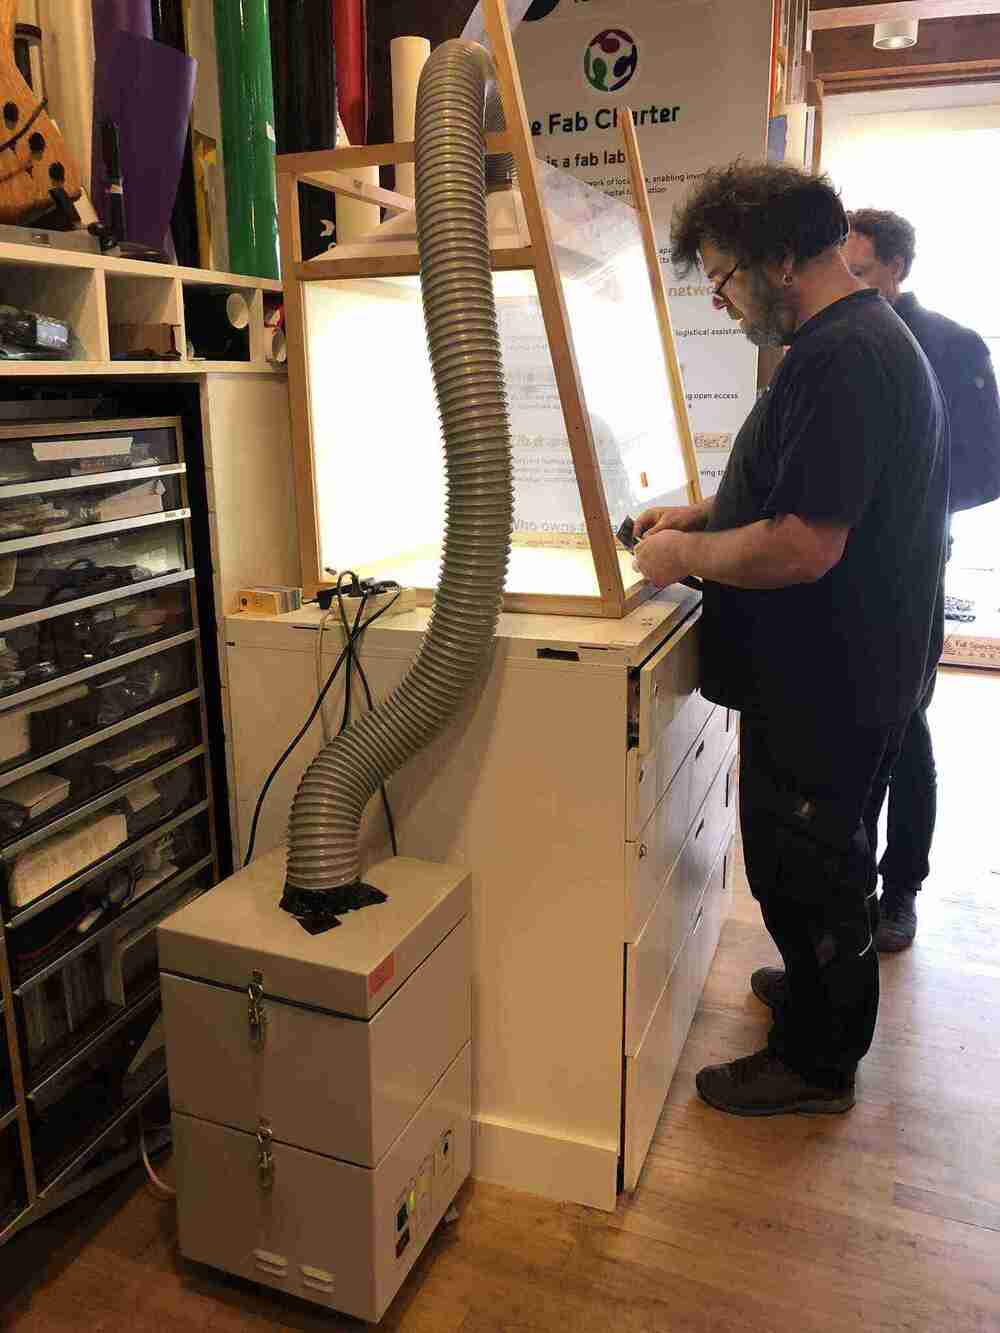
We have a ventilation box that we bring out every year for this week:
Files
The mold can be downloaded on Sketchfab:
Saco’s lecture notes
- Sand casting: for metal casting; it’s sand with a binder
- Cast iron has a texture because of the sand
- Core is for hollow parts
- Spuitgieten: injection molding; we are doing casting by pouring
We make a positive model in wax, then cast the negative mold, so you can use that mold to get your positive part again
Elements of a mold:
- Pins to connect the parts of the mold
- Pouring holes: make sure they’re big enough for the volume you want to cast and the viscosity of the material you want to cast. A funnel on top of the pouring hole can help with pushing the volume down
- Extra space (vent) for pouring as buffer; see Saco’s tire ‘handles’
- Some material heats up and expands like urethane, epoxy, gypsum etc. (not silicon)
- Exothermal reaction: heats up when it’s drying. The bigger the volume the bigger the reaction
- ‘Lossingshoek’: you need to be able to get your shape out of your mold. Silicone molds are flexible enough but rigid models need space to get your model out without breaking it
- Generally speaking: if you want something soft, your mold should be rigid. If you want something rigid your mold should be soft.
Casting strategies
- Multiple holes to fill mold with material for bigger molds, otherwise it can take too long to fill the mold
Read the safety datasheet!!! pot life curing time
Lecture notes
- Injection (sprue, runner, gate, vent, parting line, flashing)
- We’re focusing on soft machining; milling machinable wax then casting elastomers so you can demold easily because it’s flexible
- Smooth-on
Alignment: little bumps on one side, cavities on the other sides. Neil doesn’t recommend that; instead use a complete rim Parting line should be placed tactically so you don’t see where the molds meet; for example at a
Amaco flexwax: work it with heat so you can mold it like clay; solid at room temperature > fun to try
Milling material:
- Machinable wax
-
Rigid foam > paint it with gesso, epoxy af or use hot air or shrinkwrap
- Alginate gels: biocompatible, one time use, used for mold of body parts (https://www.dickblick.com/products/activa-instamold-moldmaking-compound/)
Urethane plastics that are tinted are nice for casting but need good ventilation (https://www.smooth-on.com/products/so-strong/) Clear rubber & epoxy is fun for casting stuff in it (https://www.smooth-on.com/products/encapso-k/)
Aluminium: sand casting; can’t do that here
Oomoo: great for making the flexible molds, nothing sticks to it and it’s safe to use without ventilation SORTA-Clear is food safein
Mixing: Sheering, not stirring (stirring brings in bubbles) Mix until the color is uniform
Bubbles: how to avoid stirring, pouring, vibrating, painting, vacuum, pressure, time
- Tilt mold when casting to avoid bubbles
Release agents: vaseline, diluted dish soap, talc depending on material (not needed for silicone)
Read the safety datasheet!!!