Week 13. Networking and communications
Group Assignment
Here is our group assignment on Kelleigh's page:
Group AssignmentIndividual Assignment
Wired UART Communication using Thonny: Step-by-Step Guide
In this comprehensive guide, I will walk you through the process of establishing wired UART communication between two Raspberry Pi Pico boards using Thonny.
Prerequisites:
Hardware Setup:
- Gather two Raspberry Pi Pico boards, USB power cords, a breadboard, and male-male wires.
- You'll need two computers, one for programming Pico A and another for programming Pico B.
Software Installation:
Download and Install Thonny:
- Download and install Thonny, a Python IDE recommended for beginners, on both computers.
Initial Setup:
Setting Up Pico Boards:
I have never used this board before, so I first wanted to ensure I could get it to work on both computers.
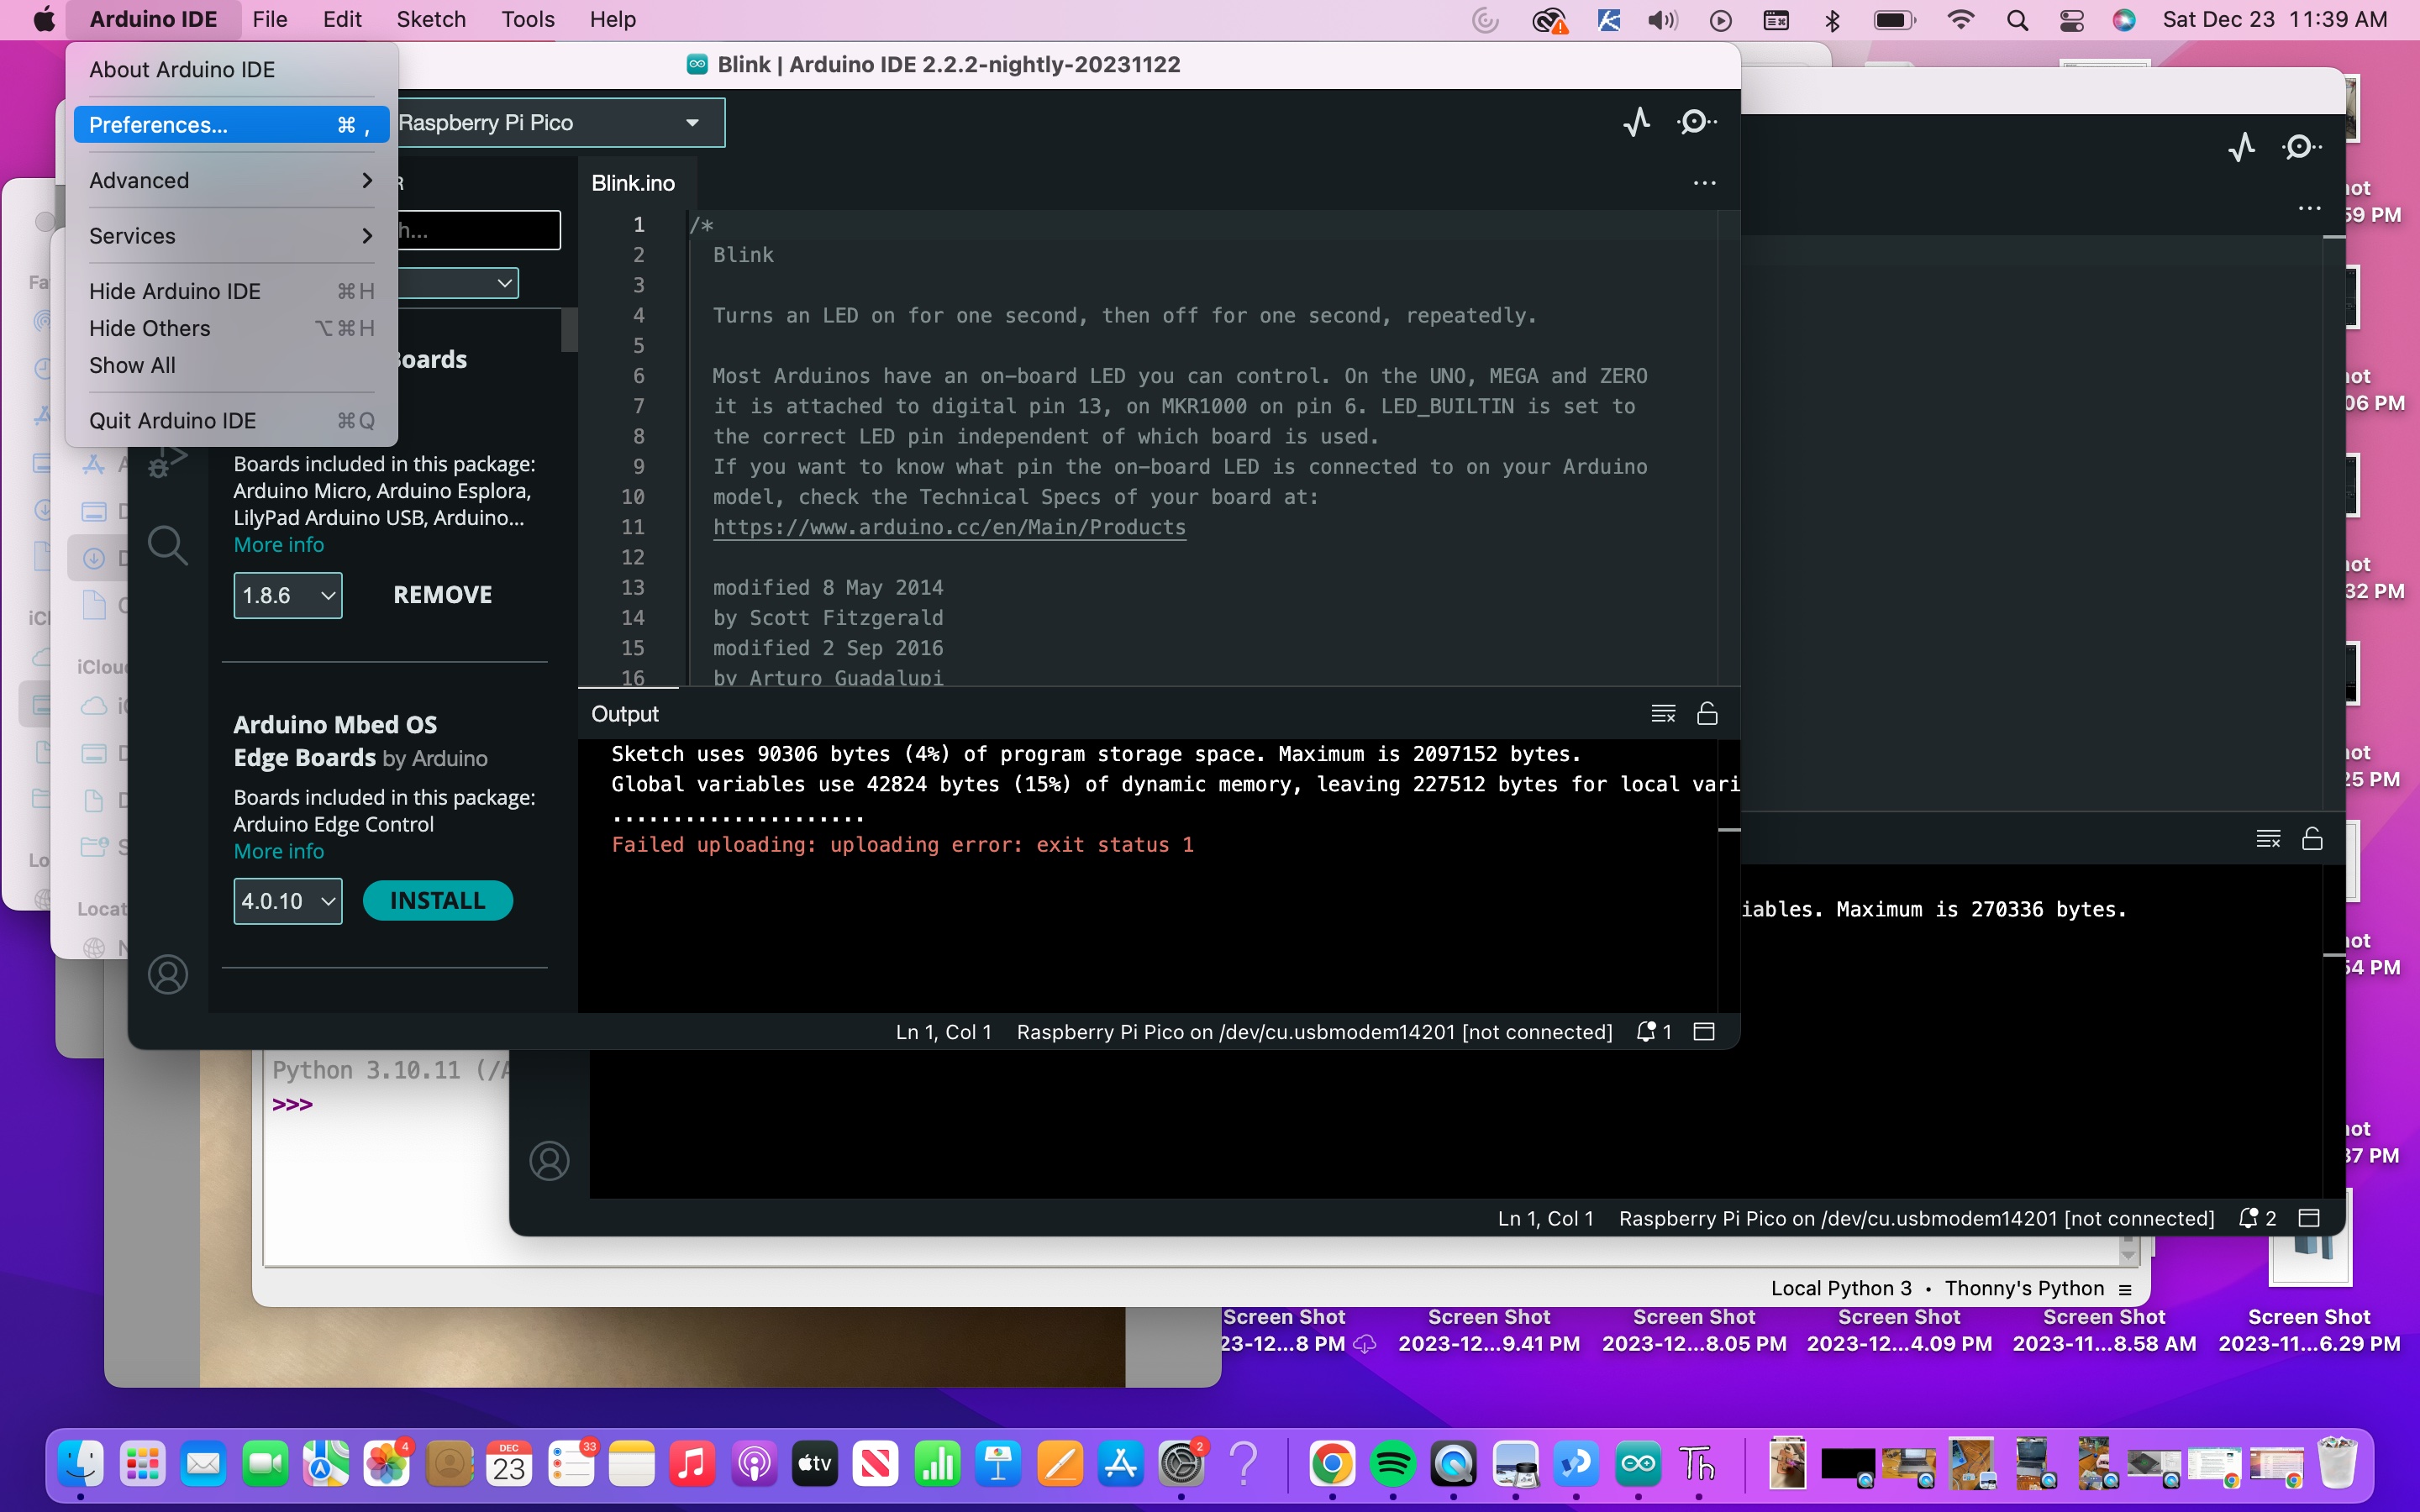
I tried several times to get the pico board connected to my device and another laptop and kept experiencing the error: "User Upload error: Failed uploading: uploading error: exit status 1"
I found a lot of different advice out there to address this issue so I tried all of the following. To be honest, I’m not sure if all of those steps were necessary or not, but hopefully it was not a waste of time.
First I went into preferences and added this URL
https://github.com/earlephilhower/arduino-pico/releases/download/global/package_rp2040_index.json

I then added RP2040 to the boards manager:
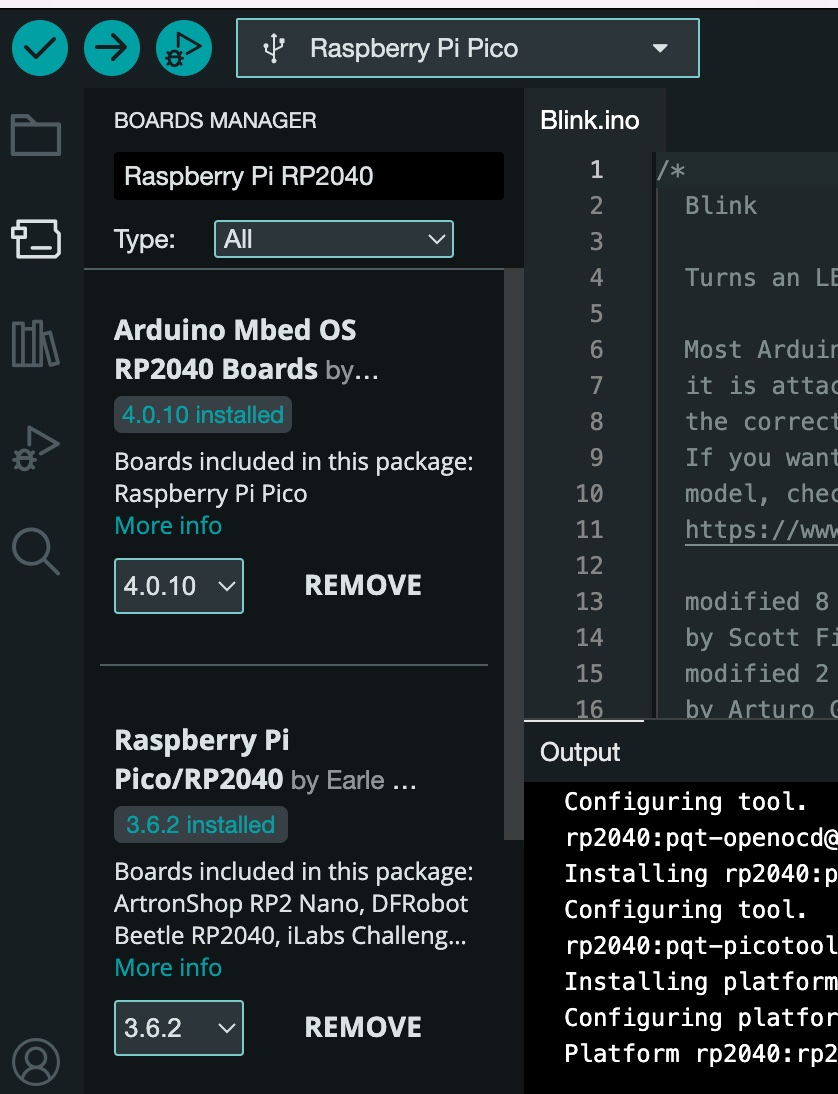
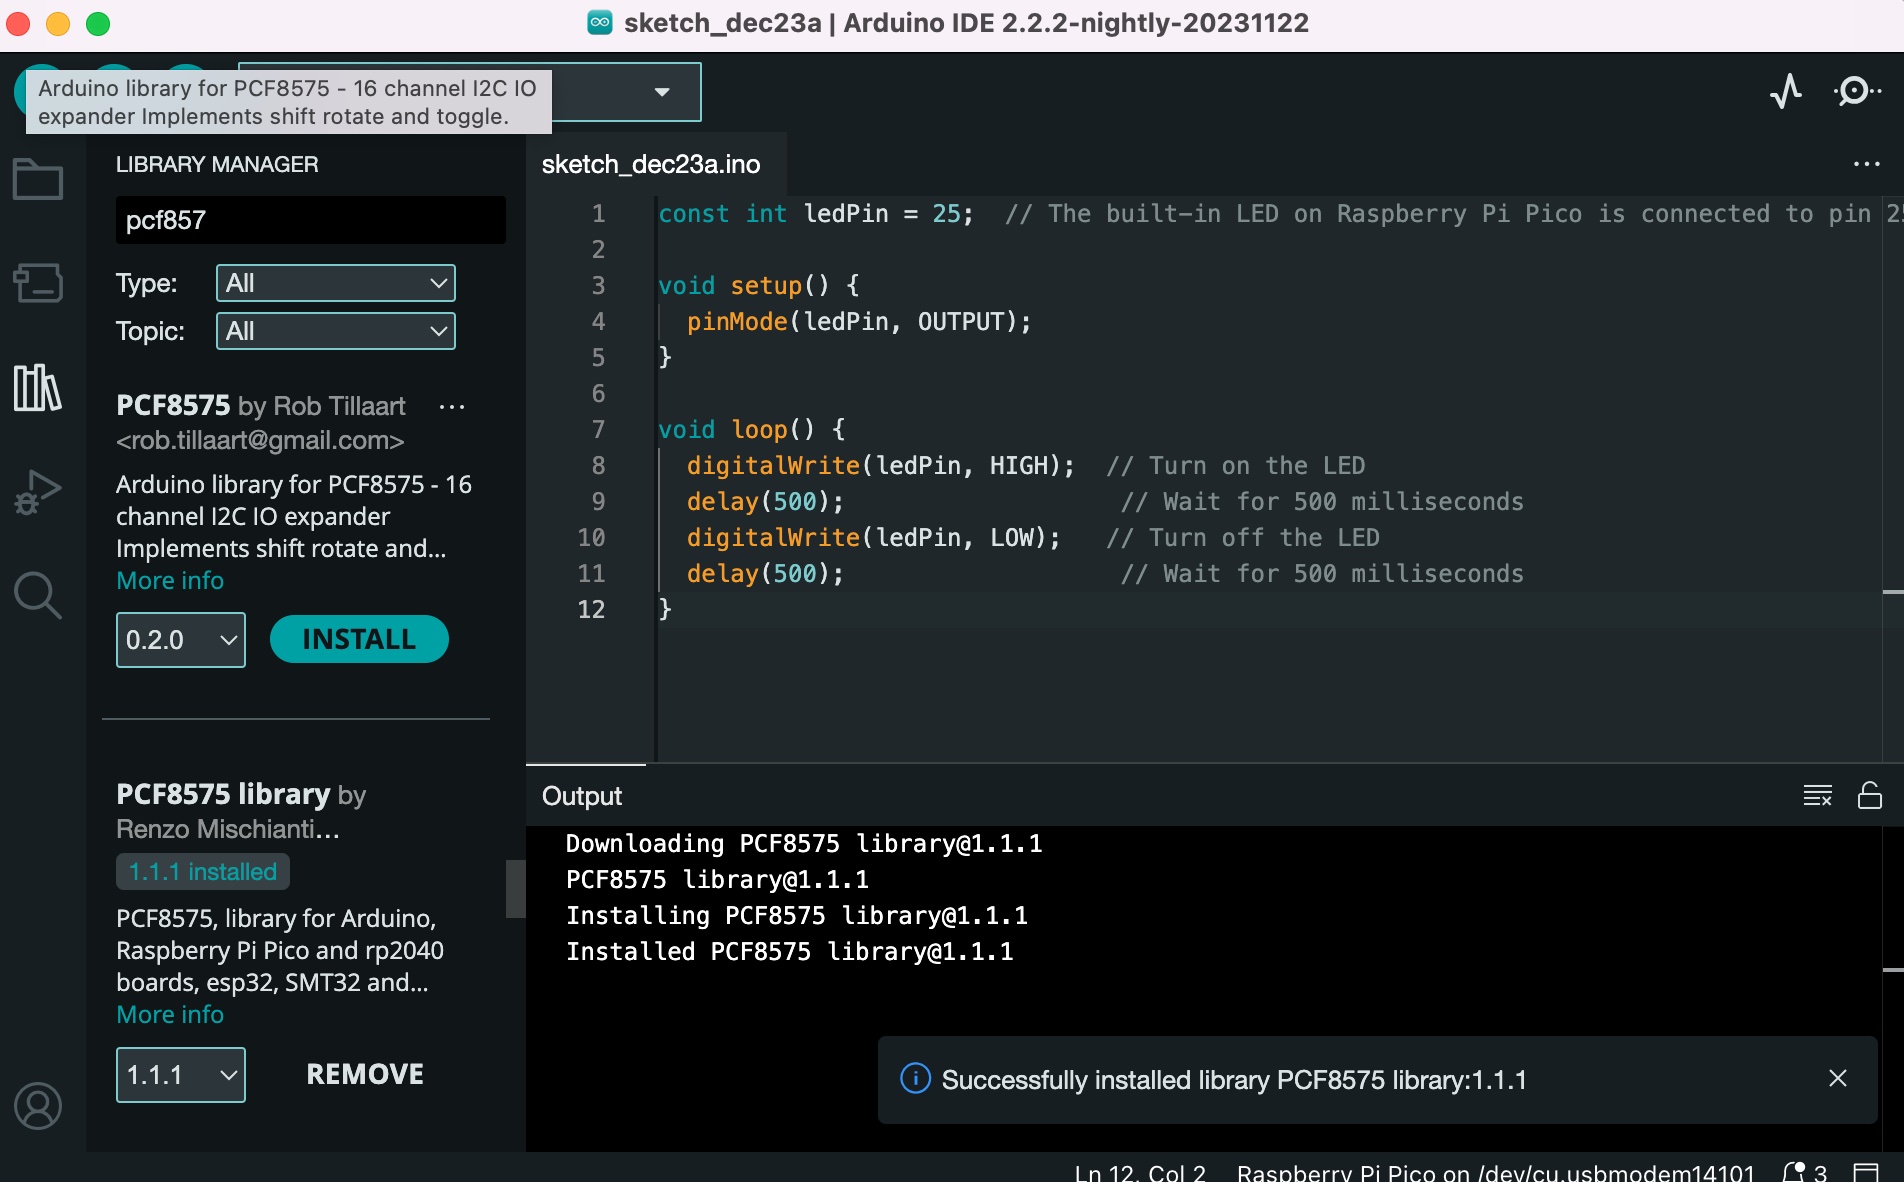
I also added the following libraries after searching pcf857:
Bootsel Button
Finally, I think what actually did it, was holding down the Bootsel button.
On the Raspberry Pi Pico, there is a "BOOTSEL" button. Press and hold this button while connecting the Pico to your computer via USB. Release the "BOOTSEL" button after connecting.
Now, my boards are communicating with each device and the LEDs are blinking with this code:
  const int ledPin = 25;  // The built-in LED on Raspberry Pi Pico is connected to pin 25


void setup() {
 pinMode(ledPin, OUTPUT);
}


void loop() {
 digitalWrite(ledPin, HIGH);  // Turn on the LED
 delay(500);                   // Wait for 500 milliseconds
 digitalWrite(ledPin, LOW);   // Turn off the LED
 delay(500);                   // Wait for 500 milliseconds
}
Download Necessary Files:
Download the Required Python Files:
- Download the
easy_comms.py,pico_comms_a.py, andpico_comms_b.pyfiles.
Computer A downloads:
Computer B downloads:
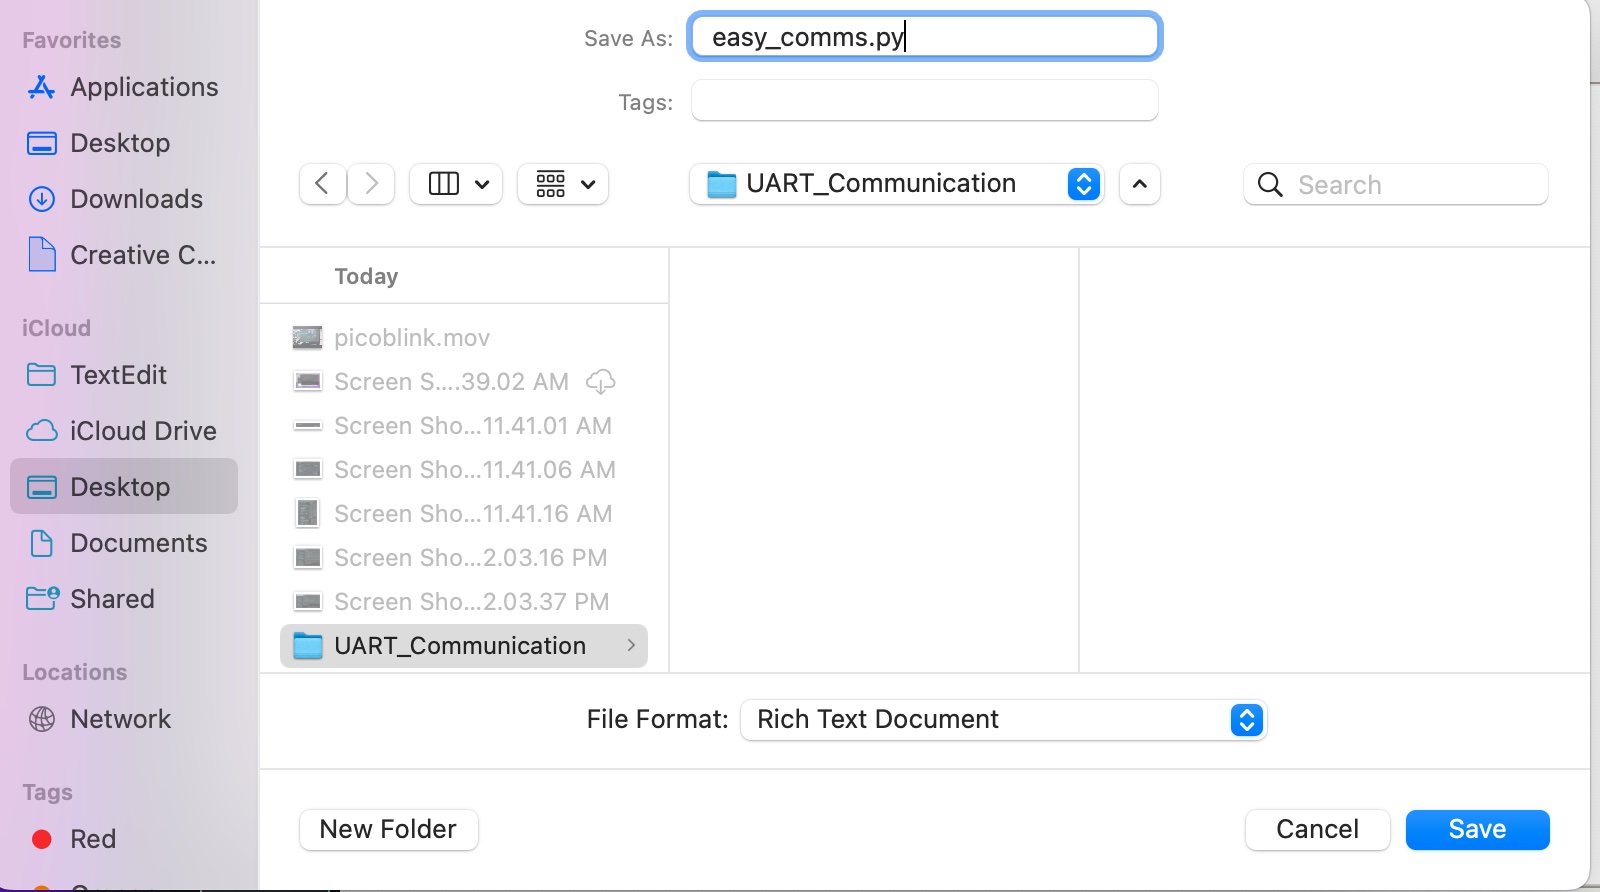
If Needed, Create Your Own Files Manually (this is what I had to do to create the files above):
Open a Text Editor:
- Open a text editor on your computer (e.g., Notepad, TextEdit).
- Copy the code for each file (easy_comms.py, pico_comms_a.py, and pico_comms_b.py) or whatever code you are using.
- Paste the code into TextEdit.
- Click on "Format" in the top menu.
- Choose "Make Plain Text."
- Click on "File" and then "Save."
- Save the file with the desired name and the .py extension (e.g., easy_comms.py).
- Choose the appropriate directory (folder) and click "Save."
Configure Thonny:
Open Thonny:
- Open the Thonny IDE on your computer.
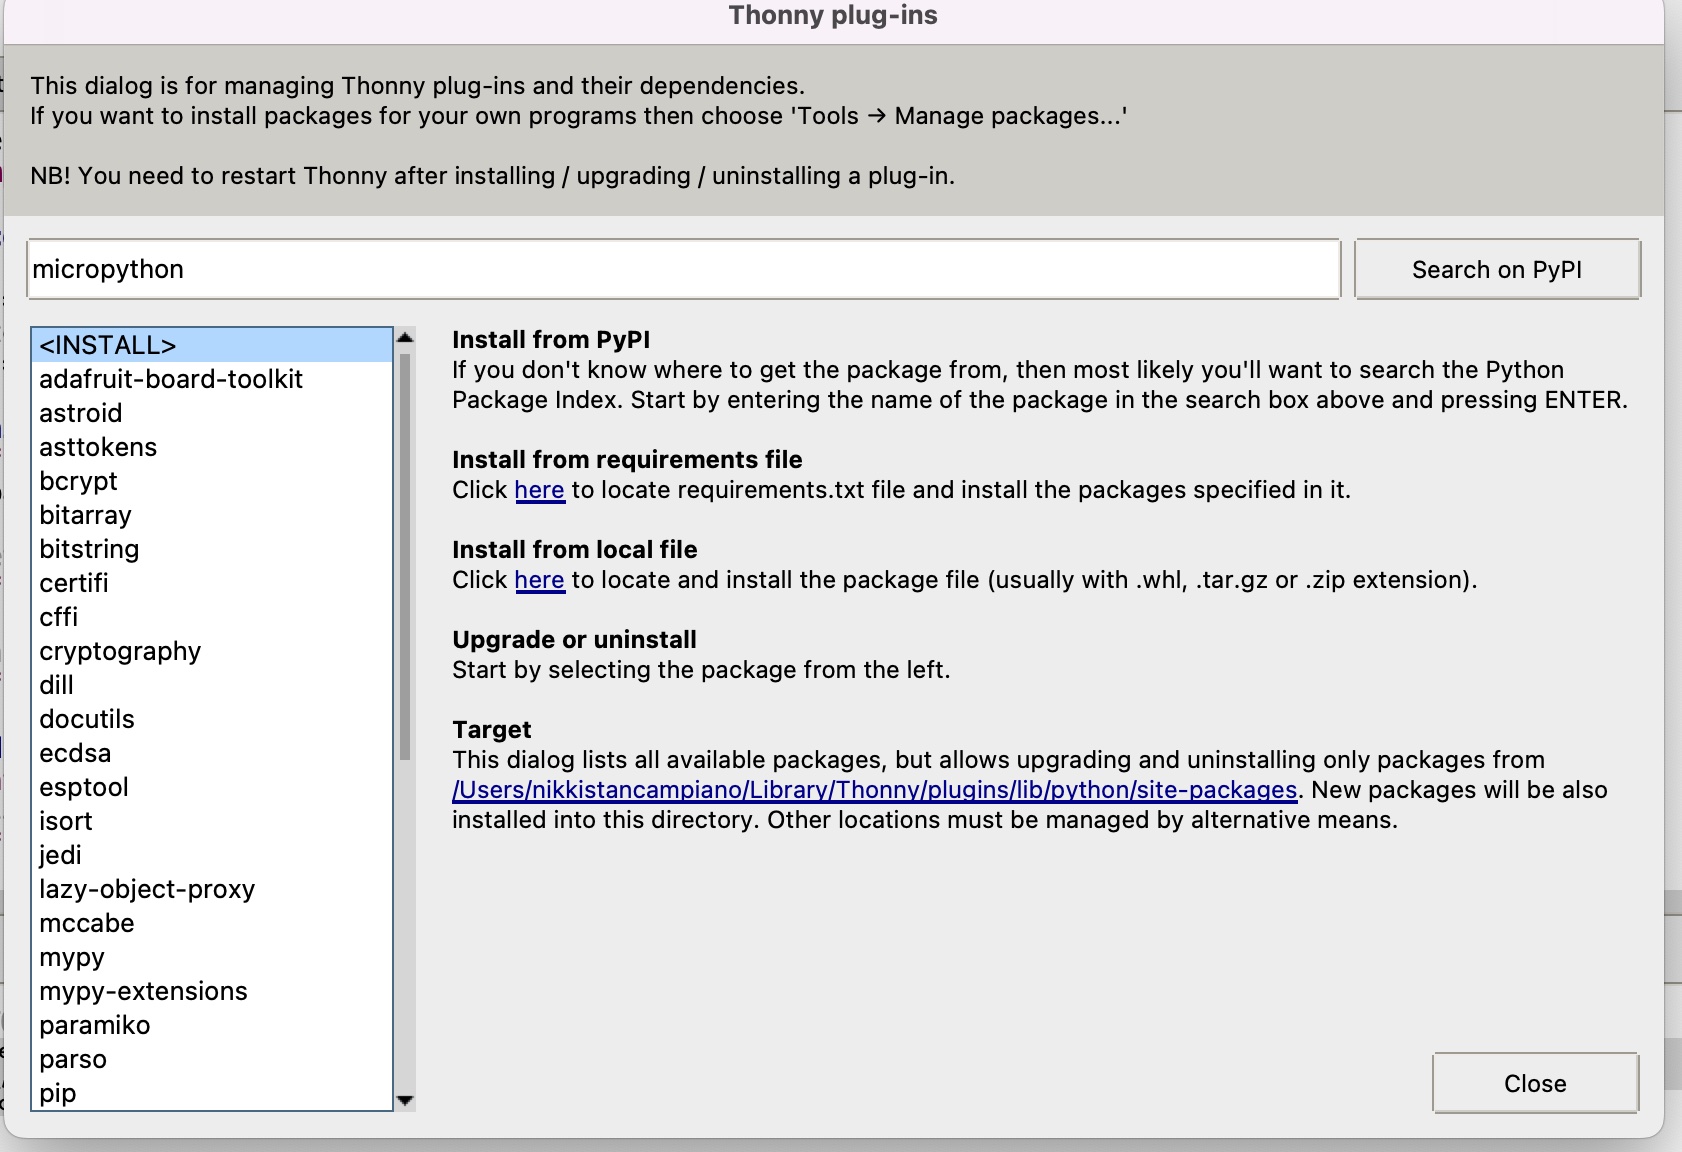
Install MicroPython Plugin:
- In Thonny, go to the "Tools" menu.
- Select "Manage Plug-ins."
- In the "Manage Plug-ins" window, find and install the "MicroPython" plug-in.
- Restart Thonny to apply the changes.
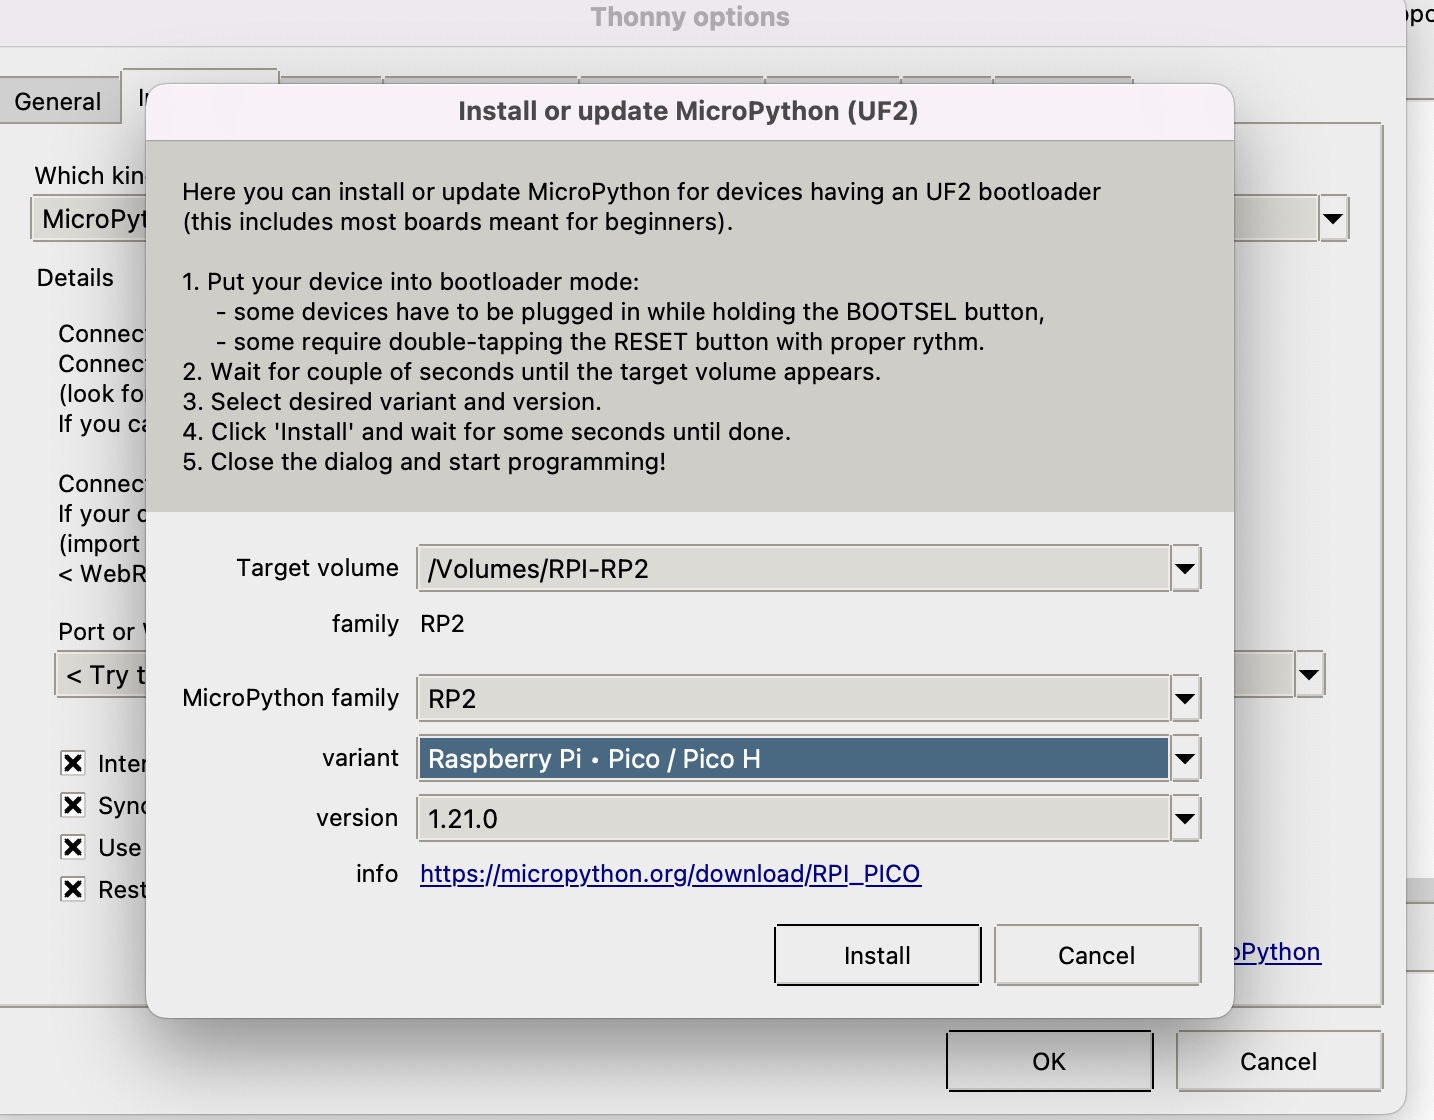
Connect Raspberry Pi Pico:
- Connect your Raspberry Pi Pico to your computer using a micro-USB cable.
- Ensure that the Pico is in "BOOTSEL" mode. If not, press and hold the "BOOTSEL" button while connecting the USB cable.
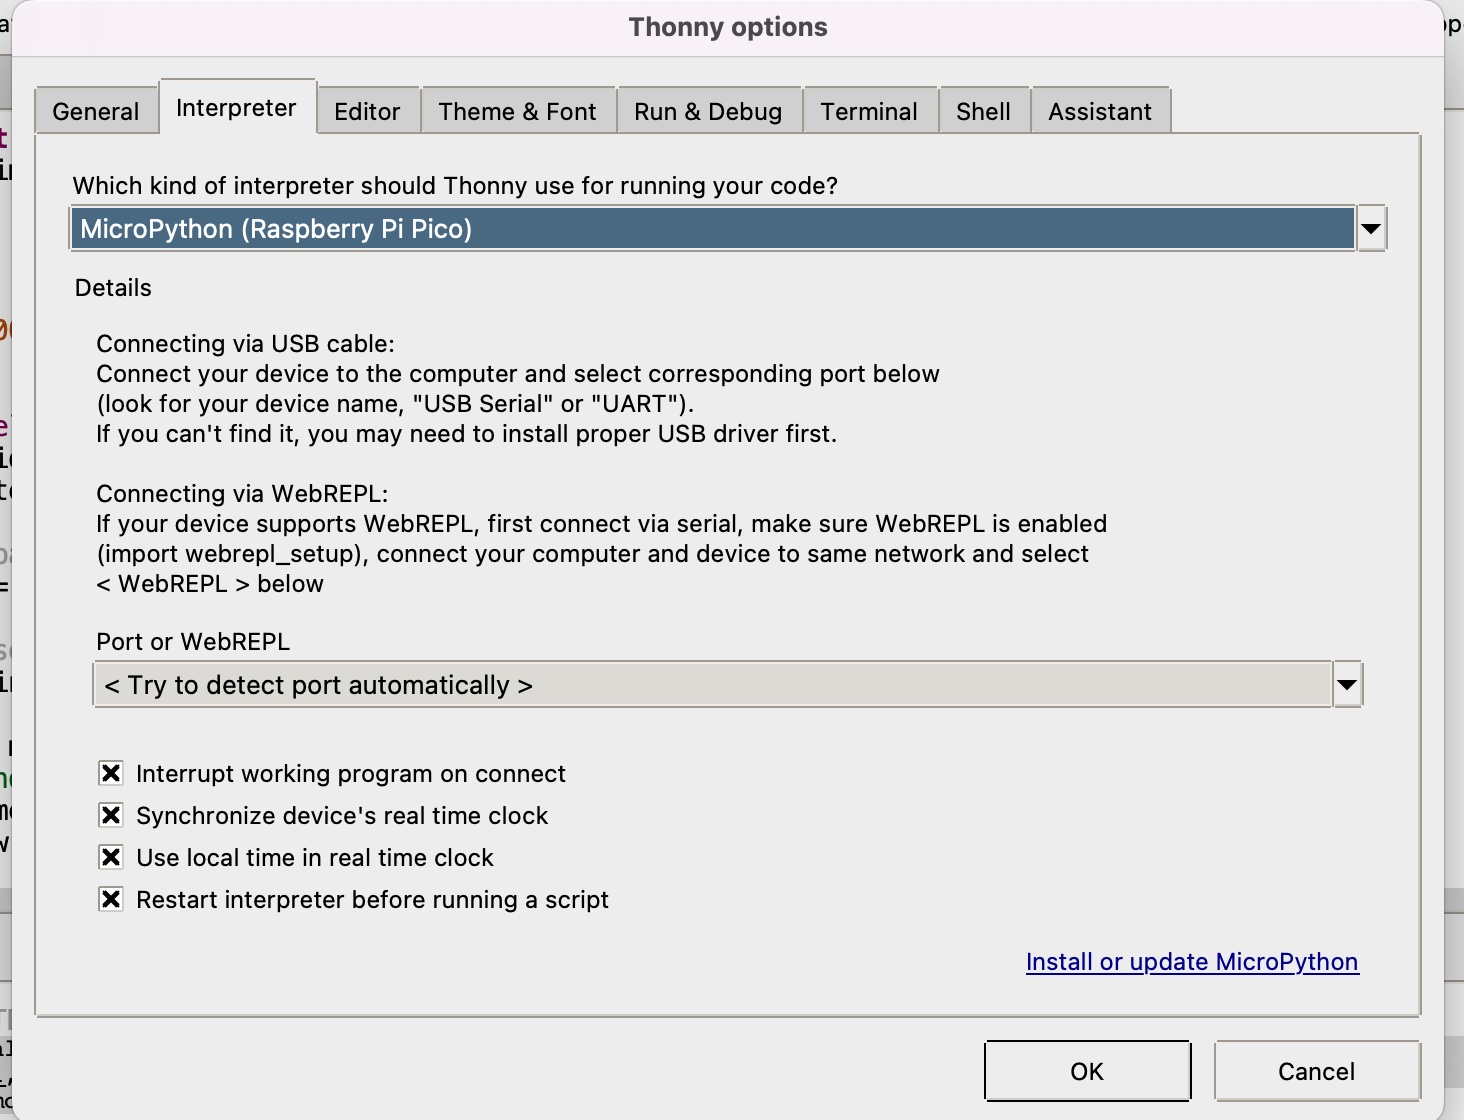
Select MicroPython Interpreter:
- In Thonny, go to the "Tools" menu.
- Select "Options."
- In the "Interpreter" section, you should see a dropdown menu with available Python interpreters. Select the MicroPython interpreter that corresponds to your Pico.
- If you don't see the MicroPython interpreter listed, make sure that your Pico is properly connected, and try restarting Thonny.
Check Connection Status:
- Look at the bottom-right corner of the Thonny window. You should see the status indicating whether the MicroPython environment is detected and if your Pico is connected.
- If the Pico is connected, you should see a green dot next to the "MicroPython" status.
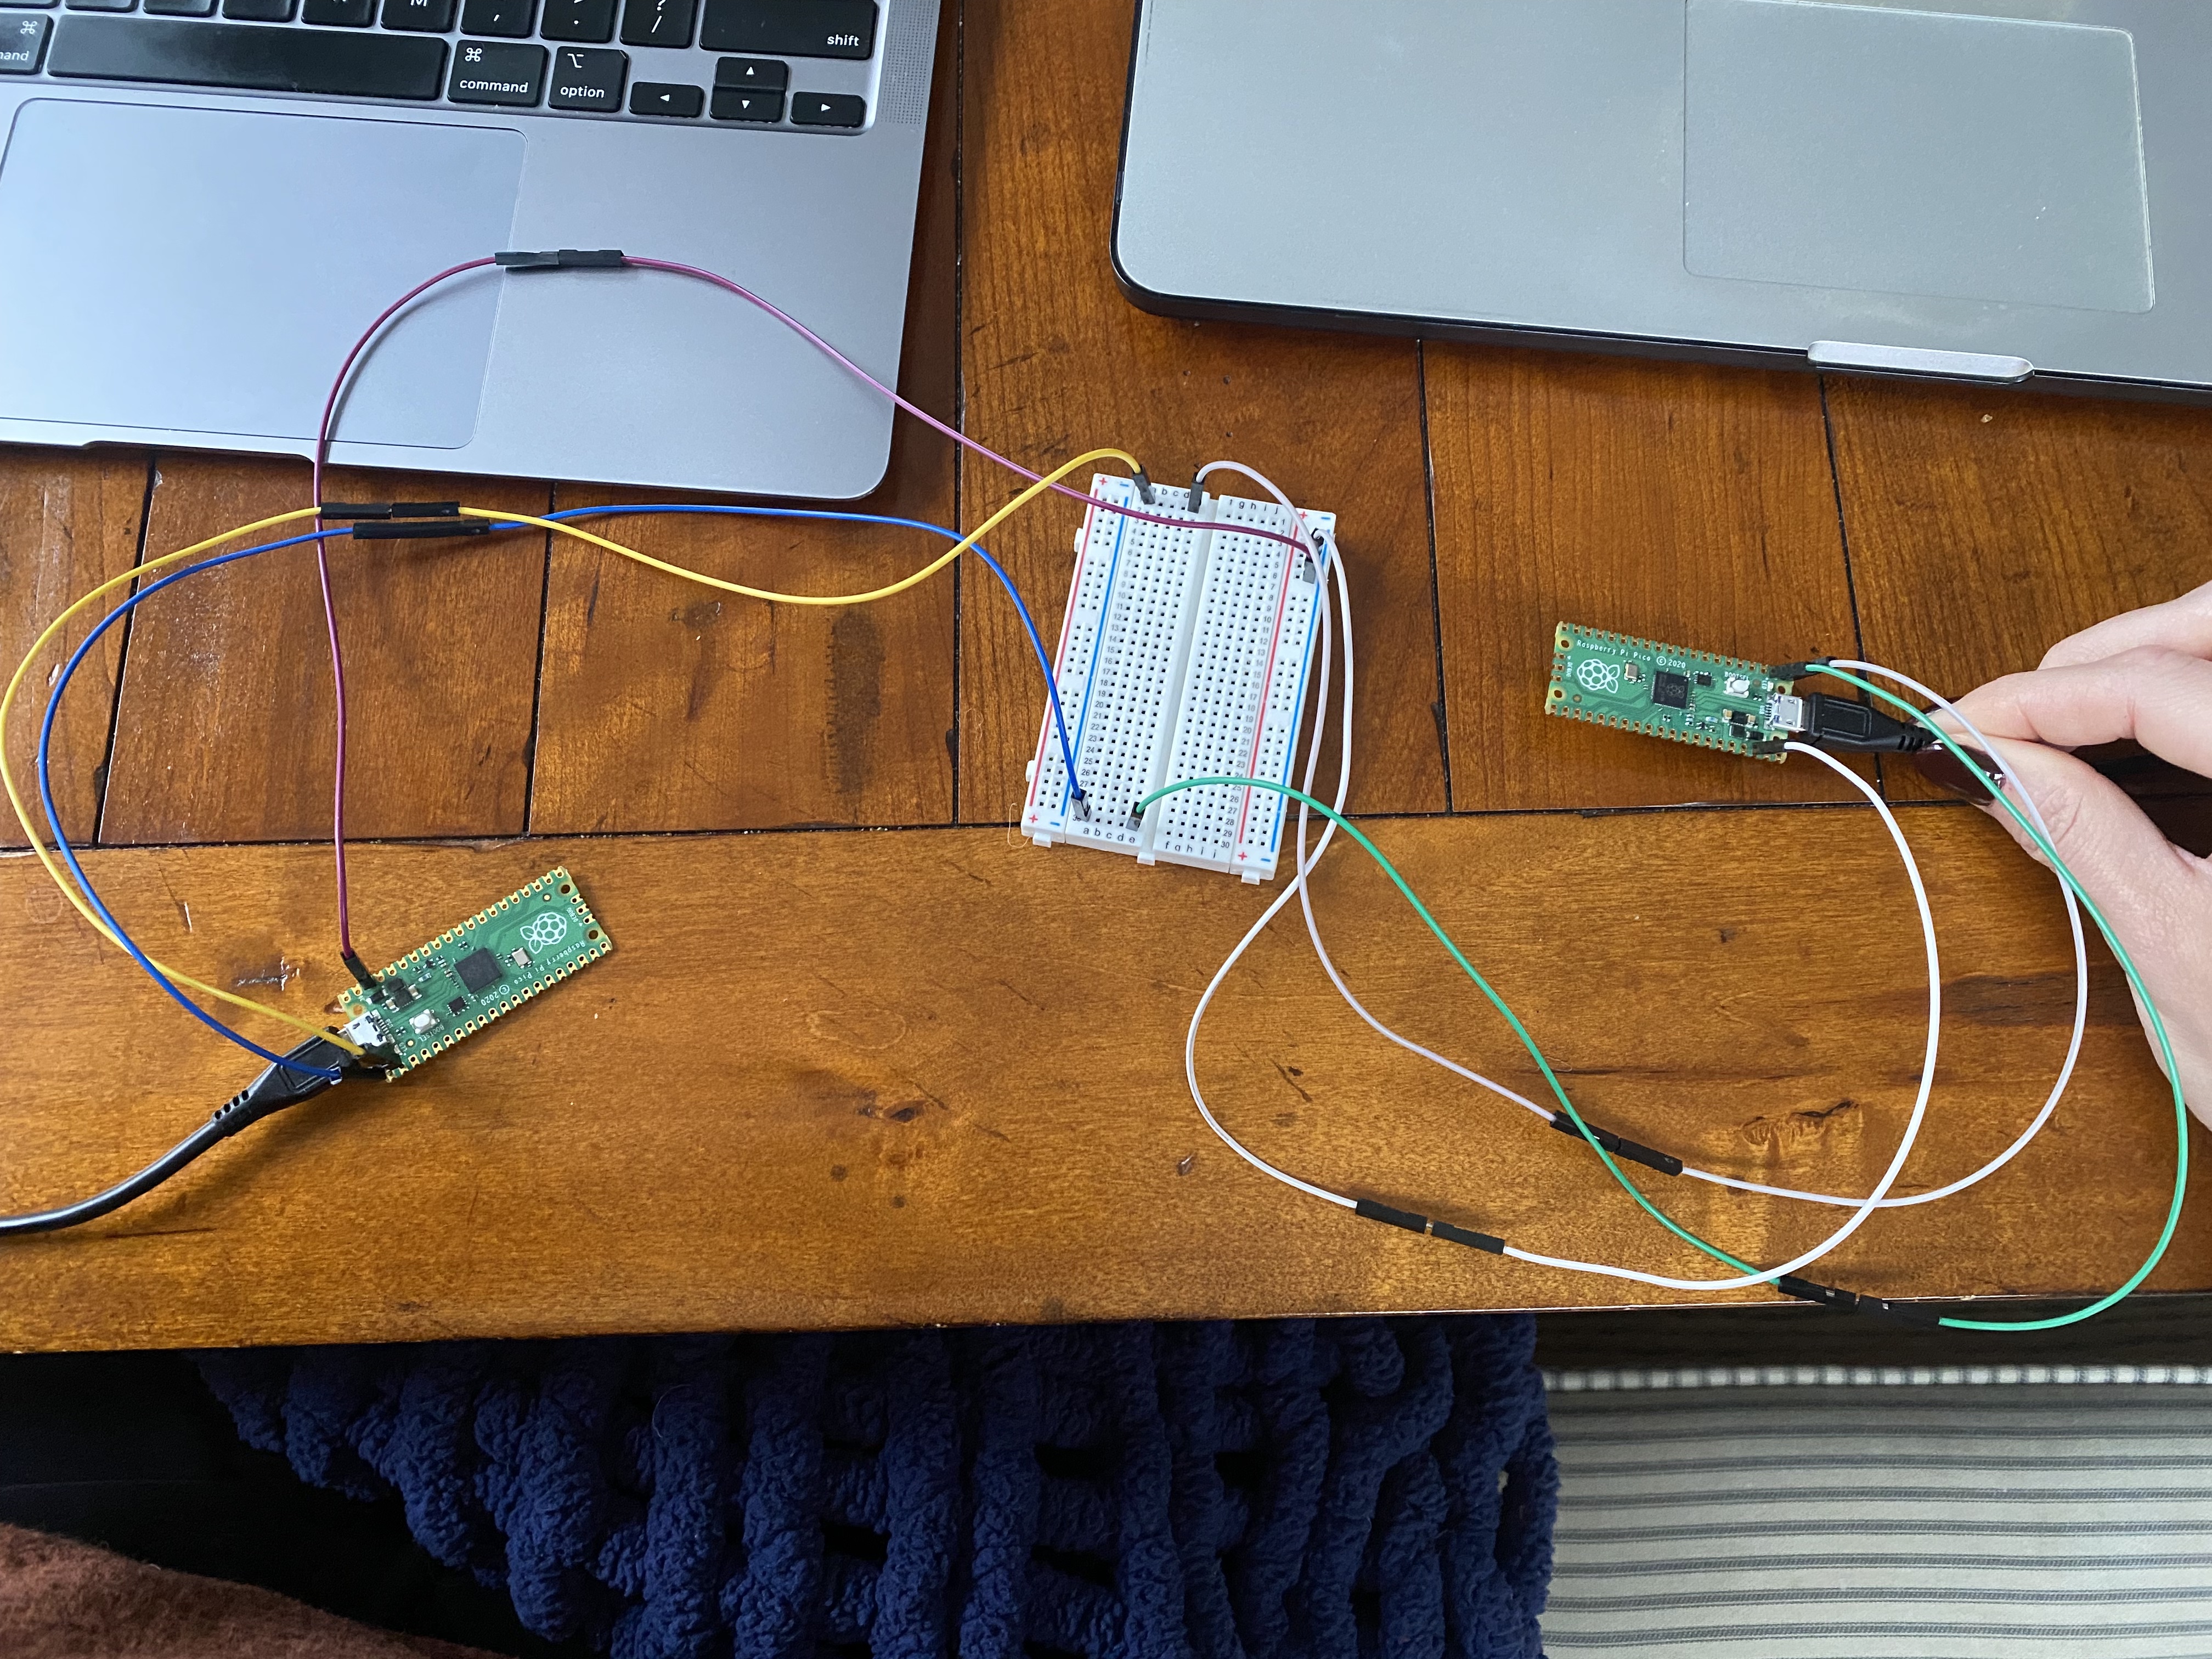
Wiring:
Use a breadboard and male-male wires to establish the following connections:
- TX (Pico A) > RX (Pico B) through the breadboard.
- RX (Pico A) > TX (Pico B) through the breadboard.
- GND (Pico A) > GND (Pico B) through the breadboard.
Here is what it looks like:
Programming Computers:
Use one computer (Computer A) to program Pico A and the other computer (Computer B) to program Pico B.
Programming Pico A (Computer A):
Code: easy_comms.py
      from machine import UART, Pin
      from time import time_ns

      class easy_comms:

          uart_id = 0
          baud_rate = 9600
          timeout = 1000 # milliseconds

          def __init__(self, uart_id:int, baud_rate:int=None):
              self.uart_id = uart_id
              if baud_rate: self.baud_rate = baud_rate

              # set the baud rate
              self.uart = UART(self.uart_id,self.baud_rate)

              # Initialise the UART serial port
              self.uart.init()

          def send(self, message:str):
              print(f'sending message: {message}')
              message = message + '\n'
              self.uart.write(bytes(message,'utf-8'))

          def start(self):
              message = "ahoy\n"
              print(message)
              self.send(message)

          def read(self)->str:
              start_time = time_ns()
              current_time = start_time
              new_line = False
              message = ""
              while (not new_line) or (current_time <= (start_time + self.timeout)):
                  if (self.uart.any() > 0):
                      message = message + self.uart.read().decode('utf-8')
                      if '\n' in message:
                          new_line = True
                          message = message.strip('\n')
                          # print(f'received message: {message}')
                          return message
              else:
                  return None
Code: pico_comms_a.py
      # Pico_comms_a
      # Sends commands and listens to responses from pico_comms_b

      from easy_comms import easy_comms
      from time import sleep

      com1 = easy_comms(uart_id=0, baud_rate=9600)
      com1.start()

      while True:
      message = ""
      message = com1.read()

      if message is not None:
      print(f"message received: {message.strip('\n')}")
      sleep(1)
Programming Pico B (Computer B):
Code: pico_comms_b.py
      # Pico_comms_b
      # Sends commands and listens to responses from pico_comms_a

      from easy_comms import easy_comms
      from time import sleep

      com1 = easy_comms(uart_id=0, baud_rate=9600)
      com1.start()

      count = 0
      while True:
          # send a message
          com1.send(f'hello, {count}')

          #check for messages
          message = com1.read()

          if message is not None:
              print(f"message received: {message.strip('\n')}")
          sleep(1)
          count +=1
Running the Programs:
Pico A (Computer A):
- Load the
easy_comms.pyandpico_comms_a.pycodes in Thonny (use two separate scripts). - Click the green "Run" button to execute the program on Pico A.
Pico B (Computer B):
- Load the
easy_comms.pyandpico_comms_b.pycodes in Thonny. -
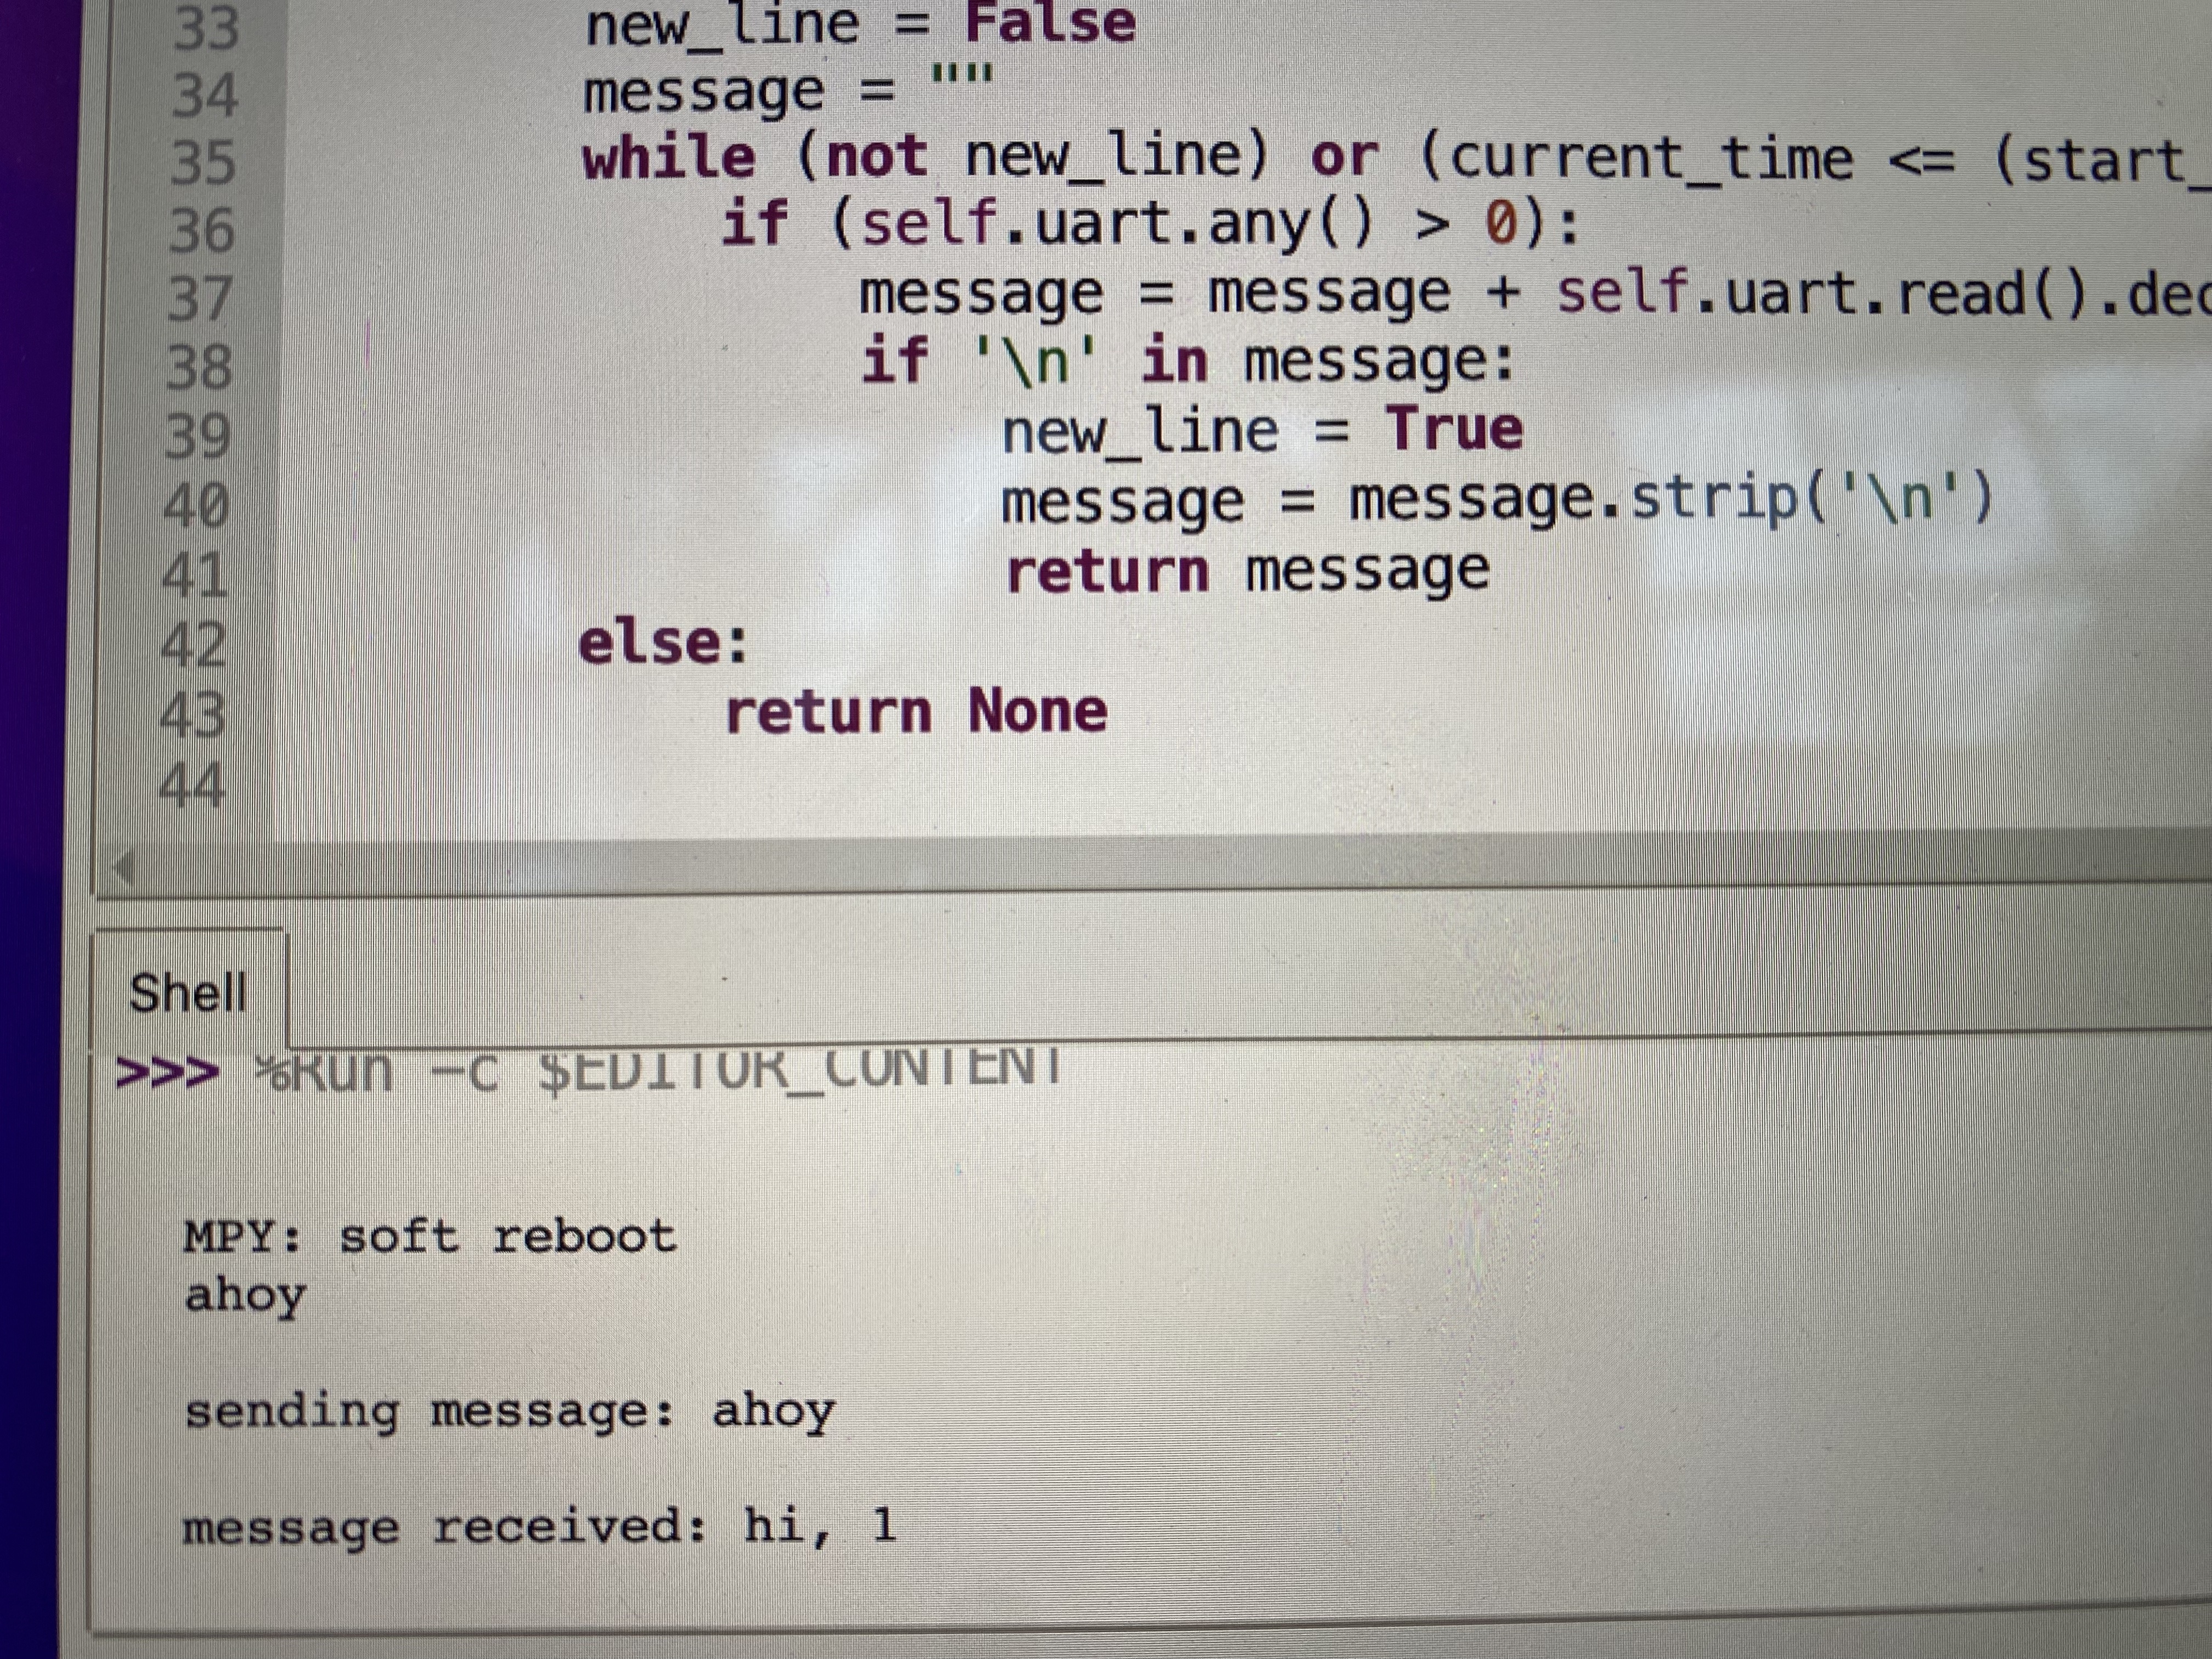
Here is a photo of the two computers communicating with each other:
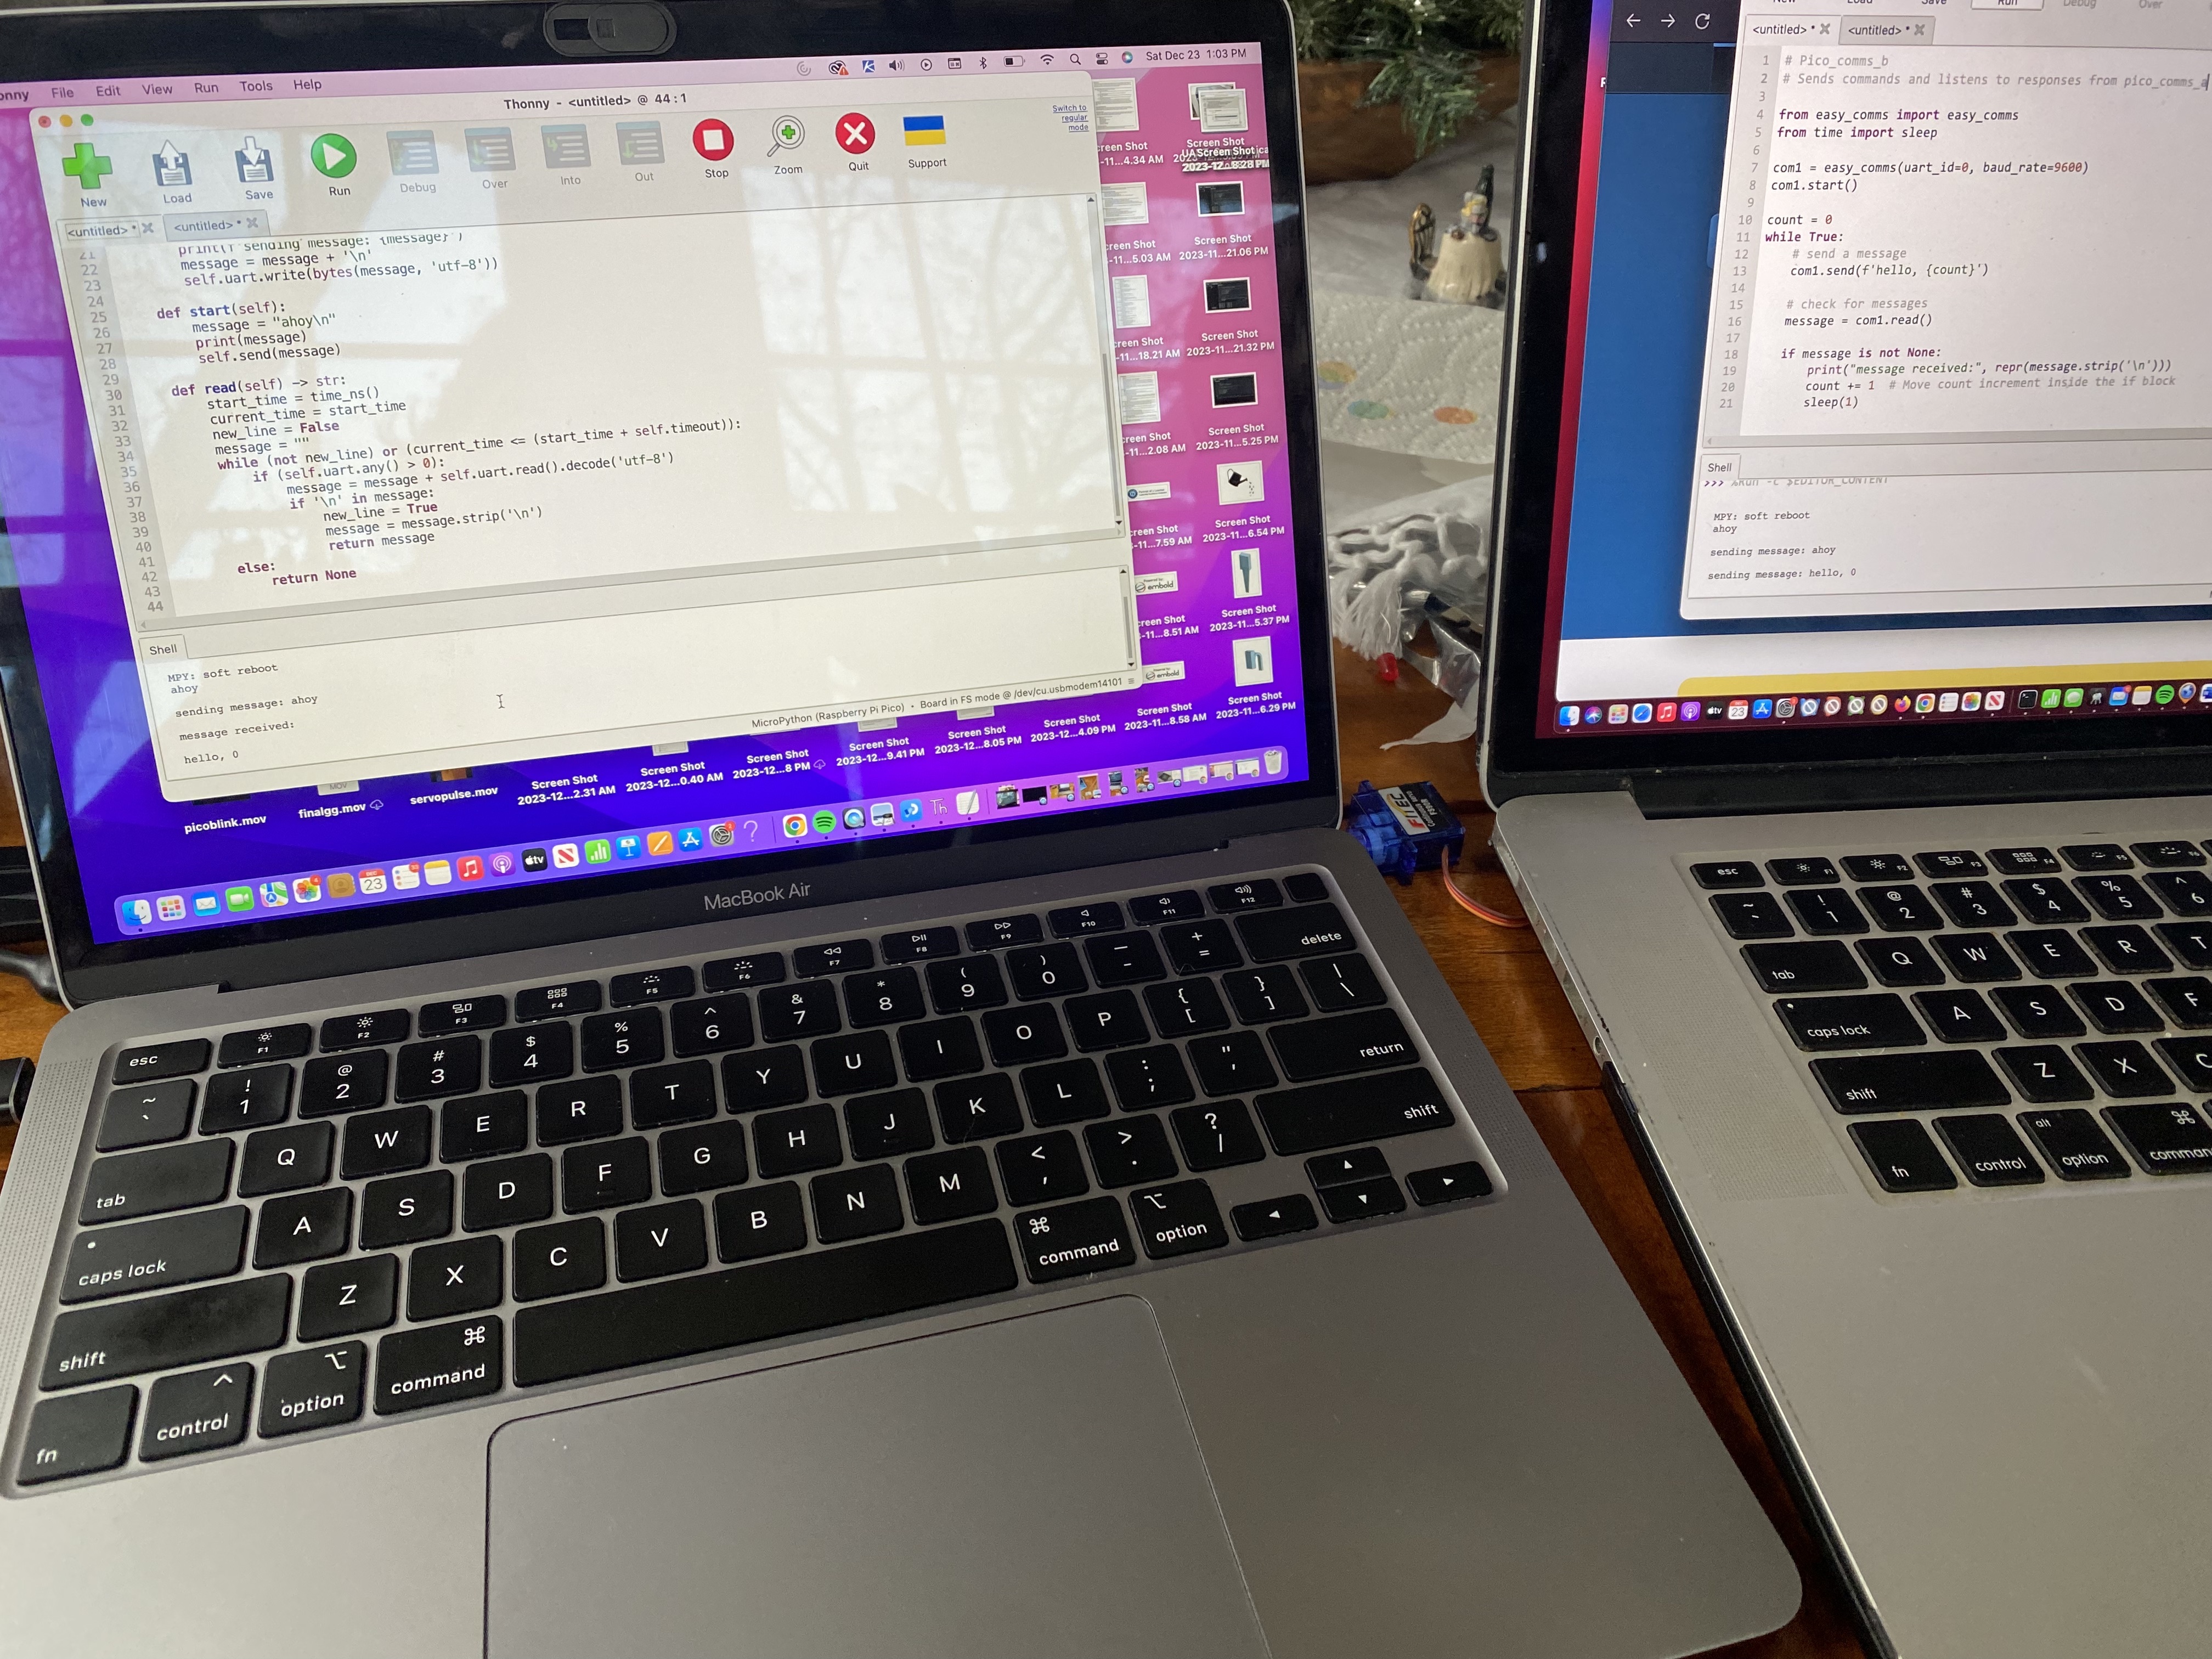
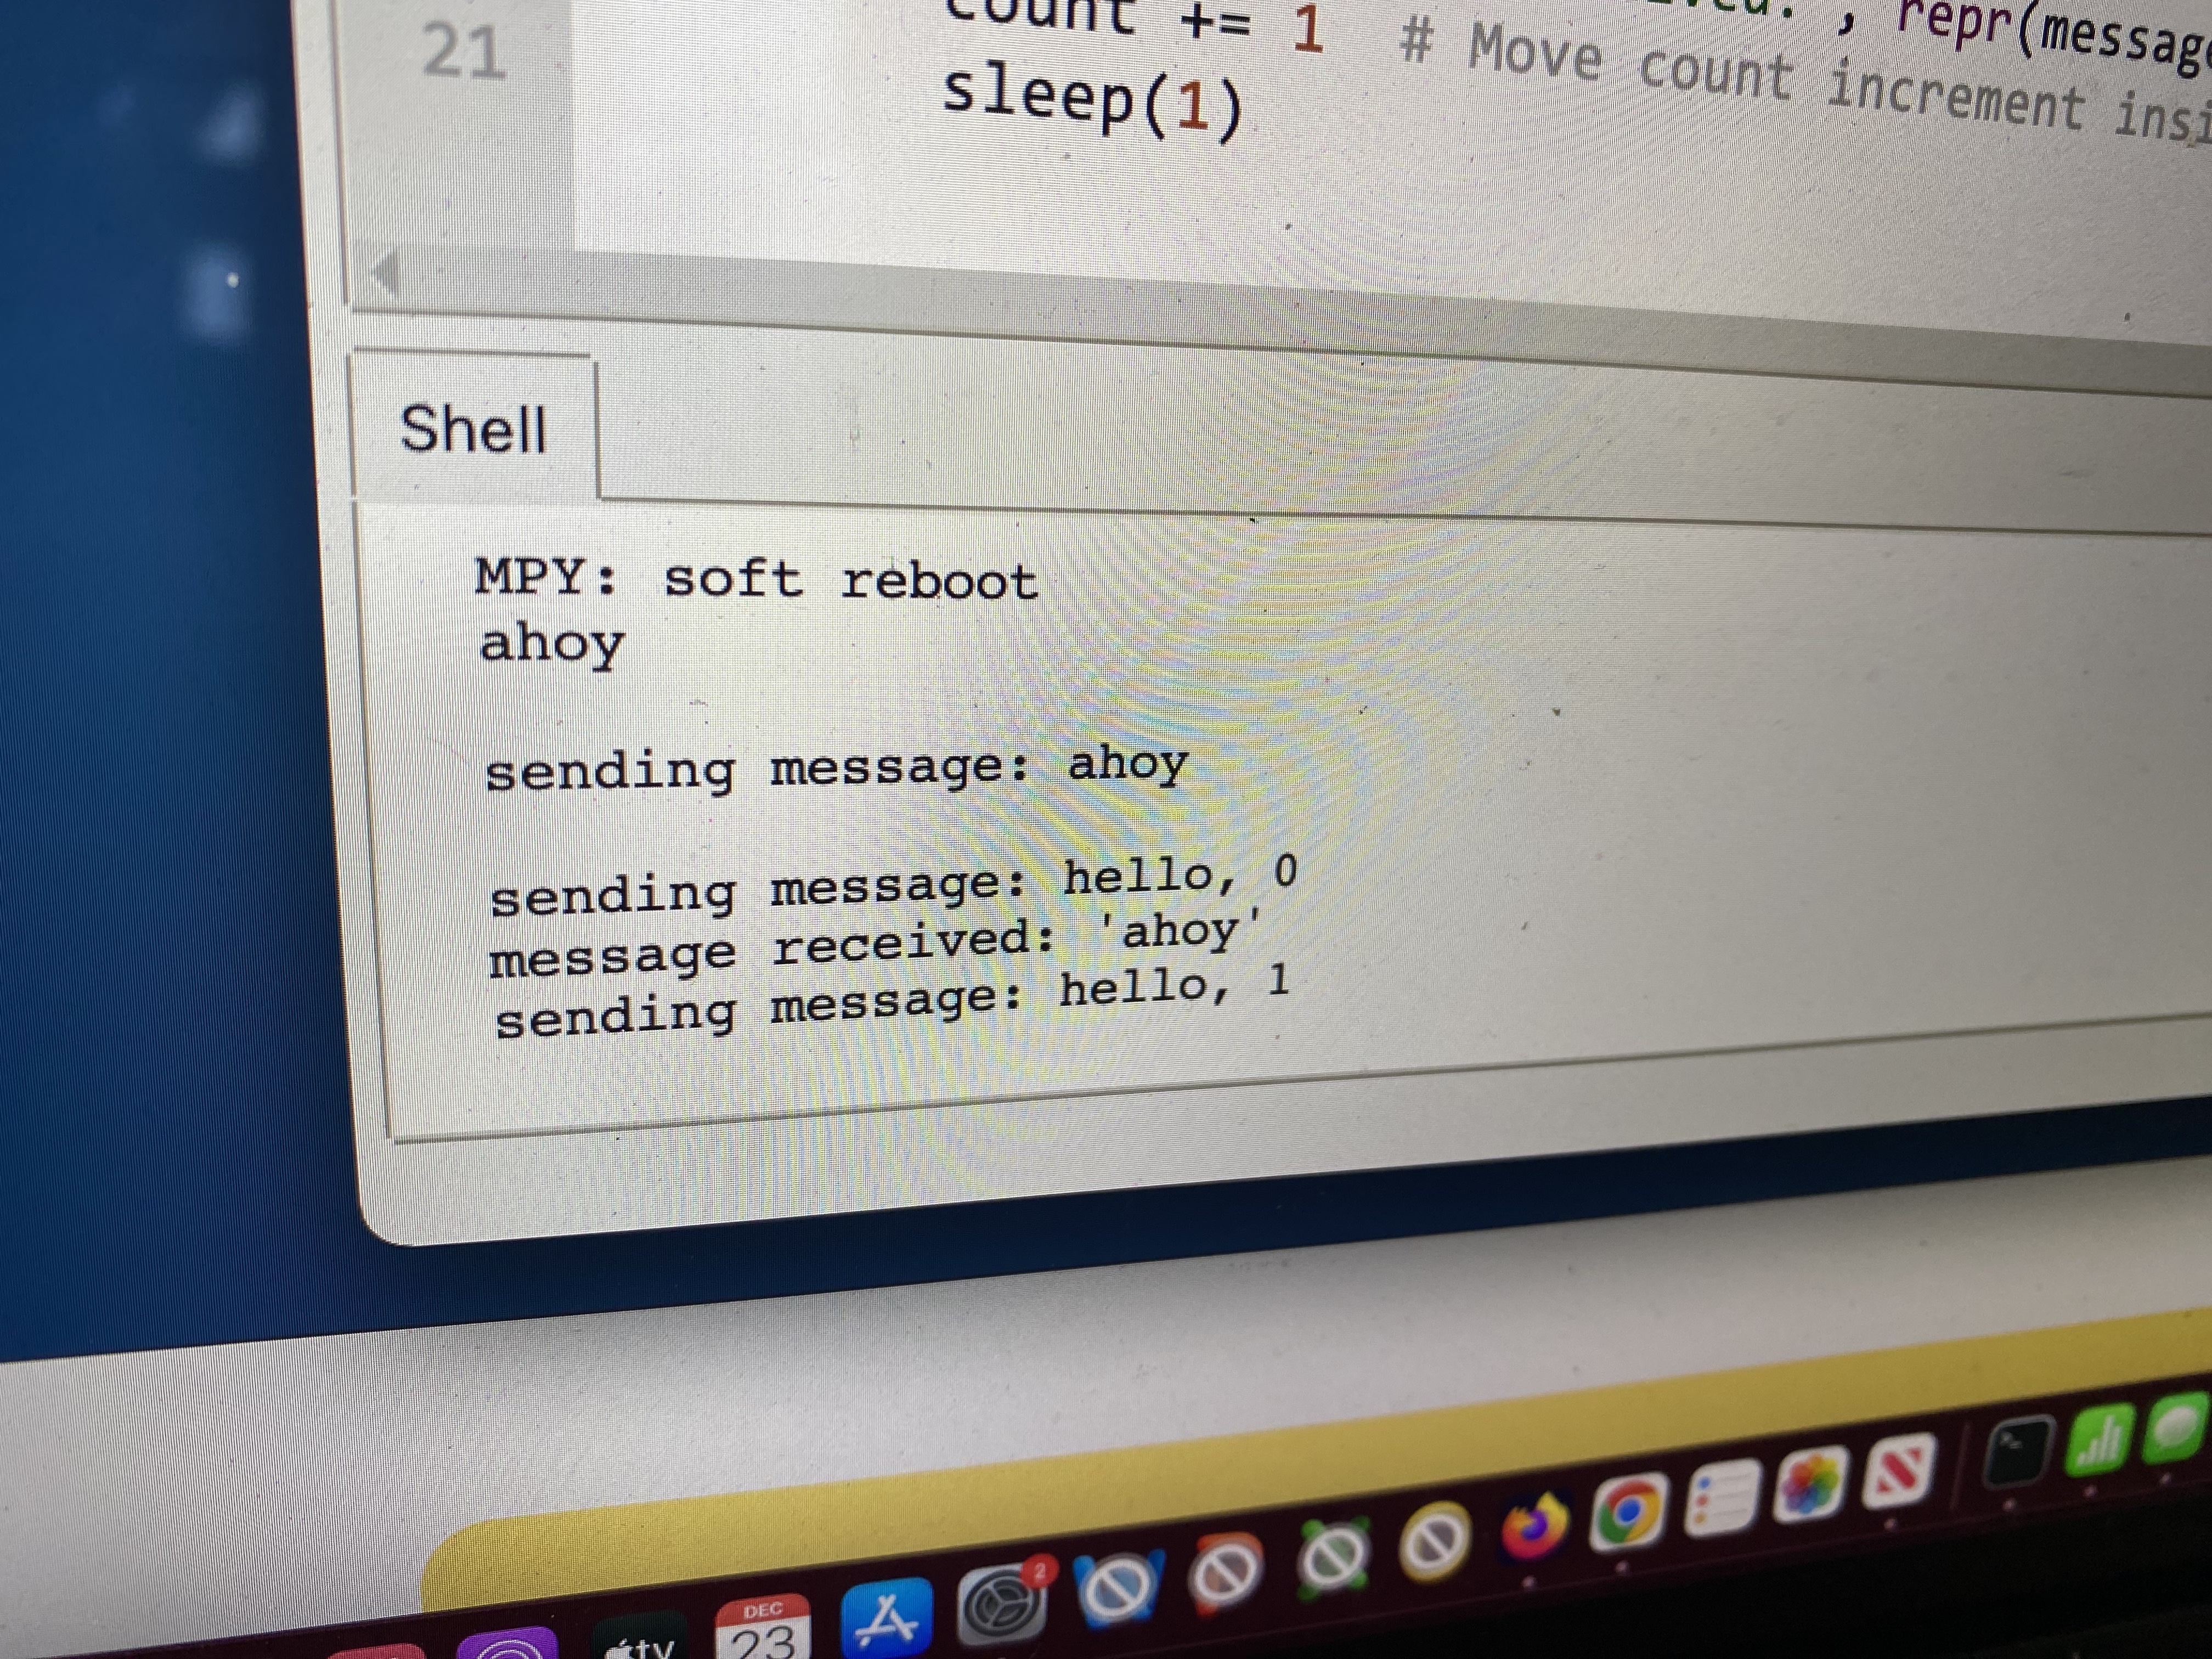
I changed the response to "hi" this time: