Week 4. Embedded programming
Group Assignment
You can find our group assignment linked below:
Individual Assignment
First, download Arduino: https://wiki-content.arduino.cc/en/software
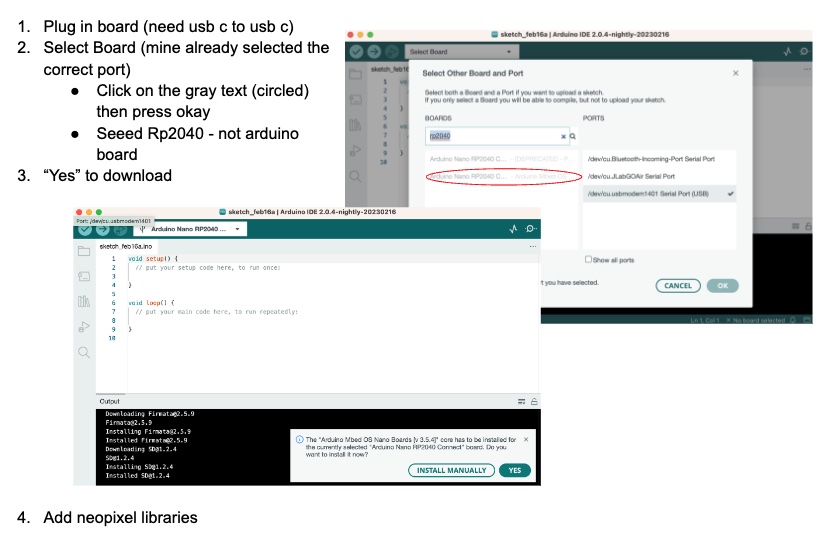
Now watch this video:
Copy and paste the code from this site:

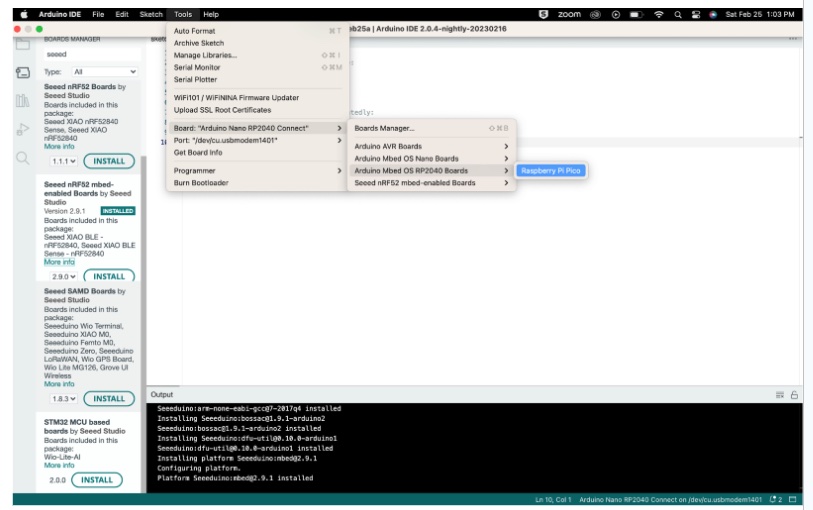
Install the latest version of Seeed:

Select the board "Arduino Nano RP2040 Connect" and then "Raspberry Pi Pico":
Copy and paste the following code (will make “User” pin blink green after 1 second)
// the setup function runs once when you press reset or power the board
void setup()
{
 // initialize digital pin LED_BUILTIN as an output.
 pinMode(LED_BUILTIN, OUTPUT);
}
// the loop function runs over and over again forever
void loop()
{
 digitalWrite(LED_BUILTIN, HIGH);   // turn the LED on (HIGH is the voltage level)
 delay(5000);                       // wait for a second
 digitalWrite(LED_BUILTIN, LOW);    // turn the LED off by making the voltage LOW
 delay(2000);                       // wait for a second
}
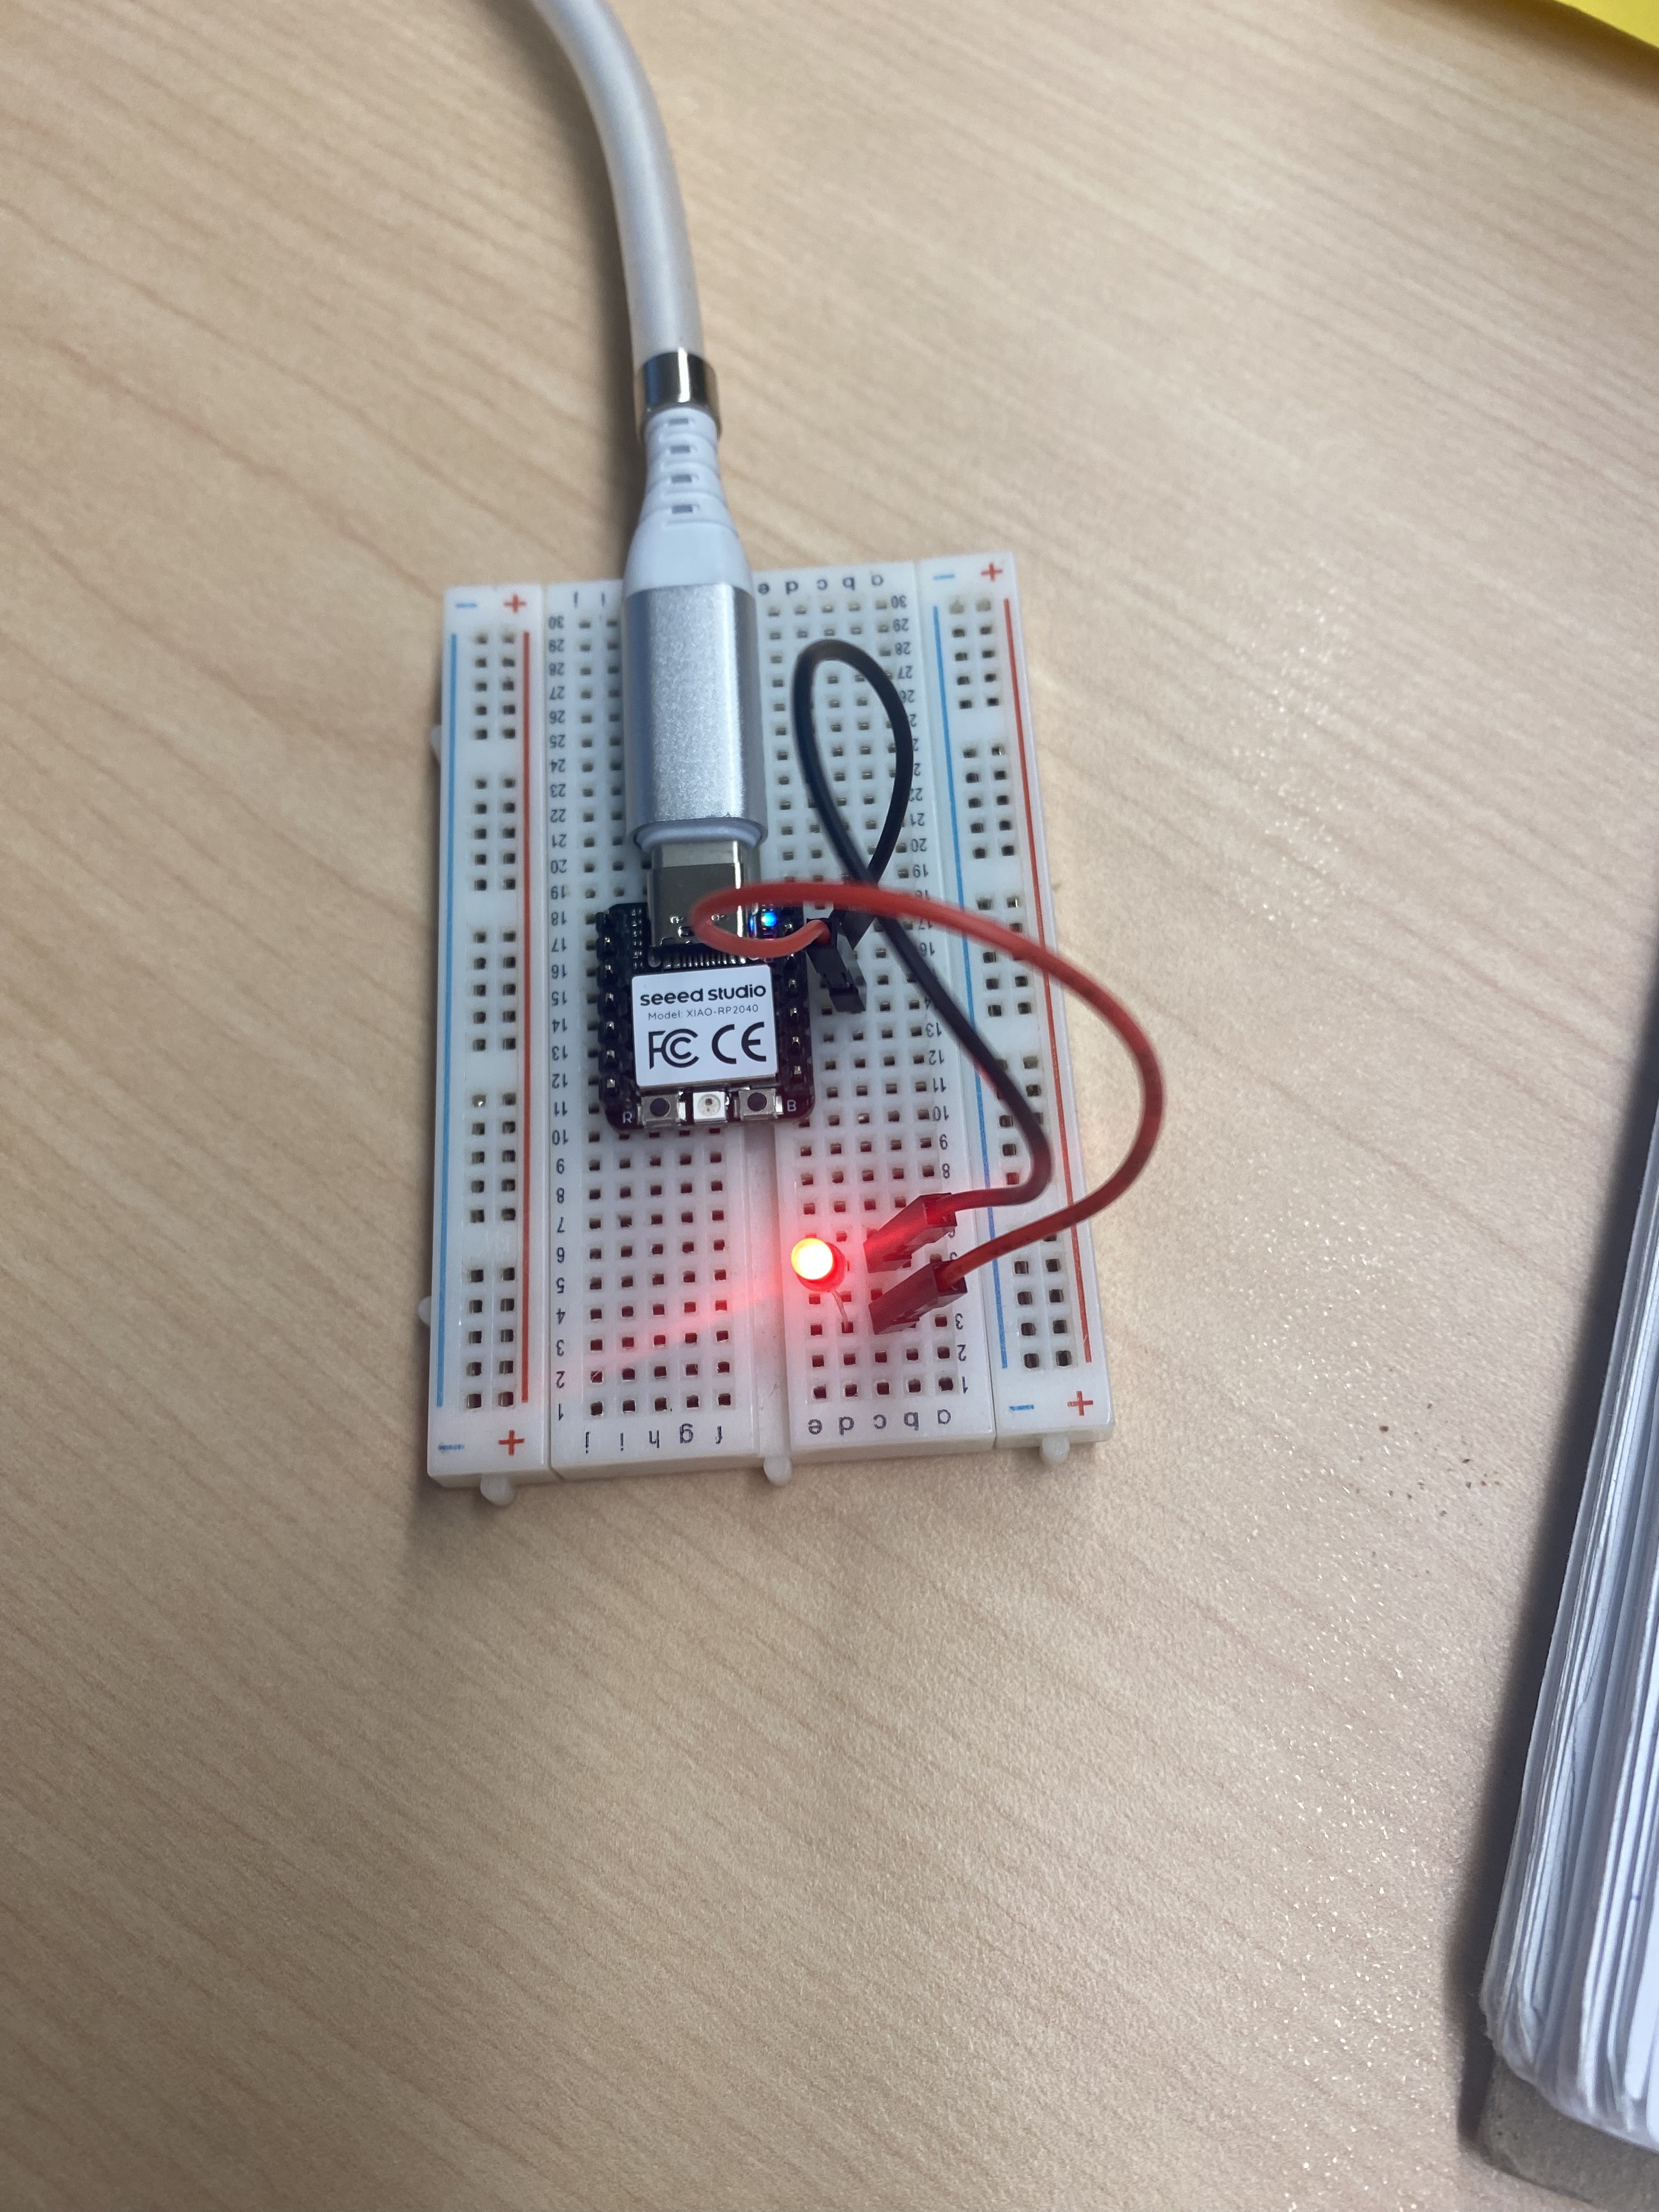
Here is the LED in action: