Project Development
Individual Assignment
This week we are tasked with completing our final projects and tracking the progress.
Kitten Mitten - Kitten Toy Progress
I am about a week away from the deadline to have local evaluations so I wanted to update this page to match. My two colleagues and I who have been undergoing this Fab Academy course had a very very busy summer with our job so we opted for the fall/winter timeline for finishing. My deadline for local evaluation is November 15. The purpose of my project is to be a cat toy that I can use to keep my cats distracted while I work from home, do dishes, cook, or get something done that needs my attention around my house. It will feature a 3D printed cat that moves its paw, controlling the direction of the laser pointer, a laser cut box that houses the electronics, vinyl cut facial features and potentially stripes (if time allows), and marketing/project name vinyl cut on the box.
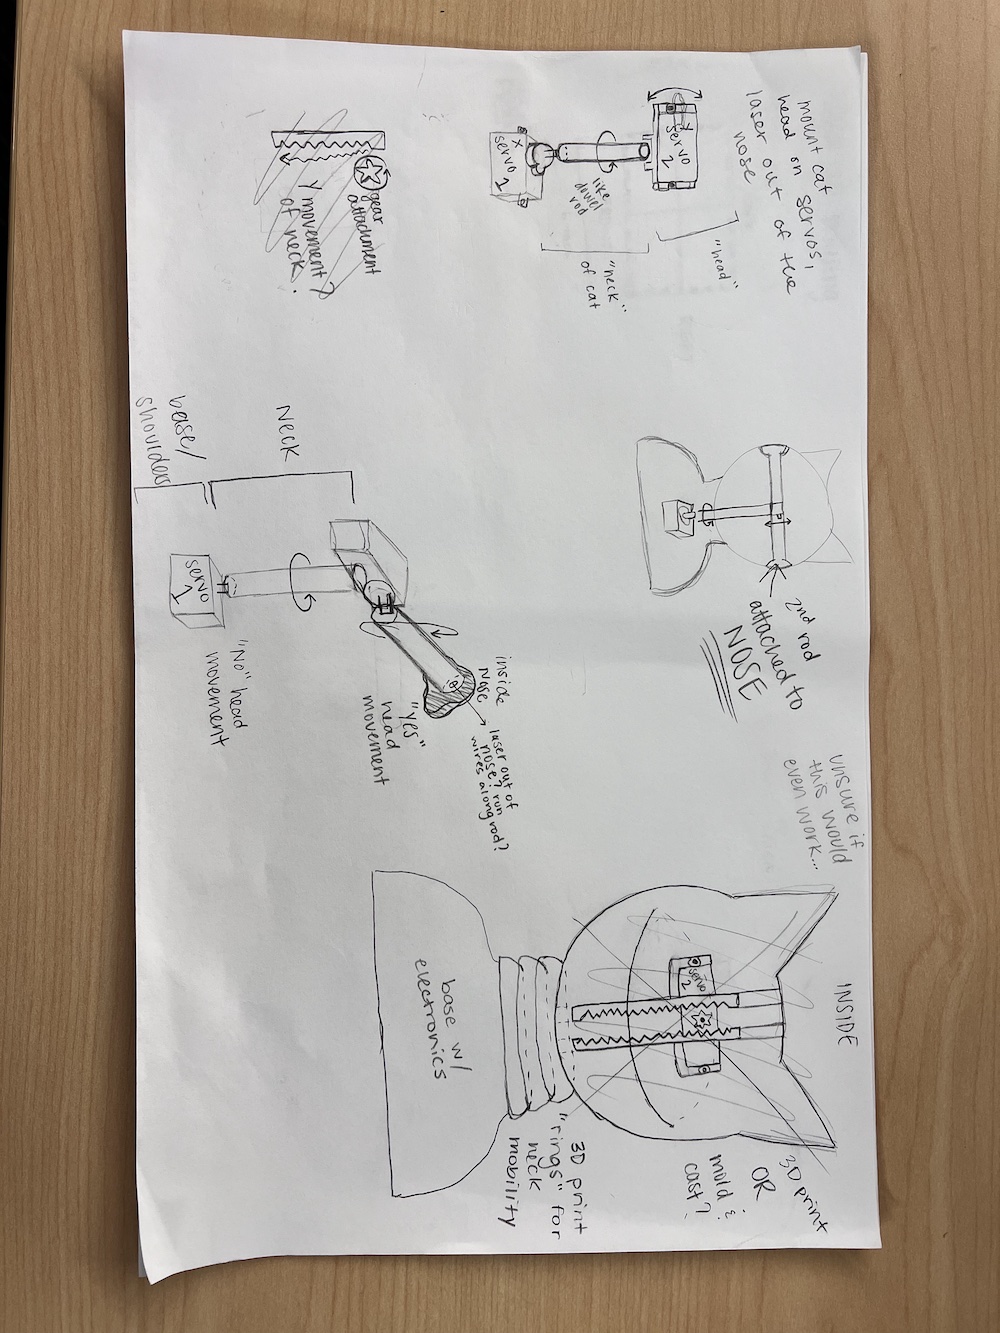
This is the very first sketch I did.
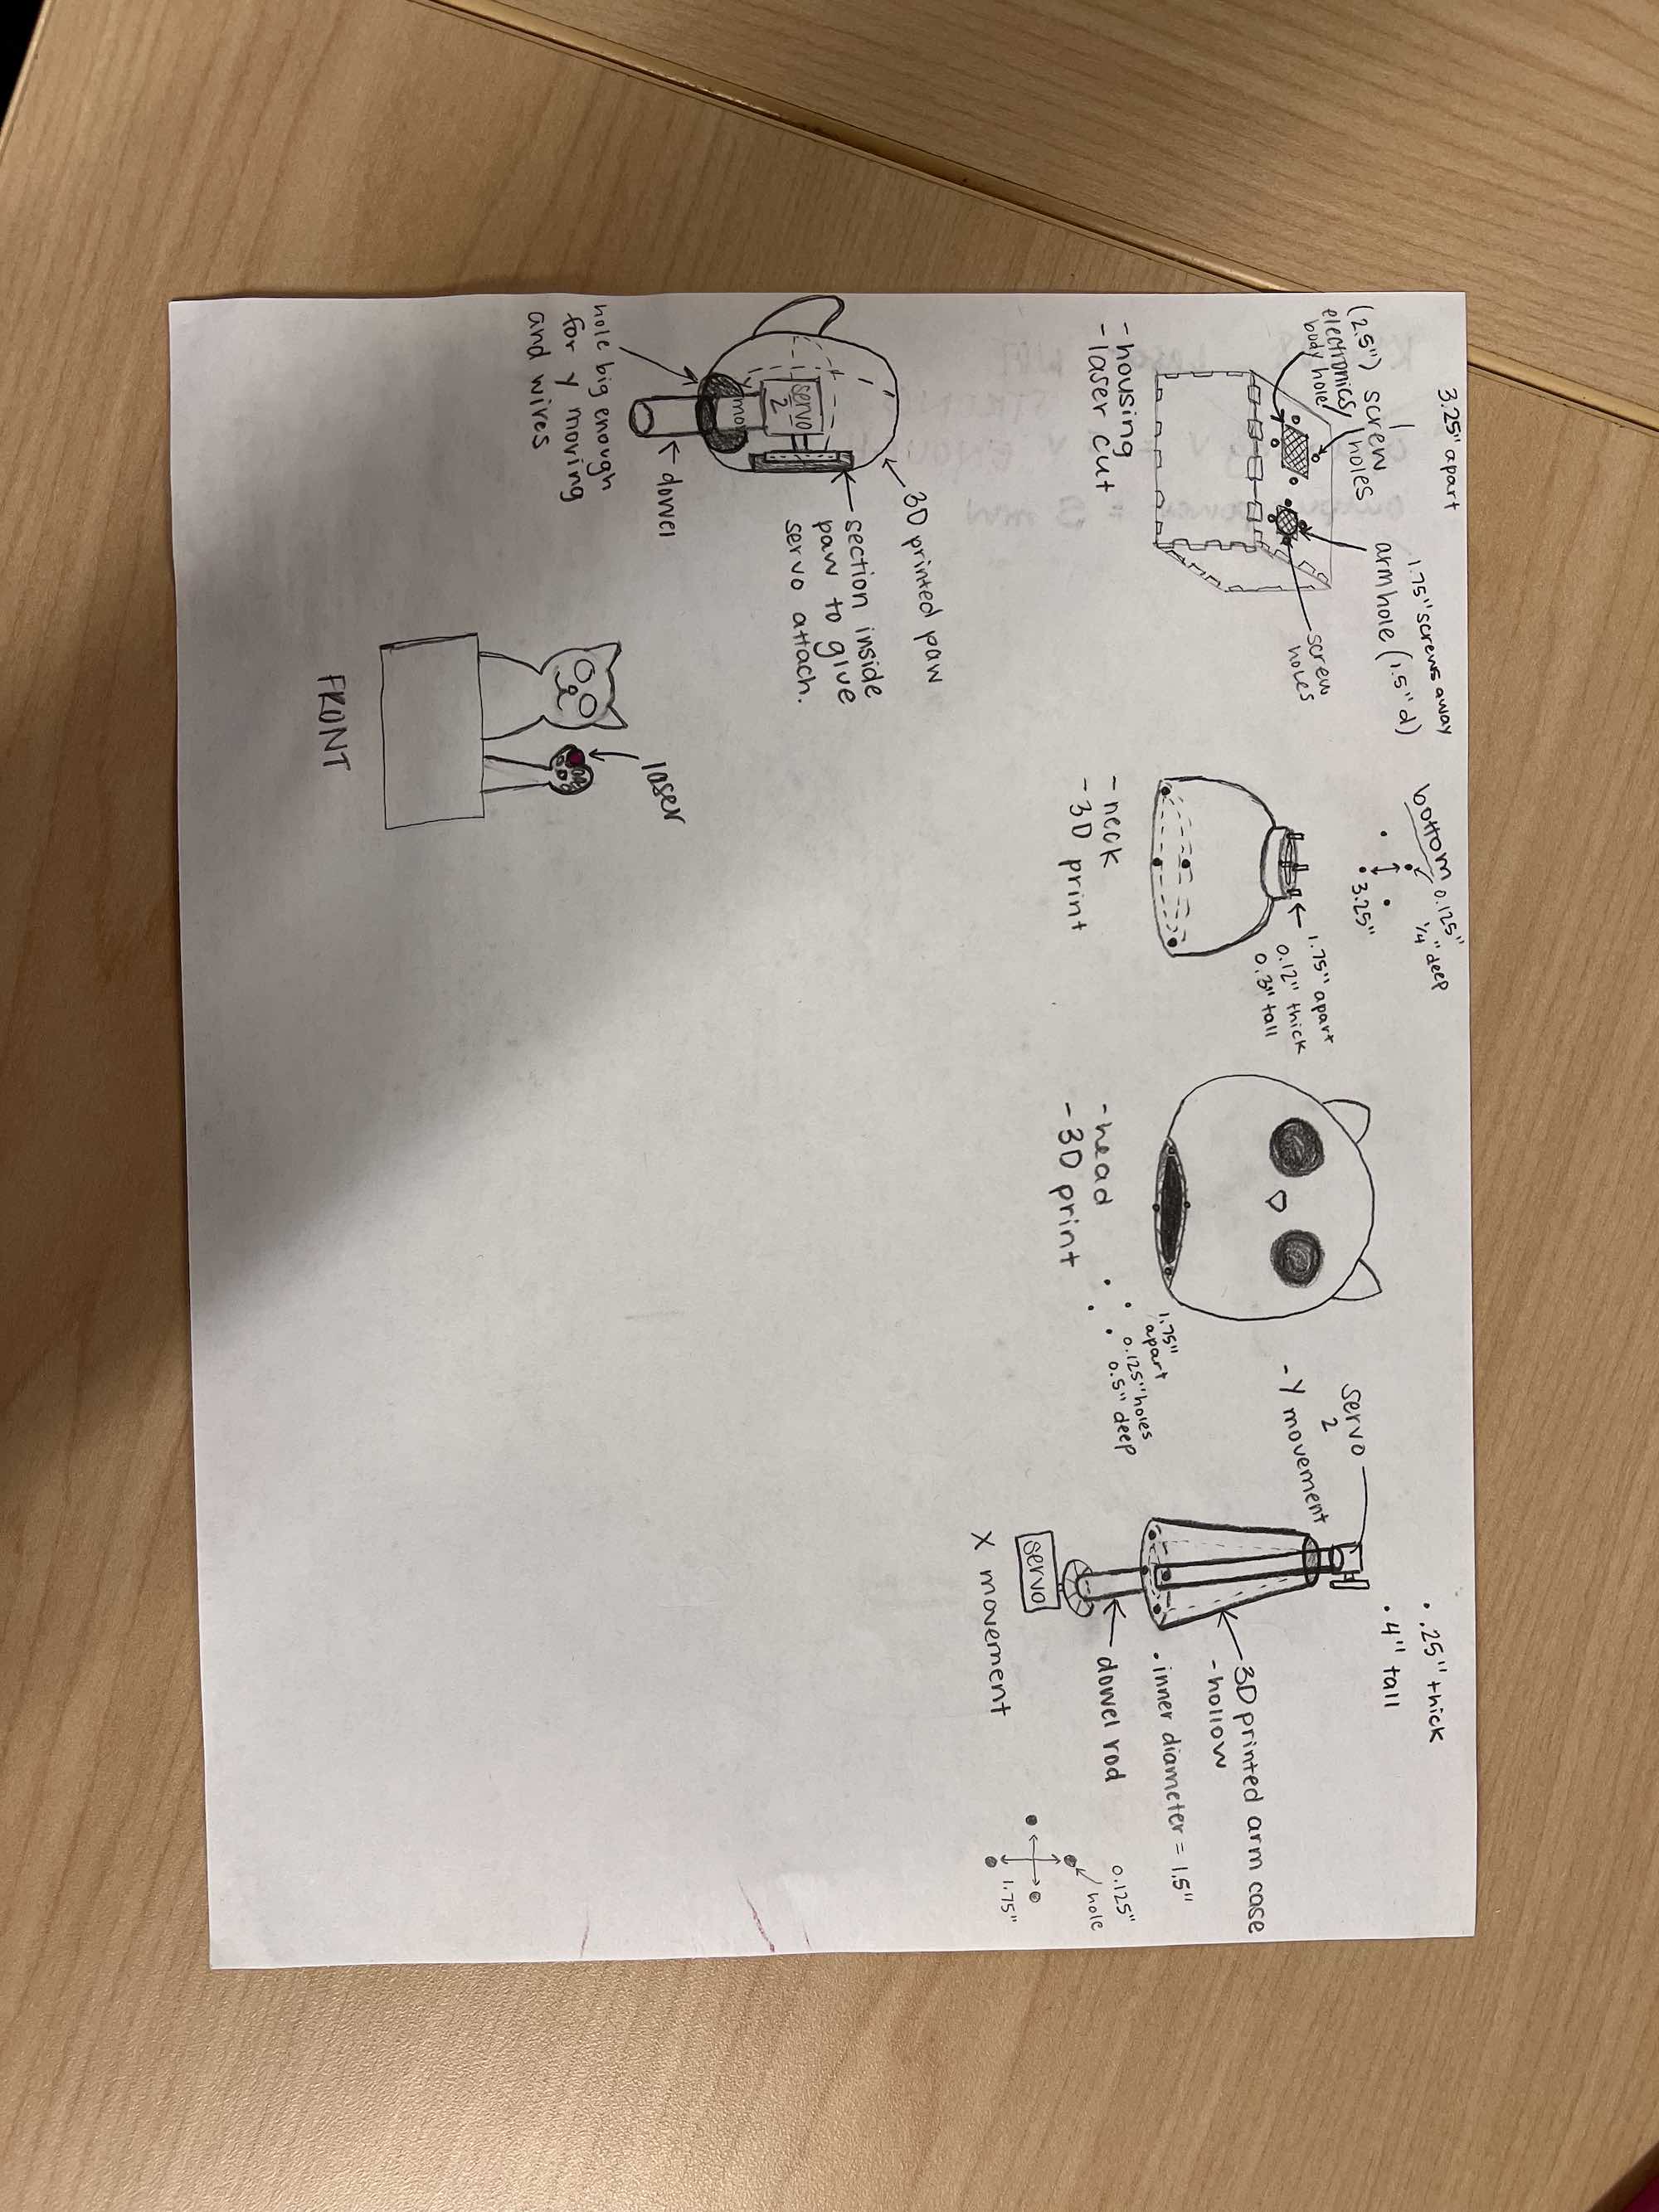
This is the "final" version of my final project sketches.
3D Printing
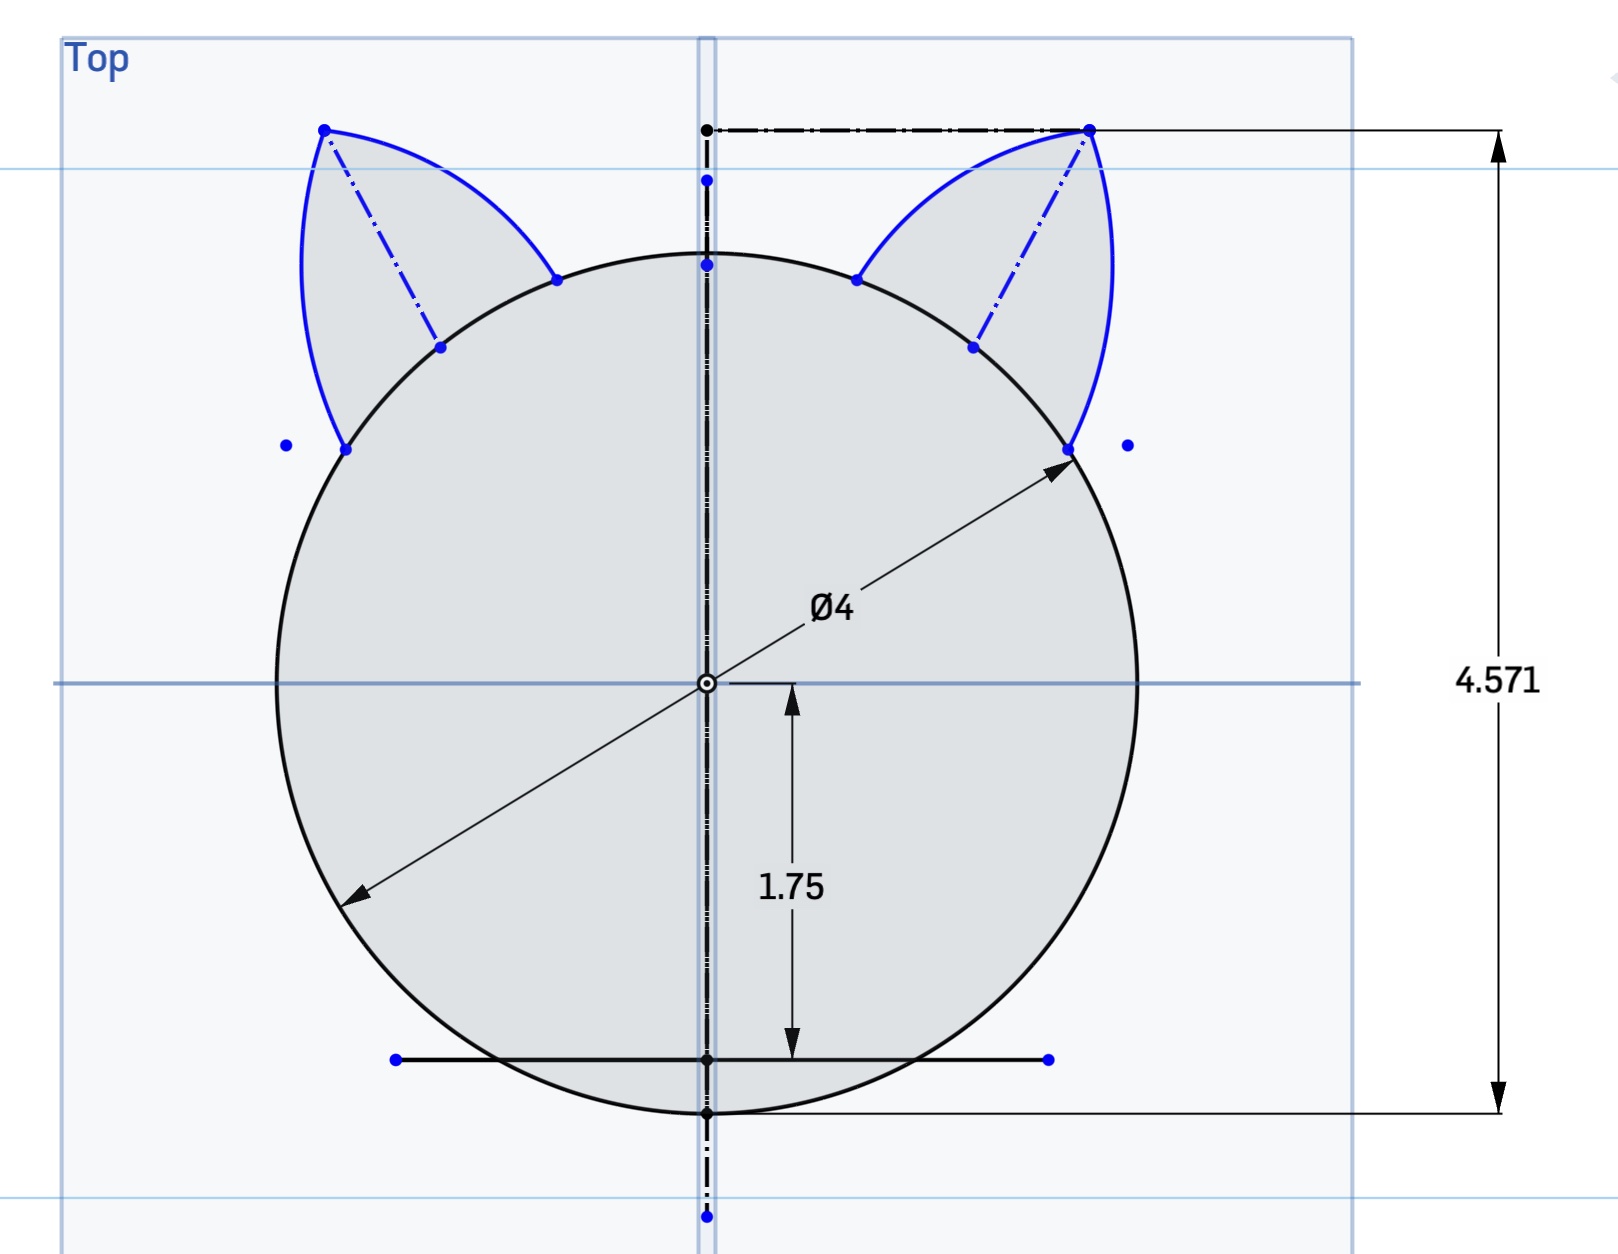
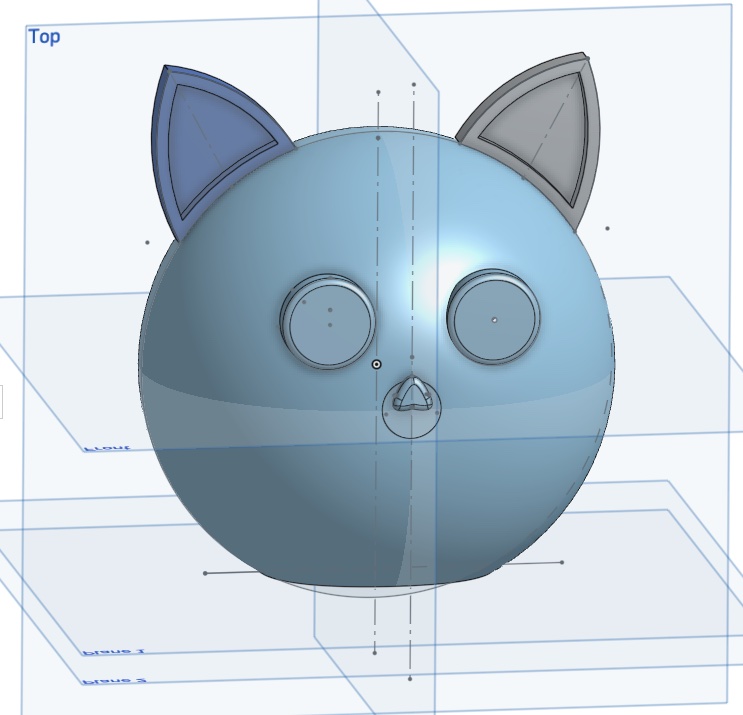
I am finished with 3D modeling my final project design in Onshape. On my week 2 page, you will see where my skill levels were when I first began using online modeling software - I was not good. There are many things I learned while using Onshape for the duration of this course - most of which just included knowing what tools did what.
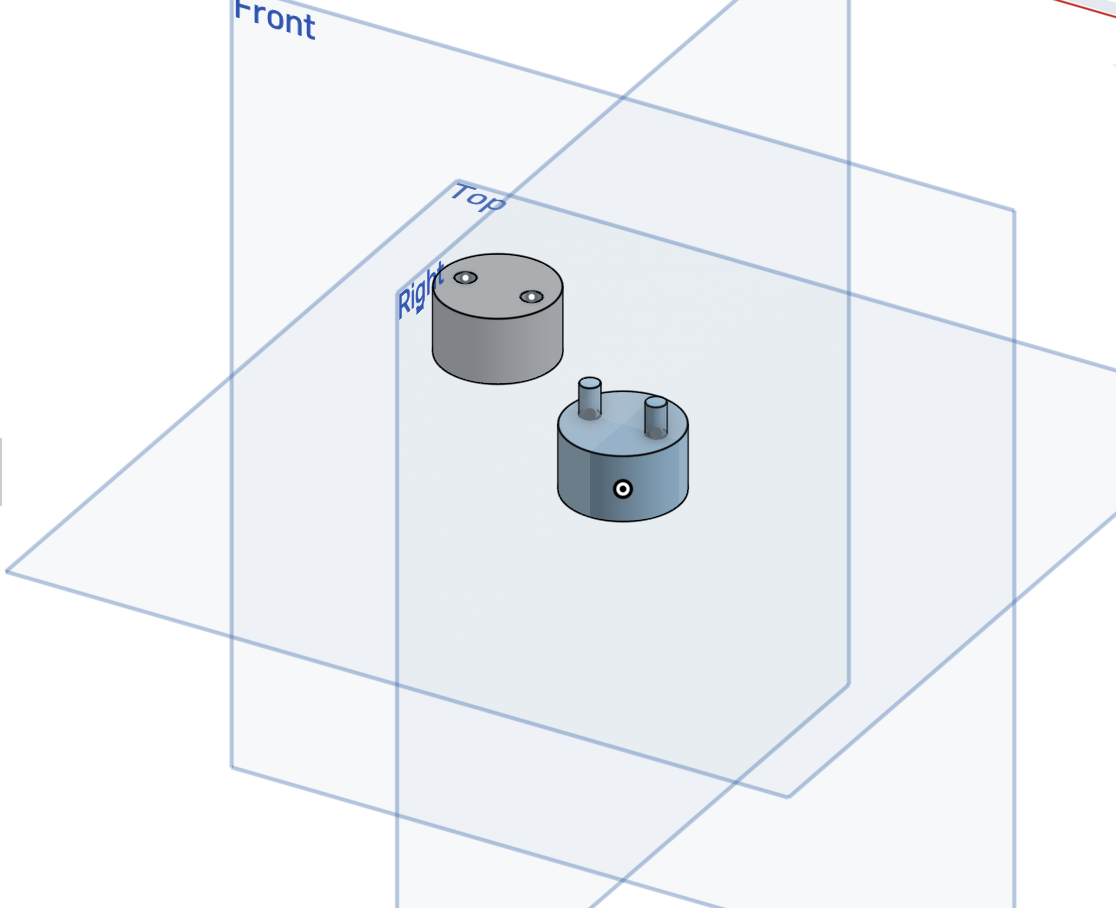
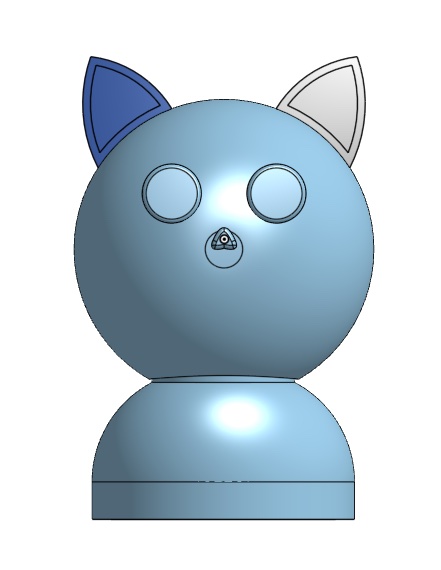
The parts of my project that I am 3D printing include the cat head, body, arm, and paw. So far, I have successfully printed the head and neck. I am currently wainting on another printer to free up so I can print the arm and paw later today or tomorrow. Originally, my cat head would split in half for ease of access to electronics, but I am planning to change the general idea for the electronics.
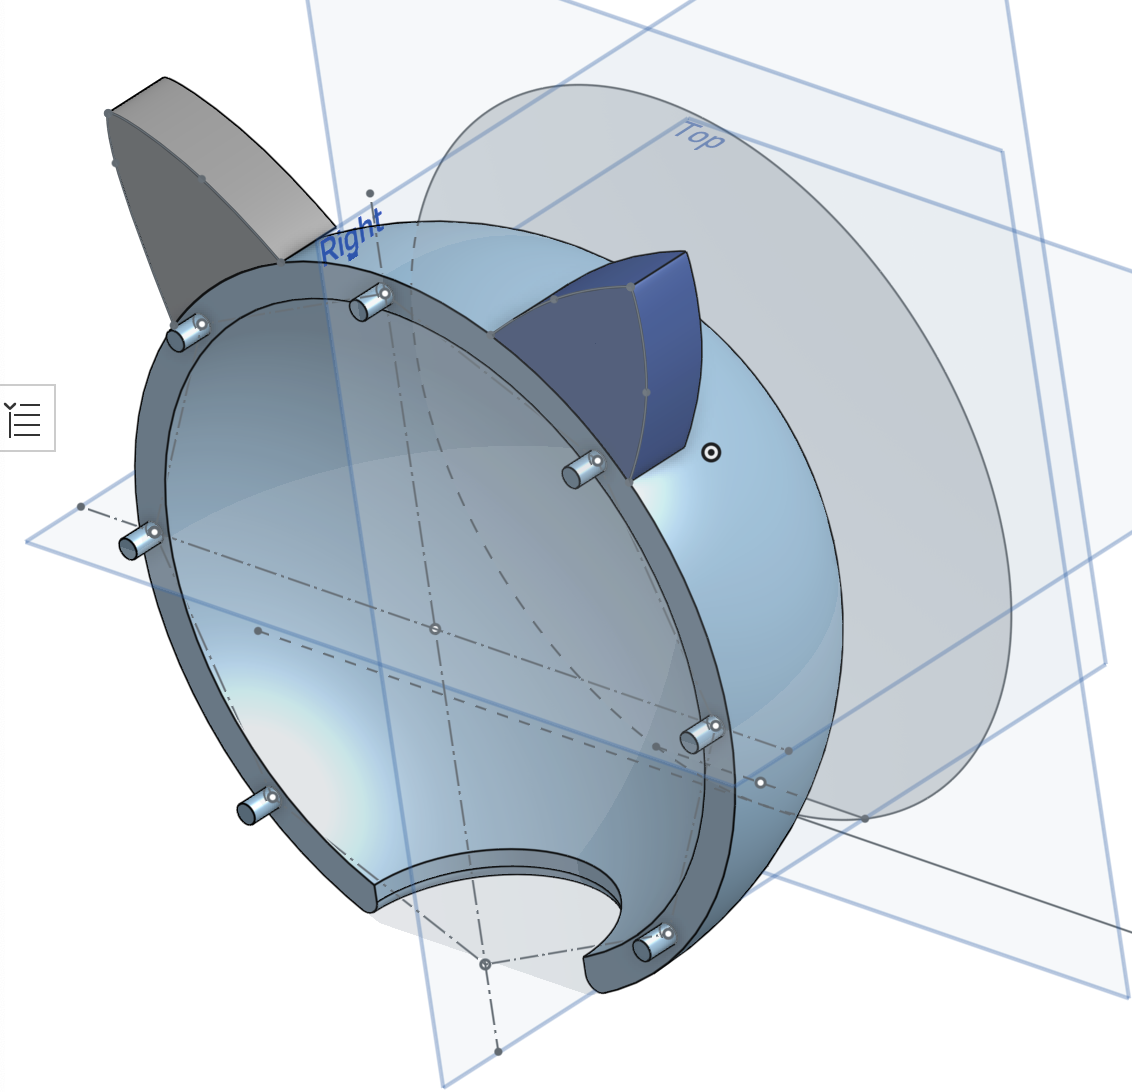
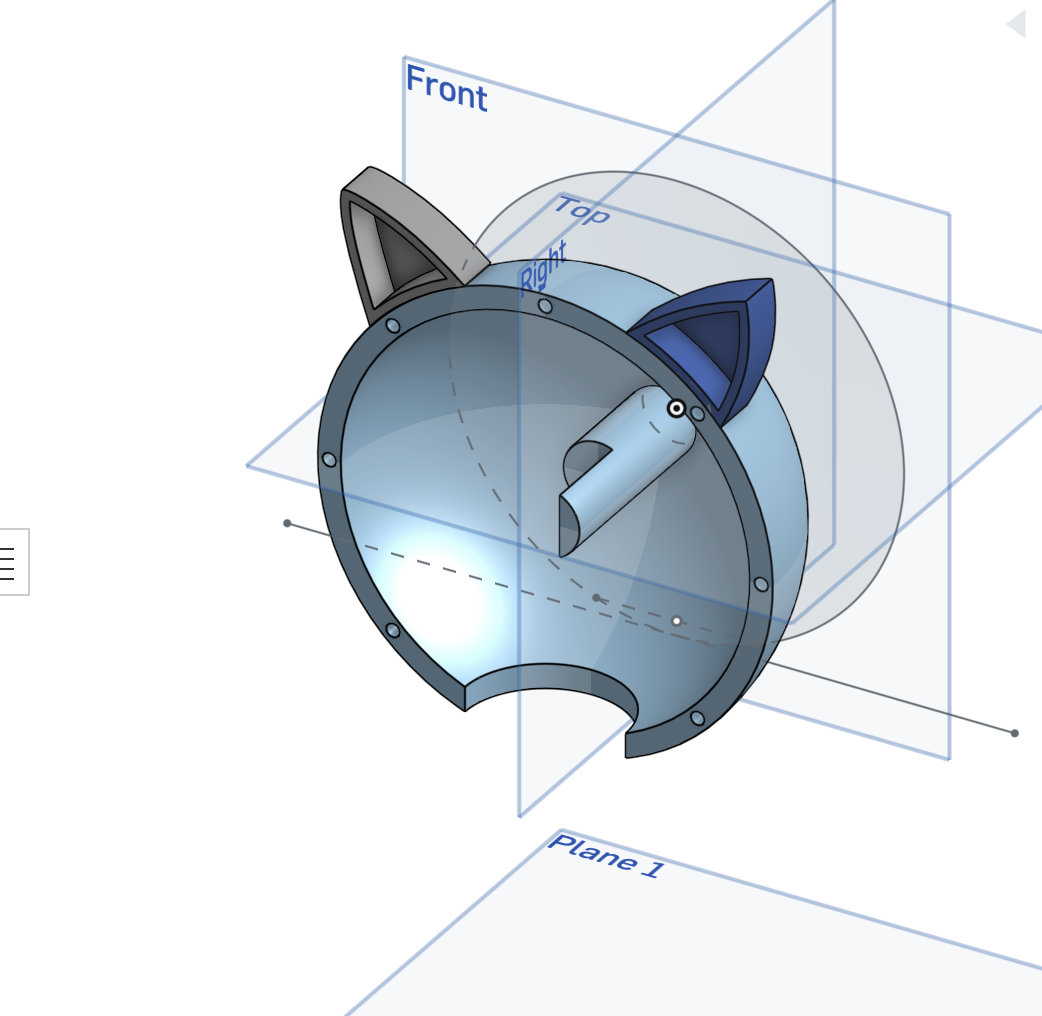
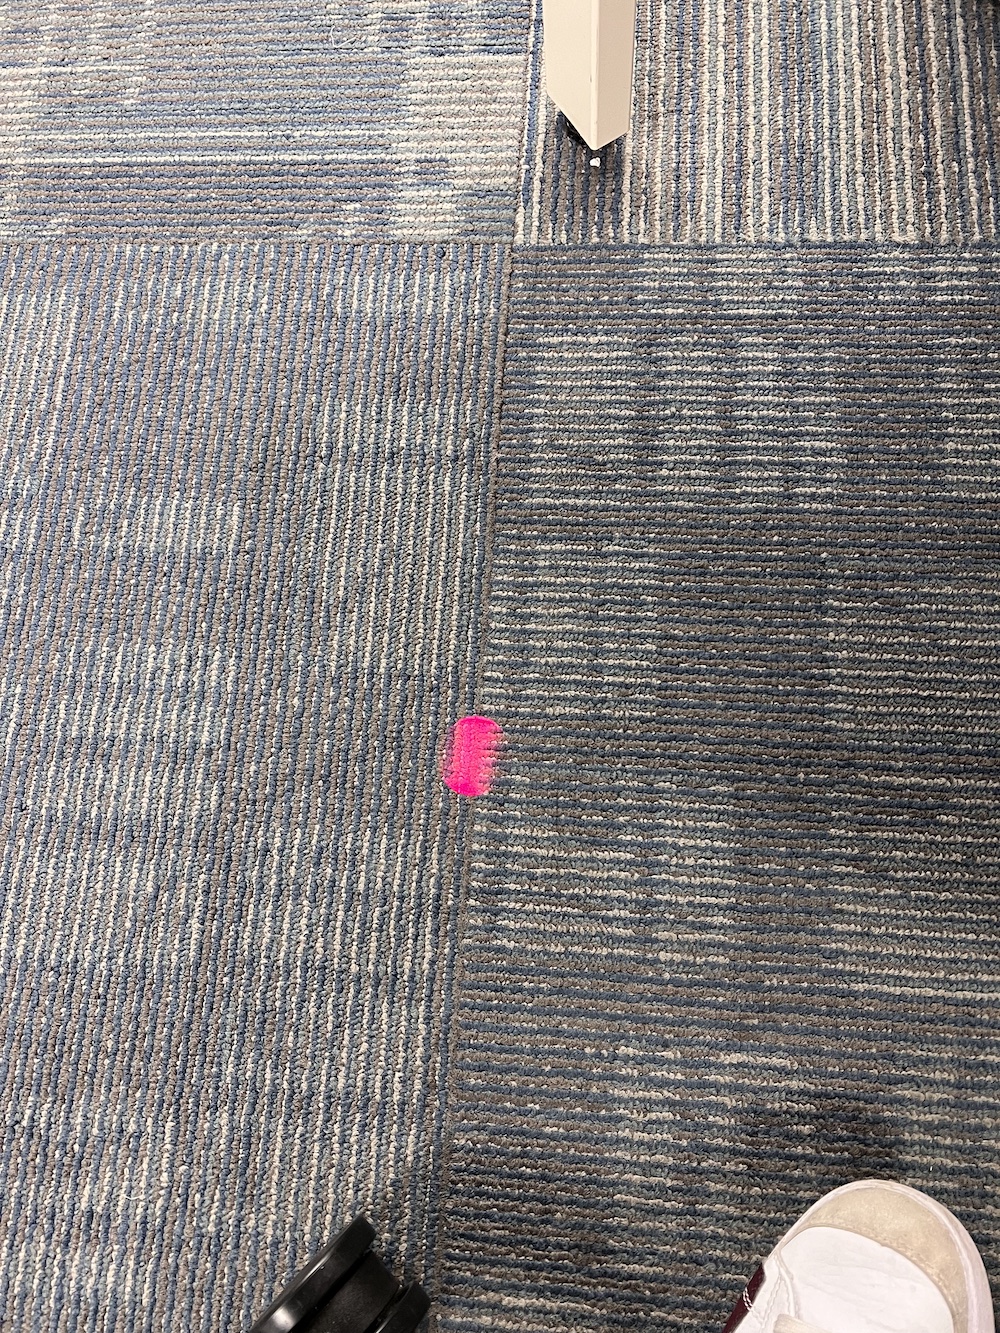
The cat head images above are from the first iteration of my design. One day I was testing the strength of the laser component alone, and realized that if I was testing it, I shouldn't just be making sure I can power it... I should also make sure that the laser dot will not diffuse too much when aimed at the floor. When I ended up testing the strength of the laser from farther away, it did not go well. The laser dot, as I was afraid, was too diffused from the height of my desk, which is at least a foot shorter than the countertop I was planning on placing my toy on. I needed to come up with another option, and FAST.
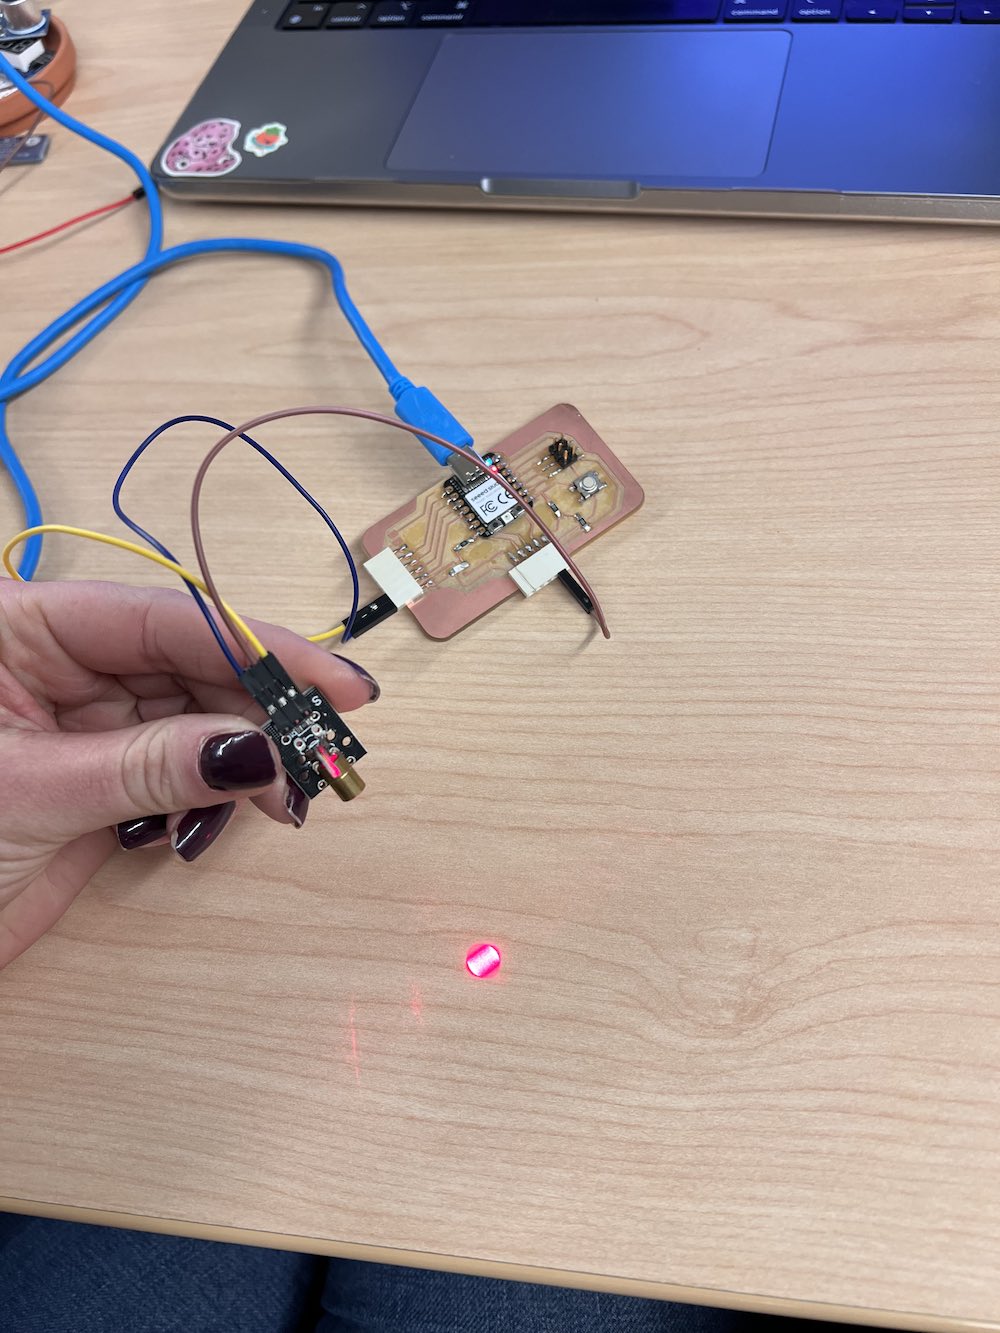

To test the laser, I used code from ArduinoModules - KY-008 Laser Transmitter Module . This page gave me most of the information I needed to know about the module, including its power, pinouts, and example code to test.
My solution was to scrap the laser component piece and to use what I already had available to me. I knew at home I had a laser pointer that my cats LOVE. It has multiple settings so I can use a red laser, blue light, or a flashlight. Furthermore, the red laser has multiple settings as well. The laser can change its shape from just the standard laser dot, to a mouse shape, star, smiley face, or a butterfly. I can tell my cats like the mouse and butterfly shaped laser because they go even harder while trying to catch the dot. I am hoping that the removal of the laser within the cat will be okay. The only small changes will be: not including the laser in the code when programming, not including an attachment point on the inside of the paw shape, and not needing additional wires or an additional power supply to power the laser.

I also plan on using a 3D scanner to scan a model paw I made from clay. I did this to ensure that I had the proper fit for where I am going to place my external laser pointer. I decided to keep the laser pointer separate from the whole system. This means the electronics part of my project, will mostly be the necessary connections for my two servos (the moving function on my robot).
Laser Cutting
I am in the process of gettin gmore materials to use for the laser cutter. The materials have not yet been delivered. This task will need to be completed as soon as the wood and/or acrylic are shipped. I have the design file done and ready to go.
Front of Box
Back of Box
Bottom of Box
Top of Box
Short Sides of Box (Left & Right)
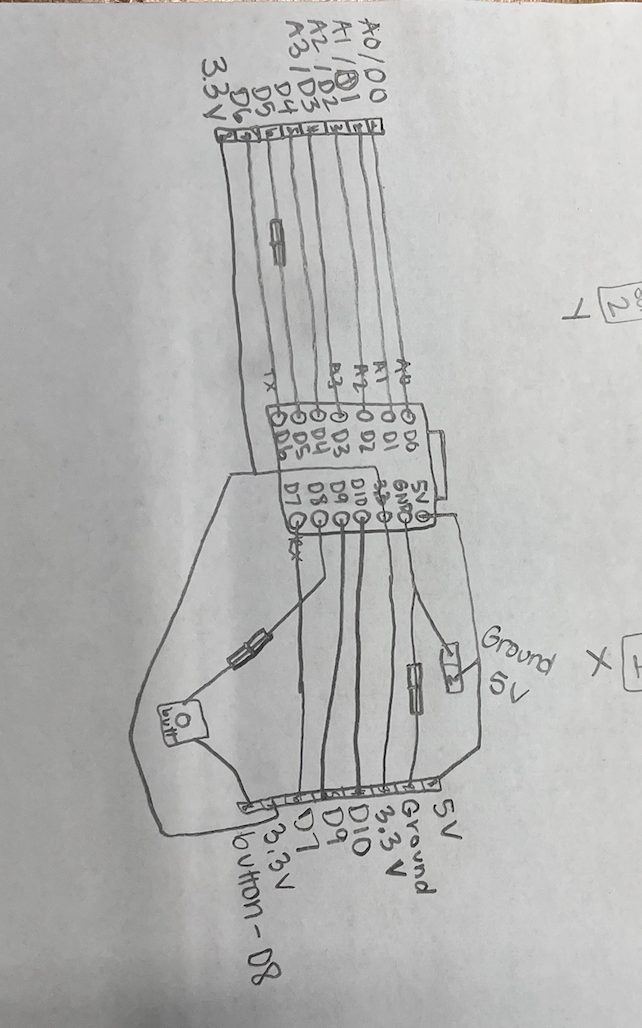
Kicad
To begin my electronics component, I designed a PCB using the XIAO RP2040 as my microcontroller. I did this in Kicad. I have successfully exported and milled this PCB, but have not yet milled the components to it yet and tested its capabilities. I will include progress pictures below and Kicad files to download.
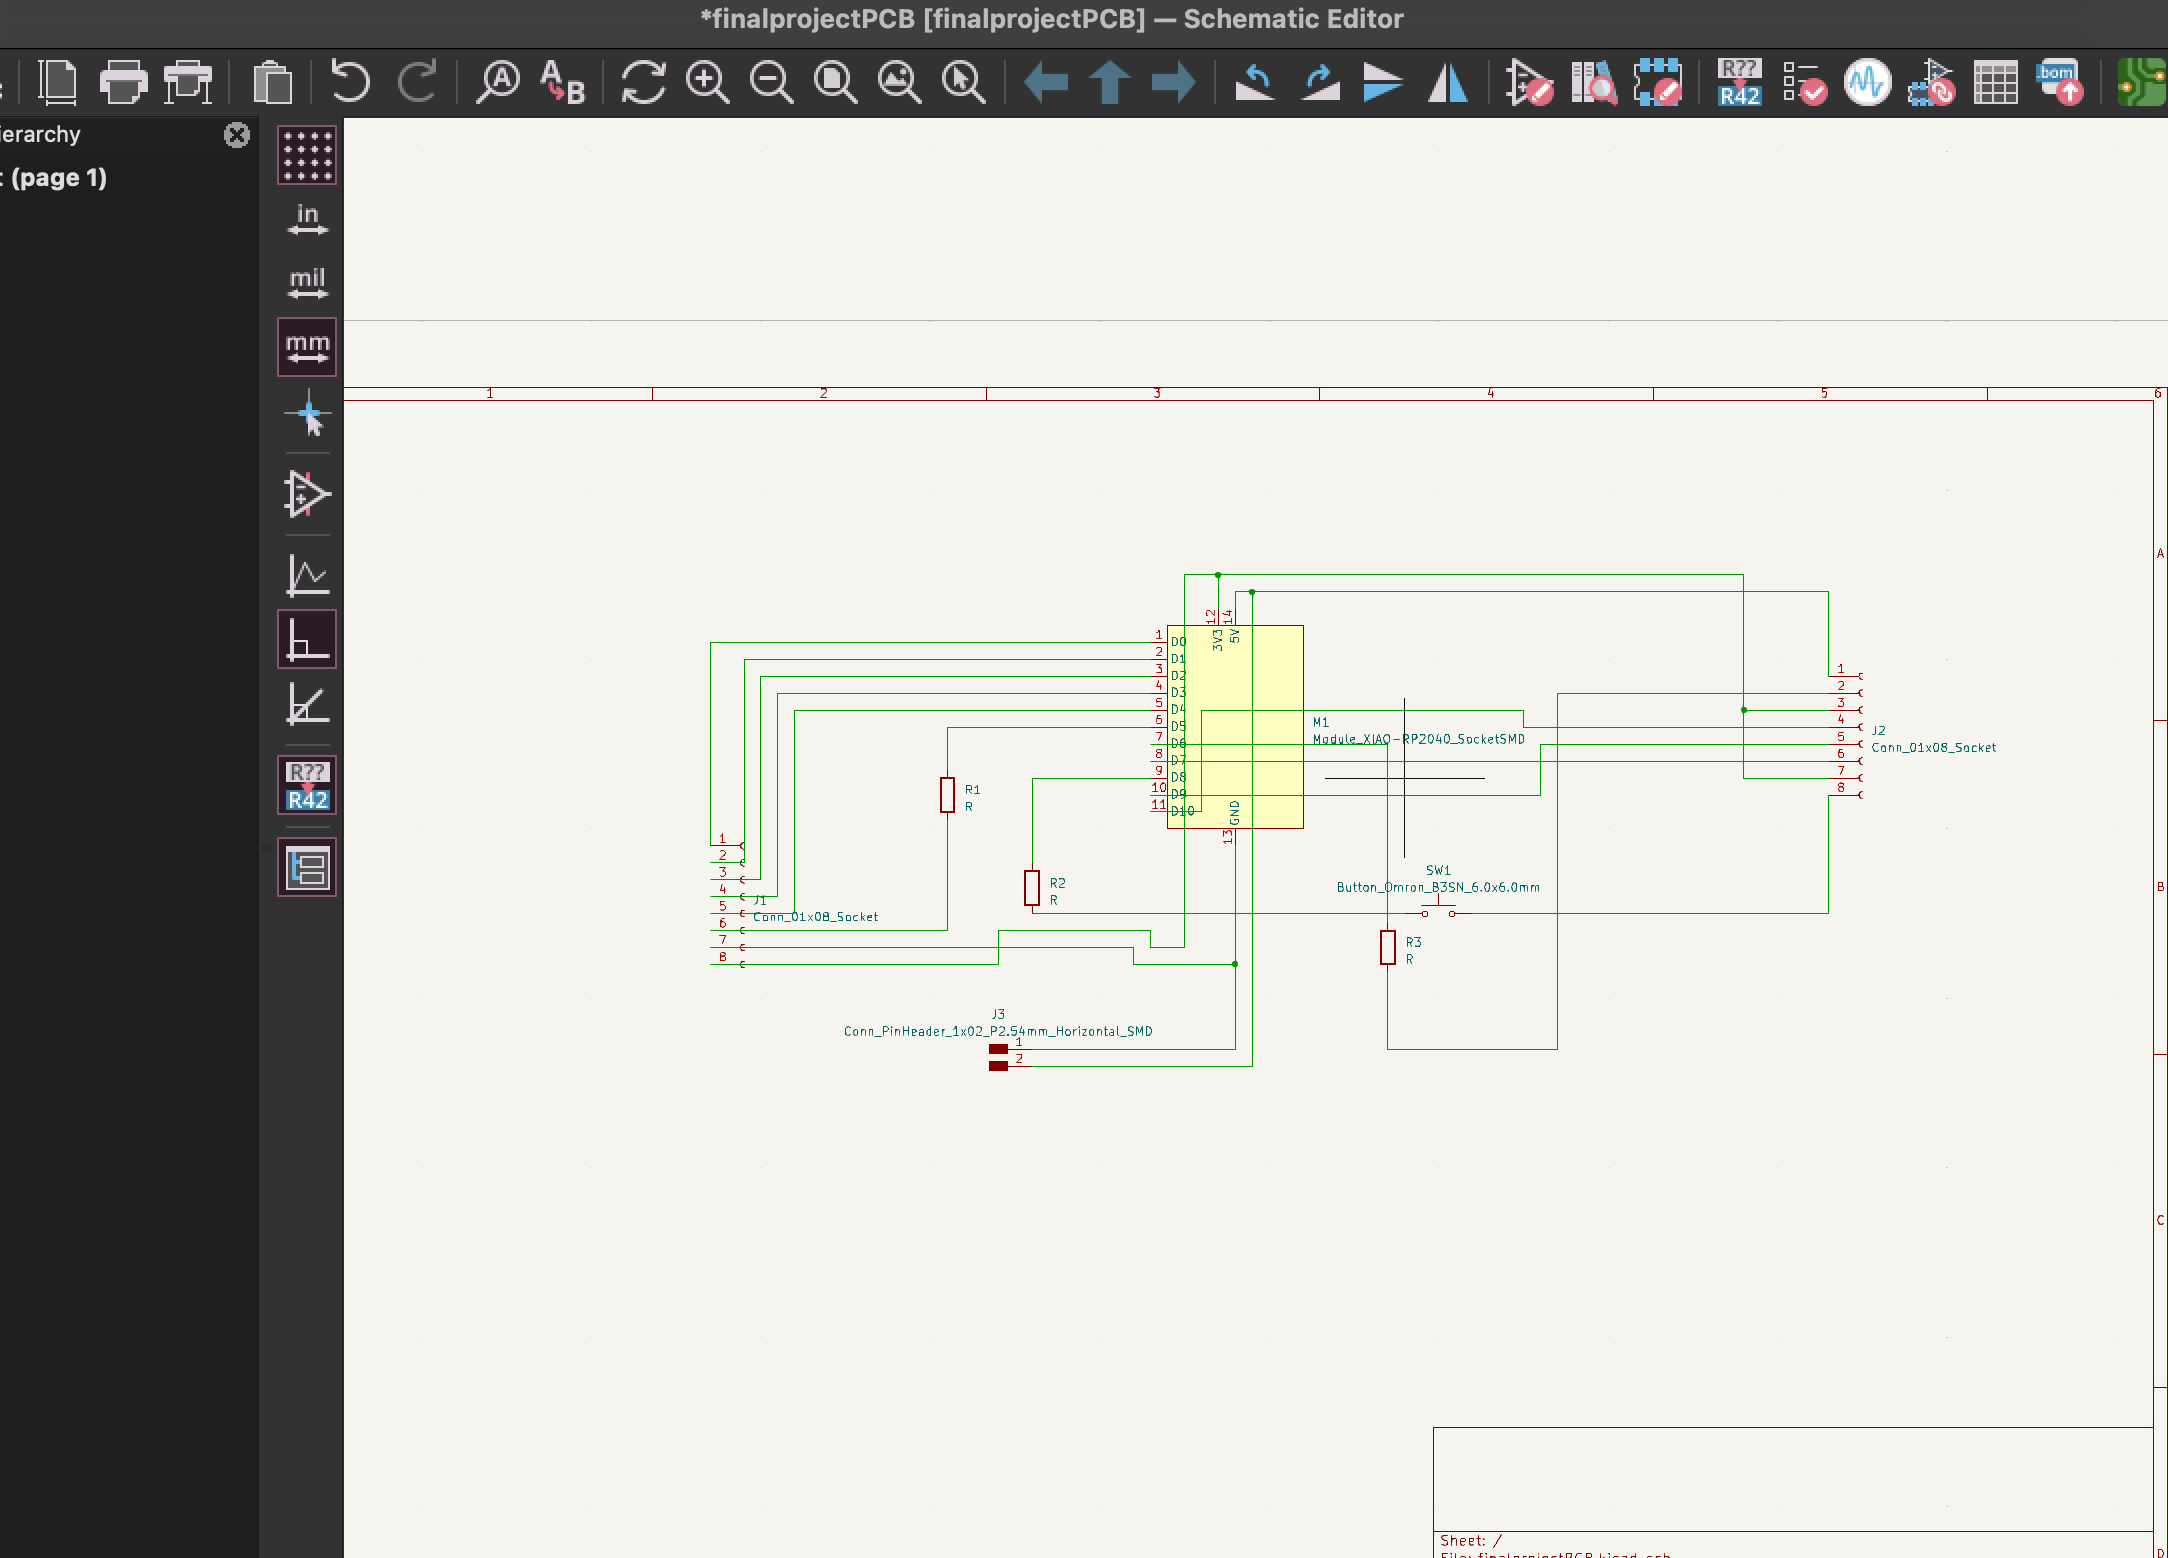
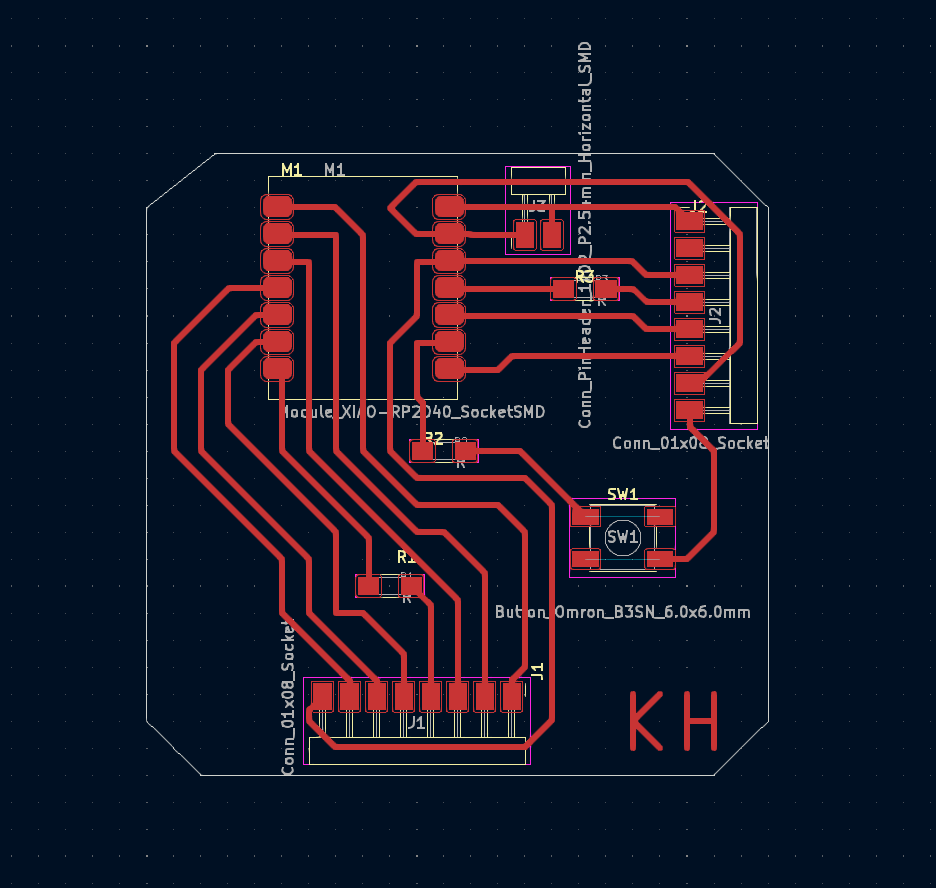
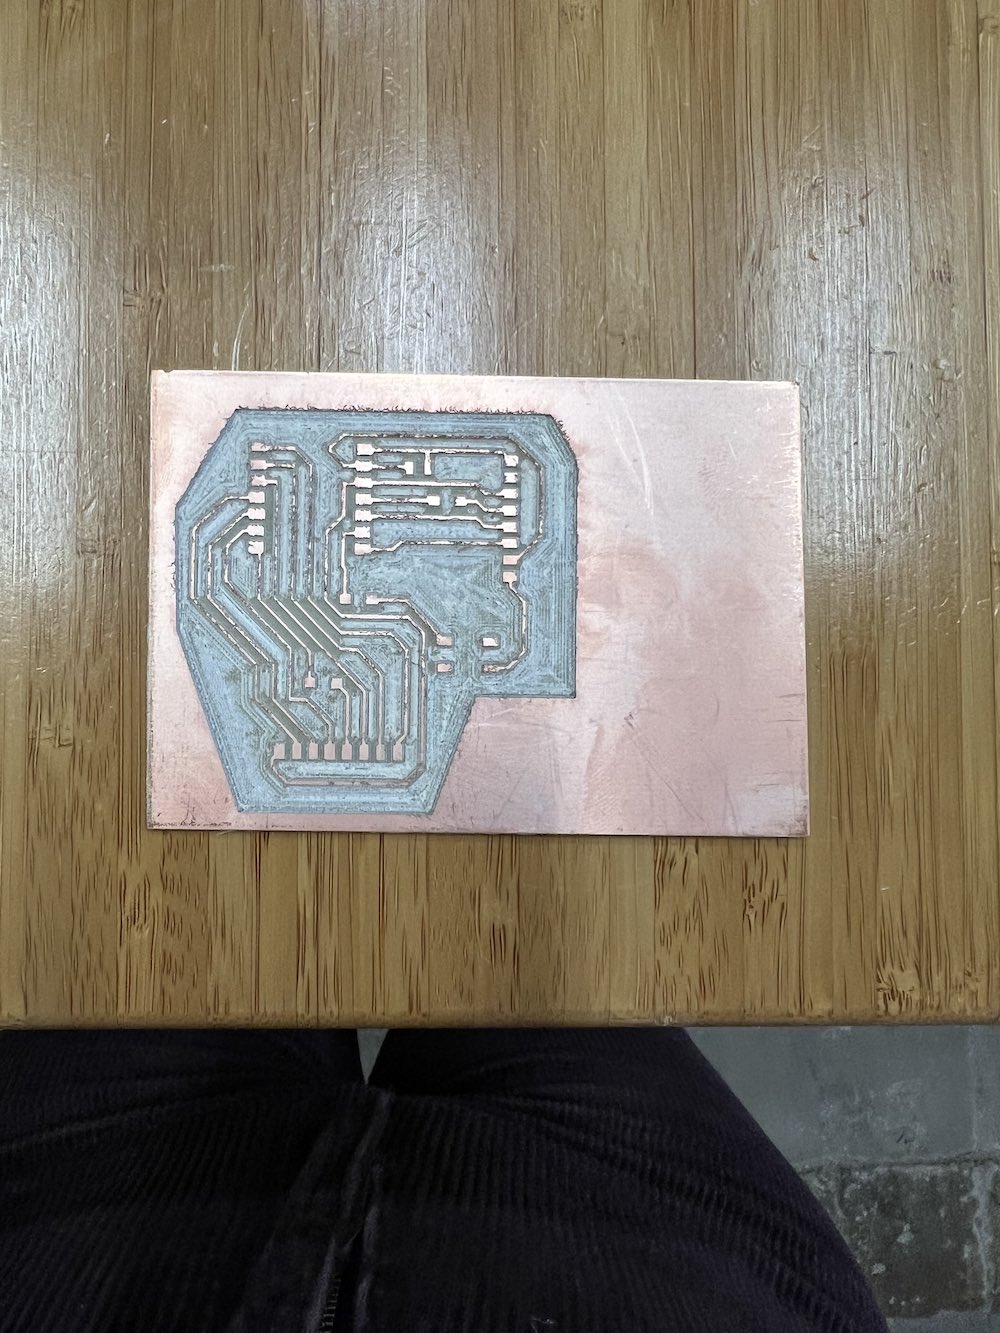
Kicad Schematic Kicad PCB