1. Project management
This week I worked on learning HTML and getting experience in Gitlab. Gitlab is an online platform and a DevOps software package that can develop, secure, and operate software. Below you will find more on the challenges I overcame and some of the errors I ran into along the way, as well as examples of code I used and screenshots of the work.
Necessary Downloads
To start coding for my website, I began by opening the terminal on my MacBook by searching in my finder "Terminal".
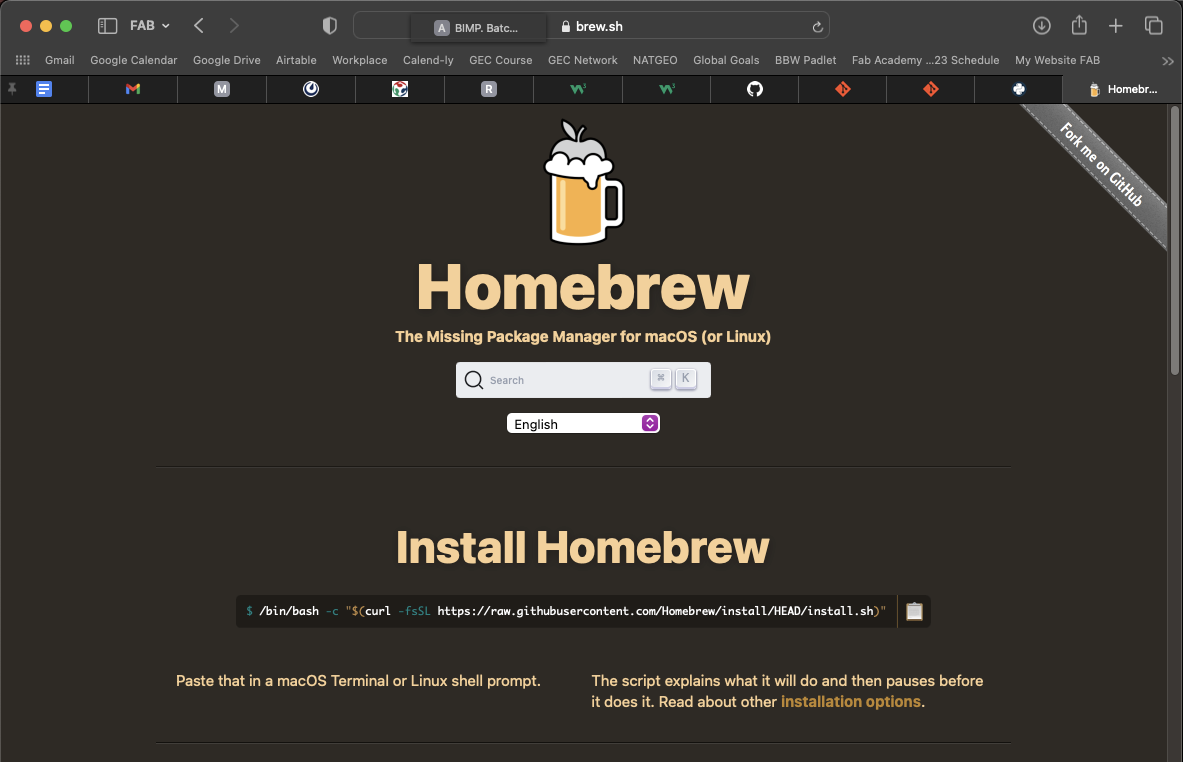
Next, I downloaded Homebrew. Homebrew is a free and open source software package management system that simplifies the instillation of software onto Apple's operating system, macOS, which is what I am using to design, build, and document through my website. To do this, I entered " /bin/bash -c "$(curl -fsSL https://raw.githubusercontent.com/Homebrew/install/HEAD/install.sh)" " to my terminal. This allowed me to install Homebrew on my Macbook.
 Once Homebrew was installed, I installed git through my terminal using the command " brew install git ".
Git is used to track changes in the source code for my website. It is a version control system (VCS) used to handle small and large projects. After git was installed, I downloaded XCode from the Apple App Store. This will allow me to push my code from my local repository to my remote and work on coding this documentation website. This is the primary website developing software I will use for the class. XCode allows me to make changes to my local repository first, giving me an extra step before pushing to my website. This will be my safety net, along with GitLab, for tracking previous versions and fixing any mistakes made along the way.
Once Homebrew was installed, I installed git through my terminal using the command " brew install git ".
Git is used to track changes in the source code for my website. It is a version control system (VCS) used to handle small and large projects. After git was installed, I downloaded XCode from the Apple App Store. This will allow me to push my code from my local repository to my remote and work on coding this documentation website. This is the primary website developing software I will use for the class. XCode allows me to make changes to my local repository first, giving me an extra step before pushing to my website. This will be my safety net, along with GitLab, for tracking previous versions and fixing any mistakes made along the way.
Research
Most of my research was done through Gitlab's help websites. I watched the videos streamed on Vimeo and took notes on how to apply this knowledge to my webpage. I began to document my progress through screenshots and photos. Another page I have found helpful is the W3 Schools HTML webpage. This site is very helpful in breaking down terminology and guiding you through what code means and what it will do for your project. Because I had no experience with HTML coding, or website development at all, I started with these websites to give me a foundation which I can build on as more skills are required to document my website each week.
Useful links
Coding
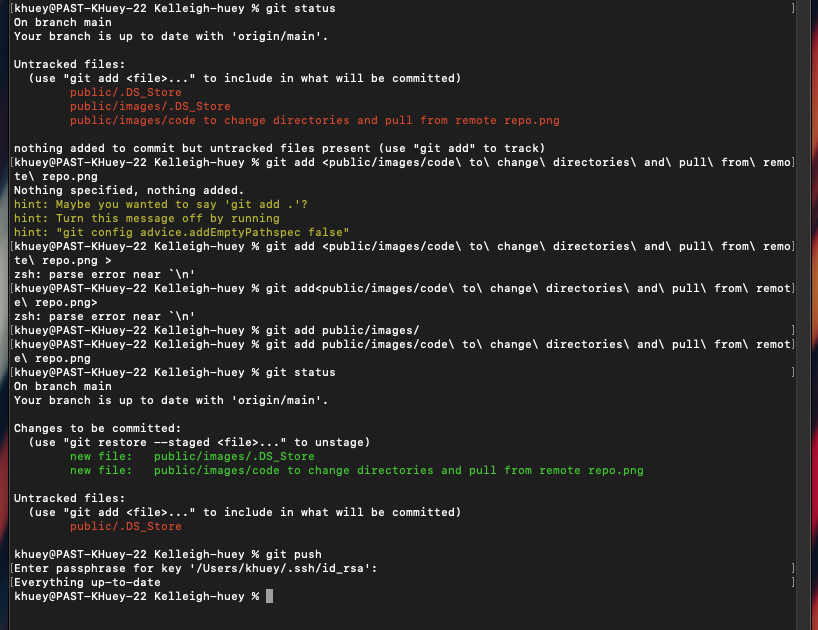
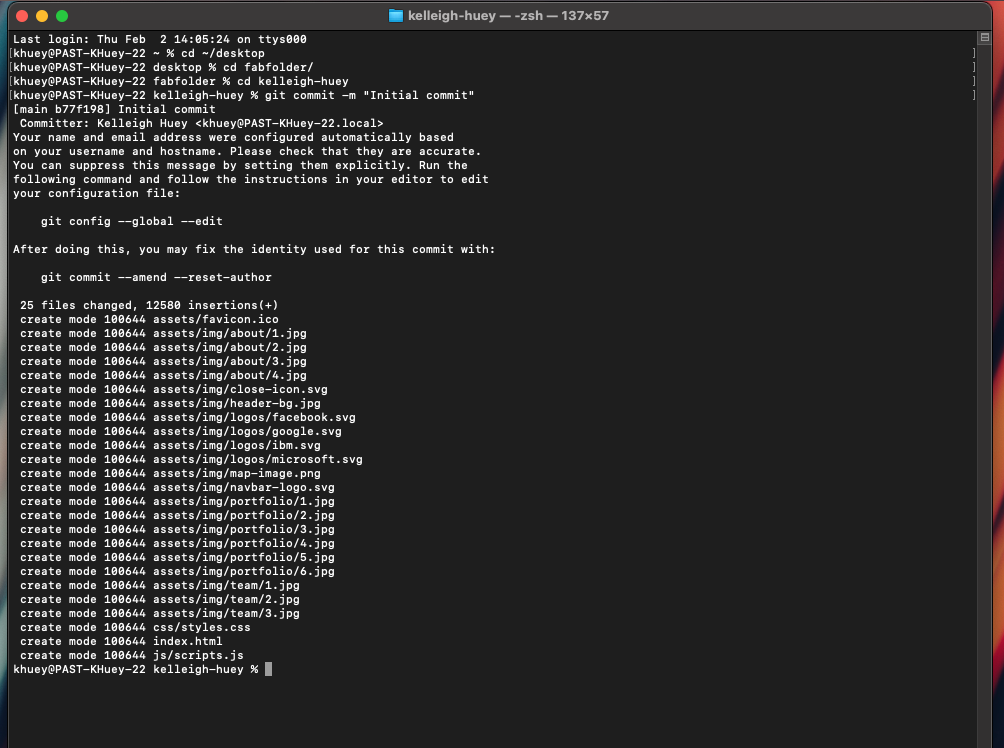
First, I created a folder on my computers Desktop specifically for cloning my repository into. To do this, I copied the SSH clone URL within Gitlab and opened my terminal. There, I commanded "git clone Next I needed to pull my remote repository to my local file by commanding "git pull" on my terminal. This added my files from Gitlab so I can open them in XCode and make changes to later commit.
<"img scr="..images/..." alt="..Name.."<
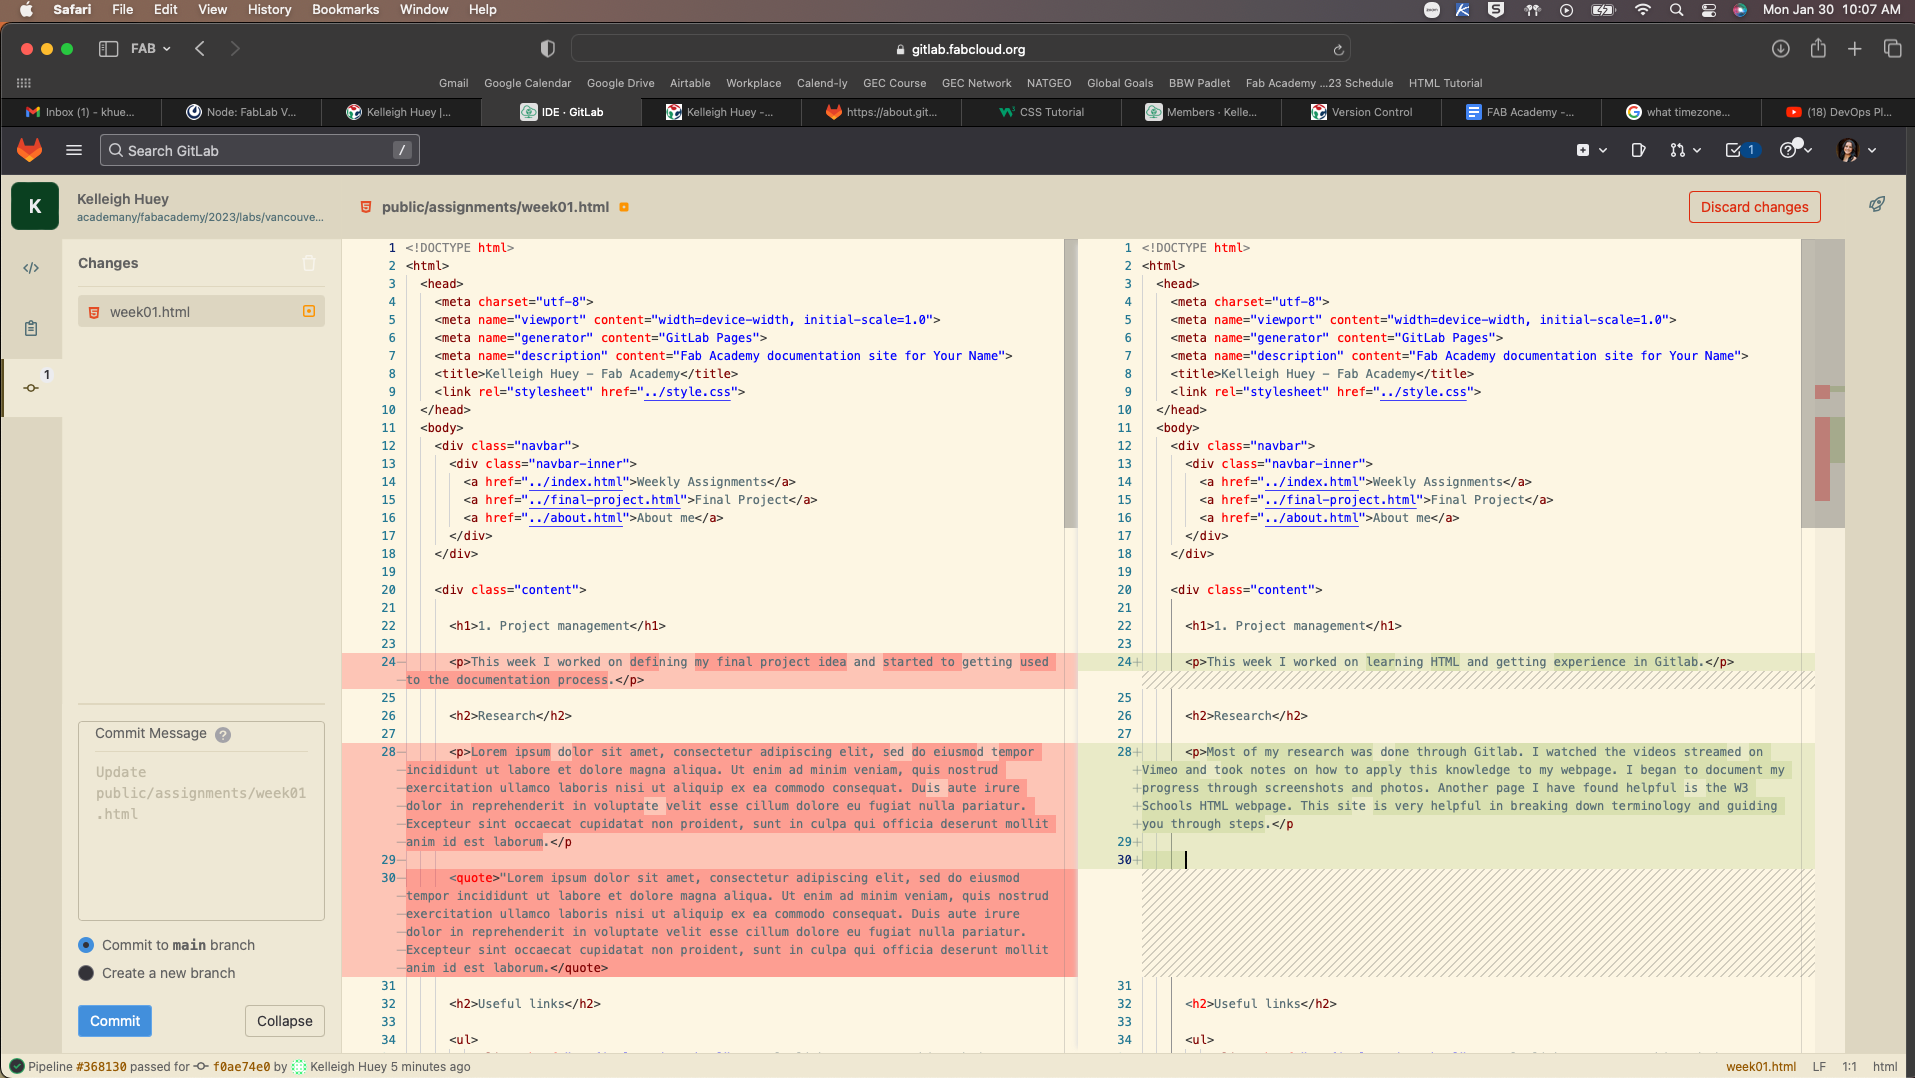
I didn't know at first how to add another link within my repository but after some trials I found a way. In my Gitlab repository on the web IDE, I added a file named "week01.html", and pasted the source code from my original html template, and made a commit. I then opened my Terminal and entered " git pull " to pull my remote repository to the local folder on my desktop. If I did not already have a rough template in place for my website or files to pull to my local, I could have alternatively opened XCode, made a new file, added my code into it, then commited and pushed from there.
Once I had my file on my computer, I opened the week I wanted to edit (this week a.k.a. Week 1) in XCode. From there, I can add my code and using the source control tab at the top, I can push and commit my changes to my remote repository.
I will now go into more detail about specific codes.
This function adds photos from your repository and allows you to add it into the webpage you are on.
"<img src= "../images/htmldocumentation1" alt="Documentation of Web IDE in Gitlab." width="800"/<"
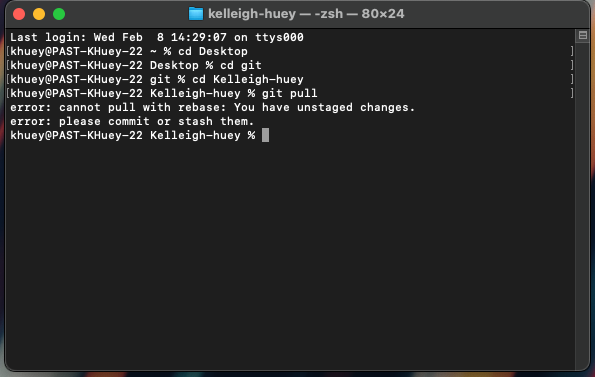
To clone my repository I needed to tell my terminal where to put the files. I must tell my computer which directory it is pulling out of/into. I do this with the " cd " function.
-
" khuey@PAST-KHuey-22 ~ % cd Desktop
khuey@PAST-KHuey-22 Desktop % cd git
khuey@PAST-KHuey-22 git % cd Kelleigh-huey "
Originally, I wanted to find a new template for my website so it could be more aesthetically pleasing and tried the code below- which did NOT end up working out for me. I ended up using the original plain html template provided to us by Gitlab Pages.
Gallery
Example of what the web IDE looks like when going to commit and push changes.
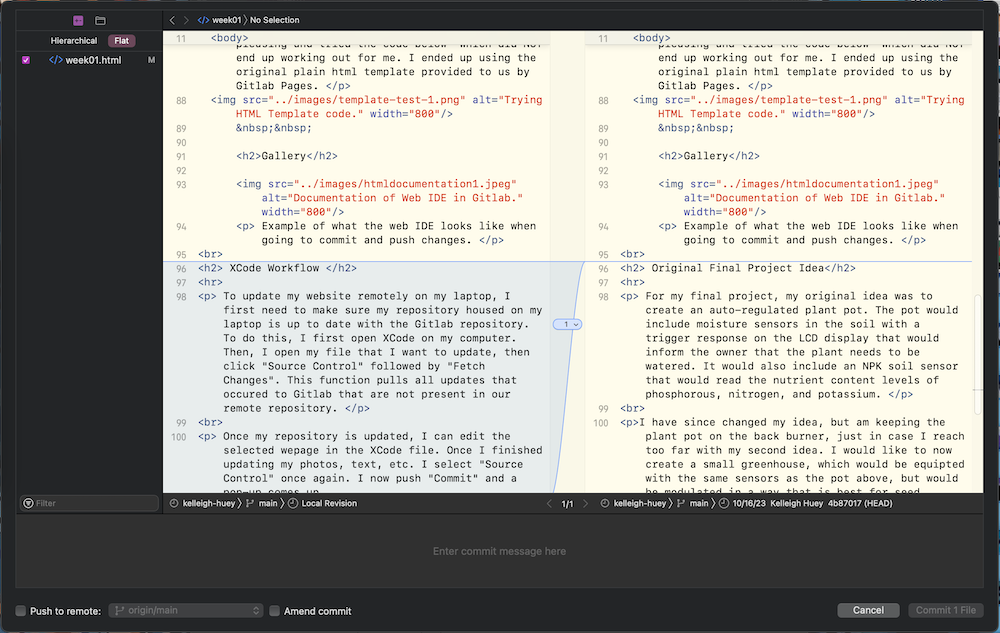
XCode Workflow
To update my website remotely on my laptop, I first need to make sure my repository housed on my laptop is up to date with the Gitlab repository. To do this, I first open XCode on my computer. Then, I open my file that I want to update, then click "Source Control" followed by "Fetch Changes". This function pulls all updates that occured to Gitlab that are not present in our remote repository.
Once my repository is updated, I can edit the selected wepage in the XCode file. Once I finished updating my photos, text, etc. I select "Source Control" once again. I now push "Commit" and a pop-up comes up that looks like the following.
Here, I add my commit message and check-mark the option "Push to remote: origin/main". This will push my updated webpage to Gitlab, and updates my webpage as submitted.
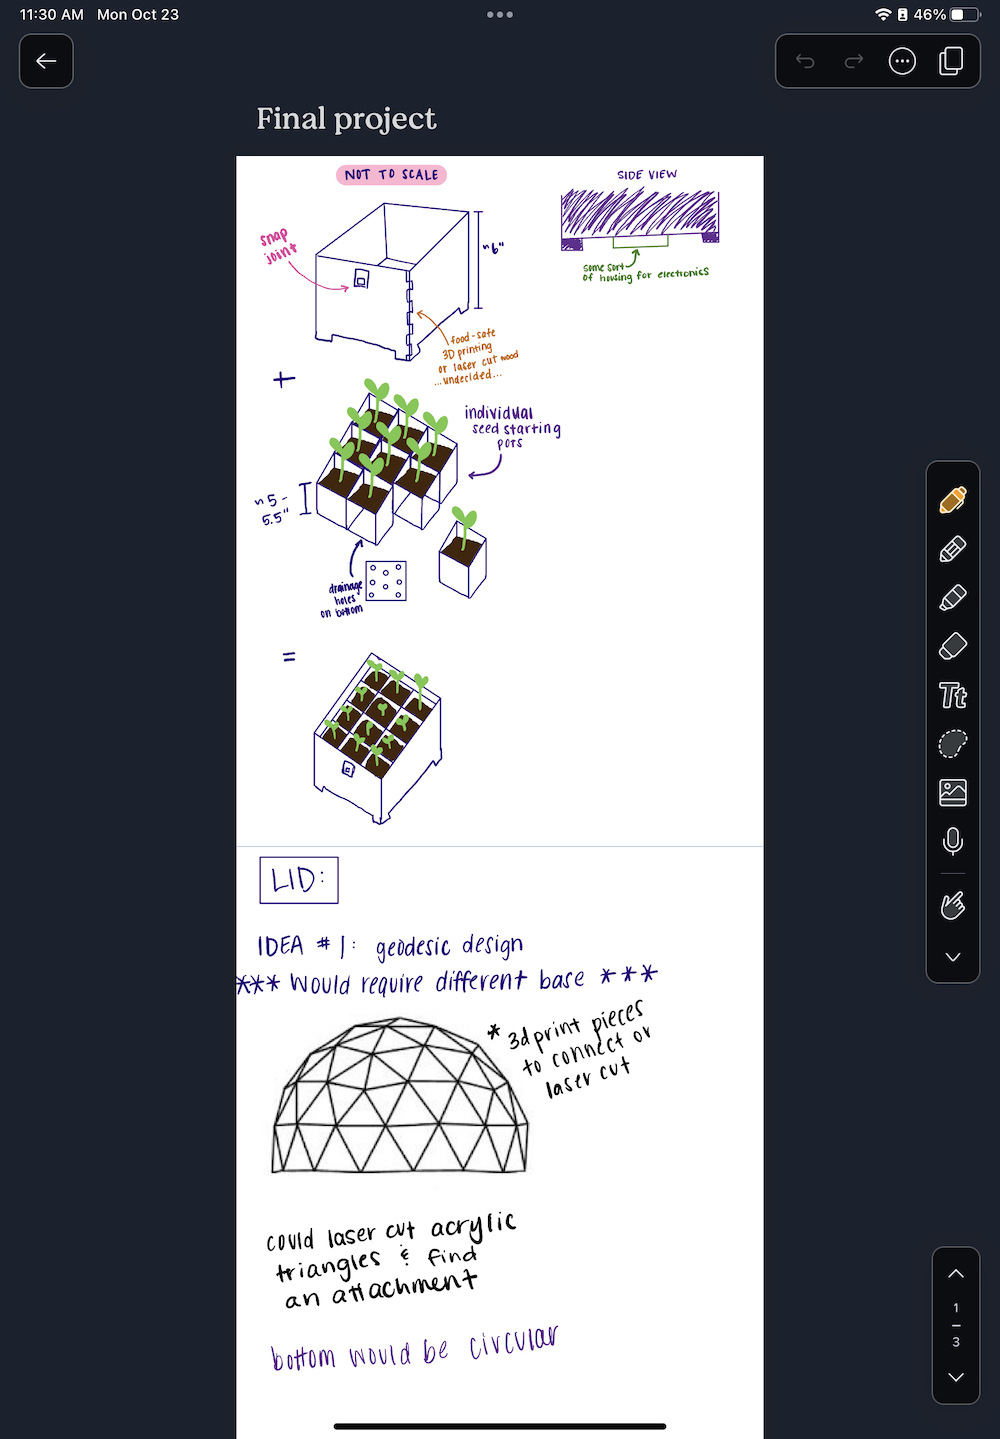
Original Final Project Idea
For my final project, my original idea was to create an auto-regulated plant pot. The pot would include moisture sensors in the soil with a trigger response on the LCD display that would inform the owner that the plant needs to be watered. It would also include an NPK soil sensor that would read the nutrient content levels of phosphorous, nitrogen, and potassium.
I have since changed my idea, but am keeping the plant pot on the back burner, just in case I reach too far with my second idea. I would like to now create a small greenhouse, which would be equipted with the same sensors as the pot above, but would be modulated in a way that is best for seed starting. It would also contain LED lights that can be programmed to being a different color depending on what part of the plants life cycle it is.
Anyone who wanted to start growing seeds would be able to use this product. I aim to make it simple yet effective, while also being very efficient. This project came from a trial I did last year- I tried to start growing my own food whenever I could. This started with me trying to sprout seeds late last Spring, and let's just say, it did NOT work out. I don't think I got a single plant out of it.. sad. But, I moved on with my plan and instead just bought established plants to put in my new garden bed. This way worked well for growing, but was much much harder on my wallet. So, with this project, I am hoping I can try again and grow plants and my own food from seeds.
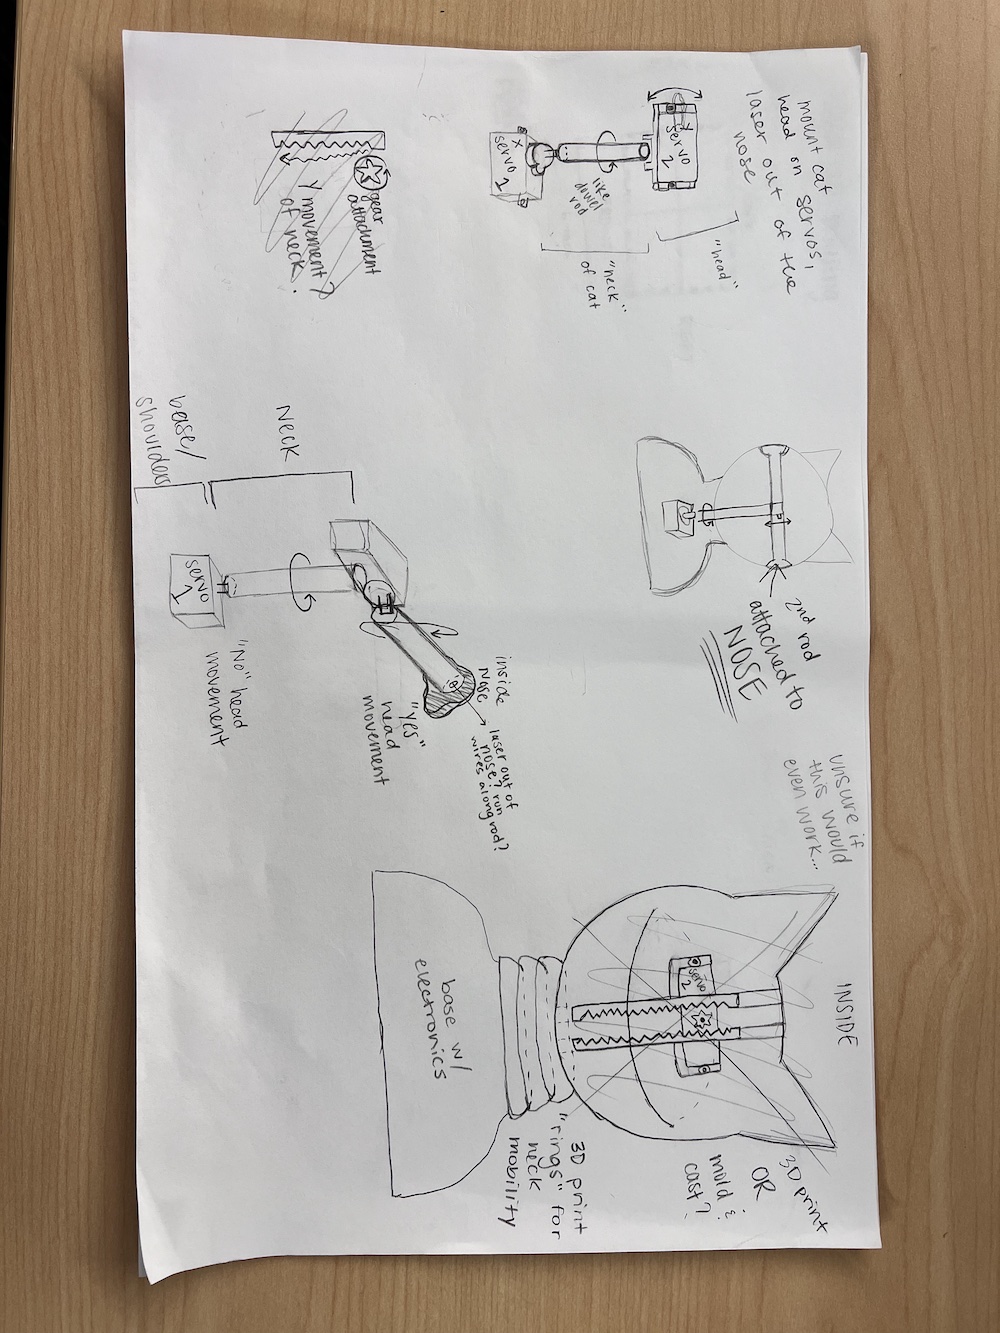
*UPDATE* (09/01/2023): I have continued my Fab Academy class until the end of this year. With the experience and insights I have gained thus far in this class, I am able to re-evaluate my final project idea. I am now (3rd times the charm) going to design and build a cat laser toy to keep my new kitties entertained for short periods of time. I will divuldge more information on this project in my final project page, which can be found through the Final Project tab at the top of this webpage.