Week14: wildcard week

This week, I have decided to get deeper immersion in the fascinating world of Origami.
Origami is the traditional Japanese art of paper folding. The word "origami" comes from the Japanese words "ori" (meaning "folding") and "kami" (meaning "paper"). It involves creating intricate and beautiful designs by folding a single sheet of paper, often without the use of scissors or glue.
Origami has a long history in Japan, dating back several centuries. It was initially practiced by the nobility as a form of entertainment and decoration. Over time, origami spread throughout Japanese society and became a popular art form for people of all ages.
The goal of origami is to transform a flat sheet of paper into a three-dimensional sculpture through folding techniques. These folds can be simple or complex even very complex, and they can create a wide range of objects, including animals, flowers, geometric shapes, and more
Origami is not only an art form but also a recreational and educational activity. It promotes creativity, patience, and problem-solving skills. Folding origami can be a calming and meditative process, allowing individuals to focus their attention and relax.
In addition to traditional origami, which follows specific folding patterns and designs, there is also modern origami that encourages experimentation and innovation. Many contemporary origami artists push the boundaries of the art form, creating intricate and intricate models that were once considered impossible to fold.
Origami has gained international popularity and recognition beyond Japan. It has become a worldwide art form, with enthusiasts and practitioners from various cultures and backgrounds. There are origami conventions, exhibitions, and societies dedicated to the art, where artists showcase their creations and share their knowledge and techniques.
Overall, origami is a fascinating and versatile art form that combines creativity, precision, and mathematical principles. It continues to inspire people of all ages to explore the possibilities of paper folding and create stunning works of art.
Applications of origami in various industries and research fields:
Origami techniques and principles have found applications in various industries and research fields.
Here are some examples:
These are just a few examples of how origami techniques have been applied in industry and research. The versatility and adaptability of origami principles continue to inspire innovation and contribute to advancements in various fields.
Personal activities performed:
I had never really considered seriously the Origami field before the FabAcademy program and I have to say that it was a revelation for me netering into the fabulous world of Origami.
To get started with, I started folding very basic and simple Origamis with just the help of a pencil and a ruler.
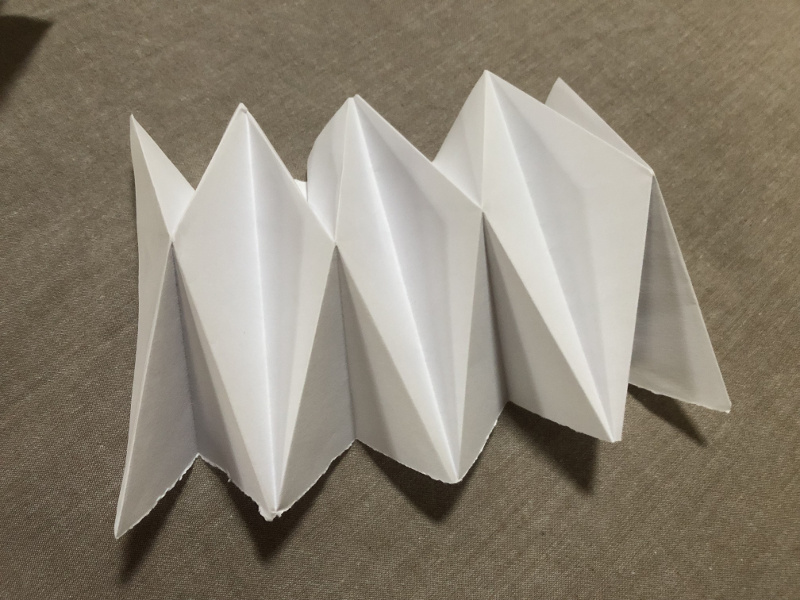
The real first achievement came with this Origami that requires the good mastery of a key concept in Origami: valley fold Vs mountain fold.
A valley fold is in its essence a paper fold that forms a trench. A mountain fold is, on the other hand, a paper fold that forms a ridge
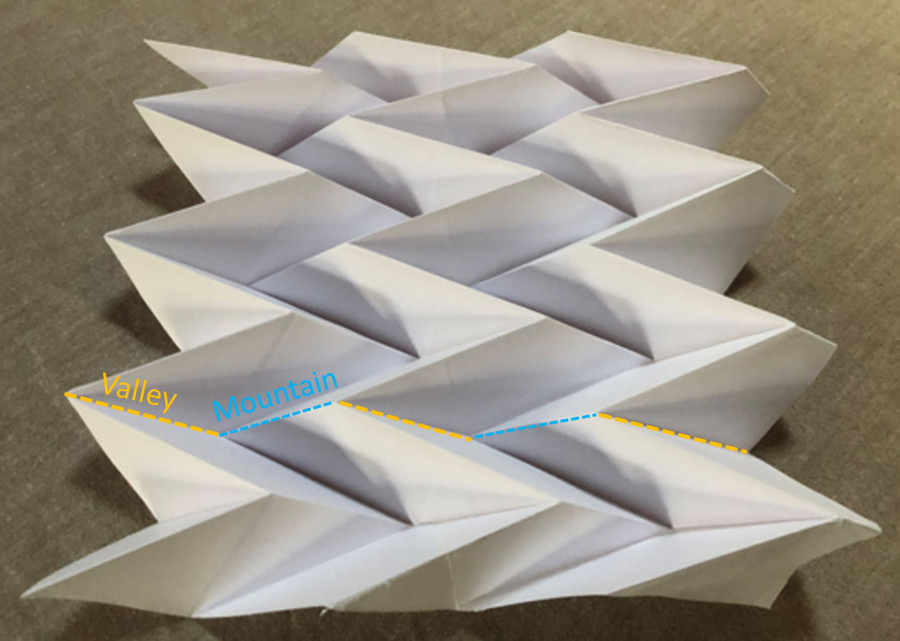
As you can notice, on the same line we alternate "valleys" and "montains" and that brings practical challenges when it comes to folding, at least the first times you execute such kind of folding.
Do not underestimate the learning curve: the more you practice, the fastest youj managed to fold these Origami and manage the alternance between valleys and mountains.
Then I touched a new type of Origami, the tessellation Origami. These origami are clearly more sophisticated and complex to create.
But it's clearly possibile to create some using only a ruler and a pencil.
Tessellation in origami refers to the technique of folding a single sheet of paper repeatedly in a specific pattern to create a tessellated design. A tessellation is a repeating pattern of shapes that fit together perfectly without any gaps or overlaps.
Tessellations can take various forms, including geometric shapes, animals, plants, and abstract patterns.
The folding techniques used in origami tessellations can be complex and require precise calculations and attention to detail.They can be challenging to fold and require patience, skill, and understanding of origami techniques. But tessellations in origami definitely offer unique artistic and creative possibilities and can result in visually stunning designs that showcase the beauty of repeating patterns and the precision of folding.
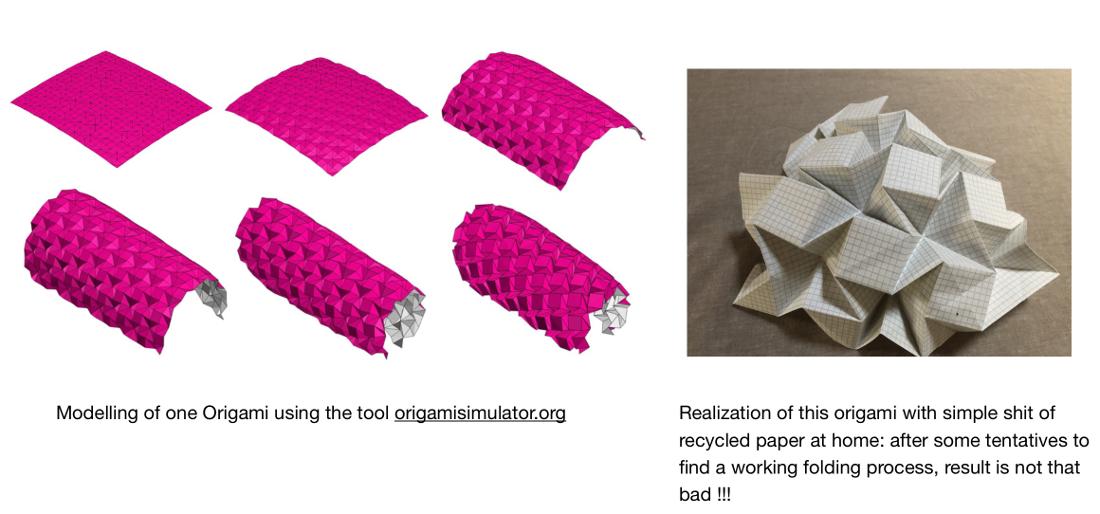
Example of one tessellated structure I realized with recycled paper:
Next stage: since I started having a reasonale confidence with the basic techniques, my new goal was to go up a level in complexity by using new tools.
The key enabler and tool is the laser cutter equipment in the Santa Chiara Lab. The model at my disposal was the machine from Trotec(R) with e power of 125W.
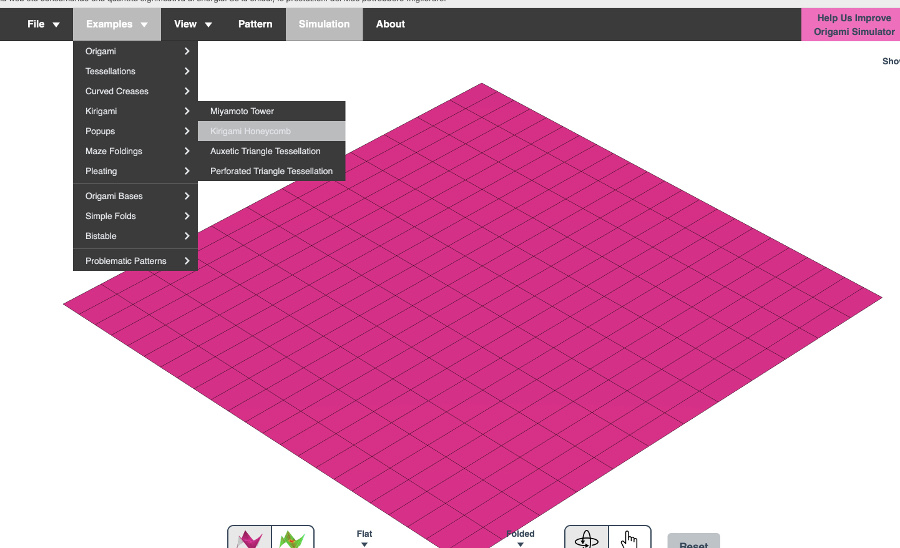
The second key enabler in the fast creation of origami is the online tool Origamisimulator.org
First Example of Origami realised: Kirigami Honeycomb
Kirigami is a traditional Japanese paper cutting art that involves folding and cutting paper to create intricate and decorative designs.
The term "kirigami" comes from the Japanese words "kiri" (meaning "cut") and "gami" (meaning "paper").
In kirigami, a single sheet of paper is folded, and then precise cuts are made to create a pattern or design.
Overview of the Kirigami project:
Overview of the Kirigami when folded:

Creation steps of this Kirigami:
Download of .svg file of the Kirigami Honeycomb project
"Kirigami Honeycomb .svg file download"
Overview of the raw .svg file downloaded:
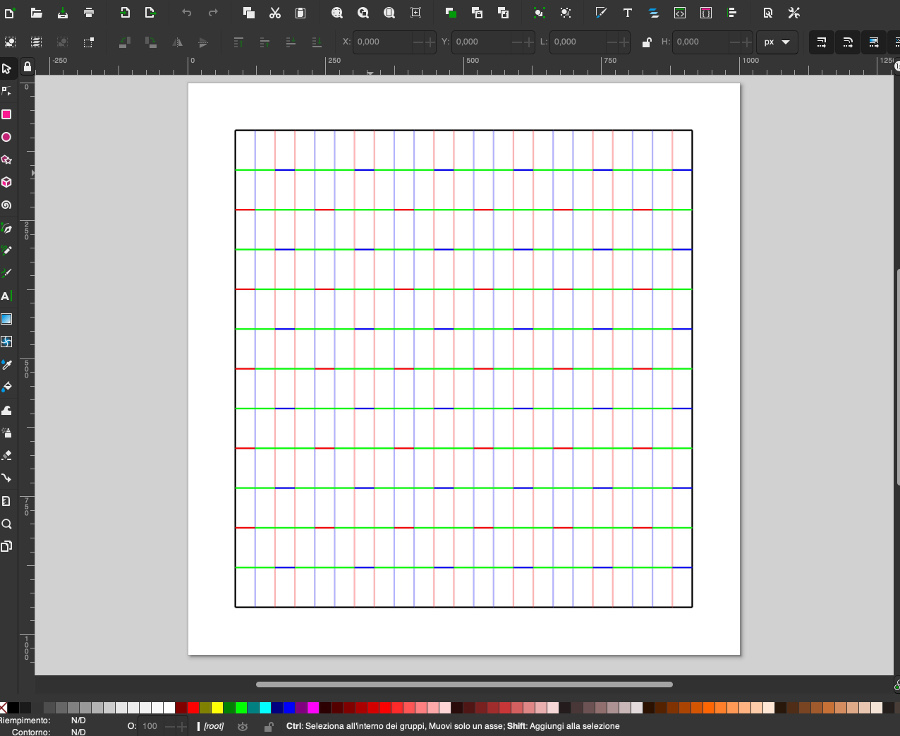
As you can notice, the layout of the Kirigami includes different colors that correspond to the folding areas (green lines) and the cutting areas (blue and red).
There's a need to transform this .svg into a file that can be correctly interpretated by the laser cutter.
In practical terms, the greens lines need to be transformed into incision lines (black lines) and the blue and red lines need to be converted into cut lines (yellow lines)
The detailed process of transformation of the .svg file will be provided in the next example.
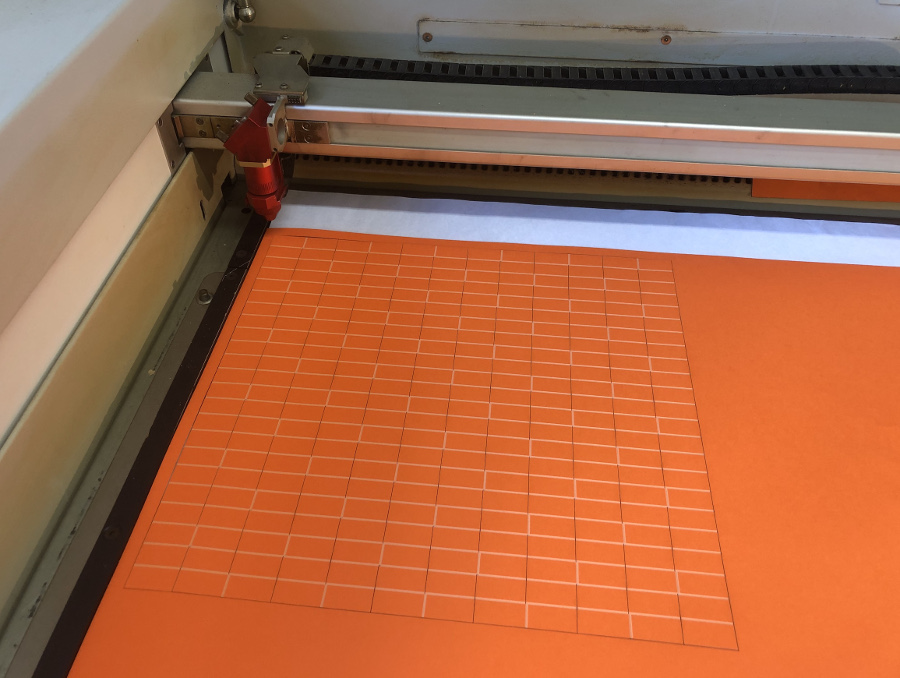
Overview of the piece of paper right after completion of the cutting process with the laser cutter:
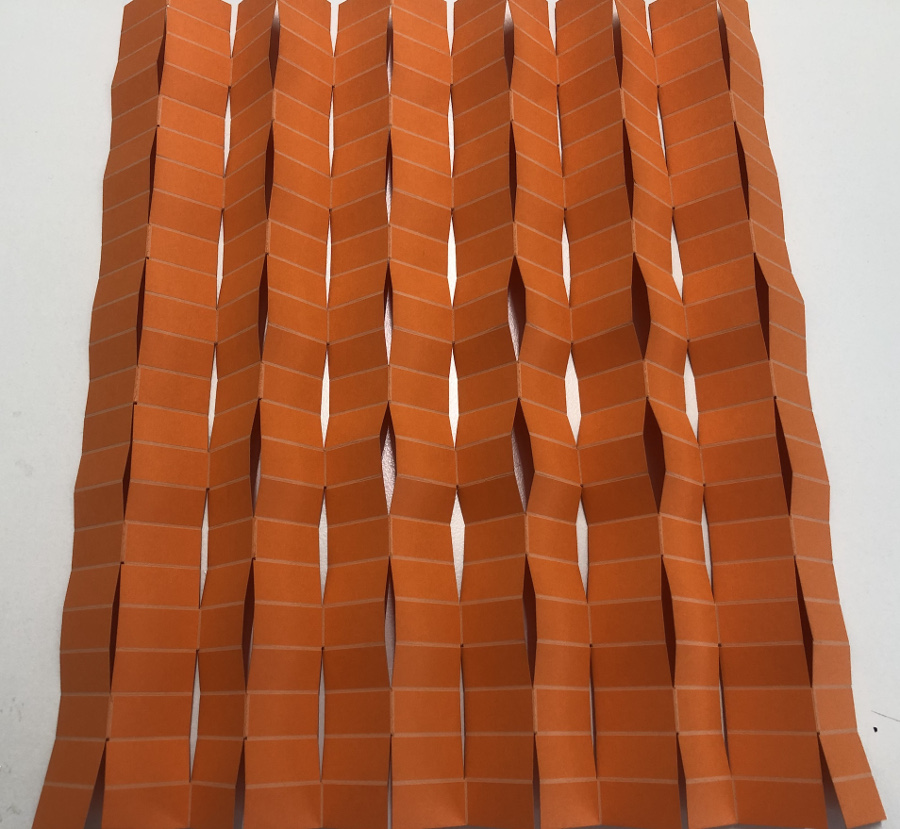
Folding process in progress

After completion of the folding process, there would be a need to glue the Kirigami to freeze the Honeycomb structure.
Second Example of Origami realised: Kirigami Honeycomb
The second model is a curved star. Overview of the final result online using origamisimulator.org tool.

Creation steps of this Kirigami:
Download of .svg file of the curved star origami:
Curved start.svg file download
Run Abode illustrator, create a new file (select RGB and not CMYK color mode) and import the .svg file.
Overview of the raw .svg file downloaded:
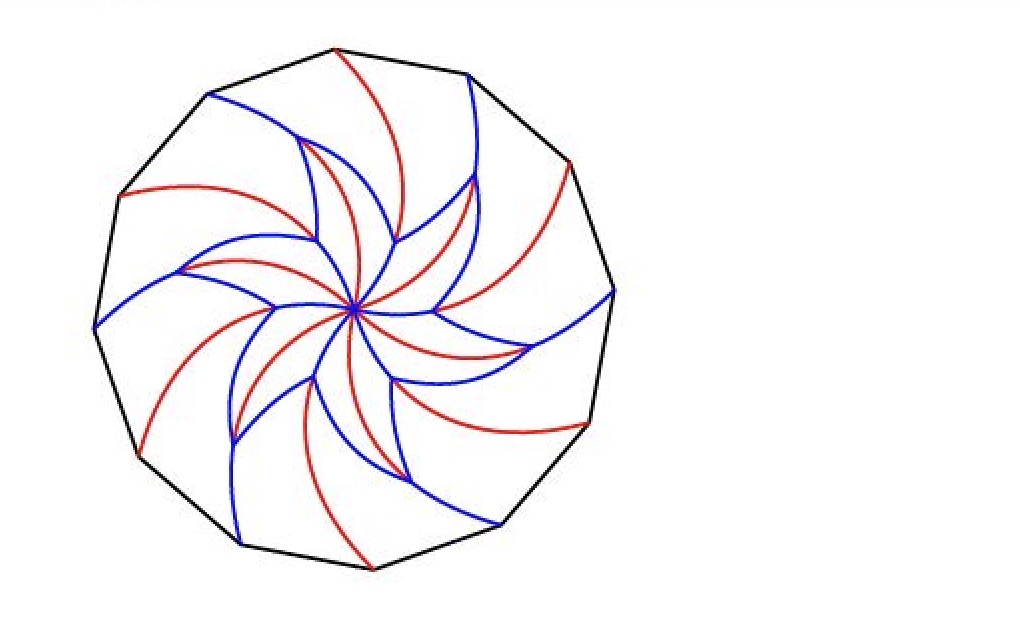
Note: this file contains different colors of lines:
There's a need to transform this .svg into a file that can be correctly interpretated by the laser cutter.
The black lines need to be transformed into yellow lines (cutting lines) while the blue and red lines need to be converted into black lines (incision lines).
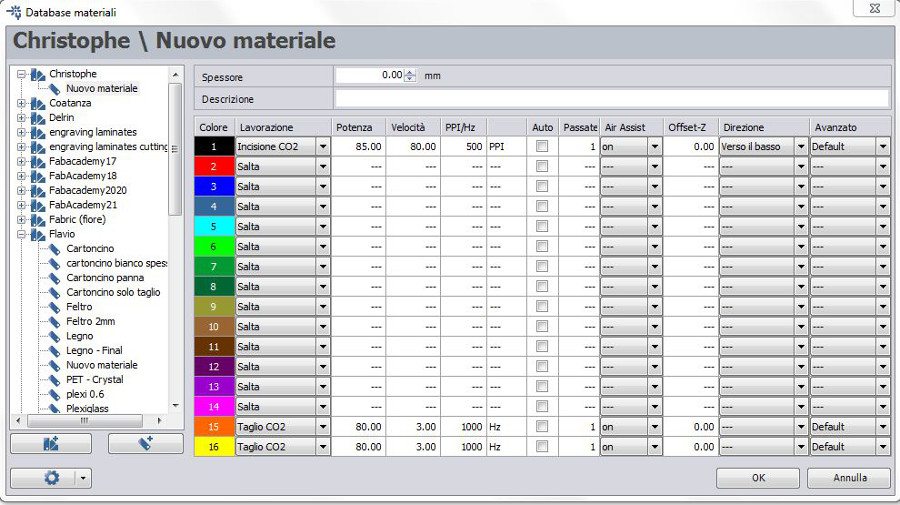
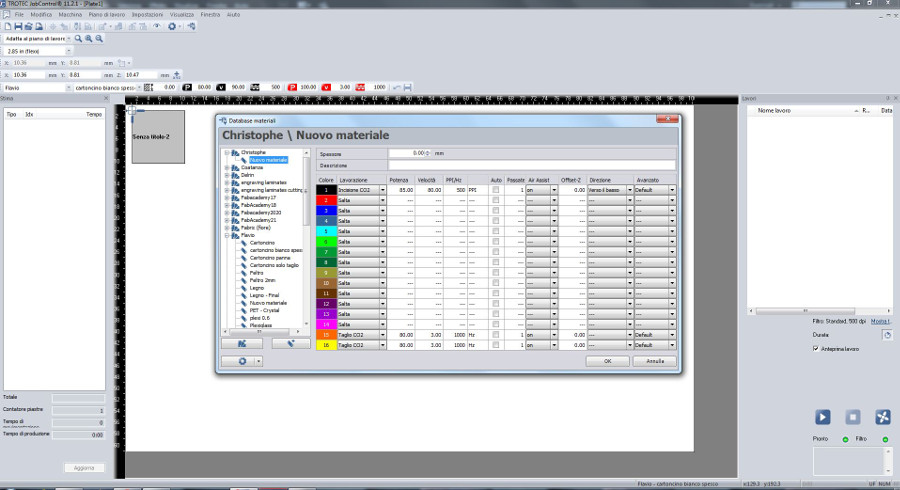
Below the table summarizing yhe different types of posible actions on materials (cut, incision) and associated parameters (Power, Speed, PPI/Hz, Air assist, offset... ).
From this table, we can deduct from the current set-up that yellow and orange lines correspond to cutting lines while black lines correspond to incision lines.
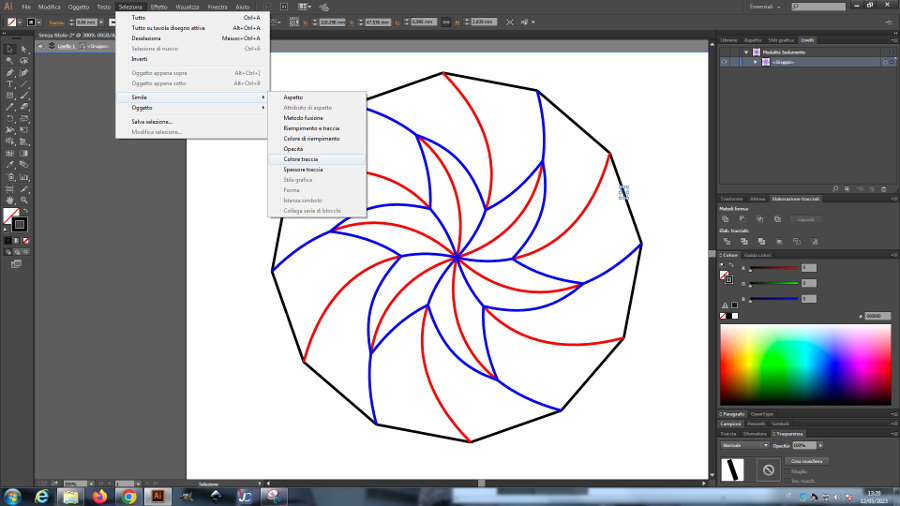
To carry-on quickly these changes in colors, I have used Adobe Illustrator tool.
There's one feature of Illustrator that is definitely very helpful: after selecting a segment, Menu -> "Select" -> "Simliar" -> "Color Trace"
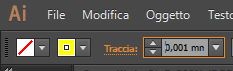
Important to always specify the width of the desired "cut" ot "incision": in this case, 0,001 mm
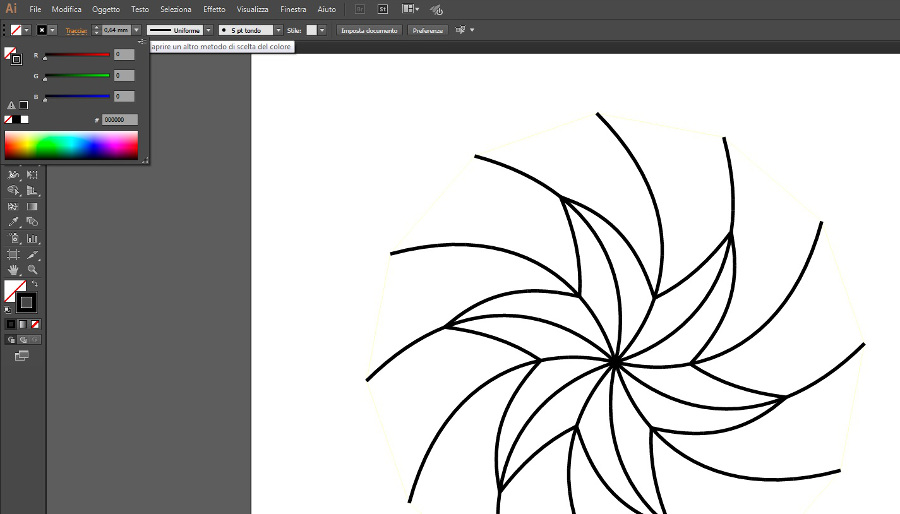
At completion of Red and Blue into black lines transformation:
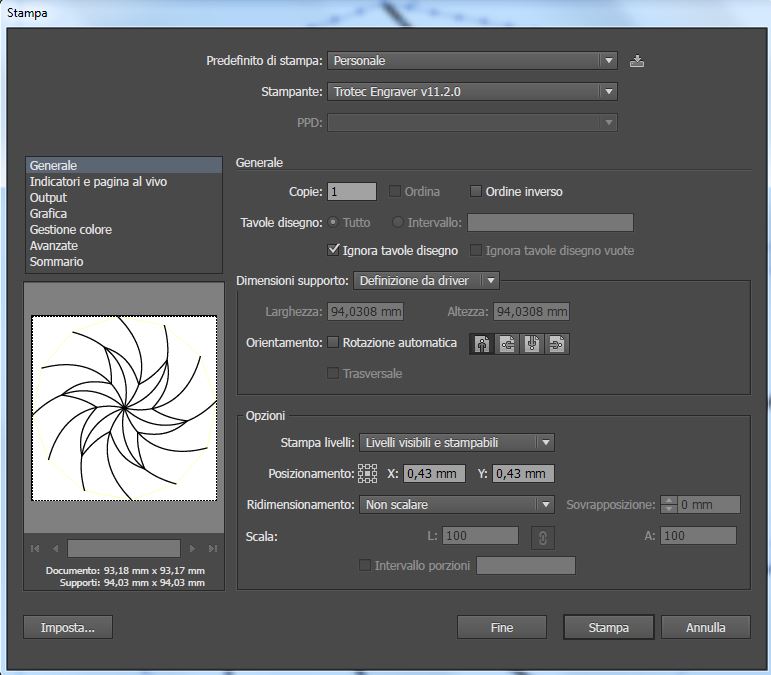
After completing the changes in the color, "print" of the file using the Trotec Engraver as printer:
Note and points of attention:
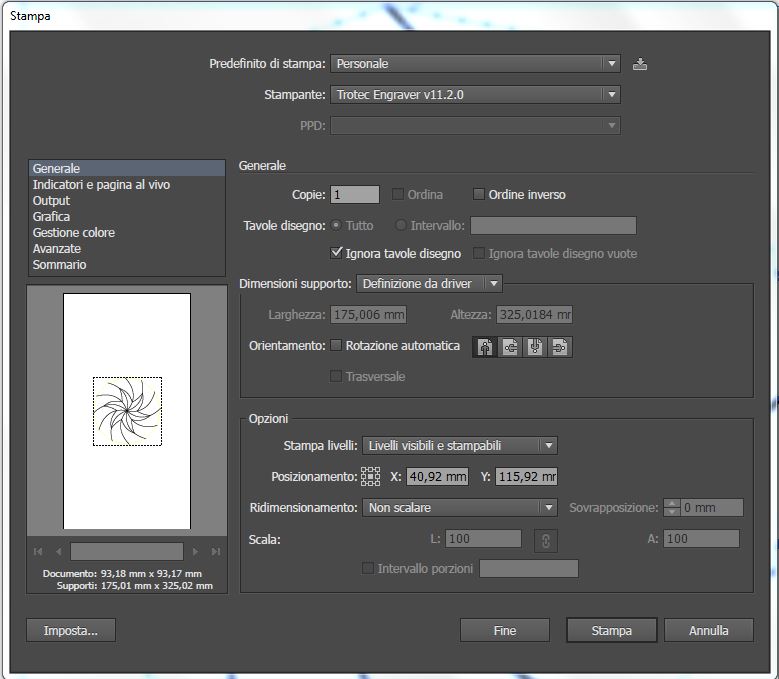
When correctly set, click on Print
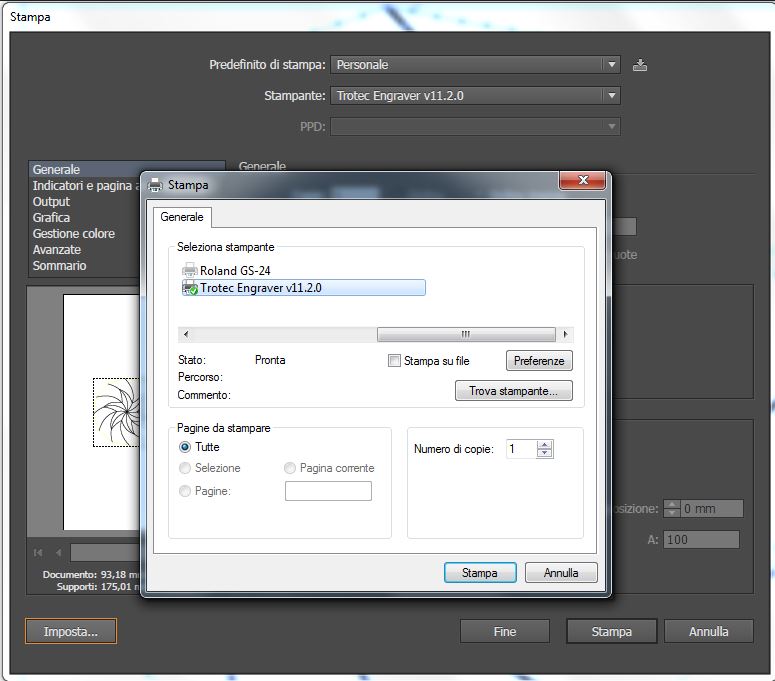
Click on the "Preferences" button and the following interface pops-up:
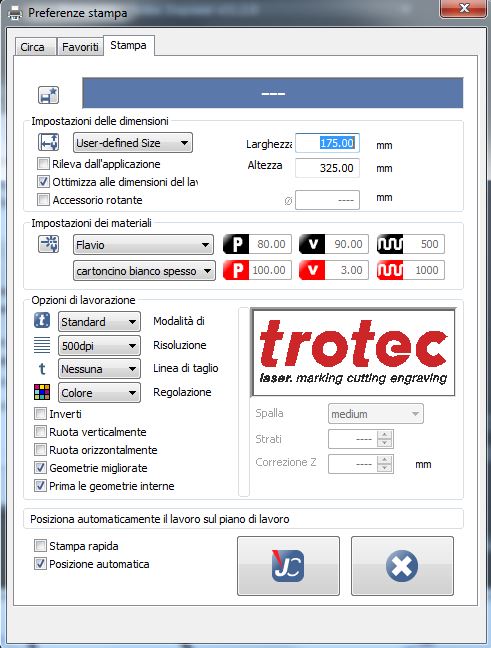
Do not forget to adjust the Width and High in accordance to the dimensions of the project in Illustrator:
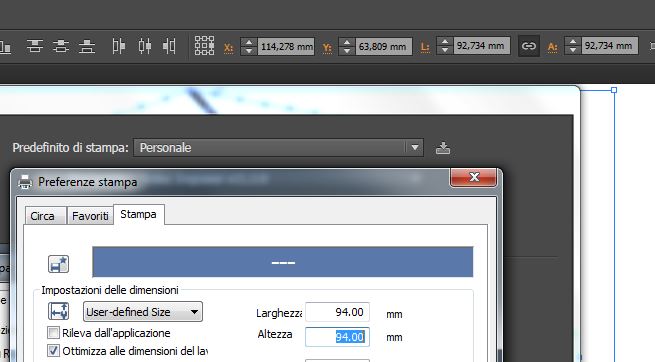
Do not forget to click once again on Print and preferences to get the preview window updated (bug from the Trotec SW)
Position the project correctly on the working space and at this point you can click on the "Cut" button.
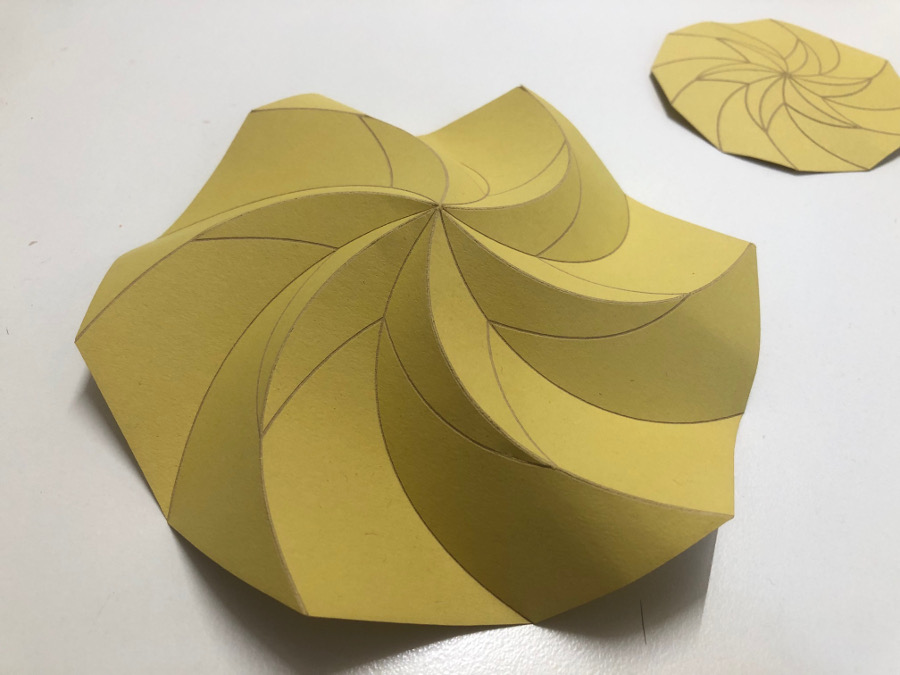
Overview of the result after cutting and first round of folding (only Valleys or montains on a single line):
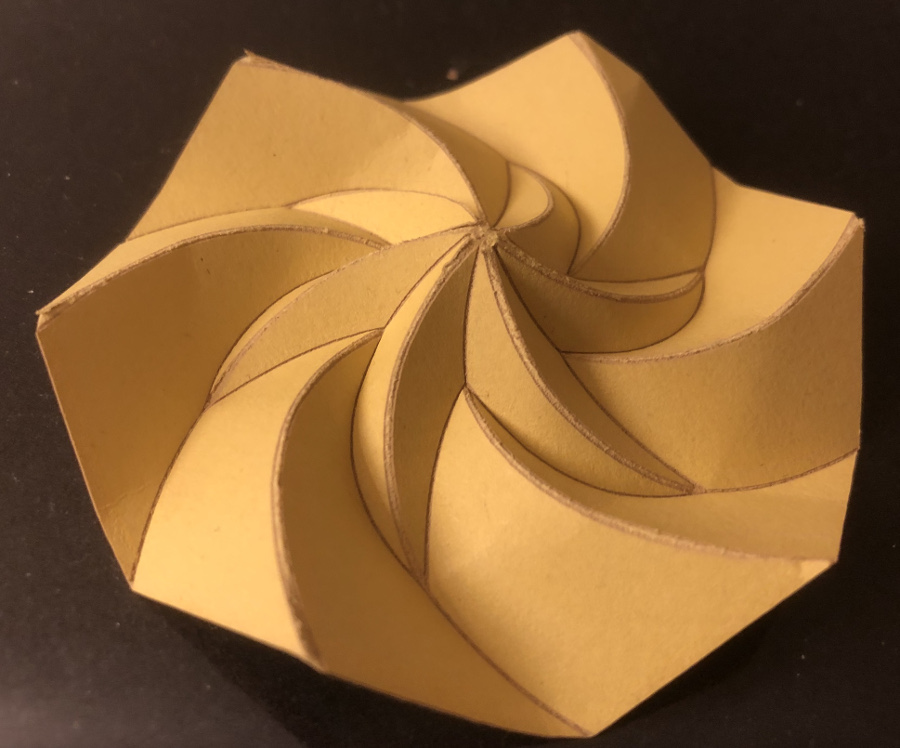
Result after final folding: after creation of alternances valley / montain on each line:
 Adobe illustrator Curvved Start Origami download
Useful links:
Download summary section:
-
Kirigami Honeycomb .svg file download
"Curved start.svg file download"
"Adobe illustrator Curvved Start Origami download"
Useful links
Abrashi Origami School Huge collection of Origami links Practical Origami instructions