Week13: Interface and Application Programming

Group assignment:
Compare as many tool options as possible
Individual assignment:
write an application that interfaces a user with an input &/or output device that you made
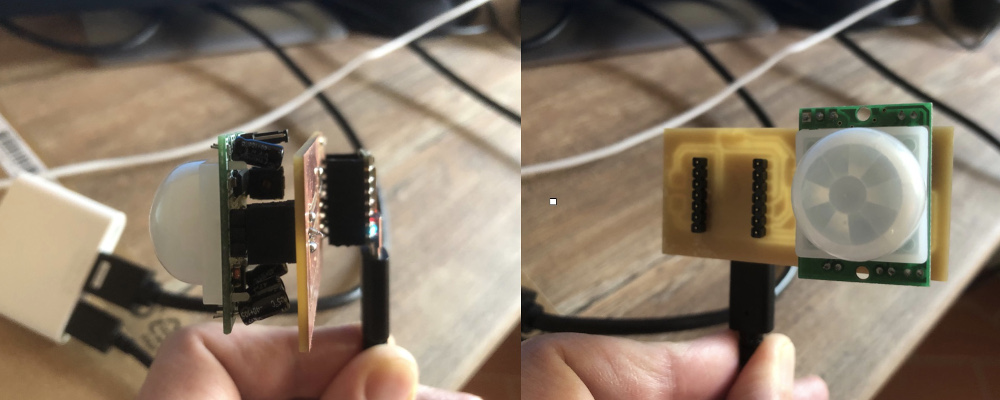
For this assignment, I have taken the hardware that had been built during the week 11 Input Device.
The hardware consists in a simple PCB build to support a PIR sensor.
The code uploaded on the XIAO RP2040 using ARDUINO IDE is as follows:
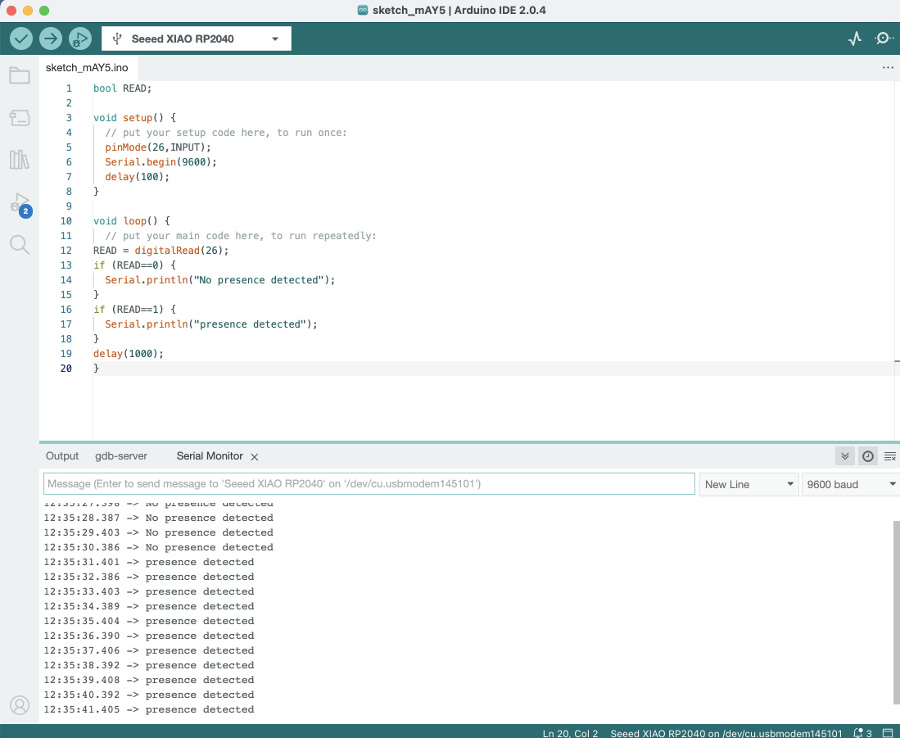
This basic application checks every second the status of the ouput PIN of the PIR sensor.
In case no presence has been detected (0), "no presence detected" message is propagated through the serial port.
In case a presence has been detected (1), "Presence detected" message is propagated through the serial port.
Project coding:
The idea is to use Python tools to carry-on the individual assignment of this week
Development environment preparation
First step consisted in the creation of a specific virtual enviornment associated to the working directory where python file are stored:
$ python3 -m venv .venv
When this instruction is executed, Python creates a new virtual environment in the specified directory. A virtual environment is a self-contained Python environment that allows to install packages and dependencies without affecting the system Python installation or other Python projects on the machine.
By using a virtual environment, we can ensure that our project has access to the exact packages and dependencies it needs, without conflicts or compatibility issues with other projects.
After that, there's a need to do the activation of the virtual enviornment newly created.
To do that, just run the following command in the Terminal:
source .venv/bin/activate
Then just verify the correct activation of the virtual environment using the following command:
$ which python3
This command returns: /Users/chris/Desktop/Week13_dev_Py/.venv/bin/python3
Installation of PySide6 packge:
PySide6 is a Python binding for the Qt framework, specifically Qt 6.
Qt is a powerful and widely-used cross-platform development framework for creating graphical user interfaces (GUIs) and applications.
PySide6 provides Python developers with the ability to utilize Qt's functionality and create interactive and feature-rich applications.
PySide6 is primarily used for GUI development: it provides classes and tools to create interactive user interfaces, handle events, manage layouts, display graphics, and more. The framework supports a wide range of UI elements, including buttons, labels, text fields, tables, and charts, enabling developers to create visually appealing and functional applications.
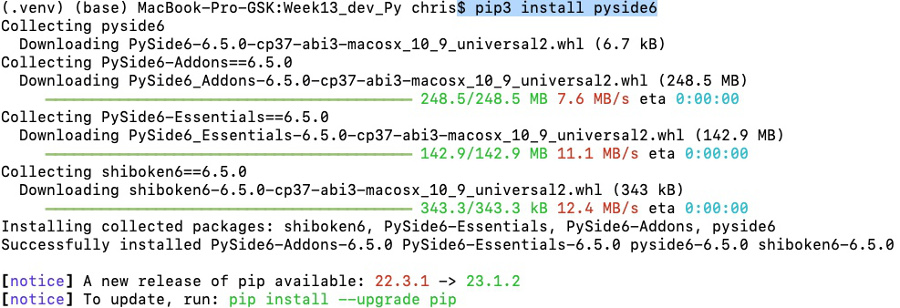
to install this package I ran the following command:
$ pip3 install pyside6
At completion of the installation process, things look that that:
Installation of pySerial
to install this package I ran the following command:
$ pip3 install pyserial
Activation of the virtual environment running the following command:
$ source .venv/bin/activate
$ which pip3
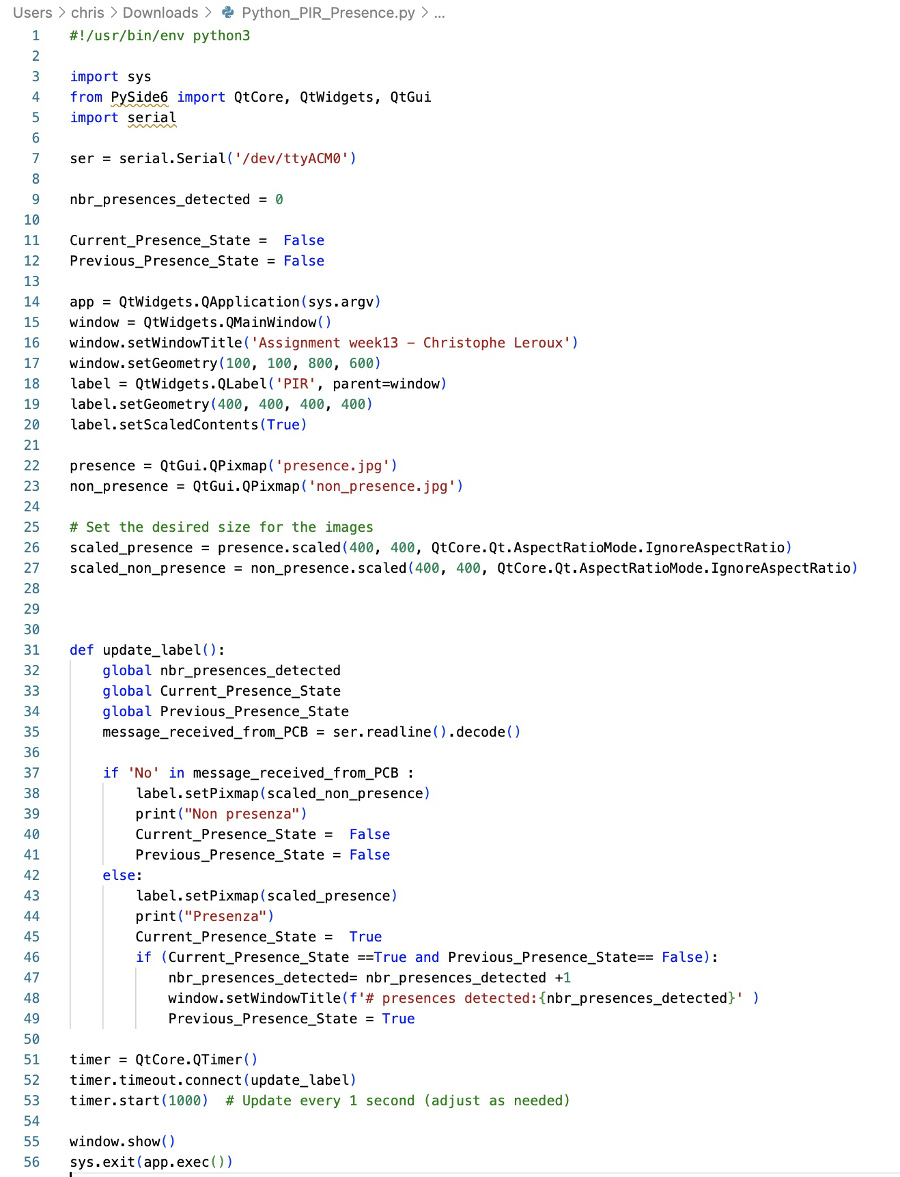
Python Code creation (this code will be executed on the computer).
What this piece of Python code will basically do is the following:
Overview of the Python code written:
 Python code Presence PIR
Execution of this Python code:
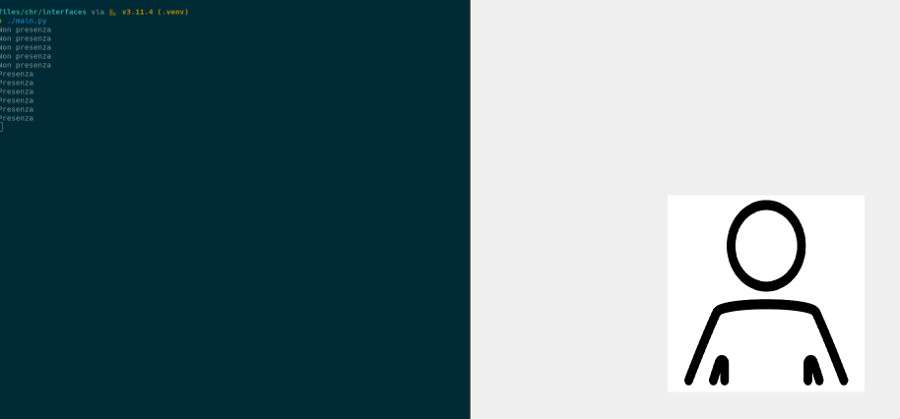
This simple application is working fine, the interface is very "basic" and would be potentially subject to enhancement to make it prettiest.
But all in all, very happy with the functionality implemented.