Week 12:Molding and Casting
Assignment Activities
1.Group Assignment.
.review the safety data sheets for each of your molding and casting materials,
then make and compare test casts with each of them
.Extra credit: try other molding and casting processes
2.Individual Assignment.
.design a mold around the stock and tooling that you'll be using,
mill it (rough cut + three-axis finish cut) and use it to cast parts.
extra credit: use more then two mold parts
For the Group Assignment link: Group Page
In this week 12,For Molding and Casting Week I dive deep into the molding and casting process though it was a while passed that chapter of molding and casting in my College but we learnt it as theory but now was practice of it, This was really an Awesome week.
In our Node we sat and discuss about molding and casting in details and everyone was then assigned to choose any design he wanted and designed it in a way that he wants and After design the mold of that Pattern.
Firstly,The main difference between molding and casting is the use of the material in the process. Casting will typically involve metal, while molding focuses on plastics. In both cases, the melted material goes into a die or mold to create the final form.
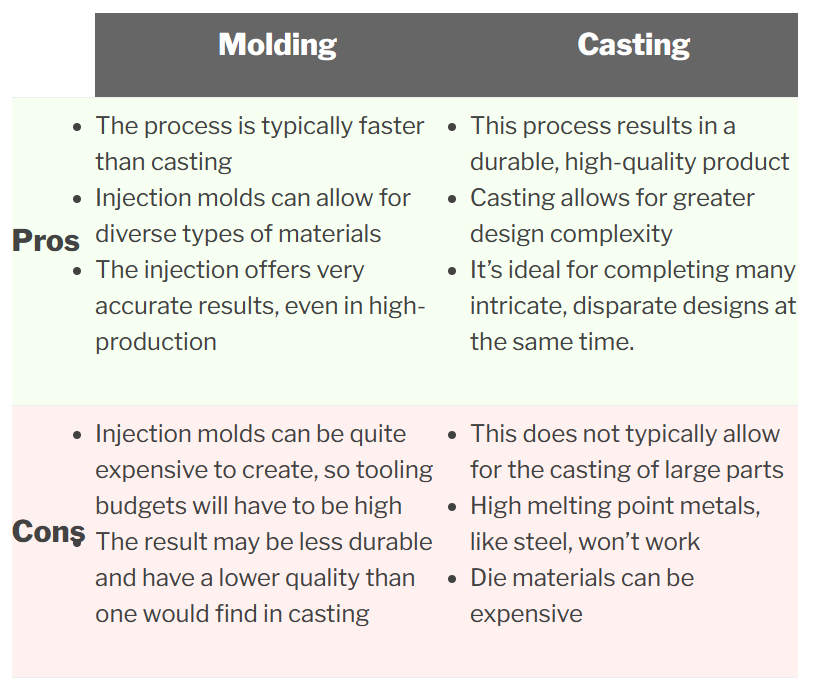
For More explanations between molding and Casting.
After Understanding the main difference between molding and casting, I continued with brainstorming of what I was about to design so that the mold could be presentable and could be simple.
WAX Safety Measures.
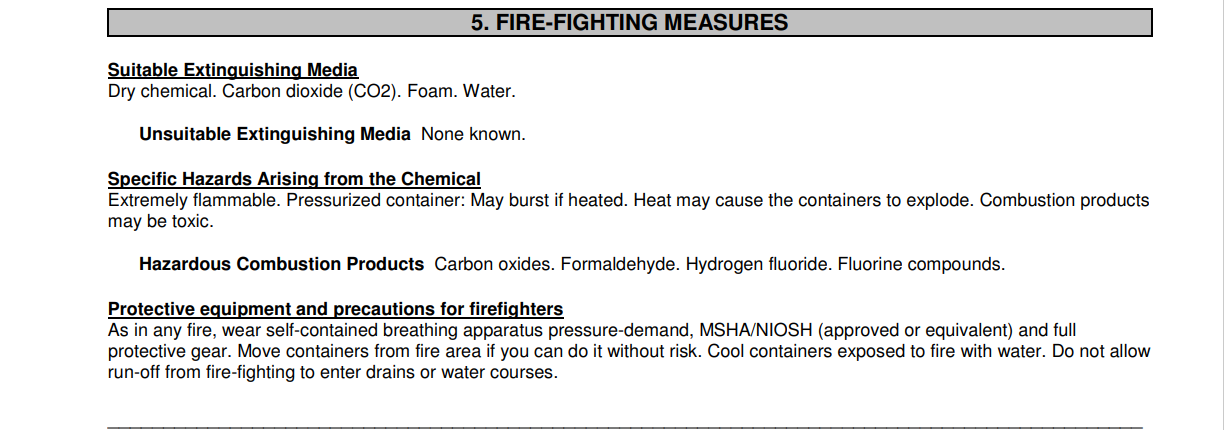
I have read the safety measures of the WAX through the WAX datasheet, I have been gained more details of how I can handle the wax in molding and casting,I have seen more essential components in the data sheet some of them are:Wax Properties,Hazards Identification,First Aid Measures,Fire Fighting Measures,Accidental Release Measures,Handling and Storage, and other Useful information regarding the Wax.
I wish to share some useful information that I have used while making wax mold, below are the Wax Characteristics.
-
PHYSICAL AND CHEMICAL PROPERTIES
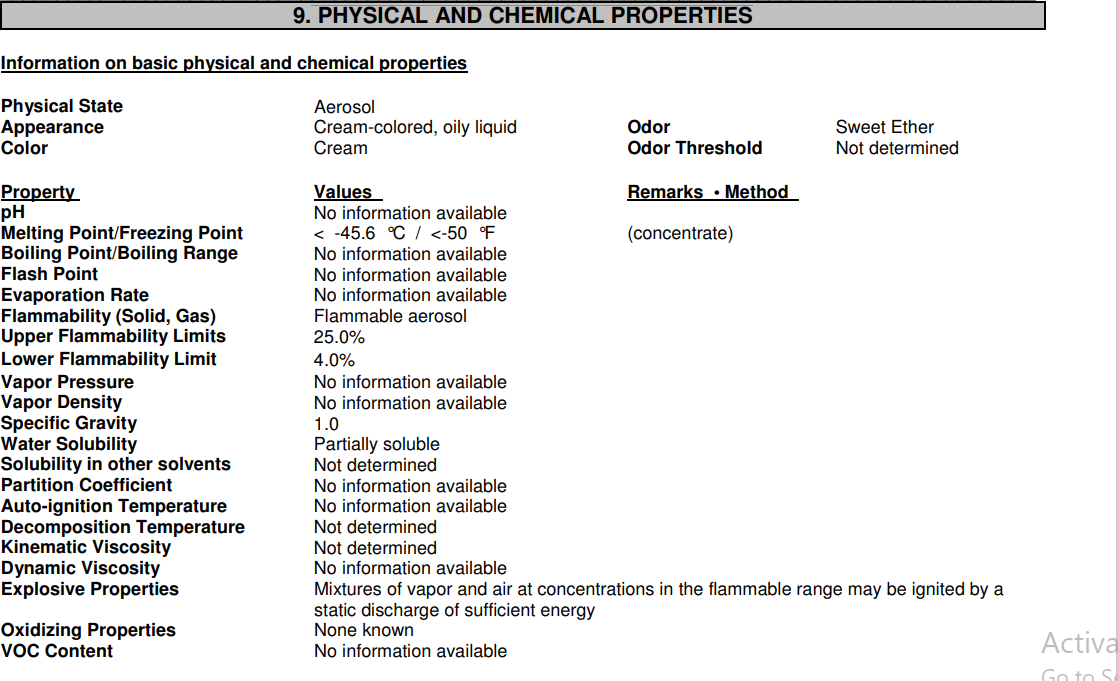
-
HAZARDS IDENTIFICATION
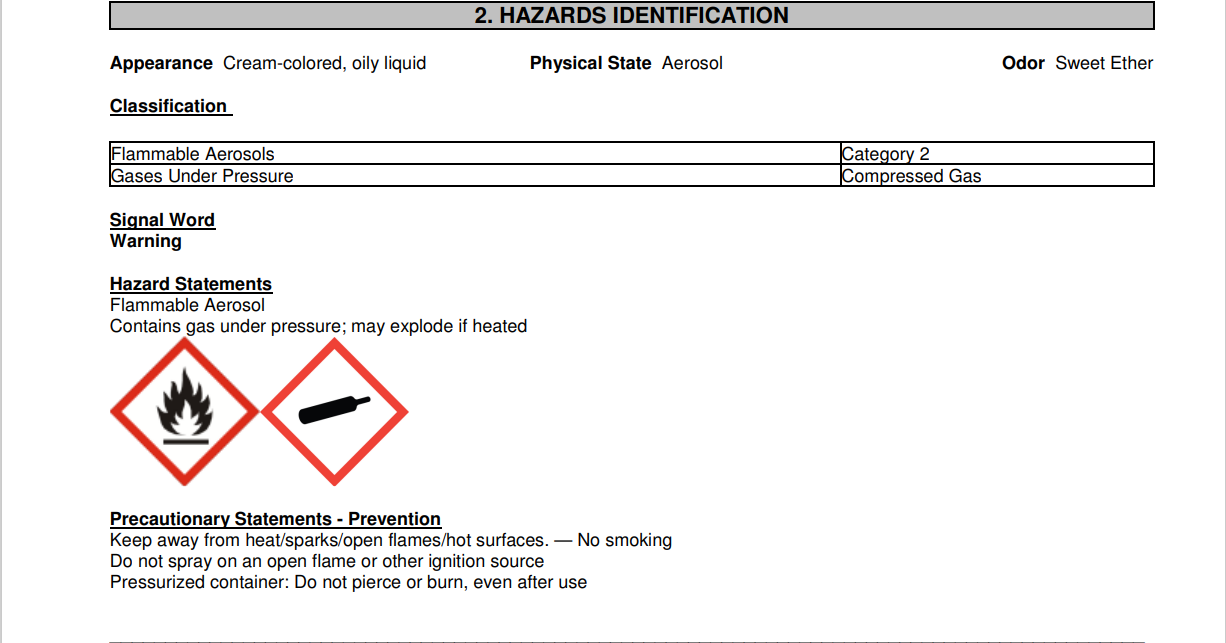
-
FIRST-AID MEASURES
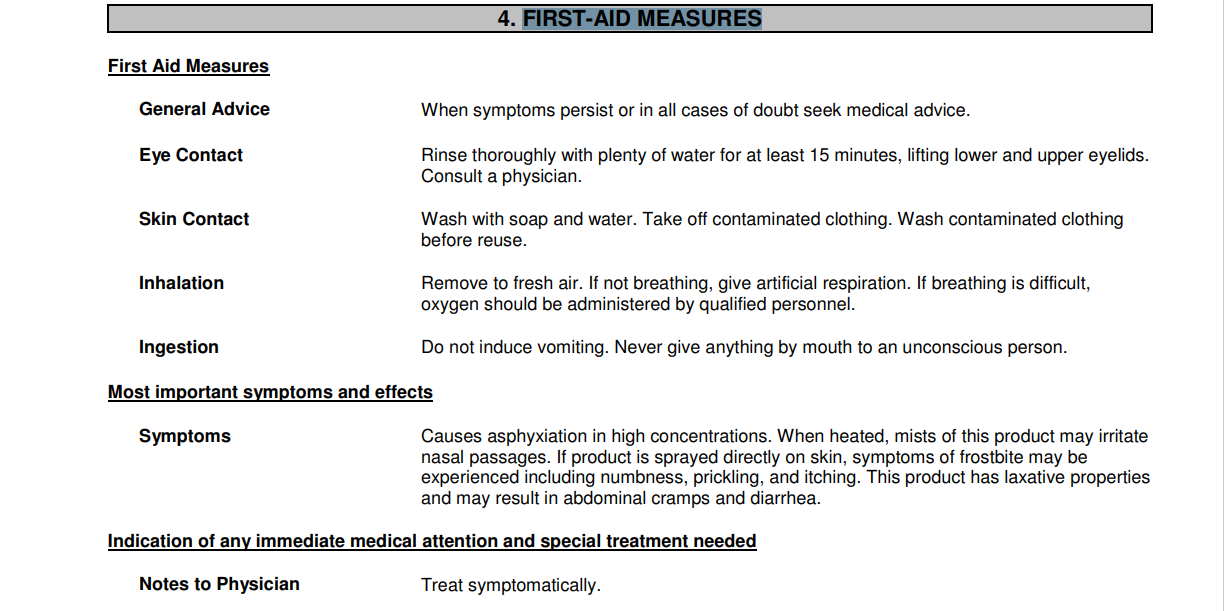
-
FIRE-FIGHTING MEASURES
-
ACCIDENTAL RELEASE MEASURES

-
HANDLING AND STORAGE

And There are other useful information and for more information regarding this datasheet you can download it below
Wax_Datasheet
After Reading the Safety of the Wax in Molding and Casting I continued to think about What I was going to mold like a pattern I was going to use.
Now I decided to cast something like the small bulb that I have seen in our workshop.

Then After the selection of the material I Started to design in Solidworks like The 3D model and The mold of the Pattern.
Below Are the Steps I followed to Design my Pattern and the Mold