Week 3:Computer Controlled Cutting
Assignment activities
1.Reflection on group Assignment.
2.Vinyl Cutter Design.
3.Laser cut design and Parametric Construction Kit.
Group Assignment
1.Reflection on group Assignment
On Saturday was an educative day for us in as group and individual level, we took enough time with the brief explanation about the fundamental concept, working principle and application of the laser cutter machine, I gained more theory and practical skills added on the theory of physics , it was like added value to my knowledge.
A laser cutting machine is a precise method of cutting materials,involving a focused beam of laser light which melts, burns or vaporises materials. It is capable of achieving accurate cuts with a quality finish, and its often used in engineering for the precision cutting of components of machines. For industrial applications, a laser cutting machine is often used to cut structural and piping materials.here
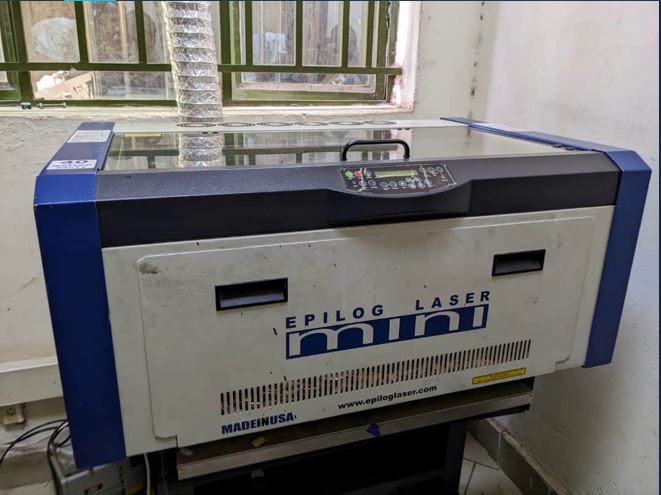
Our Laser is Epilog laser Mini , A laser cutting machine has settings known as the computer numerical control (CNC), as well as laser optics, which control and direct the laser beam’s intensity for the desired design effect, or the specific cuts required in a manufacturing or design project. The laser beam is generated by a process whereby electrical discharges or a lamp trigger a lasing material within a confined container causing a chemical reaction, resulting in a high powered beam being released. The beam is then reflected using a mirror in a stream of monochromatic light. From the mirror, the light is then directed by fibre optics or mirrors to the work area, with the narrowest point of the beam cutting or making the design etch on the material, For our laser its primary element is Carbon dioxide to be used in creating the beam of light. here
Our Laser Specifications
A.Laser Cut Focus
Laser Cut Focus means the extremely concentrated point where all rays converges on the same point,It ensures that the maximum amount of available energy produced by the tube reaches the work piece.
Steps To set Laser Focus;
-
Place the material/work piece that you want to cut or engrave on the cutting bed of the laser cutter. Make sure it is securely fastened in place.
-
Use a Vernier caliper to measure the thickness of the material. This information is needed to determine the correct focus distance.
-
By using the focus checker ,Adjust bed on Z-axis in order to create material-focus checker contact, once there's contact
-
Turn on the laser cutter and run a test cut or engrave on a small portion of the material. If the cut is too shallow or too deep, adjust the focus lens accordingly and repeat the test until the focus is correct.
-
Once the focus has been set correctly,and It is repeatitive work or using same material, you can remain with the focus until material is changed.
B.Power, speed, rate, kerf, joint clearance description and settings
It's critical to know the parameters to be used while using laser cutter machine, without knowing the variation of parameters and their effect to the outout it will be difficult to get the desired ,and they told us that requires some experience as someone get used in it he will get to know the parameters that fits to each type of material.
-
Laser Power:Refers to the amount of energy absorbed into the work sheet, And as you increase the temperature of beam increases in order to penetrate and also produce smokes which are consumed by filters.
-
Laser Speed:The Speed laser parameter describes the movement of the laser head. Fast speeds lead to short exposure times, slow speeds lead to long exposure times. For example, large-scale engravings of TroLase materials are engraved at high speeds between 80 and 100%, but for photo engravings with lots of detail on wood, the speed should not exceed 10%.
-
Laser Rate:It basically refer to how many cycles per period time, it is interconnected to the speed of the head in way that one depend on the other.
All the above parameters are setted either in the connected computer before printing or adjust it on the laser cutter machine.
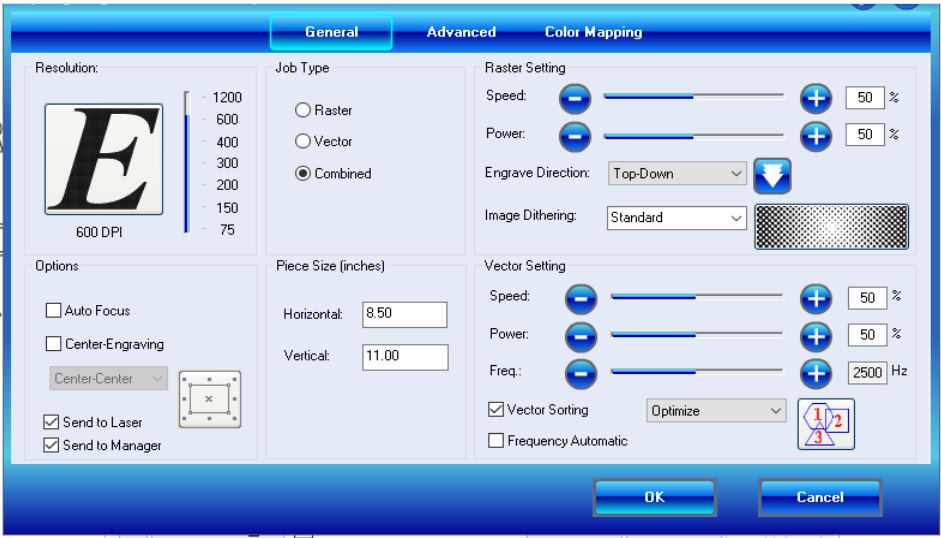
On Computer Settings

On Laser machine
-
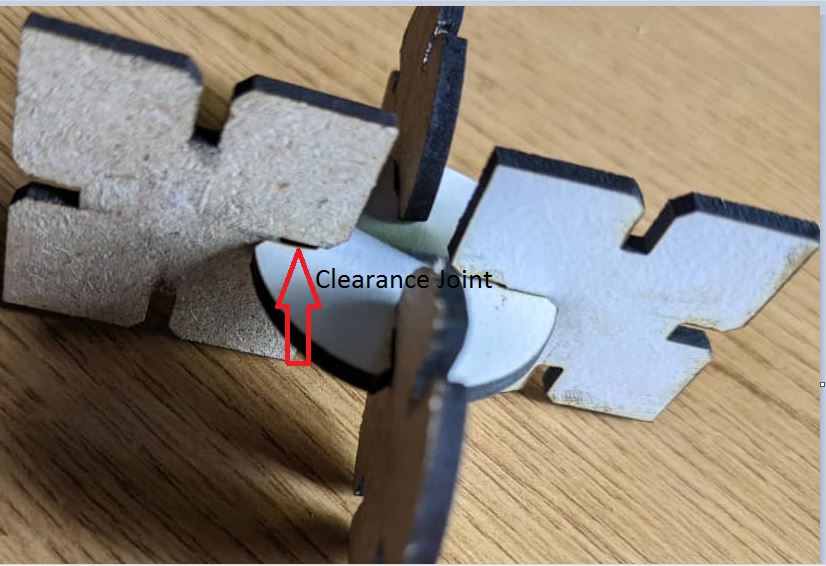
Laser Joint clearance:The joint clearance is the distance between mating surfaces of a joint, clearance are often required for materials to be coelesced and fit together each other.
You can access Group Assignment in details here
individual Assignment
2.Vinyl Cutter Design
Vinyly Cutter:The vinyl cutter machine is a computer controlled machine that looks like a printer but works a little differently. These machines consist of small blades or cutters whose movements are controlled by the computer. The computer directs these cutters to cut the desired shape and design into different mediums like paper, paperboards, leather, and other such things. These cutters are mostly used to produce designs on an adhesive plastic sheet that are generally known as, stickers. Different kind of crafts can be produced with different kind of cutters. The best large vinyl cutting machines can also produce large designs and banners of any imaginable shape and design.here
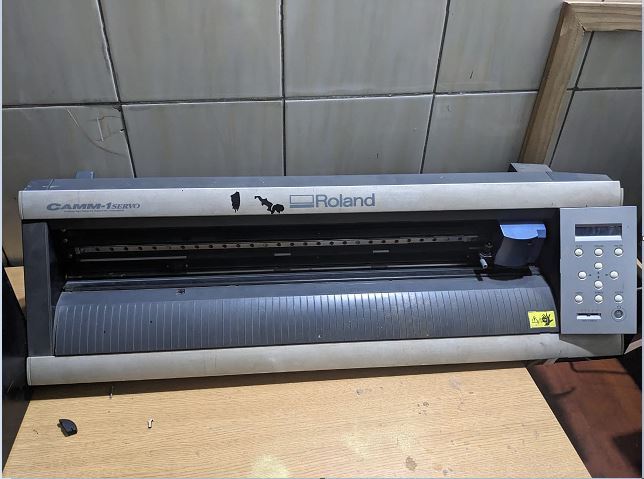
As we use the vinyl cutter to make some bunners and also stickers,and before we cut using the vinyl cutter machine we have to use the design that we created in another software, for me I used the inkscape software to design the panda design.
Steps that I followed while I was designing my panda sticker.
The first step is to create the new document in the inkscape, where i will start to draw by using different tools.
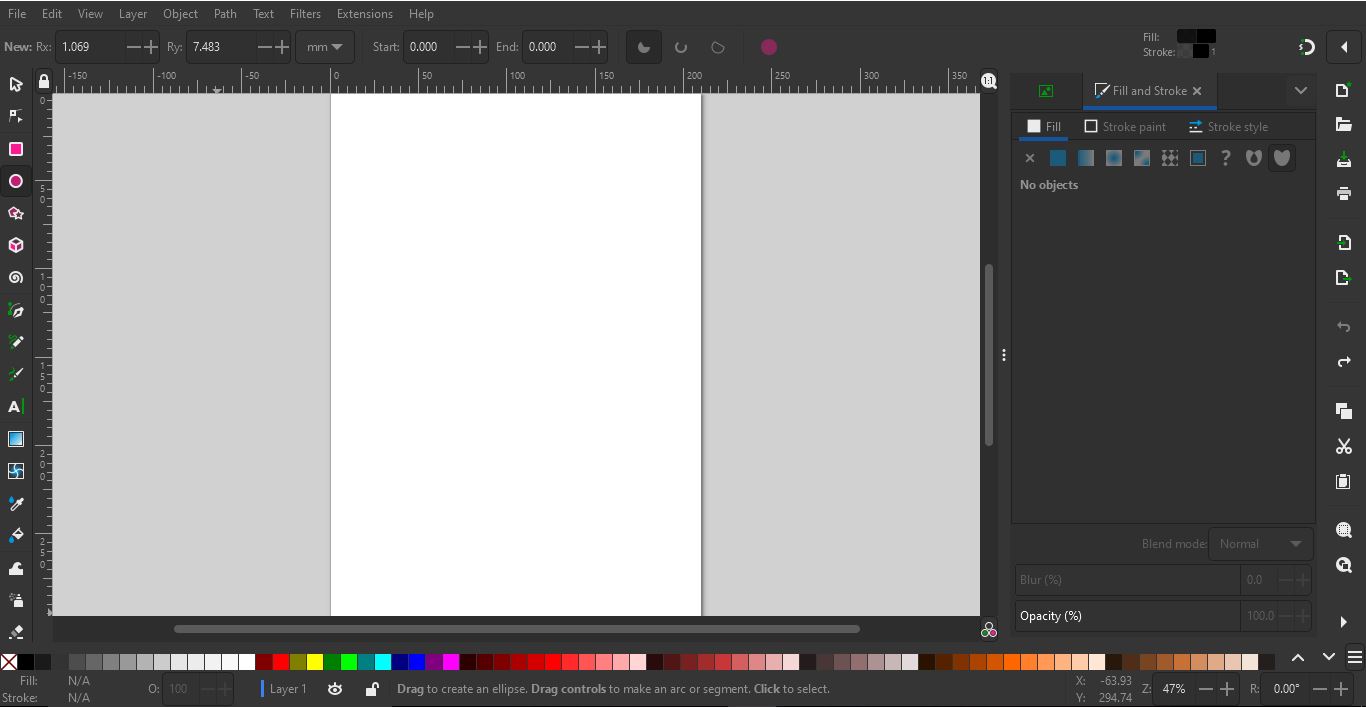
Secondly,I drew the panda by using the circle tool in giving the face in the black colour of white background
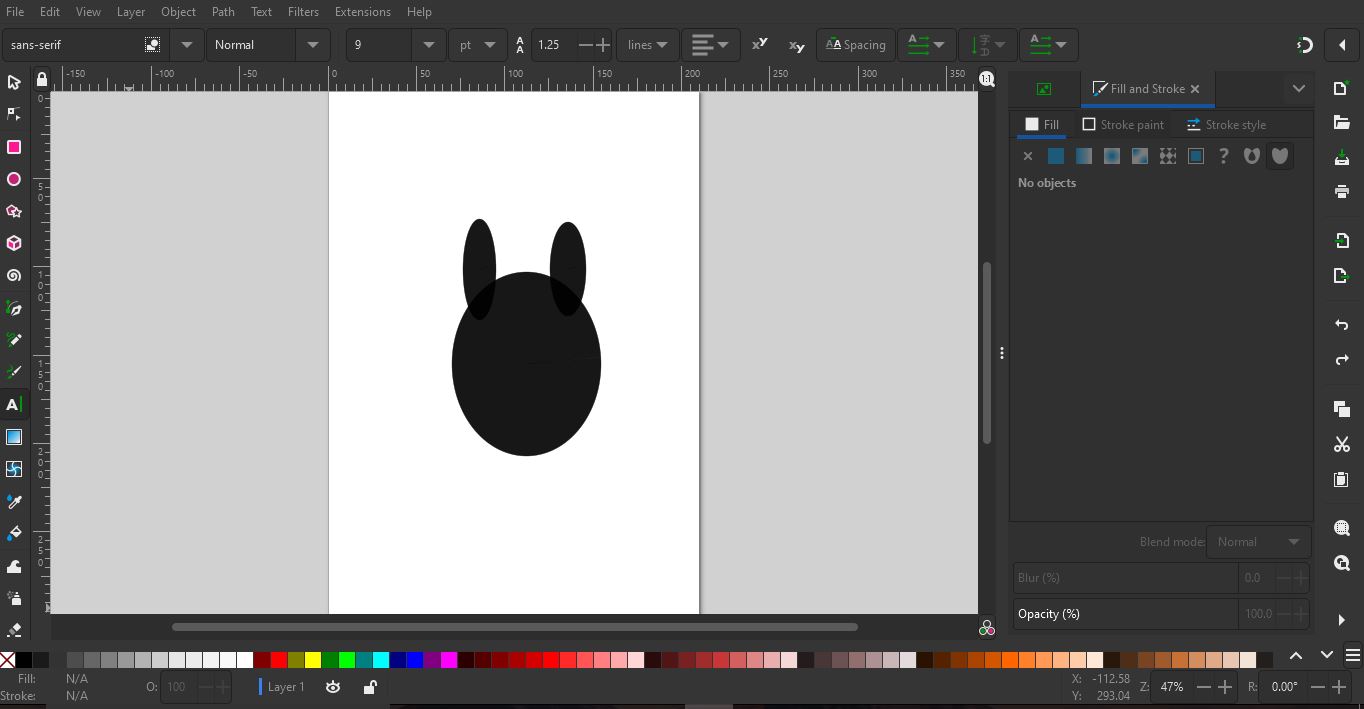
Next step,I drew the the eyes,nose and mouth , for the panda

Another step is to add the text, name of the panda , it became nice sticker to put on the electronic device.

Then the file of the inkscape is in the SVG(Scalable Vector Graphics) extension,then its imported to the easy_cut_studio
Steps of to follow while using easy_cut_studio
-
After download the setup and install Easy_cut_studio,through this here,then create the new document in Easy cut studio.
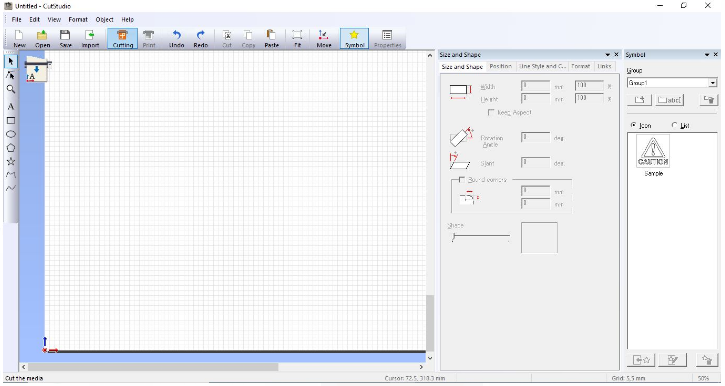
after creating new work sheet,import the image that I want to use, in order to cut it regarding desired dimensions,and the best of this app can be compatible with different many formats(extensions) like pdf,svg and many others.

After importing the SVG file in the worksheet ,I made adjustment to the image, for example;Alignment Image density ,extracting contour lines and also properties to display.
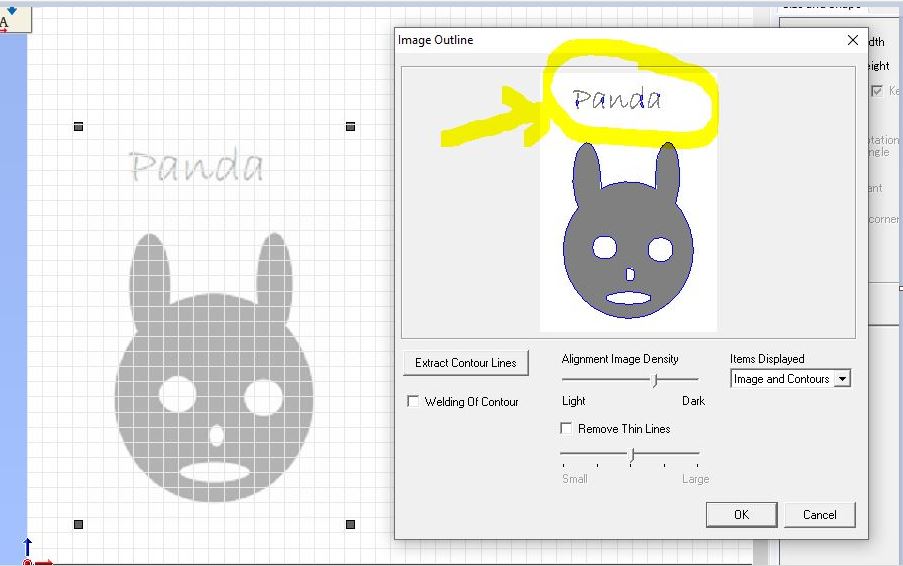
The next is to set the dimensions of the vinyl cutter and The software should allow you to adjust the size and position of the design on the cutting mat.
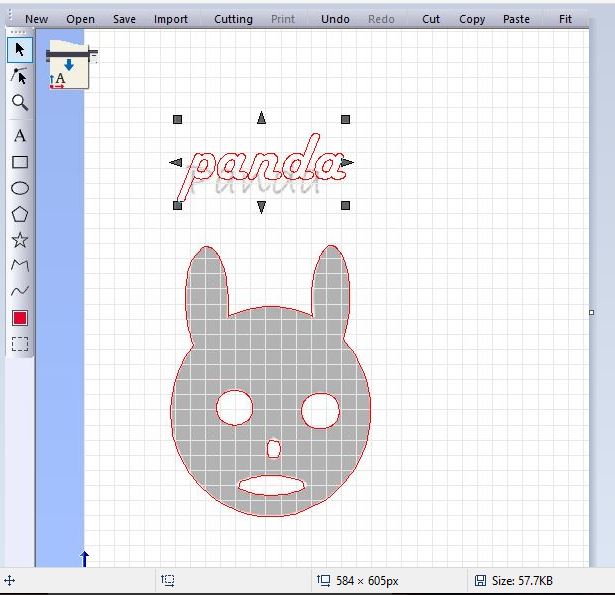
The next thing is to convert the image in the vector files so that whenever it is going to be cuttedmachine may follow the right path.

Set up the vinyl cutter: Load the vinyl into the cutter and adjust the cutting blade and pressure according to the type of vinyl you are using.
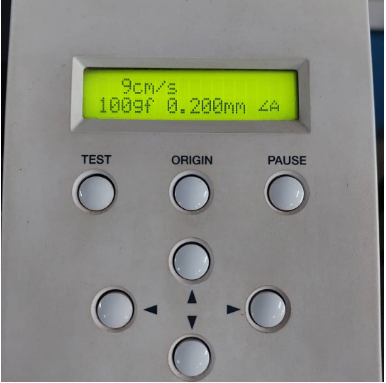
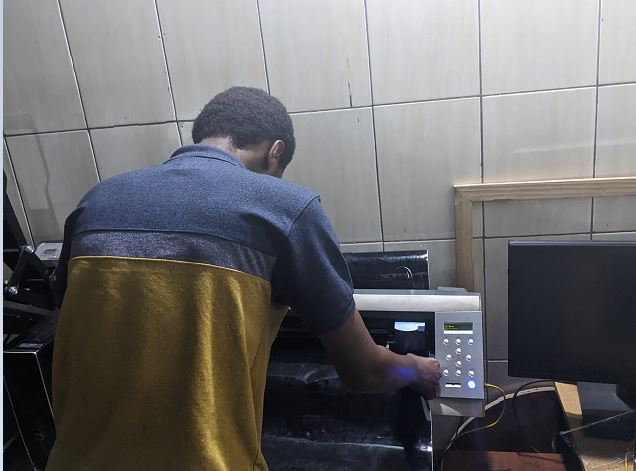
Send the design to the cutter: Once the vinyl cutter is set up and ready, use the software to send the design to the cutter. Make sure to select the correct cutting settings, such as blade depth and speed.
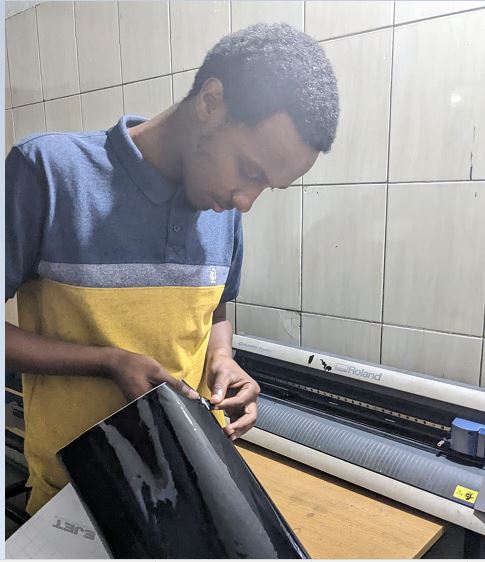
Weed the vinyl: After cutting, remove the vinyl from the cutter and carefully weed (remove) the excess vinyl around the design.
- The cutted vector image printed is this.
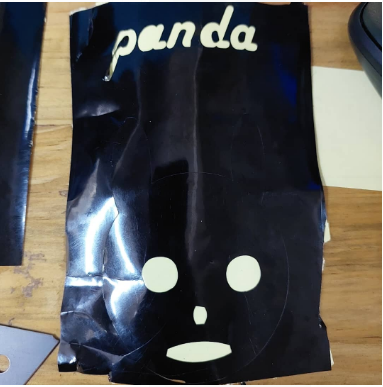
Apply the vinyl: Finally, apply the vinyl to the desired surface, using the transfer tape to help position and apply the design.


3.Laser cut design and Parametric Construction Kit.
As we have already discussed about The laser cutter machine which is used in cutting materials with a focused beam of laser light which melts, burns or vaporises materials, we have practiced it and implement the parametric press fit ,below are the process with followed to reach the final kit.
a.Design the press fit material in Solidworks.
After making the research about press fit Construction as the kit which can be assembled in multiple, I remembered Lego for children's toy, and I tried to design kit with parametric design.
Open Solidworks and create new document.

Choose the plane(front Plane), and sketch according to my desired output
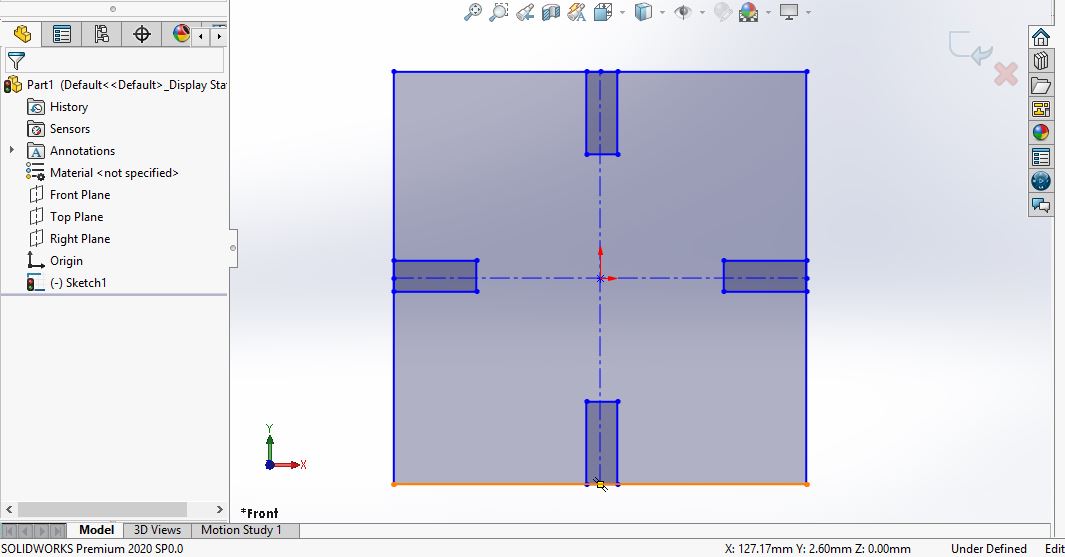
By considering the Parametric design of the sketch I included the global variables, steps to create global are easy , go to smart dimensions, before entering the number first add equal sign"=" and then write the name of global variables click ok and put the value of created variable, and check if your dimension has summation sign.

you will see summation sign as the result of setting global variable.
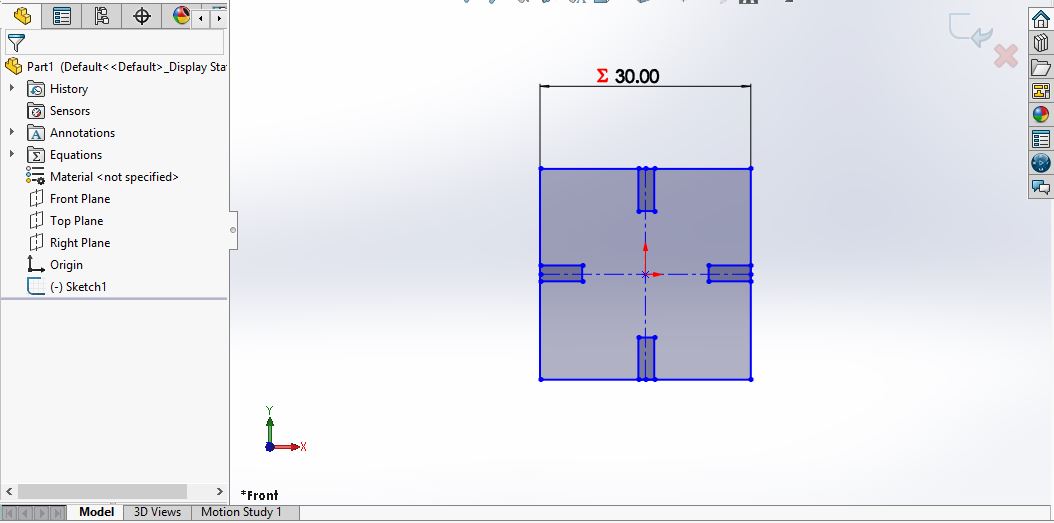
After assigning the relationship of all dimensions to one global variable.

The next step is to extrude with relation to the global variable , still in parametric design.
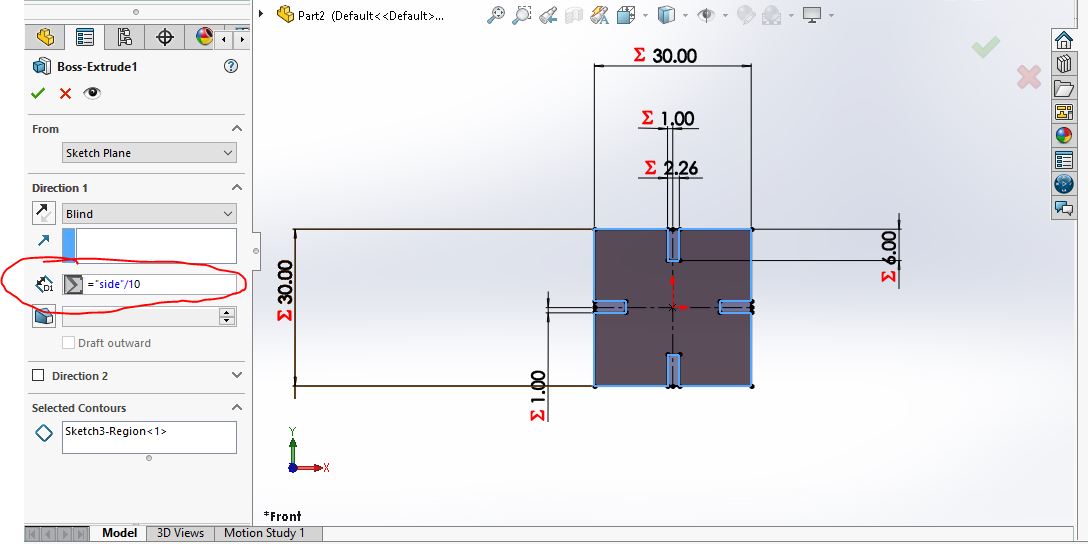
And I created chamfer also for better joint fittings of the materials , also is in relation with global variable.

Then save the file with extension of DXF File for readable extension in our software(Corel Draw)

Then it will be saved in 2D so that the laser may cut from Corel draw.
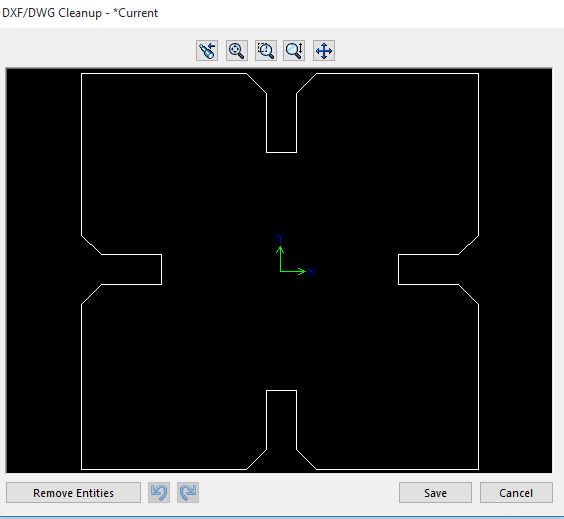
There are other press fits i did in the same way like the one I have presented, so it means the steps are almost similar there 2D images are below, the only difference is in the shapes, it is square,circle and polygon with six sides , other steps looks the same./h4>

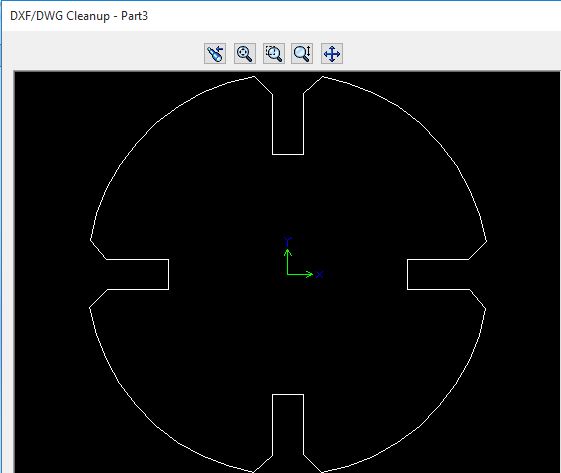
Then Last step is copy my DXF files on external disk to be inputed to corel draw of another computer, then we go to cut on Laser machine.
b.Cutting the design on laser Machine.
Then as I'm done with the design part of my press fit the next step is to take the design in DXF format and put it in another software which uses 2D for me I used Corel Draw and in that format laser machine will read it.
Steps followed to print my press fit;
-
Copy the DXF files in the Corel Draw, and see if the dimensions are fitted as you did in solidworks.

-
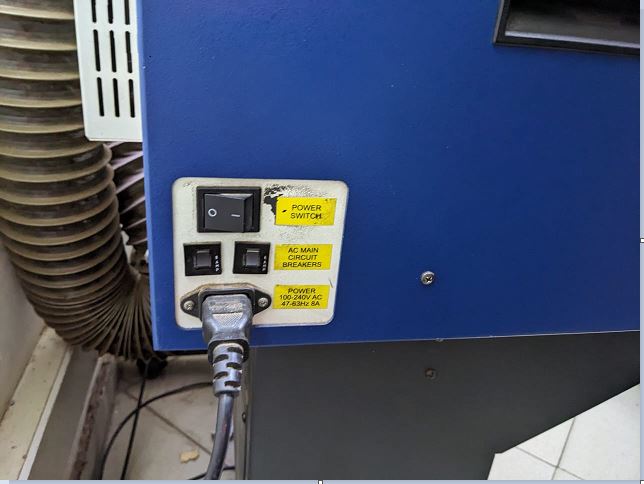
I have to switch on the machine , by clicking on switch button on the side of the laser
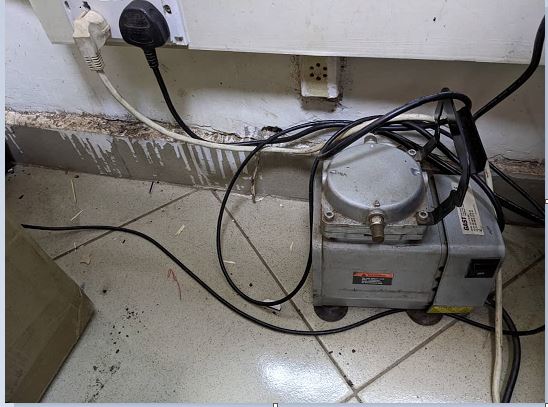
I have to switch on the compressor ,so that whenever job starts it bring the pressure through the beam pipe to allow the beam passing channel with high strength.
I have to switch on the filter also to consume all the smokes in the laser machine and reduce heat exposure and fumes.

-
After switch on the Laser machine, I have to configure Laser machine and my computer (linking the devices in order to send the job), After configuration, Adjust the focus as we have said above in setting the Laser focus, press ctrl+p in order to print the job
After Pressing ctrl+p,I have to set parameters in the Power,Speed and rate ,for me I used power:100% ,speed:10%,Rate:2500 HZ

-
Cutting the job by using material ply wood
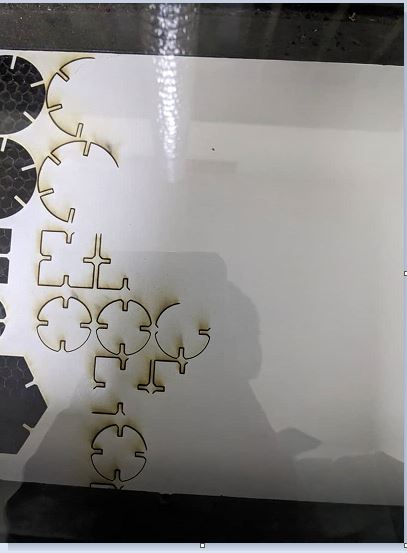
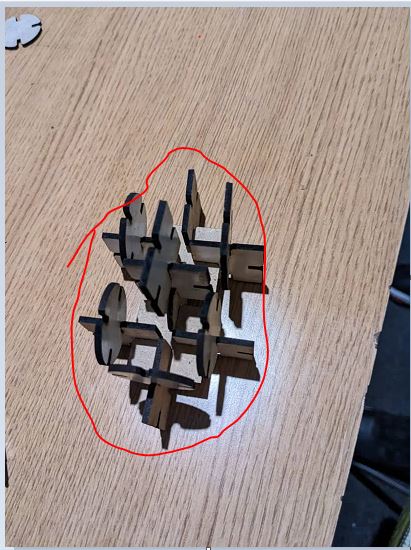
After printing the required number of press fits, I got to assemble them in multiple ways
The primary press fit I used in my design.
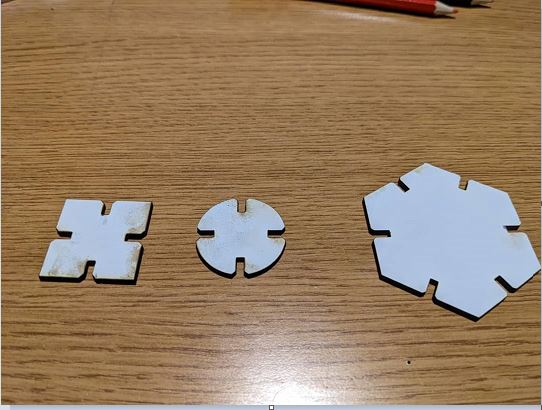
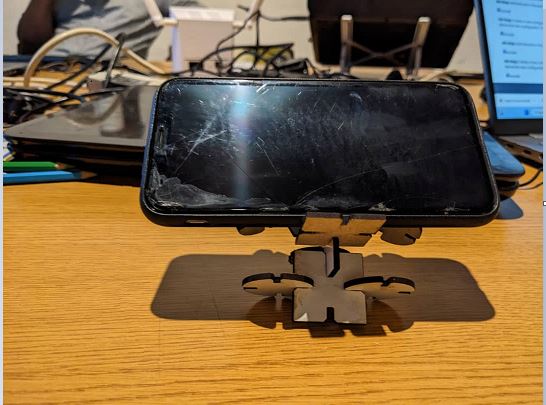
I made different assemblies to make different , It was like lego to be used as children toys, I made colour stand,bus stop sign and phone stand, and you can another thing that you want.
Colour stand
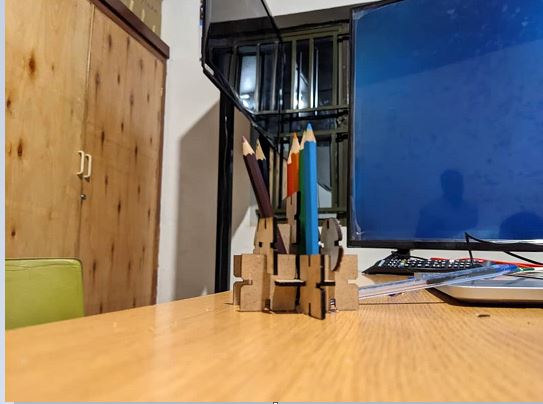
Bus Stop sign

Phone stand
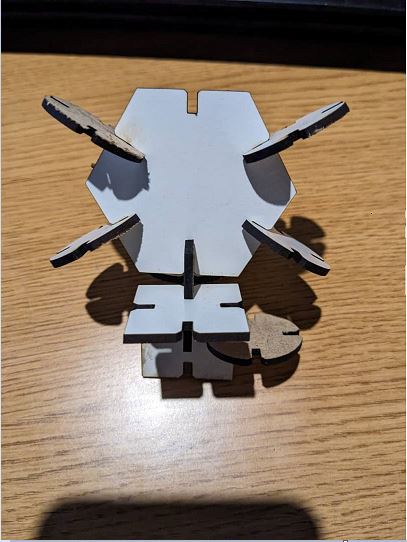
Phone on the stand
The top view
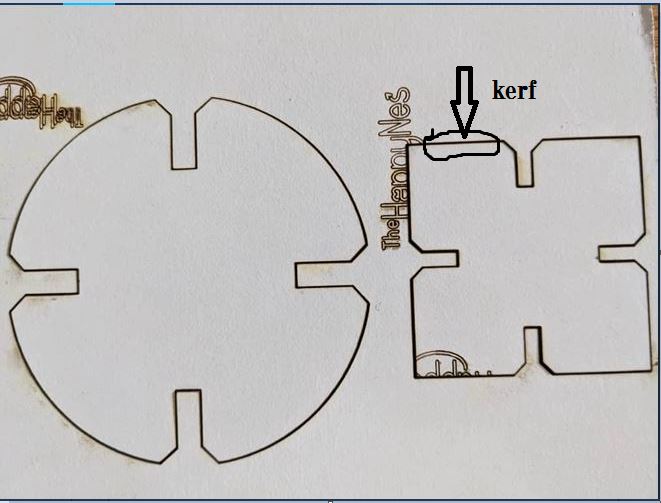
MY KERF
Laser Kerf:is the slit caused by the laser beam cutting into the material/workpiece,As we have stated it before that the kerf is the slit caused by the laser beam cutting into the material/workpiece.
After cutting my design using the Ply wood I measured the kerf and I found that it's equal to 0.35 mm, I have got that the kerf depends on the type of material as we have different types of material like Acrylic, Ply wood and other , means whenever Laser beam is passing it creates different kerf depending on their nature and mostly is melting temperature (temperature properties).
Comparison between the Laser cutter machine and Vinyl cutter machine
- Laser cutters can handle different materials that a cutting plotter cannot
- A laser cutter can do the work of vinyl cutters; however, a cutting plotter cannot overtake the job of a laser cutter
- Vinyl cutters cannot make markings or even the engravings like the laser cutters do
- The laser cutters can handle a variety of materials than the vinyl cutters, here
hereyou can access the files