Week 5:3D Printing and Scanning
Assignment activities
1.Group Assignment.
.test the design rules for your 3D printer(s)
2.Individiual Assignment.
.design and 3D print an object (small, few cm3, limited by printer time)that could not be made subtractively
.3D scan an object (and optionally print it)
1.Group Assignment.
Test the design rules for your 3D Printer.
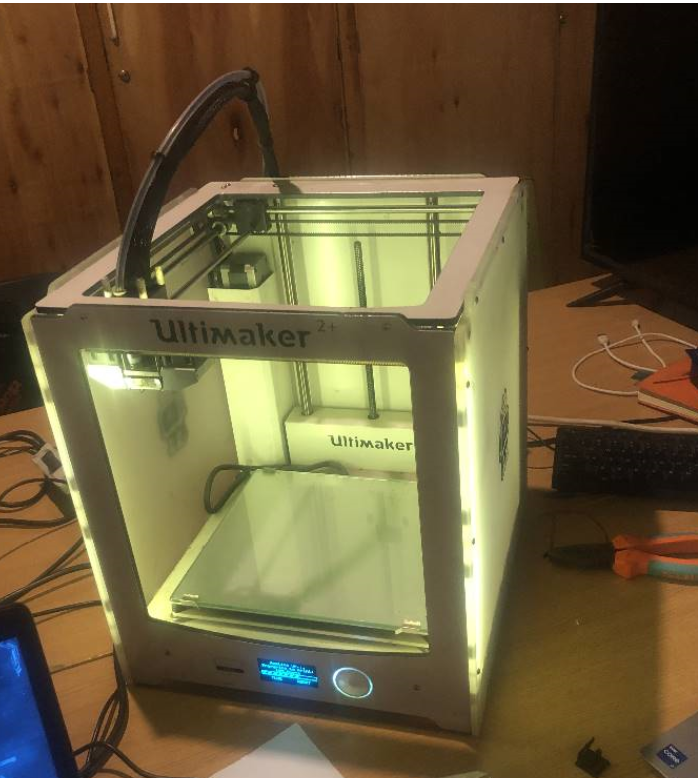
In week5 we had to print and scan 3D Model, It was really an educative and marvelous week for me, I had enough time to explore more about 3D model design and machine used in printing those objects,for us in Rwanda node we use ultimaker 2+ (3D printer).
We started by repairing the ultimaker which were setted apart and unfortunately it's the one we continued to use in the designs,we have studied editings the settings.
As we said above, we used Ultimaker2+: is a desktop 3D printer manufactured by Ultimaker
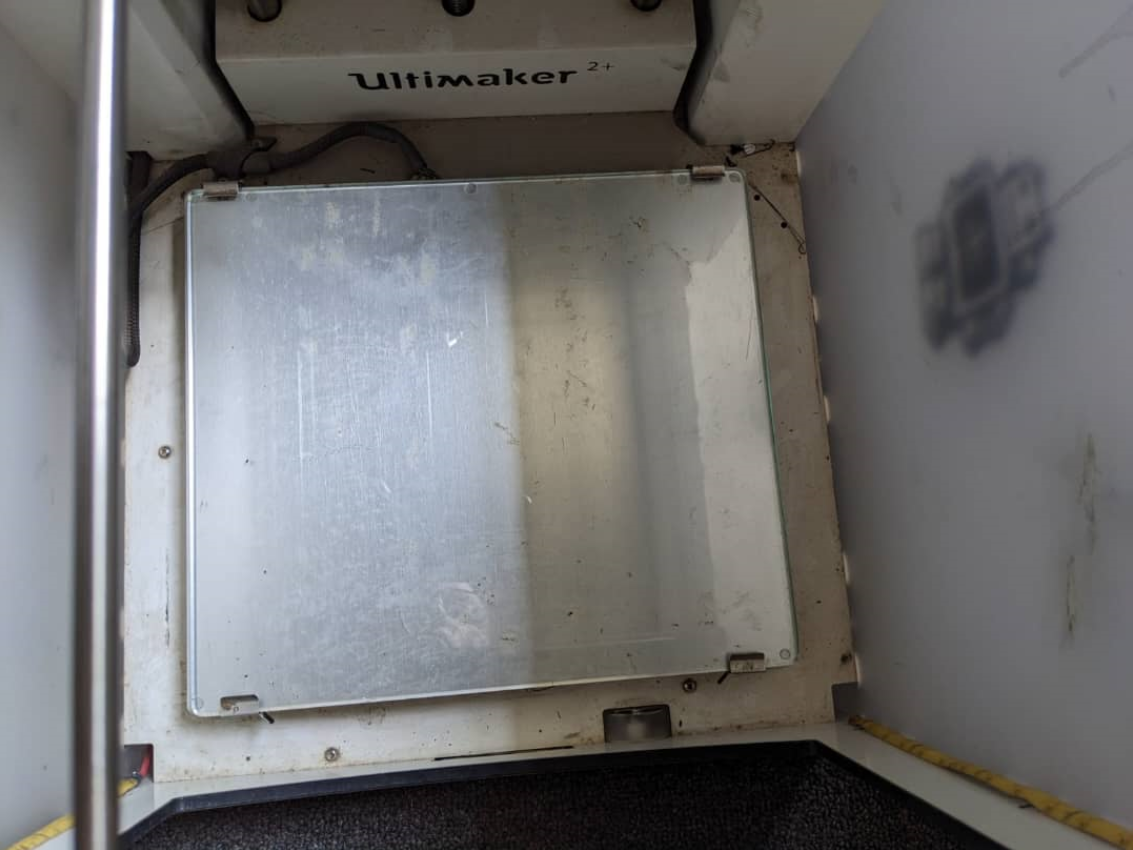
These are the parts of our 3D Printer(ultimaker 2+) below;
-
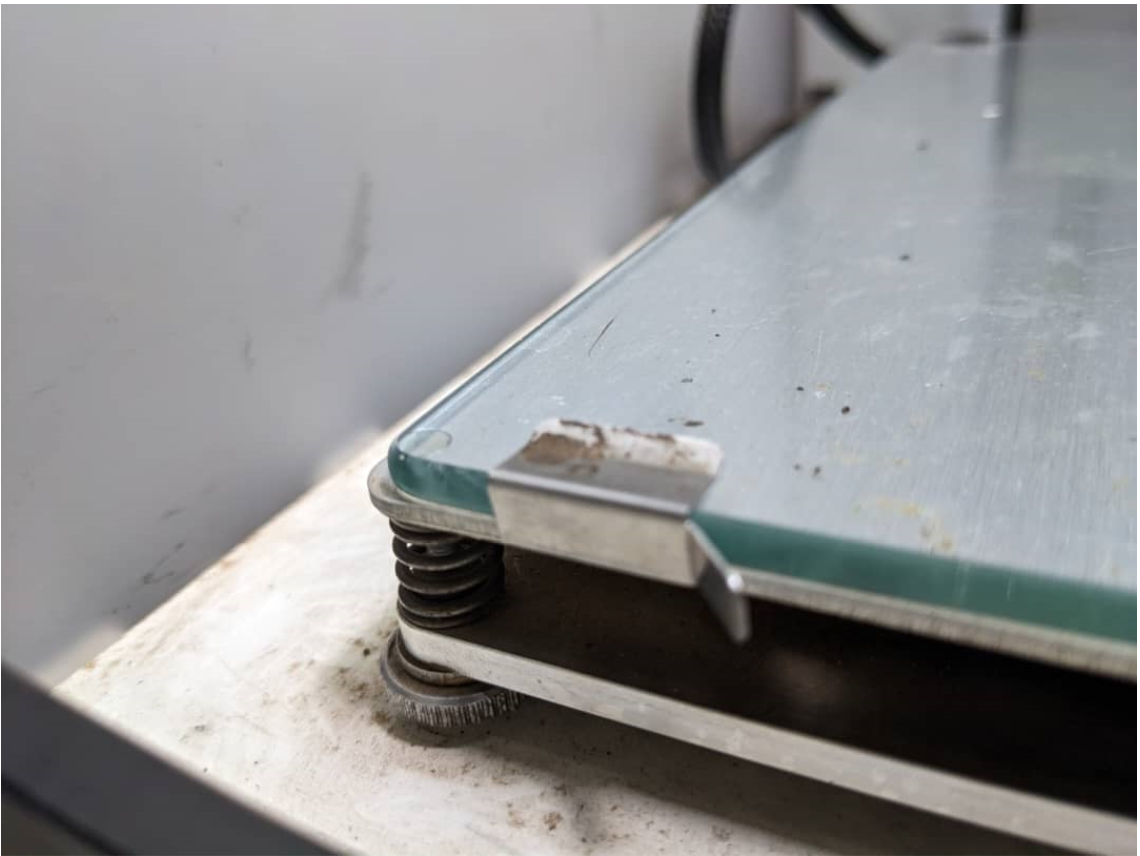
Build Plate:This is the surface upon which the 3D model is printed. It is usually made of a material like glass, and is heated to allow for better adhesion of the printing material.
- Print Head: The print head is the part of the 3D printer that deposits the printing material. The Ultimaker 2+ uses a single extruder print head, which can be fitted with various nozzle sizes to accommodate different printing needs.
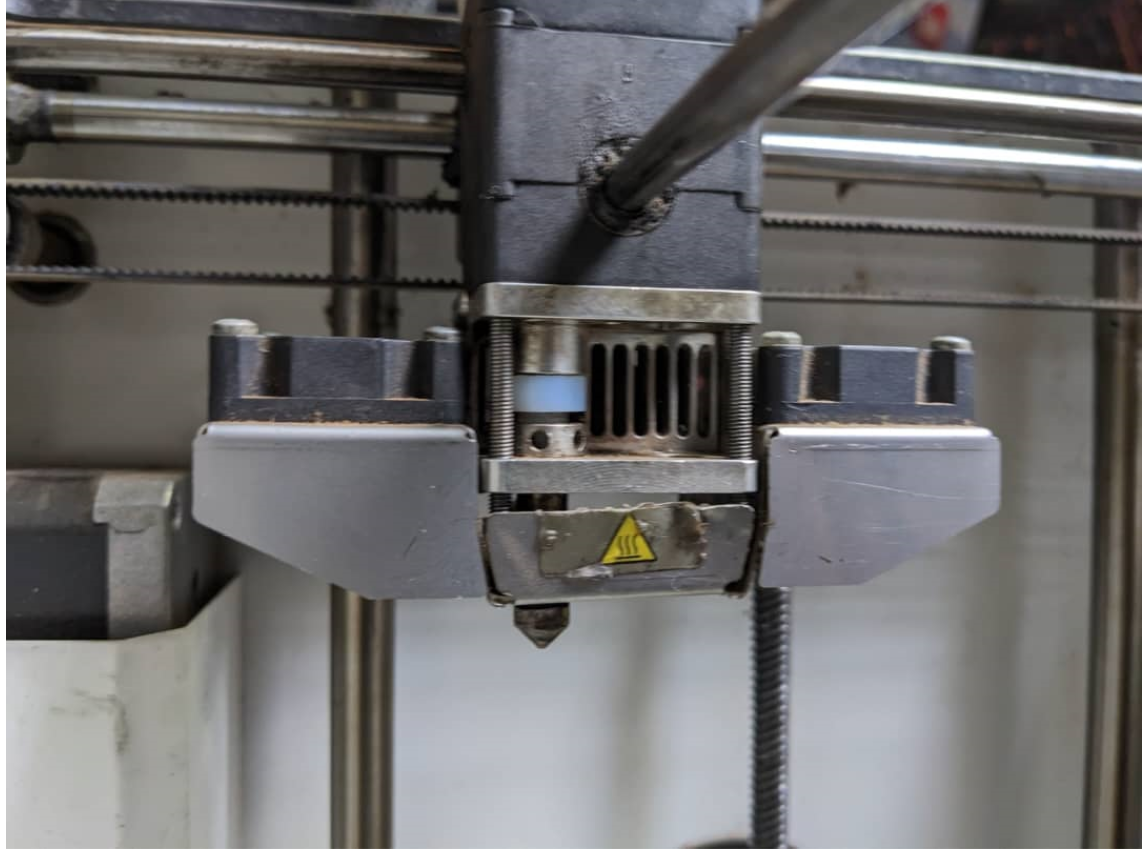
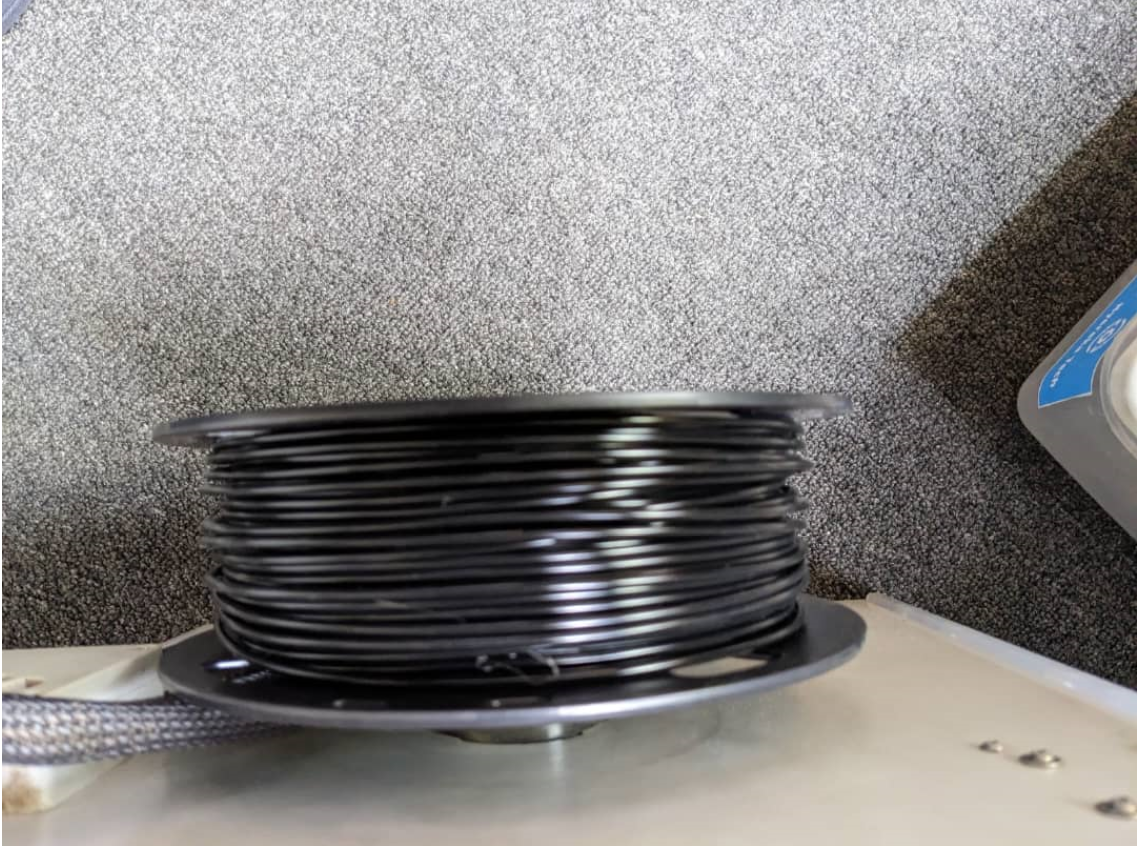
- Bowden Tube:The Bowden tube is a long, thin tube that connects the print head to the spool of printing material. It helps to guide the material from the spool to the print head.

- Filament Spool Holder:The filament spool holder is a part of the Ultimaker 2+ that holds the spool of printing material in place. It is usually located on the back of the printer.
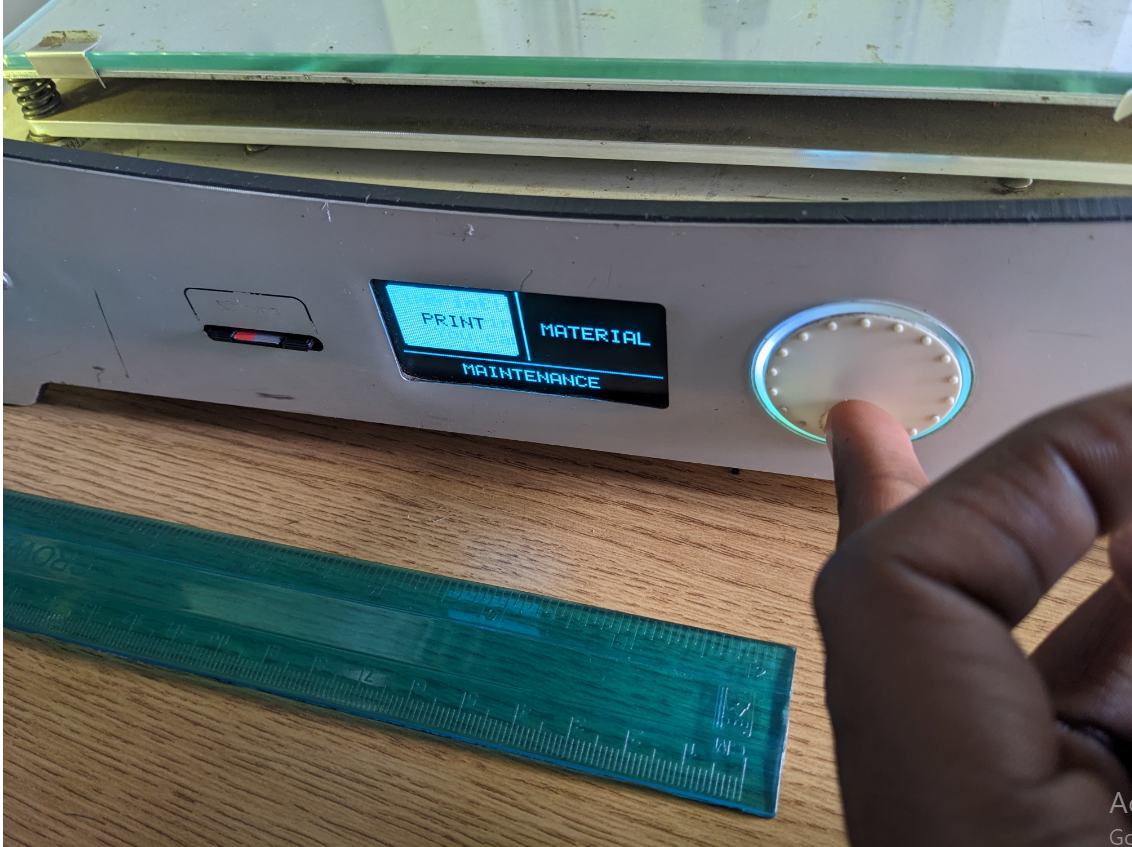
- Control Panel:The Ultimaker 2+ has a control panel that allows the user to navigate through various settings and options for the printer. This includes settings for print speed, temperature, and material type.

- Power Supply:The power supply is what provides power to the Ultimaker 2+. It is usually located at the back of the printer.

- Fan:The Ultimaker 2+ has several fans that help to cool the printing material as it is being deposited, which can prevent warping and other issues.

- Z-Axis Rods:The Z-axis rods are long, vertical rods that help to guide the print head up and down as it moves along the build plate.

- Print Bed Leveling Knobs:The Ultimaker 2+ has several knobs that allow the user to adjust the height of the build plate, which is important for ensuring proper adhesion and print quality.
Was not only this we studied but also we make some modifications in settings, and we realise their effect when we printed,there are few primary parameters in settings which have effects on the model,below is the list of main parameters which we use in ultimaker cura.
Parameters in Ultimaker cura;
- Layer Height:This determines the height of each layer of the print. A lower layer height will result in a smoother surface finish, but will take longer to print.
- Infill Density:This determines how much infill material is used to fill the inside of the print. A higher infill density will result in a stronger print, but will take longer to print.
- Printing Temperature:This determines the temperature at which the material is extruded. Different materials have different optimal printing temperatures.
- Print Speed:This determines how fast the print head moves during printing. A higher print speed will result in a faster print, but may reduce print quality.
- Support Structure: This determines whether support material is printed to support overhanging parts of the model. The support material is removed after printing.
These are just a few of the many parameters that can be adjusted in Ultimaker Cura. Other parameters include infill pattern, print cooling, and print acceleration, among others.
to test printer parameters as follows
for the 3rd part we have assigned as setting, we set the quality, walls, infill
i have designed an object that will help me to test the minimum wall thickness, and the maximum overhead of printing

i have set the infill of 50% and grids of triangle, left wall thickness as default to 1.0mm and wall line count as 2 after setting the parameters.

After clicking slice button,I found that time is 20 minutes.

i made 3 stands that would help to test the over hang of printing the 1st has 2mm of over hang the 2nd has 4mm the 3rd has 6mm overhag as well,and also built two walls one has thickness of 1mm and another one with 2mm of thickness.

as it is show in the picture above the object printed has low resolution because the settigs i set in i slicer to prepare the printing process the overhang test did survived 2mm long and likely 4mm but when it comes to 4mm somehow it failed the hanging the wall thickness successful printed as well as the the nosel of the printer has the diameter of 0.4mm hole size
Here you can access the group assignment in details here
2.Individual Assignment.
3D Printing Object
It was really an interesting week for printing the object,many people are familiar to 2D objects and their machine,but whenever we consider 3D objects most of the people are not aware of how it can be manufactured, i remember my first time to hear 3D printer and I was like can I go to see the machine, I'm always wish to print anything that is expressed in 3D
This week started when I was thinking like it's easiest week in all weeks but I found it's quite difficult because of the condition that have setted, so as to design something that cannot be substractive, and I started to think I can design and print,I rejected designs I was thinking of before.
3D printing: also known as additive manufacturing, is a process of creating three-dimensional objects from a digital model,We used filament and it can be used in printing the products of plastic nature.
For me in my node we usually use the ultimaker 2+ 3D Printer, and We use the application called ultimaker cura which uses converts the file with extensions of STL to G-Code.
The 3D Printer I used in my work is Ultimaker 2+, below is the machine
To download ultimaker cura application Here's the link
it will directs me on the interface where I clicked download for free button

These are the steps I followed while I was printing my design by 3D Printer (Ultimaker 2+):
- Firstly,In the group assignment while we were learning to print, we have downloaded the the application called ultimaker cura which can be compatible to our 3D printer,Ultimaker Cura is a popular software used to prepare 3D models for printing.
- Design the 3D model: First,I needed to design the 3D model you want to print using computer-aided design (CAD) software for me I used Solidworks.
- After creating the design in solidworks, I saved it with extension of STL so that ultimaker cura can accept it.
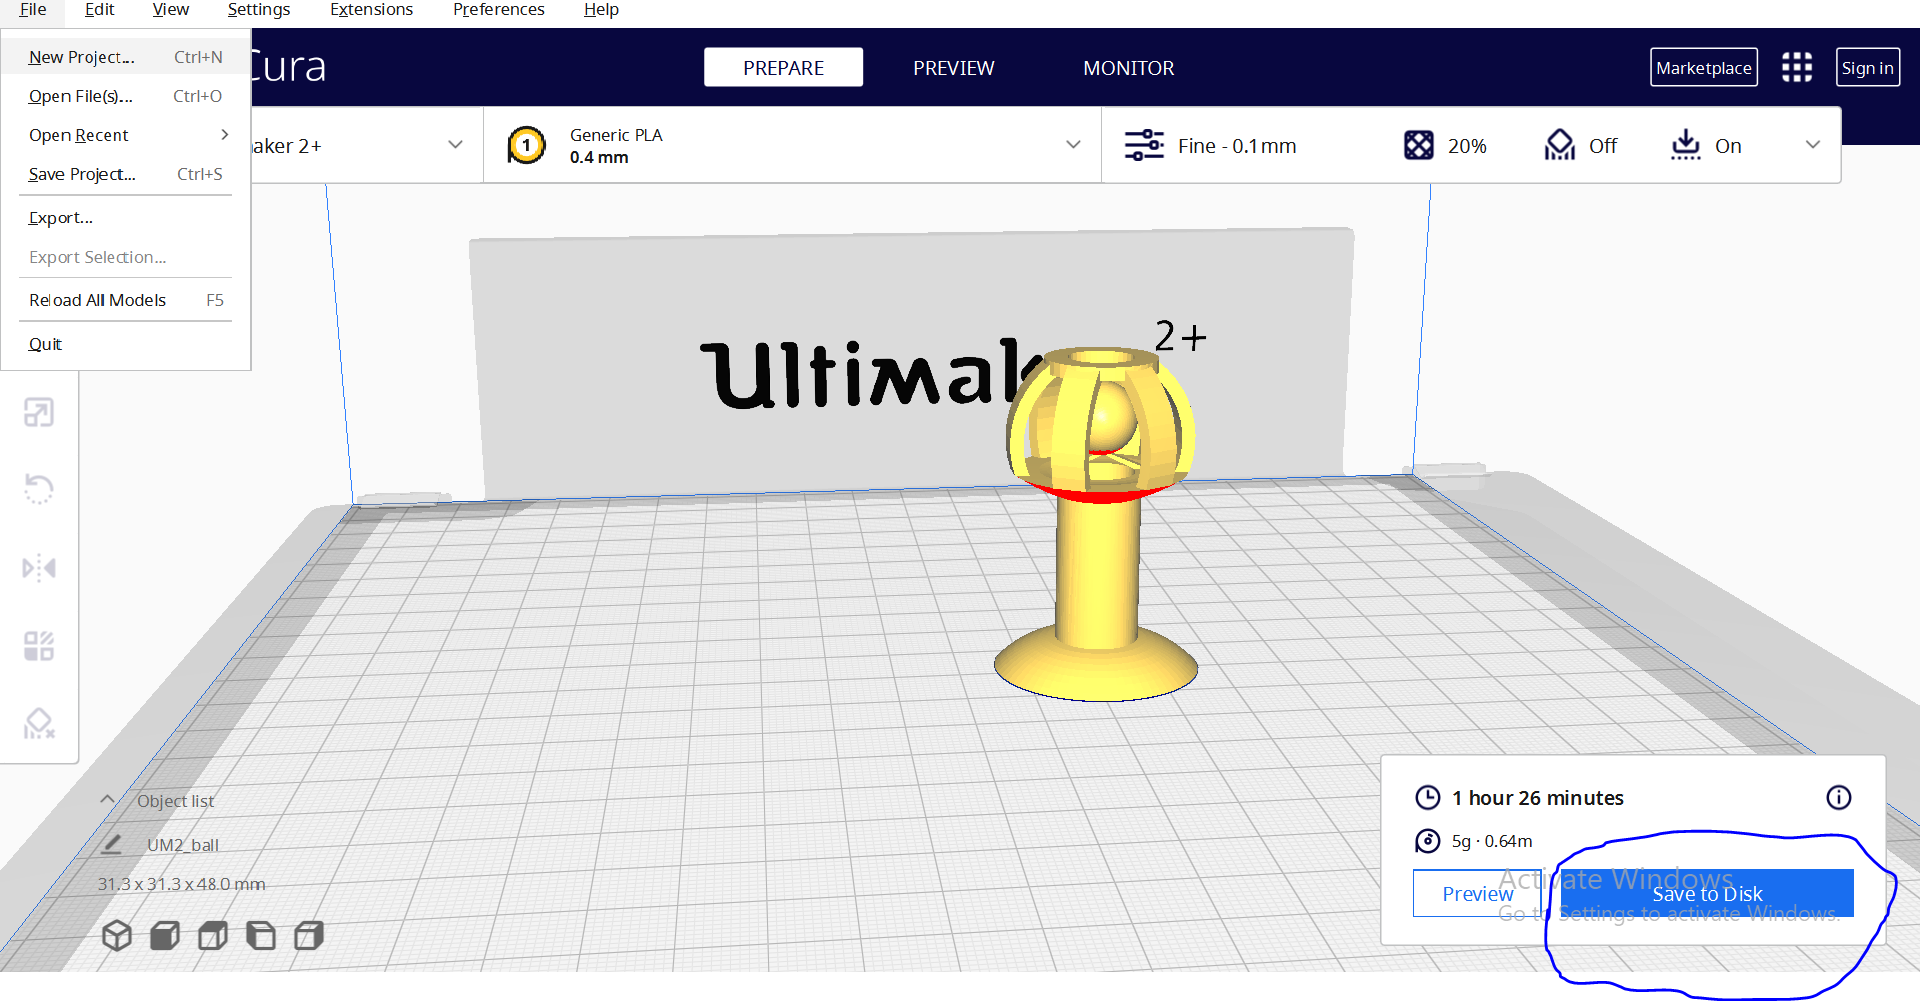
- Import the model: Next, import the 3D model into Ultimaker Cura by clicking on the "File" menu and selecting "Open file."
- Configure print settings: The next step is to configure the printing settings in Ultimaker Cura. This includes selecting the appropriate print quality, layer height, and print speed.
- Slice the model: Once you have configured the printing settings, click on "Prepare to Print" in Ultimaker Cura to slice the 3D model into layers. This creates a printable file that the 3D printer can interpret,and it will display the time,it takes to print them.
- I saved the file: Save the sliced file to an SD card that is compatible with your 3D printer for me it saved with extension of G-Code.
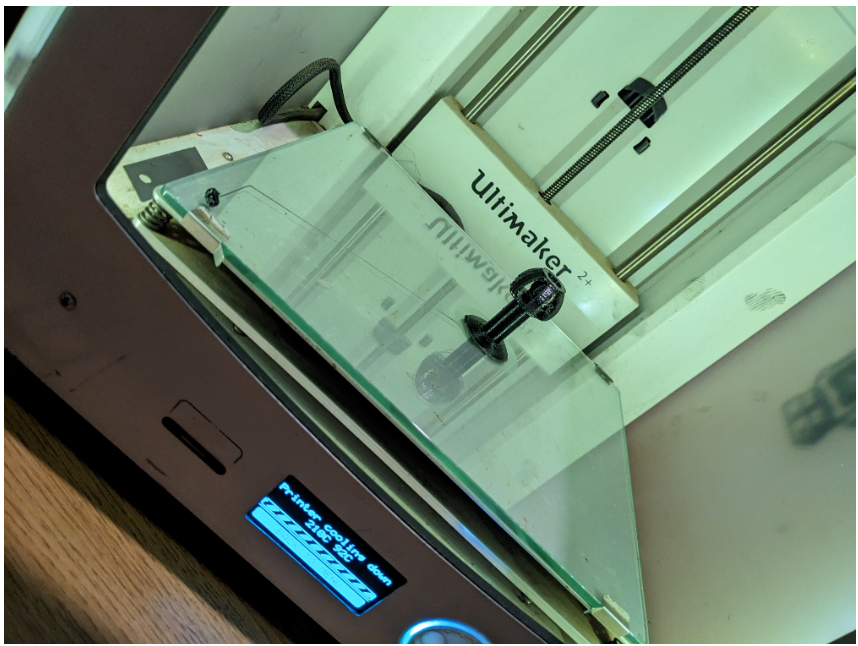
- Start the print: Insert the SD card into the 3D printer and select the print job. The 3D printer will begin the printing process based on the file created in Ultimaker Cura.
- Remove the finished print: Once the 3D printer has finished printing, carefully remove the finished print from the printer's build platform.


This is the video showing how it was printed, its like hello shot for printing process in the Printer.
The final result was the hand jungle bell for the kids toy
In summary printing a 3D model requires a combination of hardware, software, and materials, along with some basic knowledge and some experience of 3D printing technology.
3D Scanning
This week assignment was very interesting regarding my hobbies, I found how we design the statues I was always wondering how they did it,and amazingly i found it in the scope of this week, The very first thing I was eager to perform was to scan my self and another thing I scanned was my shoe, I wasn't really not get tired of this I always see them as fascinating things.
Firstly,3D Scanning:means the process of capturing the shape and geometry of a physical object and creating a digital 3D model and There are several methods and technologies for 3D scanning
but For me the process I used involves the following steps:
-
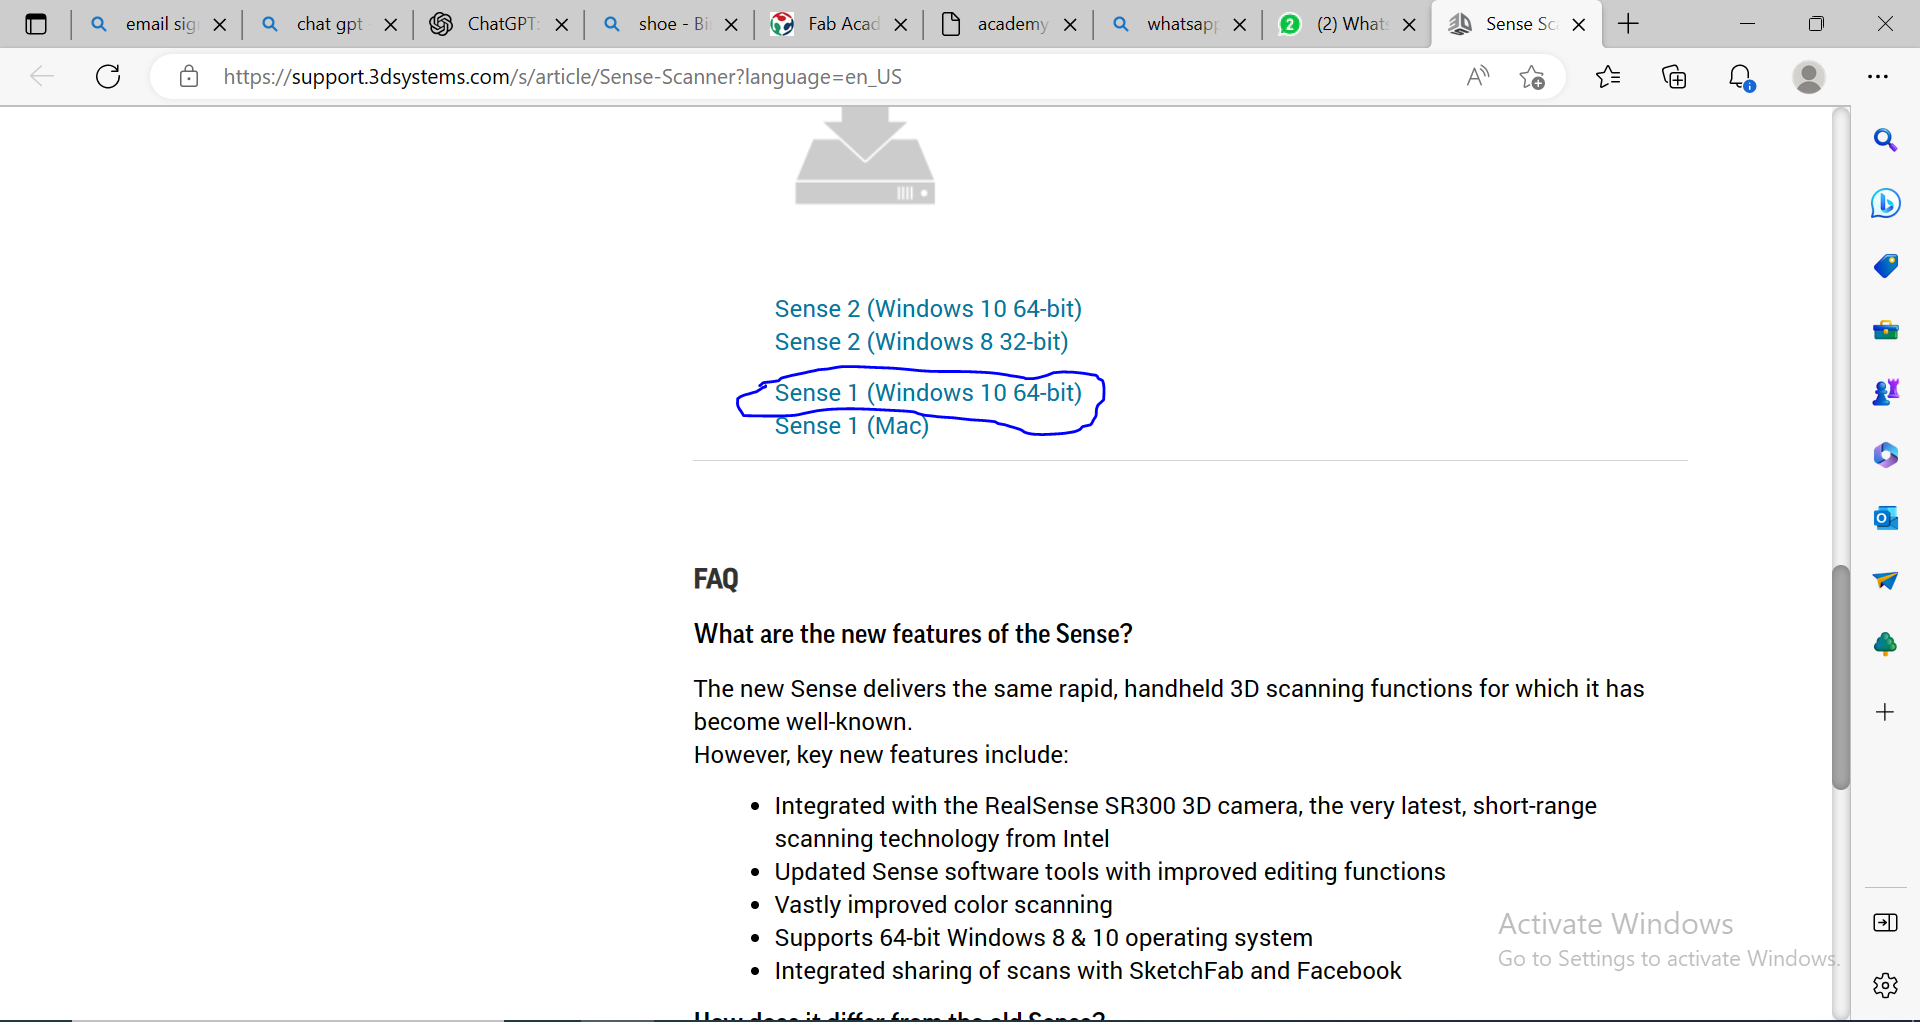
I first download the app that is usually used, its called sense through this link you can download it,
link, After click the link it directed to interface and I scrolled until I see the setup that meets my Operating system(Windows 10-64 bits).
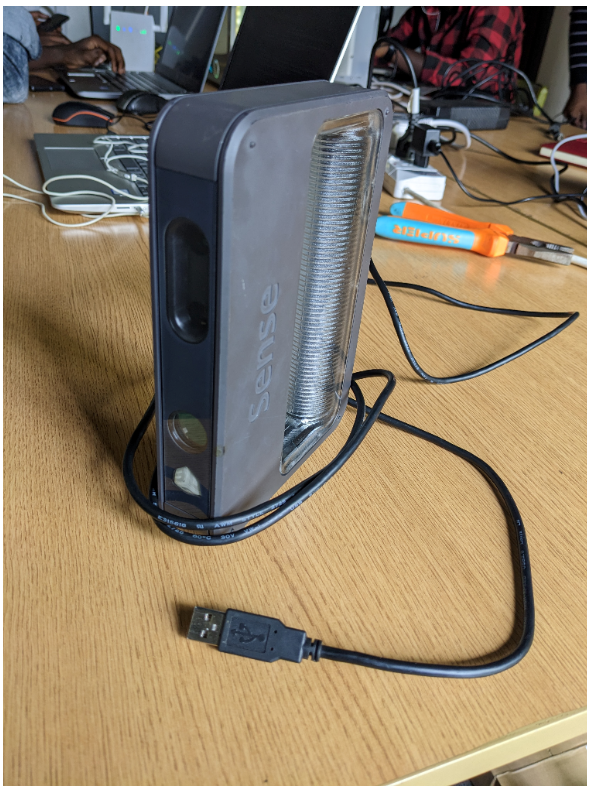
- Then I took the scanner device which can camera infront and is used manually to the take the picture of whole person or object in 3D, it means it takes the pictures as I go around my face and then combine captured pictures to form one whole 3D body.Below is the device i used.
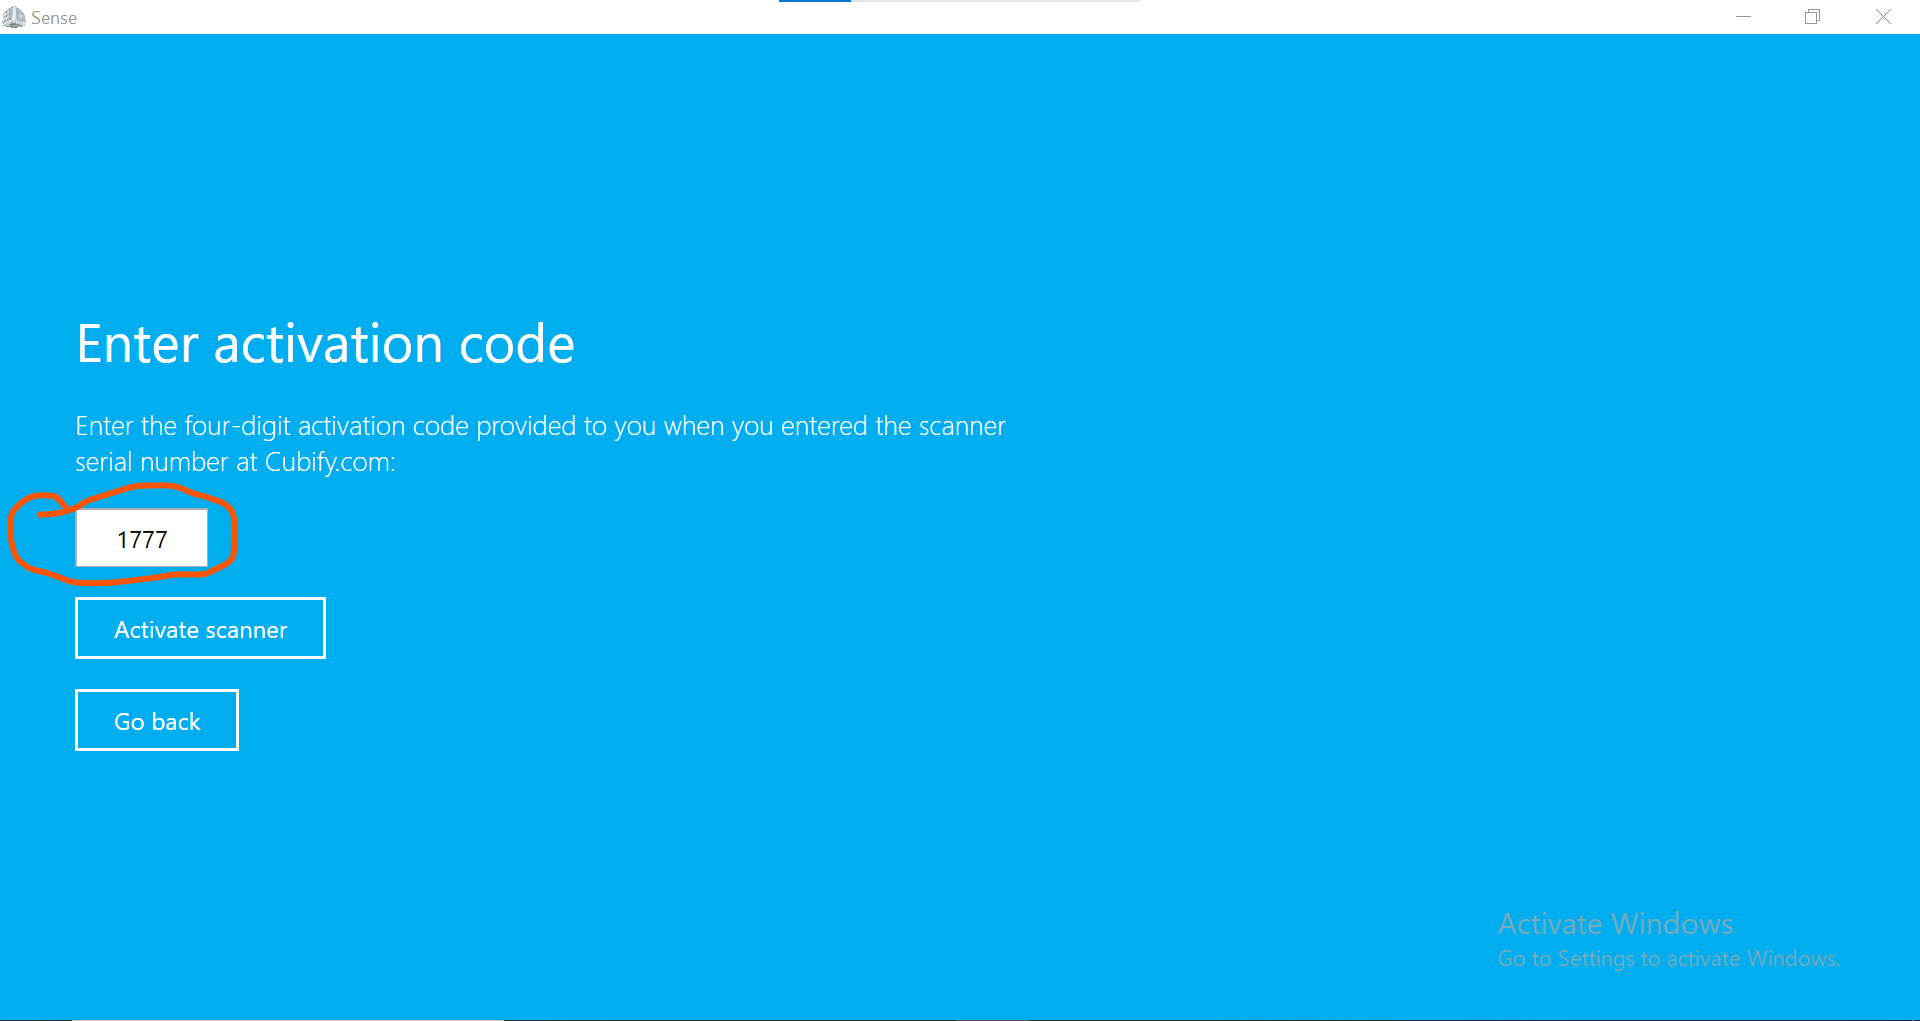
- Then next step is to connect the device with my computer which has the other app called sense,sense app will automatically recognise that it's 3D scanning device which will allow you to proceed installation of the App where there's an interface where you can add on your activation code or get it through cubify.com.
- Because I was having the code, I didn't bother my self to on cubify.com, rather I entered my activation code which was code:1777 and then I proceeded to scan.
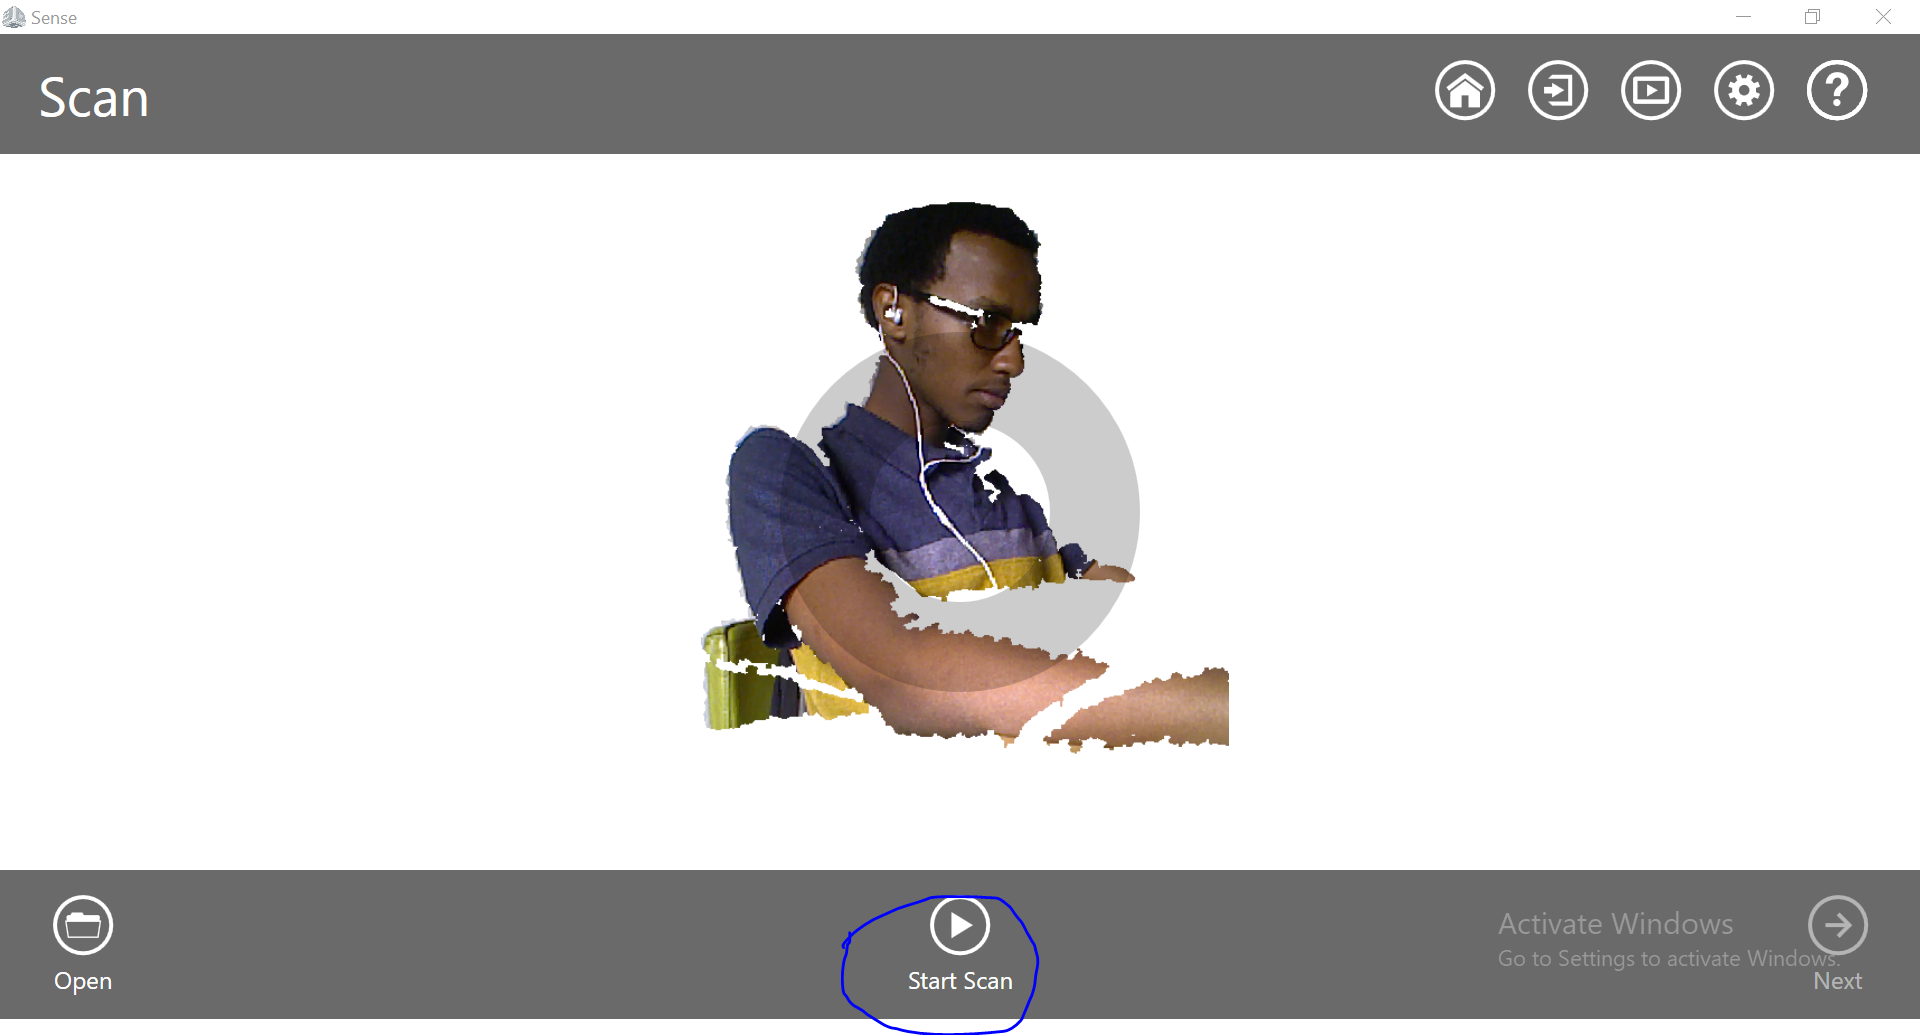
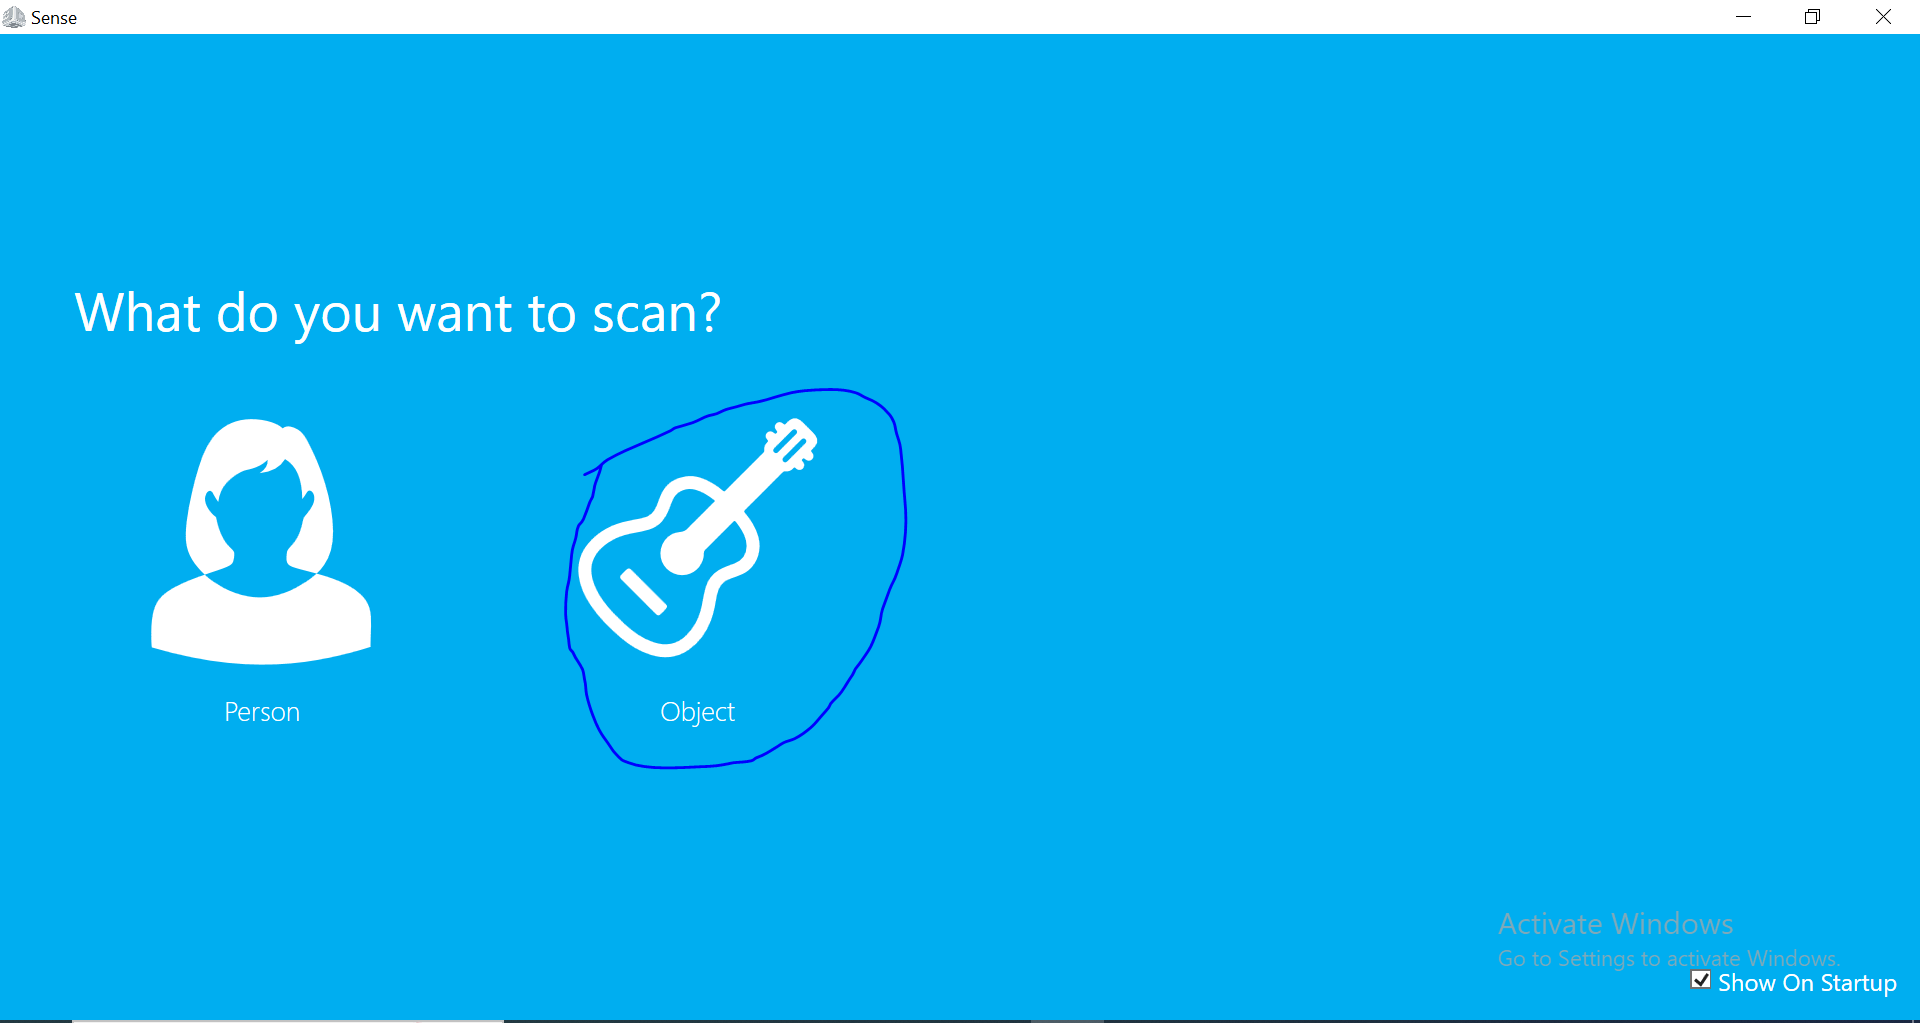
- Then for my face firstly,After entering the activation code, I proceeded on another inteface asking if i am going to scan person or object , then I selected person.
- The next interface is to choose if you are going to scan the full body or head,an I selected the face.
- Then I gave the device to my colleague to scan me infront and behind the head,after the captures.
- I edited the photo the way I want by solidifying it and trim some unnecessary parts to my desired head which looks like real one.
- Below you can access the video of editing my scanned head through my youtube channel.


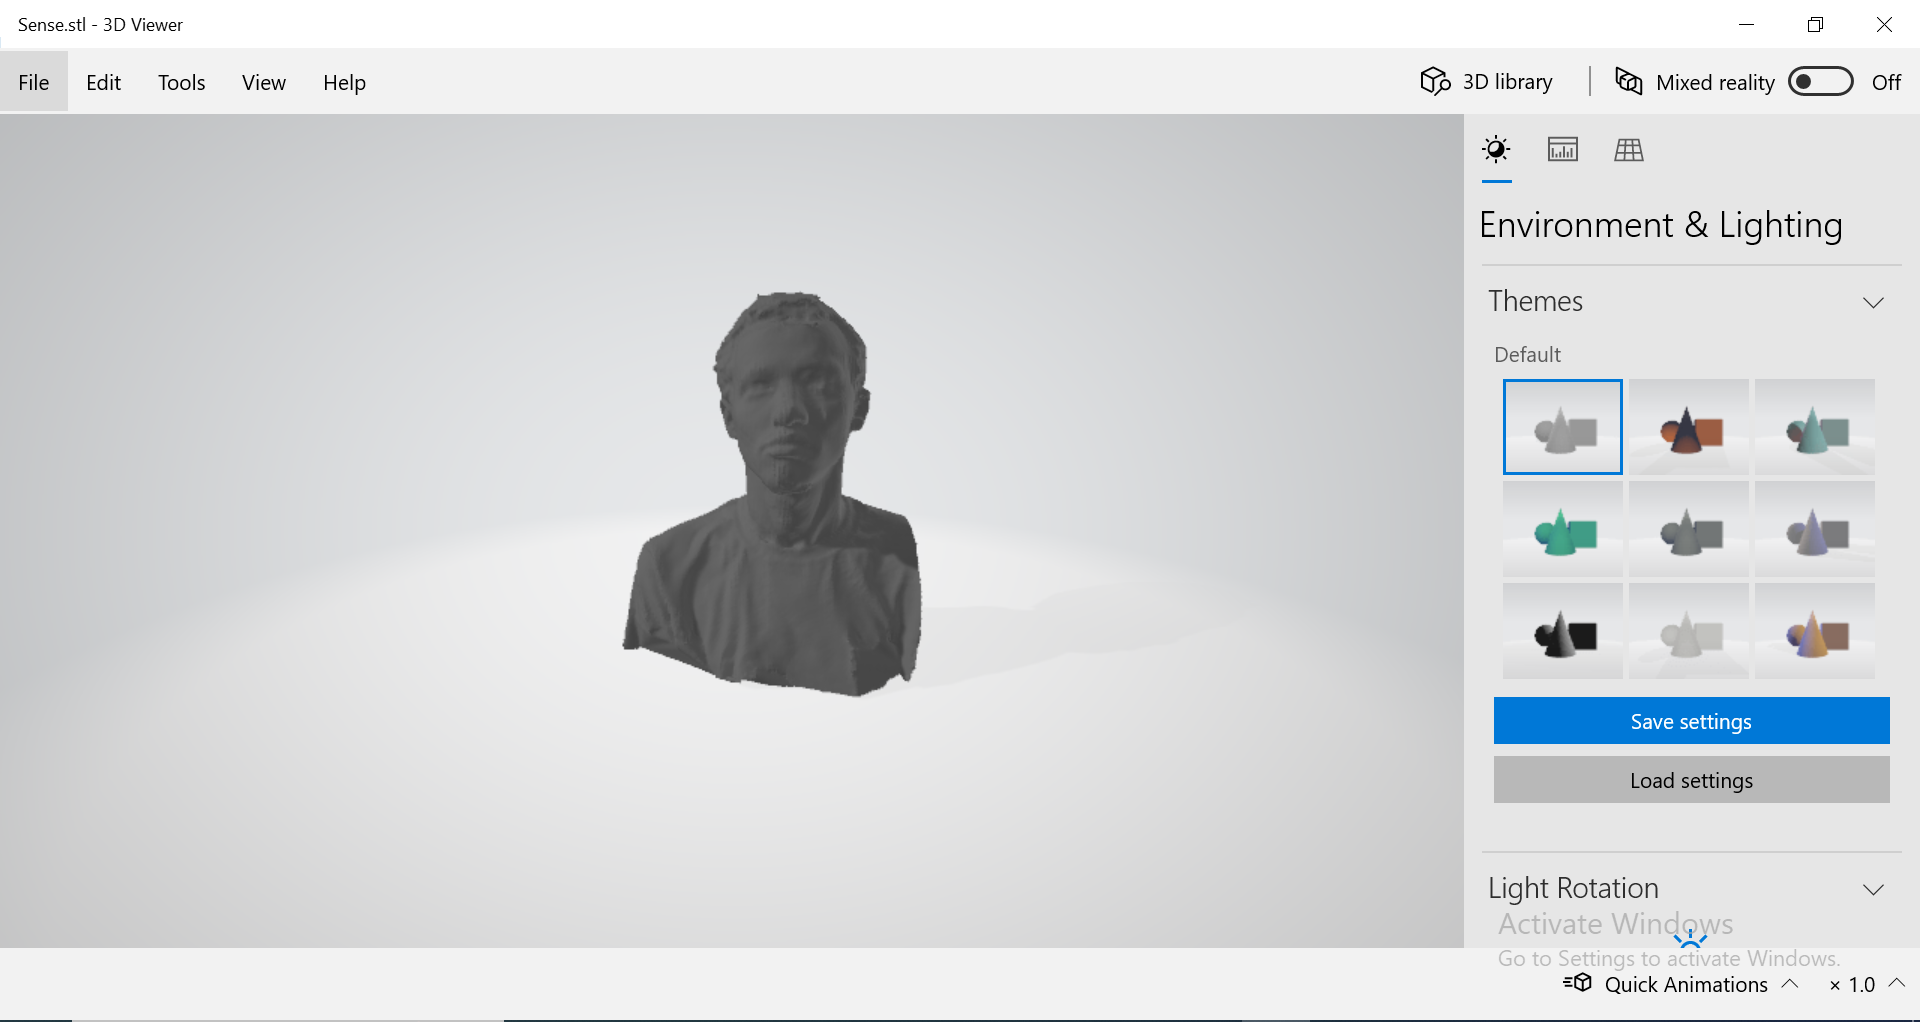
Video showing how I edited my scanned model.
Video showing how to scan my head the whole process.
As I said above I continued to scan my shoe and its almost similar to the scanning of my shoe,these are the steps I followed.
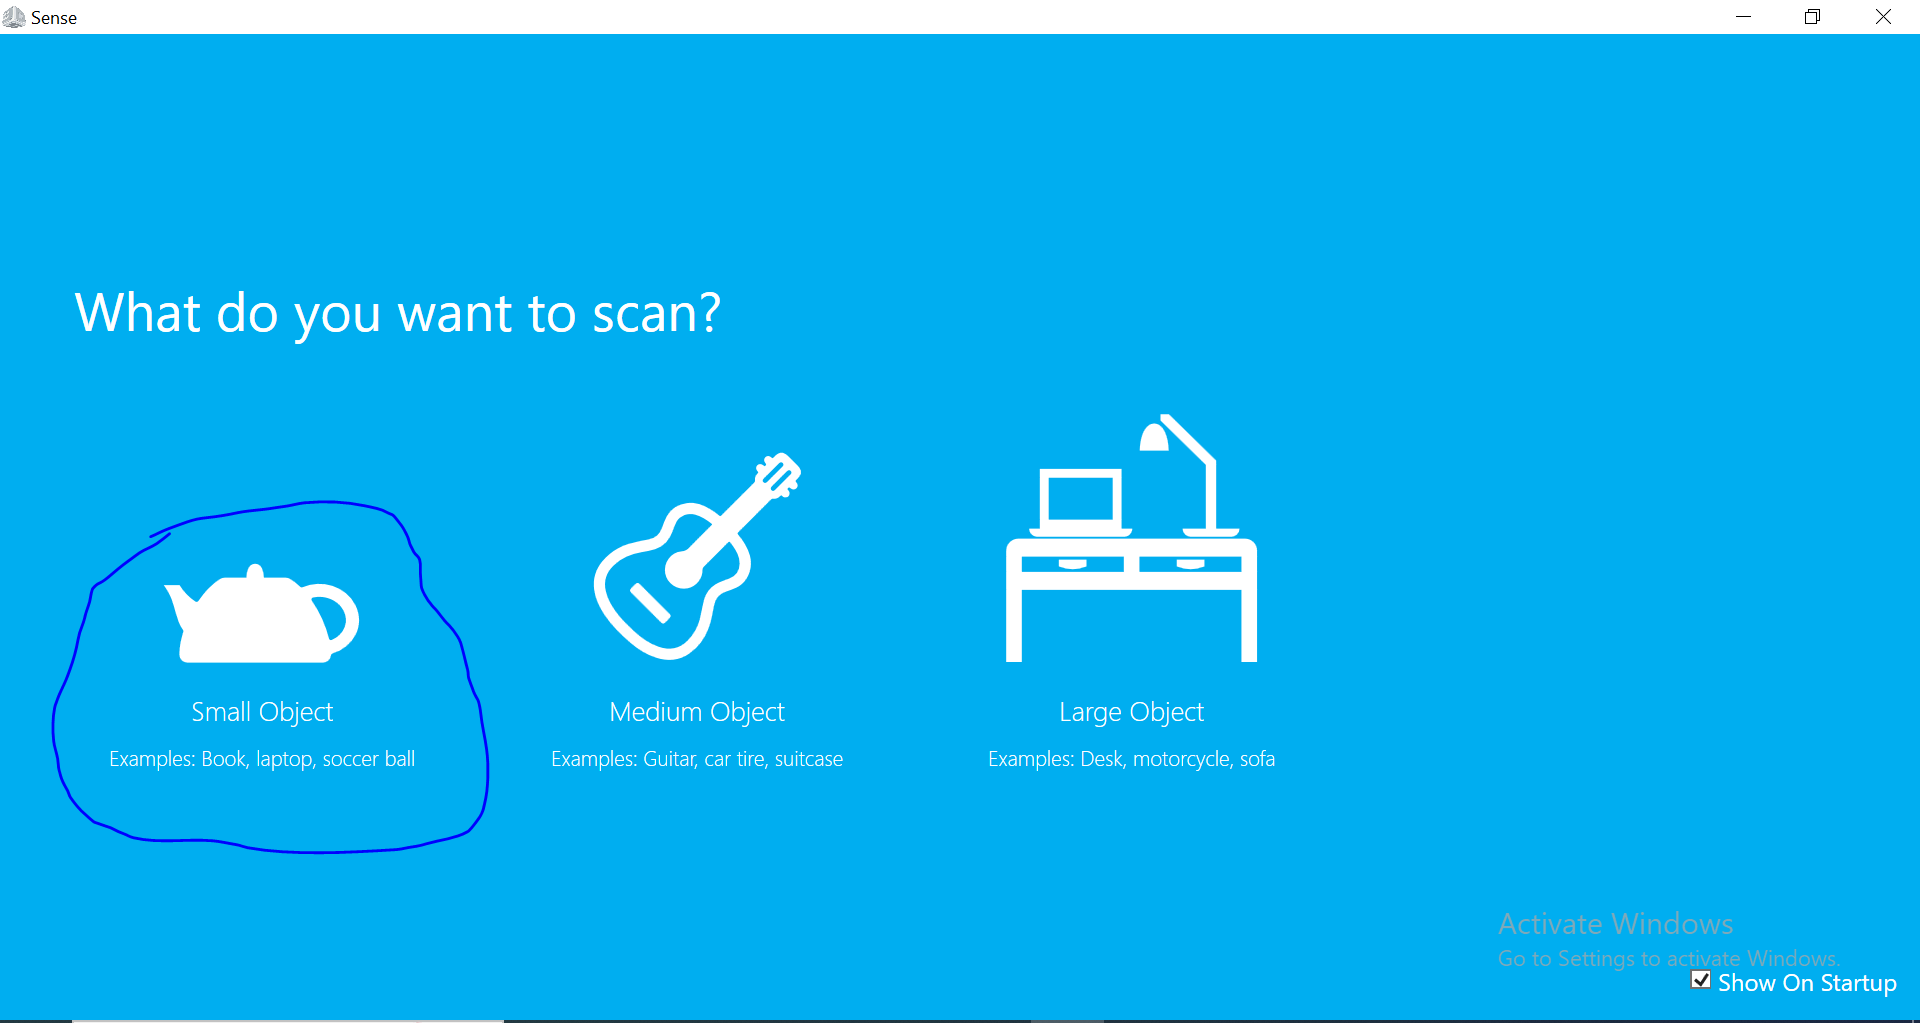
- Because I have already sense app,I automatically connect my scanning device to my Computer,then I continue to the interface where is to choose between person and object (I chose object).
- next was to chose the type of the object regarding its size; small,medium,large, and I chose small because it was my shoe.
- Next step after choosing the type of the object , I started to scan the whole shape of the model, the output 3D model I got after is scanning is below
- And then the next shape I followed qith is to edit the the captured model,first edit I used crop to modify captured model into desired size, erase to delete the big part of unwanted part (was on bed of the shoe),solidify I used this feature to fill where I didnot reach because after scanning I remaining with shape but inside there is hole the i used feature solidify to fill all holes and form printed shape.
- I continued to edit by using other features like color to change the brightness and contrast of the model ,another is trim feature to cut small unwanted part of the model, also I used the touch up feature To improve the look of the scan,below is the picture after using the features.
.png)
.png)
.png)
In summary what I have realised,the 3D scanning process involves a combination of hardware, software, and expertise to create accurate and detailed 3D models of real-world objects because it takes me long period to know how I can scan someone or an abject and gain almost whole features so that another person may recognise it that its the one,Once I get the knowledge It was woow feeling and I was really excited.