Week 7: Computer Controlled Machining
Computer Controlled Machining
Assignment activities: Group assignment: Do your lab's safety training test runout, alignment, fixturing, speeds, feeds, materials, and toolpaths for your machineI. Group Assignment
If you want to explore the group Assignment Click Here A.The Safety Measure of ShopBot CNC Router ShopBot CNC Router Machines are powerful tools that can be used to create precise cuts and designs on a variety of materials, including wood, plastics, and metals. However, as with any industrial machine, safety must always be a top priority when operating a ShopBot CNC Router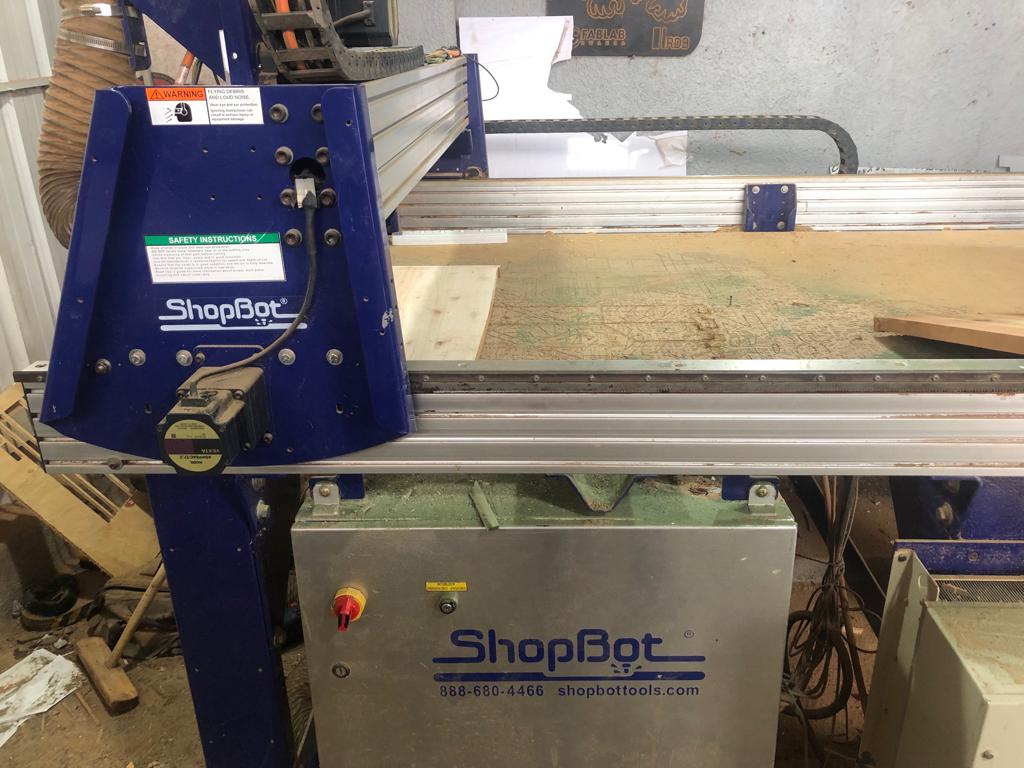 Here are some safety measures that should be followed when using a ShopBot CNC Router Machine:
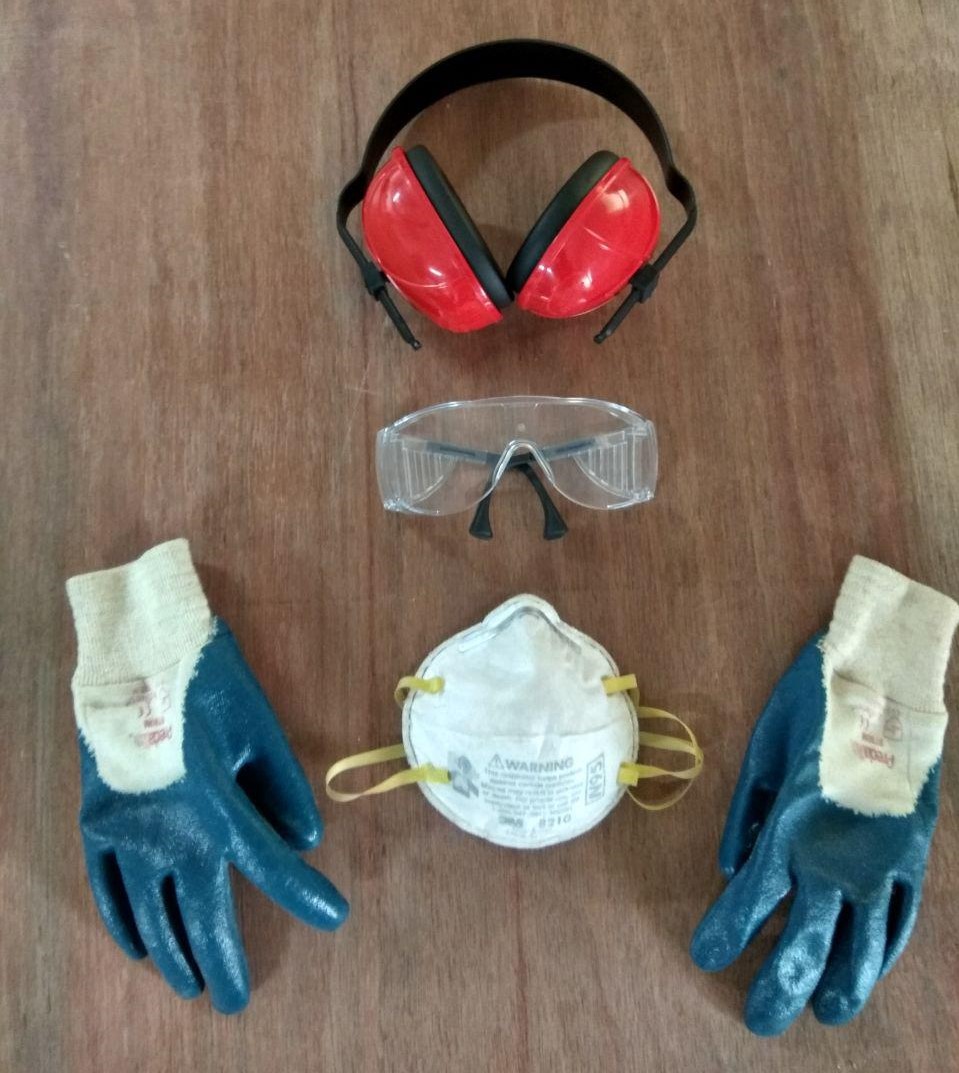
1. Wear appropriate safety gear:
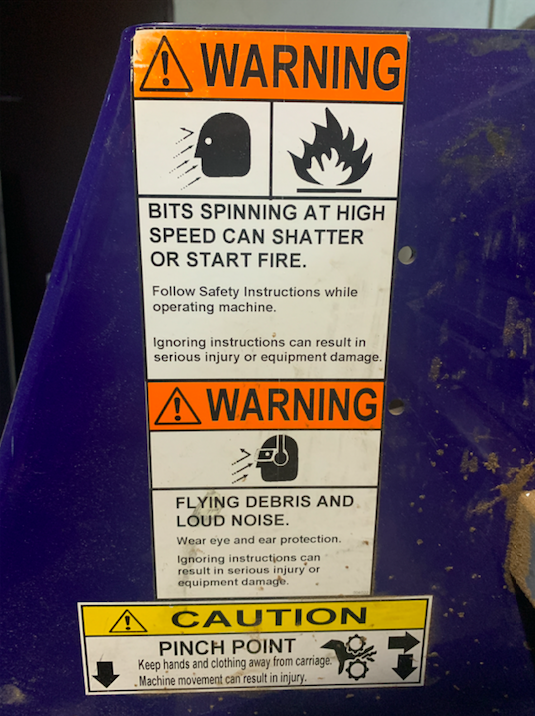
Before operating the machine, make sure to wear appropriate safety gear, such as safety glasses, earplugs, and closed-toe shoes. Long hair and loose clothing should be tied back or tucked in to avoid getting caught in the machine.
 2. Familiarize yourself with the machine::
Read the operator's manual and familiarize yourself with the machine's controls, emergency stop button, and safety features.
Read ShopBot User Guide here
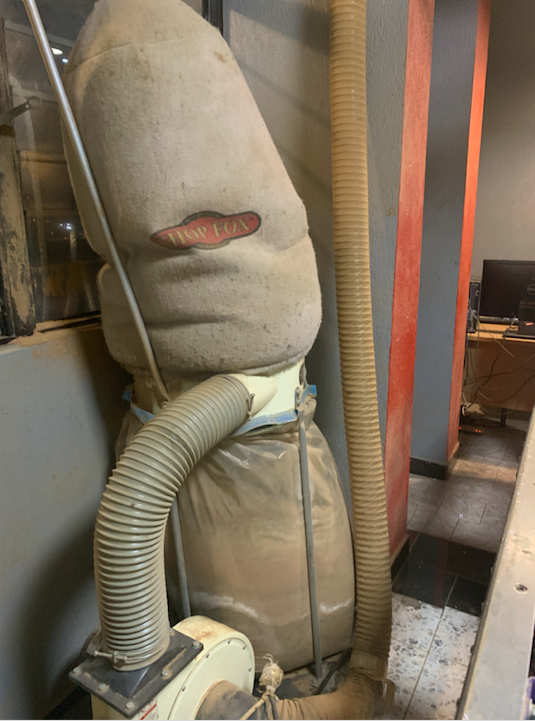
 3.Use dust collection:
The ShopBot CNC Router Machine generates a lot of dust and debris during operation. Use a dust collection system to keep the work area clean and to prevent dust from becoming a health hazard.
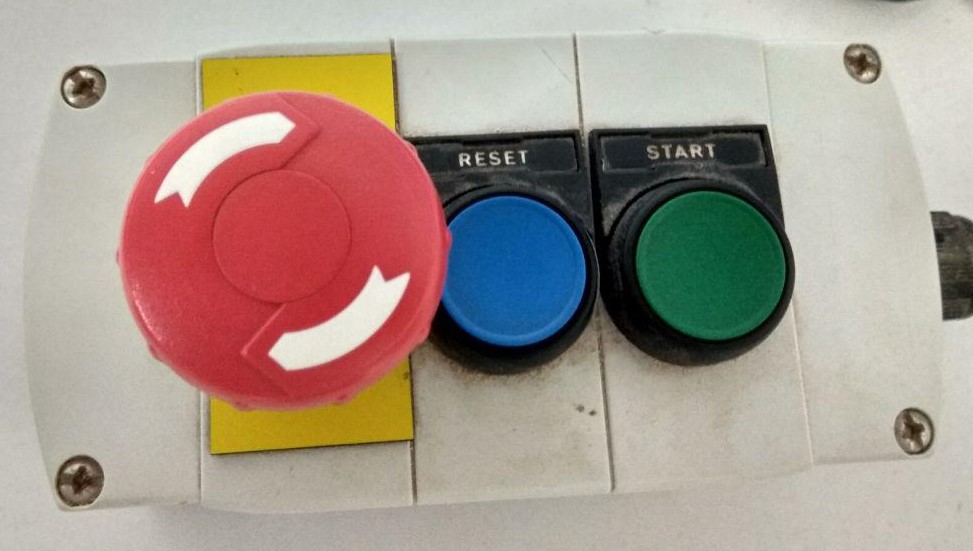
 4.Use Emergency stop switches
Emergency stop switches are an important safety feature for any CNC router, including the ShopBot CNC Router. In the event of an emergency or malfunction, an emergency stop switch can quickly shut down the machine to prevent injuries or damage.
 B.test runout, alignment, fixturing, speeds, feeds, materials, and toolpaths for your machine
1.Runout :
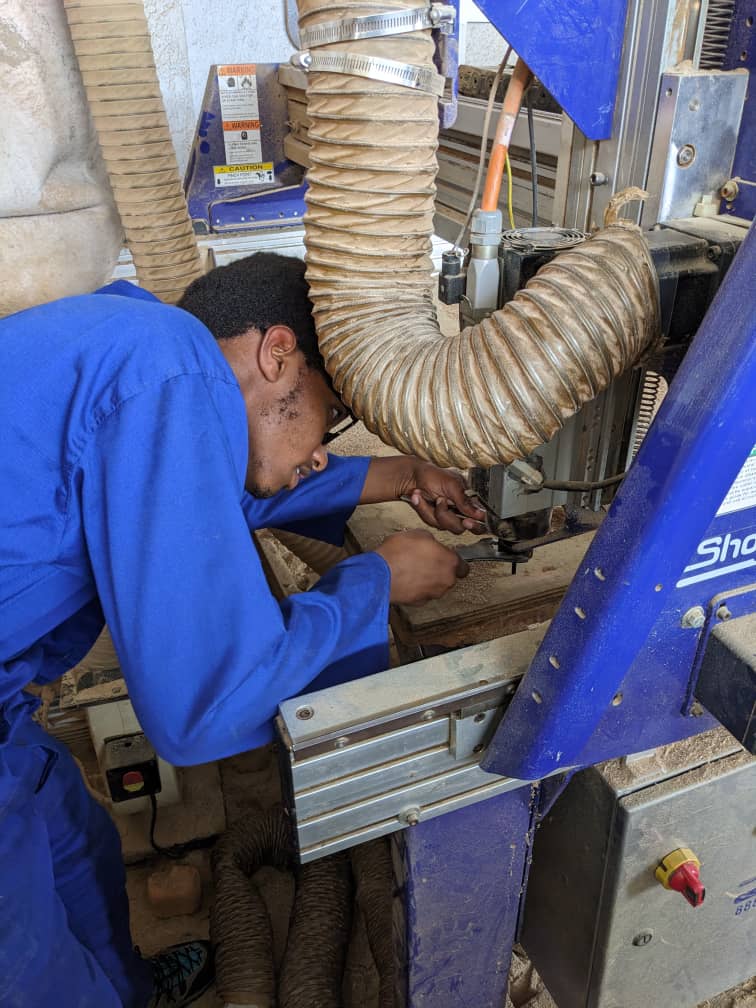
Runout refers to any wobbling or vibration of the cutting tool. To test runout, you can use a dial indicator to measure any movement in the cutting tool as it rotates.
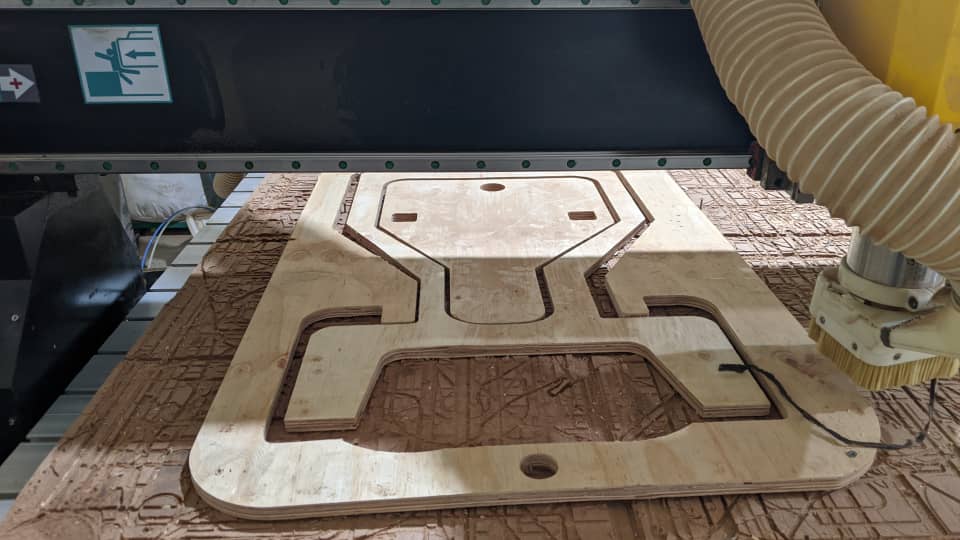 2.Alignment :
Alignment refers to the positioning and calibration of the cutting tool relative to the workpiece. Proper alignment ensures that the tool cuts exactly where it's supposed to, resulting in accurate and consistent cuts. The alignment of the cutting tool should be checked regularly and adjusted as needed.
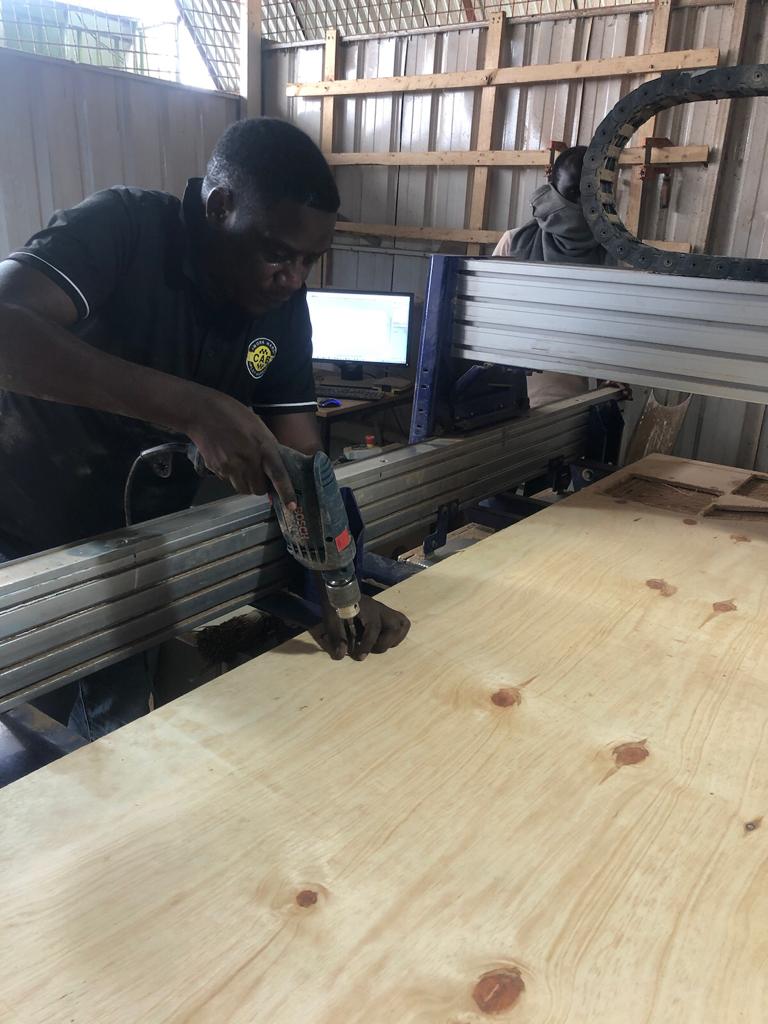
 3.Fixturing :
Fixturing refers to the methods used to hold the workpiece in place during cutting. Proper fixturing is important to ensure that the workpiece doesn't move or shift during cutting, which can result in inaccurate cuts or damage to the machine.
 4. Machine speed :
:Lower the speed if working with hard surfaces and medium speed for high frictional material. Otherwise, the tool will break.
.png) 5. Feed rate:
Feed rate means how fast the CNC os running to take the next line. It's better to have it at a low rate like 15% or 30% depenting on the material.
5. Feed rate:
Feed rate means how fast the CNC os running to take the next line. It's better to have it at a low rate like 15% or 30% depenting on the material.
 5. Feed rate:
Feed rate means how fast the CNC os running to take the next line. It's better to have it at a low rate like 15% or 30% depenting on the material.
6. Materials:
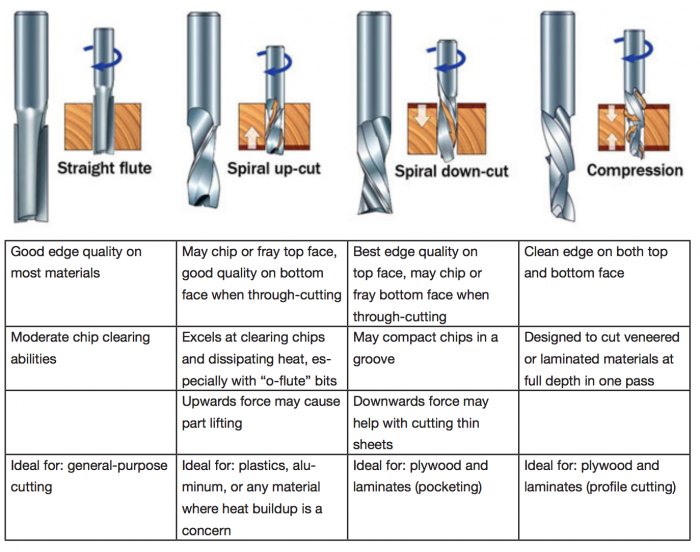
materials: the istructor explain the virious type of material to be used on our machine such Wood (MDF, Plywood, cherry, mapple,OBS...) Metal (aluminum thin layers) Plastic.
6. Toolpaths:
Toolpaths used with our machine: toolpaths for our machine Pocket profile drill 3d rough, smooth Vcarve and mamy others
II.Individual assignment:
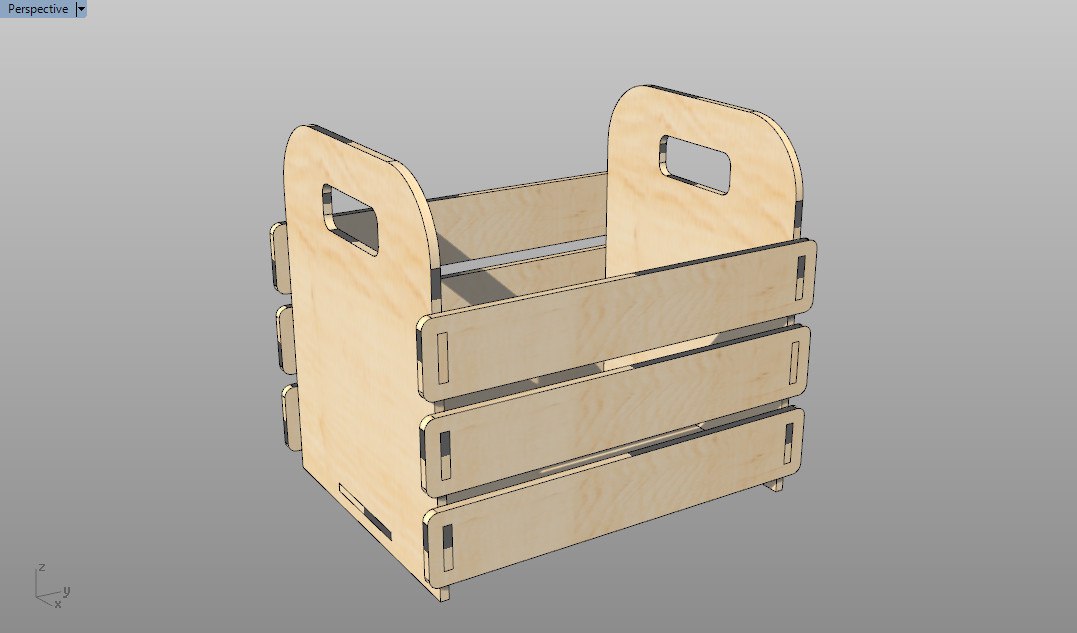
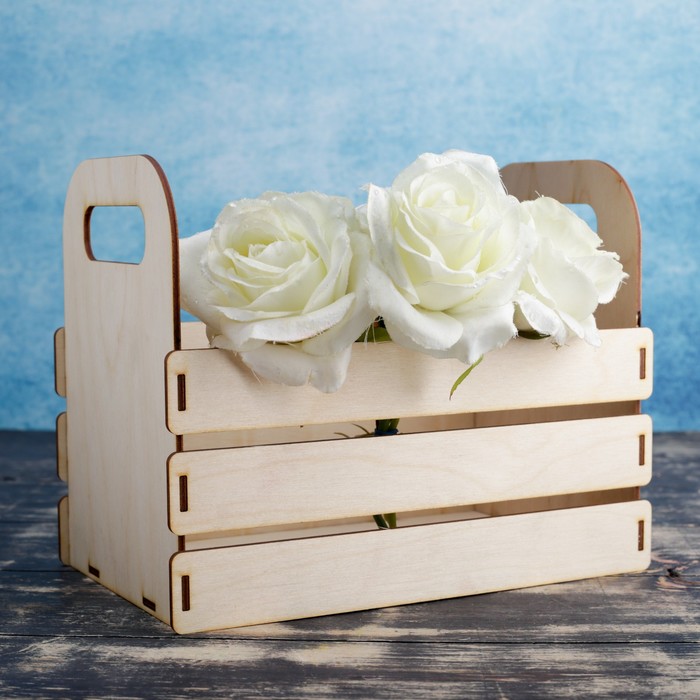
- 1. Make (design+mill+assemble) something big (~meter-scale)
- 2. Extra credit: don't use fasteners or glue
- 3. Extra credit: include curved surfaces
 Openning working sheet in SolidWorks
 1. We started by Sketching the general shape of the cupboard using the Sketch tool. This includes the overall size and shape of the cupboard, as well as any specific features or design elements we want to incorporate in our design.
.png)
.png)
.png) 2. Test the design using the Simulation tools in SolidWorks. This involves checking for any weaknesses or flaws in the design, such as areas that may be prone to breakage or other problems.
2. Test the design using the Simulation tools in SolidWorks. This involves checking for any weaknesses or flaws in the design, such as areas that may be prone to breakage or other problems.
.png)
.png)
.png) 3. Convert our designs into 2D design and save one face using DXF format
3. Convert our designs into 2D design and save one face using DXF format
.png)
.png)
.png) 4. Export the design to the appropriate file format for use with manufacturing equipment, such as CNC machines, in our Assignment we use Vcarve Pro- ShopBot Edition
4. Export the design to the appropriate file format for use with manufacturing equipment, such as CNC machines, in our Assignment we use Vcarve Pro- ShopBot Edition
.png) 5. Set up your material and machine: Make sure your material is securely attached to the CNC machine's bed and that the machine is properly calibrated. Set up your machine's origin point and make sure your material is positioned correctly.
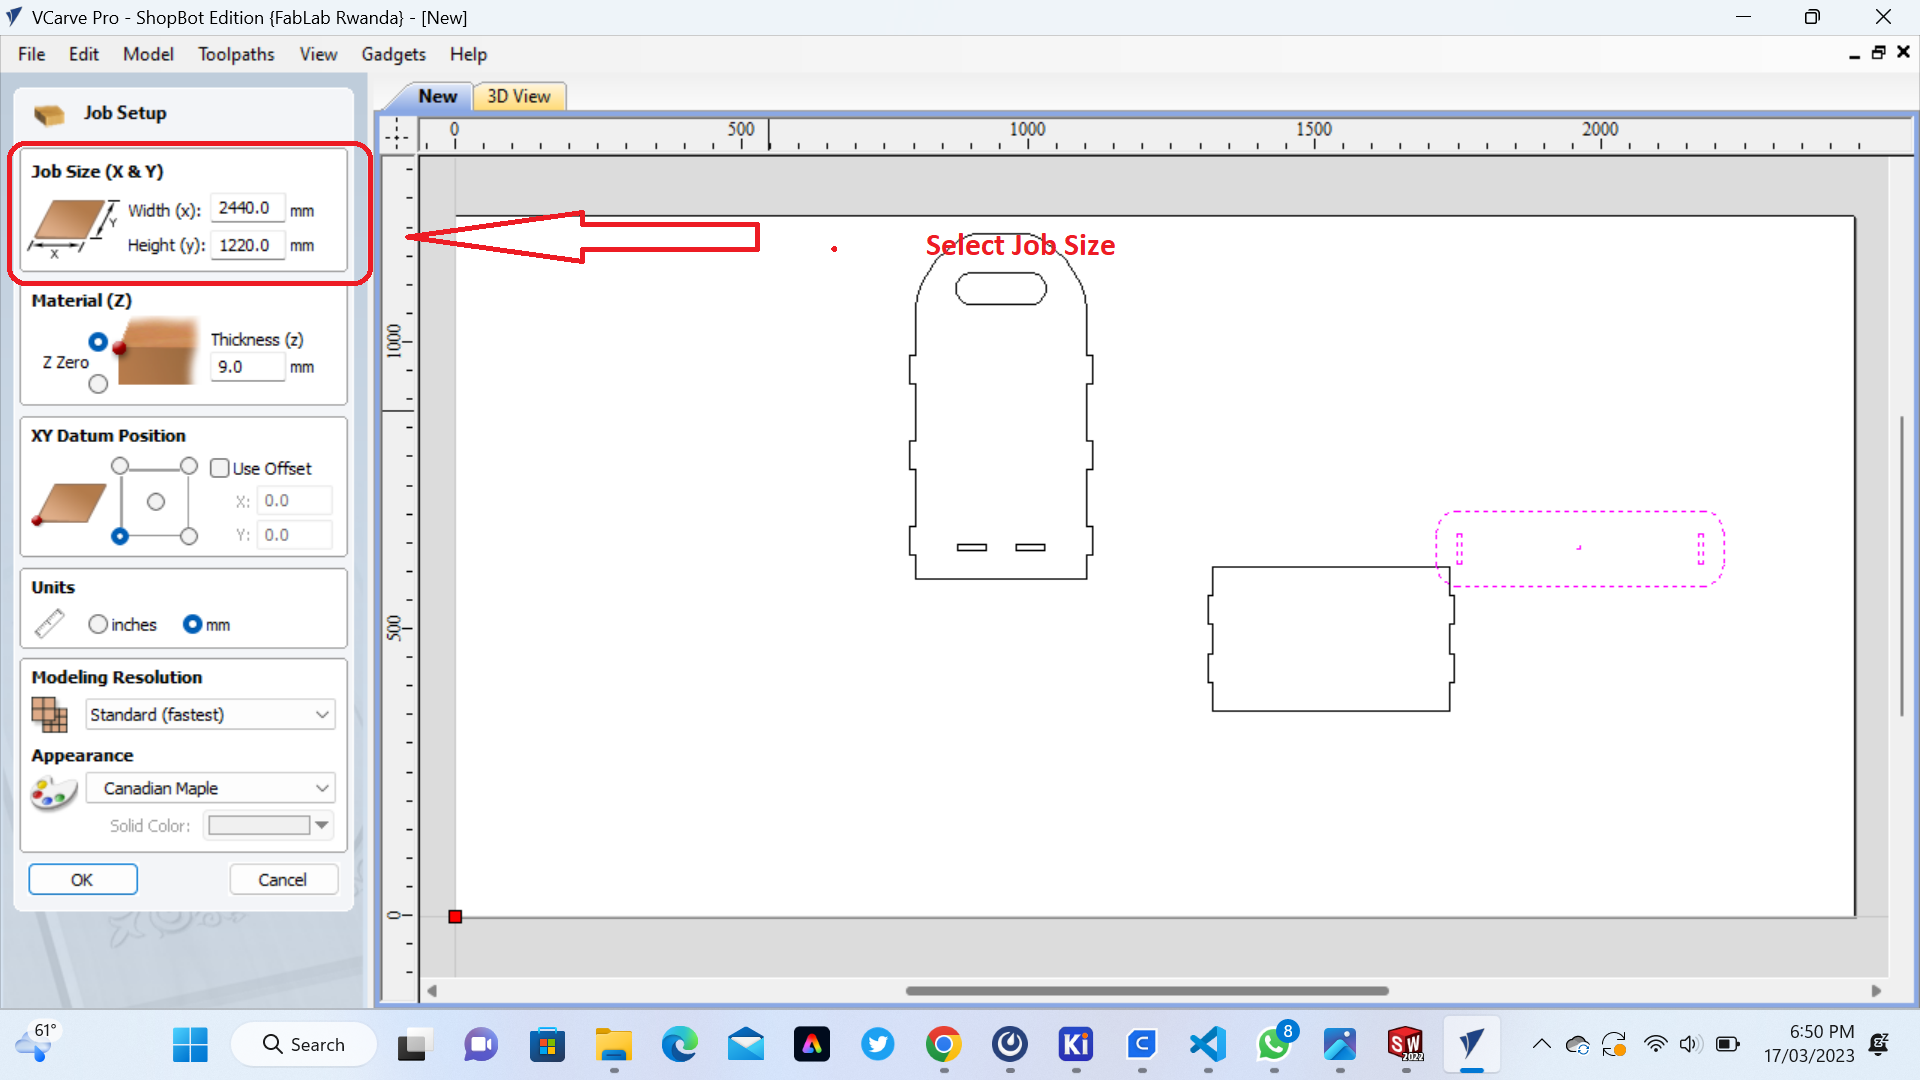
6. Job Size: The Job Size in VCarve Pro - ShopBot Edition refers to the dimensions of the design or project that you are creating. It is the physical size of the material that you will be cutting or carving. The Job Size is typically set at the beginning of a new project, and it can be adjusted later if needed.
5. Set up your material and machine: Make sure your material is securely attached to the CNC machine's bed and that the machine is properly calibrated. Set up your machine's origin point and make sure your material is positioned correctly.
6. Job Size: The Job Size in VCarve Pro - ShopBot Edition refers to the dimensions of the design or project that you are creating. It is the physical size of the material that you will be cutting or carving. The Job Size is typically set at the beginning of a new project, and it can be adjusted later if needed.
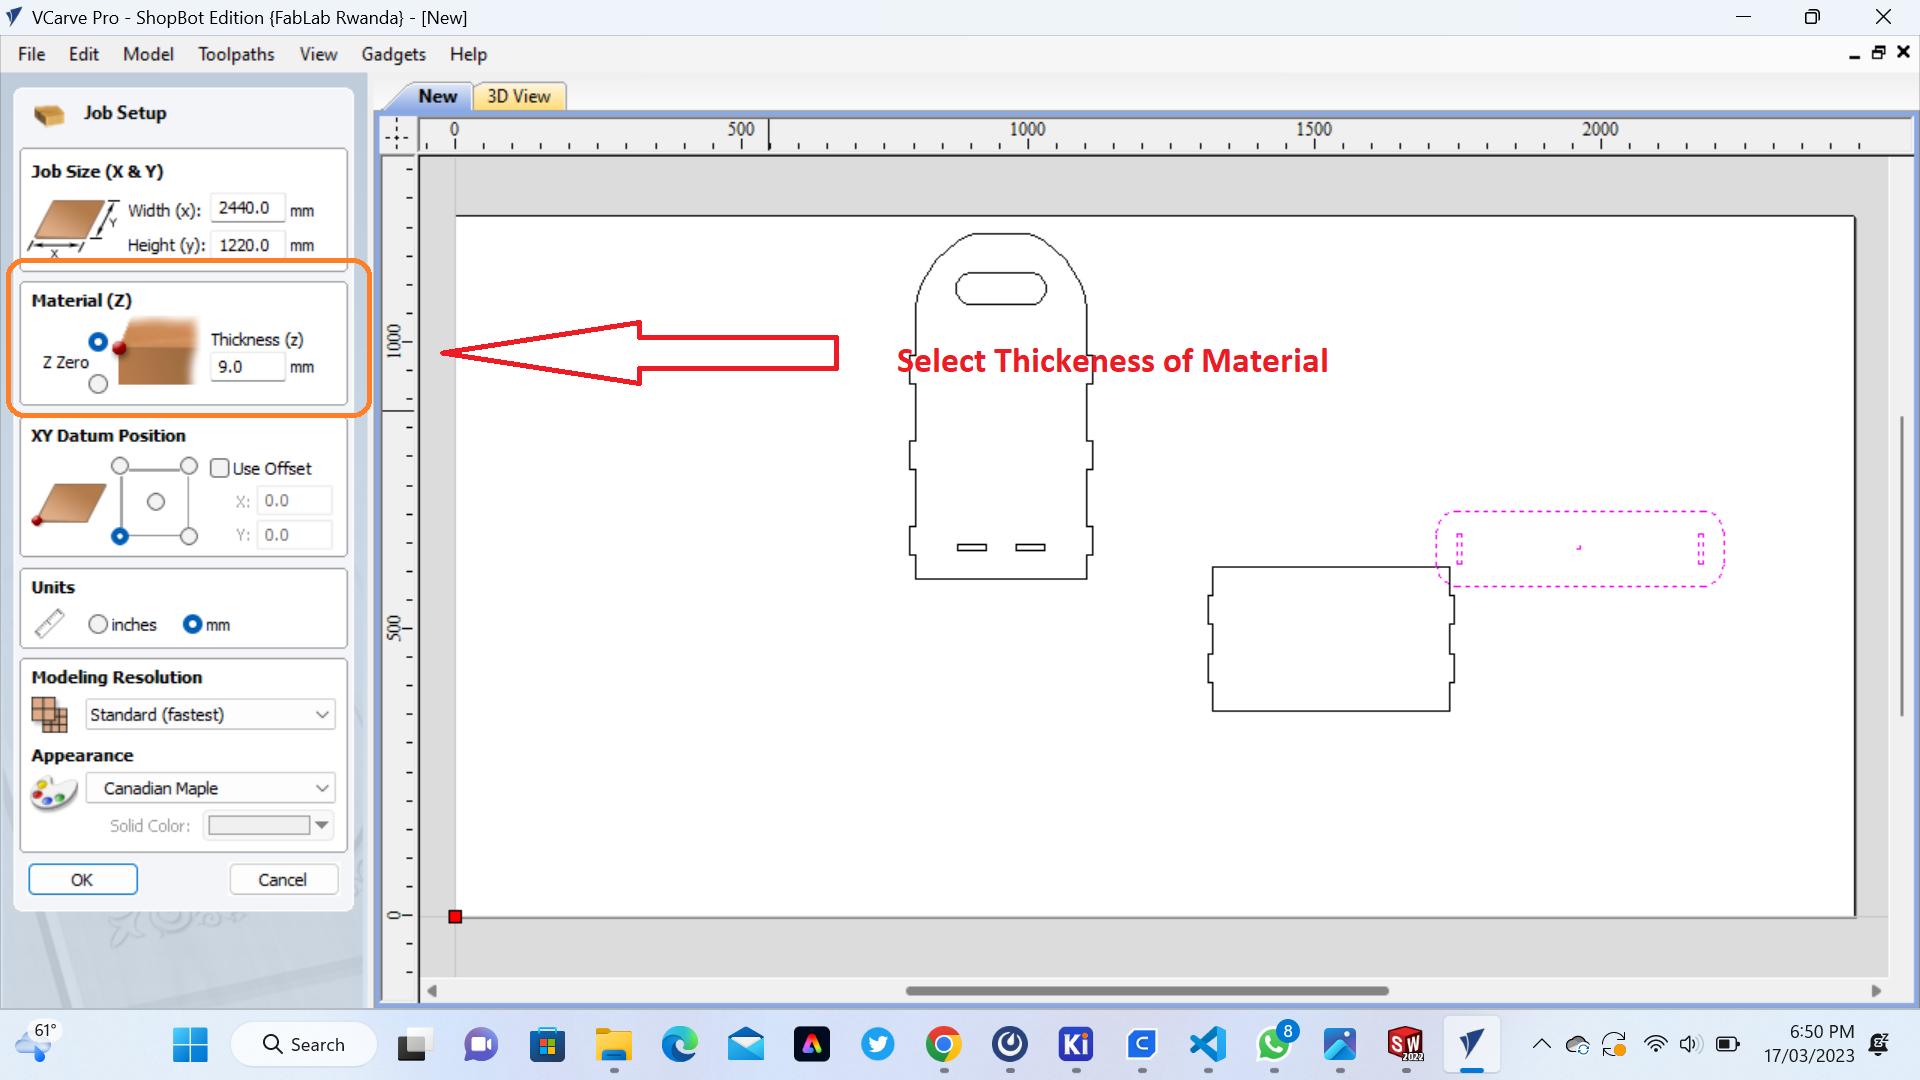
 7. Thickness : Thickness setting in VCarve Pro - ShopBot Edition refers to the thickness or depth of the material that you will be cutting or carving. It is an important parameter to set correctly, as it is used to calculate the toolpath and ensure that the design is cut to the appropriate depth.
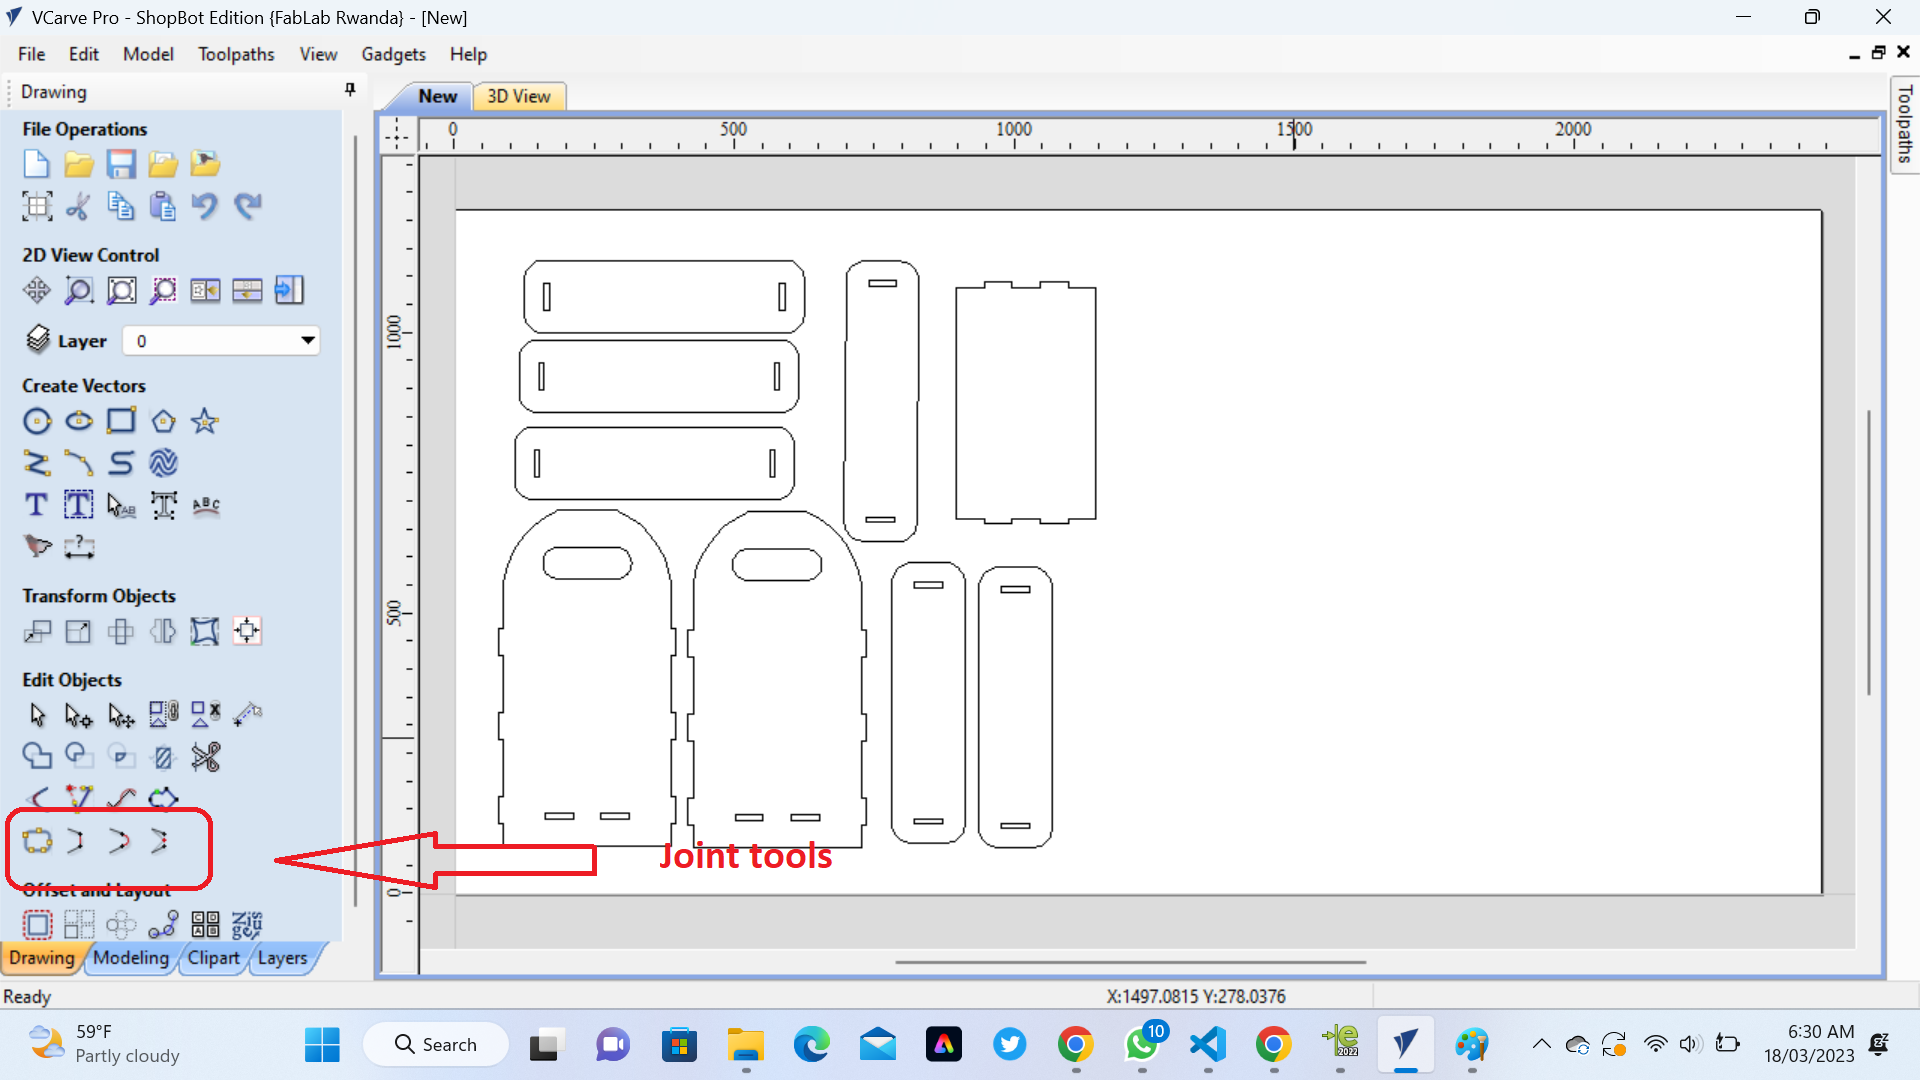
 8. Join tool: Join tool in VCarve Pro - ShopBot Edition is a feature that allows you to join multiple vectors or shapes together into a single entity. This can be useful for simplifying your design or creating more complex shapes that are made up of multiple smaller parts.
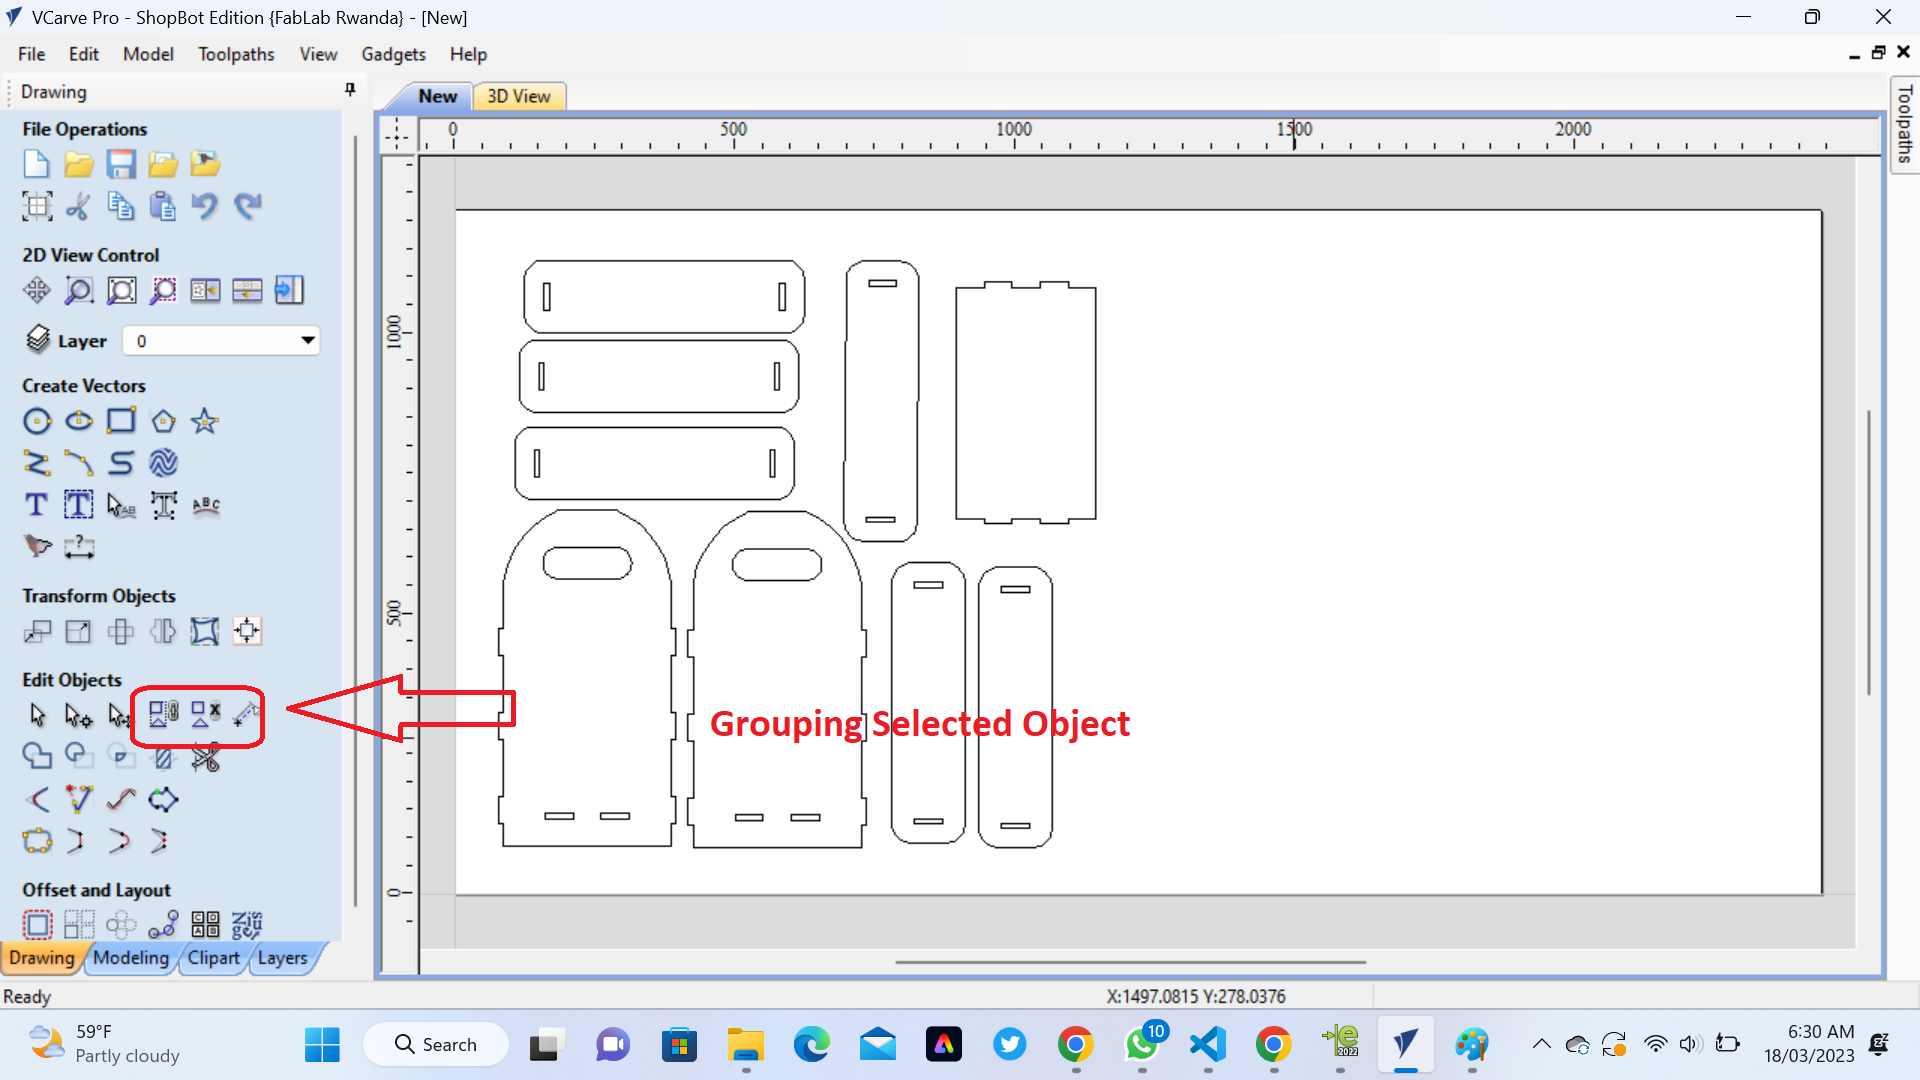
 9.Grouping tool: Grouping tool in VCarve Pro - ShopBot Edition is a feature that allows you to group multiple vectors or shapes together into a single entity. This can be useful for organizing your design and making it easier to manipulate as a single object.
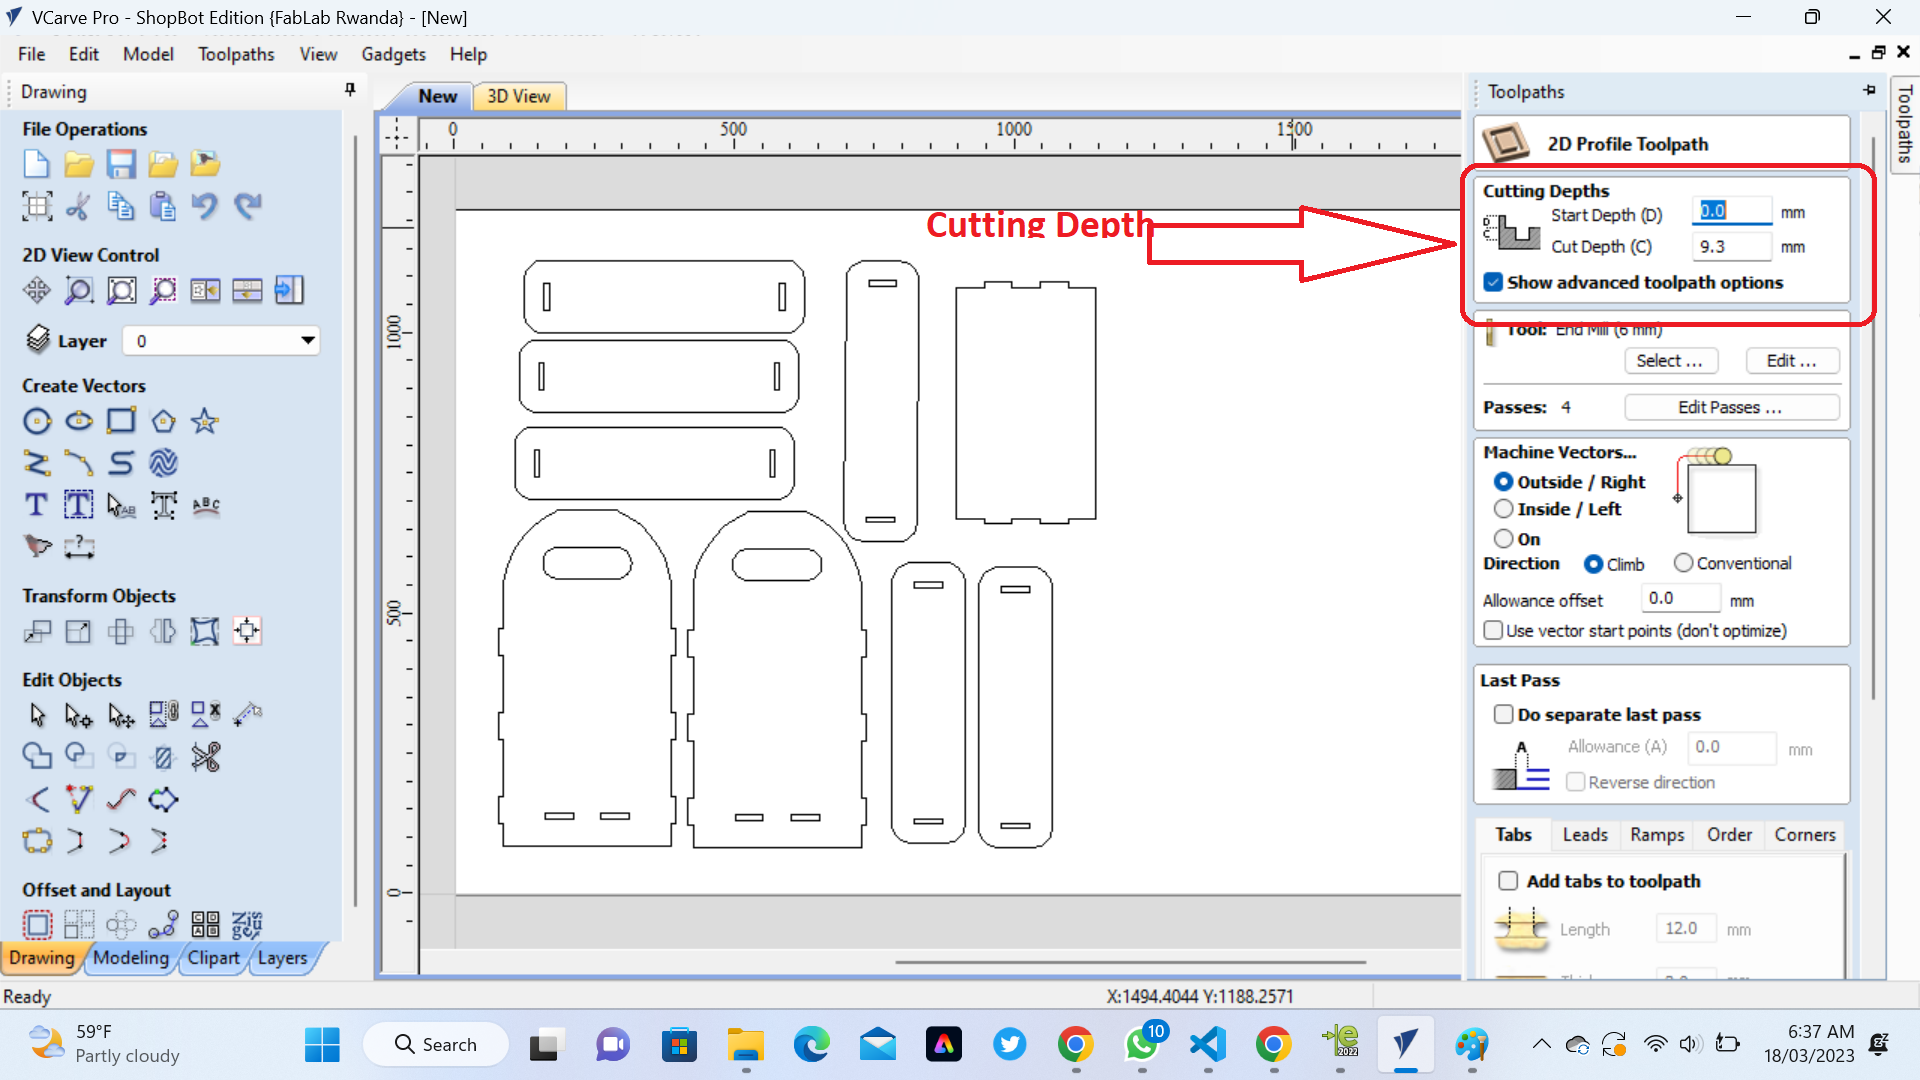
 10. Cutting Depth: Cutting Depth in VCarve Pro - ShopBot Edition refers to the depth to which the cutting tool will penetrate the material being machined. This parameter is critical in ensuring that the tool cuts to the correct depth and that the finished part is accurate.
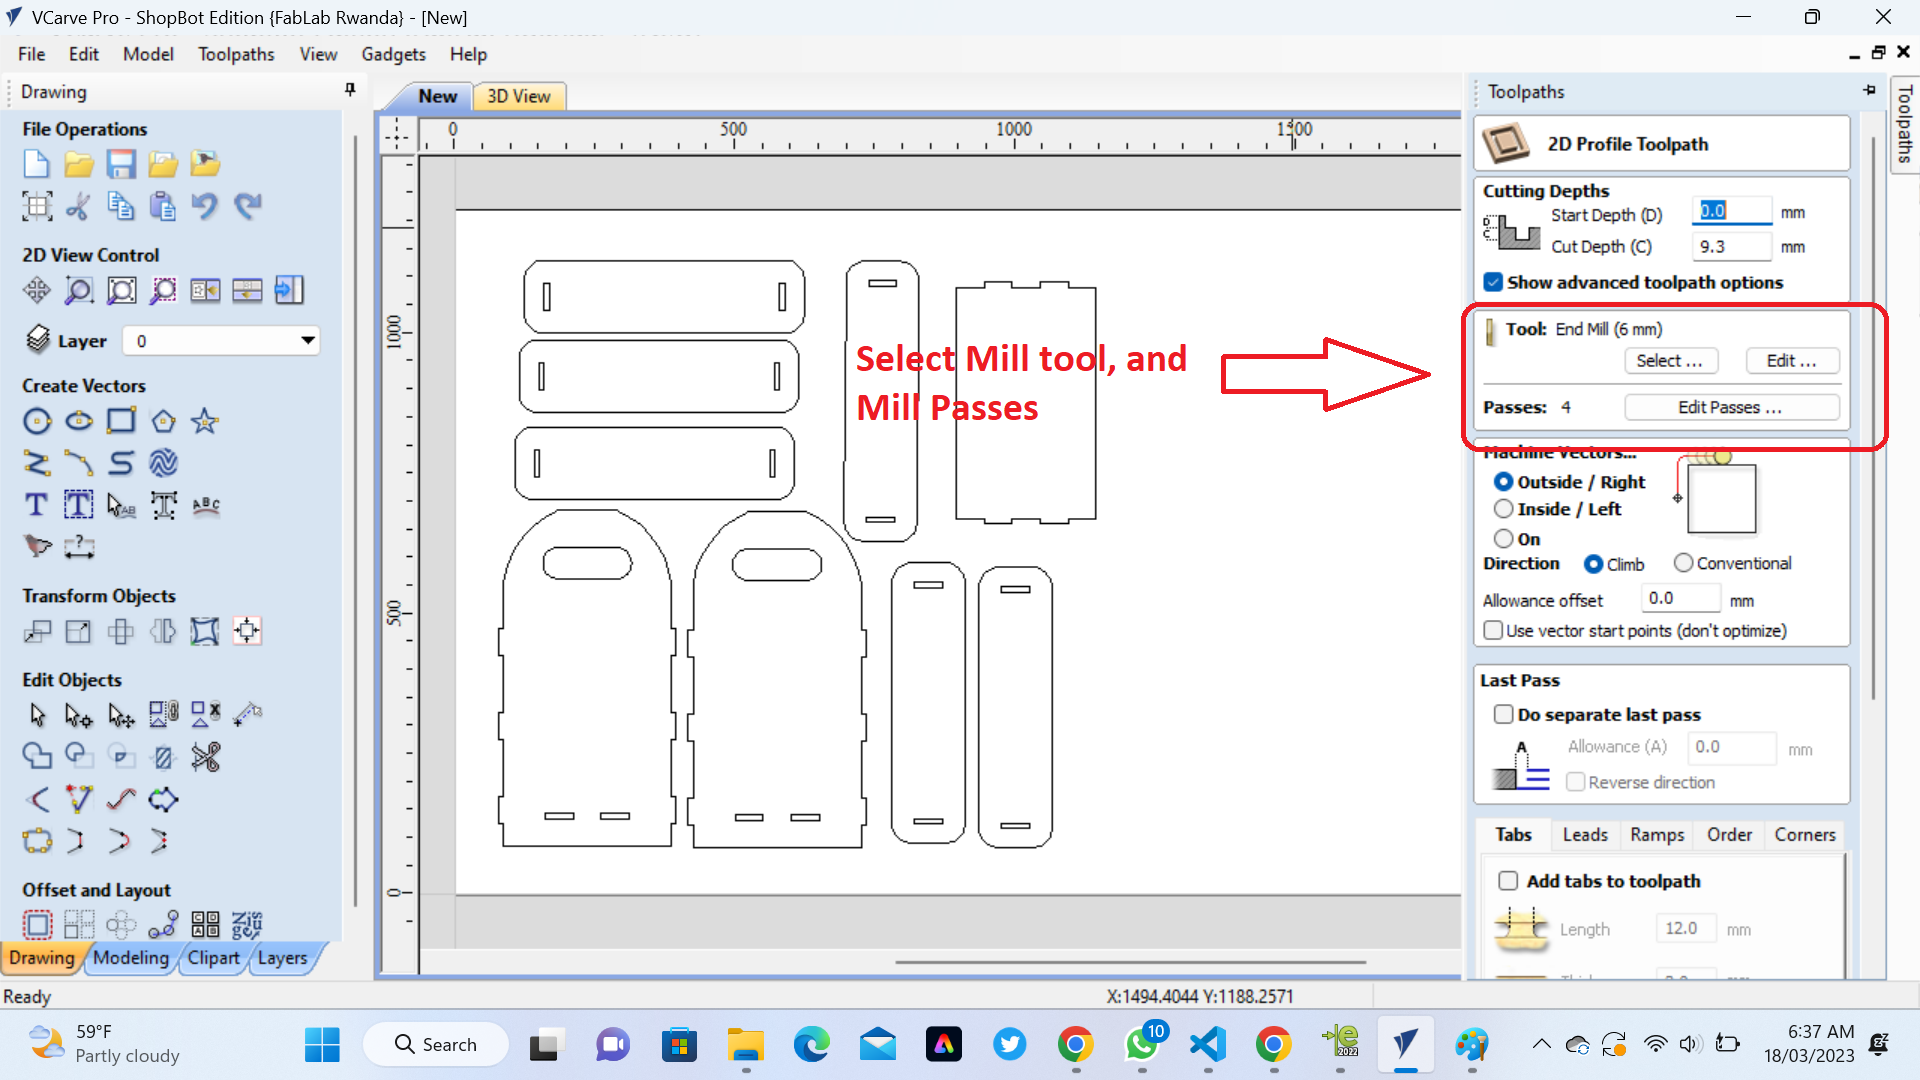
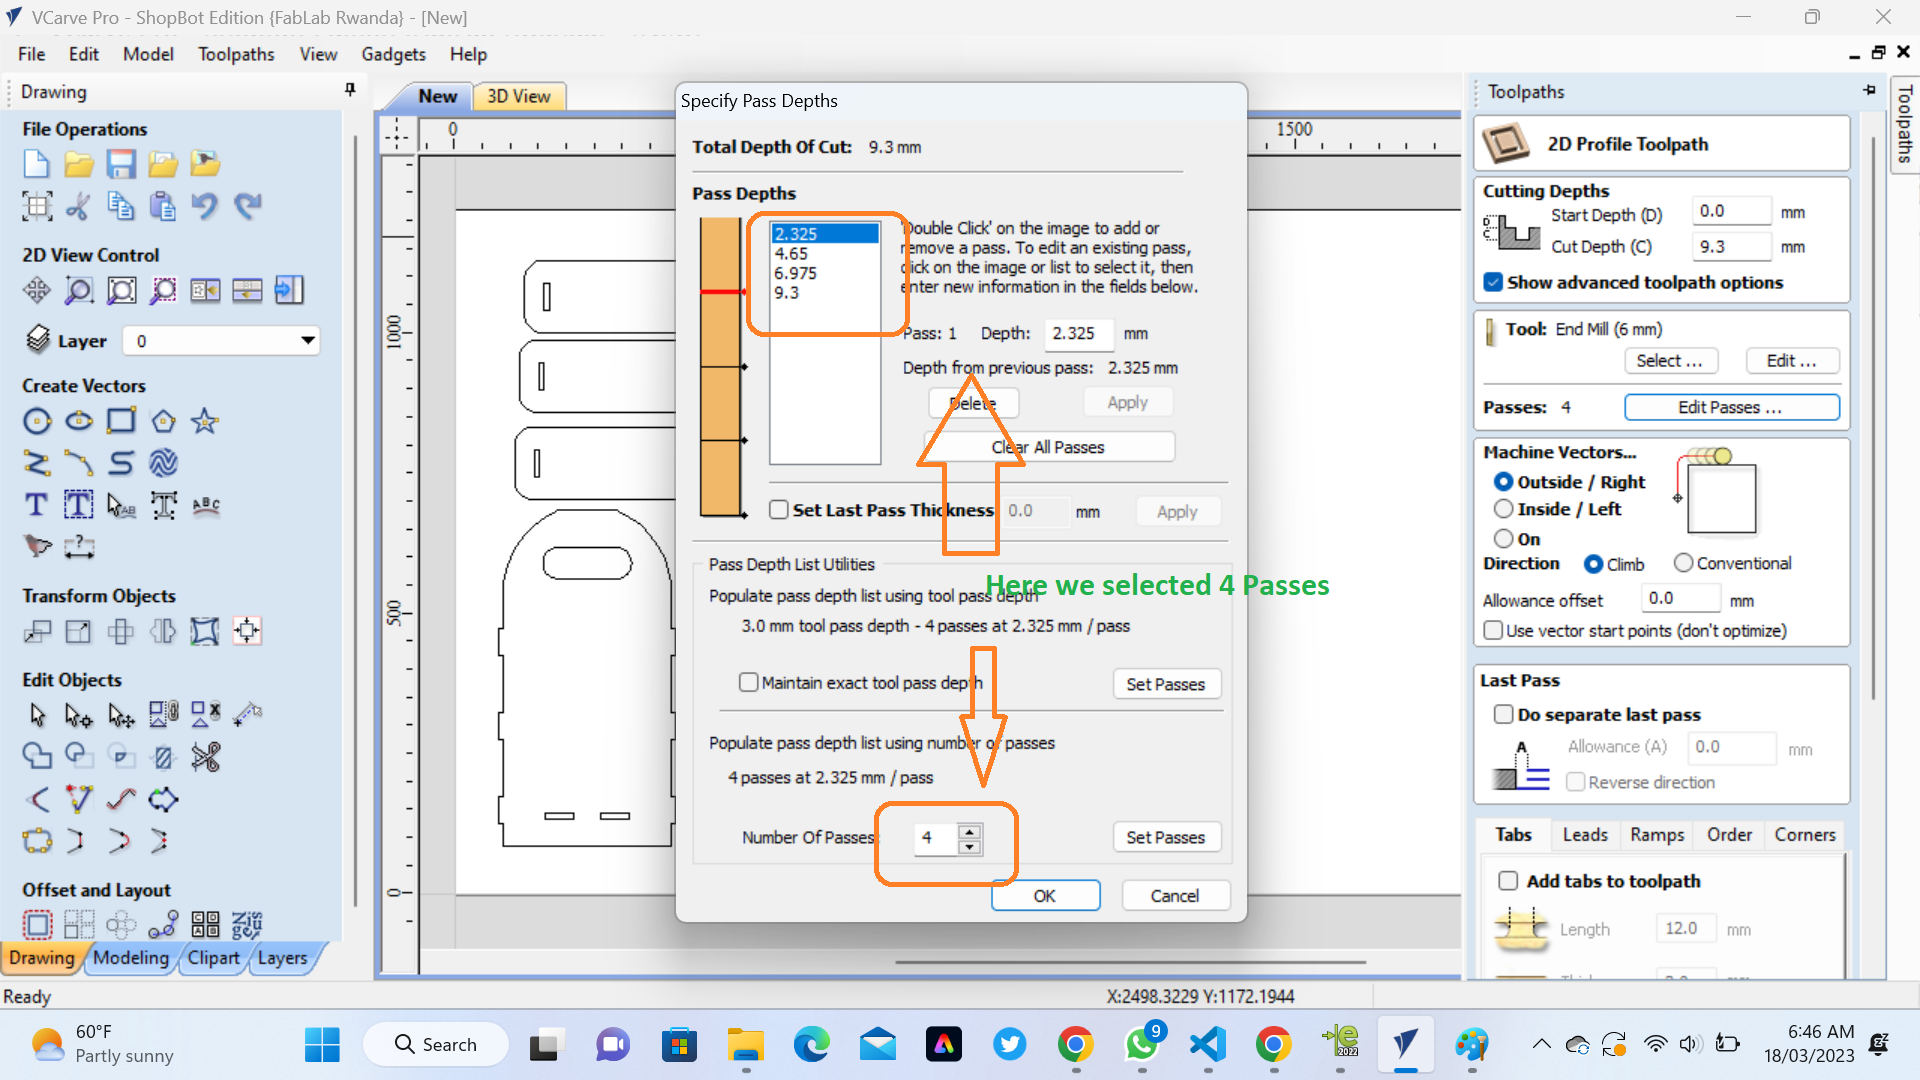
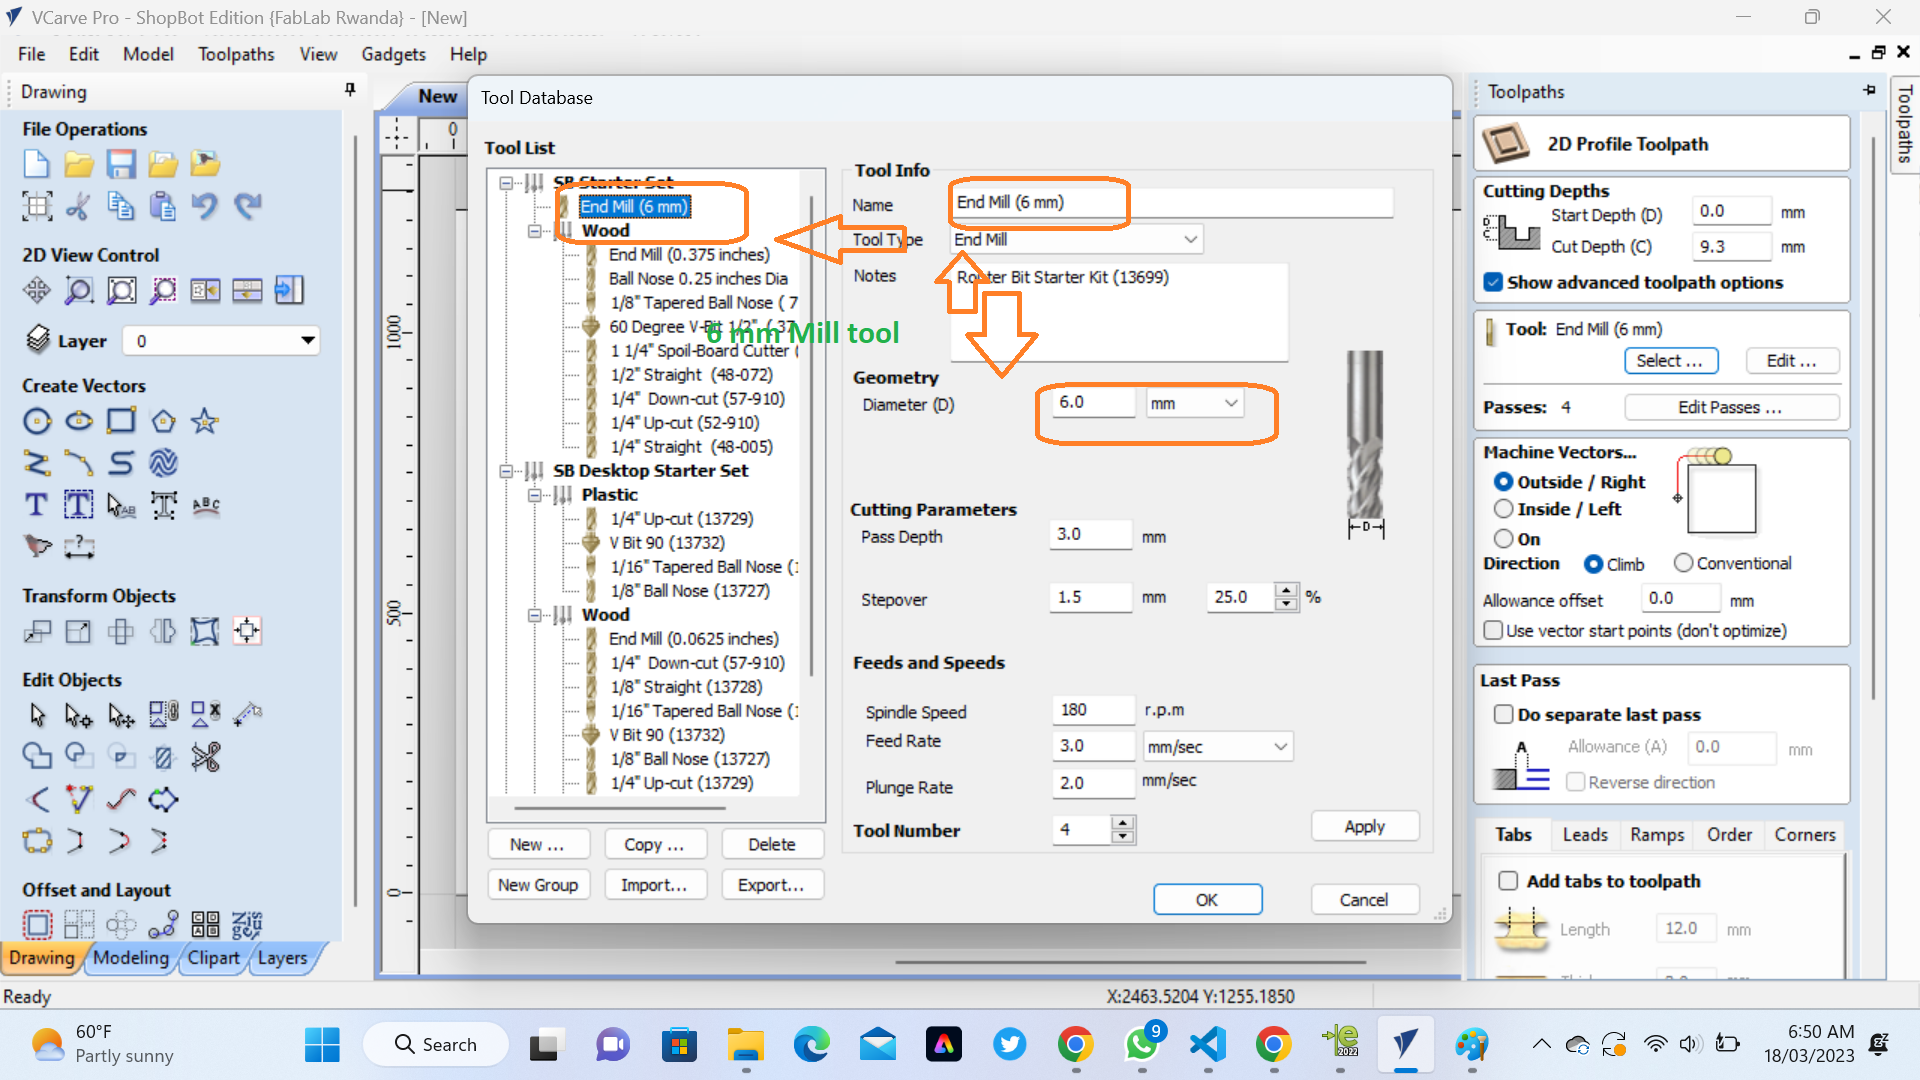
 11. Mill tool: Mill tool in VCarve Pro - ShopBot Edition is a feature that allows you to select and define the cutting tools that will be used in your machining operation. This includes the type of tool, its dimensions, and its cutting properties.
 12. Machine Vector: Machine Vector in VCarve Pro - ShopBot Edition is a feature that allows you to specify the direction and orientation of the cutting tool as it moves through the material being machined. This is important for ensuring that the tool cuts accurately and efficiently, and that the finished part is of high quality.
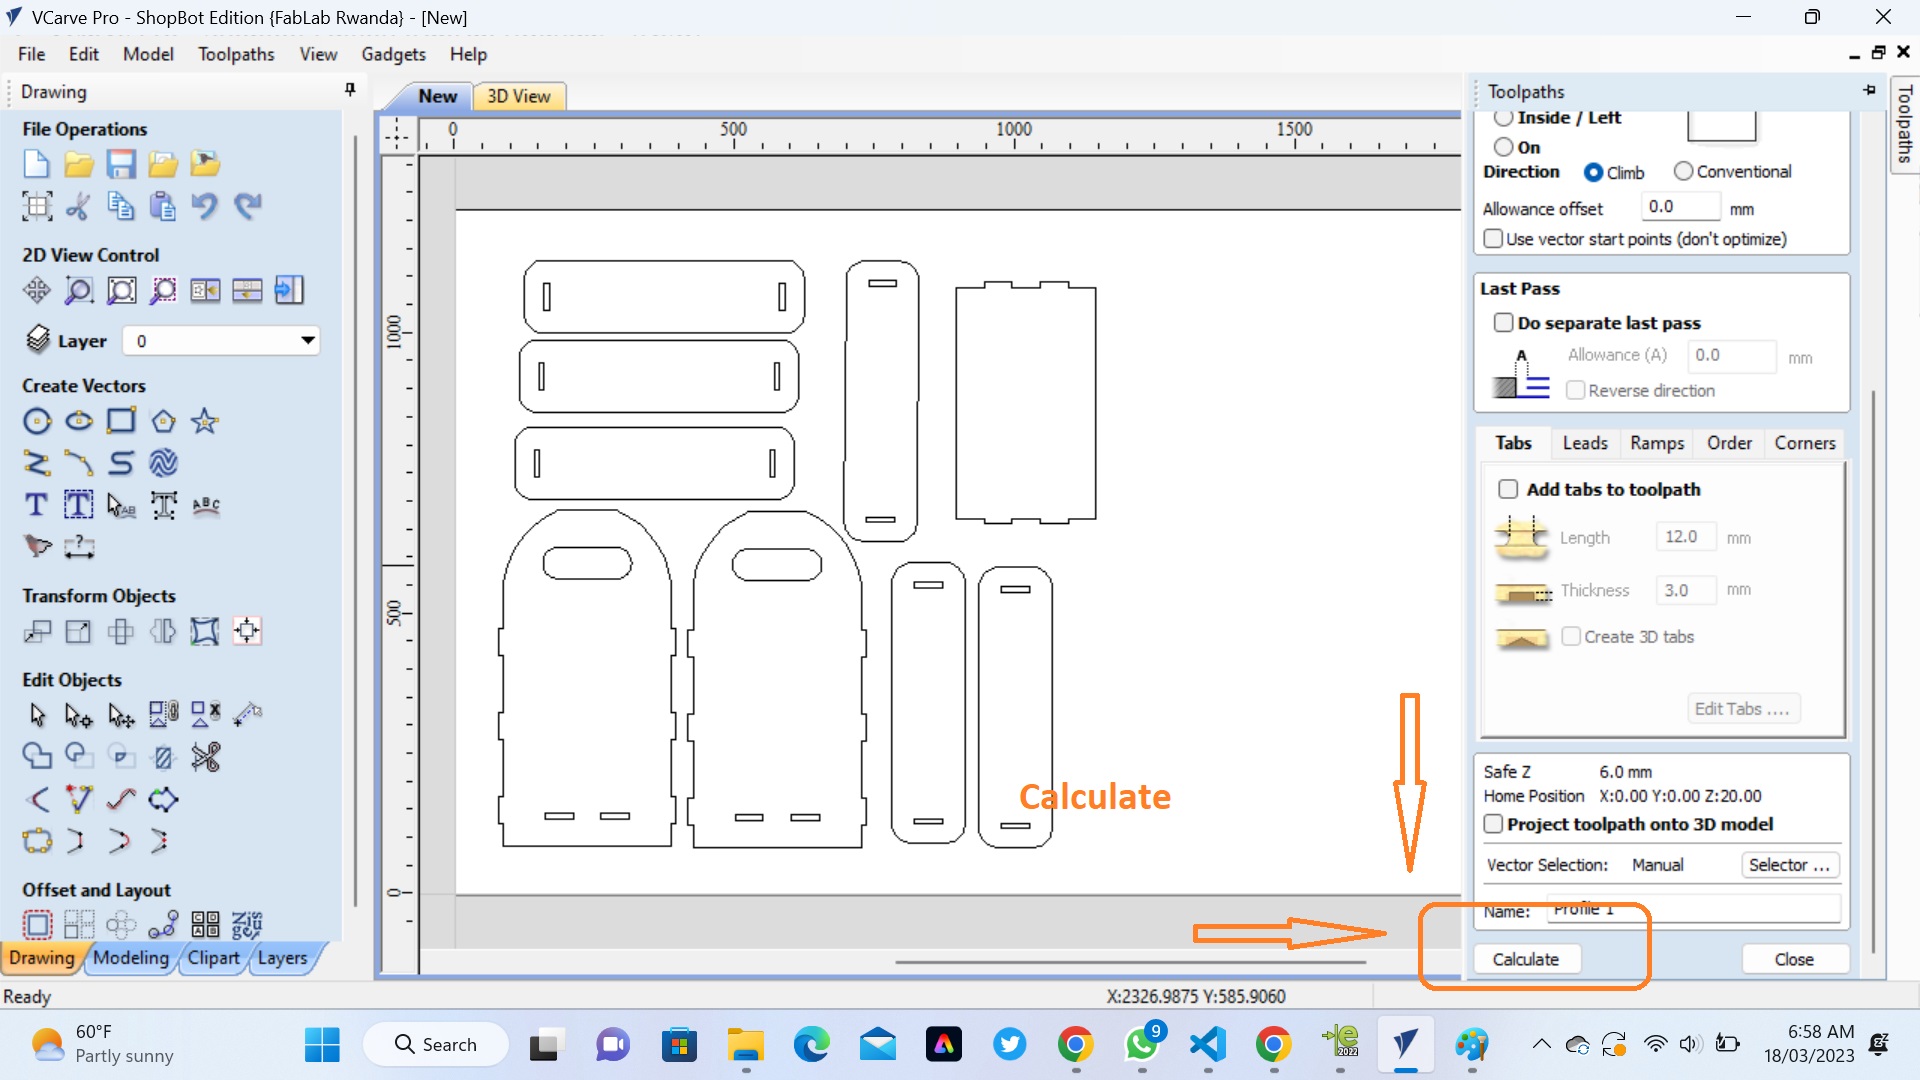
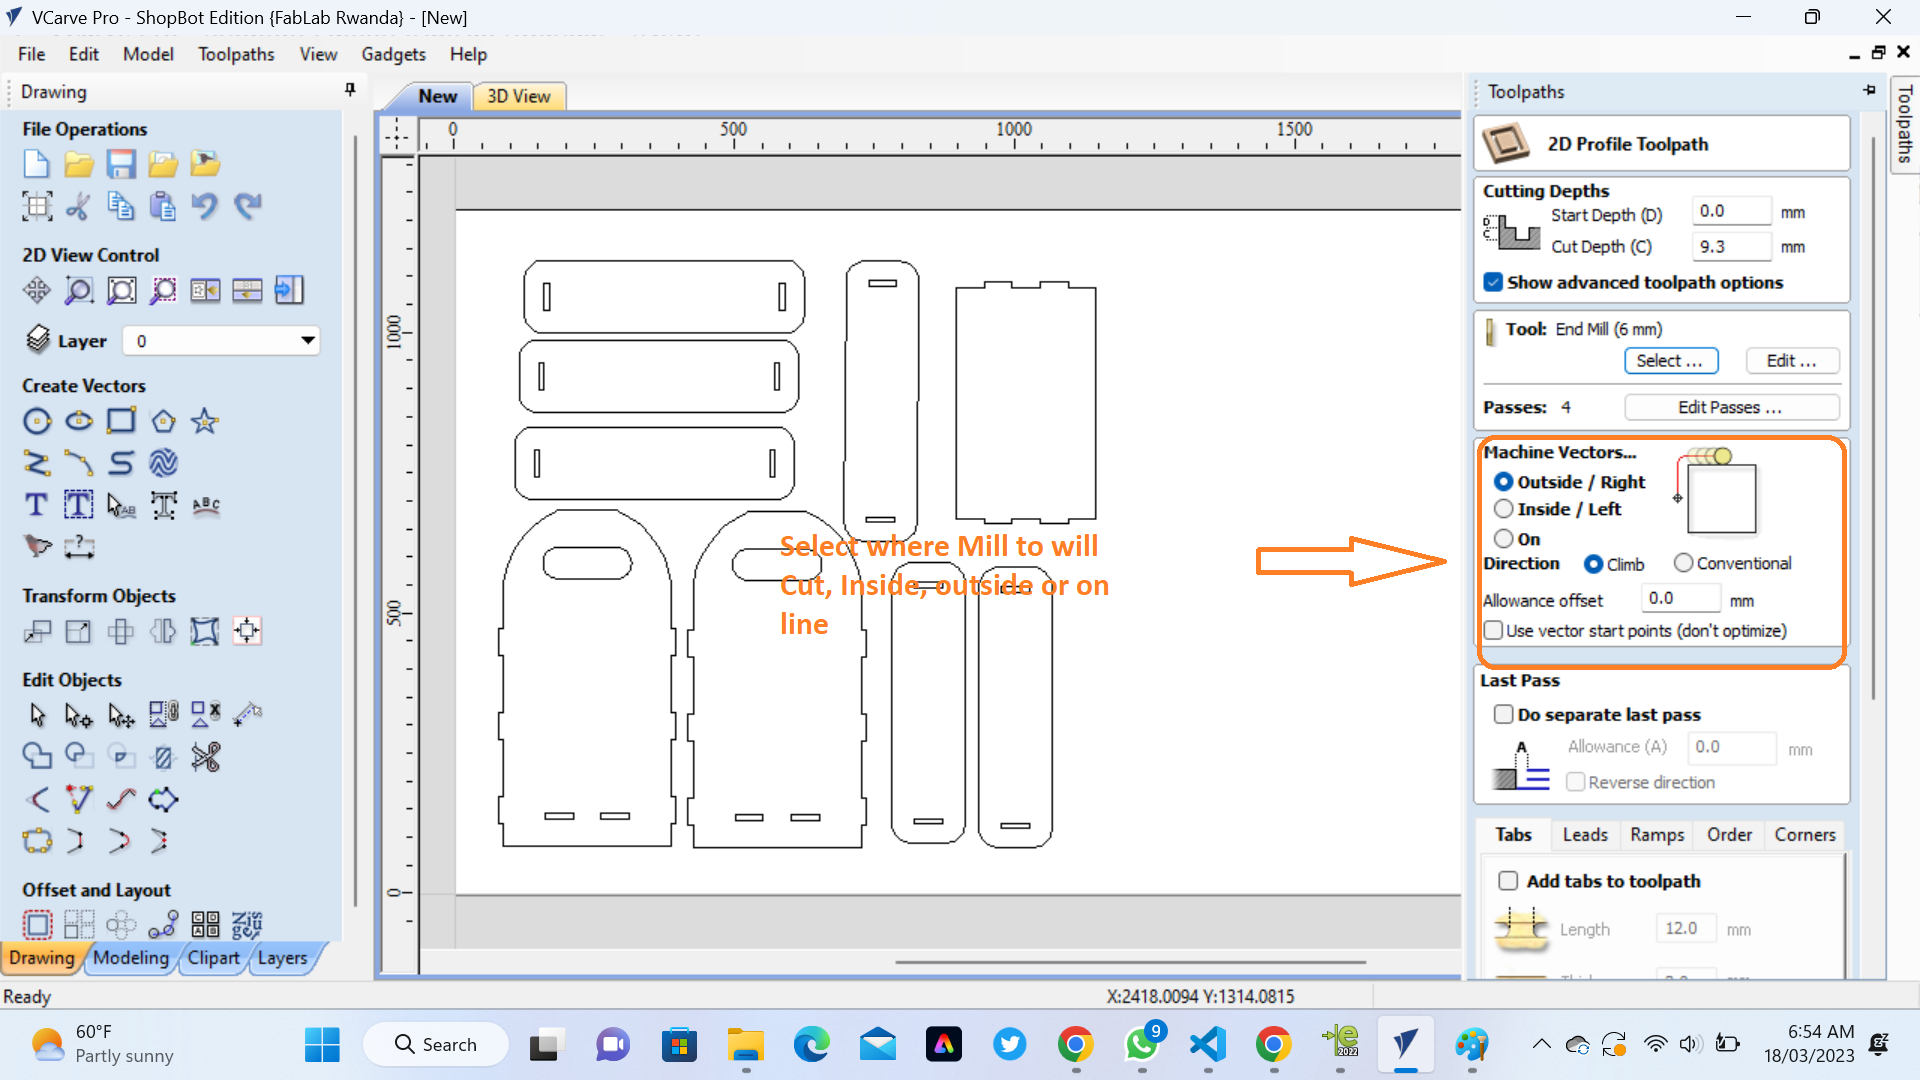 13. Calculate:"Calculate" is a feature in Vcarve Pro software that is used to determine the toolpath for a design to be cut on a ShopBot CNC (computer numerical control) machine. This feature allows the user to specify the material dimensions, cutting depth, and cutting tool properties, and then generates a toolpath that the ShopBot machine will follow when cutting the design.
When using the "Calculate" feature in Vcarve Pro for ShopBot, the software will take into account the material properties, cutting tool properties, and the desired cutting depth to generate a toolpath that will produce the desired result. The user can then preview the toolpath to ensure that it is correct before sending it to the ShopBot machine for cutting.
 When I was satisfied with my designs I continued to export DXF files for each part so they can be milled on the CNC.
I imported the DXF file in VCarve software for generating command that will be executed by the shopbot.
First I had to set XYZ coordinate and this is the window I used to make it.
.png) Then we have to save our works. At this point we are ready to send G-Code to Shopbot (CNC Router)
Then we have to save our works. At this point we are ready to send G-Code to Shopbot (CNC Router)
.JPG)
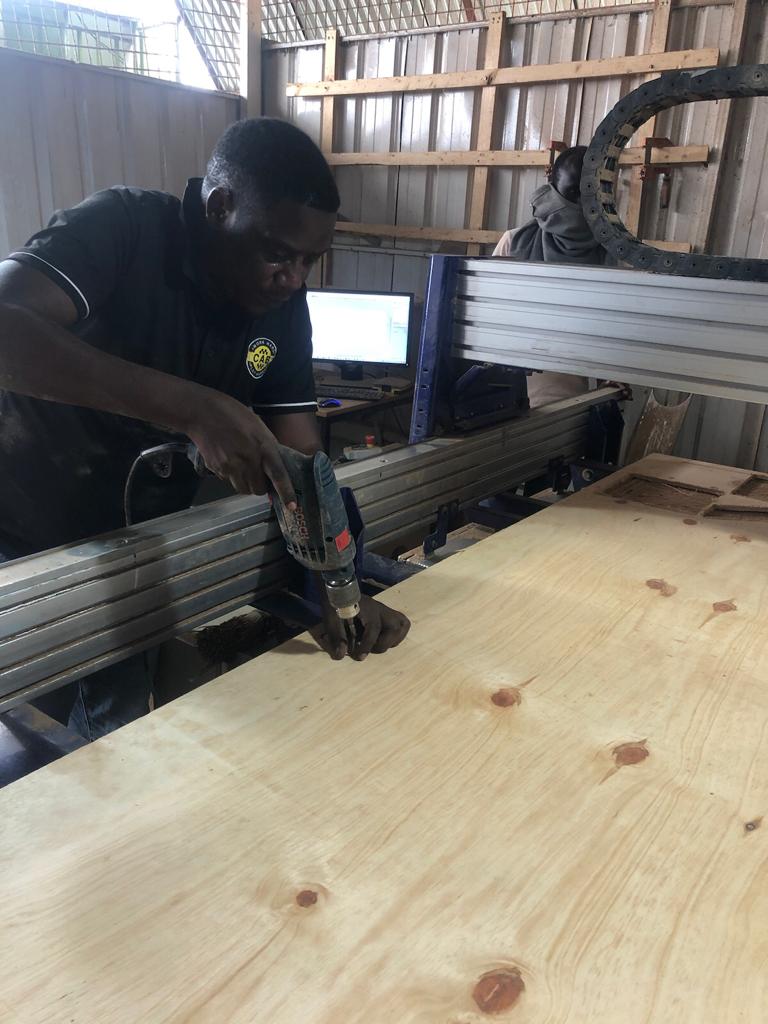 This video show the Shopbot (CNC Router) cutting MDF
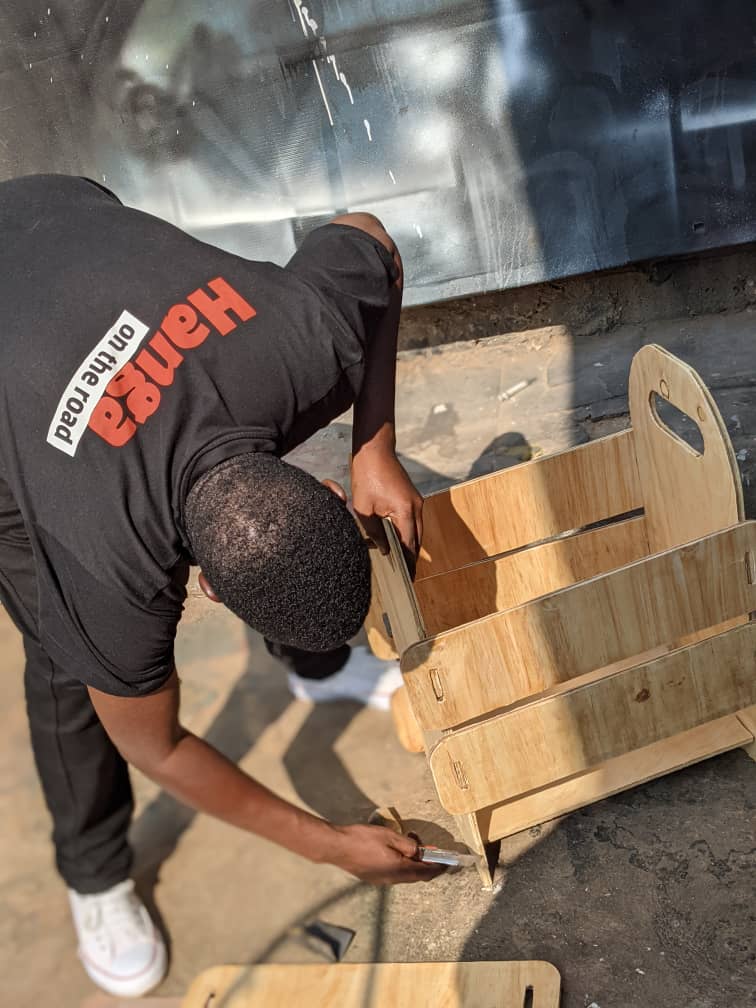
The Problems I faced when assembling and how I fixed it
When I was cutting with CNC I forgot to use Dog-Born Cut,when working with CNC milling, dog-bone cuts are often used to accommodate the tool's size and geometry. These cuts are typically made at the inner corners of a design where the tool cannot fully reach due to its rounded shape
When I am assembling CNC-milled parts that lack dog-bone cuts in the corners, I faced potentially pose challenges during the assembly process.
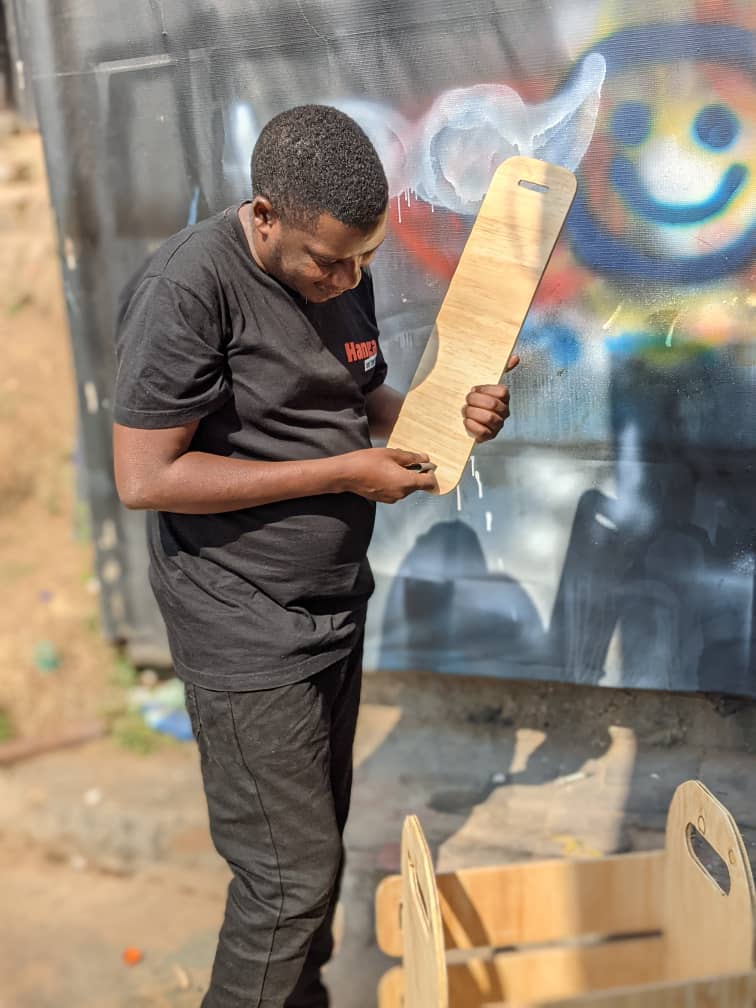
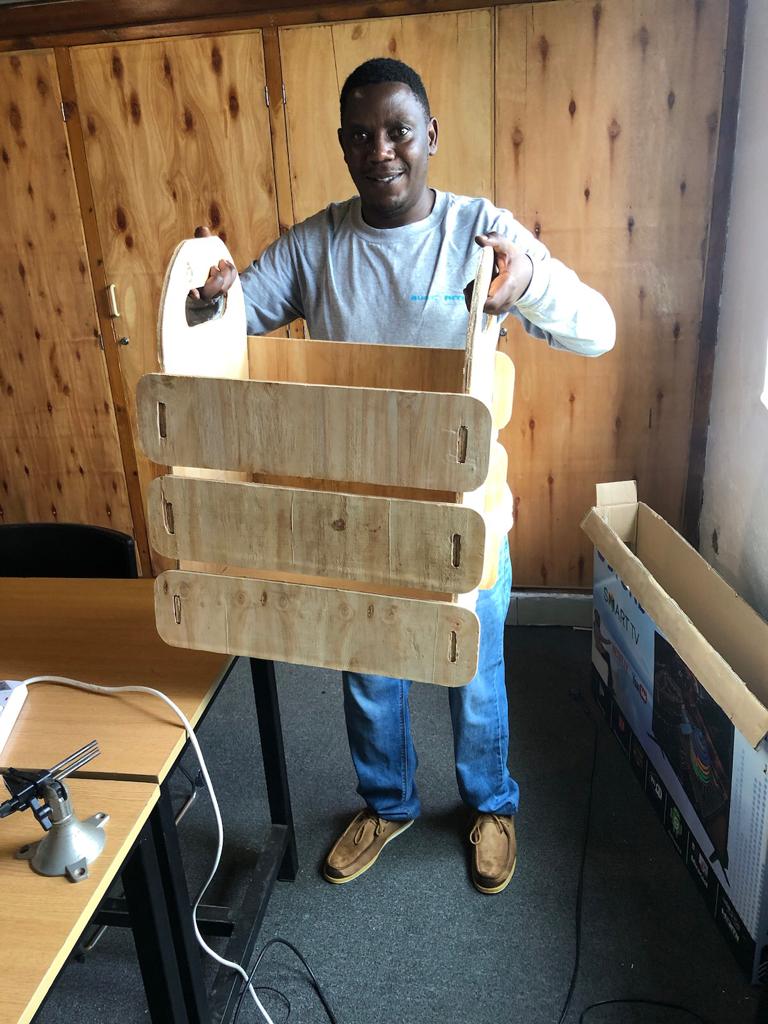
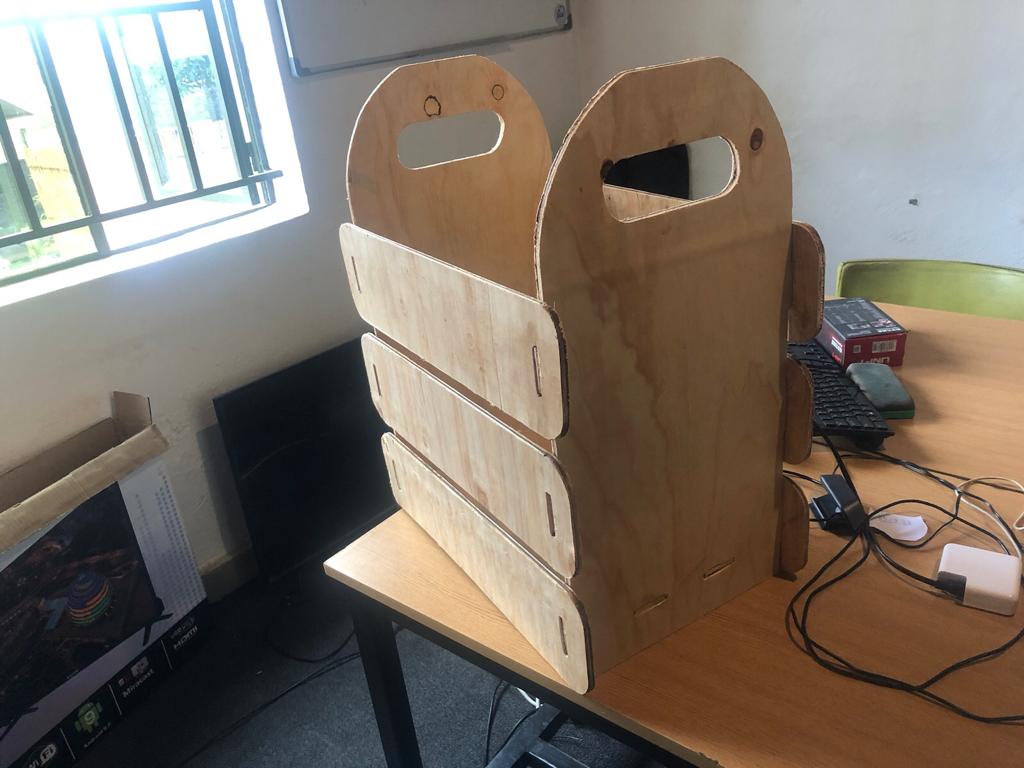
 Below photo shows my box after assembling its parameters

If you want to learn about my designers, kindly click here for downloading my files